Loading ...
Loading ...
Loading ...
13
Installation
Stainless Steel Interior Dishwasher
• Follow all local codes and ordinances.
Drain Line Preparation
• The dishwasher is supplied with a 78” long
corrugated drain hose.
• If the location requires a longer drain hose,
add up to 42” length to the supplied hose.
Use 3/4” inside diameter hose and thin
wall copper coupler to join the hose ends.
Note:
Total drain hose length must not exceed 10 feet for
proper drain operation.
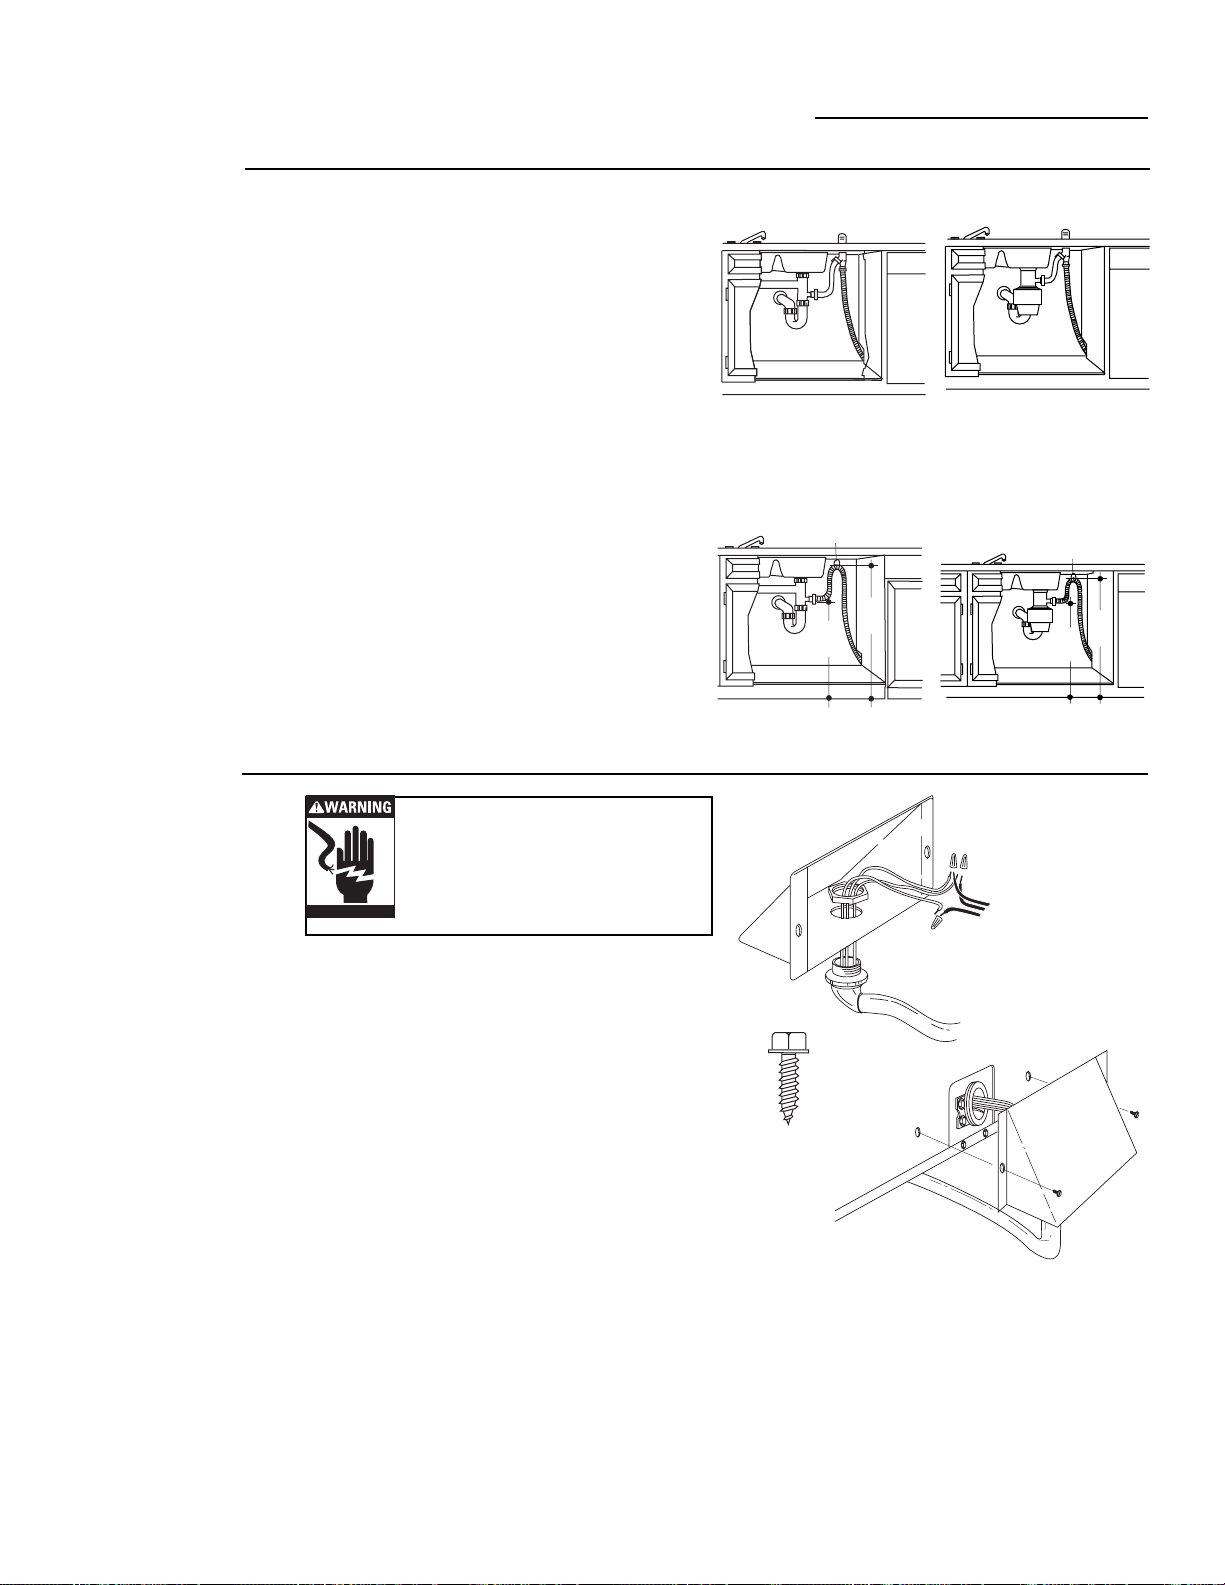
Drain Line Installation
• Connect drain line to air gap, waste tee or
disposer using either method 1 or 2 as
previously determined.
• Secure connection using appropriate
clamps (not supplied).
• Make sure drain hose is not kinked.
Note:
Remove drain plug before connecting to disposer.
Dishwasher cannot drain if plug is left in place.
Step 8
Install
Drain Line
Step 9
Connect
Electrical
(For direct
connection to
house wiring)
Verify that power is turned off at the source.
• Install a strain relief onto the junction box
and tighten against the incoming wires.
• Strip 1/2” insulation from end of incoming
wires.
• Connect white to white, black to black and
incoming ground to green wire.
• Push all wires into the junction box and
place on dishwasher frame. Secure with
screws “F”.
Waste Tee Installation Disposer Installation
Waste Tee Installation Disposer Installation
Method 1 – Air Gap with Waste Tee or Disposer
Method 2 – High Drain Loop
with Waste Tee or Disposer
Fasten to underside
of countertop
30"
Min.
12"
Min.
12"
Min.
Fasten to underside
of countertop
30"
Min.
If house wiring is not 2-wire with a ground wire,
a ground must be provided by the installer.
When house wiring is aluminum, be sure to use
U.L. listed anti-oxidant compound and
aluminum-to-copper connectors.
Screws F
Loading ...
Loading ...
Loading ...