Loading ...
Loading ...
Loading ...
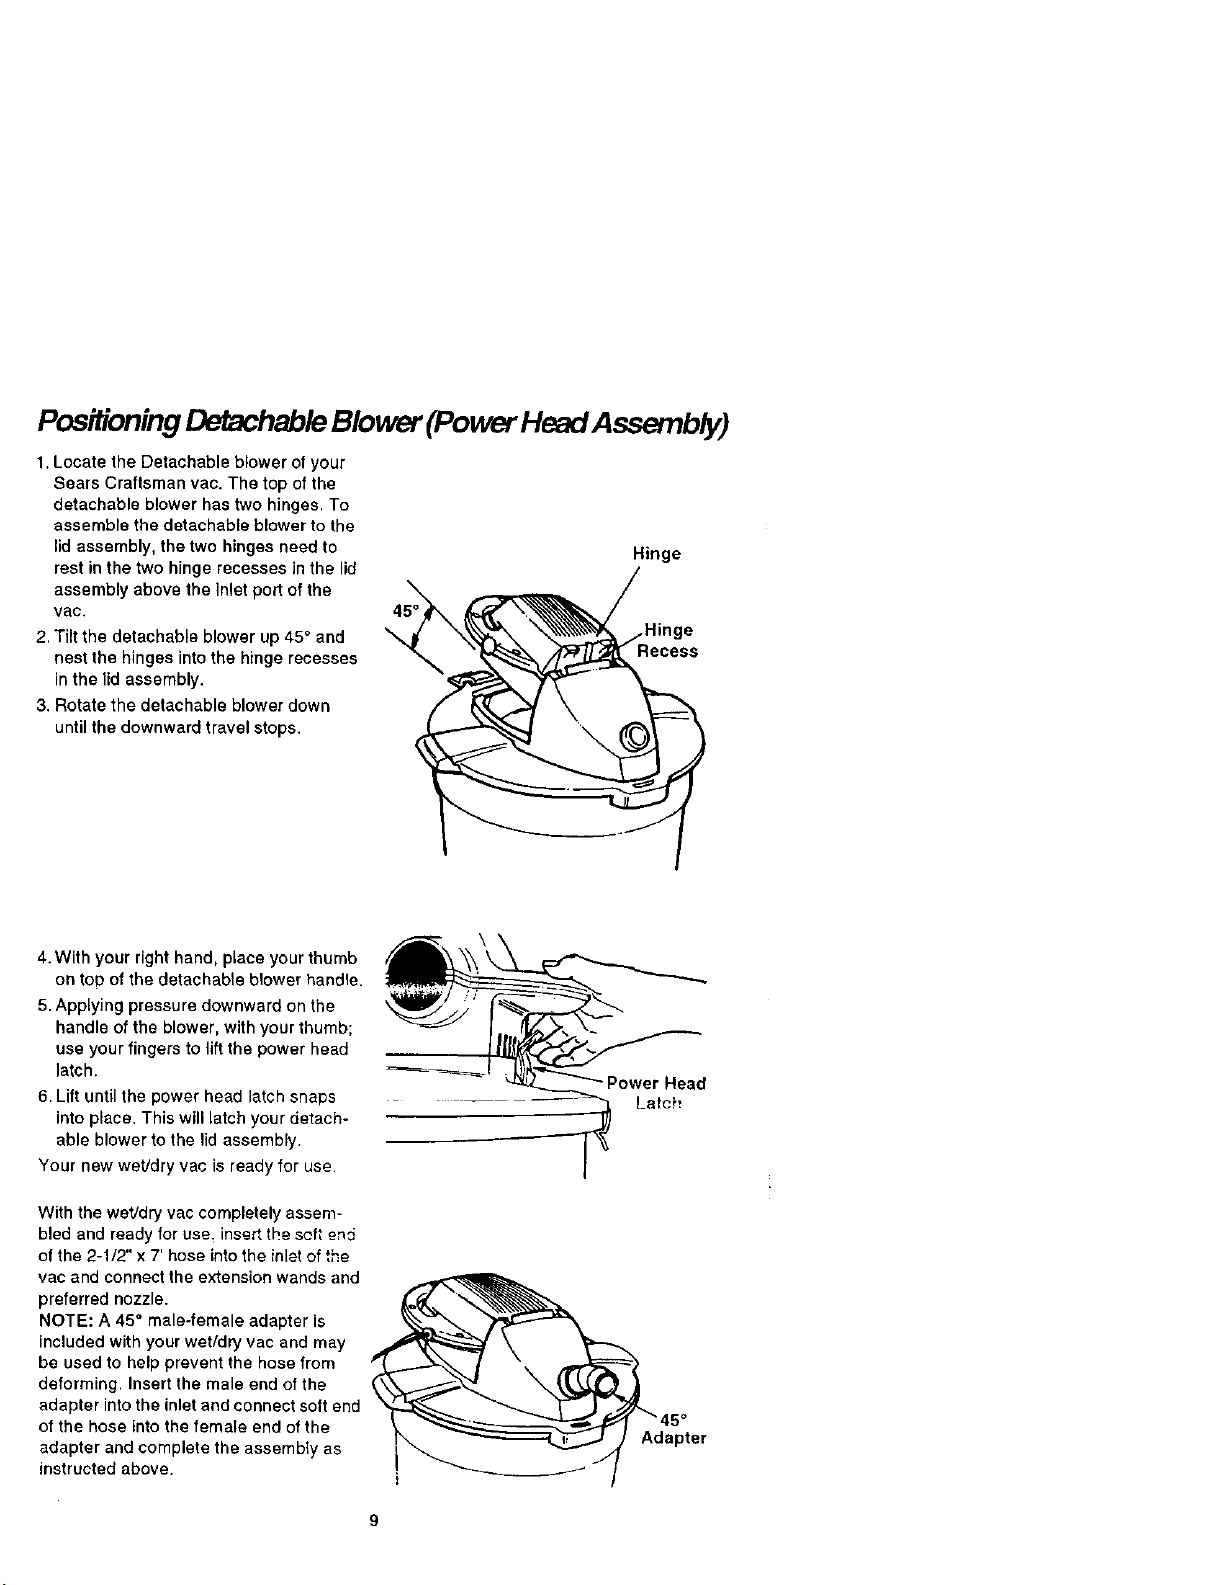
Positioning Detachable Blower (Power Head Assembly)
1, Locate the Detachable blower o! your
Sears Craftsman vac. The top of the
detachable blower has two hinges. To
assemble the detachable blower to the
lid assembly, the two hinges need to
rest in the two hinge recesses in the lid
assembly above the Inlet port of the
vac.
2, Tilt the detachable blower up 45° and
nest the hinges into the hinge recesses
in the lid assembly.
3. Rotate the detachable blower down
45°
\
Hinge
until the downward travel stops.
4. With your right hand, place your thumb
on top of the detachable blower handle.
5.Applying pressure downward on the
handle of the blower, with your thumb;
use your fingers to lift the power head
latch.
6. Lift until the power head latch snaps
into place. This will latch your detach-
able blower to the lid assembly.
Your new wet/dry vac is ready for use.
With the wet/dry vac completely assem-
bled and ready for use. insert the soft end
of the 2-1/2" x 7' hose into the inlet of the
vac and connect the extension wands and
preferred nozzle.
NOTE: A 45" male-female adapter is
included with your wet/dry vac and may
be used to help prevent the hose from
deforming. Insert the male end of the
adapter into the inlet and connect soft end
of the hose into the female end of the
adapter and complete the assembly as
instructed above.
._rHead
Latch
Adapter
Loading ...
Loading ...
Loading ...