Loading ...
Loading ...
Loading ...
Operation (continued)
Blowing Feature
Your wet/dry vac features a "detachable
blower". It has the capability to be used as
a dedicated blower for yard work, patio
cleanup and workshop applications to
blow sawdust and other debris.
CAUTION: To reduce the risk of
hearing damage wear ear protectors
when using the vac/blower for
extended hours or when using it in a
noisy area.
WARNING: To avoid injury to
bystanders, keep them clear of blow-
ing debris.
1. Familiarize yourself with the detachable
blower portion of your wet/dry vac.
2, Removethe detachable blowerofyour vac
by pressingdown on the latch underthe
handleofthe detachable blower.This latch
holdsthe detachable blowerto the lid
assembly.
3. Lift the detachable blower up by raising
the handle upward and pulling the unit
away from the nested posi'Jon of the
hinges.
Assemble the Detachable
Blower for "Blowing".
This may be assembled two ways,
1. fnsert the small end o! one of the exten-
sion wands into the blowing port of the
detachable blower. Insert the male-
male adapter into the extension wand
and install the blower nozzle onto the
male-male adapter.
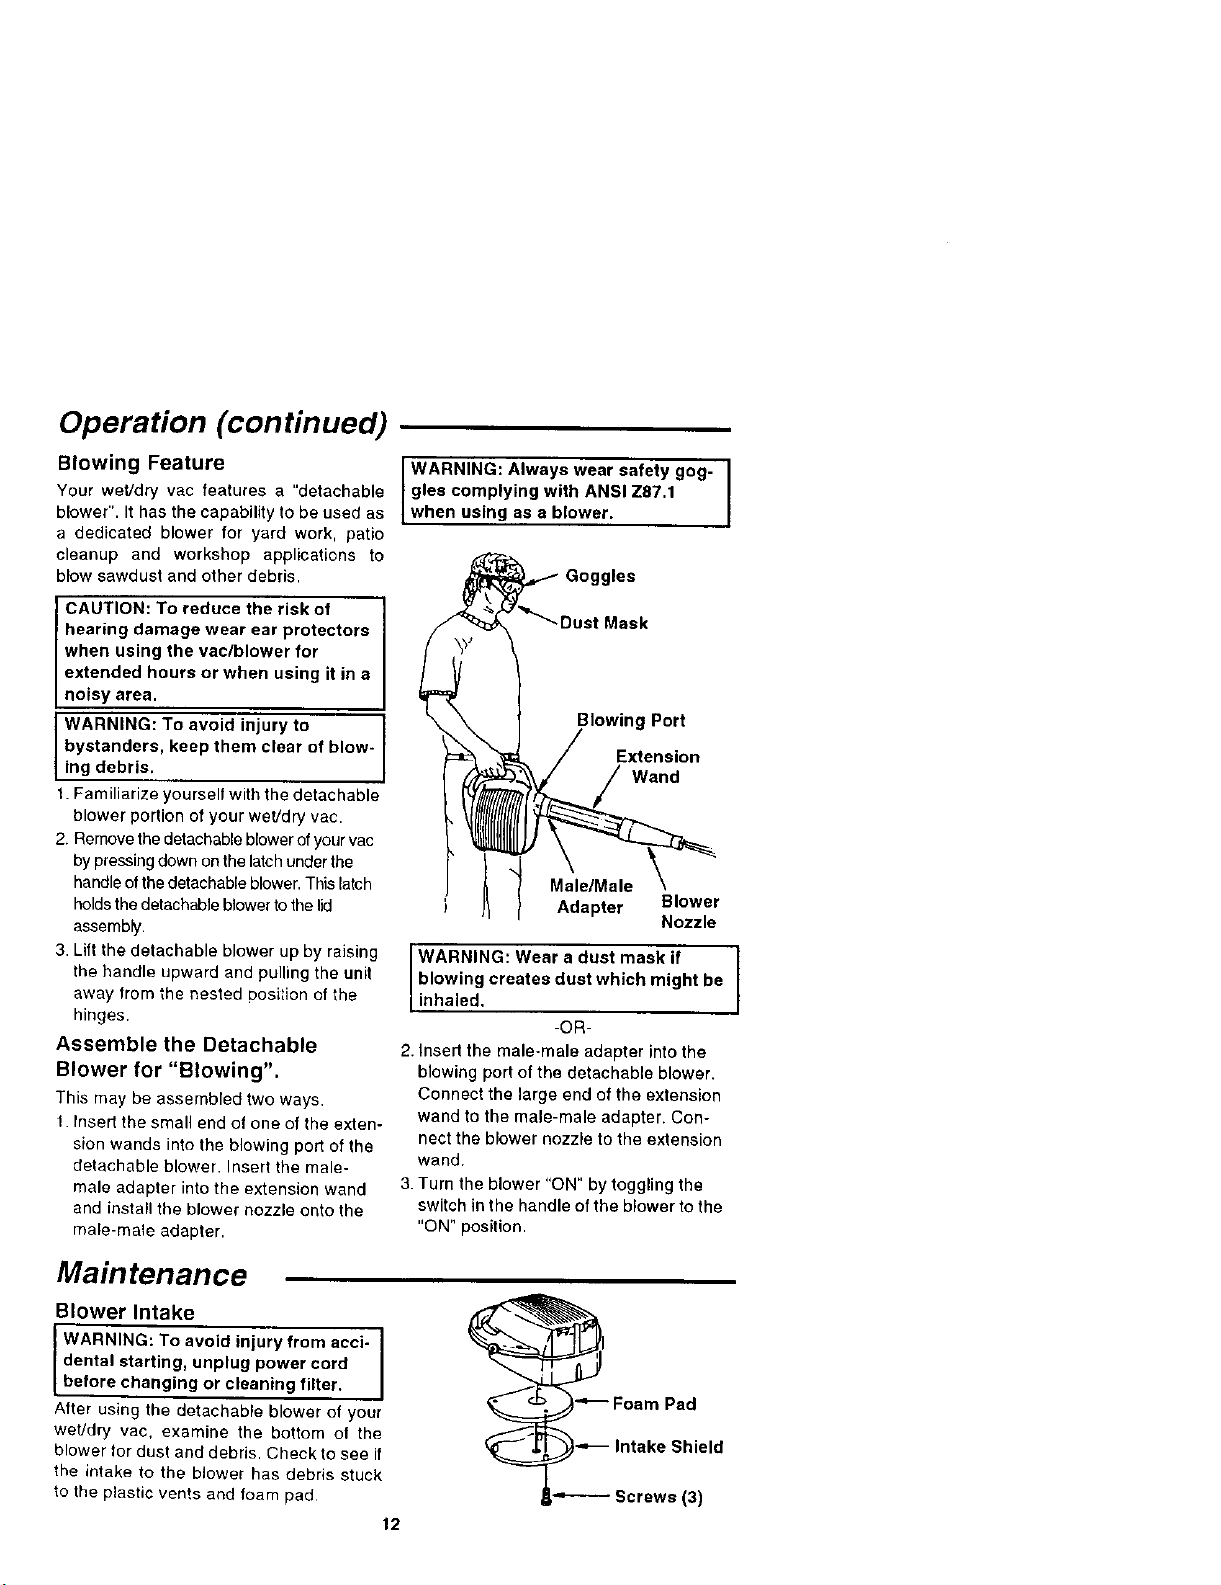
WARNING: Always wear safety gog- I
gles complying with ANSI Z87.1
I
when us ng as a blower.
Goggles
t Mask
Blowing Port
Extension
Wand
Male/Male
} Adapter Blower
Nozzle
WARNING: Wear a dust mask if
blowing creates dust which might be
nha ed.
-OR-
2. Insert the male-male adapter intothe
blowing portof the detachable blower.
Connect the large end of the extension
wand to the male-male adapter. Con-
nectthe blower nozzle to the extension
wand.
3. Turn the blower "ON" by toggling the
switch in the handle ofthe blower tothe
"ON" position.
I
Maintenance
Blower Intake
WARNING: To avoid injury from acci-
dental starting, unplug power cord
before changing or cleaning filter.
After using the detachable blower of your
wet/dry vac, examine the bottom of the
blower for dust and debris. Check to see if
the intake to the blower has debris stuck
to the plastic vents and foam pad
"_____. _ Foam Pad
_'_--- Intake Shield
Screws (3)
12
Loading ...
Loading ...
Loading ...