Loading ...
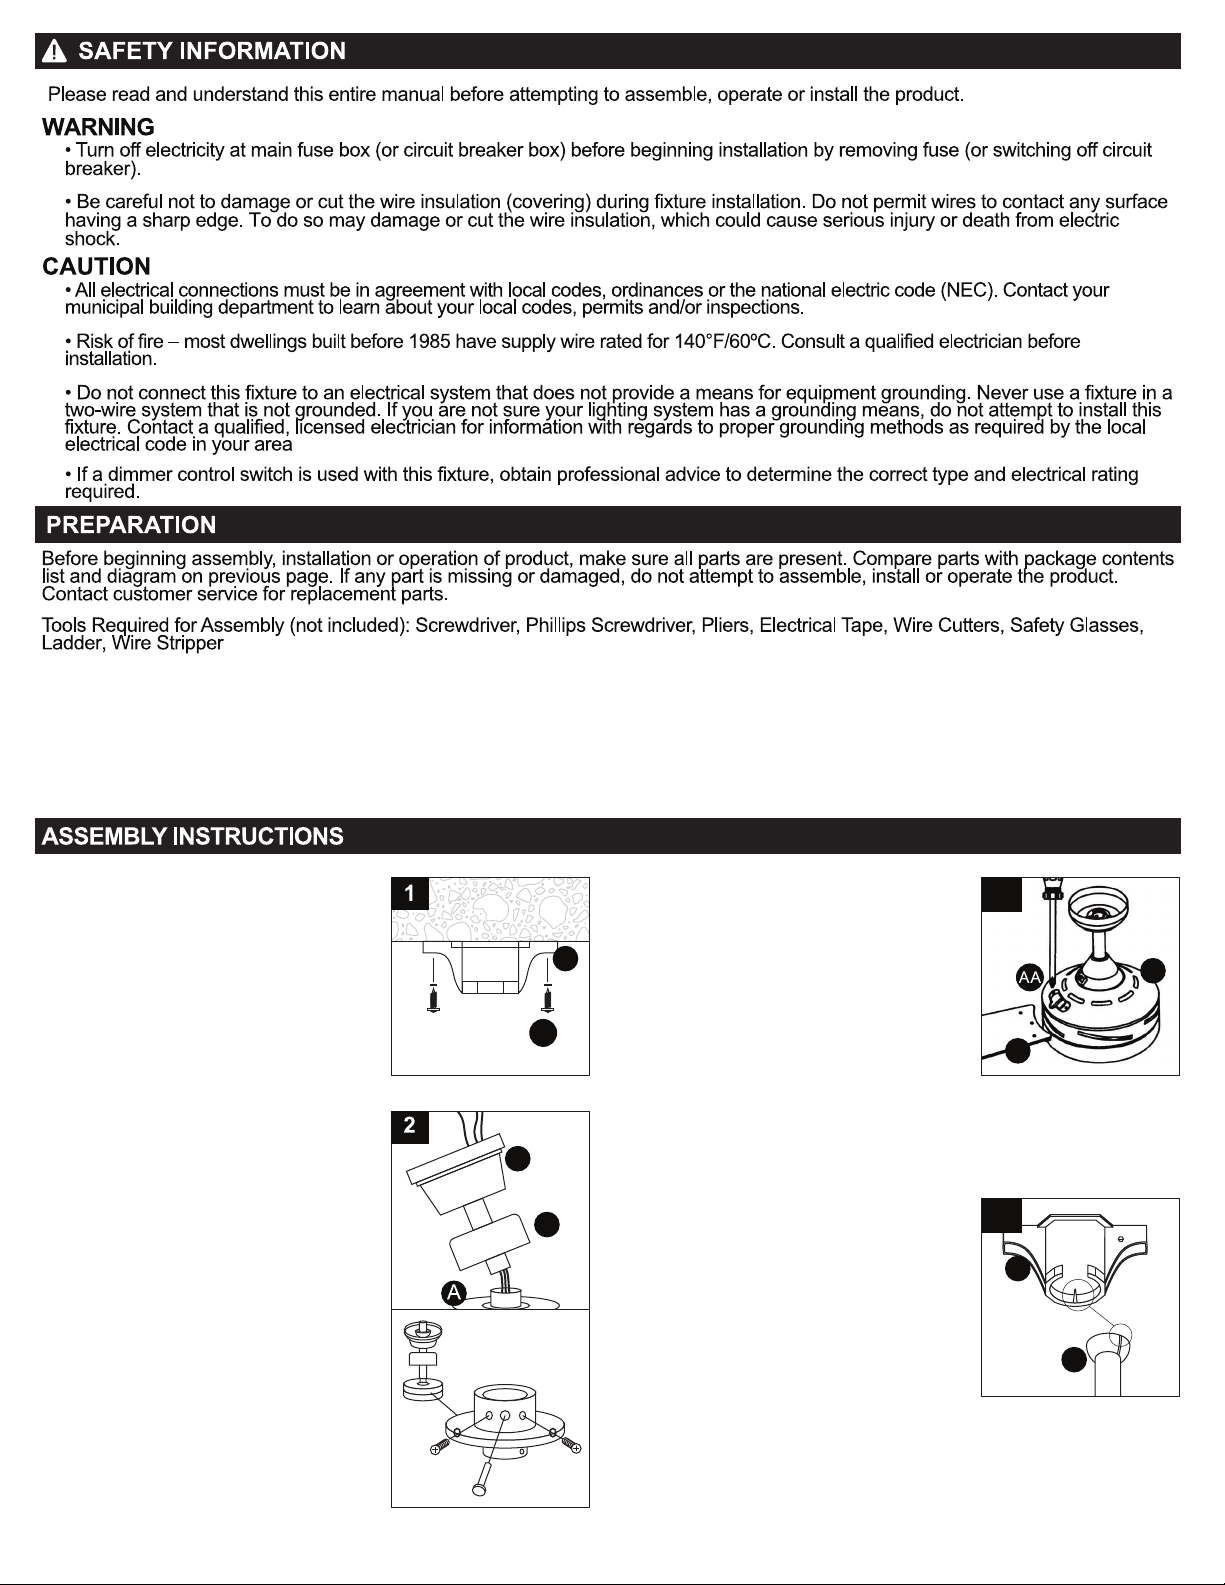
2. Loosen the two Downrod Set Screws
and remove the Clip and Connection Pin
from the downrod coupling.Insert the
Downrod through Canopy (C) and Flange
Cover (E), pull lead wires through
Downrod.
Insert Downrod into downrod coupling.
Make sure to align holes in Downrod with
the holes in the coupling. Insert the Clip
into the Connection Pin until it snaps into
place. Tighten the Screws in the downrod
coupling.
3. Remove the two screws from the
covering plate of blade-xing hole .
Insert blades (F) one at a time through slots
around the motor assembly (A) and secure
with three screws (AA) for each blade
through the top opening. Repeat this
procedure for all blades.
Replace the cover plate and secure with two
screws one all four blades have been rmly
tted .
Please ensure that the blades do not get
bent during the installation process while the
fan may be on the ground, as this will affect
the performance and balance of the fan and
this is NOT covered under warranty.
Make sure that the fan voltage (120) is compatible with your own electrical system. Check to make sure that your carton contains all the parts
mentioned in the parts list.
NOTE: The box can be used as a work space to prevent any damage on the ornamental surface.
CAUTION: Before installing, choose a location for mounting the fan where the blades have at least 7 feet of clearance from all objects and oor.
Mount an outlet box to the ceiling or use an existing box
CAUTION: Do not mount fan to sheet rock or drywall type materials. To insure proper support, use the two #1 wood screws to secure mounting
bracket to joist or beam. If the location you choose does not have a suitable support beam, install a 2"x 4" brace between ceiling joists to
support. Check to make sure blades are at least 30" from any obstruction. Check Down rod Length to make sure blades are at least 7 .1' above
the oor.
3
1. Securely attach the mounting bracket
(B) to an outlet box marked “Acceptable
for Fan Support”, using the supplied outlet
box screws with lock washers (EE)
C
F
B
A
E
EE
4. Carefully lift the fan assembly (A) onto the
Mounting Bracket (B).
Rotate the fan until the notch on the Nylon
Ball of the Downtube (A) ts against the
ridge on the Mounting Bracket (B).
With the Mounting Bracket holding the fan
assembly, follow wiring instructions.
WARNING: Failure to hold the fan assembly
may result in serious injury or death.
4
A
B
Loading ...
Loading ...