Loading ...
Loading ...
Loading ...
7
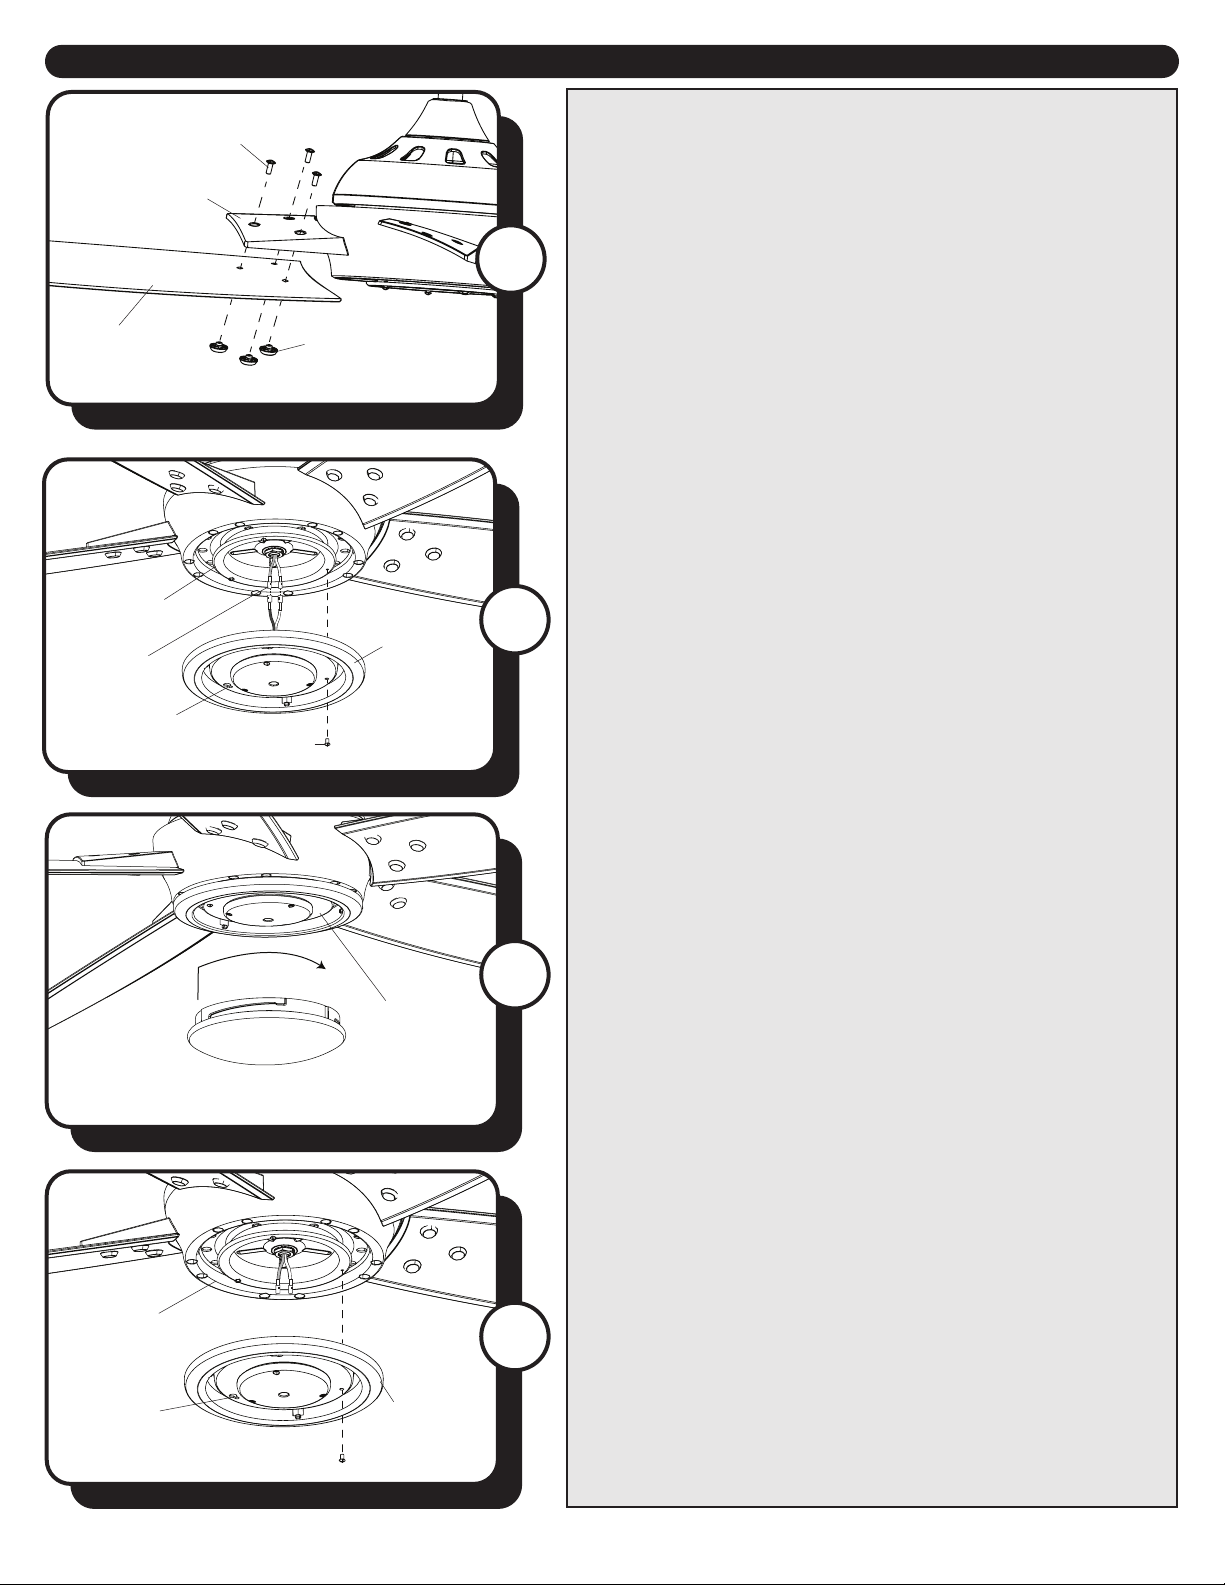
Fitter Plate
Light Kit
Single-pin
Connector
Fitter Plate Screw
Keyhole Slot
Glass Bowl
Light Kit
Blade Screw
Screw Cap
Blade Arm
Blade
ASSEMBLY INSTRUCTIONS
11
10. Note: To install without light kit, skip to Step 12.
Remove one of the three tter plate screws preassembled
to the tter plate and loosen the other two but do not
remove. Connect the single-pin connector from the tter
plate to the single-pin connector from the light kit--Blue
to Black and White to White. Align the keyhole slots in the
light kit with the loosened screws in the tter plate. Turn
light kit clockwise and replace the previously removed
tter plate screw. Tighten all screws.
9. Attach the blade to the blade arm using blade screw
and screw cap. Repeat for each blade.
10
9
11. Attach the glass bowl to the light kit by twisting the
glass bowl rmly in a clockwise direction until it is secure.
CAUTION: Avoid cross-threading the glass during
installation. Improper installation could cause the glass
bowl to be dicult to remove or fall, which could cause
serious injury.
12. INSTALLATION WITHOUT THE LIGHT KIT (optional)-
Remove one of the three tter plate screws preassembled
to the tter plate and loosen the other two but do not
remove. Align the keyhole slots in the light kit with the
loosened screws in the tter plate. Turn light kit clockwise
and replace the previously removed tter plate screw.
Tighten all screws.
WARNING: To avoid re hazard, DO NOT cut, remove, or
connect the single-pin connectors if installing with “no
light” option.
Fitter Plate
Keyhole
Slot
Fitter Plate Screw
Light Kit
12
Loading ...
Loading ...
Loading ...