Loading ...
Loading ...
Loading ...
HOW TO USE YOUR DETHATCHER
RAISING/LOWERING THE DETHATCHER
e
To raise the dethatcher for transport, lift up on the
front of the dethatcher and secure it with the trans-
port hook. Lower the dethatcher by releasing the
transport hook.
SETTING THE OPERATING POSITION
e
The operating height of the dethatcher is controlled
by the gauge wheel at the front of the dethatcher and
is not adjustable. The correct wheel position was
determined in figure 2 when you assembled the
wheel.
Ii
Set the sweeper to the desired operating height. (The
best height is usually with the brushes set about 1/2"
down into the grass.) Refer to your sweeper owner's
manual for sweeper.
USING THE DETHATCHER
Regular removal of thatch is critical to the maintenance
of a healthy lawn. Thatch is layer of stems, clippings,
runners, roots and leaves that have not decayed. Ex-
cessive thatch prevents air, water and fertilizer from
reaching the roots. The dethatcher will effectively dis-
lodge excessive thatch from your lawn.
• Start with the tractor in low gear. Vary the forward
speed to determine the best speed for maximum
dethatcher performance.
• Use a crisscross pattern to achieve the most even
removal of thatch.
• On slopes, always operate in an up and down
direction only.
• Avoid extremely sharp turns.
Avoid towing the dethatcher across sudden steep
dips in the ground while dethatching. Loss of ground
contact with the gauge wheel could cause the
dethatcher to be pulled back underneath the
sweeper.
CUSTOMER RESPONSIBILITIES
• Read and follow the maintenance schedule and the maintenance procedures listed in this section.
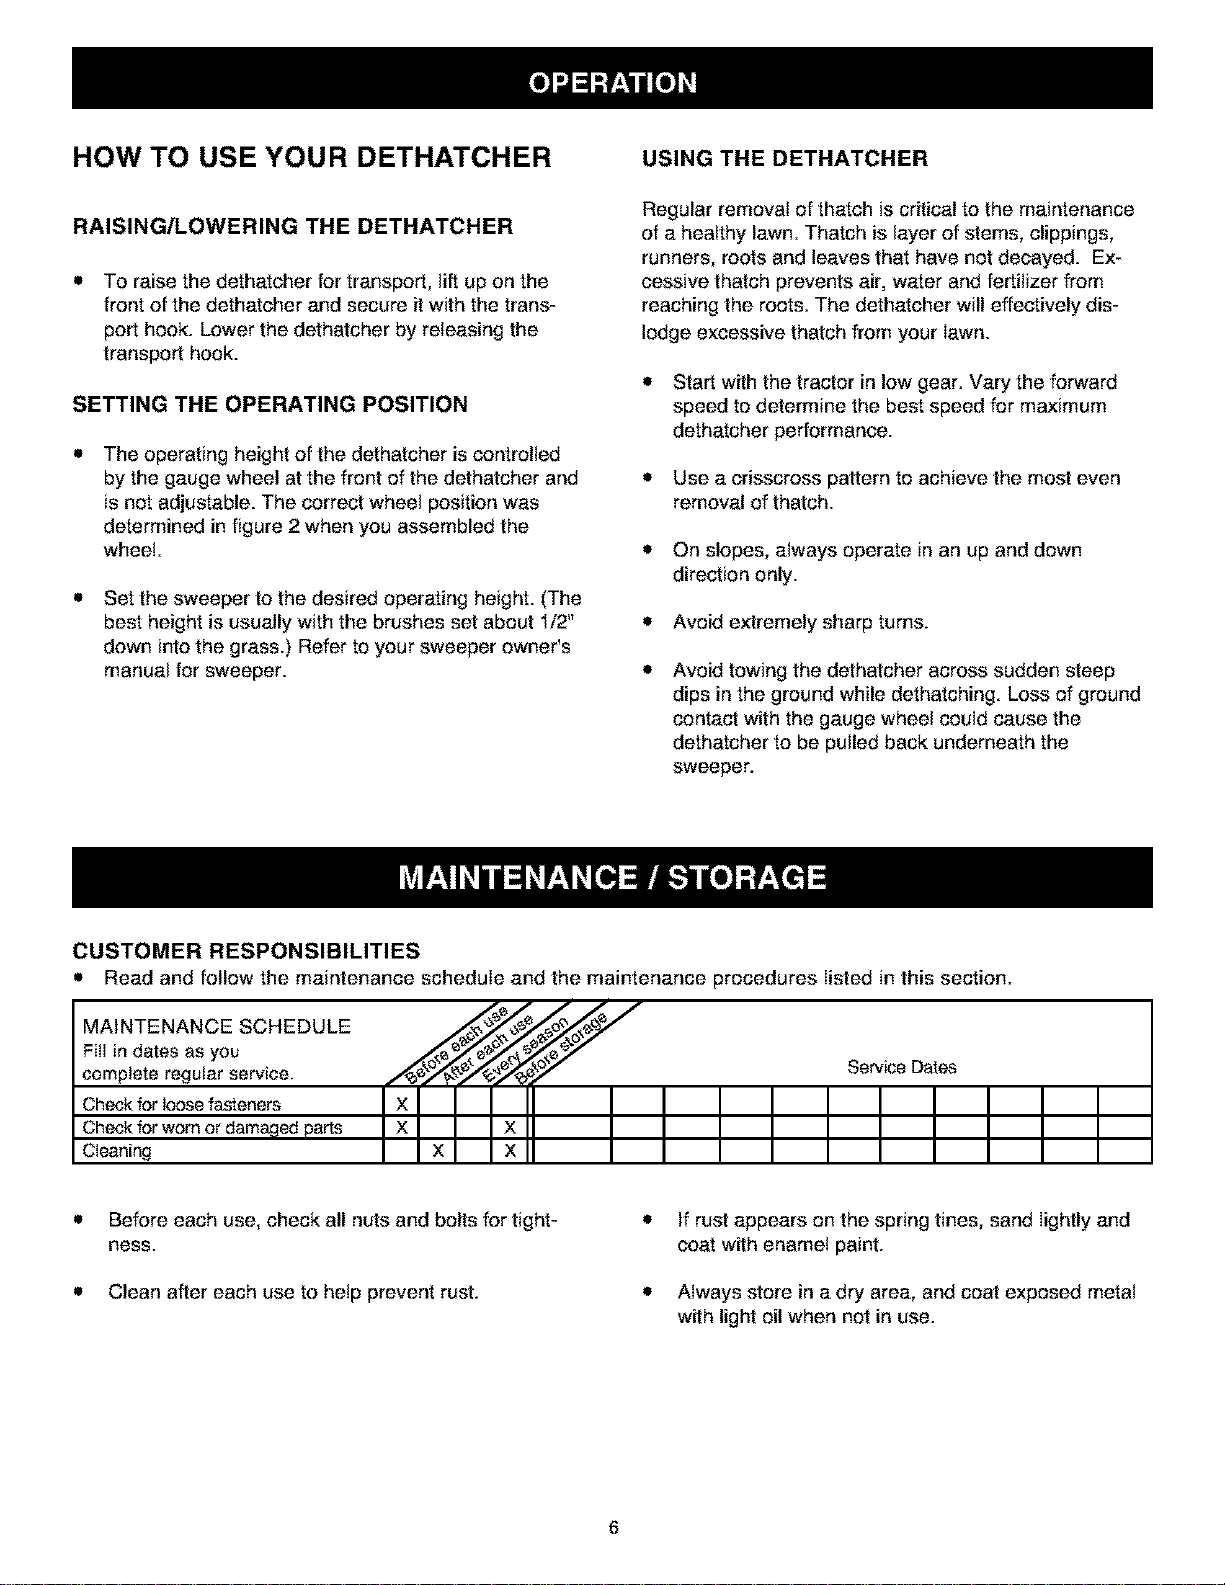
MAINTENANCE SCHEDULE
Fill in dates as you
complete regular service.
Check for loose fasteners
Check for worn or dama4_edparts
Cleaning
Service Dates
e
e
Before each use, check all nuts and bolts for tight-
ness.
Clean after each use to help prevent rust.
• If rust appears on the spring tines, sand lightly and
coat with enamel paint.
• Always store in a dry area, and coat exposed metal
with light oil when not in use.
6
Loading ...
Loading ...