Loading ...
Loading ...
Loading ...
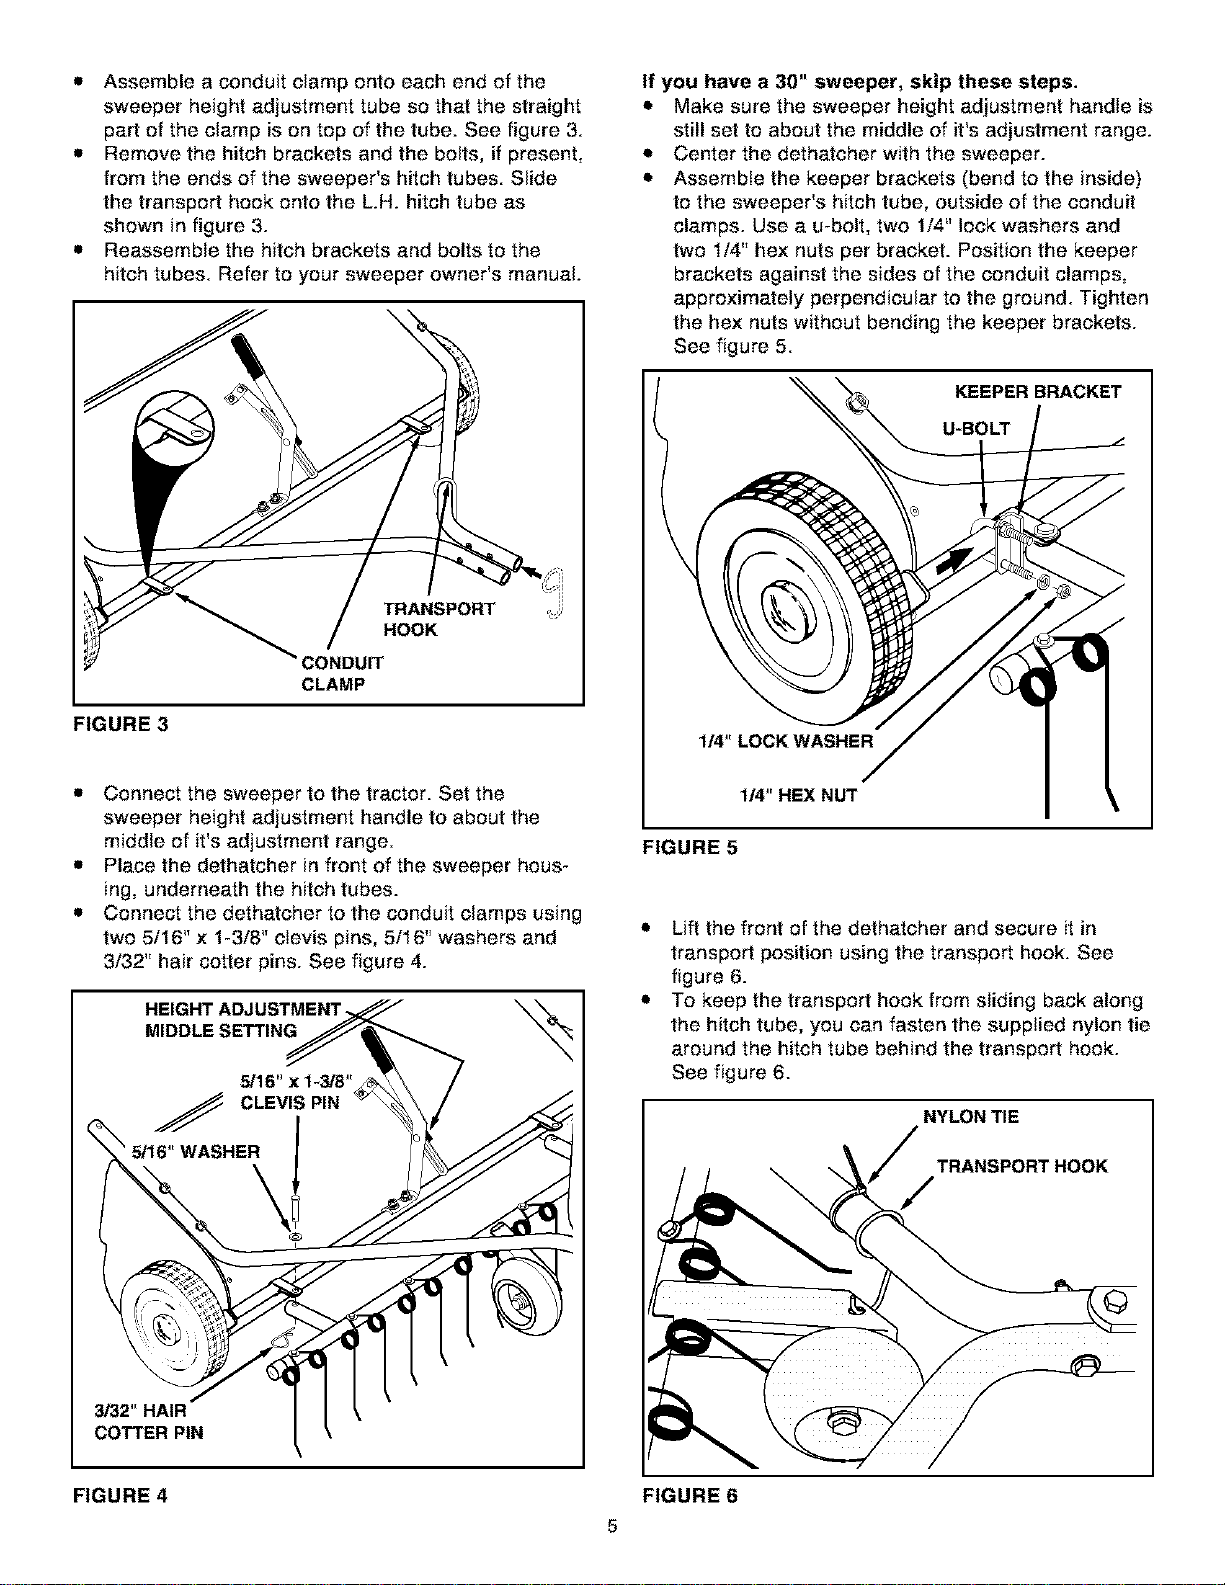
• Assembleaconduitclampontoeachendofthe
sweeperheightadjustmenttubesothatthestraight
partoftheclampisontopofthetube.Seefigure3.
• Removethehitchbracketsandthebolts,if present,
fromtheendsofthesweeper'shitchtubes.Slide
thetransporthookontotheL.H.hitchtubeas
showninfigure3.
• Reassemblethehitchbracketsandboltstothe
hitchtubes.Refertoyoursweeperowner'smanual.
FIGURE 3
TRANSPORT ÷_
HOOK
CONDUIT
CLAMP
• Connect the sweeper to the tractor. Set the
sweeper height adjustment handle to about the
middle of it's adjustment range.
• Place the dethatcher in front of the sweeper hous-
ing, underneath the hitch tubes.
• Connect the dethatcher to the conduit clamps using
two 5/16" x 1-3/8" clevis pins, 5/16" washers and
3/32" hair cotter pins. See figure 4.
HEIGHT ADJUSTMENT.
MIDDLE SETTING
If you have a 30" sweeper, skip these steps.
• Make sure the sweeper height adjustment handle is
still set to about the middle of it's adjustment range.
• Center the dethatcher with the sweeper.
• Assemble the keeper brackets (bend to the inside)
to the sweeper's hitch tube, outside of the conduit
clamps. Use a u-bolt, two 1/4" lock washers and
two 1/4" hex nuts per bracket. Position the keeper
brackets against the sides of the conduit clamps,
approximately perpendicular to the ground. Tighten
the hex nuts without bending the keeper brackets.
See figure 5.
"_ KEEPER BRACKET
U-BOLT
I_"LOCKWASHER
I_"HEX NUT
FIGURE 5
Lift the front of the dethatcher and secure it in
transport position using the transport hook. See
figure 6.
To keep the transport hook from sliding back along
the hitch tube, you can fasten the supplied nylon tie
around the hitch tube behind the transport hook.
See figure 6.
NYLON TIE
TRANSPORT HOOK
/
FIGURE 4 FIGURE 6
5
Loading ...
Loading ...
Loading ...