
Loading ...
Loading ...
Loading ...
Perform hydrostatic pressure test:
See pages 2 and 3 for boiler feature locations.
1. Install air vent in relief valve tapping.
2. Plug supply and return tappings.
3. Install the boiler drain valve shipped with boiler.
4. Fill boiler.
5. Vent all air.
6. Pressure test boiler at 1½ times working pressure.
Do not leave boiler unattended. Cold water ll can ex-
pand and damage cast iron, resulting in severe personal
injury, death or substantial property damage.
7. Check for maintained gauge pressure for at least 10 minutes.
Visually check for leaks if gauge pressure drops.
8. Drain boiler. Repair leaks if found.
Do not use petroleum-based sealing compounds to
repair leaks. Damage to system components can result,
causing property damage.
9. Retest boiler aer repairing leaks.
10. Remove air vent and plugs. Reinstall relief valve.
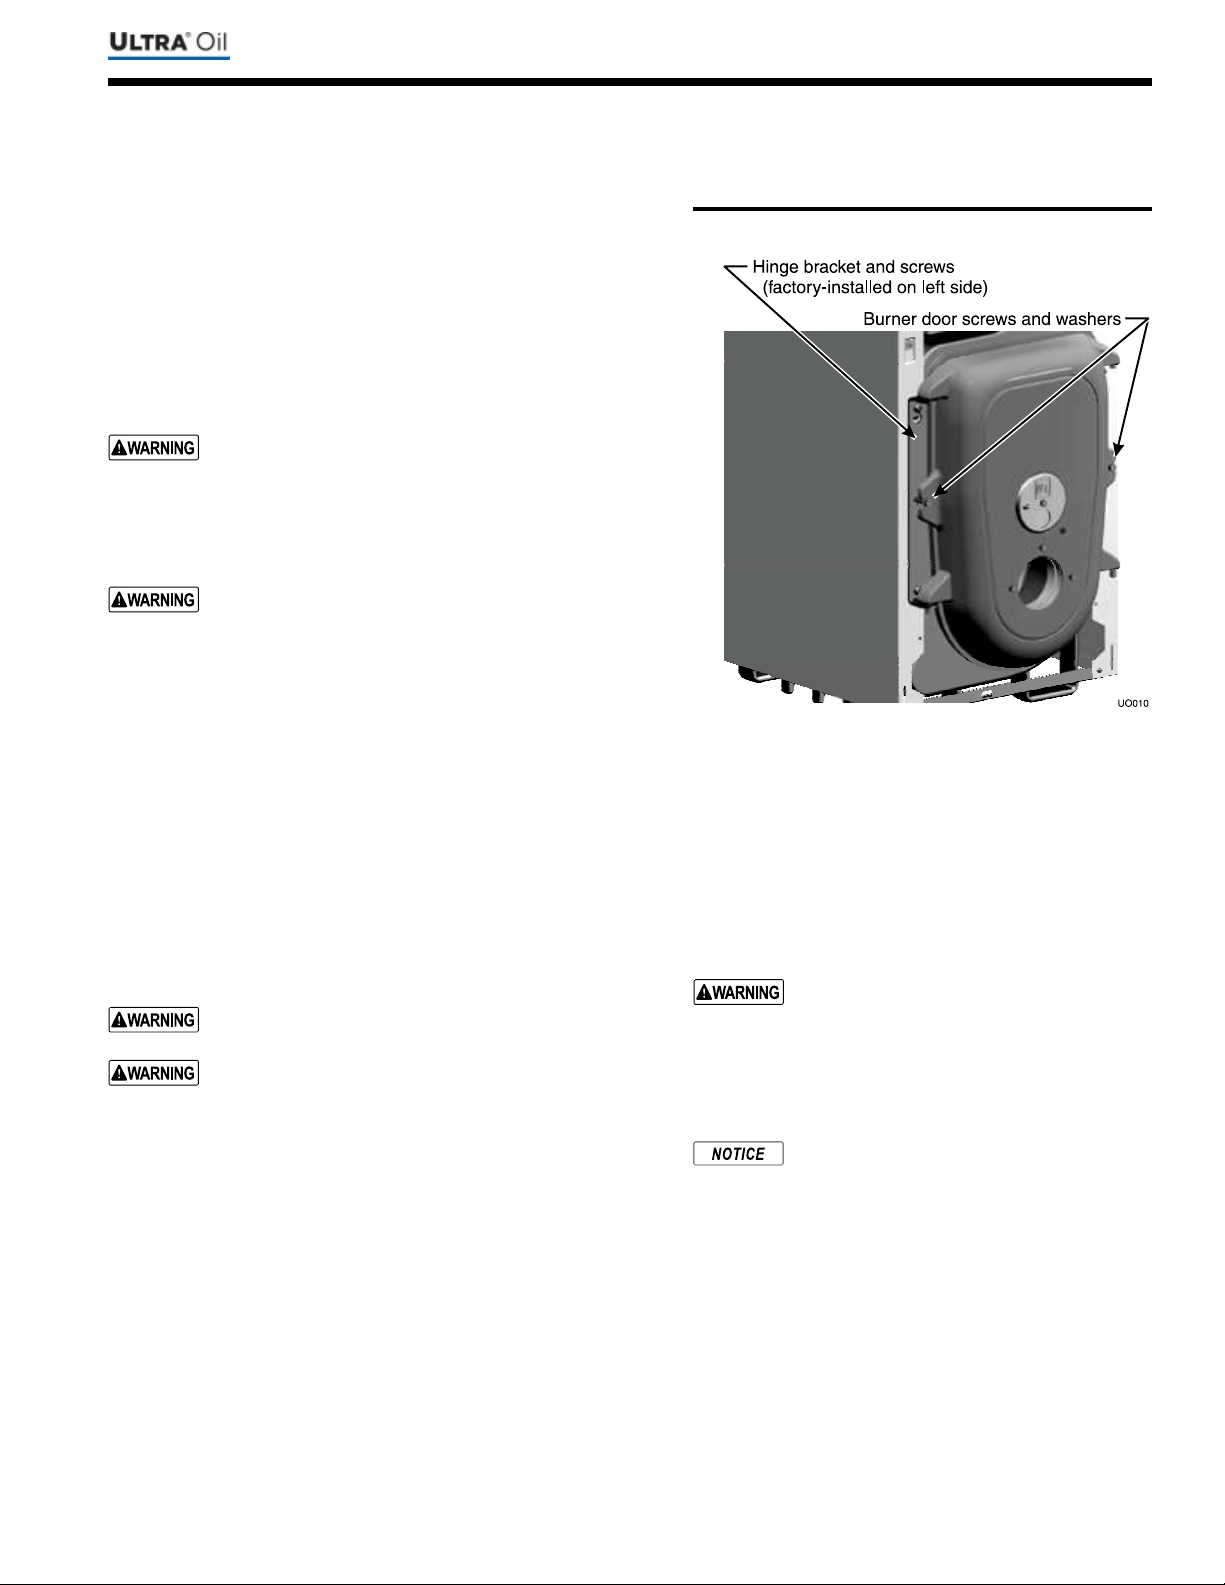
Boiler preparation
e boiler is shipped with the burner door hinged on the le side. e
hinge bracket can be relocated to the right side if desired. See Figure 4.
1. Remove jacket front panel.
2. Remove and retain burner door screws and washers used to fasten
the burner door to the front section (one on each side of door).
3. Carefully li the burner door so the door pins li out of the hinge
bracket.
4. Set the burner door aside temporarily.
e burner door is heavy. Handle carefully to avoid
potential for personal injury.
Do not damage the burner door insulation when han-
dling.
5. e hinge bracket has keyhole slots. Loosen the two (2) screws
securing the hinge bracket to the front section. Remove the hinge
bracket.
6. Loosen the two (2) screws on the opposite side. Place the hinge
bracket on that side and tighten the two screws to secure the
bracket. Also tighten the two (2) screws on the other side.
7. Carefully li the burner door and position so the door pins slide
into the hinge bracket holes. e lower pin is longer than the up-
per. So align the lower pin, then the upper.
8. Replace burner door screws and washers used to fasten the burner
door to the front section (one on each side of door).
Prepare boiler location(continued)
1. Check for secure placement of insulation on burner
door.
2. Check for secure placement of combustion chamber
oor blanket.
3. Visually check b
urner mounting door seal.
Verify gas-tight seal to prevent possible ue
gas leakage and carbon monoxide emissions,
which can lead to severe personal injury or
death.
e Ultra Oil boiler is shipped with baes
installed for improved eciency. A stainless
steel shipping strap is installed to keep baes
in place during shipment. is band may stay
in place until maintenance is required. is
band does not have to be replaced aer its
removal.
Part number 550-143-013/0621
11
Series 3
Loading ...
Loading ...
Loading ...