Loading ...
Loading ...
Loading ...
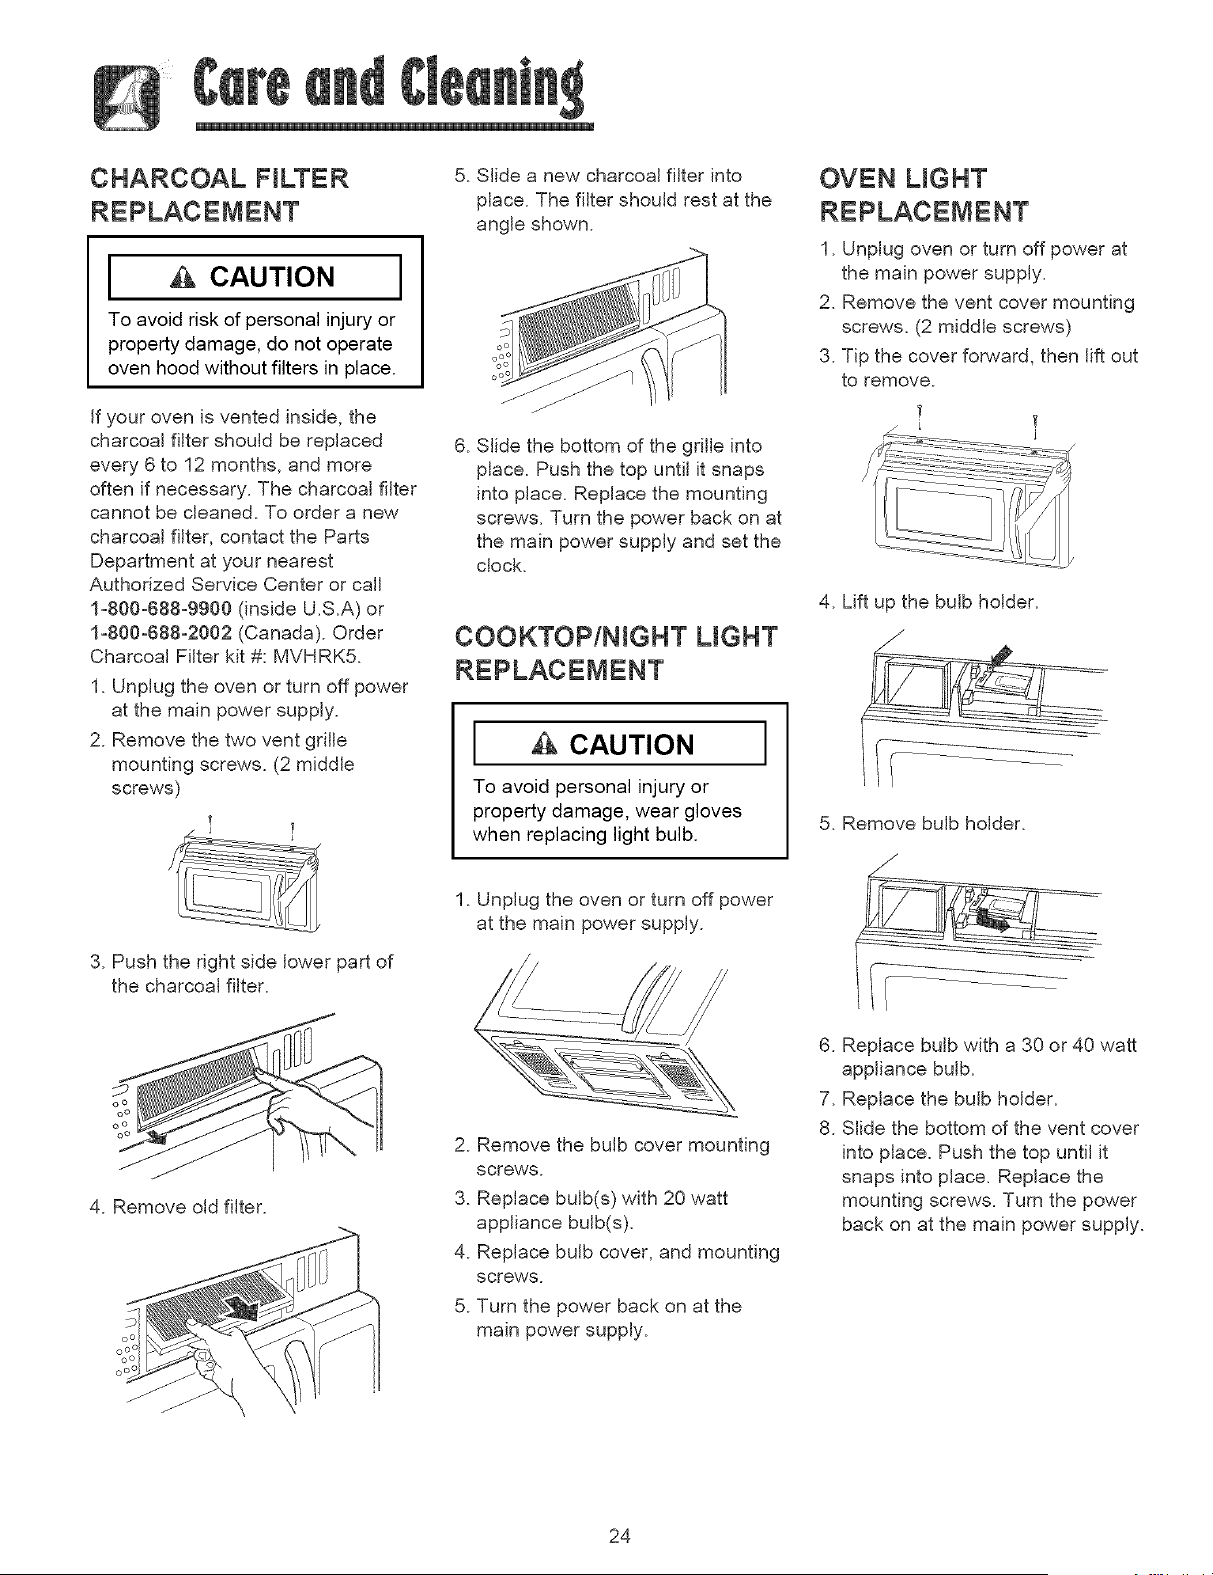
CHARCOALFI ER
I & CAUTION I
To avoid risk of personal injury or
property damage, do not operate
oven hood without filters in place.
if your oven is vented inside, the
charcoal filter should be replaced
every 6 to 12 months, and more
often if necessary. The charcoal filter
cannot be cleaned. To order a new
charcoal filter, contact the Parts
Department at your nearest
Authorized Service Center or call
1-800-688-9900 (inside U.S.A) or
1-800-688-2002 (Canada). Order
Charcoal Filter kit #: MVHRK5.
1. Unplug the oven or turn off power
at the main power supply.
2. Remove the two vent grille
mounting screws. (2 middle
screws)
5. Slide a new charcoal filter into
place. The filter should rest at the
angle shown.
6. Slide the bottom of the grille into
place. Push the top until it snaps
into place. Replace the mounting
screws. Turn the power back on at
the main power supply and set the
clock.
COOKTOPiNmGHT LIGHT
I ,& CAUTION I
To avoid personal injury or
property damage, wear gloves
when replacing light bulb.
OVEN LIGHT
1. Unplug oven or turn off power at
the main power supply.
2. Remove the vent cover mounting
screws. (2 middle screws)
3. Tip the cover forward, then lift out
to remove.
4. Lift up the bulb holder.
,/
5. Remove bulb holder.
3. Push the right side lower part of
the charcoal filter.
o o
o o
co
o o
4. Remove old filter.
Unplug the oven or turn off power
at the main power supply.
2. Remove the bulb cover mounting
screws.
3. Replace bulb(s) with 20 watt
appliance bulb(s).
4. Replace bulb cover, and mounting
screws.
5. Turn the power back on at the
main power supply.
.
7.
8.
Replace bulb with a 30 or 40 watt
appliance bulb.
Replace the bulb holder.
Slide the bottom of the vent cover
into place. Push the top until it
snaps into place. Replace the
mounting screws. Turn the power
back on at the main power supply.
24
Loading ...
Loading ...
Loading ...