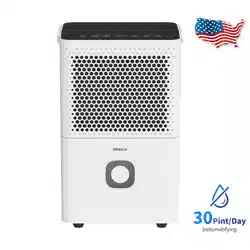
Manual of dehumidifier
Model No. SDO-40P
1
CONTENTS
Placement guidelines..............................................................2
Important Safety Instructions.................................................4
Operation ................................................................................7
Care &Cleaning......................................................................10
Troubleshooting ....................................................................11
Warranty ............................................................................... 12

2
Before First Use:
To prevent a
ny internal damage, it is very important to keep refrigeration units
(like this one) upright throughout their journey. Please leave it standing upright
and outside the box for 24 HOURS before plugging it in.
For Customers:
Thank you for purchasing our dehumidifier.
We wish that our products and services can bring convenience to your
work and life. We highly recommend that you keep the manual for reference if
you encounter unexpected events using the unit. Please read the manual
carefully to ensure the proper use of the dehumidifier. The dehumidifier
from operating quickly and efficiently to reduce room's humidity and bring
you a healthy and comfortable life.
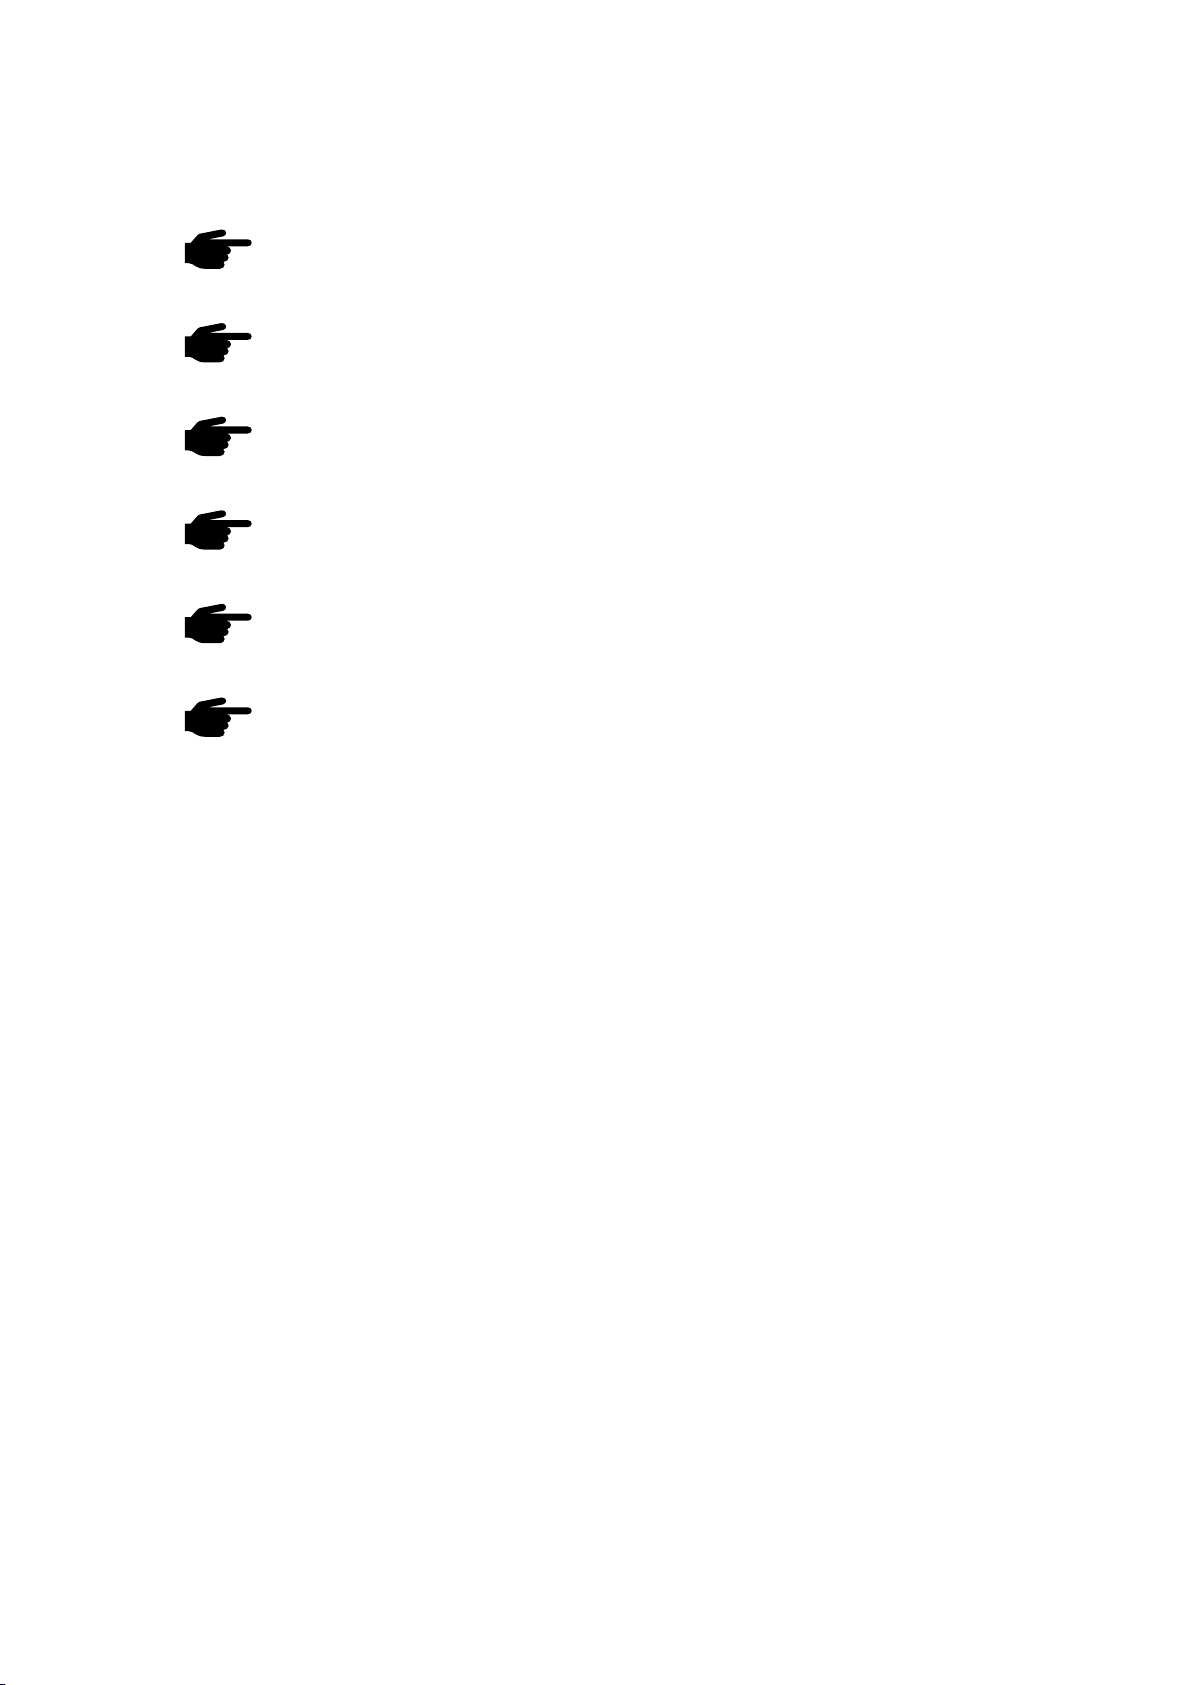
Placement guidelines
The dehumidifier should be used in closed rooms for efficient work. When
operating the appliance, keep doors, windows and other openings closed. Ma
ke
sure to
m
aintain
distances of 15.8 in(40cm)upwards and 19.7 in (50cm)
sidewards for free air circulation. The dehumidifier has the function of drying
clothes. Make sure to maintain distances of ≥19.7 in (50cm) on all sides to the wet
laundry.
Do not operate the dehumidifier near dryers, heaters or radiators.
3
As shown below:
This dehumidifier is designed to operate with a working environment between
41°F (5°C) and 90°F (32°C).
Casters (Installed at four points on the bottom of the dehumidifier)
- Do not force casters to move over carpet, or move the dehumidifier with
water in the bucket. (The dehumidifier may tip over and spill water.)

4
Important Safety Instructions
To prevent injury to the user or other people and property damage, the
foll
owing instructions must be followed when using the dehumidifier.
Incorrect operation due to ignoring of instructions may cause harm or
damage.
1. Before using, please gently open the air outlet's swing
door.
2. Place the machine in a flat place to reduce vibration and noise.
3. Don’t place the machine into water or other liquids.
4. To prevent accidents, please do not use this machine when the wires or other
connections are damaged.
5. Please unplug the power when you stop using, reset or clean the machine.
6. Please use it under the specified voltage.
7. This machine can only be used indoor.
8. Don’t put heavy objects on the machine.
9. Please empty the water tank before restarting the machine to avoid spills.
10. Don’t tilt the machine to avoid damage to the machine by spilled water.
11. Do not use the dehumidifier near flammable gas or combustibles, such as
gasoline, benzene, thinner, etc.
12. Never insert your finger or other foreign objects into grills or openings. Take
special care to w
arn children of these dangers.
13. Care should be taken when using the dehumidifier in a room with the
following persons: infants, children, the elderly and peopl
e not sensitive to
humidity.
14. If the power cord is damaged, in order to avoid danger, it must be replaced
by professionals.
15. Do not drink or use the water drained from the dehumidifier.
SAVE THESE INSTRUCTIONS
5
- Be sure the dehumidifier is properly grounded. To minimize shock and
f
ire hazards, proper grounding is important. This power cord is equipped
with a three-prong grounding plug for protection against shock hazards.
- Your dehumidifier must be used in a properly grounded wall socket. If your
wall
socket is not adequately grounded or protected by a time delay fuse or
circuit breaker, have a qualified electrician instal
l the proper socket.
- Avoid fire hazard or electric shock. Do not use an extension cord or an
adapter plug.
Do n
ot remove any prong from the power cord.
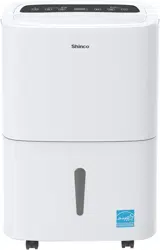
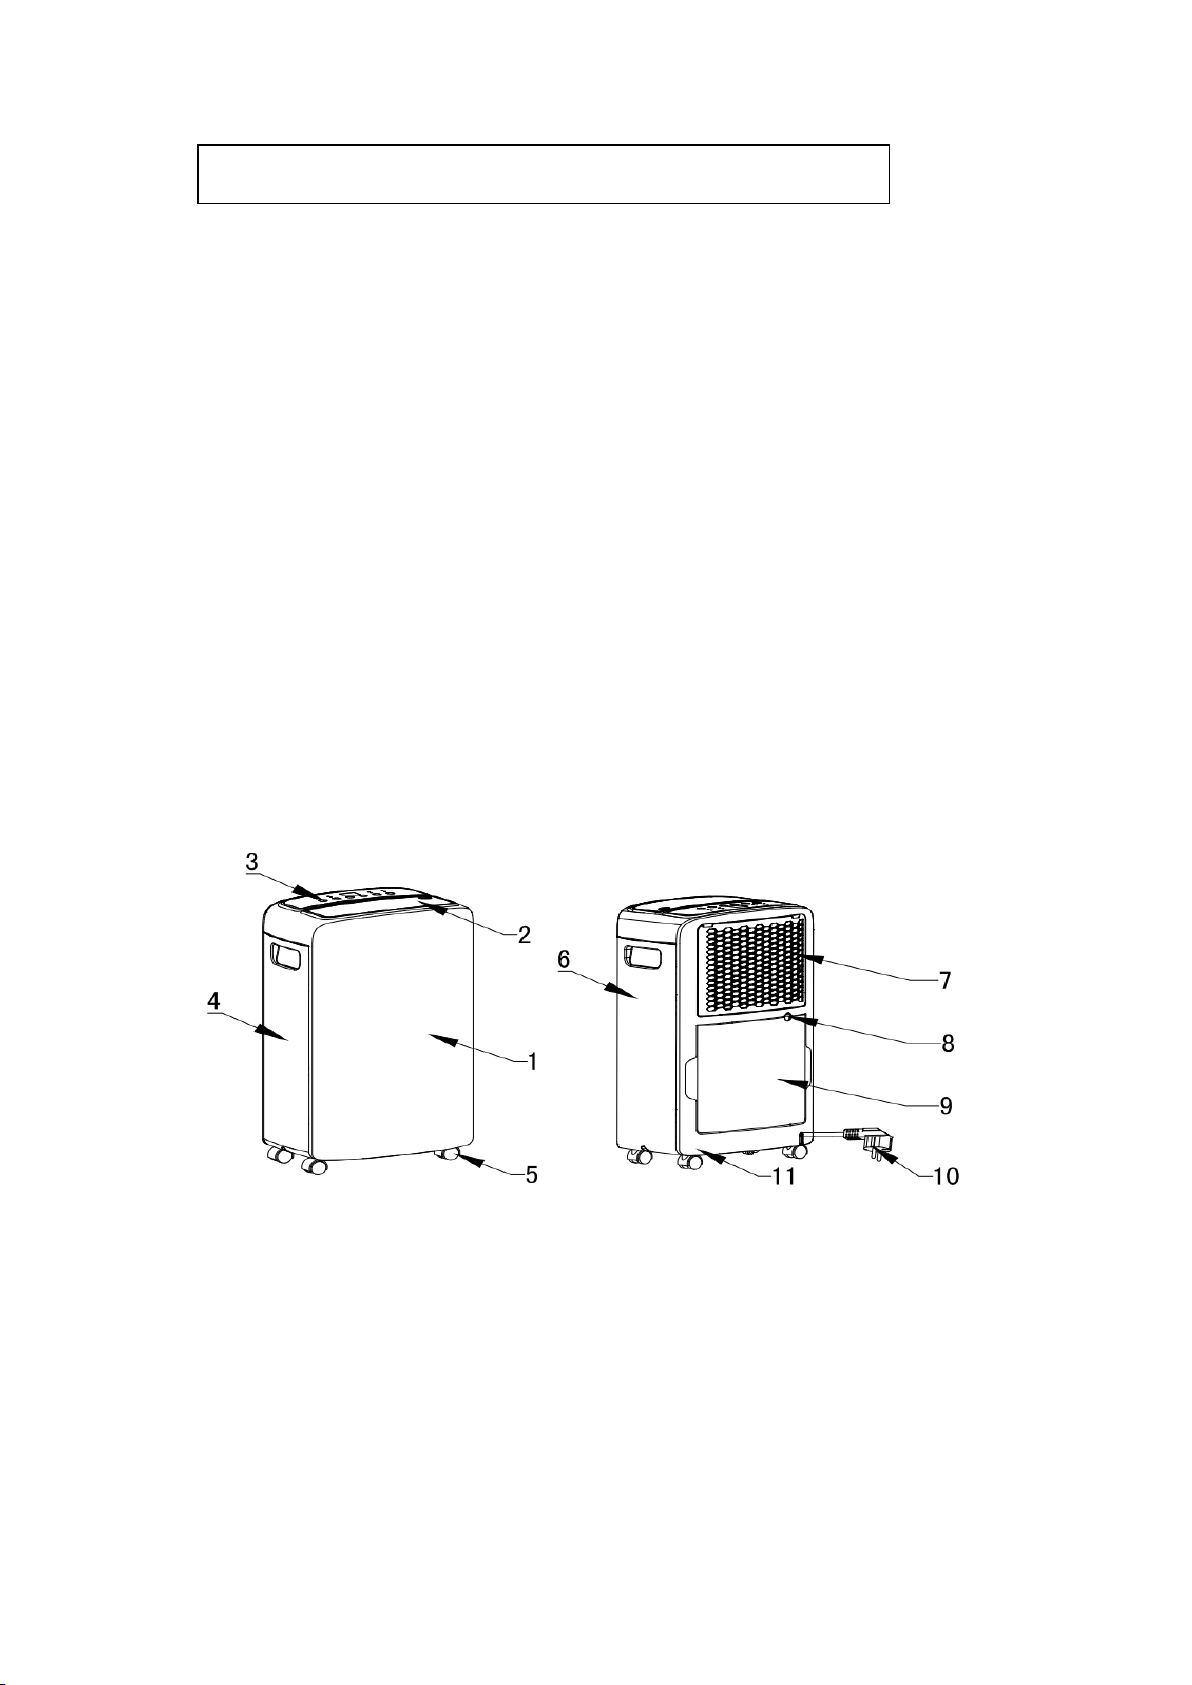
Product overview
1. Front panel 2. Air outlet grille 3. Control panel 4. Left side panel
5. Caster 6. Right side panel 7. Air intake grille/Air filter 8. Drain hose outlet
9. Water tank 10. Power cord 11. Back panel
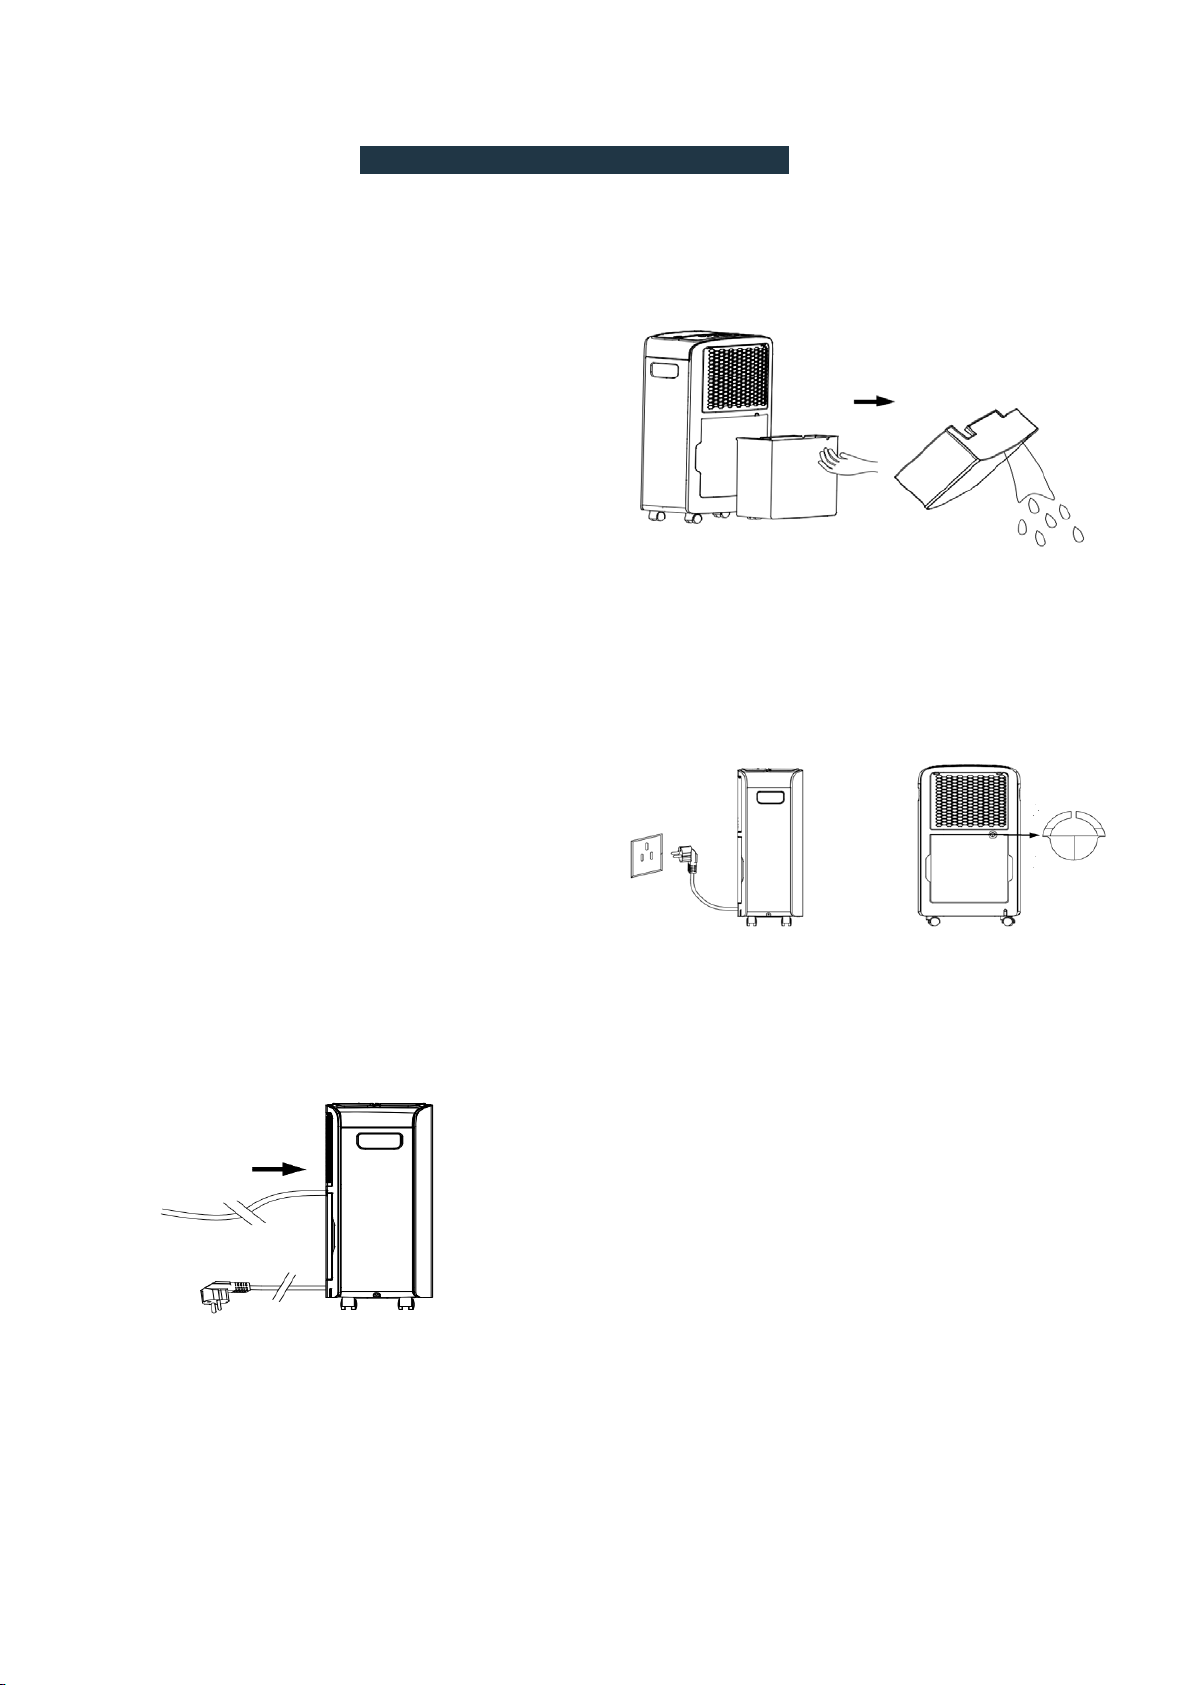
ELECTRICAL INFORMATION
6
Technical Parameters
Model
Unit SDO-40P
Dehumidifying capacity Pint/Day
90°F,RH90%
40
Power Supply V~,Hz
110-120, 60Hz
Rated input
W
370W
Rated Current
A
3.3
Refrigerant
R410A
Air Flow m³/h
180
Water Tank Capacity L 2.0
Noise High dB(A) 48
Body Size W×H×D mm 190×292×501
Package Size W×H×D mm 246×341×525
Net Weight/Gross Weight kg 10/12
Application Area m² 15~18
Power Cord Length m 1.8
24-hour Timing Function √
Display mode LED
Appearance color White
7
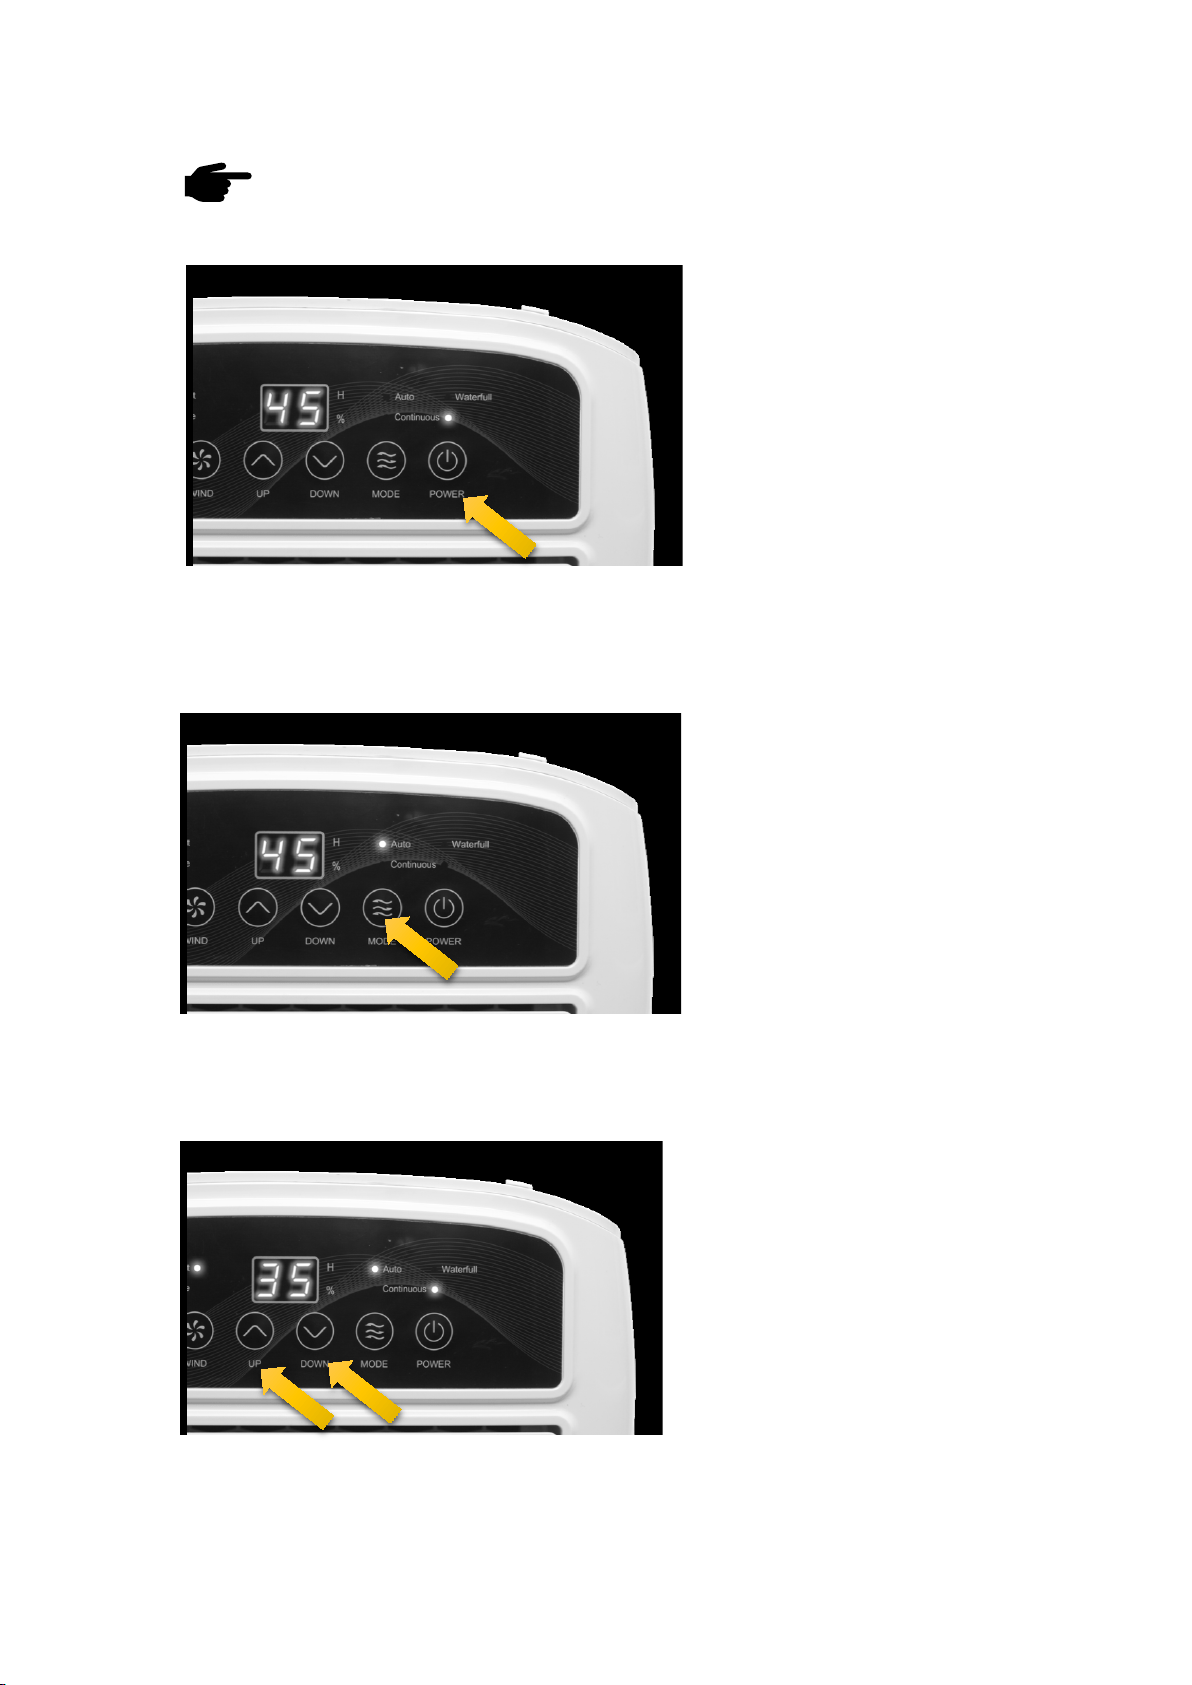
Operation
Switch On/Off button
Press ON/OFF button.
The current humidity level in the
room shows in the display screen.
(Notes: When the machine is powered on for the first time, the machine uses
automatic dehumidification mode by default and operates in low wind.)
Mode button
Press MODE to switch between
automatic(when it reaches
the humidity you set,it will
stop)and continuous(it will
always dehumidify without
stopping) dehumidification.
(Notes: After selecting the mode, next time you turn on the machine , it will run the last
operating mode.)
Setting humidity level button
Ensure that the appliance is in Auto
mode. Press UP or DOWN to set
the desired humidity level. The
appliance will start to work until the
desired level is reached.
(Notes: The default relative humidity of the machine is 50%.)
8
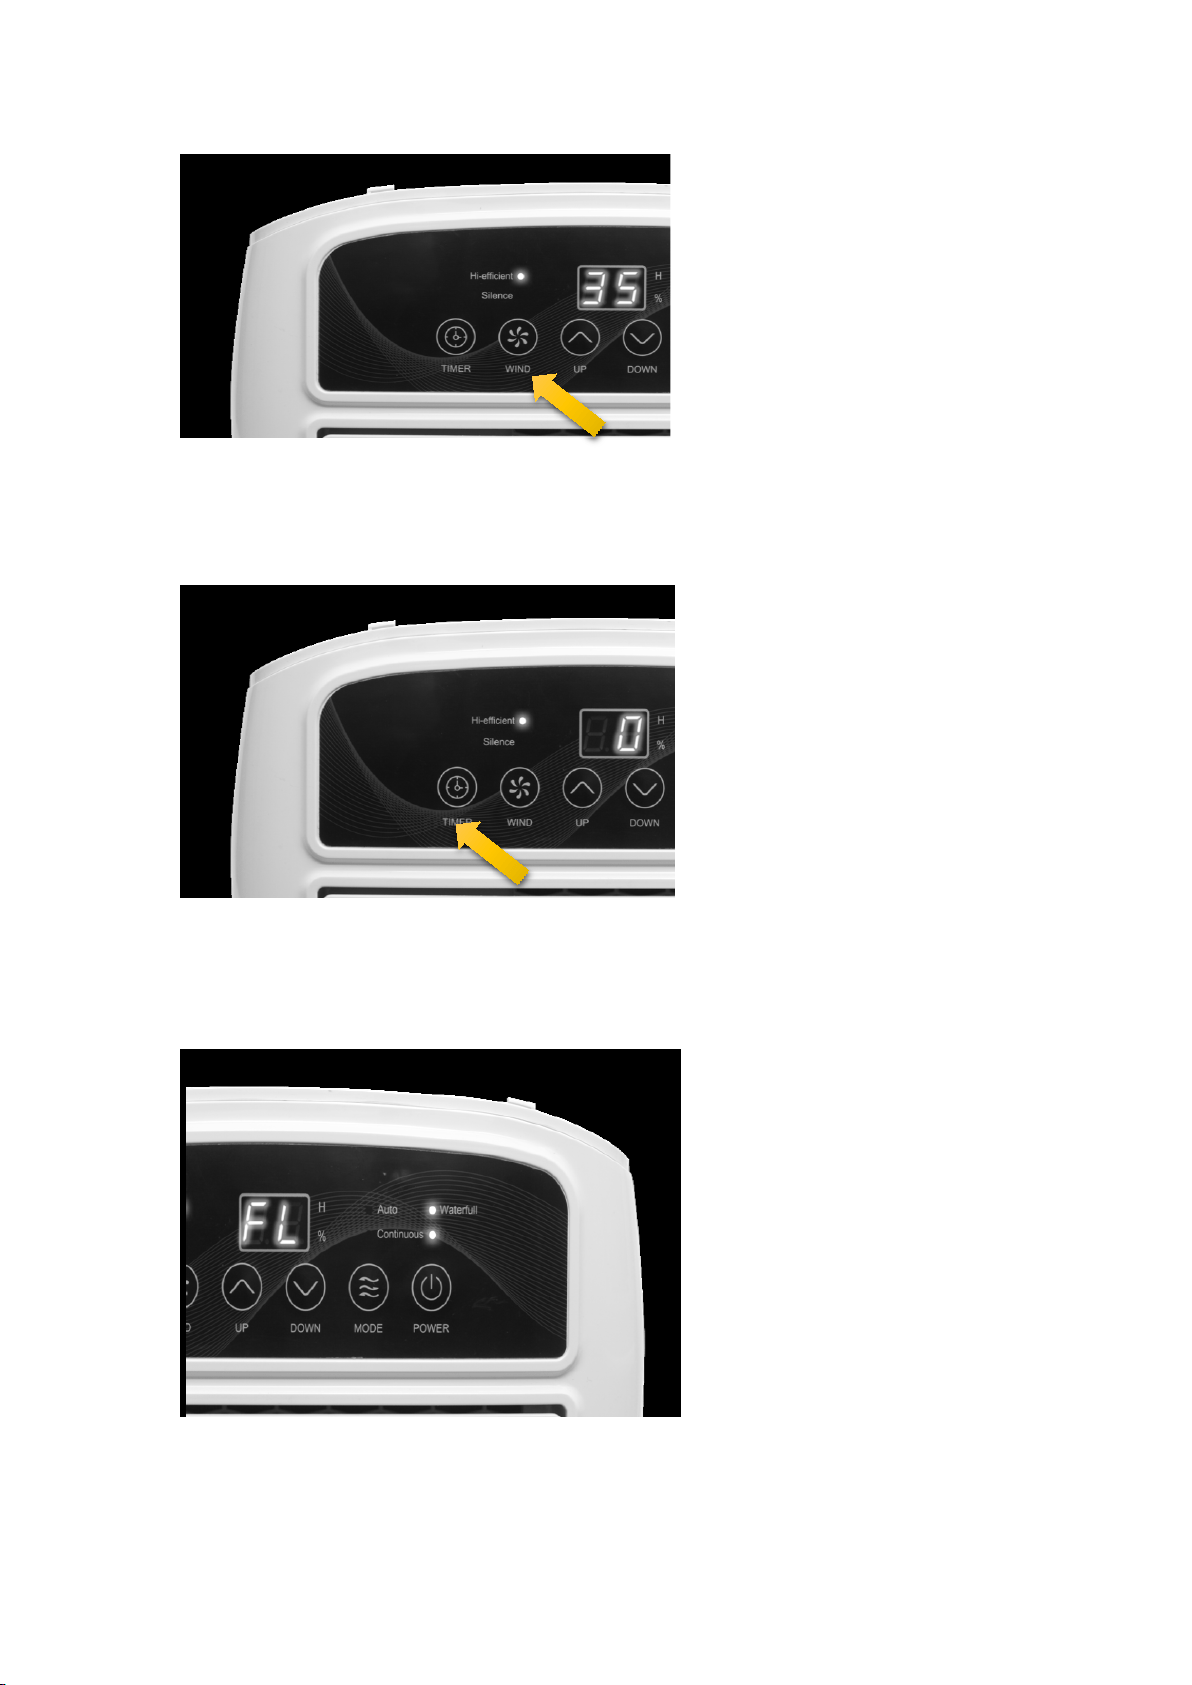
Fan speed button
Press WIND to
switch between
highly efficient (hi-efficient) and
silent (Silence) fan speed.
(Notes: Only work in auto mode. And you can press it for 5s to start the inside drying
function of this machine.)
Timer button
To run the dehumidifier for a
preset amount of hours, press
TIMER."0" blinks on the display.
Set the time you wish the
appliance to operate between 1
and 24 hours.
(Notes: If you want to change the time you just set, press the timer button again to reset it.
And you can set time to turn on this machine by pressing this button in standby.)
Empty the container
If "Water full" lights up and the
display shows "FL", the water
tank needs to be emptied (see
"Empty the water tank") ,After
reinstalling
the emptied water
tank, the dehumidifier restarts
automatically after three mins.
9
REMOVING THE COLLECTED WATER
There are two ways to remove collected water:
1. Use the bucket
When the bucket is full, remove the
bucket and empty it.
Please take out the
water tank with both hands to avoid
spilling water. Then reinstall it properly.
2. Continuous draining
Water can be automatically be emptied into a
floor drain by attaching the dehumidifier to a
water hose.
STEP 1: Cut off the power;
STEPT 2: Remove the 3 plastic seals by
needle-nose pliers a
t the continuous
drainage outlet behind the machine.
STEPT 3: Connect the water pipe (Inner
diameter * wall thickness = 9mm * 2mm) to
the drainage outlet.
STEPT 4: After placing the water ta
nk, the continuous drainage function can be used.
(Notes: Please place it higher, the water pipe
shall not be bent and the other end of the water
pipe shall not be higher than the drainage
outlet.)
Stept1
Stept2
1
0
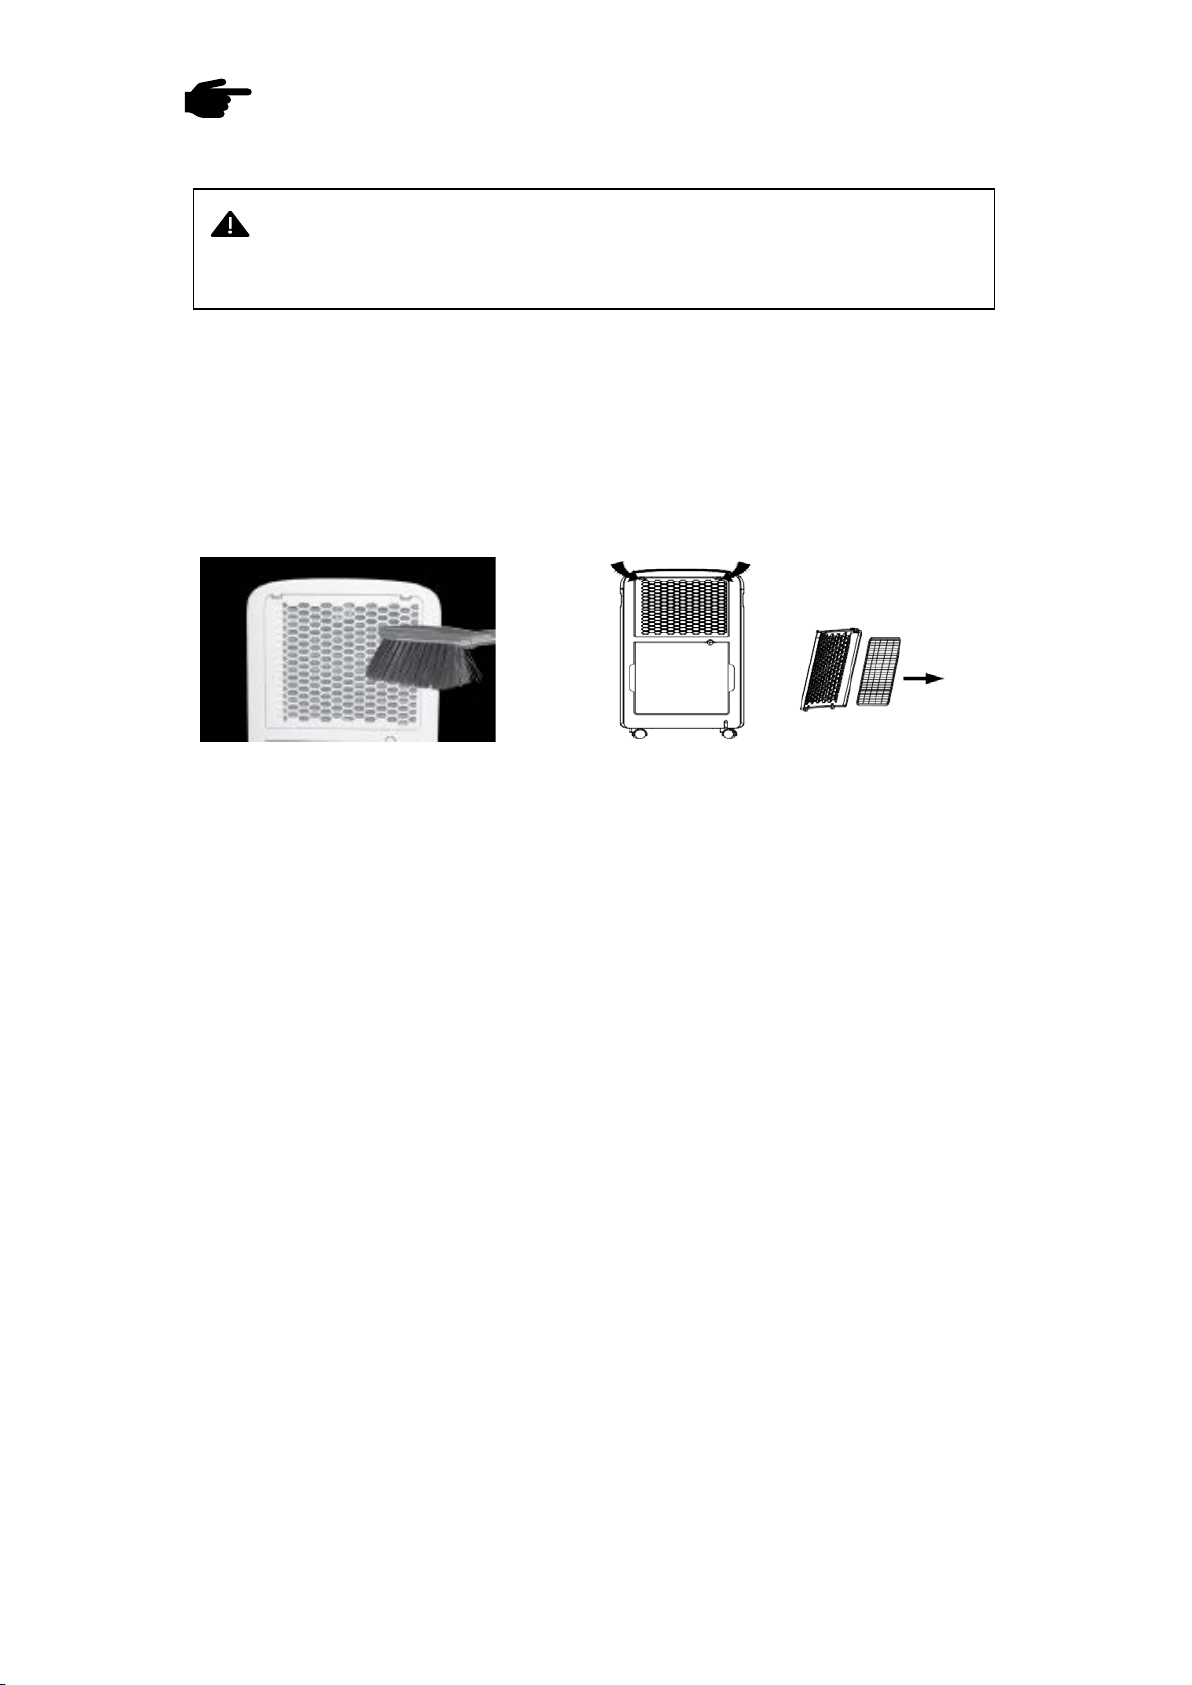
Care
& Cleaning
1.Clean the bucket
Clean the bucket every two weeks with a mild cleaning detergent a
nd water.
2.Clean the air filter
Clean the filter with potable water at least once every 30 days.
The steps to remove the filter are as follows:
Step 1: R
emove the filter frame through the position indicated by the arrows on
both sides of the filter frame;
Step 2: Remove the filter by pressing the buckle on the side of the filter. Wash the
filter in clean water with a soft brush.
(Notes: It must be air-dried naturally after cleaning. Never use any type of dryer.)
3.Storing the dehumidifier
When not using the dehumidifier for long time periods:
- Press “WIND”button for 5s to start the inside drying function of this
machine, the process will take about 45min-1h;
- Clean the main dehumidifier, bucket and air filter.
- Wrap the cord and bundle it with the band.
- Cover the dehumidifier with a soft cloth.
- Store the dehumidifier upright in a dry, well-ventilated place.
WARNING: Turn the dehumidifier off a
nd remove the plug from the wall
outlet before cleaning.
Troubleshooting
(Before contact our customer service, review this list. It may save your time and
expense. This list includes the most common occurrences that are not the result of
defective workmanship or materials in this dehumidifier.)
Problem Cause&Solution
Dehumidifier
does not run
Make sure the dehumidifier’s plug is inserted completely into the outlet.
Bucket is not in the proper position, reinstall the bucket gently.
Adjust the set humidity of the machine to be lower than the ambient humidity.
It is recommended to use this machine at an ambient temperature of 5-35℃.
Dehumidifier
does not dry
the air as it
should
Did not work enough time to remove the moisture.
Make sure there are no curtains, blinds or furniture blocking the front
or back of the dehumidifier.
The humidity selector may not be set low enough.
Check that all doors, windows and other openings are securely closed.
Room temperature is too low, below 41°F (5°C).
There is not a kerosene heater or something giving off water vapor in the room.
Frost appears
on the coils
This is normal. The dehumidifier has Auto defrost feature.
Water leaking Hose to connector or hose connection may be loose.
Noise The dehumidifier stands tilted and not upright. The floor is not flat.
Filter is blocked, pls clean the filter.
Water does
not drain from
the hose
It
is recommended to keep the hose as short as possible for proper draining.
The hose must be pl
aced lower than the bottom of the dehumidifier, and be
kept flat and smooth without kinks.
Error code
Meaning Solution
E2
Temperature sensor
is defective
Unplug the plug and wait a while
before plugging it in. If the error still
occurs, pls contact us.
P1
The unit is in the defrosting
state
It will disappear automatically when
the unit has defrosted
Fl
Water tank is full or not
inserted correctly
Empty the water tank and insert it
correctly
into the unit.
(Please contact our Customer Service by writing a
if dehumidifier operates abnormally or does not operate, and the solutions above are not
useful.)
11

12
Warranty
TO OBTAIN WARRANTY SERVICE:
Please contact us by email.
Sales support: [email protected]
WARRANTY PERIOD :
Labor: 1 Year from the Date of Purchase.
Parts: 1 Year from the Date of Purchase.
SHINCO Electric Co., Ltd reserves rights to upgrade
products without user notice.