Loading ...
Loading ...
Loading ...
CASTER INSTALLATION AND SET-UP (NON-GLASS DOOR)
INSPECTION FOR DAMAGE
Inspect the underside of the cabinet and packaging for damage such as a
fork truck can cause. If hidden damage is found after uncrating,
immediately call the delivery carrier and request an inspection. Retain all
packaging and crating materials until the inspection is complete.
PARTS AND ACCESSORIES
Check to make sure that you have received the box containing all of the
components listed below.
D F
!
.7--- E G
A CASTER RAIL(2) E SWIVELCASTER (2)
a TAPPING PLATE (2) F SPACER PLATE (4)
C BOLT (6) G SW VEL CASTER W/BRAKE (2
D WASHER (6)
TOOLS NEEDED
You will need the following tools to assemble and install the casters to the
unit.
3/8" AND 1/2" INCH ADJUSTABLE WRENCH
SOCKET WRENCH OR PLIERS
1/2" INCH FIXED
WRENCH
CASTER RAIL INSTALLATION
= Place a washer onto one of the six long bolts and slide bolt through the
hole located at the front of caster rail.
• Align the caster rail assembly with the right hand side of the unit.
• Align the bolt with the threaded hole in the front right foot pad of the
unit. Thread the bolt into the hole until finger tight (see Fig. 3).
>J I .....
Figure 3 :'.-
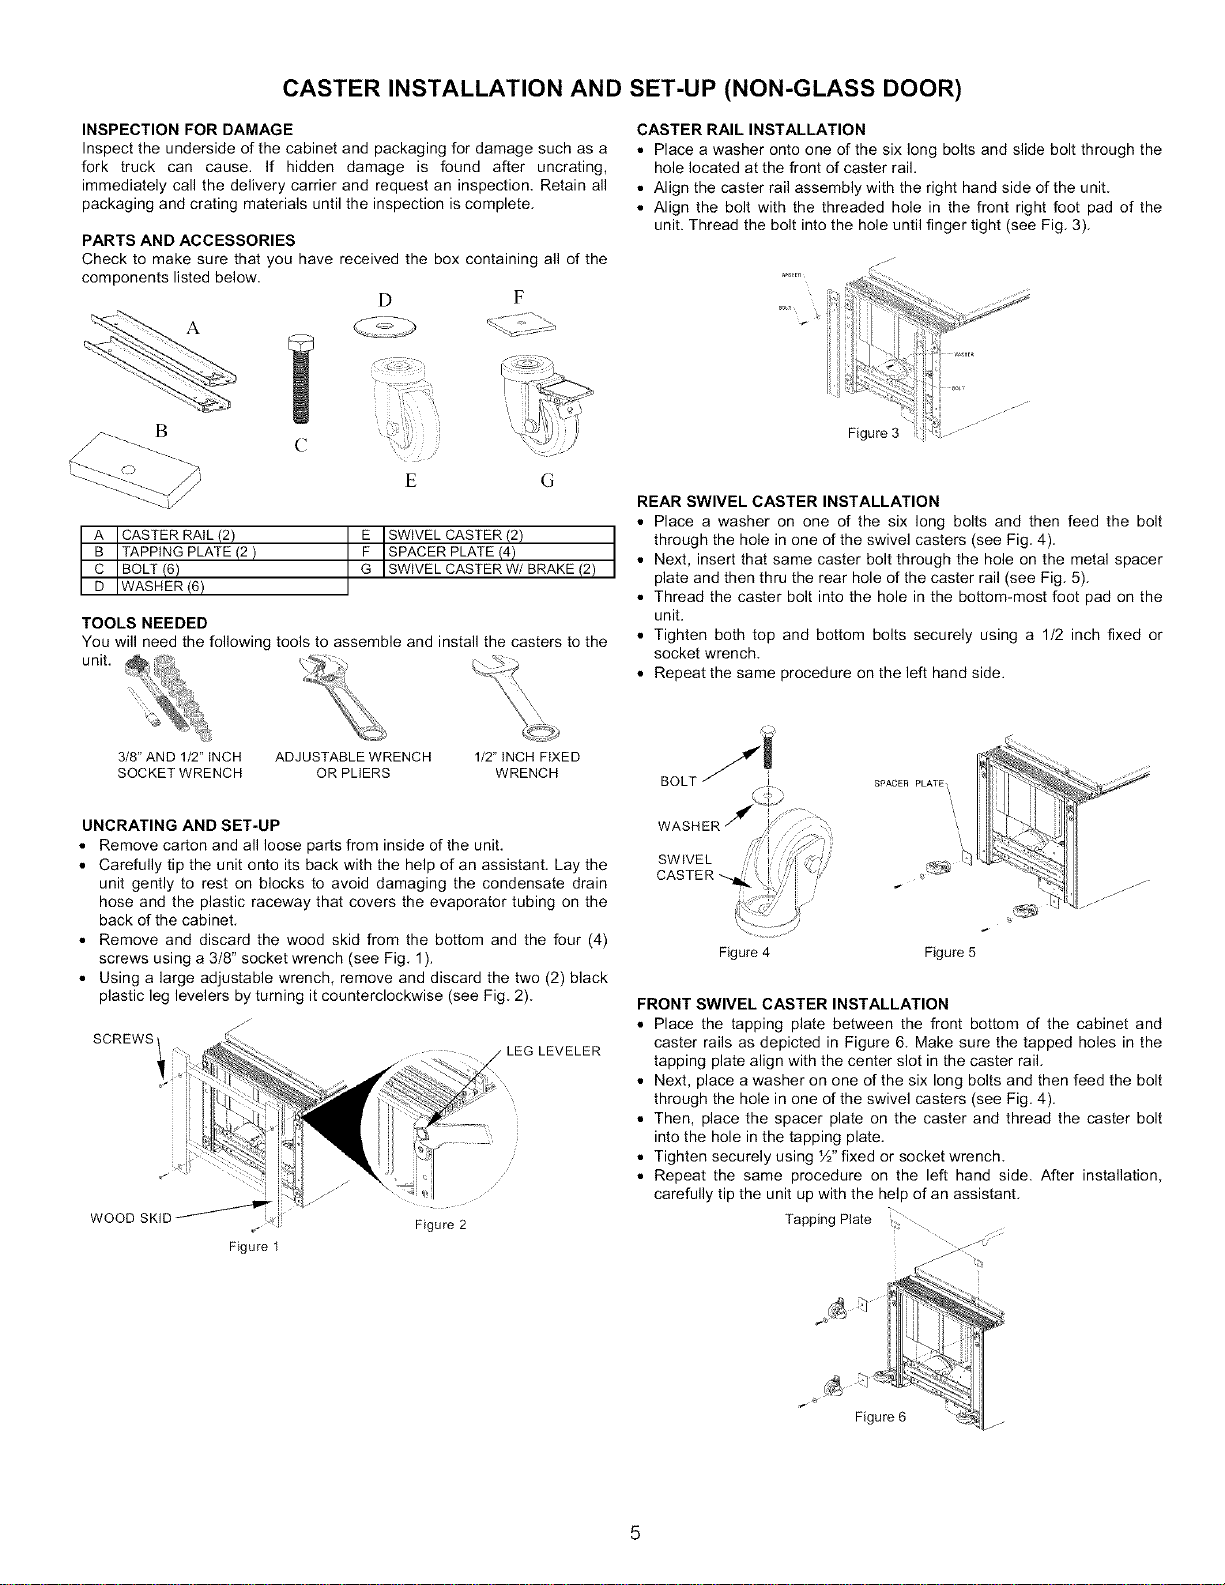
REAR SWIVEL CASTER INSTALLATION
• Place a washer on one of the six long bolts and then feed the bolt
through the hole in one of the swivel casters (see Fig. 4).
• Next, insert that same caster bolt through the hole on the metal spacer
plate and then thru the rear hole of the caster rail (see Fig. 5).
• Thread the caster bolt into the hole in the bottom-most foot pad on the
unit.
• Tighten both top and bottom bolts securely using a 1/2 inch fixed or
socket wrench.
• Repeat the same procedure on the left hand side.
UNCRATING AND SET-UP
• Remove carton and all loose parts from inside of the unit.
• Carefully tip the unit onto its back with the help of an assistant. Lay the
unit gently to rest on blocks to avoid damaging the condensate drain
hose and the plastic raceway that covers the evaporator tubing on the
back of the cabinet
• Remove and discard the wood skid from the bottom and the four (4)
screws using a 3/8" socket wrench (see Fig 1).
• Using a large adjustable wrench, remove and discard the two (2) black
plastic leg levelers by turning it counterclockwise (see Fig 2)
SCREWS
,LEG LEVELER
WOOD SKID
Figure 1
Figure 2
Figure4 Figure5
FRONT SWIVEL CASTER INSTALLATION
• Place the tapping plate between the front bottom of the cabinet and
caster rails as depicted in Figure 6. Make sure the tapped holes in the
tapping plate align with the center slot in the caster rail.
• Next, place a washer on one of the six long bolts and then feed the bolt
through the hole in one of the swivel casters (see Fig. 4).
• Then, place the spacer plate on the caster and thread the caster bolt
into the hole in the tapping plate.
• Tighten securely using ½" fixed or socket wrench.
• Repeat the same procedure on the left hand side. After installation,
carefully tip the unit up with the help of an assistant.
Tapping Plate .........
Loading ...
Loading ...
Loading ...