User Gudie Kalorik PZM 43618 R Oven
Table of contents
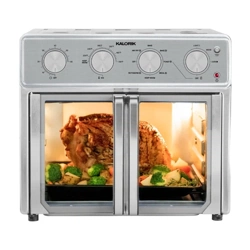
- PARTS DESCRIPTION
- Lid
- Viewing window
- Handles
- Heating element
- Removable pizza stone
- Pizza peels
- Pizza cutter
- Timer knob (15 minutes)
- Indicator light
- Thermostat knob
IMPORTANT SAFEGUARDS
When using electrical appliances. basic safety precautions should always be followed. including the following:
1. READ ALL INSTRUCTIONS BEFORE USE!
2. Check that the voltage in your home corresponds to that stated on the
3. Do not touch hot surfaces. Use handles or knobs. Please use oven mitts
4. To protect against electrical shock. fire or personal injury. do not
5. Close supervision is necessary when any appliance is used by or near
6. Unplug from outlet when not in use and before cleaning. Allow to cool
7. Do not operate any appliance with a damaged cord or plug or after
8. The use of accessory attachments not recommended by the
9. Do not use outdoors.
10. Do not let the cord hang over the edge of a table or counter. or touch
11. Do not place on or near a hot gas or electric burner. or in a heated
12. Extreme caution must be used when moving an appliance containing
13. To disconnect. turn any control to “0” then remove the plug from wall
14. Do not use the appliance for anything other than intended use.
15. A fire may occur if the appliance is covered or touching flammable
16. Do not clean with metal scouring pads. Pieces can break off the pad
17. Do not attempt to dislodge food when the appliance is plugged in.
18. Do not store any materials. other than manufacturers recommended
19. Do not place any flammable materials in the appliance.
20. Do not leave unit unattended when in use.
21. Immediately unplug the appliance if you see dark smoke coming out
22. Do not place the appliance against a wall or against other appliances.
23. Leave at least 8 inches (20 cm) of free space on the back. sides and
24. Always operate the appliance on a stable. level. clean. and heat
25. The appliance is not intended to be operated by means of an external
26. Do not lean or stand over the appliance when opening the lid as
27. Do not leave the lid open for extended periods of time.
28. Do not place hands inside the appliance during operation.
29. Do not insert oversized foods into the appliance as this may create risk
30. Caution should be exercised when cooking foods with high oil content.
31. DO NOT OPERATE THE PIZZA OVEN WITHOUT THE PIZZA STONE (or optional
SAVE THESE INSTRUCTIONS
HOUSEHOLD USE ONLY
POLARIZED PLUG INSTRUCTIONS
This appliance is equipped with a polarized plug (one blade is wider than the other). To reduce the risk of electric shock. this plug will fit into the polarized outlet only one way. If the plug does not properly fit into the outlet at first. reverse it. If it still does not fit. contact a competent qualified electrician. Do not attempt to modify the plug in any way.
SHORT CORD INSTRUCTIONS
A short power supply cord is provided to reduce the hazards resulting from becoming entangled in. or tripping over a longer cord. Extension cords may be used if care is exercised in their use. The electrical rating of the extension cord should be at least that of the appliance. If the electrical rating of the extension cord is too low. it could overheat and burn.
The resulting extended cord should be arranged so that it will not drape over the counter top or tabletop where it can be pulled on by children or tripped over.
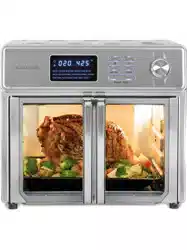
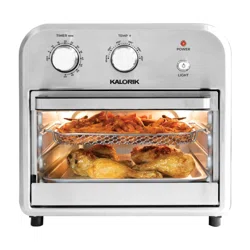
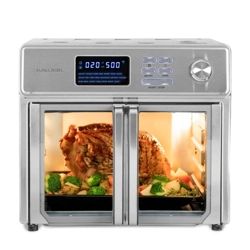
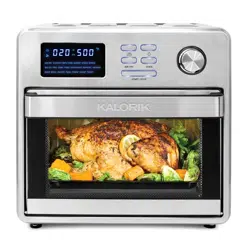
KNOW YOUR PIZZA MAKER
- Your new pizza maker features: Temperature up to 715°F (380°C). like in a brick oven
- A reversible pizza stone that retains heat and absorbs moisture. for a perfectly crispy crust
- A large glass window to monitor baking without opening the lid
- A 15-minute timer for easy monitoring
BEFORE THE FIRST USE
- Unpack the appliance and its accessories (pizza stone. pizza peels. pizza cutter). Wash the pizza peel and pizza cutter in hot. soapy water and then wipe them dry. Wipe the pizza stone with a soft damp cloth. and then dry with a paper towel. Make sure the cavity is dry before operating the unit.
- There is no need to season the pizza stone before the first use.
- It is recommended to let your unit heat on the highest setting for about 10 minutes without any food in it and with the lid closed. This helps to eliminate grease that may have adhered during manufacturing. and to eliminate the "new" appliance smell.
OPERATING INSTRUCTIONS
1. Preparing for use
- Place the appliance on a stable. horizontal. clean. level surface.
- Make sure that the surface is heat resistant and that the pizza maker is also positioned at least 8 inches (20cm) away from any surrounding objects.
- Ensure that all controls are on the 0 position.
2. Using the appliance
- Insert the power plug into the power outlet. Turn the temperature knob to the desired setting to start preheating the unit. Preheat for 5 to 15 minutes.
- After about 5 minutes. the indicator light will turn off to indicate that the unit is pre-heated and ready for use.
- Turn the temperature control knob to the desired setting (see SETTINGS section). Place the uncooked pizza. frozen pizza or pizza dough onto floured pizza peels.
- If your pizza dough is fresh. gently prick the pizza dough with a fork and add the ingredients and toppings on top of the dough.
- Open the lid and quickly use the pizza paddles to slide your pizza directly onto the heated stone. Warning: the pizza stone and handles will be extremely hot. use gloves or oven mitts.
Note:
- If cooking a store-bought pizza. ensure that all packaging materials are removed before cooking.
- Carefully close the lid and adjust the timer to the desired cooking time. You can also monitor the cooking process with the large window.
- When the timer goes off and the pizza is cooked to the desired doneness. carefully open the lid using oven mitts.
WARNING
- Do not lean or stand over the pizza oven when opening the lid as steam may be released. Danger of scalding!
Remove the pizza using the pizza peels.
- If you are done using your pizza maker. turn all knobs to “0” and unplug the unit.
- To prevent smoking or burning. after the pizza stone has completely cooled off. scrape off hot melted cheese and ingredients that may have fallen onto the stone after each pizza has been cooked.
IMPORTANT:
- The timer doesn’t have an auto shut off feature. To switch the unit off. turn the temperature dial to the minimum setting and switch the appliance off.
IMPORTANT:
- Never use the pizza cutter or a knife to cut the pizza directly on the stone. as this could damage the cooking surface.
- Remove the pizza from the stone prior to cutting.
NOTE:
- The pizza stone will darken in color with use. This is a normal part of the natural season process
PIZZA AND DOUGH TYPES
- The Kalorik Hot Stone pizza maker allows you to prepare a variety of pizza types.
- Frozen pizza: cook frozen pizzas straight from the freezer. Select setting 1 and wait until the pizza maker preheats. Once the indicator light turns off. place the frozen pizza directly on the stone and close the lid. Cook on setting 1 for approximately 4 minutes to let the pizza defrost. Then. adjust the setting to 2 or 3 and cook for an additional 5 minutes.
- Fresh pizza: to make your own fresh pizza. prepare pizza dough using the recipe provided in “Recipes” or use pizza mix. fresh pre made pizza dough or frozen pre-made pizza dough.
- Pitta pizza: use pitta bread instead of pizza dough as a base for your pizza. Simply add toppings on top of pitta bread and cook for 2-3 minutes.
- Calzone: for added variety. fold the crust over the toppings and seal the edges. Cook until golden.
RECIPES
Best Pizza Dough
Ingredients:
- 2 teaspoon Active Dry yeast
- 1 teaspoon granulated sugar or honey
- ¼ cup lukewarm water (~90°F/30°C)
- 1 cup whole wheat flour
- 2 cups All-purpose flour
- 2 tablespoons olive oil
- 1 teaspoon salt
- ¾ to 1 cup lukewarm water (~90°F/30°C)
1. In a small bowl or a glass. put ¼ cup lukewarm water with the yeast
2. In a large bowl. sift together the flours and salt. Add olive oil. yeast
3. Dump the dough out on a flat. well-floured surface and knead.
4. Place the dough in a well-greased bowl large enough for it to
5. Use in your favorite pizza recipe for a yummy. made-from-scratch
Margherita Pizza
Ingredients:
- 2 tablespoons tomato passata or tomato sauce
- 8-9 ounces mozzarella cheese
- 4-5 leaves of fresh basil
Extra virgin olive oil
1. Preheat the pizza maker.
2. Place the pizza dough on the stone.
3. Spoon the tomato sauce or passata over the dough and add your
4. Close the lid and cook for 5 to 6 minutes on setting 2 or 3.
5. Once cooked. drizzle with extra virgin olive oil.
Pepperoni Pizza
Ingredients:
- 2 tablespoons tomato passata or tomato sauce
- 8-9 ounces mozzarella cheese
- 2 ounces peperoni
- 1. Preheat the pizza maker.
- 2. Place the pizza dough on the stone.
- 3. Spoon the tomato sauce or passata over the dough and add your
- 4. Add the pepperonis over the tomato sauce and cheese base.
- 5. Close the lid and cook for 3 to 4 minutes on setting 5.
Moroccan Lamb Pizza
Ingredients:
- 2/3 cup low-fat yogurt
- Juice of 1 lemon
- 2 tablespoons chopped mint
- 6.5 ounces lamb backstrap. roughly chopped
- 1 ½ teaspoon Moroccan seasoning (Ras el Hanout)
- 1 large garlic clove. chopped
- ½ red onion. chopped
- 1 tablespoon pine nuts
- 8 cherry tomatoes. halves
- 1 tablespoon chopped coriander
1. Preheat the pizza maker.
2. Combine the yogurt. 2 tablespoons of lemon juice and the
3. Place the chopped lamb. Moroccan seasoning. garlic. red onion.
4. Place the dough directly onto the stone. scatter the base with the
5. Close the lid and cook for 3 to 4 minutes on setting 5.
6. Sprinkle with the chopped coriander and drizzle over remaining
7. Serve with the mint yoghurt.
Nutella and Caramelized Banana Pizza
Ingredients:
- ¼ cup of Nutella or hazelnut spread
- 2 small bananas
- 2 tablespoons brown sugar
- Powdered sugar
1. Preheat the pizza maker.
2. Place the dough on the stone.
3. If necessary. warm the Nutella in the microwave for a few seconds
4. Top with sliced bananas.
5. Sprinkle with brown sugar.
6. Close the lid and cook for 3 to 4 minutes on setting 5.
7. Dust with powdered sugar and serve with custard or vanilla ice
Ortalana Pizza
Ingredients:
- Chargrilled vegetables (zucchinis. asparagus. .)
- 5 slices fresh mozzarella
- 3 tablespoons tomato passata or tomato sauce
- Handful of Pecorino
- Handful of baby spinach leaves
- Extra virgin olive oil
1. Preheat the pizza maker on setting 5.
2. Place the dough on the stone.
3. Spread the tomato passata over the dough.
4. Add the slices of mozzarella.
5. Add the chargrilled vegetables and baby spinach leaves.
6. Sprinkle with pecorino cheese.
7. Close the lid and cook for 3 to 4 minutes on setting 5.
8. Drizzle with olive oil.
Chicken and Arugula Pizza
Ingredients:
- 7 ounces chicken tenderloins. sliced
- 1 ½ tablespoon Tandoori paste
- 2 tablespoons yoghurt
- 3 tablespoons tomato sauce
- 1 handful of shredded mozzarella
- 1 handful of halved cherry tomatoes
- 1 handful arugula
- 2 tablespoons tzatziki sauce
- 2 tablespoons mango chutney
1. Preheat the pizza maker on setting 1.
2. Place the chicken. Tandoori paste and yoghurt in a bowl. Toss until
3. Place the dough on the heated stone. top with tomato sauce and
4. Place the chicken and halves tomatoes over the base.
5. Close the lid and cook for 5 to 7 minutes on setting w or 3.
6. Top with arugula and drizzle with tzatziki.
CLEANING AND MAINTENANCE
- Make sure to clean the appliance after each use!
- Unplug the appliance from outlet and switch the appliance off by putting the knobs into the 0 position.
- Let the stone cool down and scrape off any cheese or pizza ingredients that may have fallen onto the stone.
- Before cleaning more thoroughly. allow the unit to cool down completely.
Reversible stone:
- The pizza stone can be used on both sides. To change side. start by scraping off any food remains from the side of the stone that was last used.
- See below for cleaning instructions. Once the stone is free of any food. remove it from the base. turn it upside down and replace it on the base.
IMPORTANT:
- Make sure the side that will be close to the lower heating element is free of any food remains.
Cleaning the reversible stone:
- Never use cooking oil or any types of detergents to clean the cooking stone.
- Never immerse the stone in water.
- Scrape off any excess food with the metal paddles or a stiff brush bristled brush and wipe clean with a paper towel or a clean dishcloth.
- Pizza stones are porous and will absorb fats and oils. It is normal for pizza stones to accumulate stains from dripping cheese and fatty toppings.
- This will not affect the taste of the pizza or the performance of the stone. However. cooking residue may create excess smoke and odor to form.
- How to remove stains: Small stains can be cleaned by scrubbing with a toothbrush and a paste made from equal parts of baking soda and water. Work in small circles until stains are removed. Wipe clean with a damp cloth and dry completely.
- To remove burnt on food. use a scouring pad or a scraper lightly over stubborn areas.
- If the accumulation is heavy. use a hard-abrasive paper like sand paper to clean the surface.
- Make sure to wipe the stone clean with a damp cloth and allow plenty of time for the stone to dry out completely before use.
IMPORTANT:
- DO NOT immerse the stone in water or use cleaning liquids or detergents. Immersing the pizza stone in water could cause it to crack. Cleaning liquids or detergents will absorb into the stone and transfer to the pizza during baking.
For a deep clean:
- Prepare a paste by mixing 1/3 cup of baking soda with 3 tablespoons of water. Apply the paste to the desired areas of the pizza stone and leave for 15-20 minutes
- . Scrape off excess paste and food from the surface of the pizza stone. Using a damp cloth. wipe off excess food and dry thoroughly.
Cleaning the viewing window:
- Always wait for the unit to cool down completely before cleaning the window.
- The viewing window will darken from cooking vapors with ongoing use.
- To clean. make a paste from 2 teaspoons baking soda. 1 teaspoon white vinegar and 1 teaspoon of water.
- Rub paste onto viewing window or rear vent area and wipe clean with a damp cloth.
Cleaning the outer body:
- After each use. wipe the outer body with a soft. damp cloth and dry thoroughly. A non-abrasive liquid cleanser may be used to avoid build-up of food residue and stains.
- Make sure all parts and surfaces are thoroughly dried before plugging the pizza maker in and using.
TROUBLESHOOTING
- Problem Possible cause Solution
- The top of the pizza is burnt
- The temperature of the oven is too high
- Lower the temperature by selecting a lower setting.
- Monitor the cooking process by
- The pizza is cooked
- Cook the pizza for a shorter amount of time. IMPORTANT:
- The timer doesn’t have an auto shut off feature. If the pizza is left
- The bottom of the
- The temperature of the oven is too high.
- Make sure the oven has been pre-heated on setting 5. When the oven indicator light turns off. allow a couple minutes for the stone to rest before adding the pizza. When cooking one pizza
- The pizza is cooked
- Cook the pizza for a shorter amount of time. IMPORTANT:
- The timer doesn’t have an auto shut off feature. If the pizza is left
WARRANTY
We suggest that you complete and return the enclosed Product Registration Card promptly to facilitate verification of the date of original purchase. However. return of the Product Registration Card is not a condition of these warranties. You can also fill out this warranty card online. at the following address: www.KALORIK.com
This KALORIK product is warranted in the U.S.A. and in Canada for 1 year from the date of purchase against defects in material and workmanship. This warranty is not transferable. Keep the original sales receipt. Proof of purchase is required to obtain warranty performance.
During this period. if the KALORIK product. upon inspection by KALORIK. is proven defective. it will be repaired or replaced. at Kalorik’s option. without charge to the customer. If a replacement product is sent. it will carry the remaining warranty of the original product.
This warranty does not apply to any defect arising from a buyer's or user's misuse of the product. negligence. failure to follow KALORIK instructions noted in the user’s manual. use on current or voltage other than that stamped on the product. wear and tear. alteration or repair not authorized by KALORIK. or use for commercial purposes. There is no warranty for glass parts. glass containers. filter basket. blades and agitators. There is also no warranty for parts lost by the user.
ANY WARRANTY OF MERCHANTABILITY OR FITNESS WITH RESPECT TO THIS PRODUCT IS ALSO LIMITED TO THE ONE YEAR LIMITED WARRANTY PERIOD.
Some states do not allow limitation on how long an implied warranty lasts or do not allow the exclusion of incidental or consequential damages. so the above limitations may not apply to you. This warranty gives you specific legal rights. and you may also have other rights which vary from state to state.
If the appliance should become defective within the warranty period and more than 30 days after date of purchase. do not return the appliance to the store: often. our Customer Service Representatives can help solve the problem without having the product serviced. If
If this is the case. send the product via your pre-paid postage back to Kalorik. along with proof of purchase and a return authorization number indicated on the outer package. given by our Customer Service Representatives. Send to the authorized KALORIK Service Center (please visit our website at www.KALORIK.com or call our Customer Service Department for the address of our authorized KALORIK Service Center).
When sending the product. please include a letter explaining the nature of the claimed defect.
If you have additional questions. please call our Customer Service Department (please see below for complete contact information).
Monday through Thursday from 9:00am - 5:00pm (EST) and Friday from 9:00am - 4:00pm (EST). Please note hours are subject to change.