Loading ...
Loading ...
Loading ...
4
INITIAL INSTALLATION
PREPARATION
Before beginning the assembly of this product, ensure all parts are present. Compare all parts with the package contents list
and hardware contents list. If any part is missing or damaged, do not attempt to assemble the product.
Estimated assembly time: 2 hours
Tools required (not included): Electrical tape, Phillips Screwdriver, Safety Glasses, Step Ladder, and Wire Strippers.
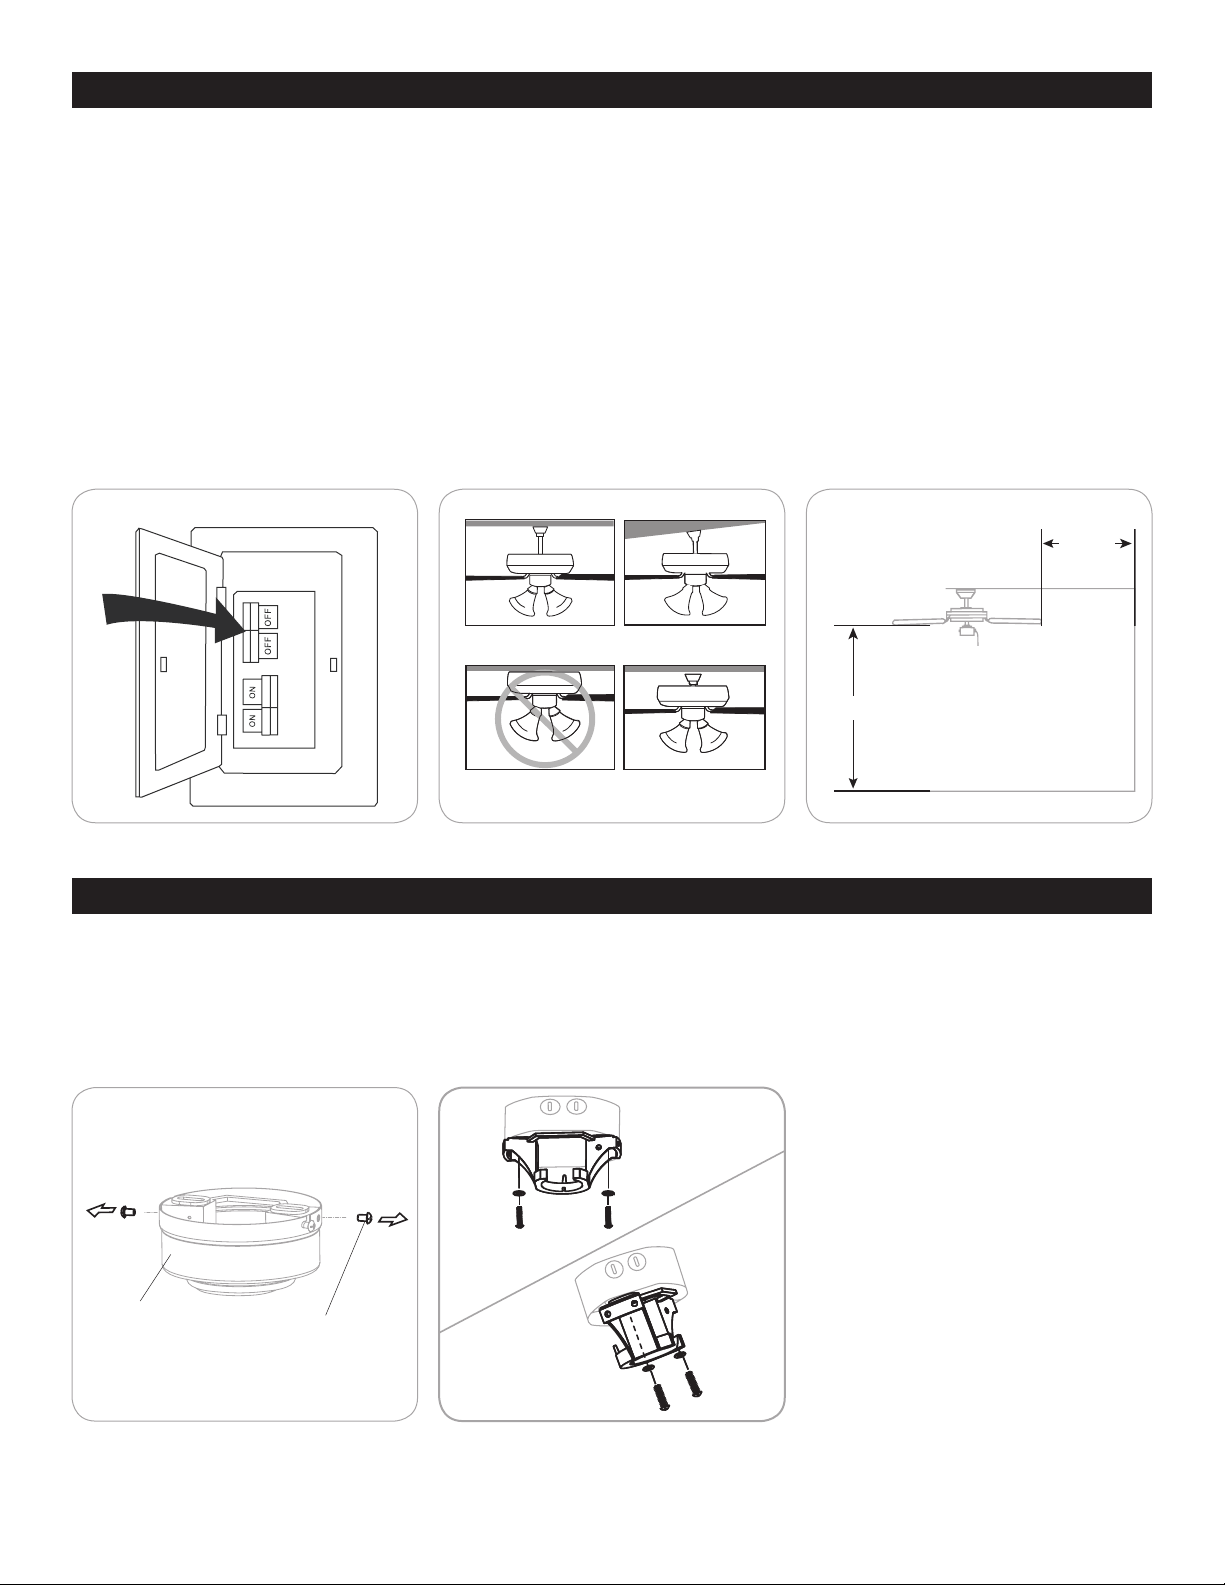
1. Turn off power to the fan at the breaker box and the wall switch (Figure 1.1). DANGER: Failure to disconnect the power supply
prior to installation may result in serious injury or death.
2. Choose one of the following mounting options (Figure 1.2) :
Standard Mount - best suited for ceilings 8 feet or higher. For very high ceilings, use a longer downrod (not included).
Angle Mount - best suited for angled or vaulted ceilings. A longer downrod is sometimes necessary to ensure proper blade
clearance. Ensure the ceiling angle is not steeper than 10 degrees.
Flushmount Installation - not available for this model.
Closemount Installation - best suited for ceilings lower than 8 feet.
3. Choose a suitable location - Ensure the blades will be at least 30 inches from any obstructions. Also check the downrod
length to ensure the blades will be at least 7 feet above the oor (Figure 1.3).
1. Loosen all four mounting bracket screws and completely remove the two screws from the round holes in the canopy. Then
remove mounting bracket from the canopy and save them for later (Figure 2.1).
2. Install the mounting bracket to the outlet box (sold separately) using the screws and washers provided with the outlet box
(Figure 2.2).
For CLOSEMOUNT INSTRUCTIONS, skip to page 6.
Figure 1.1
Figure 2.1
Figure 1.2
Standard and
Closemount
Angle Mount
Figure 2.2
Figure 1.3
Mounting
Bracket Screw
Canopy
7 ft. min.
30in. min.
Standard Mount
Flushmount
Angle Mount
Closemount
D
Loading ...
Loading ...
Loading ...