Loading ...
Loading ...
Loading ...
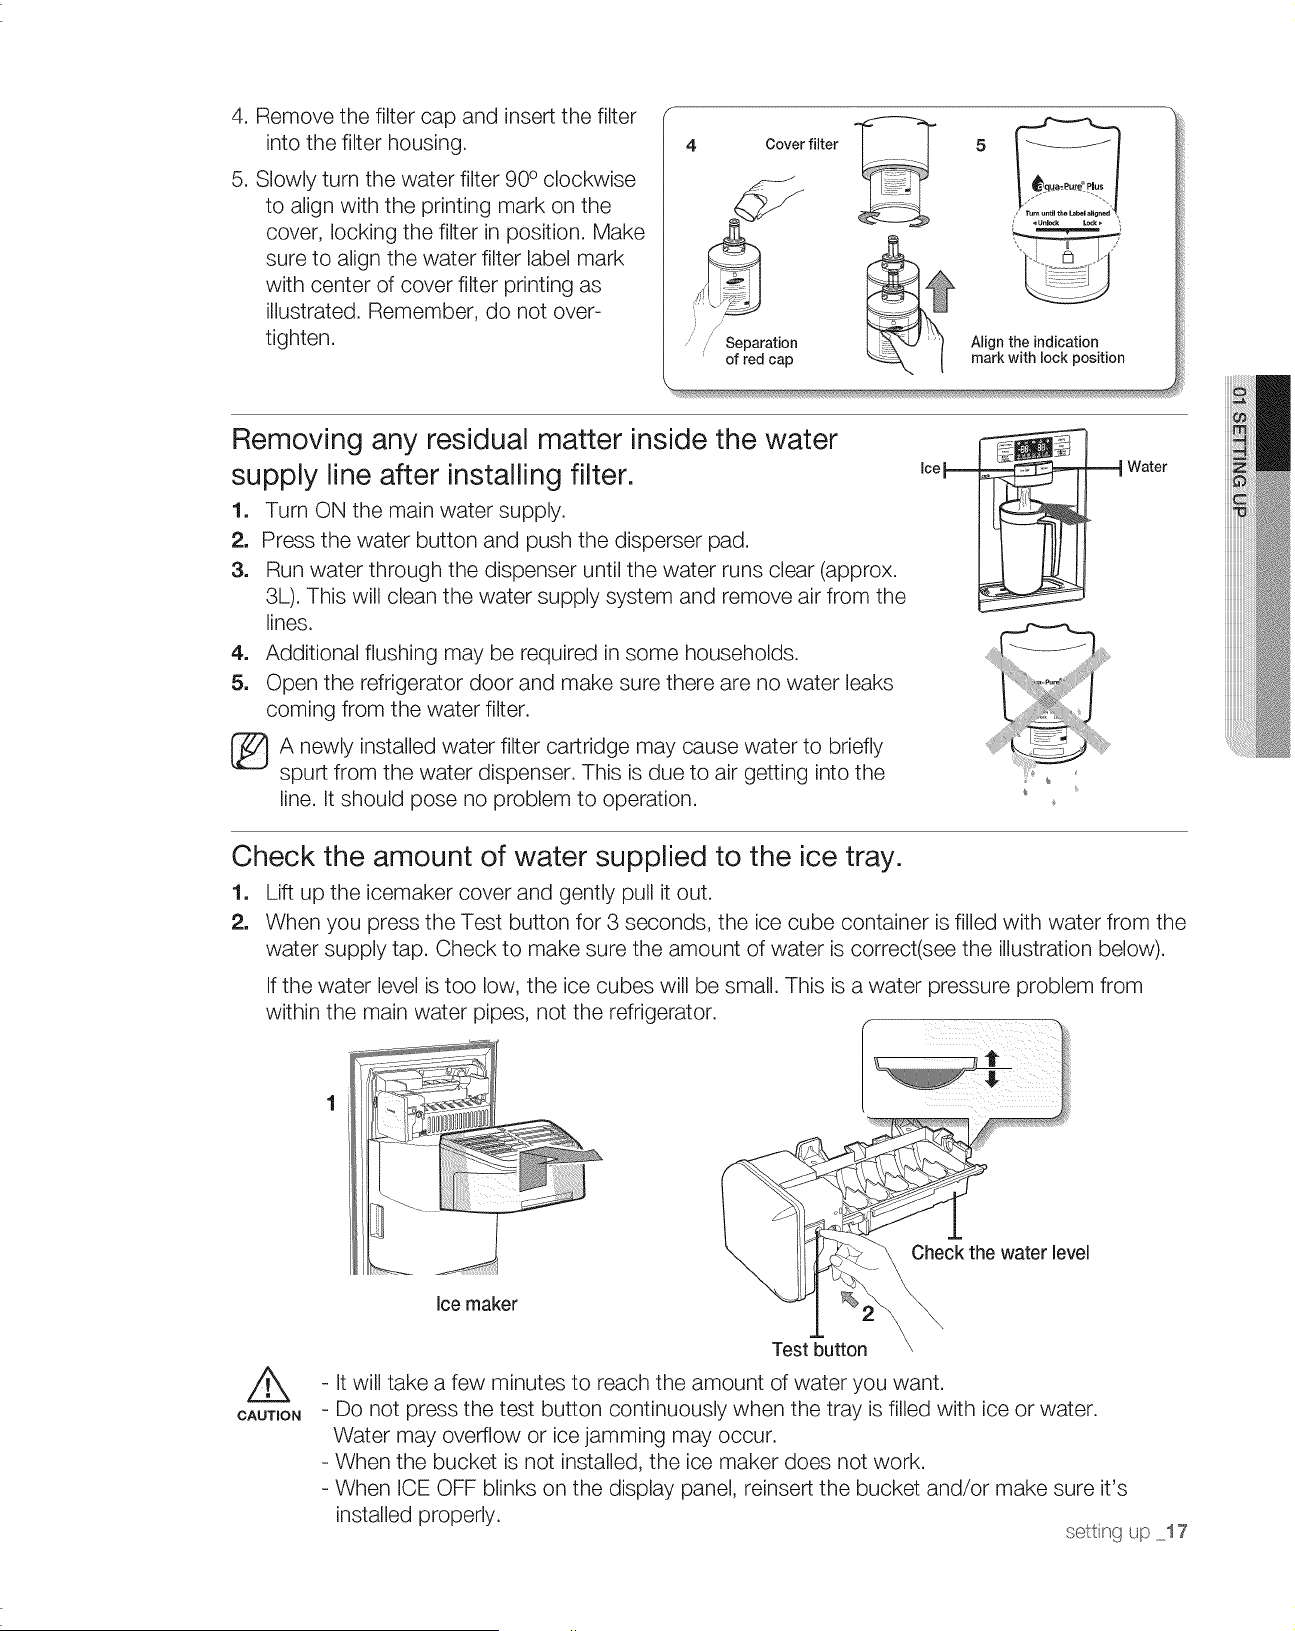
4. Remove the filter cap and insert the filter
into the filter housing.
5. Slowly turn the water filter 90 ° clockwise
to align with the printing mark on the
cover, locking the filter in position. Make
sure to align the water filter label mark
with center of cover filter printing as
illustrated. Remember, do not over-
tighten.
Removing any residual matter inside the water
supply line after installing filter.
1. Turn ON the main water supply.
2. Press the water button and push the disperser pad.
3. Run water through the dispenser until the water runs clear (approx.
3L). This will clean the water supply system and remove air from the
lines.
4. Additional flushing may be required in some households.
5. Open the refrigerator door and make sure there are no water leaks
coming from the water filter.
A newly installed water filter cartridge may cause water to briefly
spurt from the water dispenser. This is due to air getting into the
line. It should pose no problem to operation.
Ice Water
Check the amount of water supplied to the ice tray.
1. Lift up the icemaker cover and gently pull it out.
2. When you press the Test button for 3 seconds, the ice cube container is filled with water from the
water supply tap. Check to make sure the amount of water is correct(see the illustration below).
If the water level is too low, the ice cubes will be small. This is a water pressure problem from
within the main water pipes, not the refrigerator.
Check the water level
CAUTION
Ice maker
Test button
- It will take a few minutes to reach the amount of water you want.
- Do not press the test button continuously when the tray is filled with ice or water.
Water may overflow or ice jamming may occur.
- When the bucket is not installed, the ice maker does not work.
- When ICE OFF blinks on the display panel, reinsert the bucket and/or make sure it's
installed properly, setti-_g up 17
Loading ...
Loading ...
Loading ...