Loading ...
Loading ...
Loading ...
13
Accessories
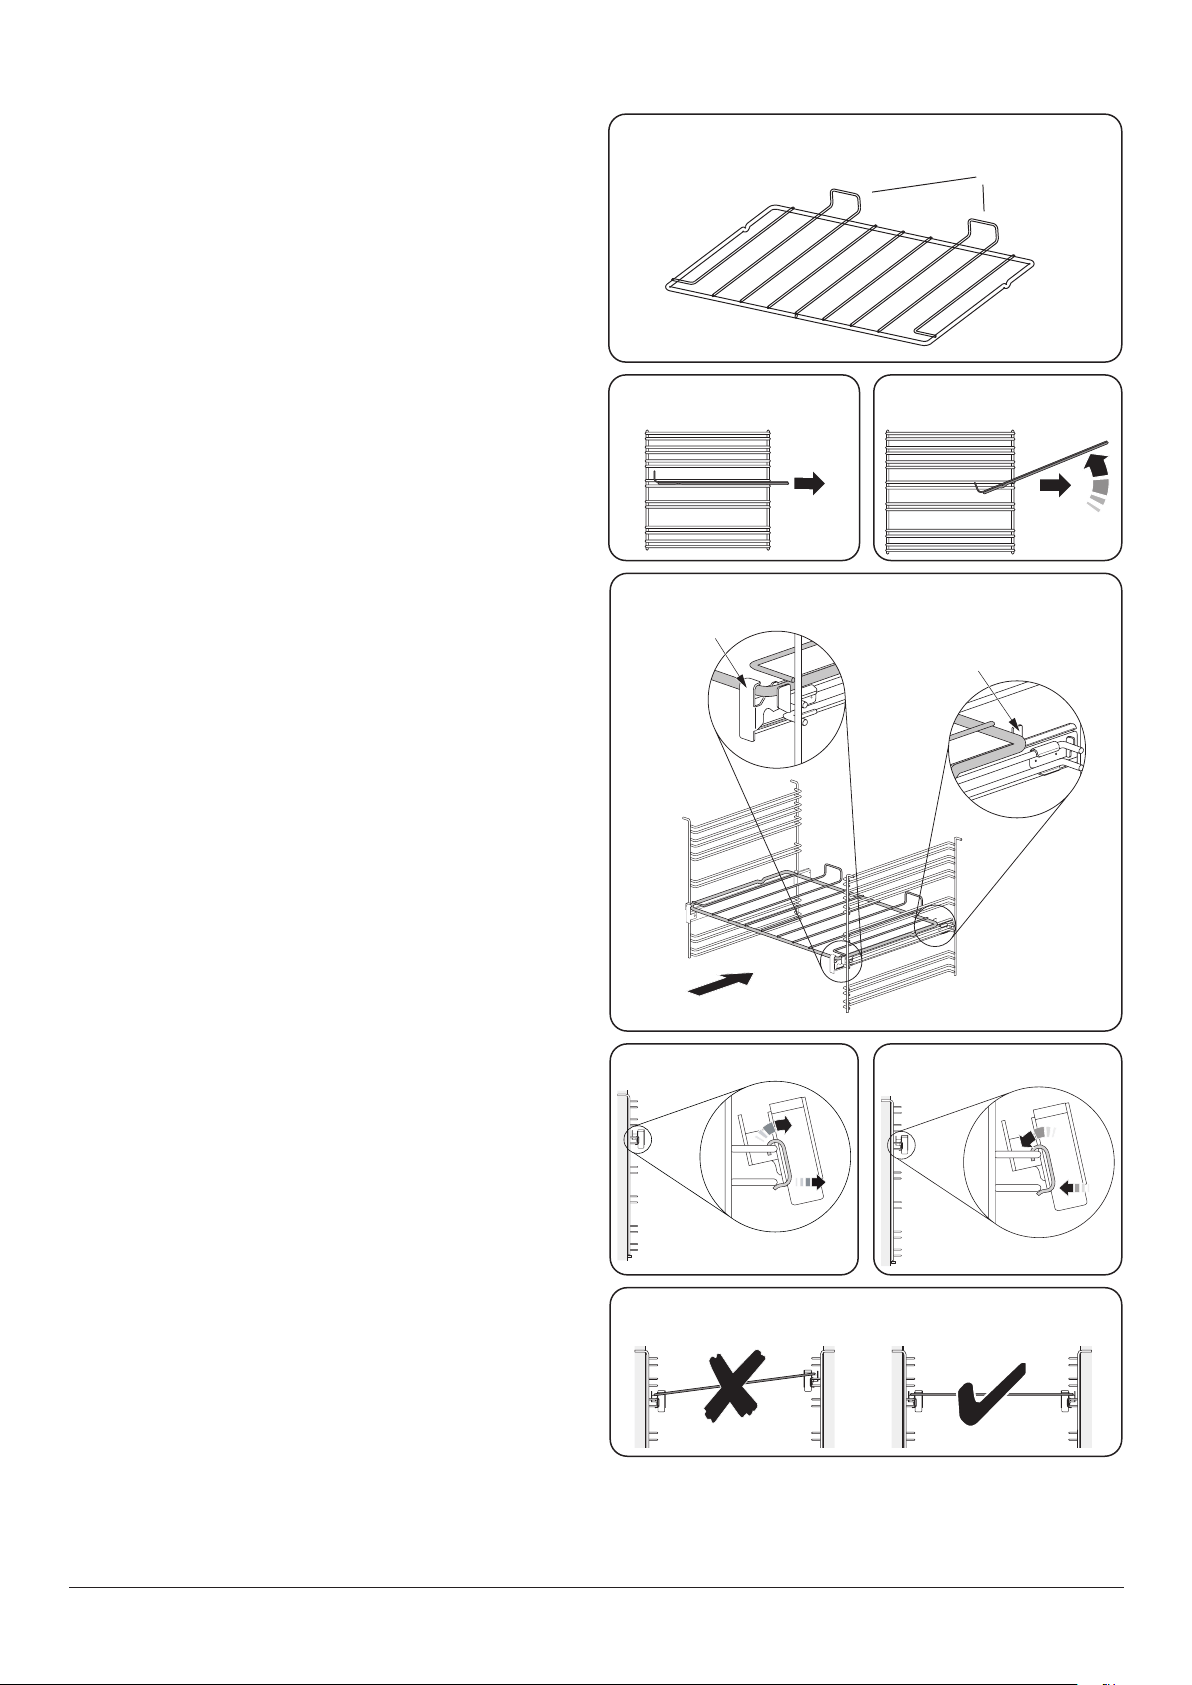
Oven Shelves
The oven shelves (Fig. 2.21) are retained when pulled
forward but can be easily be removed and retted.
Pull the shelf forwards until the back of the shelf is stopped
by the shelf support (Fig. 2.22).
Lift up the front of the shelf so the back of the shelf will pass
under the shelf stop and then pull the shelf forward
(Fig. 2.23).
To ret the shelf, line up the shelf with a groove in the oven
side and push the shelf back until the ends hit the shelf stop.
Lift up the front so the shelf ends clear the shelf stops, and
then lower the front so that the shelf is level and push it fully
back.
Telescopic runners - Left-hand (Main) Oven
As well as standard shelves, the left-hand oven is supplied
with a set of runners for a glide-out oven shelf.
To t the glide-out shelf, hook the front of the shelf onto the
runners as shown (Fig. 2.24). The rear of the shelf should rest
on the runners, in front of the rear stop (Fig. 2.24).
The glide-out shelf and runners can be easily removed or
repositioned.
To remove the glide-out shelf
Raise the rear of the shelf, so that it clears the rear stops. Then
unhook from the front locating bracket.
To remove the glide-out runners
Twist to unclip the base of the runners from the shelf
supports. Then unhook the runner from the top rung of the
shelf support and remove (Fig. 2.25).
To refit the glide-out runners
Hook the rear of the runner over the top rung of a pair of shelf
supports. Then hook the front of the runner onto the same
rung. Push to clip under the bottom rung (Fig. 2.26).
Ensure that the shelf runners are tted in the same position
on each side (Fig. 2.27).
The front of the shelf runners can be identied by the bracket
(Fig. 2.24).
n
DO NOT put the glide-out shelf runners in a
dishwasher.
Storage
The bottom drawer is for storing oven trays and other
cooking utensils. It can get very warm, so do not store
anything in it that may melt or catch re.
The drawer can be removed completely by pulling it right out
and up.
Shelf guard
Front
ArtNo.320-0011 Removing the shelf 1
ArtNo.320-0012 Removing the shelf 2
Fig. 2.21
Fig. 2.22 Fig. 2.23
Fig. 2.24
Fig. 2.25 Fig. 2.26
Fig. 2.27
1
2
FRONT
Rear stop
Front
bracket
2
1
Loading ...
Loading ...
Loading ...