Loading ...
Loading ...
Loading ...
Aftermakingpreliminary
adjustments,pressdownoneach
cornerofthedryerto makesure
theunitdoesnotwobble.If
pressingdownona cornercauses
thedryertowobble,lowerthe
dryerfootonthatcorneruntilthe
foottouchesthefloorfirmly.
Installthedryerandlevelitfromsideto
sideandfrontto back.Usea bubble
level.Neverremovethe
height-adjustablefeet!
13.Connecttheexhaustducttothe
exhaustairoutletonthedryer(see
page17).
14.Insertthedryerelectricalpluginto
thewallreceptacle(seepage14).
15.Readtheoperatinginstructionsto
understandhowyourdryer
operates.(seepage20).
16.Conductanappliancetest:
Checkthatthedrumis empty.
Closethedryerdoor.
Switchthedryerto "ExtraDry"
andthenpressthe
"Start/Pause"button.
After3 5 minutespressthe
"Start/Pause"buttonandopen
thedoor.
Iftheinteriorofthedryerfeels
warm,thedryerhasbeen
connectedproperly.
Switchthedryerto "OFF".
Ifthedryerdoesnotwork,
switchthedryerto "OFF".
Lookinthetroubleshooting
section(page30)andfindthe
fault.
Door Hinge Reversal
The door is hinged on the right hand
side of the dryer at the factory. The
door hinge can be reversed if
necessary.
Tools Needed
T20 star head screwdriver
Hinge Reversal Parts
Hinge (with 4 white plastic bushings)
Hinge Cover Plate
Door Assembly
Hinge Reversal Procedure
1. Unplug the dryer.
2. Prepare a firm, flat, padded
surface to lay the dryer door on
while changing the hinge.
3. Open the dryer door to fully
expose the hinge cover.
4. Remove the 4 screws holding the
hinge cover in place.
remove
four
screws
Set the cover aside along with the
four screws for later reinstallation.
5. Rotate the door so that it is
perpendicular to the dryer front.
Slide the door away from the dryer
so the hinge pins slide out of the
grooves in the dryer door.
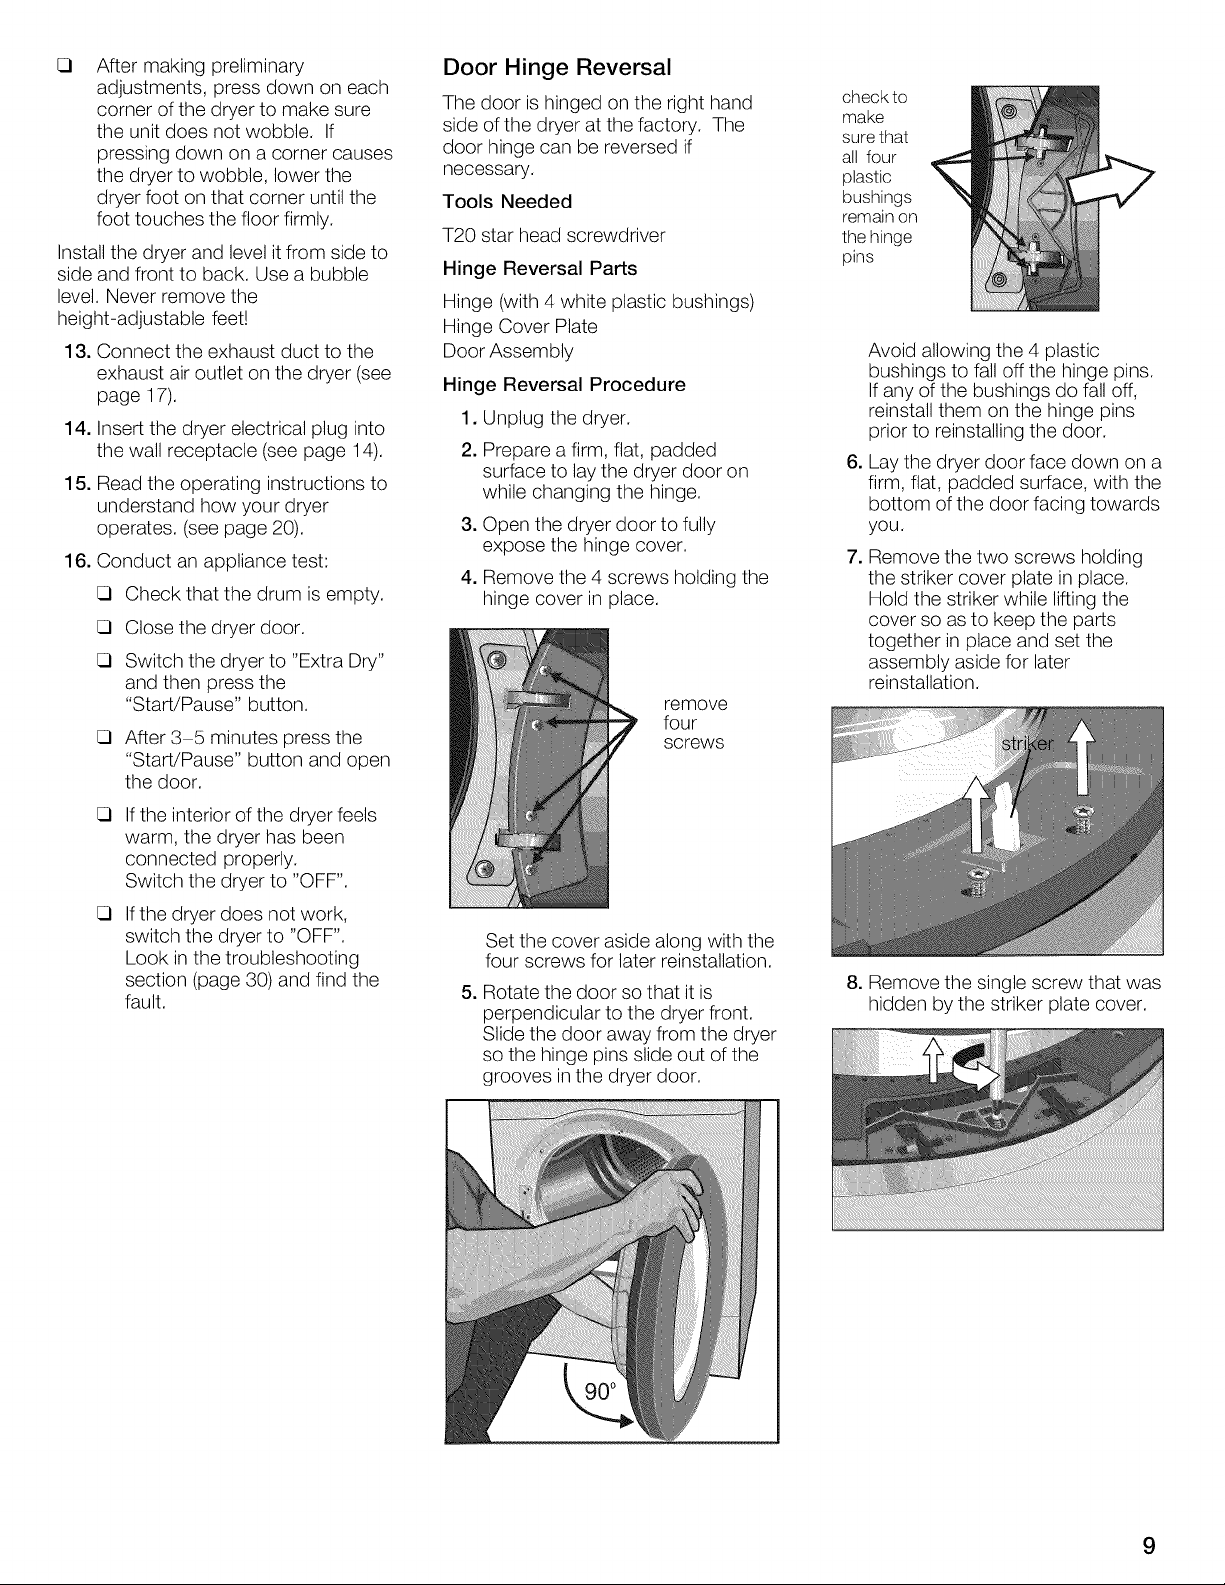
check to
make
sure that
all four
plastic
bushings
remain on
the hinge
pins
Avoid allowing the 4 plastic
bushings to fall off the hinge pins.
If any of the bushings do fall off,
reinstall them on the hinge pins
prior to reinstalling the door.
6. Lay the dryer door face down on a
firm, flat, padded surface, with the
bottom of the door facing towards
you.
7. Remove the two screws holding
the striker cover plate in place.
Hold the striker while lifting the
cover so as to keep the parts
together in place and set the
assembly aside for later
reinstallation.
8. Remove the single screw that was
hidden by the striker plate cover.
9
Loading ...
Loading ...
Loading ...