Loading ...
Loading ...
Loading ...
INSTALLATION
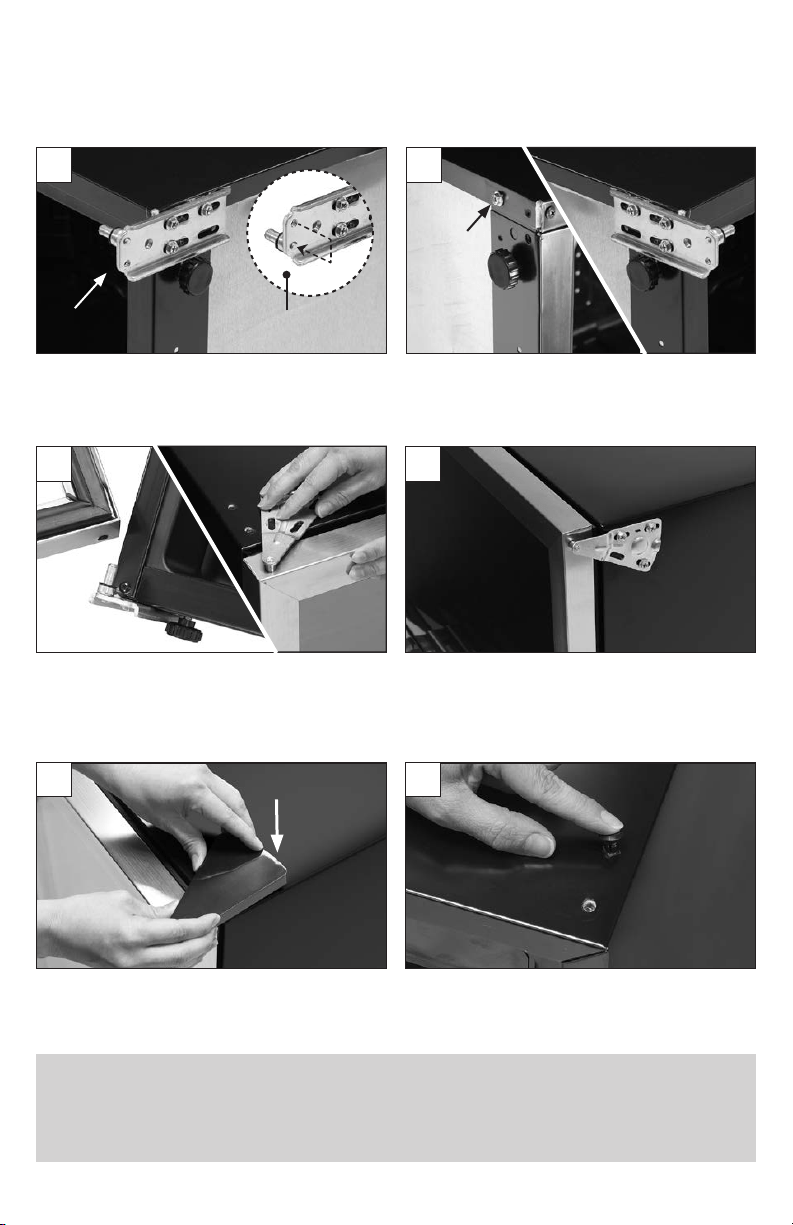
DOOR REVERSAL INSTRUCTIONS
Gently place the wine and beverage center on
opposite side to complete the door reversal. Remove
screw and re-insert into the opposite side. Re-attach
the metal base bracket with nylon washer on the
new hinge side. Lift the unit to an upright position.
With the unit on its side, remove the bottom metal
base bracket with nylon washer. Unscrew the axle
insert with a flathead screwdriver. Screw into the
opposite hole of the metal base bracket.
The rubber gasket should be compressed on all
sides of the door. If the gasket is more compressed
on one side, the metal bracket position should be
adjusted. Make sure the door is level. Once the door
position is finalized, securely tighten the screws.
Reinstall the triangular bracket cover by carefully
threading the bracket cover onto the metal bracket
and pressing down.
To reattach the door, place the door onto the bottom
axle insert. Place the top bracket into the door and
align the metal bracket holes over the holes in the
top of the unit cabinet. Tighten the three screws to
hold in place.
Reinstall all plastic hole insert plugs. The re-installation
of the plastic hole insert plugs is important to
maintain the seal and integrity of the insulation. Extra
inserts are included in case the plugs are damaged
during removal.
IMPORTANT: It is extremely important to wait at least six hours before plugging the wine
and beverage center into a power outlet. During the door reversal process, the refrigerant and
compressor oil fluids mixed. It is important to allow the refrigerant and compressor oil to separate
and settle so the compressor operates properly. Failure to do so will cause severe mechanical
problems, perhaps even the destruction of the unit’s motor/compressor, and will void the warranty.
7a7
98
10 11
- 7 -
Switch Axel
Insert Position
Remove Metal
Base Bracket
Remove
screw and
re-insert
into the
opposite
side
Loading ...
Loading ...
Loading ...