IS5V4KHW/UKIS5V4KHW/UKIS5V4KHW/UKIS5V4KHW/UKIS5V4KHW/UK
EN
ENGLISH
Safety Instructions
Installation Guide
Daily Reference Guide
4
11
2
EN
SAFETYINSTRUCTIONS
IMPORTANTTOBEREADANDOBSERVED
Beforeusingtheappliance,readthesesafety
instructions.Keepthemnearbyforfuture
reference.
Theseinstructionsandtheapplianceitselfprovide
importantsafetywarnings,tobeobservedatall
times.Themanufacturerdeclinesanyliabilityfor
failuretoobservethesesafetyinstructions,for
inappropriateuseoftheapplianceorincorrect
settingof controls.
WARNING:Theapplianceanditsaccessible
partsbecomehotduringuse. Careshoulbetaken
to avoid touching heating elements. Children less
than8yearsofagemustbekeptawayunless
continuouslysupervised.
WARNING:Ifthehobsurfaceiscracked,donot
usetheappliance– riskofelectricshock.
WARNING : Danger of fire :Do not store items
onthecookingsurfaces.
CAUTION:Thecookingprocesshastobe
supervised.Ashortcookingprocesshastobe
supervisedcontinuously.
WARNING:Leaving thehob unattended when
cooking withfatoroilcanbedangerous – riskof
fire.NEVER try to extinguish a fire with water,but
switchofftheapplianceandthencovertheflames
e.g.witha lidorafireblanket.
Donotusethehobasaworksurfaceorsupport.
Keepclothesorotherflammablematerialsaway
fromtheappliance,unitl allthecomponentshave
cooleddowncompletely– riskoffire.
Veryyoungchildren(0-3years)shouldbekept
awayfromtheappliance.Youngchildren(3-8
years)shouldbekeptawayfromtheappliance
unlesscontinuouslysupervised.Childrenfrom8
yearsoldandaboveandpersonswithreduced
physical,sensoryormentalcapabilitiesorlackof
experienceandknowledgecanuse this appliance
onlyiftheyaresupervisedorhavebeengiven
instructionsonsafeuseandunderstandthe
hazardsinvolved. Childrenmustnot play with the
appliance.Cleaningandusermaintenancemust
notbecarriedoutbychildrenwithoutsupervision.
WARNING:Theapplianceanditsaccessible
partsbecomehotduringuse.Careshouldbetaken
to avoid touching heating elements. Children less
than8yearsofagemustbekeptawayunless
continuouslysupervised
Never leavethe applianceunattended during
fooddrying.Iftheapplianceissuitablefor
probeusage,onlyuseatemperatureprobe
recommendedforthis oven-riskoffire.
Keepclothesorotherflammablematerials
awayfromtheappliance,untilallthecomponents
havecooleddowncompletely-riskoffire.Always
bevigilantwhencookingfoodsrichinfat,oilor
whenaddingalcoholicbeverages-riskoffire.Use
ovenglovestoremovepansandaccessories.At
theendofcooking,openthedoorwithcaution,
allowinghotairorsteamtoescapegradually
before accessing the cavity - risk of burns.Do not
obstructhotairventsatthefrontoftheoven-risk
offire.
Exercise caution when theoven door isinthe
openor downposition,to avoidhittingthedoor.
PERMITTEDUSE
CAUTION:Theapplianceisnotintendedto
beoperatedbymeansofanexternalswitching
device,suchasatimer,orseparateremote
controlledsystem.
Thisapplianceisintendedtobeusedin
householdandsimilarapplicationssuchas:staff
kitchenareasinshops,officesandotherworking
environments;farmhouses;byclientsinhotels,
motels,bed&breakfastandotherresidential
environments.
Nootheruseispermitted(e.g.heatingrooms).
Thisapplianceisnotforprofessionaluse.Do
notusethe applianceoutdoors.
Donotstoreexplosiveorflammable
substances(e.g.gasolineoraerosolcans)insideor
nearthe appliance- riskoffire.
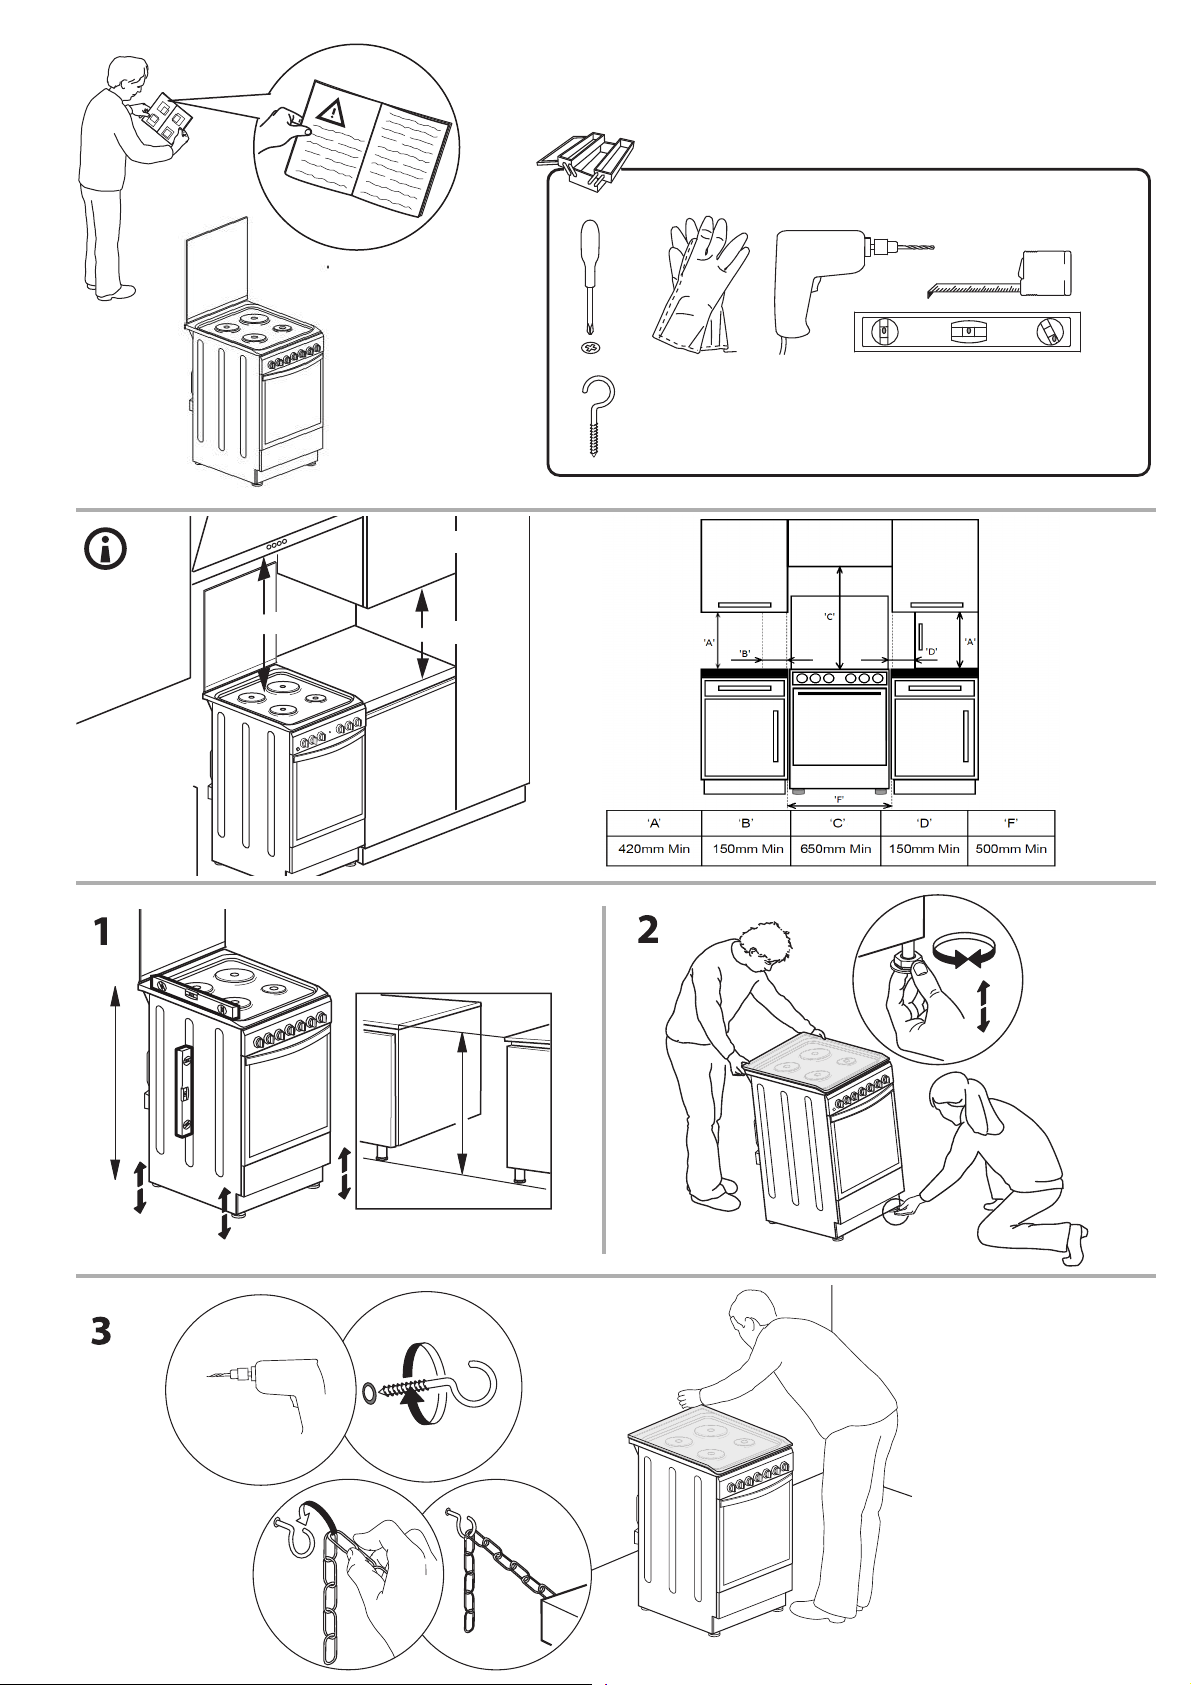
INSTALLATION
Theappliancemustbehandledandinstalled
bytwoormorepersons-riskofinjury.Use
protectiveglovestounpackandinstall-riskof
cuts.
Installation,includingwatersupply(ifany),
electricalconnectionsand repairs must becarried
outbyaqualifiedtechnician.Donotrepairor
replaceanypartoftheapplianceunlessspecifically
statedintheusermanual.Keepchildrenawayfrom
theinstallationsite.Afterunpackingtheappliance,
makesurethatithasnotbeendamagedduring
transport.Intheeventofproblems,contactthe
dealeroryournearestAftersalesService.Once
installed,packagingwaste(plastic,styrofoam
partsetc.)mustbestoredoutofreachof
children-riskofsuffocation.Theappliancemust
bedisconnectedfromthepowersupplybefore
anyinstallationoperation-riskofelectricshock.
During installation, make sure the appliance does
notdamagethepowercable-riskoffireorelectric
shock.Onlyactivatetheappliancewhenthe
installationhasbeencompleted.
Donot removethe appliancefromits polystyrene
foambase untilthetime ofinstallation.
Donotinstalltheappliancebehindadecorative
door- riskoffire.
iftherangeis placedon abase,itmust
beleveledandfixedtothewall bythe
retentionchainprovided,to preventthe
applianceslippingfromthebase.
2
WARNING:In ordertopreventthe
appliancefromtipping,theretentionchain
providedmustbeinstalled.Refertothe
instructionsforinstallation.
ELECTRICALWARNINGS
Theratingplateisonthefrontedgeofthe
oven(visible whenthe doorisopen).
Itmustbepossibletodisconnecttheappliance
fromthepowersupplybyunpluggingitif
plugisaccessible,orbyamulti-poleswitch
installedupstreamofthesocketinaccordance
withthewiringrulesandtheappliancemust
beearthedinconformitywithnationalelectrical
safetystandards.
Donotuseextensionleads,multiplesockets
oradapters.Theelectricalcomponentsmustnot
be accessible to the user after installation.Do not
usetheappliancewhenyouarewetorbarefoot.
Do not operate this appliance if ithas a damaged
powercableorplug,ifitisnotworkingproperly,
orifithasbeendamagedor dropped.
Ifthesupplycordisdamaged,itmust
bereplacedwithanidenticalonebythe
manufacturer,itsserviceagentorsimilarly
qualifiedpersonsinordertoavoidahazard-
riskofelectric shock.
Ifthepowercableneedstobereplaced,
contactan authorizedservicecenter.
WARNING:Ensurethattheapplianceis
switchedoffbeforereplacingthelamptoavoid
thepossibilityofelectricshock.
CLEANINGANDMAINTENANCE
WARNING:Ensurethattheapplianceis
switchedoffanddisconnectedfromthepower
supplybeforeperforminganymaintenance
operation;never usesteam cleaning equipment -
riskofelectric shock.
Donotuseharshabrasivecleanersormetal
scraperstocleanthedoorglasssincetheycan
scratchthesurface,whichmayresultinshattering
oftheglass.
Donotuseabrasiveorcorrosiveproducts,
chlorine-basedcleanersor panscourers.
Makesuretheappliancehascooleddown
beforecleaningor performing maintenance. - risk
ofburns.
WARNING:Switchofftheappliancebefore
replacingthelamp-riskofelectricshock.
DISPOSALOFPACKAGINGMATERIALS
Thepackagingmaterialis100%recyclableandismarkedwiththe
recyclesymbol
.Thevariouspartsofthepackagingmusttherefore
bedisposedofresponsiblyandinfullcompliancewithlocalauthority
regulationsgoverningwaste disposal.
DISPOSALOFHOUSEHOLDAPPLIANCES
Thisapplianceismanufacturedwithrecyclableorreusablematerials.
Disposeofitinaccordancewithlocalwastedisposalregulations.
Forfurtherinformationonthetreatment,recoveryandrecycling
ofhouseholdelectricalappliances,contactyourlocalauthority,the
collectionserviceforhouseholdwasteorthestorewhereyoupurchased
theappliance.ThisapplianceismarkedincompliancewithEuropean
Directive2012/19/EU,WasteElectricalandElectronicEquipment(WEEE).
Byensuringthisproductisdisposedofcorrectly,youwillhelpprevent
negativeconsequencesfortheenvironmentandhumanhealth.The
symbol
ontheproductorontheaccompanyingdocumentation
indicatesthatitshouldnotbetreatedasdomesticwastebutmustbe
takentoanappropriatecollectioncentrefortherecyclingofelectrical
andelectronic equipment.
ENERGYSAVINGTIPS
Onlypreheattheovenifspecifiedinthecookingtableoryourrecipe.Use
darklacquered orenamelledbaking traysas theyabsorbheat better.
DECLARATIONSOFCONFORMITY
ThisappliancemeetsEcodesignrequirementsofEuropeanRegulation
66/2014in compliancewith theEuropeanstandard EN60350-1.
ThisappliancemeetsEcodesignrequirementsofEuropeanRegulation
66/2014in compliancewith theEuropeanstandard EN60350-2.
3
THERMOSTAT
indicator light
Hob BURNER
control knobs
Hob BURNER
control knobs
THERMOSTAT
knob
SELECTOR
knob
1
6
9
10
11
7
8
2
3
4
5
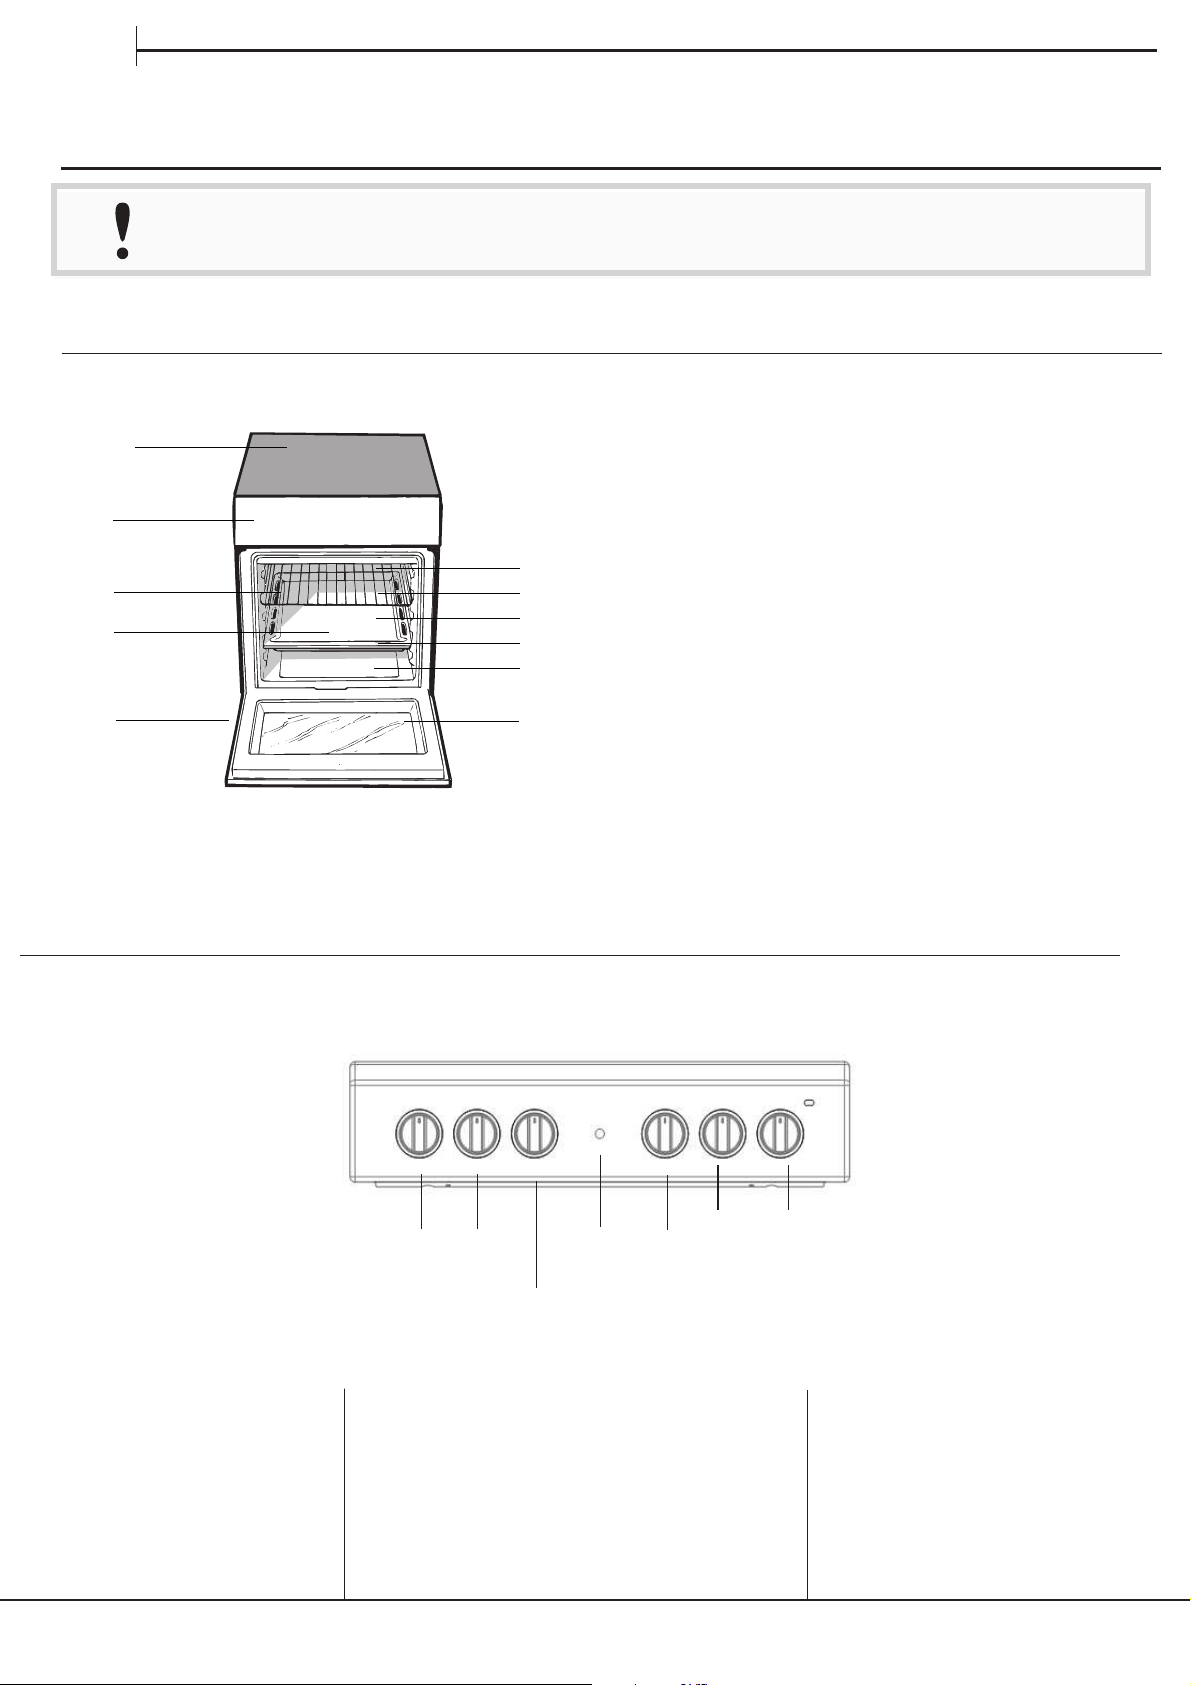
5
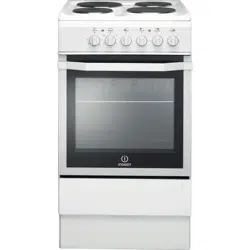
1.Glass ceramic hob
2.Control panel
3.Sliding grill rack
4.DRIPPING pan
5.Adjustable foot
6.GUIDE RAILS for the sliding racks
7.position 5
8.position 4
9.position 3
10.position 2
11.position 1
GB
EN
ENEN
Read the safety instructions carefully before using the product
EN
DAILY REFERENCE
GUIDE
DAILY REFERENCE
GUIDE
DAILY REFERENCE
GUIDE
DAILY REFERENCE
GUIDE
DAILY REFERENCE
GUIDE
DAILY REFERENCE
GUIDE
CONTROL PANEL
PRODUCT DESCRIPTION
Hob BURNER
control knobs
1 2
1.
2.
3
4
3.
4.
Hob BURNER
control knobs
5
6
7
5.
6.
7.
4
Using the oven
! The first time you use your appliance, heat the
empty oven with its door closed at its maximum
temperature for at least half an hour. Ensure that the
room is well ventilated before switching the oven off
and opening the oven door. The appliance may emit
a slightly unpleasant odour caused by protective
substances used during the manufacturing process
burning away.
1. Select the desired cooking mode by turning the
SELECTOR knob.
2. Select the recommended temperature for the
cooking mode or the desired temperature by turning
the THERMOSTAT knob.
A list detailing cooking modes and suggested
cooking temperatures can be found in the relevant
table (
see Oven cooking advice table
).
During cooking it is always possible to:
• Change the cooking mode by turning the
SELECTOR knob.
• Change the temperature by turning the
THERMOSTAT knob.
• Set the total cooking time and the cooking end
time (
see below
).
• Stop cooking by turning the SELECTOR knob to
the “0” position.
! Never put objects directly on the bottom of the
oven; this will avoid the enamel coating being
damaged.
! Always place cookware on the rack(s) provided.
THERMOSTAT indicator light
When this is illuminated, the oven is generating
heat. It switches off when the inside of the oven
reaches the selected temperature. At this point the
light illuminates and switches off alternately,
indicating that the thermostat is working and is
maintaining the temperature at a constant level.
Oven light
This is switched on by turning the SELECTOR knob
to any position other than “0”. It remains lit as long
as the oven is operating. By selecting
with the
knob, the light is switched on without any of the
heating elements being activated.
*
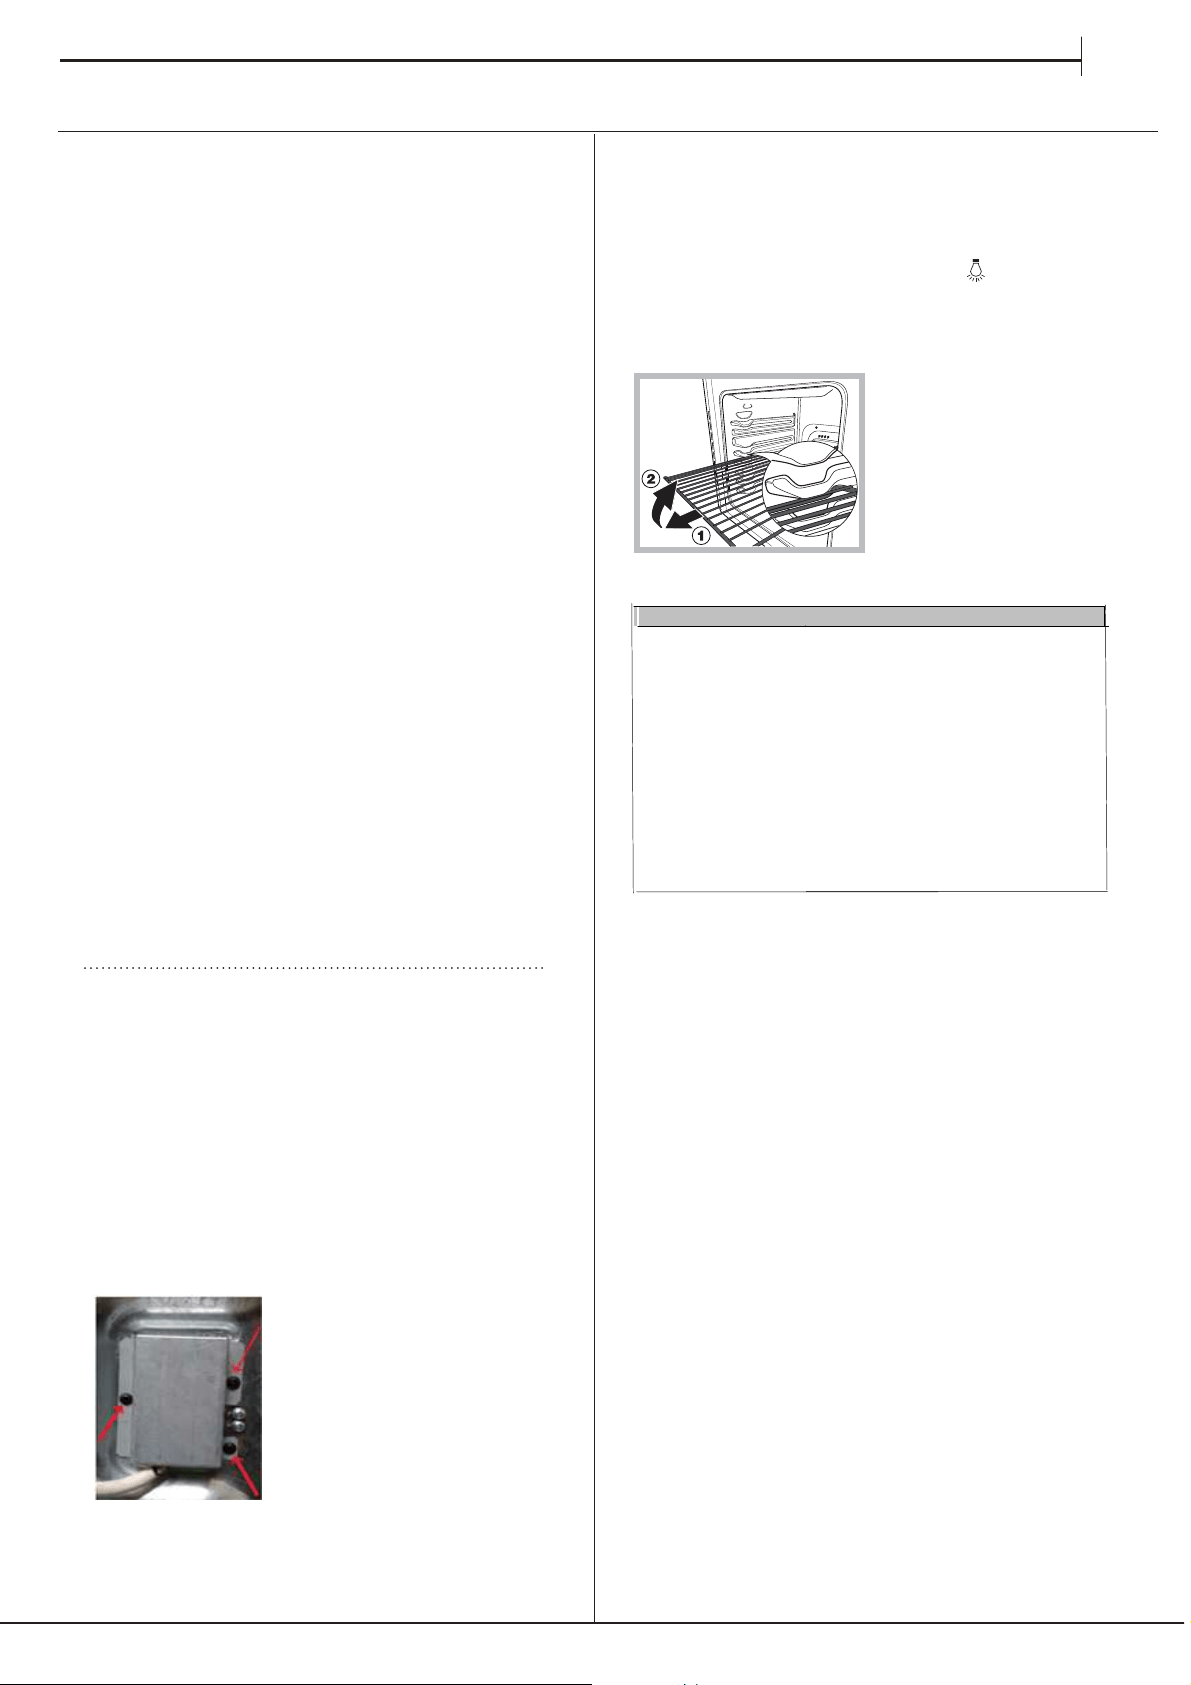
Only available in certain models.
WARNING! The oven is
provided with a stop sys-
tem to extract the racks
and prevent them from
coming out of the oven.(1)
As shown in the drawing,
to extract them comple-
tely, simply lift the racks,
holding them on the front
part, and pull (2).
TABLE OF CHARACTERISTSICS
ENERGY LABEL
Energy consumption for Natural
convection – heating mode:
Regulation (EU) No 65/2014 supplemen-
ting Directive 2010/30/EU.
Regulation (EU) No 66/2014 implementing
Directive 2009/125/EC.
Standard EN 60350-1
Standard EN 50564.
Regulation (EU) No 65/2014 supplemen-
ting Directive 2010/30/EU.
Regulation (EU) No 66/2014 implementing
Directive 2009/125/EC.
Standard EN 60350-1
Standard EN 50564.
Standard EN 60350-2.
and ECODESIGN
ECO
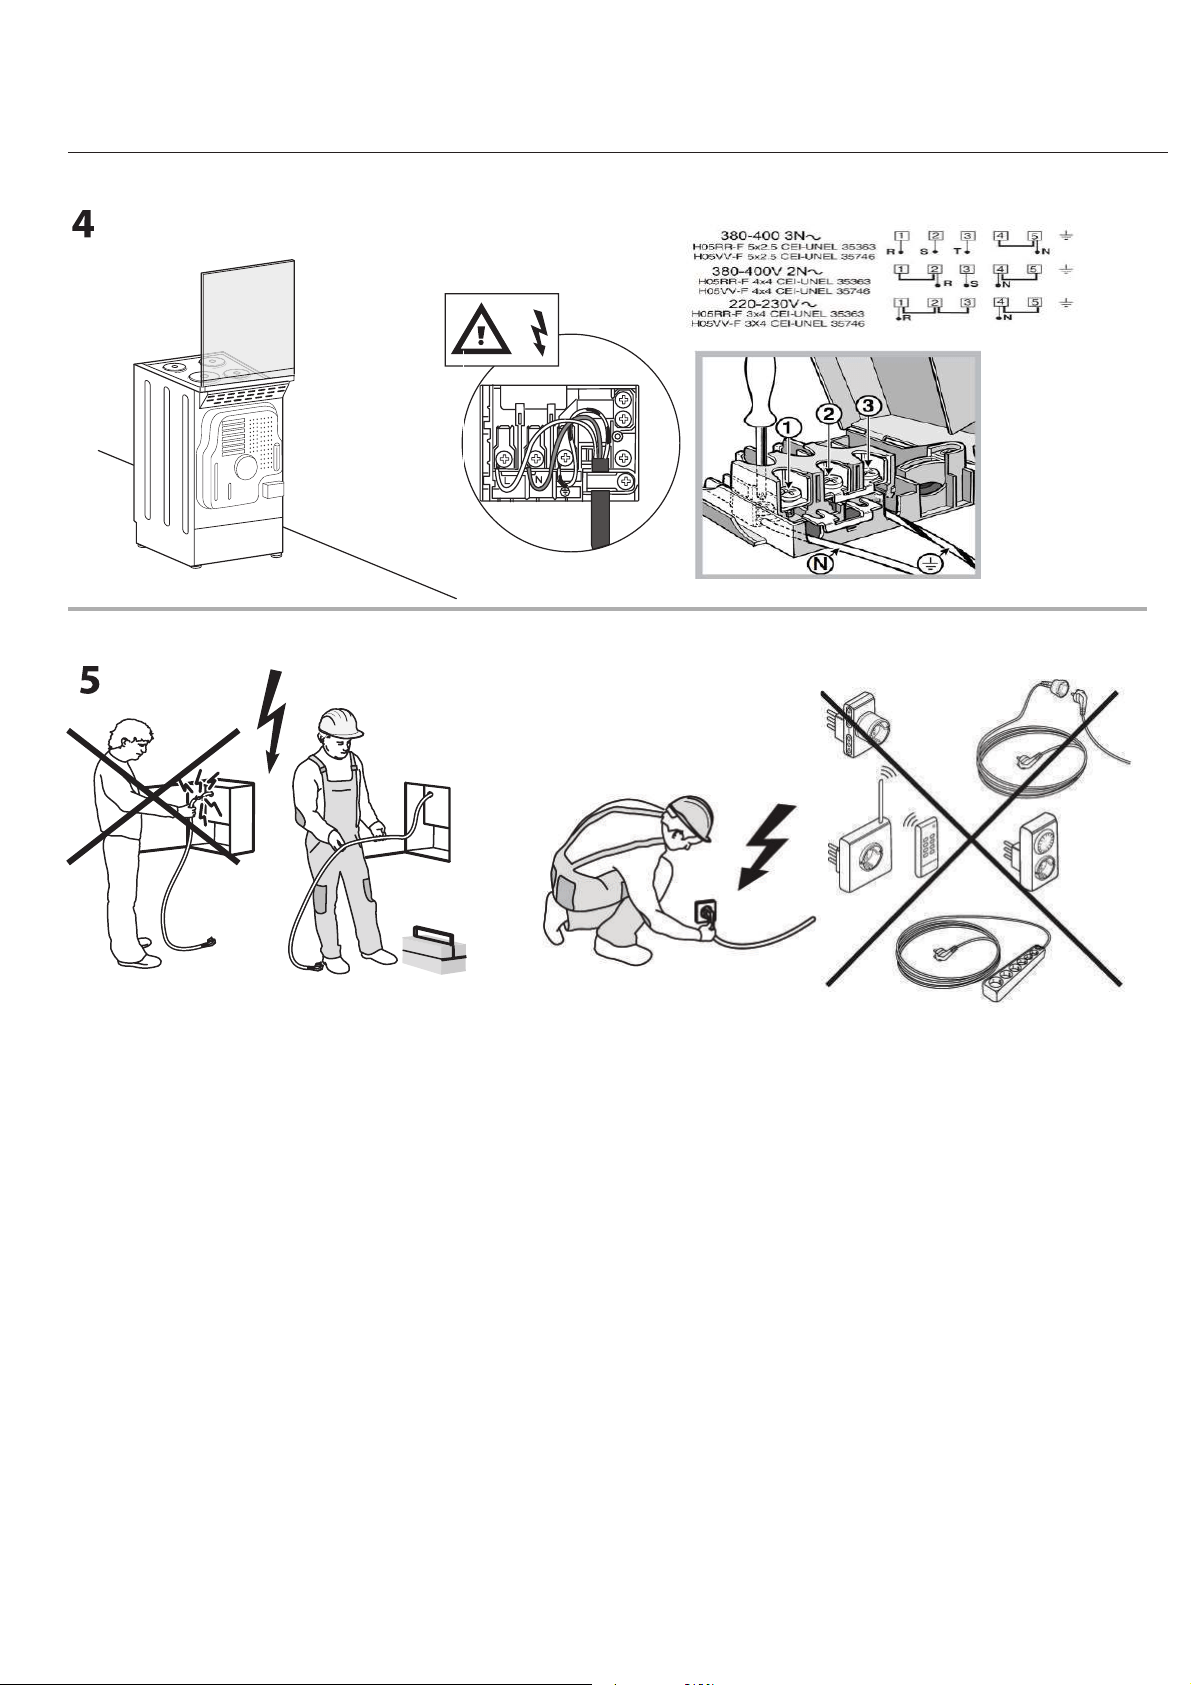
After installing the power cable, screw the metal
cover with three screws.
After installing the power cable, screw the metal
cover with three screws.
After installing the power cable, screw the metal
cover with three screws.
EN
START-UP AND USESTART-UP AND USESTART-UP AND USESTART-UP AND USESTART-UP AND USESTART-UP AND USESTART-UP AND USE
5
Cooking modes
! A temperature value can be set for all cooking
modes between 50°C and MAX, except for the
GRILL programme, for which only the MAX power
level is recommended.
TRADITIONAL (CONVECTION) OVEN
mode
Both the top and bottom heating elements will come
on. When using this traditional cooking mode, it is
best to use one cooking rack only. if more than one
rack is used, the heat will be distributed unevenly.
OVEN B OTTOM
mode
The lower heating element is activated. This position
is recommended for perfecting the cooking of dishes
(in baking trays) which are already cooked on the
surface but require further cooking in the centre, or
for desserts with a covering of fruit or jam, which
only require moderate colouring on the surface. It
should be noted that this function does not allow the
maximum temperature to be reached inside the oven
(250°C) and it is therefore not recommended that
foods are cooked using only this setting, unless you
are baking cakes (which should be baked at a
temperature of 180°C or lower).
OVEN TOP mode
The top heating element is activated. The extremely
high and direct temperature of the grill makes it
possible to brown the surface of meats and roasts
while locking in the juices to keep them tender.
.
Practical cooking advice
! In the GRILL cooking mode, place the dripping
pan in position 1 to collect cooking residues (fat
and/or grease).
GRILL
• Insert the rack in position 3 or 4. Place the food in
the centre of the rack.
• We recommend that the power level is set to
maximum. The top heating element is regulated
by a thermostat and may not always operate
constantly.
PIZZA
• Use a light aluminium pizza pan. Place it on the
rack provided.
For a crispy crust, do not use the dripping pan as
it prevents the crust from forming by extending
the total cooking time.
• If the pizza has a lot of toppings, we recommend
adding the mozzarella cheese on top of the pizza
halfway through the cooking process.
! Do not place flammable
materials in the lower
oven compartment.
! The internal surfaces of
the compartment (where
present) may become hot
(PASTRY)(PASTRY)(PASTRY)(PASTRY)
For cooking stuffed roasting joints and fillets of meat
on a single shelf.
To use the ECO cycle and therefore
optimize power consumption, the oven door should not
be opened
until the food is completely cooked.
mode
ECO
Lower compartment
GRILL mode
The top heating element is activated. The grill is also
highly recommended for dishes that require a high
surface temperature: beef steaks, veal, rib steak,
fillets, hamburgers etc...
Important: When using the grill, the ovenImportant: When using the grill, the oven
Important: When using the grill, the ovenImportant: When using the grill, the oven
Important: When using the grill, the oven
door must be left partly opendoor must be left partly open
door must be left partly opendoor must be left partly open
door must be left partly open
6
! The glue applied on the gaskets leaves traces of
grease on the glass. Before using the appliance, we
recommend you remove these with a special non-
abrasive cleaning product. During the first few hours
of use there may be a smell of rubber which will
disappear very quickly.
Switching the cooking zones on and off
To switch on a cooking zone, turn the corresponding
knob in a clockwise direction.
To switch it off again, turn the knob in an
anticlockwise direction until it is in the “0” position.
If the ELECTRIC HOTPLATE ON indicator light is lit,
this shows that at least one hotplate on the hob is
switched on.
Cooking zones
The hob is equipped with electric radiant heating
elements. When they are in use the following items
on the hob become red.
A. The cooking zone.
B. The residual heat indicator
light: this indicates that the
temperature of the
corresponding cooking zone
is greater than 60°C, even
when the heating element has
been switched off but is still hot.
Cooking zones with radiant heating elements
They have similar properties to gas burners: they are
easy to control and reach set temperatures quickly,
allowing you to actually see the power they are
providing.
Turn the corresponding knob in a clockwise
direction, to a position between 1 and 6.
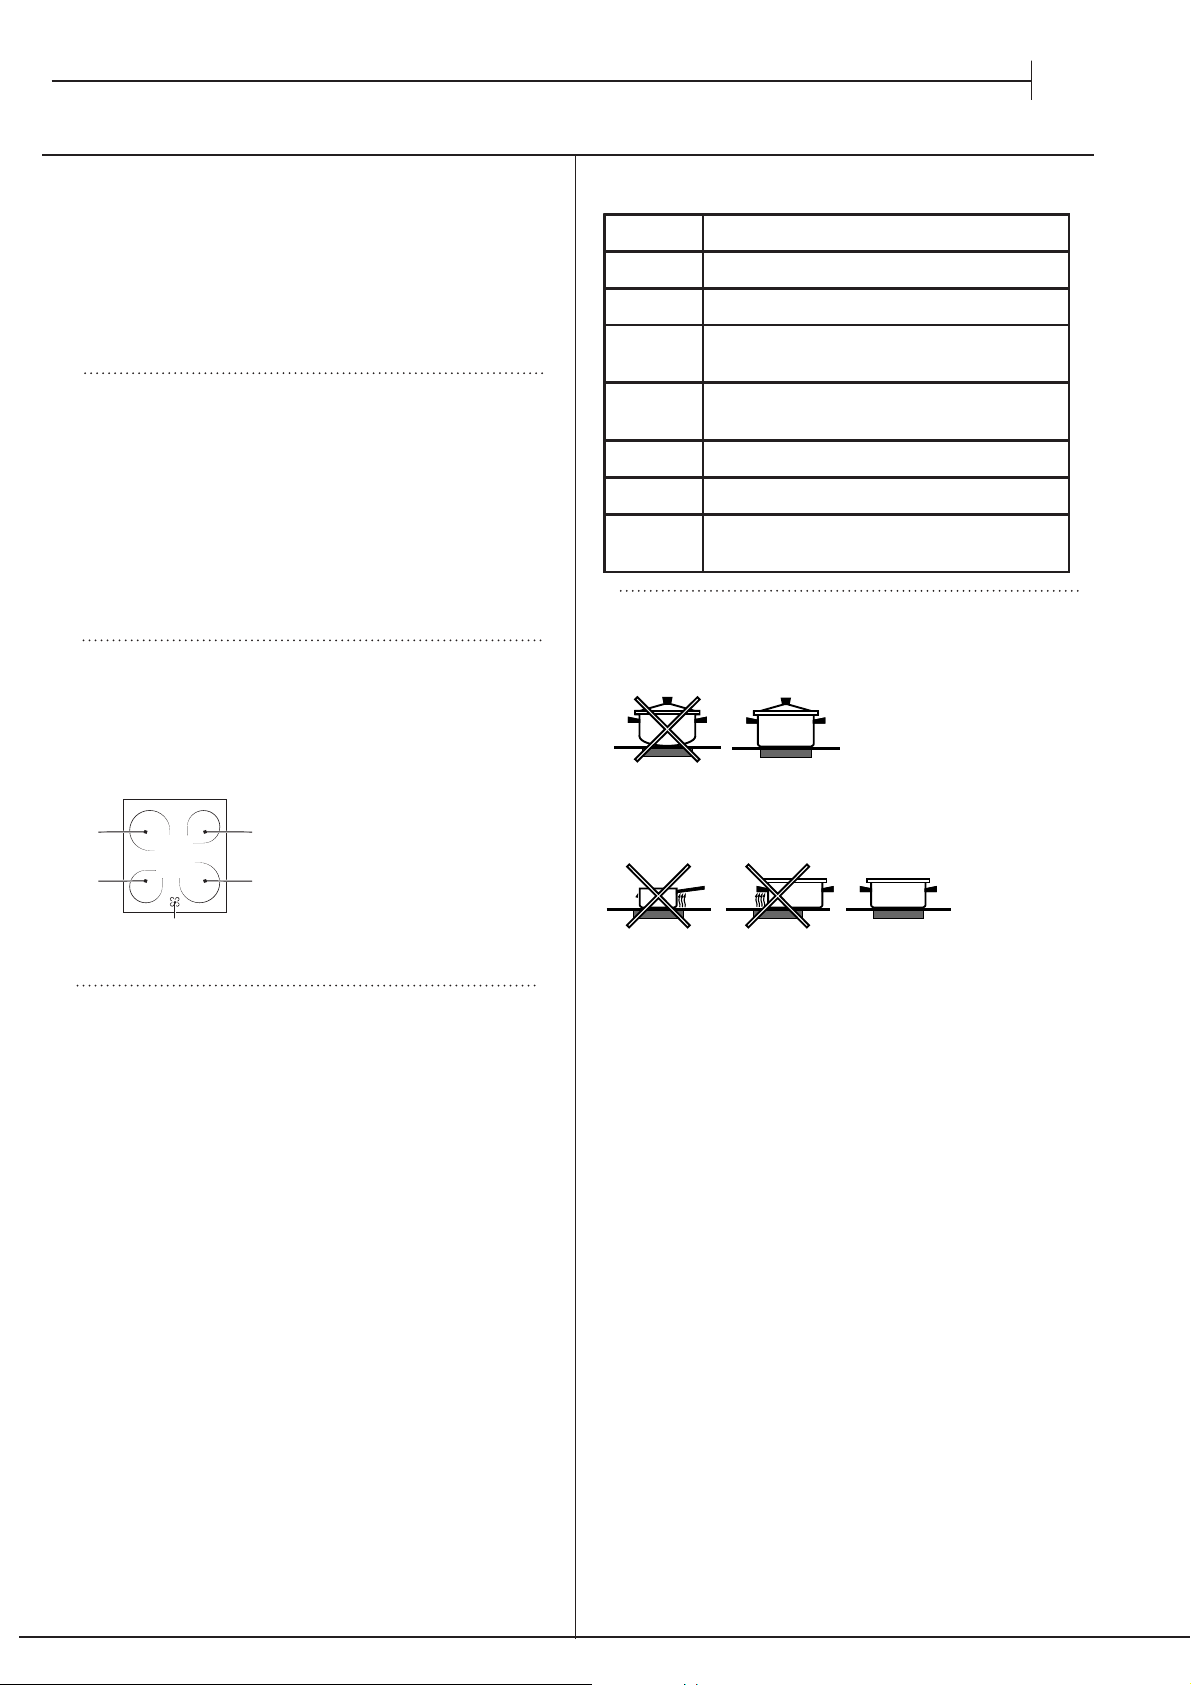
Practical advice on using the hob
• Use pans with a thick, flat base to ensure that
they adhere perfectly to the cooking zone.
• Always use pans with a diameter that is large
enough to cover the hotplate fully, in order to use
all the heat produced.
• Always make sure that the base of the pan is
completely clean and dry: this ensures that the
pans adhere perfectly to the cooking zones and
that both the pans and the hob last for a longer
period of time.
• Avoid using the same cookware that is used on
gas burners: the heat concentration on gas
burners may have warped the base of the pan,
causing it not to adhere to the surface correctly.
• Never leave a cooking zone switched on without a
pan on top of it, as doing so may cause the zone
to become damaged.
Setting Normal or Fast Plate
0
Off
1
Cooking vegetables, fish
2
Cooking potatoes (using steam) soups,
chickpeas, beans.
3
Continuing the cooking of large quantities
of food, minestrone
4
For roasting (average)
5
For roasting (above average)
6
For browning and reaching a boil in a
short time.
A
A
A
A
B
EN
USING THE GLASS CERAMIC HOBUSING THE GLASS CERAMIC HOBUSING THE GLASS CERAMIC HOBUSING THE GLASS CERAMIC HOBUSING THE GLASS CERAMIC HOBUSING THE GLASS CERAMIC HOB
7

Seletorno
setting
Footoeooeeigt
ing
!ooingra
"osition#rom
ottom
Preeatingtime
min$tes
%ermostat
no
setting
!ooing
time
min$tes
1!on&etion
uck
!oastvealorbeef
"ork roast
#iscuits(shortpastr$)
%arts
'a sagne
'amb
*ac kerel
"lum+cake
Creampuffs
/po nge+cake
/a vour$pies
1
1
1
+
1
1
1
1
1
6.7
6.8
1.8
7
7
7
7
7
7
9
9
9
7
7
7
18
18
18
18
18
16
16
16
16
16
16
18
966
966
966
1;6
1;6
1<6
1;6
1;6
1=6
1;6
1=6
966
>8+=8
=6+=8
=6+;6
18+96
76+78
78+?6
86+>6
76+78
?6+86
76+78
96+98
76+78
2Pastr'(oe
!aised Cakes
%arts
Fruitca ke s
#rioches
6,8
1
1
6,8
7
7
7
7
18
18
18
18
1>6
1;6
1;6
1>6
76+?6
78+?6
86+>6
98+76
3%o") &en
#ro w n in gfoodto
perfec tcooking
+ 7@? 18 996 +
4*rill
/olesandc u ttlefish
/qu idandpra w n
kebabs
Codfilet
Drilledvegetables
Jealsteak
Cutlets
Kamburgers
*ac kerels
%oasted sandw iches
1
1
1
1
1
1
1
1
n.M?
?
?
?
7@?
?
?
?
?
?
8
8
8
8
8
8
8
8
8
1;6
1;6
1;6
1;6
1;6
1;6
1;6
1;6
1;6
;+1 6
>+;
16
16+18
18+96
18+96
=+1 6
18+96
9+7
N+,co o ki n g times areapproNimate andma$var $ according topersonal tas te.O hen cook ing using thegrill,the
dripping pan must alwa$s be placed on the1 st oven rac k from the bottom .
(Traditional)
Respecting and conserving the
environment
• Whenever possible, avoid pre-heating the oven
and always try to fill it. Open the oven door as little
as possible because heat is lost every time it is
opened. To save a substantial amount of energy,
simply switch off the oven 5 to 10 minutes before the
end of your planned cooking time and use the heat
the oven continues to generate.
• Automatic programmes are based on standard food
product.
• Keep gaskets clean and tidy to prevent any door
energy losses
• If you have a timed tariff electricity contract, the “delay
cooking” option will make it easier to save money by
moving operation to cheaper time periods.
• Make the most of your hot plate's residual heat by
switching off cast iron hot plates 10 minutes before the
end of your cooking time and glass ceramic hot plates
5 minutes before the end of cooking time.
• The base of your pot or pan should cover the hot plate.
If it is smaller, precious energy will be wasted and
pots that boil over leave encrusted remains that can
be difficult to remove.
• Cook your food in closed pots or pans with well-fitting
lids and use as little water as possible. Cooking with
the lid off will greatly increase energy consumption
• Use purely flat pots and pans
• If you are cooking something that takes a long time,
it's worth using a pressure cooker, which is twice as
fast and saves a third of the energy.
EN
COOKING ADIVCE TABLE FOR THE OVENCOOKING ADIVCE TABLE FOR THE OVENCOOKING ADIVCE TABLE FOR THE OVENCOOKING ADIVCE TABLE FOR THE OVENCOOKING ADIVCE TABLE FOR THE OVENCOOKING ADIVCE TABLE FOR THE OVEN
8
Switching the appliance off
Disconnect your appliance from the electricity supply
before carrying out any work on it.
! Never use steam cleaners or pressure cleaners on the
appliance.
Inspecting the oven seals
Check the door seals around the oven regularly. If the
seals are damaged, please contact your nearest After-
sales Service Centre. We recommend that the oven is
not used until the seals have been replaced.
Replacing the oven light bulb
1. After disconnecting the oven from the
electricity mains, remove the glass lid
covering the lamp socket (see figure).
2. Remove the light bulb and replace
it with a similar one: voltage 230 V,
wattage 25 W, cap E 14.
3. Replace the lid and reconnect the
oven to the electricity supply.
! Do not use the oven lamp as/for ambient
lighting.
Cleaning the glass ceramic hob
! Do not use abrasive or corrosive detergents (for
example, products in spray cans for cleaning barbecues
and ovens), stain removers, anti-rust products, powder
detergents or sponges with abrasive surfaces: these
may scratch the surface beyond repair.
• It is usually sufficient simply to wash the hob using a
damp sponge and dry it with absorbent kitchen roll.
• If the hob is particularly dirty, rub it with a special
glass ceramic cleaning product, then rinse well and
dry thoroughly.
• To remove more stubborn dirt, use a suitable scraper
(this is not supplied with the appliance). Remove
spills as soon as possible, without waiting for the
appliance to cool, to avoid residues forming crusty
deposits. You can obtain excellent results by using a
rustproof steel wire sponge - specifically designed for
glass ceramic surfaces - soaked in soapy water.
• If plastic or sugary substances have accidentally
been melted on the hob, remove them immediately
with the scraper, while the surface is still hot.
• Once it is clean, the hob may be treated with a special
protective maintenance product: the invisible film left
by this product protects the surface from drips during
cooking. This maintenance should be carried out
while the appliance is warm (not hot) or cold.
• Always remember to rinse the appliance well with
clean water and dry it thoroughly: residues can
become encrusted during subsequent cooking
processes.
Glass ceramic hob cleaners Available from
Window scraper Razor blade
scrapers
DIY Stores
Replacement blades DIY Stores,
supermarkets,
chemists
COLLO luneta
HOB BRITE
Hob Clean
SWISSCLEANER
Boots, Co-op stores,
department stores, Regional
Electricity Company shops,
supermarkets
Cleaning stainless steel
Stainless steel can be marked by hard water that has
been left on the surface for a long time, or by aggressive
detergents that contain phosphorus. We recommend
that the steel surfaces are rinsed well then dried
thoroughly.
AFTER-SALES SERVICE
To receive assistance, call the number given on the
warranty leaflet enclosed with the product or follow
the instructions on our website. Be prepared to
provide:
•
a brief description of the problem;
•
the exact model type of your product;
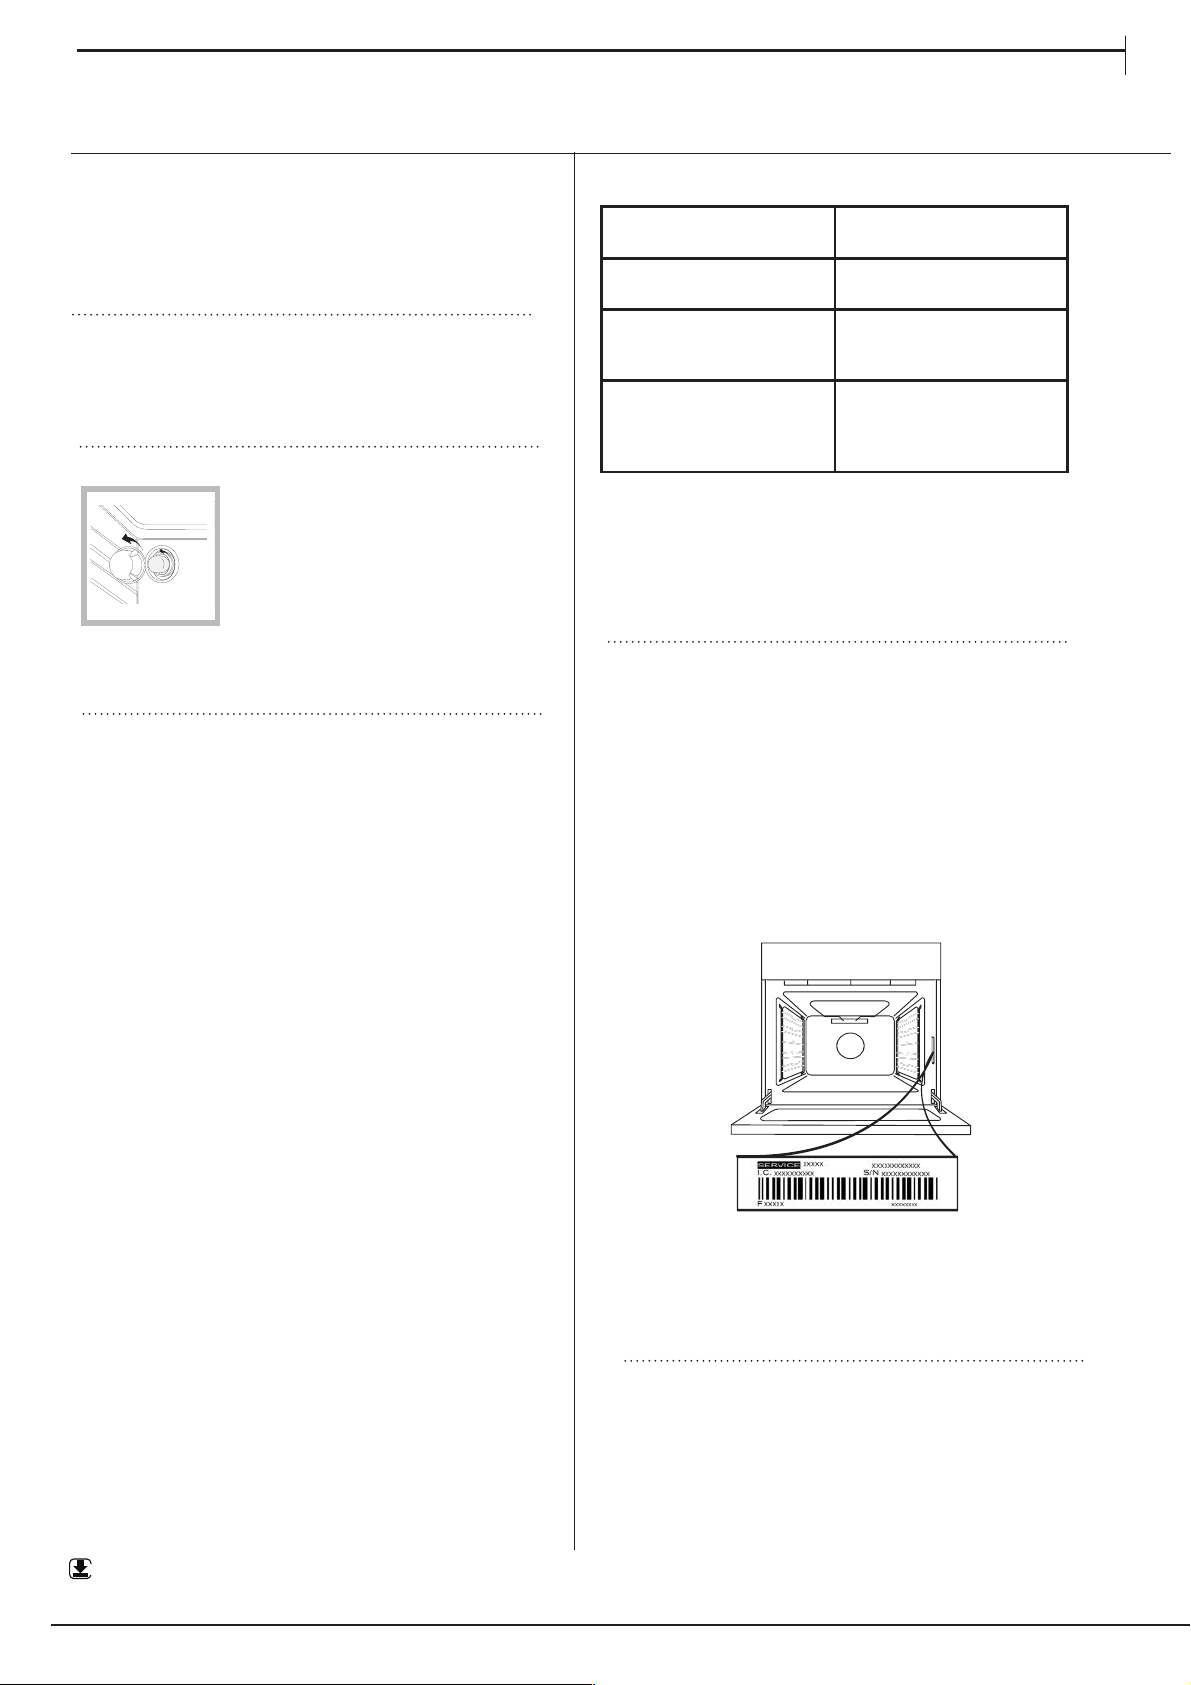
•
the assistance code (the number following the word
SERVICE on the identification plate attached to the
product, which can be seen ontheinsideedgewhen
the oven door is open);
•
your full address;
•
a contact telephone number.
Please note: If repairs are required, contact an
authorised service centre that is guaranteed to use
original spare parts and perform repairs correctly.
Please refer to the enclosed warranty leaflet for more
information on the warranty.
Assistance
Please have the following information to hand:
• The appliance model (Mod.).
• The serial number (S/N).
This information can be found on the data plate
located on the appliance and/or on the packaging.
WWW
A complete product specification, including the energy efficiency ratings for this oven, can be read and
downloaded from our website
www.indesit.com
EN
MAINTENANCE AND
CLEANING
MAINTENANCE AND
CLEANING
MAINTENANCE AND
CLEANING
MAINTENANCE AND
CLEANING
MAINTENANCE AND
CLEANING
MAINTENANCE AND
CLEANING
9

Steam-Assisted Oven Cleaning
This method of cleaning is recommended especially after
cooking very fatty (roasted)meats.
This cleaning process allows to facilitate the removal of
dirt of the walls of the oven by the generation of steam
that is created inside the oven cavity for easier cleaning.
! Important! Before you start steam -cleaning:
-Remove any food residue and grease from the bottom
of the oven.
- Remove any oven accessories (grids and drip pans).
Perform the above operations according to the following
procedure:
1. pour 300ml of drinking water into the baking tray in the oven,
placing it in the bottom shelf. In the models where the
drip pan is not present, use a baking sheet and place it
on the grill at the bottom shelf;
2. select the function of the oven
and set the temperature to 90 ° C;
3. keep it in the oven for 35min;
4. turn off the oven;
5. Once cooled the oven, you can open the door to
complete the cleaning with water and a damp cloth;
6. eliminate any residual water from the cavity after
finishing cleaning
When the steam –cleaning is done, after cooking
especially fatty foods, or when grease is difficult to
remove, you may need to complete the cleaning with the
traditional method, described in the previous paragraph.
! Perform cleaning only in the cold oven!
BOTTOM
REMOVING AND REFITTING THE DOOR
1. To remove the door, open it fully and lower the
catches until they are in the unlock position.
2. Close the door as much as you can.
Take a firm hold of the door with both hands – do not
hold it by the handle.
Simply remove the door by continuing to close it
while pulling it upwards (a) at the same time until it is
released from its seating (b).
~60°
a
b
~15°
Put the door to one side, resting it on a soft surface.
3.
Refit the door by moving it towards the oven,
aligning the hooks of the hinges with their seating
and securing the upper part onto its seating.
4.
Lower the door and then open it fully.
Lower the catches into their original position: Make
sure that you lower them down completely.
5.
Try closing the door and check to make sure that it
lines up with the control panel. If it does not, repeat
the steps above.
1.
After removing the door and resting it on a soft
surface with the handle downwards, simultaneously
press the two retaining clips and remove the upper
edge of the door by pulling it towards you.
2.
Lift and firmly hold the inner glass with both
hands, remove it and place it on a soft surface before
cleaning it.
3.
4. Refit the upper edge: a click will indicate correct
positioning. Make sure the seal is secure before
refitting the door
.
When reassembling the inner door glass
insert the glass panel correctly so that the
text written on the panel is not reversed
and can be easily legible.
10
x1
Min. 420 mm
Min. 650 mm
max. 15 mm
11
XEROX FABRIANO
www.indesit.com
07/2018 -
Whirlpool EMEA S.p.A.
Via Carlo Pisacane n.1
20016 Pero (MI), Italy
VAT number: IT00693740425
W11261367
12