Loading ...
Loading ...
Loading ...
ADJUSTMENTS
Shift Cable
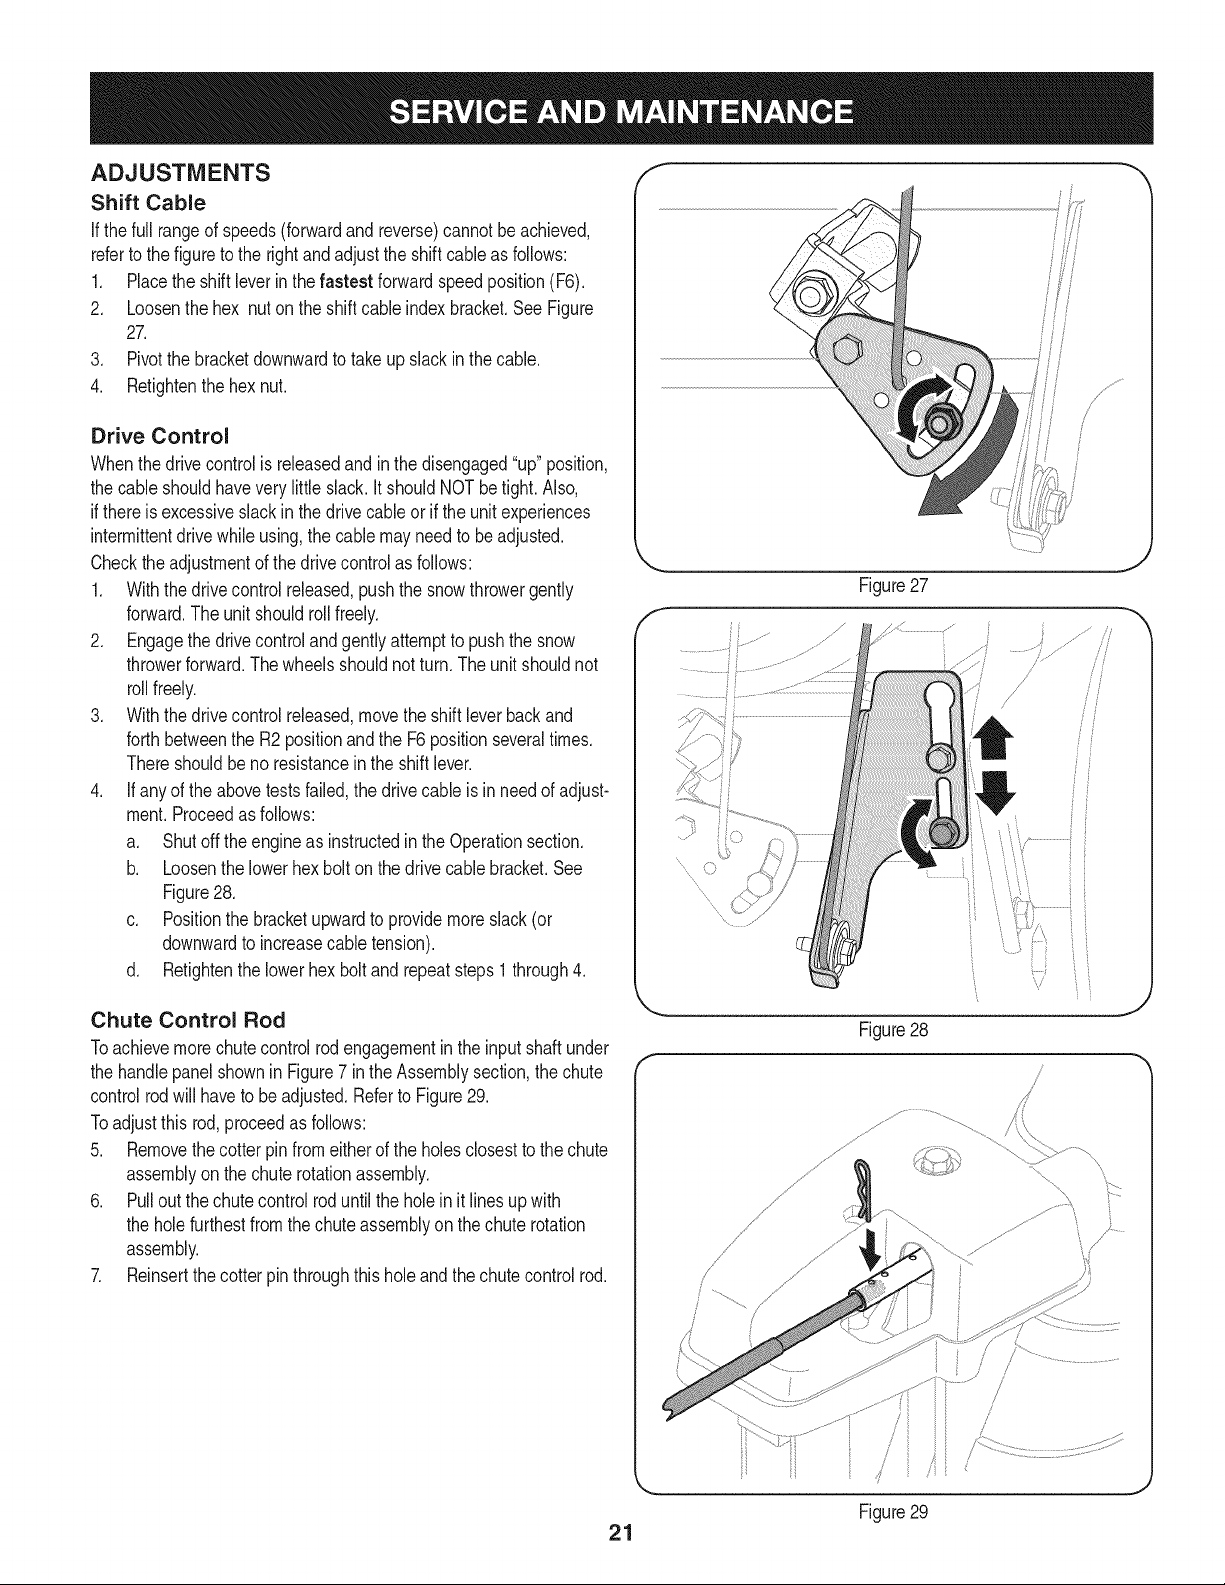
If thefull rangeof speeds(forwardandreverse)cannotbe achieved,
referto the figureto the rightandadjustthe shift cableas follows:
1. Placethe shiftleverin thefastest forwardspeedposition(F6).
2. Loosenthe hex nuton the shiftcable indexbracket.SeeFigure
27.
3. Pivotthe bracketdownwardto takeupslack inthe cable.
4. Retightenthehex nut.
Drive Control
Whenthedrivecontrolis releasedandin thedisengaged"up"position,
the cableshouldhaveverylittle slack.It shouldNOTbe tight. Also,
if thereis excessiveslackin thedrive cableor if the unitexperiences
intermittentdrivewhileusing,the cable mayneed to be adjusted.
Checktheadjustmentof the drivecontrolas follows:
1. Withthedrivecontrolreleased,pushthe snowthrowergently
forward.The unitshouldrollfreely.
2. Engagethe drivecontrolandgentlyattemptto pushthe snow
throwerforward.Thewheelsshouldnotturn.The unitshouldnot
rollfreely.
3. Withthedrivecontrolreleased,movethe shift leverbackand
forthbetweenthe R2positionand the F6 positionseveraltimes.
Thereshouldbeno resistancein the shiftlever.
4. If anyof the abovetestsfailed,the drivecable is in needof adjust-
ment.Proceedas follows:
a. Shutoff theengineas instructedinthe Operationsection.
b. Loosenthe lowerhexbolt onthe drivecable bracket.See
Figure28.
c. Positionthe bracketupwardto providemoreslack(or
downwardto increasecabletension).
d. Retightenthe lowerhex boltand repeatsteps1 through4.
J
Figure27
f
.........
Chute Control Rod
Toachievemorechutecontrolrodengagementin the input shaftunder
the handlepanelshownin Figure7 in the Assemblysection,the chute
controlrodwill haveto beadjusted.Referto Figure29.
Toadjustthis rod,proceedas follows:
5. Removethecotterpin fromeitherof the holesclosestto thechute
assemblyon thechuterotationassembly.
6. Pulloutthe chutecontrolroduntilthe holein it lines upwith
the holefurthestfromthe chute assemblyon the chute rotation
assembly.
7. Reinsertthe cotterpinthroughthis holeandthechutecontrolrod.
Figure28
.......,f
Figure29
21
Loading ...
Loading ...
Loading ...