
0
GEAppliances.com
C
I
Q_
0
-0
c-
E3
C
I
(1)
-0
OE
m
Lf3
C
OE
-0
C
E3
Or)
I
(D
LL
For a Spanish version of this
manual, visit our Website at
GEAppliances.com.
Para consultar una version
en espafiol de este manual de
instrucciones, visite nuestro sitio
de internet GEAppliances.com.
In Canada contact us at:
www.G EAppliances.ca
Safety Instructions ......... 2-6
Operating Instructions
Clock and Timer ................... 18
EnerggSaverMode ...............20
Oven .......................... 11-24
Adjust the Oven Thermostat ..... 20
Broiling, Broiling Guide ........... 14
Controls ...................... 11,12
Convection Oven ................. 15
Lower Oven Drawer .............. 17
Power Outage ................... 12
Sabbath Feature ................. 21
Self-Cleaning ................. 22, 23
Special Features ................. 20
Steam Cleaning .................. 24
Timed Baking .................... 19
Warming Drawer ................ 16
Surface Units ................... 7-10
Care and Cleaning
CoilSurface Units ................. 32
Control Knobs .................... 25
Drip Pans ......................... 32
Glass Cooktop ................ 30, 31
Lift-Off Oven Door ................ 27
Lift-Up Cooktop ................... 32
Light .............................. 29
Oven Heating Elements ........... 28
Rocks ............................. 28
Removable Lower Oven
Drawer Pan ....................... 26
Removable Worming
Drawer Pan ....................... 26
Standard-Cleon Oven Interior .... 26
Storage Drawer ................... 28
Vent .............................. 26
Troubleshooting Tips .... 33-36
Accessories .................... 37
Consumer Support
Consumer Support ...... Back Cover
Warrantg ......................... 39
Write the model and serial
numbers here:
Model #
Serial #
You can find them on a label
behind the drawer or behind the
lower oven door on the front of
the range frame.
Ouickset III and
Quickset IV Models
Printed on
Recgcled Paper
49-80591-105-09JR
IMPORTANT SAFETY INFORMATION.
READ ALL INSTRUCTIONS BEFORE USING.
i-4,WARNING i
Read all safety instructions before using the product. Failure to follow these instructions may result in fire, electric
shock, serious injury or death.
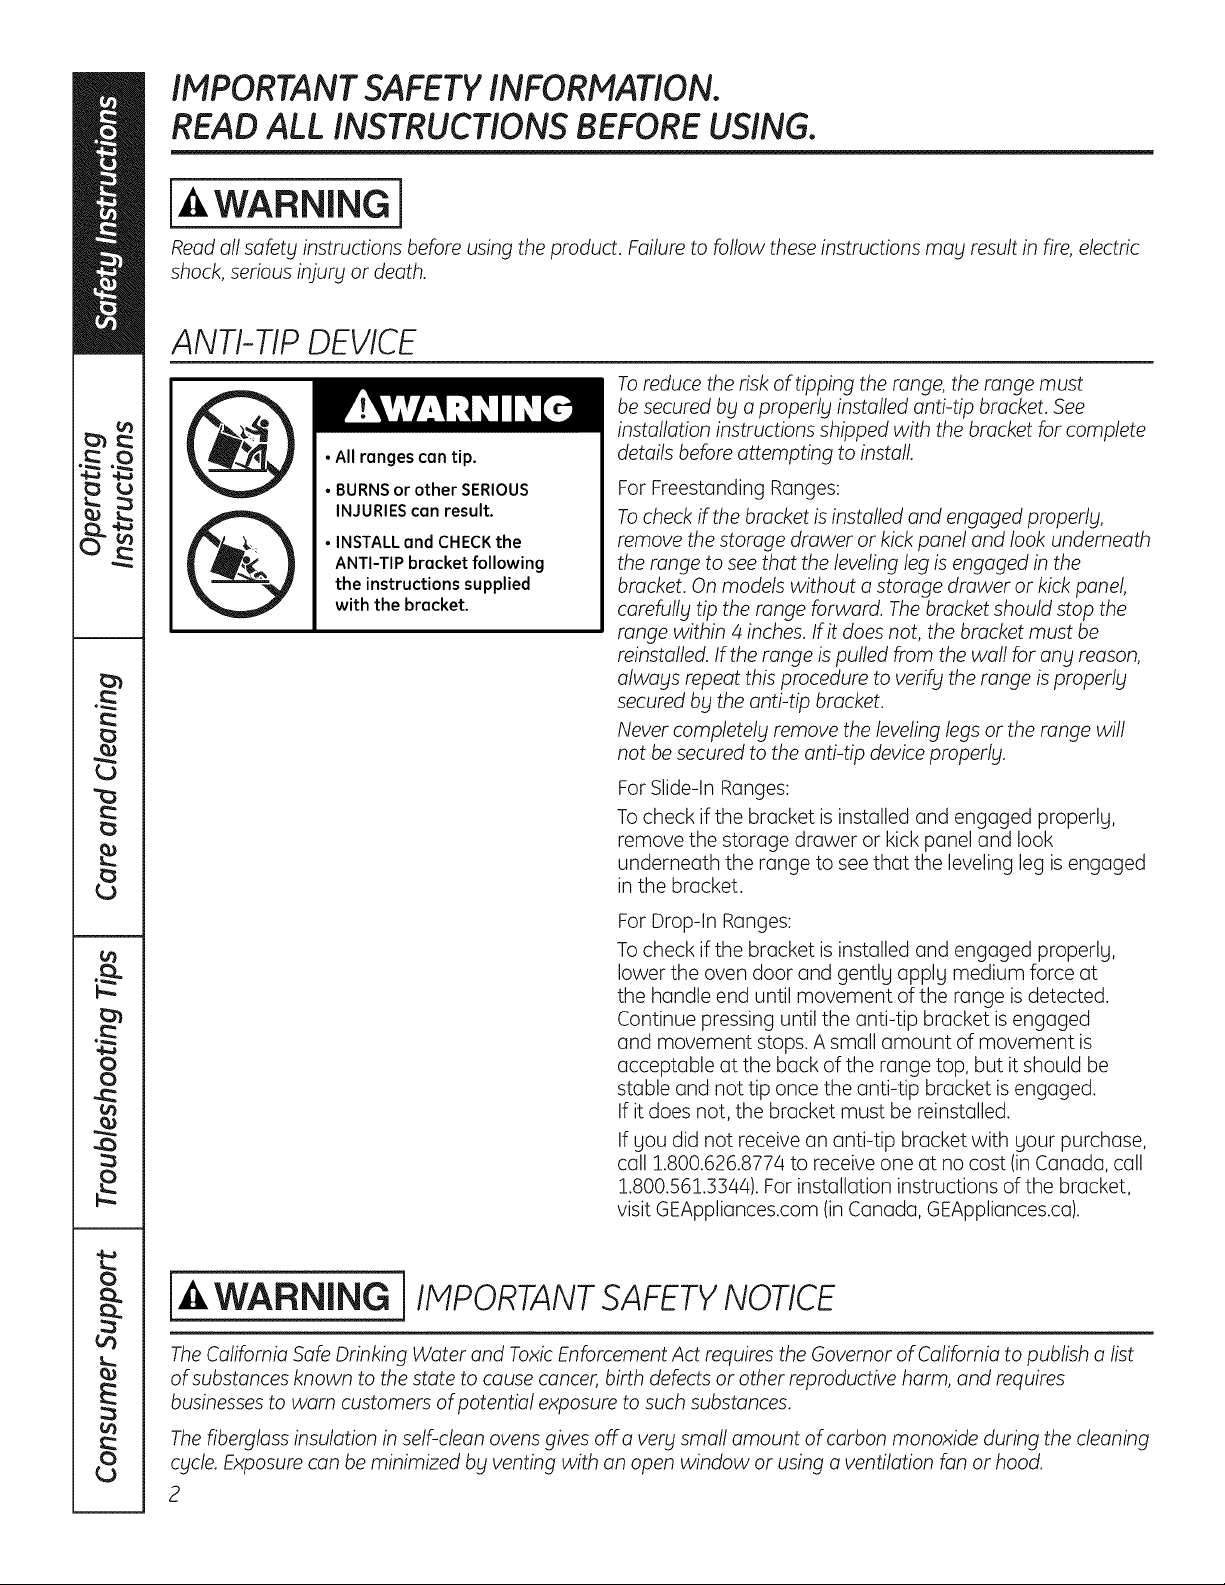
ANTI-TIP DEVICE
•All rongescon tip.
• BURNS or other SERIOUS
INJURIES can result.
• INSTALL and CHECK the
ANTI-TIP bracket following
the instructions supplied
with the bracket.
Toreduce the risk of tipping the range, the range must
be secured by a properl_l installed anti-tip bracket. See
installation instructions shipped with the bracket for complete
details before attempting to install
ForFreestanding Ranges:
Tocheck ff the bracket isinstalled and engaged properly,
remove the storage drawer or kickpanel and look underneath
the range to seethat the leveling leg isengaged in the
bracket. On models without a storage drawer or kick panel,
carefully tip the range forward. Thebracket should stop the
range within 4 inches. If itdoes not, the bracket must be
reinstalled. If the range ispulled from the wall for any reason,
always repeat this procedure to verify the range isproperly
secured by the anti-tip bracket.
Never completely remove the leveling legs or the range will
not be secured to the anti-tip device properly.
ForSlide-In Ranges:
Tocheck if the bracket is installed and engaged properly,
remove the storage drawer or kick panel and look
underneath the range to seethat the leveling leg isengaged
in the bracket.
ForDrop-In Ranges:
Tocheck if the bracket is installed and engaged properly,
lower the oven door and gently apply medium force at
the handle end until movement of the range isdetected.
Continue pressing until the anti-tip bracket is engaged
and movement stops. A small amount of movement is
acceptable at the back of the range top, but itshould be
stable and not tip once the anti-tip bracket is engaged.
If it does not, the bracket must be reinstalled.
If you did not receive an anti-tip bracket with your purchase,
call 1.800.626.8774 to receive one at no cost (in Canada, call
1.800.561.3Bq4). Forinstallation instructions of the bracket,
visit GEAppliances.com (in Canada, GEAppliances.ca).
i-& WARNING ] IMPORTANTSAFETYNOTICE
TheCalifornia Safe Drinking Water and ToxicEnforcement Act requires the Governor ofCalifornia to publish a list
of substances known to the state to cause cancer, birth defects or other reproductive harm, and requires
businesses to warn customers ofpotential exposure to such substances.
Thefiberglass insulation in self-clean ovens gives off a very small amount of carbon monoxide during the cleaning
cycle. Exposure can be minimized by venting with an open window or using a ventilation fan or hood.
2
GEAppliances.com
[-&WARNING ]GENERALSAFETYINSTRUCTIONS
Use this appliance for its intended purpose as
described inthis Owner's Manual.
Be sure your appliance isproperly installed and
grounded by a qualified installer in accordance with
the provided installation instructions.
_::Do not attempt to repair or replace any part of your
range unless itisspecifically recommended in this
manual. All other servicing should be referred to
a qualified technician.
Before performing any service, unplug the range
or disconnect the power supply at the household
distribution panel by removing the fuse or switching
off the circuit breaker.
Do not leave children alone-children should not
be left alone or unattended in an area where an
appliance is in use. They should never be allowed
to climb, sit or stand on any part of the appliance.
CAUTION : Do not store items of interest to
children above a range or on the backguard of a
range-children climbing on the range to reach
items could be seriously injured.
_::Use only dry pot holders-moist or damp pot
holders on hot surfaces may result in burns from
steam. Do not let pot holders touch hot surface
units or heating elements. Do not usea towel or
other bulky cloth in place of pot holders.
Never use your appliance for warming or heating
the room.
iiiiiil
iiiiiiili_
iiiiiiili_
iiiiiiili_
iiiiiiili_
Donot touch the surface units, the heating
elements or the interior surface of the oven.
These surfaces may be hot enough to burn even
though they are dark in color. During and after use,
do not touch, or letclothing or other flammable
materials contact the surface units, areas nearby
the surface units or any interior area of the oven;
allow sufficient time for cooling first. Other surfaces
of the appliance may become hot enough to cause
burns. Potentially hot surfaces include the cooktop,
areas facing the cooktop, oven vent opening,
surfaces near the opening and crevices around the
oven door.
Donot heat unopened food containers. Pressure
could build up and the container could burst,
causing an injury.
Do not usealuminum foil to line the drip pans or
anywhere in the oven, except as described in this
manual. Misuse could result in damage to the range
and shock or fire hazard.
Avoid scratching or impacting glass doors, cook
tops or control panels. Doing so may lead to glass
breakage. Do not cook on a product with broken
glass.Shock, fire or cuts may occur.
Cook meat and poultry thoroughly-meat to at
least an internal temperature of 160°F and poultry
to at least an internal temperature of 180°F.Cooking
to these temperatures usually protects against
foodborne illness.
[_/i,WARNING i KEEPFLAMMABLE MATERIALSAWAYFROtvl
THE RANGE.
Donot store or use flammable materials in an oven
or near the cooktop, including paper, plastic, pot
holders, linens, wall coverings, curtains, drapes and
gasoline or other flammable vapors and liquids.
Never wear loose-fitting or hanging garments while
using the appliance. These garments may ignite if
they contact hot surfaces causing severe burns.
Do not let cooking grease or other flammable
materials accumulate in or near the range. Grease
in the oven or on the cooktop may ignite.
Clean ventilating hoods frequently. Grease should
not be allowed to accumulate on the hood or filter.
3
IMPORTANT SAFETY INFORMATION.
READ ALL INSTRUCTIONS BEFORE USING.
l-& WARNING ] IN THEEVENT OF A FIRE,TAKETHE FOLLOWING
STEPSTO PREVENT THEFIREFROM SPREADING:
_:,Donot use water on grease fires. Never pick up
a flaming pan. Turn the controls off.Smother a
flaming pan on a surface unit by covering the
pun completely with a well-fitting lid,cookie sheet
or flat tray. Use a multi-purpose dry chemical or
foam4ype fire extinguisher.
::, If there isa fire in the oven during baking, smother
the fire by closing the oven door and turning the
oven off or by using a multi-purpose dry chemical
or foam4ype fire extinguisher.
If there isa fire in the oven during self-clean,
turn the oven off and wait for the fire to go out.
Donot force the door open. Introduction offresh
air at self-clean temperatures may lead to a burst
of flame from the oven. Failure to follow this
instruction may result in severe burns.
i-4,WARNING i COOKTOPSAFETYINSTRUCTIONS
Never leave the surface units unattended at
medium or high heat settings. Boilovers cause
smoking and greasy spillovers that may catch
on fire.
_:,Never leave oil unattended while frying. If allowed
to heat beyond its smoking point, oil may ignite
resulting in fire that may spread to surrounding
cabinets. Use a deep fat thermometer whenever
possible to monitor oil temperature.
Toavoid oil spillover and fire, usea minimum
amount of oil when shallow pan-frying and avoid
cooking frozen foods with excessive amounts of ice.
_:,Use proper pan size-select cookware having flat
bottoms large enough to cover the surface heating
element. The use of undersized cookware will
expose a portion of the surface unit to direct
contact and may result in ignition of clothing.
Proper relationship of cookware to surface unit
will also improve efficiency.
iii::,Only certain types of glass, glass/ceramic,
earthenware or other glazed containers are suitable
for cooktop service; others may break because of
the sudden change in temperature.
To minimize the possibility of burns, ignition of
flammable materials and spillage, the handle of a
container should be turned toward the center of the
range without extending over nearby surface units.
When preparing flaming foods under a hood, turn
the fan on.
GEAppliances.com
WARNING J
(Some models)
RADIANT COOKTOP SAFETY INSTRUCTIONS
Use care when touching the cooktop. The glass
surface of the cooktop will retain heat after the
controls have been turned off.
*:,Donot cook on a broken cooktop. If glass cooktop
should break, cleaning solutions and spillovers may
penetrate the broken cooktop and create o risk of
electric shock. Contact a qualified technician
immediately.
*:,Avoid scratching the glass cooktop. The cooktop
con be scratched with items such as knives, sharp
instruments, rings or otherjewelrg, and rivets on
clothing.
Do not place or store items that can melt or catch
fire on the glass cooktop, even when it isnot being
used. If the cooktop isinadvertentlg turned on, theg
iiiiiil
iiiiiiili_
mog ignite. Heat from the cooktop or oven vent
offer it is turned off mag cause them to ignite also.
UseCERAMABRYTE®ceramicCooktop Cleanerand
CERAMABRYTE®CleaningPadto clean the cooktop.
Wait until the cooktopcoolsand the indicator light
goes out before cleaning.A wet sponge or cloth
on a hot surface cancause steamburns.Some
cleanerscan producenoxious fumesifapplied to
a hot surface. Note: Sugarspills are anexception.
Theg shouldbe scrapedoffwhile stillhotusing an
oven mittand a scraper.Seethe Cleaningthe glass
cooktop section for detailed instructions.
Readand follow all instructions and warnings on
the cleaning cream label.
WARNING i
(Some models)
COILCOOKTOP SAFETY INSTRUCTIONS
Donot immerse or soak the removable surface
units. Do not put them in a dishwasher. Do not self-
clean the surface units in an oven. Doing so mag
cause them to fail presenting a burn or fire hazard.
Toavoid the possibilitg of a burn or electric shock,
alwags be certain that the controls for all surface
units are at the OFFposition and all coils are cool
before attempting to lift or remove a coil surface unit.
Be sure the drip pans are not covered and are in
place. Their absence during cooking could damage
range parts and wiring.
WARNING iOVENSAFETYINSTRUCTIONS
Stand awag from the range when opening the oven
door. Hot air or steam which escapes can cause
burns to hands, face and/or eges.
Keep the oven vent unobstructed.
Keep the oven free from grease buildup. Grease
in the oven mag ignite.
Place oven racks in desired location while oven
iscool. If rack must be moved while oven is hot,
do not let pot holder contact hot heating element
in oven.
When using cooking or roasting bags in the oven,
follow the manufacturer's directions.
Pull the oven rack to the stop-lock position when
loading and unloading food from the oven. This
helps prevent burns from touching hot surfaces
of the door and oven walls.
Donot leave items such as paper, cooking utensils
or food in the oven when not in use. Items stored in
an oven can ignite.
Donot use aluminum foil to line the oven bottom.
Foilmag trap or reflect heat leading to a shock or
fire hazard.
5
IMPORTANT SAFETY INFORMATION.
READ ALL INSTRUCTIONS BEFORE USING.
[_ WARNING j
(Some models)
SELF-CLEANINGOVENSAFETYINSTRUCTIONS
The self-cleaning feature operates the oven at temperatures high enough to burn away food soils in the
oven.Follow these instructions for safe operation.
_:,Before operating the self-clean cycle, remove pans, _:,
shiny metal oven rocks and other utensils from the
oven. Only grog porcelain-coated oven rocks may
be left in the oven. Do not use self-clean to clean
other ports, such asdrip pans or bowls. }
*:,Before operating the self-clean cycle, wipe grease
and food soils from the oven. Excessive amount of
grease may ignite leading to smoke damage to
your home.
If the self-cleaning mode malfunctions, turn the
oven off and disconnect the power supply. Have it
serviced by a qualified technician.
Do not clean the door gasket. Thedoor gasket is
essential for a good seal. Care should be taken not
to rub, damage or move the gasket.
Do not useoven cleaners. No commercial oven
cleaner or oven liner protective coating of any kind
should be used in or around any part of the oven.
[-& WARNING 1WARMING DRAWER/LOWER OVEN DRAWER
SAFETY INSTRUCTIONS Isomemode_s)
*:, The purpose of the warming drawer isto hold hot
cooked foods at serving temperature. Bacteria will
grow in food while itisbelow 140%.Do not put cold
food in warming drawer. Donot heat food for more
than 2 hours. Failure to follow these instructions
may result in foodborne illness.
*:,Donot leave paper products, plastics, canned food
or combustible materials in the drawer. They may
ignite.
*:,Do not touch the heating element or the interior
surface of the drawer. These surfaces may be hot
enough to cause burns.
Use care when opening the drawer. Open the
drawer a crack and let hot air or steam escape
before removing or replacing food. Hot air or
steam that escapes can cause burns to hands,
face and/or eyes.
Do not usealuminum foil to line the warming
drawer. Foilisan excellent heat insulator and
will trap heat beneath it. This will upset the
performance of the drawer and potentially
cause a fire hazard.
"'-usingthe surface units. (on some models) GEAppliances.com
WARNINGI °nor high settings. Keep flammable items awabl from the cooktop. Turn off all
controls when done cooking. Failure to follow these instructions can result in
fire, serious injur_l or death.
Throughout this manual, features and appearance mabt varbt from btour model.
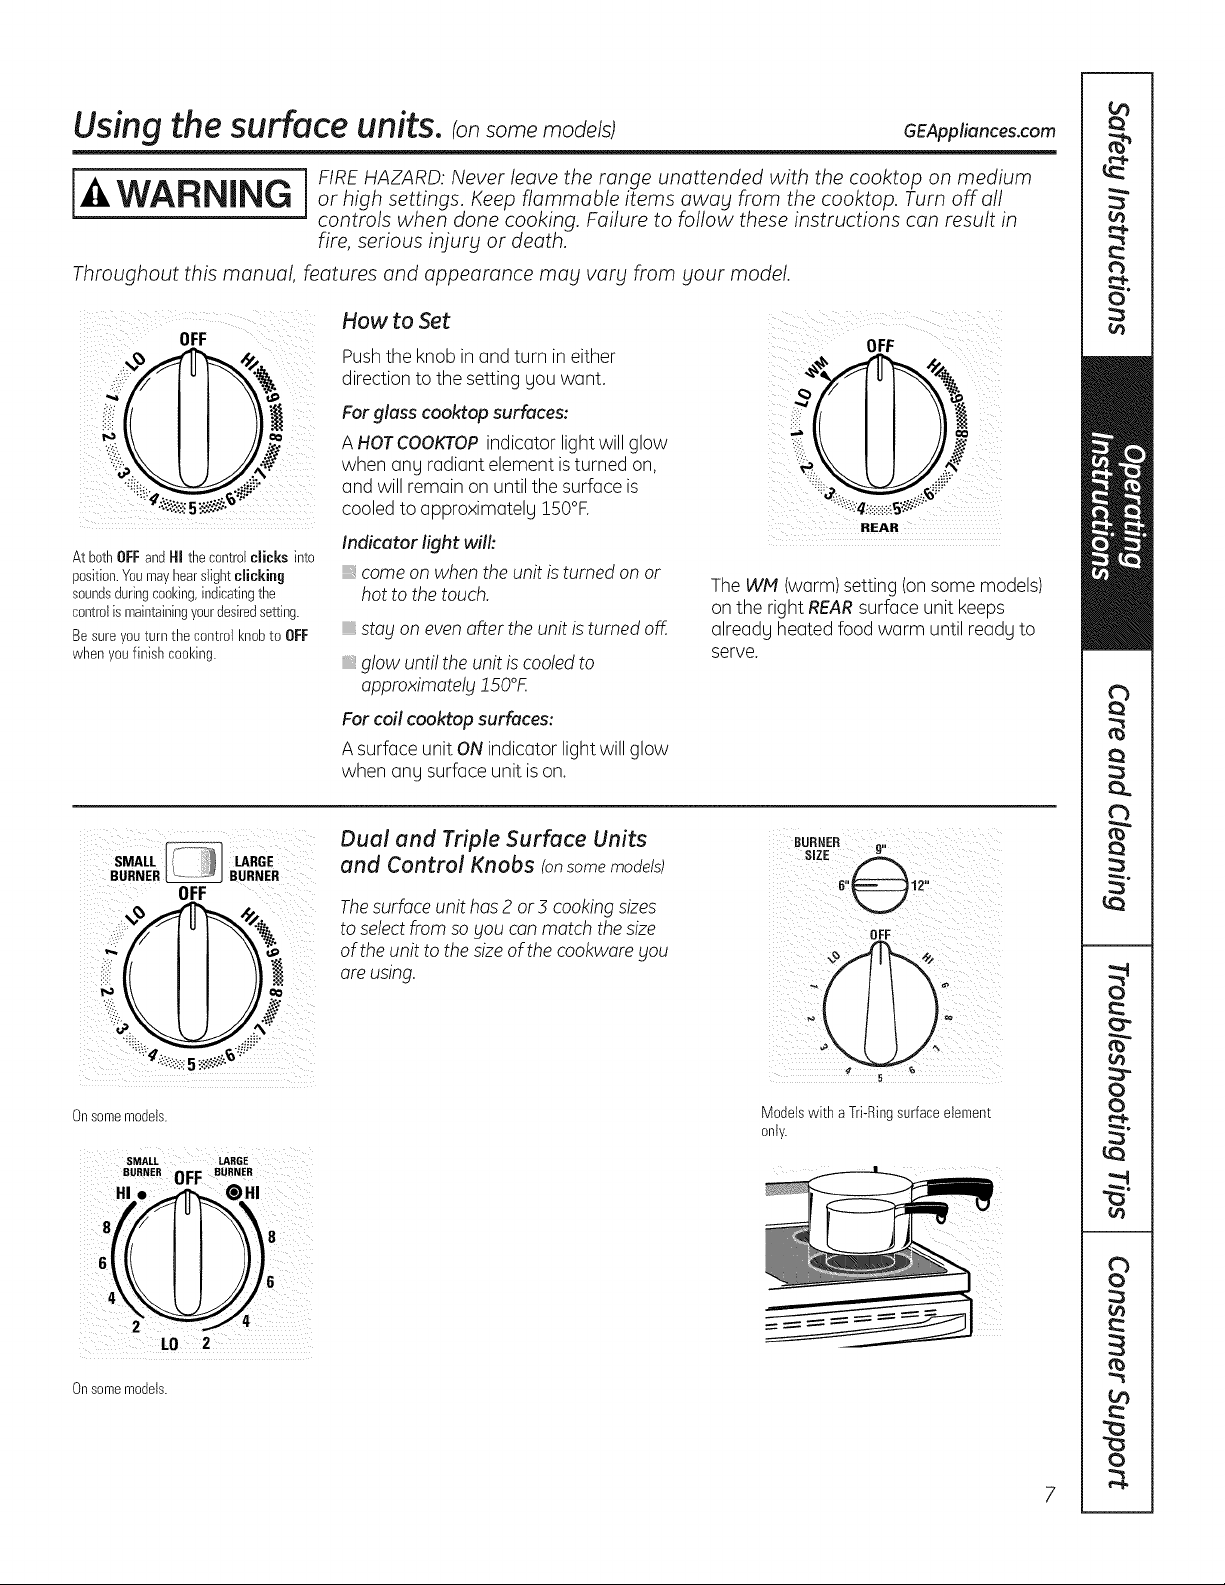
How to Set
OFF OFF
Pushthe knobin and turn in either
,::i_ direction tothe settinggou want.
_il _ For glass cooktop surfaces:
_ A HOTCOOKTOPindicator lightwillglow
when any radiant element is turned on,
: and will remainon untilthe surfaceis .:
cooled to approximatelu 150°F.
REAR
Indicator fight will:
At bothOFFandHI thecontrolclicks into
position.Youmayhearslightclicking come on whentheunitis turnedon or
soundsduringcooking,indicatingthe hottothetouch. The WM (warm)setting(on some models)
controlismaintainingyour@siredsetting, on the right REARsurfaceunit keeps
Besure youturnthecontrolknobtoOFF already heatedfoodwarm until readyto
when youfinishcooking, serve.
stag on even after theunitisturnedoff.
glow unti! theunitis cooled to
approximotelg JSO°K
For coil cooktop surfaces:
A surface unitONindicator light willglow
when any surfaceunit is on.
SMALL LARGE
BURNER _ BURNER
OFF
i,i_iO
Onsomemodels.
SMALL LARGE
BURNER 0FF BURNER
HI.
L0 2
Onsomemodels.
Dual and Triple Surface Units
and Control Knobs !onsome models)
The surface unit has 2 or3 cooking sizes
to select from so gou can match the size
of the unit to the size of the cookware gou
are using.
OFF¸¸¸ )
Modelswith aTri-Ringsurfaceelement
only.
Usingthe surface units.
Throughout this manual, features and appearance mag varg from gout model.
Temperoture Limiter on Redient Gloss Cooktops
Every radiantsurface unithas a
temperature limiter.
The temperature limiter protects the glass
cooktopfrom getting toohot.
The temperature limiter may cyclethe
units off fora time if:
. ; thepan boilsdry.
thepan bottom isnotflat.
thepan isoff-center.
_,thereis no pan on theunit.
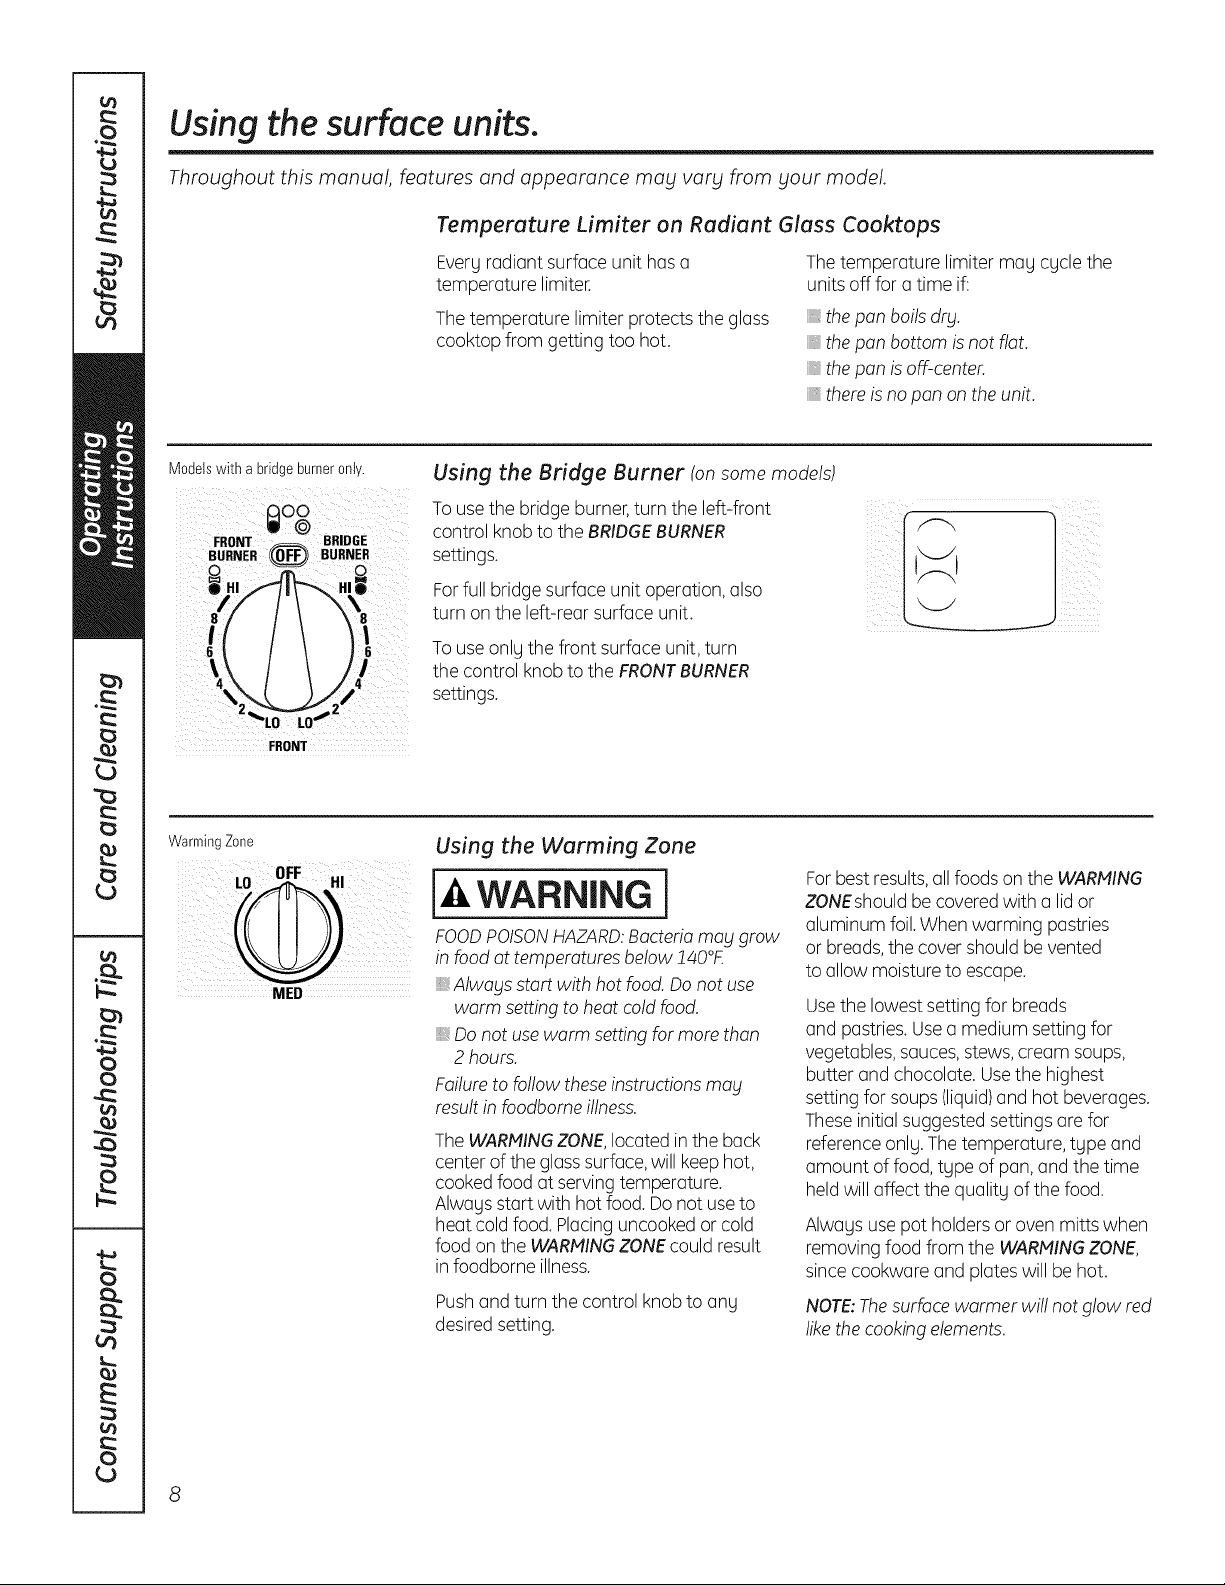
Models with abridgeburneronly.
Using the Bridge Burner (on some models)
To use thebridge burner,turn the left-front
control knobtothe BRIDGEBURNER
settings.
For fullbridge surface unitoperation, also
turn on the left-rear surface unit.
To use onlythe front surfaceunit, turn
thecontrol knobtothe FRONTBURNER
settings.
FRONT
WarmingZone
NED
Using the Warming Zone
WARNING I
FOODPOISONHAZARD:Bacteriamabl grow
in food at temperatures below!40°£
,, Alwablsstartwith hotfood. Donotuse
warm settingtoheatcoldfood.
,, Do notuse warm setting formorethan
2 hours.
Failure tofollow theseinstructions mag
result in foodbome illness.
The WARMINGZONE,located inthe back
center of the glasssurface,willkeep hot,
cooked foodatserving temperature.
Alwaysstartwith hot food. Do notuse to
heatcoldfood. Placing uncooked or cold
foodon theWARMINGZONEcouldresult
in foodborne illness.
Pushand turnthe control knob to any
desired setting.
Forbest results,allfoods on theWARMING
ZONEshould be covered with a lidor
aluminum foil.Whenwarming pastries
or breads,thecover should be vented
toallow moisture toescape.
Usethe lowestsettingforbreads
and pastries. Usea medium settingfor
vegetables, sauces,stews, cream soups,
butter and chocolate. Usethehighest
settingfor soups (liquid)and hotbeverages.
Theseinitialsuggested settings are for
reference only. The temperature, type and
amount offood, type ofpan, and thetime
held willaffect the quality ofthefood.
Alwaysusepotholdersor ovenmitts when
removing foodfrom the WARMINGZONE,
since cookwareand plates will be hot.
NOTE:Thesurfacewarmer wi!! notglow red
like thecooking elements.
GEAppliances.com
Thefollowing information will help you choose cookware which will givegood performance on glass cooktops.
Home Canning Tips
Be sure thecanner is centered over
thesurfaceunit.
Makesure thecannerisflat on thebottom.
Toprevent burns from steam or heat,
use caution when canning.
Use recipesand procedures from
reputable sources.Theseare available
from manufacturers such asBall®and
KerP and the Department ofAgriculture
Extension Service.
Flat-bottomed canners are recommended.
Useofwater bath canners with rippled
bottoms magextend thetime required
to bring thewater to a boil.
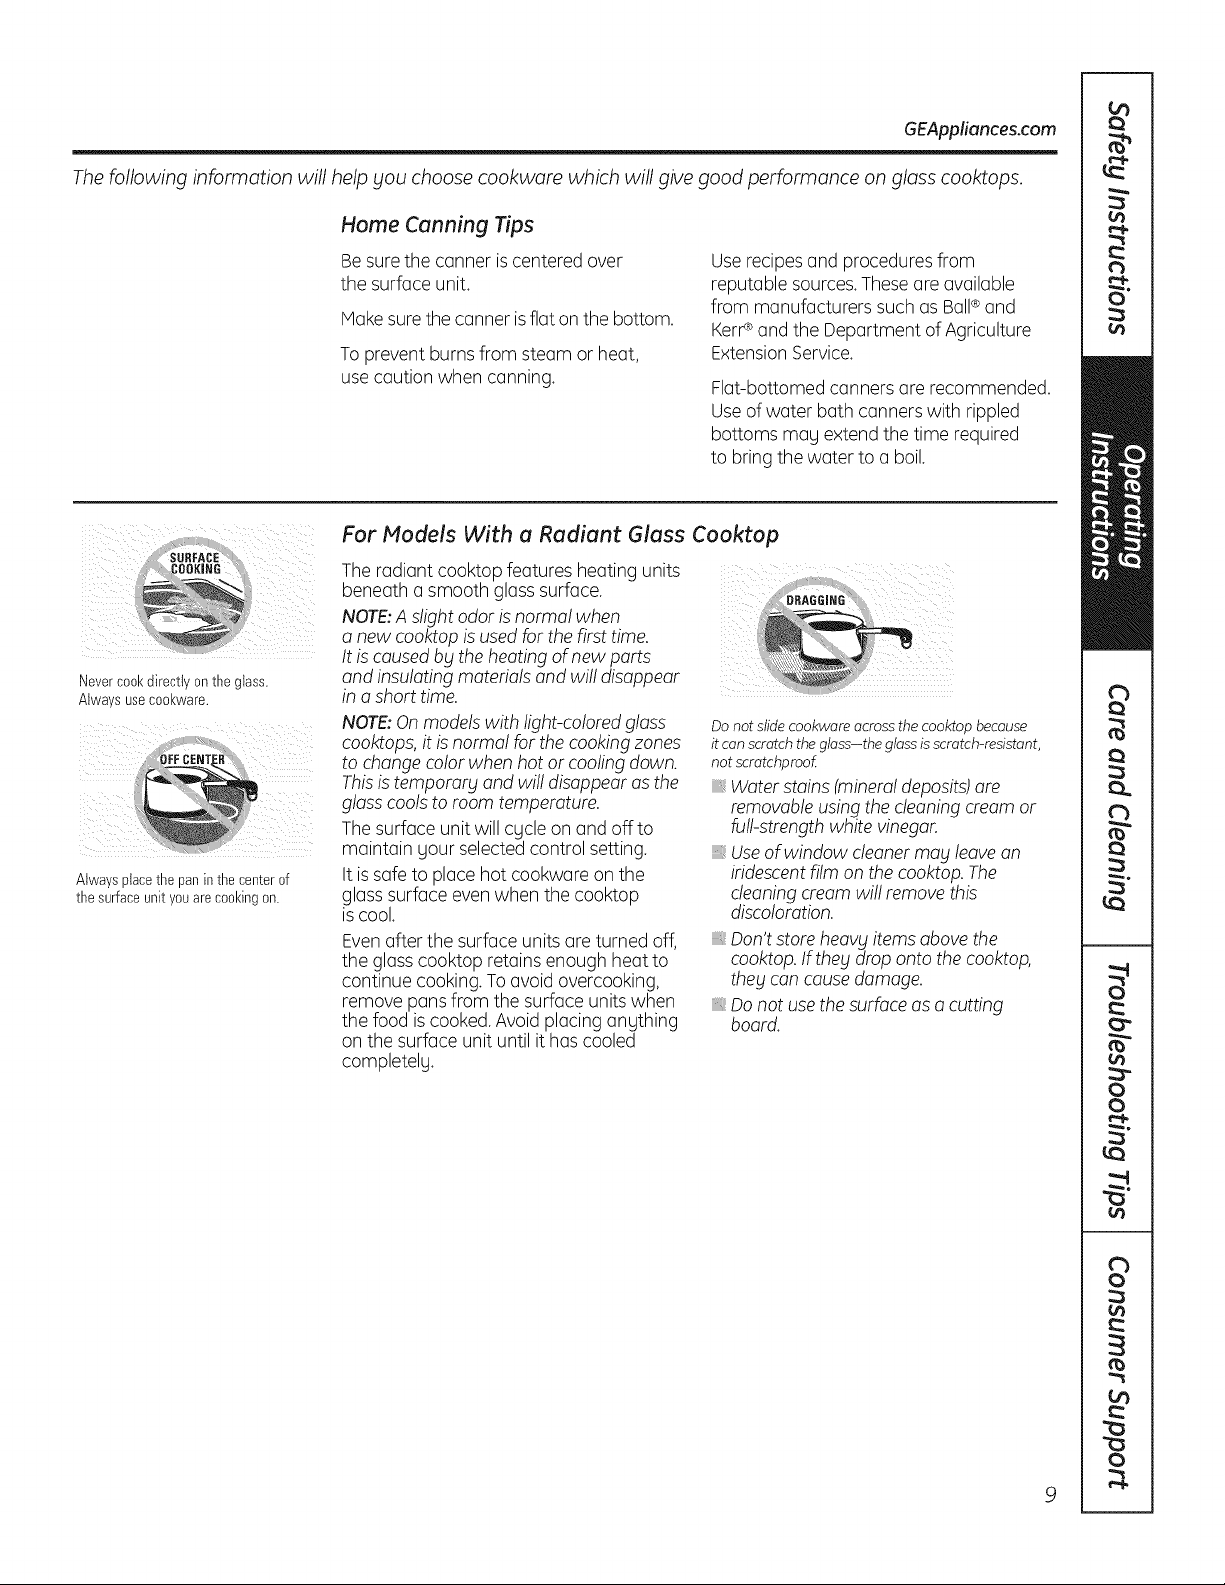
Nevercool(directtv ontne glass.
Alwa s useCOOl(ware,
Alwaysplacethe paninthecenterof
the surfaceunityouarecookingon.
For Models With a Radiant Glass Cooktop
Theradiantcooktop featuresheating units
beneatha smoothglass surface.
NOTE:A s!ight odor is normal when
a newcooktopis used forthefirsttime.
It is causedby theheatingof newparts :_
and insu!ating materialsand wil! disappear
in a short time.
NOTE:Onmodels with light-colored glass
cooktops, itis norma! forthecooking zones
tochange colorwhenhotor cooling down.
Thisistemporarg and wi!!disappear as the
glass cools toroomtemperature.
The surface unitwillcgcle on and offto
maintain yourselected control setting.
It is safe to placehotcookwareon the
glasssurface even whenthe cooktop
is cool.
Evenafter thesurface units are turned off,
the glass cooktopretains enough heat to
continue cooking. To avoidovercooking,
remove pans from the surfaceunits when
the foodiscooked.Avoidplacinganything
on thesurface unituntilithascooled
completelg.
Donot slide cookware acrossthe cooktop because
it canscratch the glass-the glassisscratch-resistant,
not scratchproof
_,Water stains(mineraldeposits)are
removableusingthecleaning cream or
furl-strengthwhite vinegar.
_,Useof window cleanermay leave an
iridescentfilm on the cooktop. The
cleaning cream wi!! remove this
discoloration.
Don't store heavy items abovethe
cooktop.If thebtdrop onto the cooktop,
they cancausedamage.
Do notuse thesurface asa cutting
board.
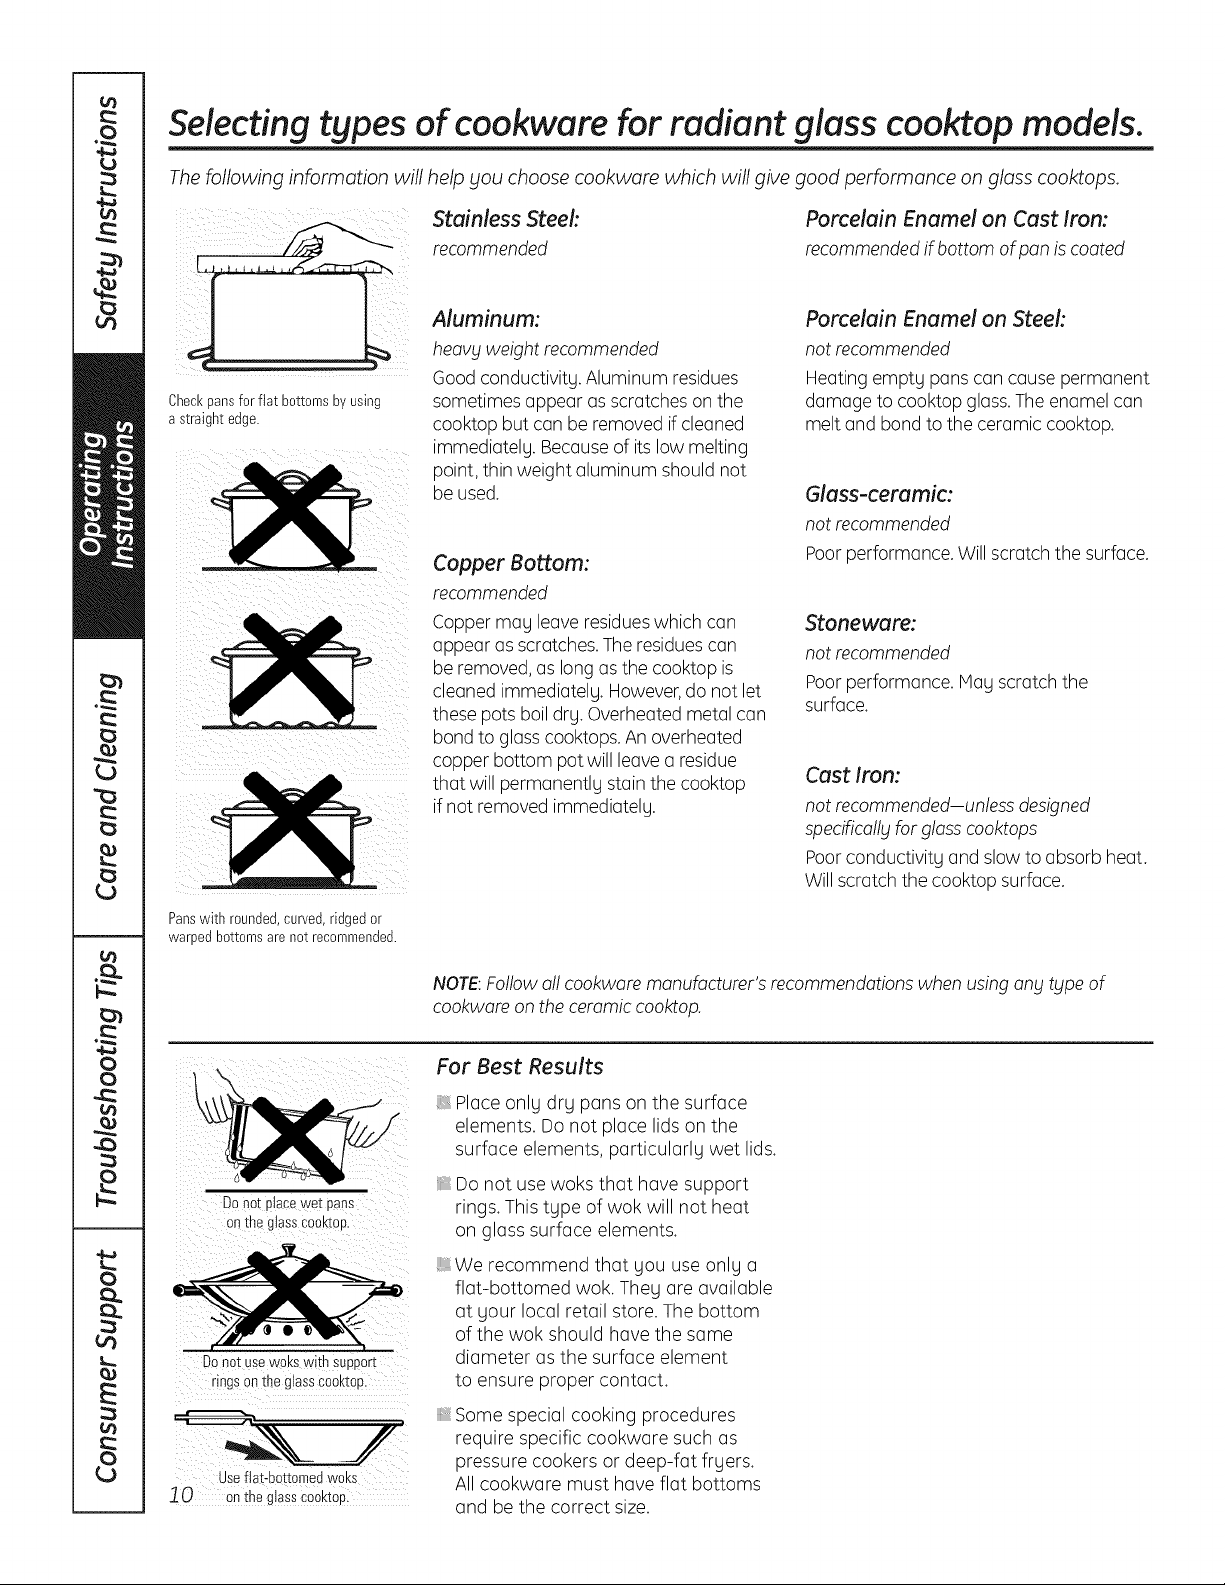
Selecting types of cookware for radiant glass cooktop models.
Thefollowing information will help you choose cookware which will give good performance on glass cooktops.
stainlessrecommendedSteel:
.....
Aluminum:
heavy weight recommended
Good conductivity.Aluminum residues
Checkpansforflat bottomsbyusing
astraightedge.
sometimesappear asscratcheson the
cooktop butcanbe removed if cleaned
immediately. Becauseof its lowmelting
point, thinweight aluminum should not
be used.
Copper Bottom:
recommended
Copper may leaveresidueswhich can
appear as scratches. The residuescan
be removed,aslong as the cooktopis
cleanedimmediately. However,do not let
these pots boil dry. Overheated metal can
bond toglass cooktops. An overheated
copperbottom potwillleavea residue
that will permanently stain the cooktop
ifnot removed immediately.
Panswith rounded,curved,ridgedor
warpedbottomsarenot recommended.
Porcelain Enamel on Cast Iron:
recommended ifbottom ofpan is coated
Porcelain Enamel onSteek
notrecommended
Heating empty panscancause permanent
damage tocooktop glass.The enamelcan
melt and bond to theceramiccooktop.
Glass-ceramic:
notrecommended
Poor performance. Willscratch thesurface.
Stoneware:
notrecommended
Poor performance. May scratch the
surface.
Cast Iron:
notrecommended-unless designed
specifica!!_jforglasscooktops
Poorconductivity and slow toabsorbheat.
Will scratch thecooktop surface.
NOTE:Followa!! cookwaremanufacturer's recommendations when using any type of
cookwareon theceramic cooktop.
DOnot ptacewetpans
onthe glassCoaktop.
Donot usew0kswith SUpport
rings onthe glass€00ktop
useflat-bottomed woks
10 o"thsgiaiSc_Okto_
For Best Results
Place only dry panson the surface
elements. Donot place lidson the
surface elements, particularly wet lids.
Donot usewoks that have support
rings. This type ofwok will not heat
on glass surface elements.
We recommend that gou useonlg a
flat-bottomed wok.Theg are available
at gour local retail store.Thebottom
of the wok should have the same
diameter asthe surface element
to ensure proper contact.
Somespecial cooking procedures
require specific cookware such as
pressure cookers or deep-fat frgers.
All cookware must haveflat bottoms
and be the correct size.
Usingtheoven control,clock
andtimer features andsettings.
Throughout this manual, features and appearance may vary from your model.
GEAppliances.com
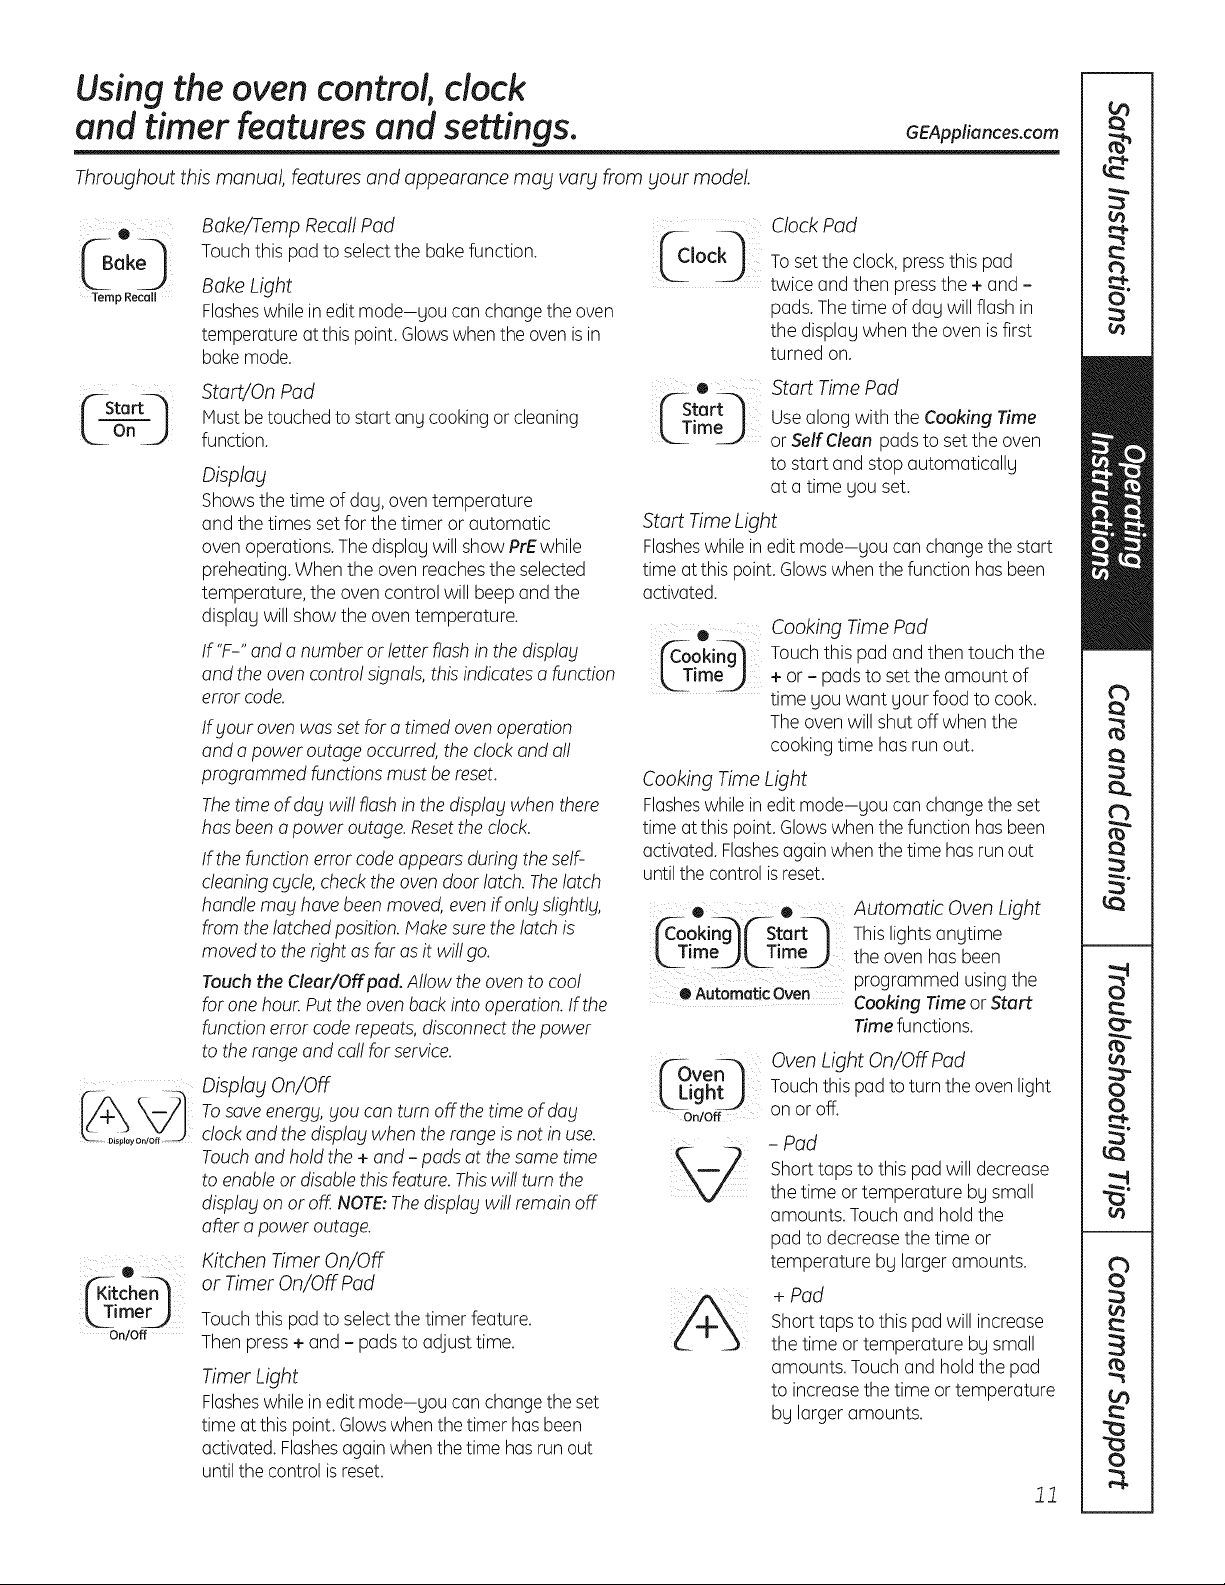
® Bake/Temp Recall Pad
(B 0 Touch this pad to select thebakefunction. _Jock_
ok
Temp Recall Bake Light
Flasheswhileineditmode-gou canchange theoven
temperatureatthis point.Glowswhen theoven is in
bake mode.
| rL|f--Sta -- _ StartJOn Pad ('--Start_t
Must betouched tostartanycookingor cleaning m Tim,, I_--" U
L
On
J
function.
_imer_
On/Off
Display
Showsthetime ofdag,oventemperature
and thetimes set forthetimer or automatic
oven operations. Thedisplag willshow PrEwhile
preheating.Whenthe ovenreachestheselected
temperature, theovencontrol willbeep and the
displag willshow theoventemperature.
If'F-" and a numberor letter flash in thedisplay
and theoven contro! signals, this indicates a function
error code.
Ifblourovenwas set fora timed oven operation
and a power outageoccurred, the clock and al!
programmed functions mustbe reset.
Thetime of dablwi!! flash in the display whenthere
has been a power outage.Resettheclock.
If the functionerror code appears during the self-
cleaning cycle,check the ovendoor latch.Thelatch
handle may have been moved, even ifonlblslightlg,
from thelatched position. Makesurethe latch is
moved totherightas farasitwi!! go.
Touch the Cleur/Off pod.Allow the oventocoo!
forone hour. Put theoven back intooperation. If the
functionerror code repeats, disconnectthepower
totherange and ca!! forservice.
Display On/Off
Tosaveenergy, youcanturn off thetime ofdabl
clock and thedisplay when the range is notin use.
Touchand hold the+ and - padsatthesame time
toenableor disable this feature. Thiswi!! turn the
display on or off. NOTE:Thedisplay wil! remainoff
after a poweroutage.
Kitchen Timer On/Off
or Timer On/Off Pad
Touch this pad to select thetimer feature.
Thenpress+and - pads to adjust time.
Timer Light
Flasheswhileineditmode-gou canchange theset
time atthis point.Glowswhen thetimer has been
activated.Flashesagainwhenthetime has run out
until thecontrol is reset.
Clock Pad
To set the clock, pressthis pad
twice and then pressthe+ and -
pads.The time ofdag willflash in
the displagwhentheovenis first
turned on.
Start Time Pad
Use along with the Cooking Time
or Self Cleon pads to set the oven
to start and stop automaticallg
at a time gou set.
Start Time Light
Flasheswhile in edit mode-gou can change thestart
time atthis point. Glowswhen thefunctionhas been
activated.
® Cooking Time Pad
j_-ooking_ Touch this pad and thentouch the
[_TmeJ +or - padstoset the amount of
time youwant your foodto cook.
Theoven willshut off when the
cooking time has run out.
Cooking Time Light
Flasheswhile in edit mode-gou can change theset
time atthis point. Glowswhen thefunctionhas been
activated. Flashesagain when thetime has run out
until thecontrol is reset.
• • Automatic Oven Light
jfC-ooki@('-Start-] Thislights angtime
[ Tmeal, Time_ theovenhas been
programmed using the
OAutomaticOven Cooking Time or Start
Time functions.
_ven_
_Light_
On/Off
OvenLight On/Off Pad
Touch this pad toturntheoven light
on or off.
- Pad
Short taps tothis pad willdecrease
the time or temperature bg small
amounts. Touch and hold the
pad to decreasethe time or
temperature bg larger amounts.
+ Pad
Shorttaps tothis pad willincrease
thetime or temperature bg small
amounts. Touchand hold thepad
to increasethetime or temperature
bg larger amounts.
11
Usingtheoven control,clock
andtimer features and settings.
Throughout this manual, features and appearance may vary from
¸¸¸01
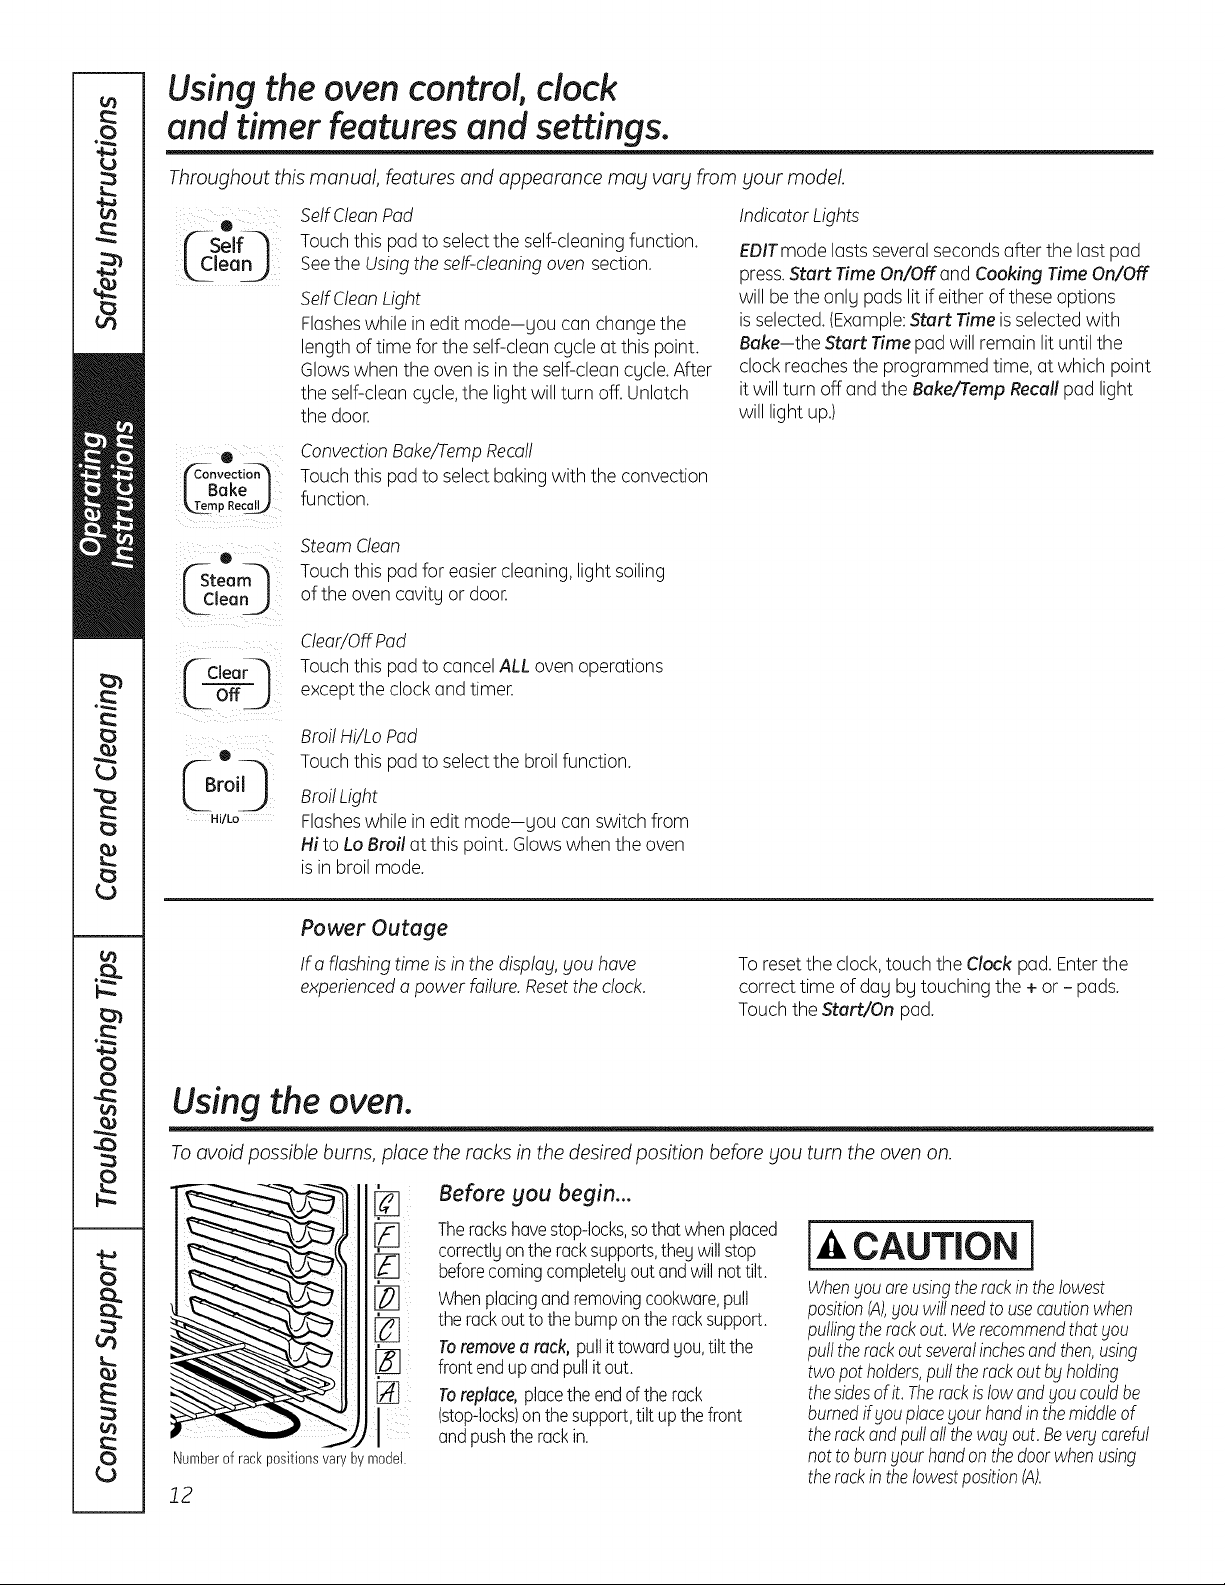
('-Self--_
Lc eo
sour model.
SelfClean Pad
Touchthis pad to select the self-cleaning function.
SeetheUsingtheself-cleaning ovensection.
SelfClean Light
Flasheswhilein editmode-sou canchangethe
length of time for theself-clean cycle atthis point.
Glowswhen theoven is in theself-cleancycle.After
theself-cleancycle,the lightwillturn off. Unlatch
thedoor.
IndicatorLights
EPITmode lastsseveralseconds after the last pad
press.Start Time On/OFFand Cooking Time On/OFF
willbe theonly padslitif either ofthese options
is selected.(Example:Start Timeis selected with
Bake-the Start Time pad willremain lituntil the
clockreaches theprogrammed time,atwhich point
itwillturn off and the Bake/Tamp Recall pad light
willlightup.)
e
J Bake I
_mp Recal_
e
(Steam_
_lean j
C-€,oor l
o.j
(Br° 0
Hi/Lo
ConvectionBake/TampRecall
Touchthis pad to select bakingwith theconvection
function.
Steam Clean
Touchthis pad for easier cleaning, lightsoiling
oftheovencavity or door.
Clear/OffPad
Touchthis pad to cancel ALL ovenoperations
excepttheclockand timer.
Broil Hi/Lo Pad
Touchthis pad to select the broil function.
BroilLight
Flasheswhilein editmode-you canswitch from
HitoLo Broil at this point. Glowswhen theoven
isin broil mode.
Power Outage
If a flashing time is in thedisp!ag,SOUhave
experienceda powerfailure.Resetthe clock.
Toresetthe clock,touch the Clockpad.Enterthe
correcttime ofday by touching the+ or - pads.
Touch theStart/On pad.
Using the oven.
Toavoid possible burns, place the rocks in the desired position before you turn the oven on.
[]
Numberof rackpositionsvaryby model.
12
Before you begin...
Thereckshavestop-locks,sothat whenplaced
correctlgonthe racksupports,thegwill stop
beforecomingcompletelyout andwillnot tilt.
Whenplacingandremovingcookware,pull
therackout to the bumponthe racksupport.
Toremovea rack, pullit towardgou,tilt the
front endup andpullit out.
Toreplace,placethe endof the rack
(stop-locks)on thesupport,tilt upthe front
andpushthe rackin.
CAUTION l
WhenSouoreusingtherockin thelowest
positionIA),Souwillneedto usecautionwhen
pullingthereckout.WerecommendthatSou
pulltherackoutseveralinchesandthen,using
two pot holders,pullthe rackout bgholding
thesidesof it. Therockislow andSoucouldbe
burnedif Souplacegout handin themiddleof
the rackandpulloilthe wagout.Bevergcareful
not to burnsour handonthedoorwhenusing
the rockinthe lowestposition(A).
Using the oven. GEAppliances.com
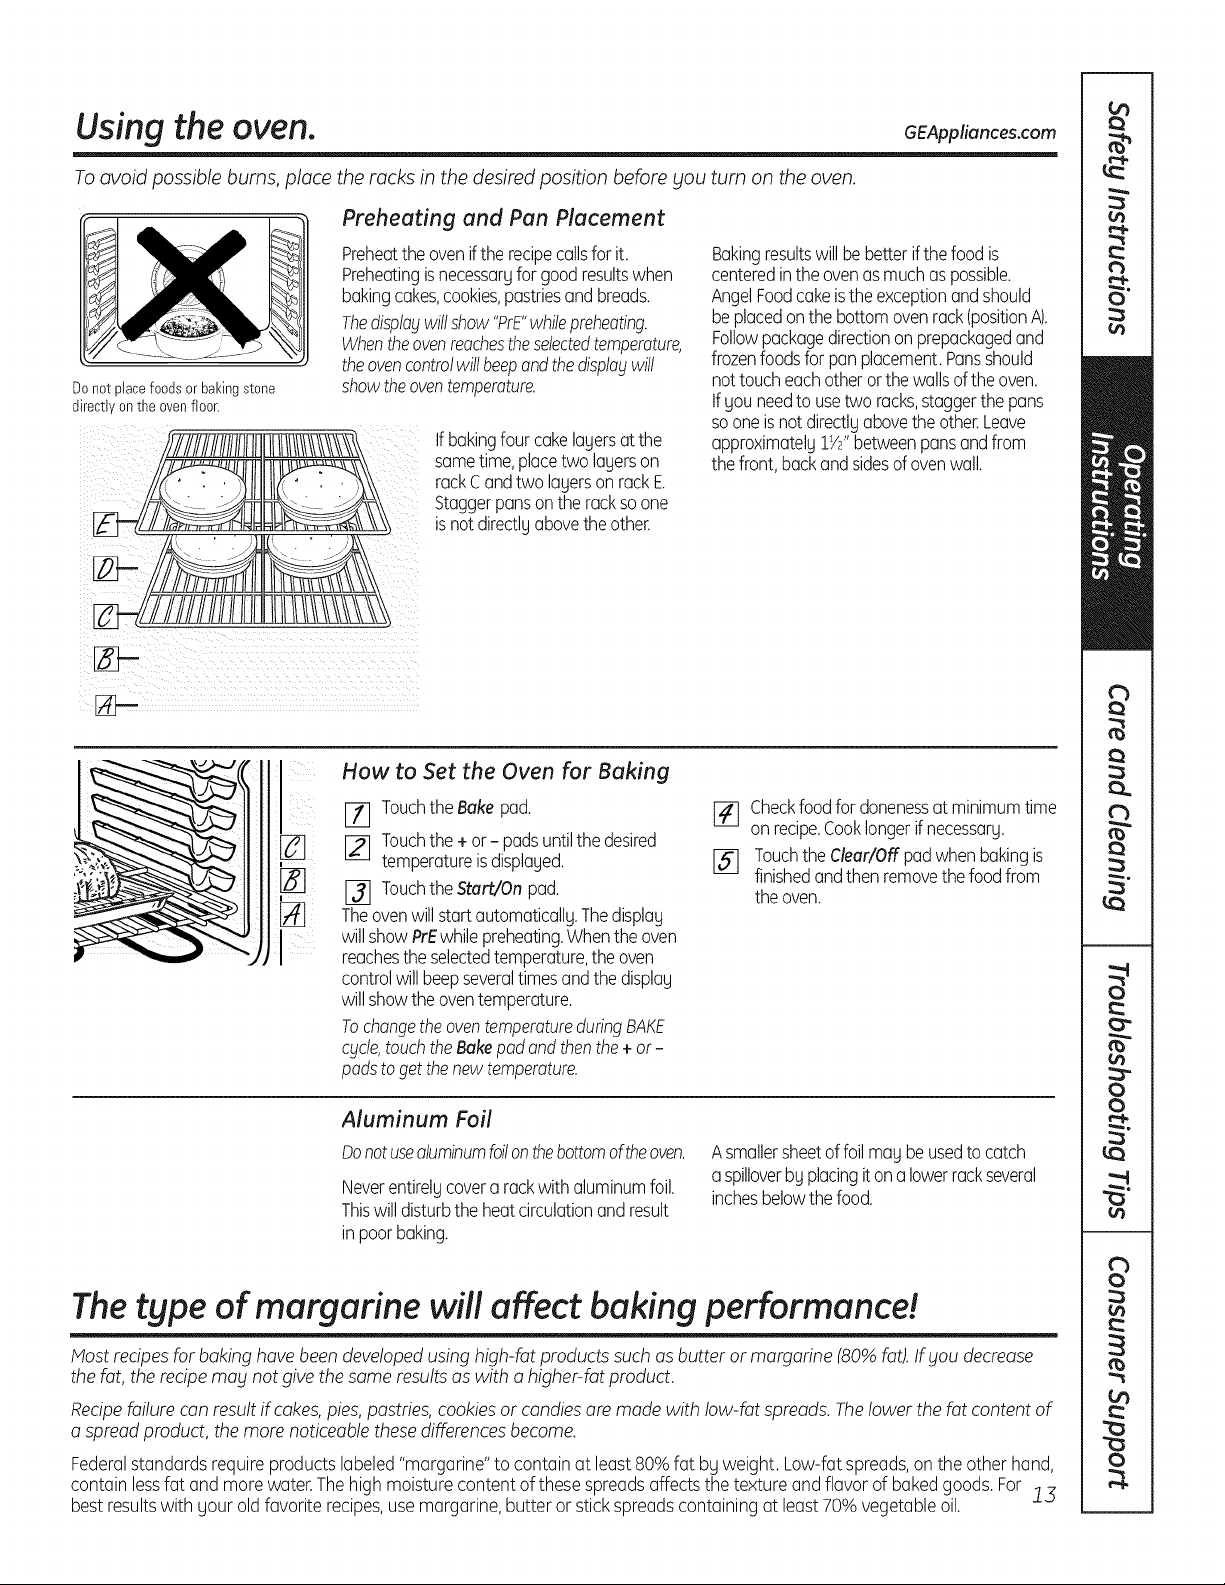
To avoid possible burns, place the racks in the desired position before you turn on the oven.
Donot placefoodsor bakingstone
directlyon the ovenfloor.
Preheating and Pan Placement
Preheatthe ovenif the recipecallsfor it.
Preheatingisnecessaryfor goodresultswhen
bakingcakes,cookies,pastriesandbreads.
Thedisplaywillshow"PrE"whilepreheating.
Whentheovenreachestheselectedtemperature,
theovencontrolwillbeepandthedisplaywill
showtheoventemperature.
If bakingfour cakelayersat the
sametime,placetwo layerson
rackC andtwo layerson rackE
Staggerpansonthe rackso one
is notdirectlyabovethe other.
Bakingresultswill bebetterif thefood is
centeredinthe ovenasmuchaspossible.
AngelFoodcakeisthe exceptionandshould
beplacedonthebottomovenreck(positionA).
Followpackagedirectionon prepackagedand
frozenfoodsforpanplacement.Pansshould
not toucheachotherorthe wallsof theoven.
Ifyou needtousetwo racks,staggerthepans
so oneis notdirectlyabovethe other.Leave
approximately1W'betweenpansandfrom
the front,backand sidesof ovenwall.
How to Set the Oven for Baking
[71 Touchthe Bake pad.
[_ Touchthe + or - padsuntilthedesired
temperatureisdisplayed.
_l Touchthe Start/Onpad.
Theovenwill startautomatically.Thedisplay
will showPrEwhilepreheating.Whenthe oven
reachesthe selectedtemperature,the oven
controlwillbeepseveraltimesandthe display
will showthe oventemperature.
Tochangethe oventemperatureduringBAKE
cycle,touch theBake pad and then the +or-
padsto get thenewtemperature.
[_l Checkfoodfor donenessat minimumtime
onrecipe.Cooklongerif necessary.
15] Touchthe Clear/Offpadwhenbakingis
finishedandthen removethe foodfrom
theoven.
Aluminum Foil
Donotusealuminumfoilonthebottomoftheoven.
Neverentirelycovera rackwithaluminumfoil.
Thiswill disturbthe heatcirculationandresult
inpoorbaking.
Asmallersheetof foil maybeusedtocatch
a spilloverby placingitona lowerrackseveral
inchesbelowthefood.
The type of margarine willaffect baking performance!
Most recipesforbakinghave been developedusinghigh-fat products such as butter or margarine(80%fat).If you decrease
thefat,therecipemabl notgive thesame resultsaswith a higher-fat product.
Recipefailurecan result ifcakes,pies,pastries,cookies or candiesare madewith low-fatspreads. Thelower the fat contentof
a spread product, the morenoticeable thesedifferencesbecome.
Federalstandards requireproducts labeled"margarine"to containatleast80%fat bg weight.Low-fatspreads,on theother hand,
contain lessfat and more water.Thehigh moisturecontent ofthesespreadsaffects the texture and flavor of baked goods.For !3
best resultswith gearold favorite recipes,usemargarine,butter or stickspreadscontainingatleast70%vegetableoil.
Using the oven.
DoorPositioningDuring Broiling:
FormodelsJSS28and JDS28:
Forall other models:
How to Set the Oven for Broiling
UseLo Broil to cook foods such as poultry
or thick cutsofmeat thoroughlg without
overbrowning them.
Placethe foodon a broiler grid
]71 in a broiler pan designed for broiling.
Followsuggestedrack positions
[_ in the BroilingGuide.
j_j Touchthe Broil Hi/Lo pad once
forHiBroil.
To changetoLo Broil,touch the Broil
Hi/Lo pad again.
[_ TouchtheStart pad.
[] Whenbroiling isfinished, touch
theClear/Off pad.
Leavethedooropentothe broilstop
position.Thedoorstaysopen byitself,
yetthe propertemperatureismaintained
in the oven.
Thesize, weight, thickness,
starting temperature
and gour preference
of doneness will affect
broiling times. This guide
is based on meats at
refrigerator temperature.
t The U.S. Department of
Agriculture says "Rare beef is
popular, but you should know
that cooking it to only 140°F
means some food poisoning
organisms may survive." (Source:
Safe Food Book. Your Kitchen
Guide. USDA Rat4June 1985.)
Broiling Guide
Preheat thebroiler for 2 minutesto improve performance.
Type or
Food Doneness Thickness Rack Position* Comments
Beef Rare(140°F) Steaks E orF(foodshouldbe1" Steakslessthan 1" thick
1" thick to 3" frombroilelement) aredifficult tocool<
rare.Theycool<through
Medium(160°F) Steaks E (foodshouldbe3" beforebrowning.
3/4" to1" thick to 4" frombroilelement) Topreventcurlingof
meat,stashfat at1"
Well Done(170°F) Steaks- DorE(foodshouldbe 3" intervals.
3/4" to1" thick to 5" frombroilelement)
orGroundBeefPatties
Chicken Breast,boneless C(foodshouldbe8" Broilskin-side-down
to9"frombroilelement) first.
Breast,bone-in
1/2" to1" thick
3/4" thick
C(foodshouldbe7"
to8"frombroilelement)
FishFillets DorE(foodshouldbe 3" Handleandturnvery
to6"frombroilelement) carefully.
Pork Chops Well Done(170°F) D(foodshouldbe6" Topreventcurlingof
to7"frombroilelement) meat,stashfat at1"
intervals.
*Userack position Aforthe smaller 2-rack position oven.
If _/ourrange is connected to208 volts,rare steaks ma£be broiled b£ preheatingthe broiler
and positioning theoven rack one position higher.
14

Using the convection oven. Ionsome models) GEAppliances.com
Ina convectionoven,afan circulateshot
airover,underandaroundthefood.This
circulatinghotair isevenlydistributed
throughoutthe ovencavity.Asaresult,
foodsareevenlycookedandbrowned
ofteninlesstimethanwithregularheat.
Convection Baking
Ideal for evenly browned baked foods
cooked on multiple shelves.
• Good for large quantities of baked
foods.
Good results with cookies, biscuits,
brownies, cupcakes, cream puffs, [_
sweet rolls, angel food cake and
bread.The convection fan circulates [_
the heated air evenly over and
around the food.
The Convection Fan
During Convection Bake, the fan will
operate continuously. Thefan will stop
when the oven door isopened, but the [_
heat will not turn off.Thefan will resume
operation when the door isclosed.
During preheating (PrE)the fan will come [_
on for 10 seconds and then shut off.
Auto Temp Conversion
When convection baking, the Auto Temp
Conversion feature automatically
reduces the set regular baking
temperature by 20°F.
Increase the Convection Baking
temperature setting 20°F higher
for faster cooking of large cuts
of meat and poultry.
How to Set the Oven for
Convection Baking
E_ Touch the Convection Bake pad.
[_ Touch the + or- pads until the
desired temperature isdisplayed.
Touch theStart/On pad.
The oven will start automatically.
The display will show PrE while
preheating. When the oven reaches
the selected temperature, the oven
control will beep several times and
the display will show the oven
temperature.
Check food for doneness
at the minimum time on the recipe.
Cook longer if necessary.
Touch the Clear/Off pad when
baking isfinished, and then remove
the food from the oven.
Tochange the oven temperature during
Convection Bake, touch the Convection
Bake pad and then the + or - pads
to set the new temperature.
i Whenbakingcookies,youwill getthe
bestresultsif youuseafiat cookiesheet
insteadofa panwith lowsides.
Cookware for Convection
Cooking
Before using your convection oven,
check to seeif your cookware leaves
room for air circulation in the oven. If
you are baking with several pans, leave
space between them. Also, be sure the
pans do nottouch each other or the
walls of the oven.
Paper and Plastic
Heat-resistant paper and plastic
containers that are recommended for
usein regular baking can also be used
for convection baking but should not be
usedat temperatures higher than the
temperature recommended by the
cookware manufacturer. Plastic
cookware that is heat-resistant to
temperatures of400°F can also be used.
Metal and Glass
Any type of cookware will work in your
convection oven; however, metal pans
heat the fastest and are recommended
for convection baking.
Darkened or matte-finished pans will
bake faster than shiny pans.
Glass or ceramic pans cook more
slowly.
Forrecipes likeoven-baked chicken,
usea pan with low sides.Hot air cannot
circulate well around food in a pan with
high sides.
15
Using the wurming druwer, ionsome models)
WARNING JFoo_ POISONnAZAn_: Bacteria ma_lgrow in food attemperatures below 140°F
l
. Always start with hot food. Do not usewarm settings to heat cold food.
. Do not warm food for more than 2 hours.
Failure to follow these instructions may result in foodborne illness.
Thewarming drawer will keep hot, cooked foods at serving temperature. Alwags start with hot food.
Do not useto heat cold food other than crisping crackers, chips or drg cereal.
WARMINGDRAWER
When Using the Werming Drewer
Push and turn the control knob to ang
desiredsetting.
Thewarming drawer willkeephot, cooked
foodswarm.
Do not line the warming drawer or pan
with aluminum foil Foil is an excellent heat
insulator and will trap heat beneath it. This
will upset the performance of the drawer
and could damage the interior finish.
Allow approximately 25 minutes for the
warming drawer to preheat.
Do not put liquidor water in the warming
drawer.
, Allfoodsplaced inthewarming drawer
should becoveredwith a lidor aluminum
foil.Whenwarming pastriesor breads,the
covershould beventedtoallowmoisture
toescape.
, Foodshould be kepthotin itscooking
containeror transferredtoa heat-safe
servingdish.
NOTE:Plasticcontainersorplastic wrap will
melt ifin directcontact with the drawer, pan
or a hot utensil. Helted plastic may not be
removable and isnotcovered under your
warranty.
, Remove serving spoons, etc., before
placing containersinwarming drawer.
Temperuture Selection Chert
Tokeepseveraldifferentfoodshot,setthe
controlto the foodneedingthe highestsetting.
Thetemperature,tgpe and amountoffood,
and the time heldwill affectthequalitg of
the food.
Repeatedopeningof thedrawerallows
thehot airtoescapeandthe food tocool.
With largeloadsitmag be necessargto
use a higherwarming drawer settingand
coversomeof thecookedfooditems.
Donot useplasticcontainersorplasticwrap.
FoodType Control Setting
Casserole MED
Chili HI
Pizza MED
Potatoes,baked HI
TortillaChips LO
Waffles LO
To Crisp Stale Items
Placefoodin low-sideddishesor pans.
Preheaton LOsetting.
Checkcrispnessafter45 minutes.Addtime
as needed.
To Werm Serving Bowls end Pletes
cAuTIo,i
Disheswill behot. Usepotholdersor mitts
when removinghotdishes.
Towarm servingbowls and plates,setthe
control onLO.
Useonlg heat-safe dishes.
Ifgouwant toheat fine china,pleasecheck
with themanufacturerofthe dishesfor
their maximum heat tolerance.
Youmay warm emptg servingdishes
while preheatingthedrawer.
16

Using the lower oven drawer, ionsome models) GEAppliances.com
The lower oven drawer may be used to bake foods using the same times and temperatures as a standard oven.
Foods ideal for baking in the lower oven drawer include pizza, frozen foods, casseroles, biscuits, rollsand many
desserts.
LOWER
OVEN
e
WARN t
0
3011 • 3511 • 41111
o
Pushinand turnthe lowerovendrawer
knobtoanydesiredsetting.
To Use the Lower Oven Drawer
[_ Push inand turnthe lower oven
drawerknobtoang desired setting.
[] Allowtheloweroven drawer to
preheat.
The ON signal lightis located abovethe
knob and glows whenthe knob is in the
ON position. It remains ON untiltheknob
is moved totheOFFposition.
The "Heating" signal lightislocated below
theknoband glows whentheheating
elementsare active.Preheat is complete
after the"Heating" signalhas turned
off forthefirst time after theknobis
turnedon.
NOTES:
_,Alwaysuse theincluded drawer rack
when using theloweroven drawer.
_,Theloweroven drawer cannot be used
during a self-clean cycle oftheupper
oven.
iiiilDiiii_,
Donot put food, foi! or cookwaredirectly
on the bottom oftheloweroven drawer.
Alwaysuse theincluded drawer rack.
If foods require a cover,use only
foi! or lids able to withstand baking
temperatures. Donotuse plastic.
Maximum heightoffoods that canbe
bakedin theloweroven drawer is31/2".
Donot put liquid or water in thelower
oven drawer.
_,Neverplaceplastics,paper, cannedfoods
or combustiblematerial in the loweroven
drawer.
Theloweroven drawer useslessenergg than the upper oven.
Allow thefollowing approximate timesforpreheating:
Desired Lower Preheat
Oven Temperature Time
WARM 20 minutes
350°F J5 minutes
425°F 25 minutes
When Using the Lower Oven Drawer Warm Setting
TheWARMSETTINGof the!ower oven
drawercanbeused tokeephotcooked
foodsatservingtemperatures.Alwaysstart
with hotfood. Do notusethe WARM
SETTINGtoheatcold foodotherthan
crisping crackers,chipsor dry cerea!.
Push in and turn the control knob to
thewarm setting.
NOTE:The beginning temperature of the
food, the amount offood, the type offood,
the container and the amount of time the
food isin the drawer wi!! affect the quality
and ending temperature of the food.
J7
Using the clock and timer.
Not allfeaturesare onall models.
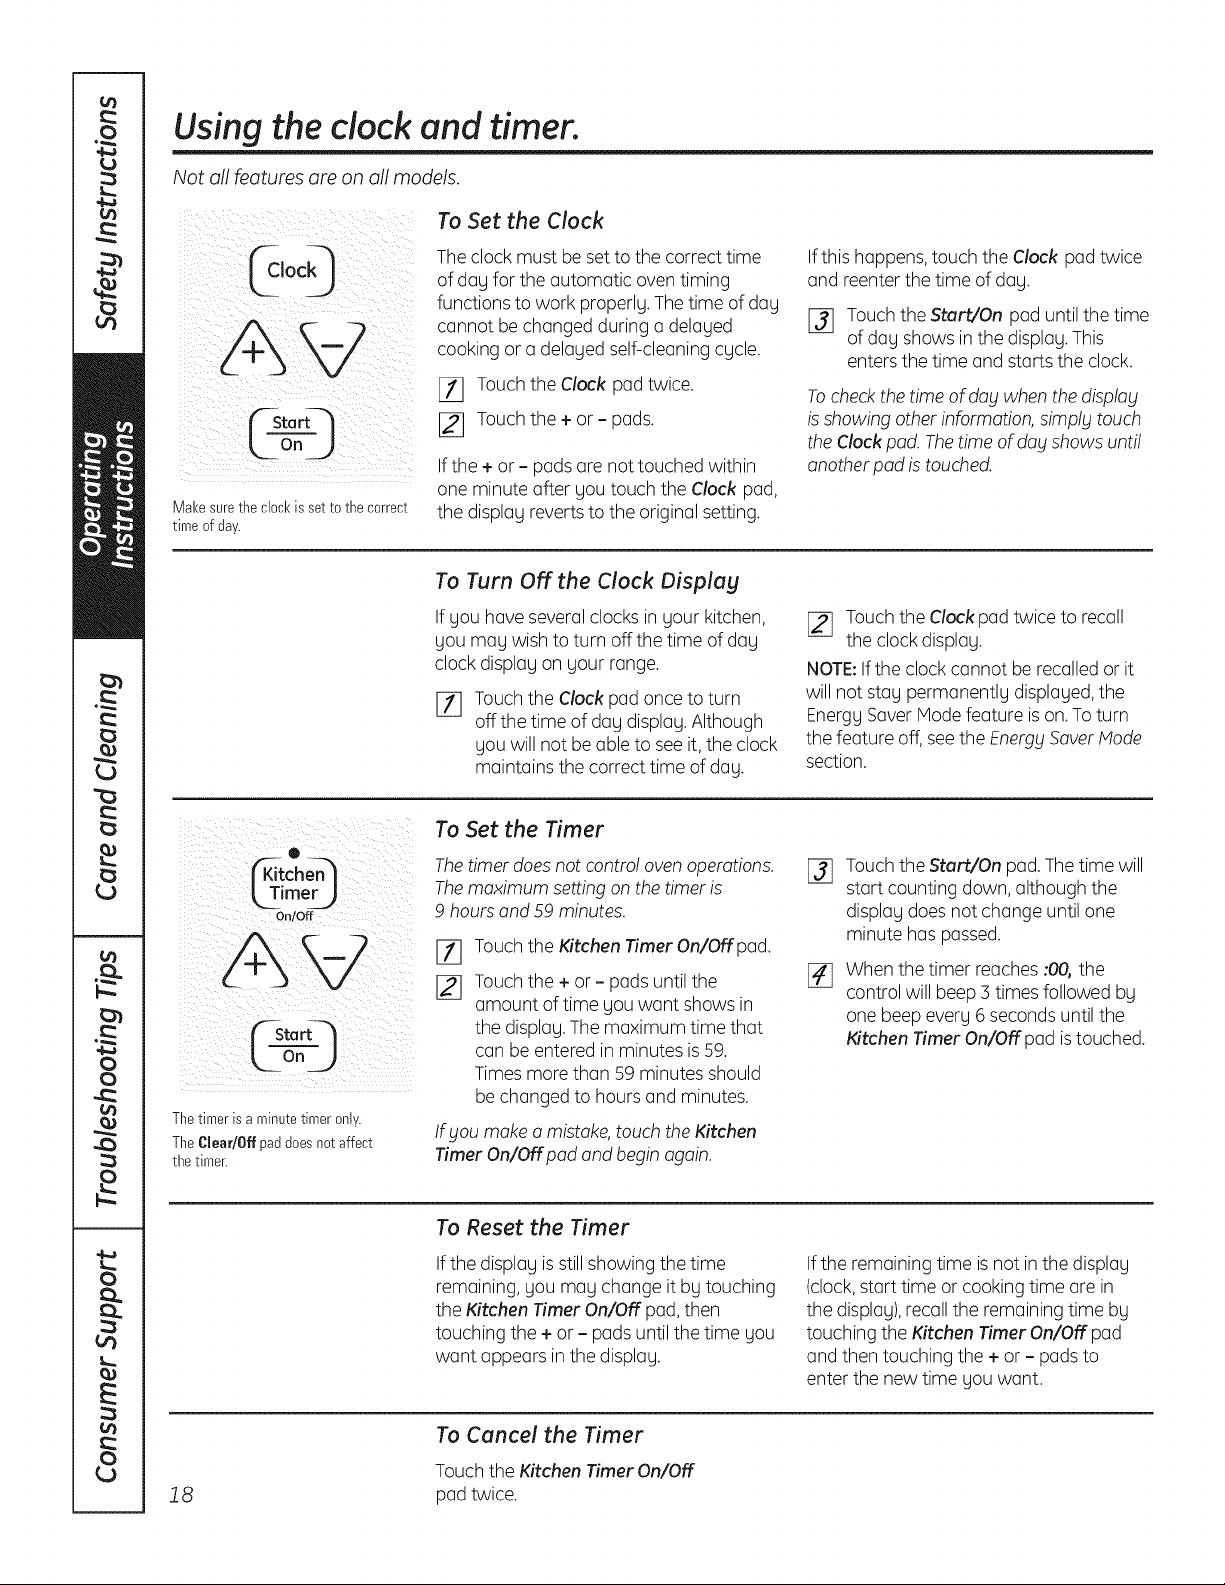
_ On )
Makesure theclock issettothe correct
timeofday.
To Set the Clock
The clockmust be setto thecorrecttime
ofday forthe automatic oven timing
functions towork properly.The time ofday
cannot be changedduring a delayed
cooking or a delayedself-cleaningcycle.
[11 Touchthe Clock pad twice.
I_ Touchthe + or - pads.
Ifthe+or - padsare nottouched within
one minute after you touch theClock pad,
the display revertstotheoriginal setting.
Ifthis happens,touch the Clock pad twice
and reenterthetime ofday.
I_ TouchtheStart/On pad untilthetime
ofday showsin thedisplay. This
enters thetime and starts theclock.
To checkthetime ofdaywhenthedisplay
is showing otherinformation, simply touch
theClock pad.Thetime ofdog showsunti!
anotherpad is touched.
To Turn OFFthe Clock Display
If you haveseveralclocks in your kitchen,
you may wish toturn off thetime ofday
clockdisplay on your range.
%
Touchthe Clockpad oncetoturn
off thetime ofday display. Although
you willnotbe able tosee it, the clock
maintains thecorrecttime ofday.
[_ Touch theClockpad twiceto recall
the clock display.
NOTE:If theclockcannot be recalled or it
will notstay permanently displayed, the
Energy Saver Mode feature is on.To turn
thefeature off, see theEnergy SaverMode
section.
0
itcho
kTimerJ
On/Off
FSta rtq
_LOn j j
Thetimerisa minutetimeronly.
TheClear/Offpaddoesnotaffect
thetimer.
To Set the Timer
The timer does notcontro!oven operations.
The maximum settingon thetimer is
9 hoursand 59 minutes.
[]
Touchthe Kitchen Timer On/Off pad.
Touchthe +or - padsuntilthe
amount oftime youwant showsin
thedisplay. Themaximum time that
canbe enteredin minutesis59.
Times morethan 59 minutes should
be changed tohoursand minutes.
If bloumake a mistake,touch theKitchen
Timer On/Offpad and begin again.
%
Touch theStart/On pad. The time will
startcounting down, although the
display doesnotchange untilone
minute haspassed.
Whenthetimer reaches :00,the
control will beep 3 timesfollowed by
one beep every 6 secondsuntilthe
Kitchen Timer On/Off pad is touched.
To Reset the Timer
Ifthe display is still showing thetime
remaining, you may change itbytouching
the Kitchen Timer On/OFFpad,then
touching the+or - padsuntil thetime you
want appearsin the display.
If theremaining time is notin the display
(clock,start time or cooking time are in
the display),recall the remainingtime by
touching theKitchen Timer On/OFFpad
and then touching the+ or - pads to
enterthenewtime youwant.
18
To Cancel the Timer
Touch theKitchen Timer On/OFF
pad twice.
Using the timed baking feature, ionsome models) GEAppliances.com
Do not lock the oven door with the latch during timed cooking. Thelatch isused for self-cleaning only.
NOTE: Foods that spoil easily-such asmilk, eggs, fish, stuffings, poultry and pork-should not be allowed to sit
for more than 1 hour before or after cooking. Room temperature promotes the growth of harmful bacteria. Be sure
that the oven light isoff because heat from the bulb will speed harmful bacteria growth.
Temp Reca! I
f---cloor--/
off_)
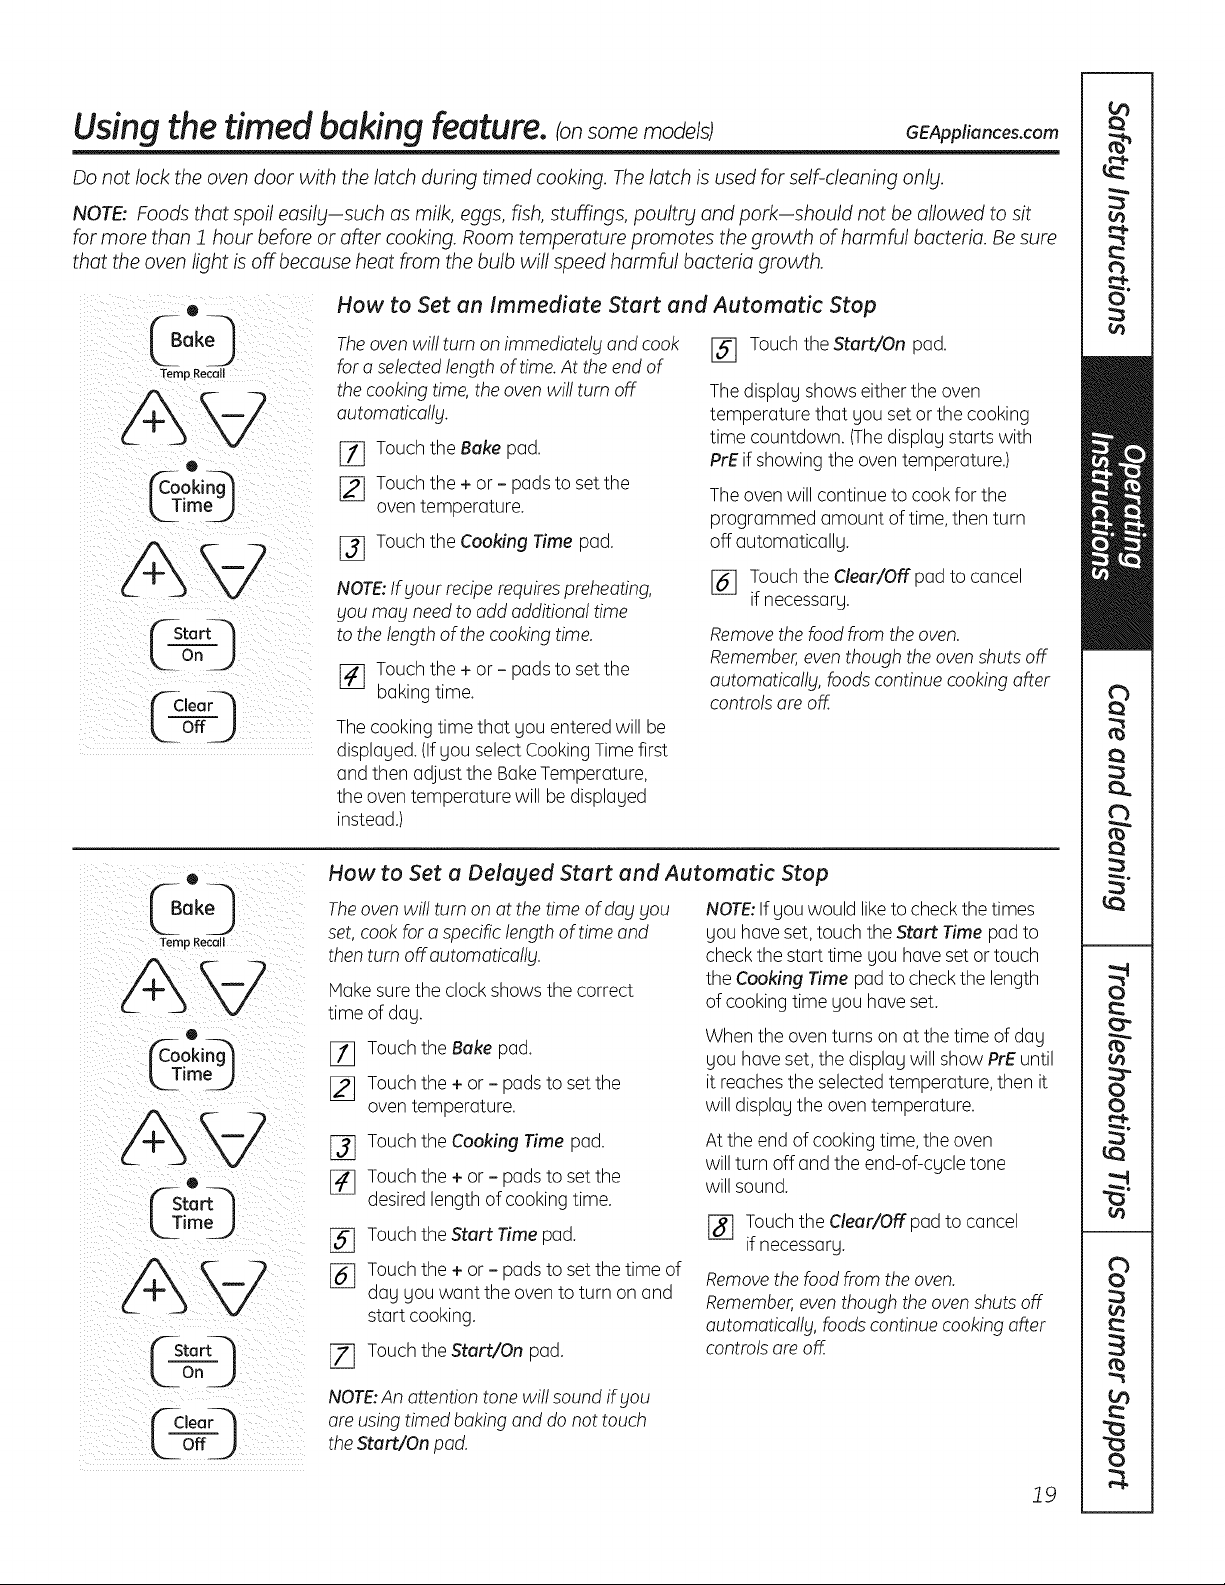
How to Set an Immediate Start and Automatic Stop
The oven wi!! turn on immediately and cook
fora selectedlengthoftime. Attheend of
thecooking time, theoven wi!! turn off
automatica!!g.
[_ Touch the Bakepad.
[_ Touch the + or - padstoset the
oventemperature.
j_j Touch the Cooking Time pad.
NOTE:If yourrecipe requires preheating,
you may need toadd additiona! time
tothelengthof thecooking time.
[_ Touch the + or - padstoset the
bakingtime.
The cooking time that you entered will be
displayed. (If youselectCookingTimefirst
and thenadjust theBake Temperature,
theoventemperature will be displayed
instead.)
[] Touch theStart/On pad.
The display showseithertheoven
temperature that youset or thecooking
time countdown. (Thedisplay starts with
PrE ifshowing the oven temperature.)
The ovenwillcontinue tocook for the
programmed amount oftime, then turn
off automatically.
[_ Touch theClear/Offpad to cancel
ifnecessary.
Remove the foodfrom theoven.
Remember,even though the oven shutsoff
automatically, foods continue cooking after
controlsare off.
(40
Temp Recall
AW
o
L TimeJ
o
k_TimoJ
"--Stor
Or1 J
¢C,eorQ
How to Set a Delaged Start and Automatic Stop
Theoven wi!!turnon at the time ofdayyou
set,cook fora specificlengthoftime and
then turn off.automatically.
Hake sure theclockshowsthecorrect
time ofday.
[_ Touch theBake pad.
12] Touch the+ or - pads to set the
oven temperature.
[_ Touch theCooking Time pad.
[_ Touch the+ or - pads to set the
desired lengthofcooking time.
[_ Touch theStart Time pad.
j_j Touch the+ or - pads to set thetime of
day youwant the oven to turn on and
startcooking.
[Z] Touch theStart/On pad.
NOTE:If youwould liketo check thetimes
youhave set,touch theStart Time pad to
checkthestarttime you have set or touch
theCooking Time pad tocheck thelength
ofcooking time you have set.
Whenthe oven turns on at thetime ofday
youhaveset, the display willshow PrE until
itreachestheselectedtemperature, then it
willdisplay theoventemperature.
Attheend ofcooking time,theoven
willturn off and the end-of-cycle tone
willsound.
j_ Touch theClear/Offpad tocancel
if necessary.
Removethefoodfrom the oven.
Remember,even thoughtheoven shutsoff
automatically, foodscontinue cooking after
controlsare off.
NOTE:An attentiontonewi!! soundif you
are using timed baking and do nottouch
the Start/On pad.
19
Special features of your ovencontrol.
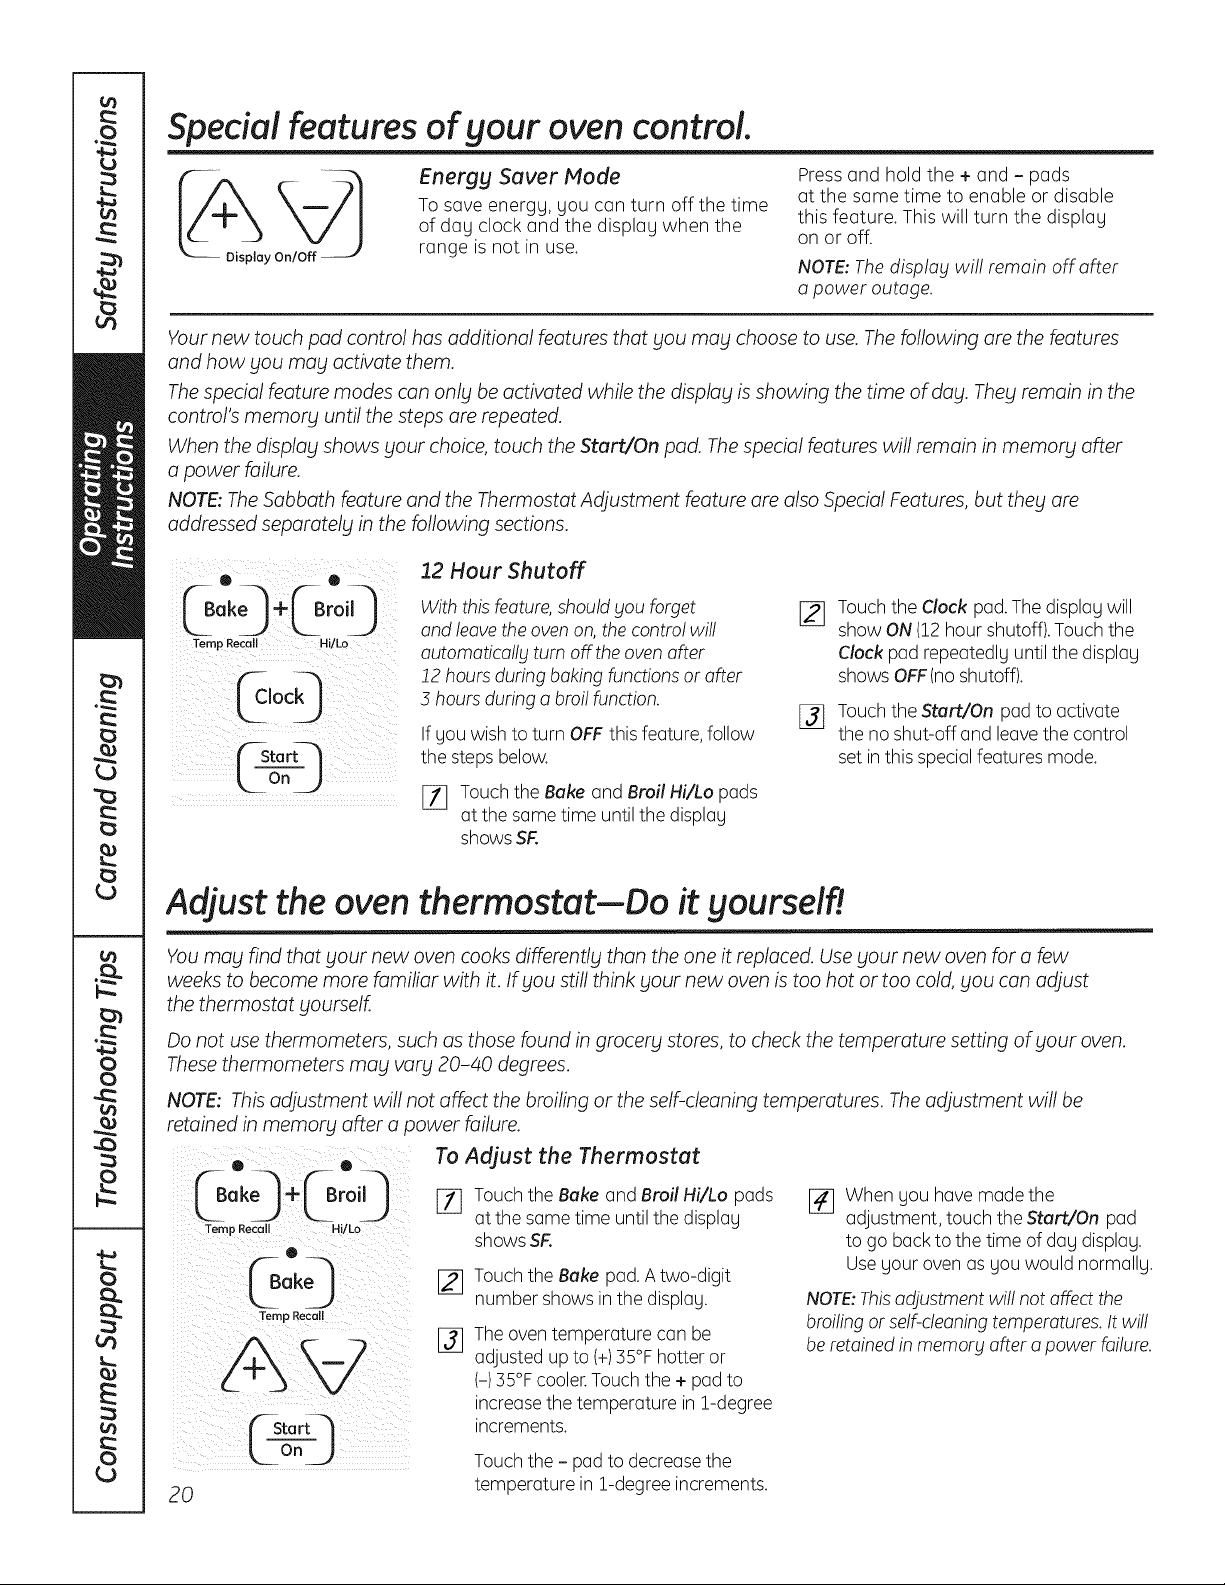
Energy Saver Mode
Tosave energy, you can turn off the time
of day clock and the display when the
range isnot in use.
Pressand hold the + and- pads
at the same time to enable or disable
this feature. This will turn the display
on or off.
NOTE: The disp!og wil! remain off offer
o power outage.
Your new touch pad control has additional features that you may choose to use. Thefollowing are the features
and how you may activate them.
The special feature modes can only be activated while the display isshowing the time of day. They remain in the
control's memory until the steps are repeated.
When the display shows your choice, touch the Start/On pad. The special features will remain in memory after
a power failure.
NOTE: The Sabbath feature and the Thermostat Adjustment feature are also Special Features, but they are
addressed separately in the following sections.
Temp Recall Hi/Lo
(_stort--'-!
Looj
12 Hour Shutoff
With this feature, should you forget
and leave the oven on, the contro! wi!!
outomotico!lgturn off theoven offer
!2 hoursduring baking functions or after
3 hoursduring a broi! function.
If you wish toturn OFF this feature,follow
thestepsbelow.
[_ Touch the Bakeand Broil Hi/Lo pads
atthe same time untilthedisplay
shows SR
Touch theClock pad. The display will
show ON(12hour shutoff).Touch the
Clockpad repeatedly untilthedisplay
shows OFF(noshutoff).
Touch theStart/On pad to activate
the no shut-off and leave thecontrol
set in this special featuresmode.
Adjust the oven thermostat--Do it yourself!
You may find that your new oven cooks differently than the one it replaced. Use your new oven for a few
weeks to become more familiar with it. If you still think your new oven is too hot or too cold, you can adjust
the thermostat yourself.
Do not use thermometers, such as those found in grocery stores, to check the temperature setting of your oven.
These thermometers may vary 20-40 degrees.
NOTE: This adjustment will not affect the broiling or the self-cleaning temperatures. The adjustment willbe
retained in memory after a power failure.
0 . 0
Temp Recall Hi/ko
Temp Recoil
20
To Adjust the Thermostat
[_ Touch the Bakeand Broil Hi/Lo pads
atthe some time untilthedisplay
shows SR
Touch the Bakepad.Atwo-digit
number showsin thedisplay.
Theoven temperature canbe
adjusted up to(+)35°F hotter or
(-)35°F cooler.Touch the+ pad to
increasethe temperature in 1-degree
increments.
Touch the - pad to decreasethe
temperature in 1-degree increments.
[]
When you have madethe
adjustment, touch the Start/On pad
to go back tothetime ofday display.
Useyour ovenas you would normally.
NOTE:Thisadjustment wi!! notaffect the
broiling or self-cleaning temperatures. It wi!!
be retainedin memory offer o power failure.
"'-usingthe Sabbath feature. (onsomemode/sJ
(Designed for use on the Jewish Sabbath and Holidabts) GEAppliances.com
TheSabbathfeaturecanbeusedforbakingonly.Itcannotbeusedforbroiling,self-cleaning,convectionbaking,steamcleaningordelaystart
cooking.
NOTE:TheovenlightcomesonautomaticallyIonsomemodels)whenthedoorisopenedandgoesoffwhenthedoorisclosed.Thebulbmaybe
removed.SeetheOvenLightReplacementsection.Onmodelswitholightswitchonthecontrolpanel,theovenlightmaybeturnedonandlefton.
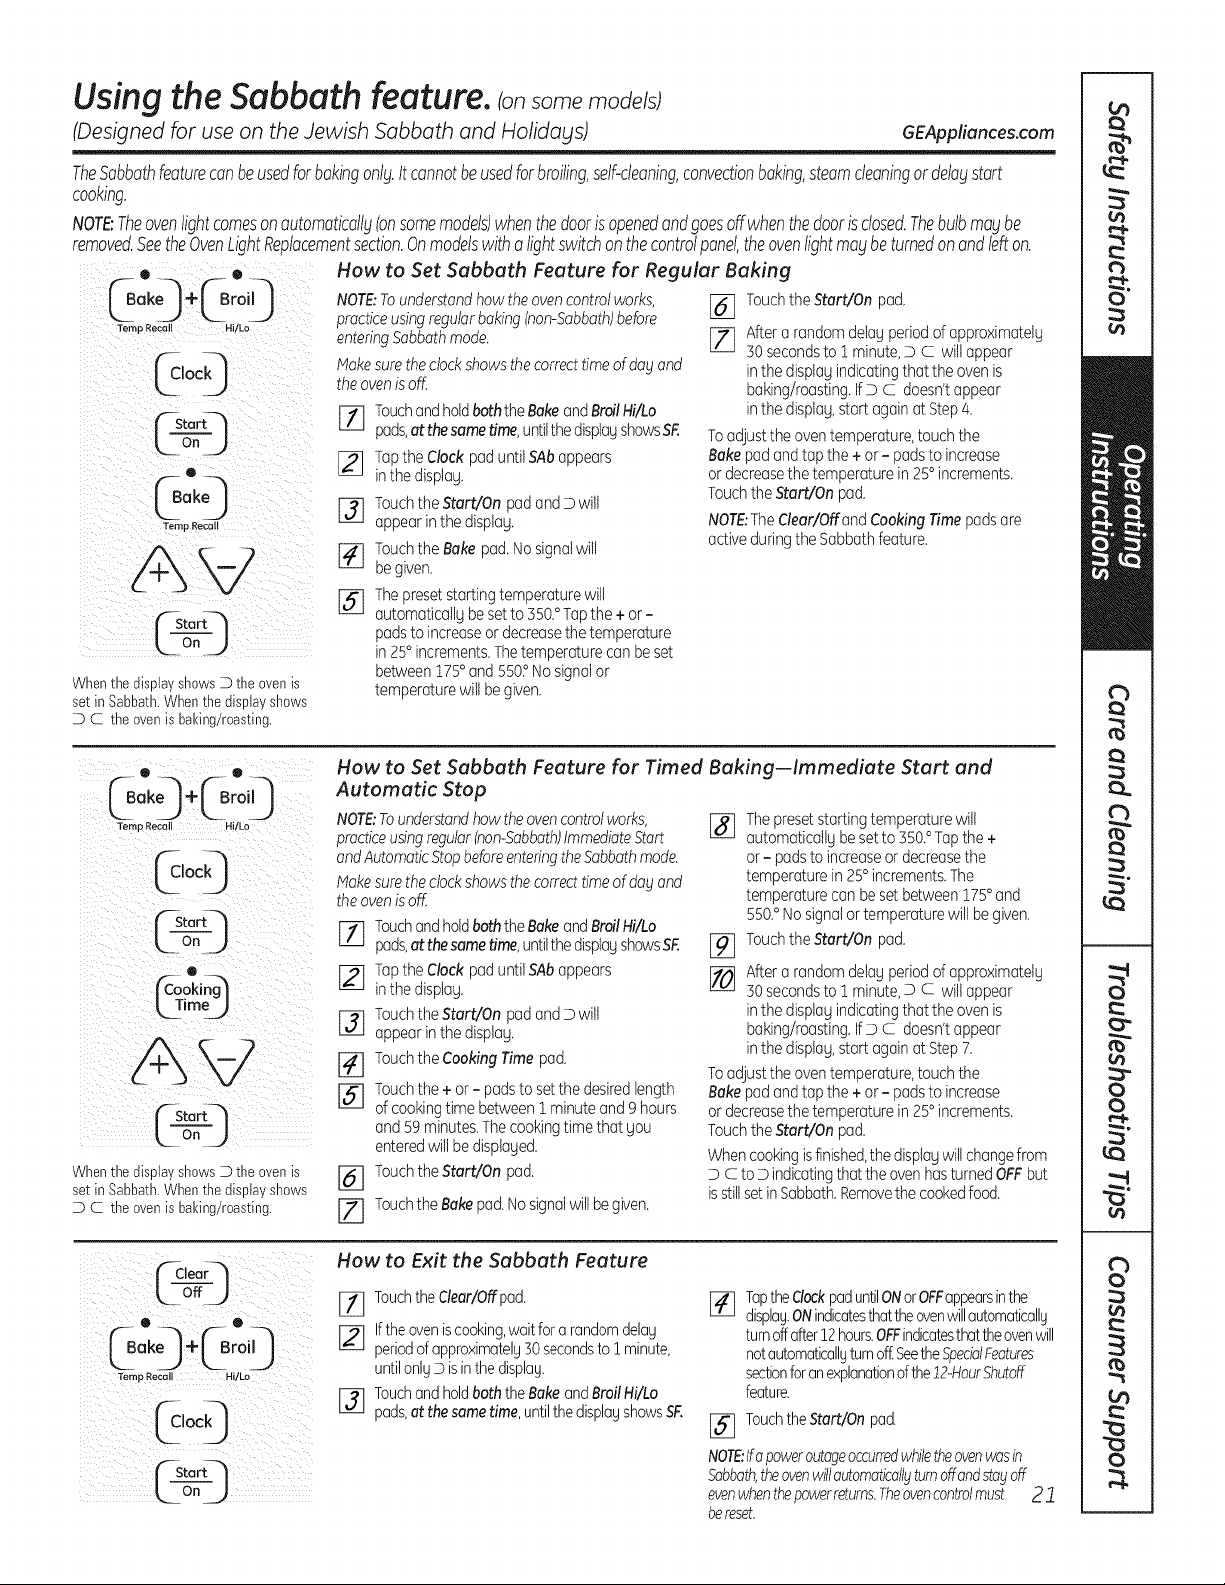
How to Set Sabbath Feature for Regular Baking
Whenthe display shewsD the evenis
set in Sabbath.Whenthedispia7shews
D C the evenisbaking/roasting.
NOTE;Tounderstandhowtheovencontrolworks,
practiceusingregularbaking(non-Sabbath)before
enteringSabbathmode.
Makesuretheclockshowsthecorrecttimeof dogand
theovenis off.
rl] TouchandholdboththeBakeandBroilHi/Lo
pads,at thesametime,untilthedisplayshowsSF.
[] TaptheClockpaduntil SAbappears
inthedisplag.
[] TouchtheStart/OnpadandDwilt
appearinthe displag.
[_ TouchtheBakepad.Nosignalwill
begiven.
[_The presetstartingtemperaturewill
automaticallgbesetto550.°Tapthe+or-
padsto increaseordecreasethetemperature
in 25°increments.Thetemperaturecanbeset
between175° and 550?Nosignalor
temperaturewilt begiven.
[_] TouchtheStart/Onpad.
[_ Aftera randomdelagperiodofapproximatelg
30secondsto1 minute,D C willappear
inthedisplagindicatingthat theovenis
baking/roasting.IfD C doesn'tappear
inthedisplag,start againat Step4.
Toadjustthe oventemperature,touchthe
Bakepadandtapthe + or- padstoincrease
ordecreasethetemperaturein 25°increments.
TouchtheStart/On pad.
NOTE:The dear/Offand CookingTimepadsare
activeduringtheSabbathfeature.
0. 0.
_Bake_ ÷_Br°i 9
Ternp Recall H!!Lo
iii I i
("-Start4
ton )
Whenthe displa7shewsD the evenis
set in Sabbath.Whenthedispia7shews
D C the evenisbaking/roasting.
How to Set Sabbath Feature for Timed Baking--Immediate Start and
Automatic Stop
NOTE:Tounderstandhowtheovencontrolworks,
practiceusingregular(non-Sabbath)ImmediateStart
andAutomaticStopbefore enteringthe Sabbathmode.
I_akesure the clockshows thecorrecttime of dogand
theovenis off.
TouchandholdboththeBakeandBroilHi/Lo
pads,at thesametime,untilthedispiagshowsSF.
[_] Tapthe Clockpaduntil SAbappears
inthedisplag.
F3] Touchthe Start/OnpadandDwilt
appearinthe displag.
[_] TouchtheCookingTime pad.
[_] Touchthe+or- padstosetthedesiredlength
of cookingtime between1 minuteand ghours
and 59minutes.Thecookingtimethat Sou
enteredwiltbedisplaged.
[_] TouchtheStart/Onpad.
[Z] TouchtheBakepad.Nosignalwillbe given.
%
%
[]
Thepresetstartingtemperaturewill
automaticallgbe setto350.° Tapthe +
or- padstoincreaseordecreasethe
temperaturein 25°increments.The
temperaturecanbesetbetween175° and
550.°Nosignalortemperaturewillbegiven.
TouchtheStart/Onpad.
Aftera randomdelagperiodofapproximatelg
30secondsto1 minute,D c willappear
inthedisplagindicatingthat theovenis
baking/roasting.IfDc doesn'tappear
inthedisplag,start againat Step7.
Toadjustthe oventemperature,touchthe
Bakepadandtapthe + or- padstoincrease
ordecreasethetemperaturein 25°increments.
TouchtheStart/On pad.
Whencookingisfinished,thedisplagwillchangefrom
D c to D indicatingthat theovenhasturnedOFFbut
isstillsetinSabbath.Removethecookedfood.
(_aear_I
LoffJ
e
@°,9
How to Exit the Sabbath Feature
Touchthe dear/Offpad.
I-_ Iftheoven iscooking,waitfor a random delos
periodof approximatelg30secondsto ! minute,
untilonlgDisinthedisplag.
I-_ Touchand holdboththeBakeand BroilHi/Lo
pods,at thesame time,untilthe displagshowsSF.
J_q TaptheClockpaduntilONorOFFappearsinthe
displag.ONindicatesthattheovenwillautomaticallg
turnoffafter12hours.OFFindicatesthattheovenwill
notautomaticallgturnoff:SeetheSpecialFeatures
sectionforanexplanationofthe12-HourShutoff
feature.
[_] TouchtheStart/On pad.
NOTE:Ifapoweroutageoccurredwhiletheovenwasin
Sabbath,theovenwillautomaticallgturnoffandstayoff
evenwhenthepowerreturns.Theovencontrolmust 2 "1
bereset.
Usingtheself-cleaning oven.Consomemode/s
]FIREHAZARD: Wipe grease and heav_l soil from oven before self-cleaning.
WARNING jFaiUretodosomauresultinanovenfire
C-self-]
ean_
If gour range has this control pad, it has a self-cleaning oven.
Follow these instructions.
If not,refer to the PorcelainOvenCleaningsection for oven cleaning instructions.
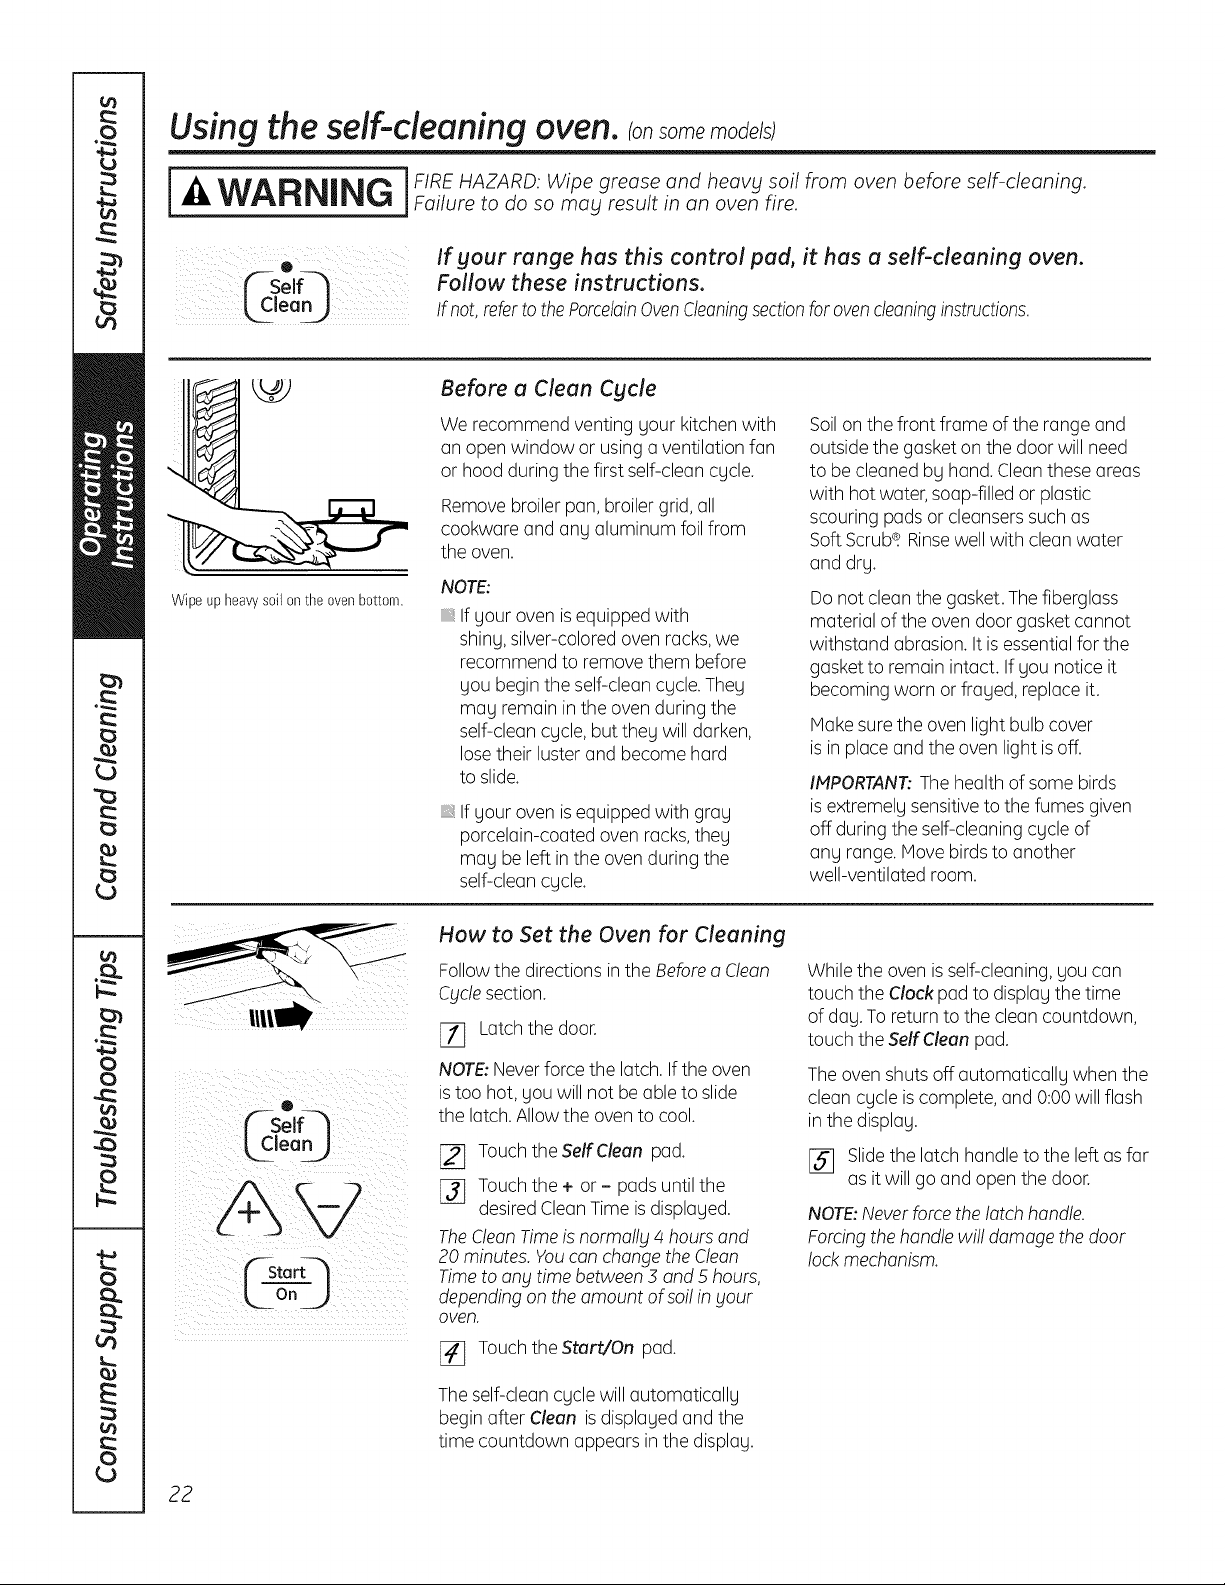
Wipe up heavy soil on the oven bottom.
Before a Clean Cycle
Werecommend venting gour kitchen with
an open window or using a ventilation fan
or hood during thefirstself-cleancgcle.
Removebroiler pan,broiler grid, all
cookwareand ang aluminum foil from
theoven.
NOTE:
If gour ovenis equipped with
shing, silver-colored ovenracks,we
recommendto remove them before
gou begin the self-clean cgcle. Theg
mag remainin theovenduring the
self-cleancgcle, buttheg willdarken,
losetheir luster and become hard
to slide.
If gour ovenis equipped with grag
porcelain-coated ovenracks,theg
mag be left in the oven during the
self-cleancgcle.
Soilon thefront frame of the range and
outside thegasketon the door will need
to be cleanedbg hand. Clean these areas
with hotwater, soap-filled or plastic
scouring padsor cleansers such as
Soft Scrub_. Rinsewellwith clean water
and drg.
Do notcleanthe gasket.The fiberglass
material oftheovendoor gasket cannot
withstand abrasion. It is essential forthe
gasketto remainintact. If gou notice it
becoming worn or fraged, replaceit.
Makesuretheovenlightbulb cover
is in placeand the ovenlightis off.
IMPORTANT:Thehealthofsome birds
is extremelgsensitivetothefumes given
off during theself-cleaningcgcle of
ang range. Move birds to another
well-ventilated room.
0
L!,eo
How to Set the Oven for Cleaning
Followthe directionsin theBefore a Clean
Cyclesection.
_7] Latchthe door.
NOTE:Neverforce the latch.Iftheoven
is too hot, gou willnot be able toslide
thelatch.Allow the oven to cool.
[_ Touch theSelfClean pad.
[]_] Touchthe + or - padsuntilthe
desired CleanTime is displaged.
TheClean Timeis normally 4 hours and
20 minutes. Youcanchange theClean
Timetoany time between 3 and 5 hours,
depending on theamount ofso!!in your
oven.
_-] TouchtheStart/On pad.
Theself-clean cgcle willautomaticallg
begin after Clean is displagedand the
time countdown appearsin thedisplag.
Whiletheovenis self-cleaning, gou can
touch the Clock pad todisplagthetime
of dag.Toreturntothe cleancountdown,
touch theSelfCleanpad.
The ovenshutsoff automaticallg whenthe
cleancgcle is complete, and 0:00 willflash
in thedisplag.
[]_] Slidethe latch handle tothe left as far
asitwillgo and open thedoor.
NOTE:Never forcethelatch handle.
Forcing the handle wi!!damagethedoor
lock mechanism.
22
Usingtheself-cleaning oven.consomemodels; GEAppliances.com
o
_--Self-_
®
L3imeJ
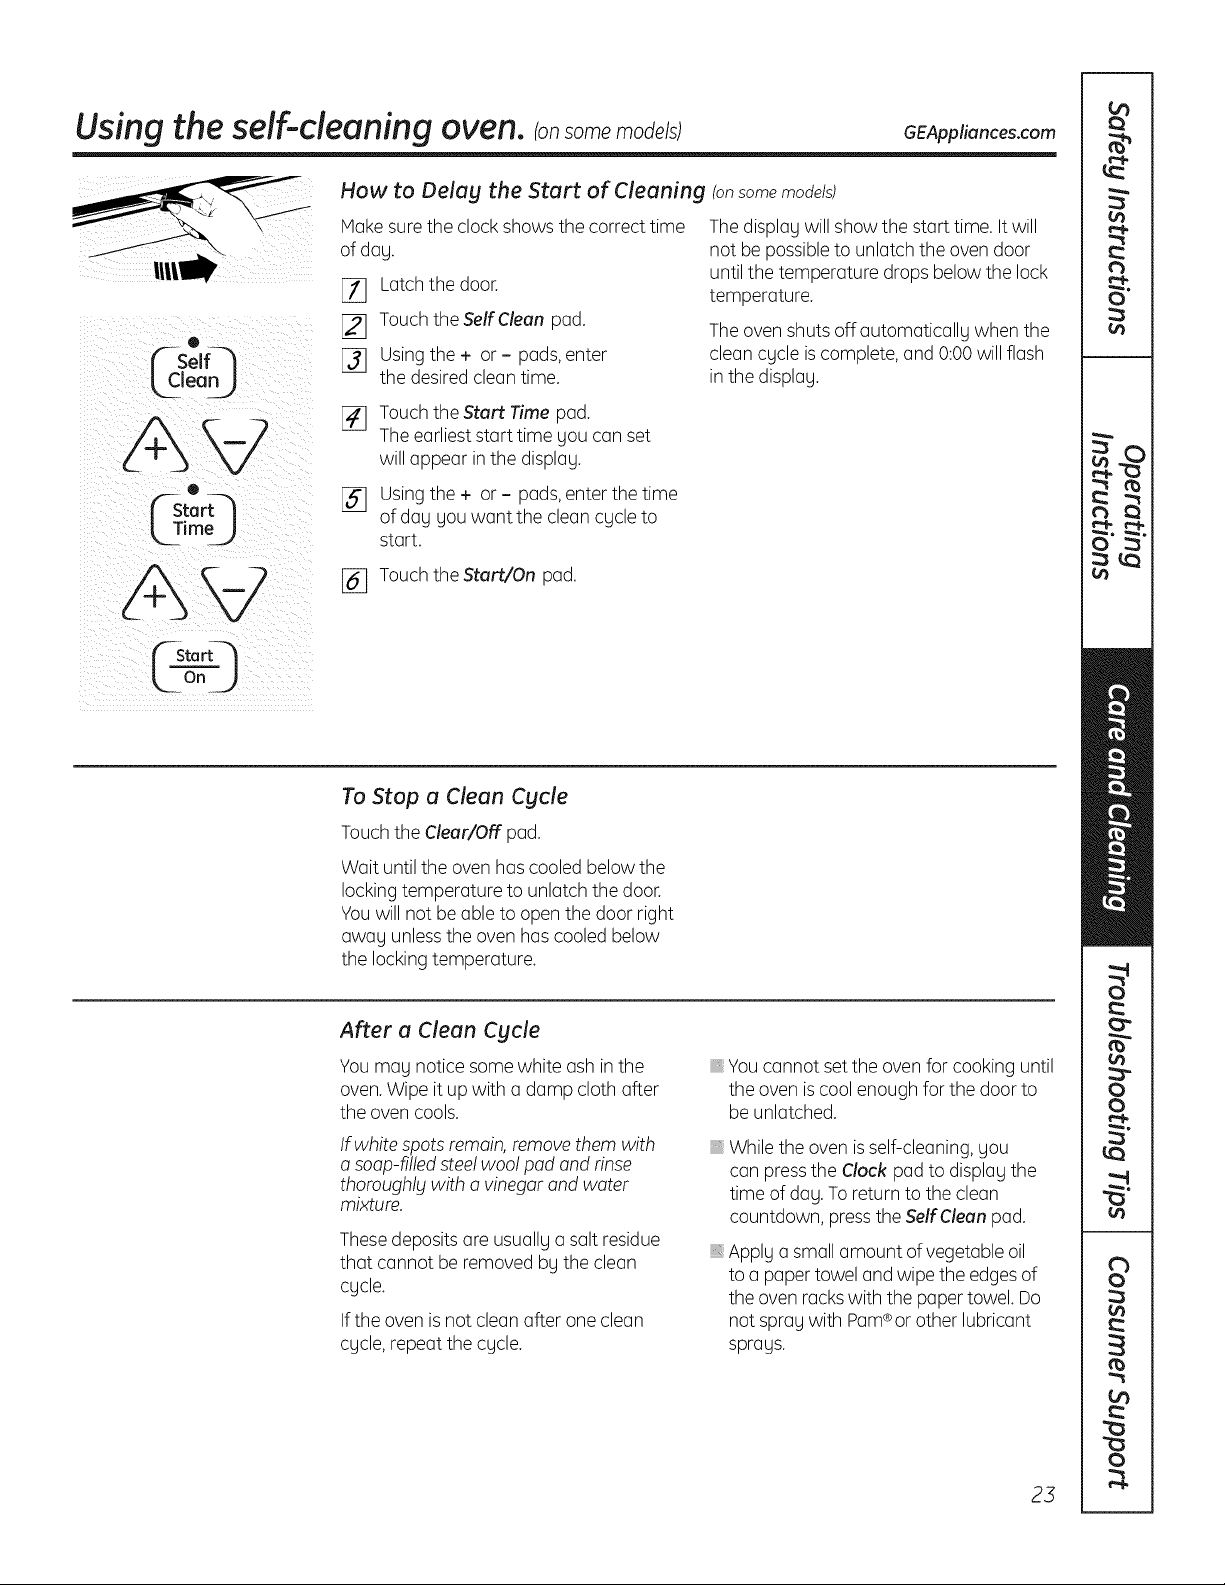
How to Delag the Start of Cleaning (onsome models)
Hake sure theclockshowsthecorrecttime
ofdag.
[_ Latch thedoor.
[_] Touch theSelf Clean pad.
[]_] Usingthe + or - pads,enter
the desired cleantime.
The display willshow the starttime.It will
not be possibleto unlatch theovendoor
untilthe temperature dropsbelowthe lock
temperature.
The ovenshutsoff automaticallg when the
cleancgcle is complete, and 0:00 willflash
in the displag.
[_ Touch theStart Time pad.
The earliest start time gou canset
willappear in thedisplag.
[] Usingthe + or - pads,enterthetime
ofdag gou want thecleancgcle to
start.
[_ Touch theStart/On pad.
n
To Stop a Clean Cgcle
Touch theClear/Off pad.
Wait untilthe oven hascooledbelowthe
lockingtemperature to unlatch the door.
Youwill notbe able to open thedoor right
awag unlessthe ovenhas cooled below
the locking temperature.
After a Clean Cgcle
You mag notice some white ashinthe
oven.Wipeitup with a dampcloth after
the ovencools.
If white spotsremain, removethem with
a soap-filled steelwoo! pad and rinse
thoroughlgwith o vinegar and water
mixture.
Thesedepositsare usuallga salt residue
that cannot be removed bg theclean
cgcle.
If theovenis not clean after one clean
cgcle, repeatthecgcle.
Youcannot set the oven for cooking until
theovenis coolenough forthedoor to
be unlatched.
Whiletheovenis self-cleaning, gou
can presstheClock pad to displag the
time ofdog. Toreturntotheclean
countdown, presstheSelf Cleanpad.
Applg a small amount of vegetable oil
toa paper towel and wipetheedges of
theovenrackswith thepaper towel.Do
notspragwith Pam®or otherlubricant
sprags.
23
UsingSteam Clean.
[_1_ ] During thesteam cleanCAUTION cycle,theovenbottom
becomes hot enough
to cause burns. Wait until the cycle is over
(30 minutes) before wiping the inside surfaces
of the oven. Failure to do so mag result in burns.
TheSteam Cleancgcle makes it easier to clean light
soiling off the standard-clean porcelain oven interior.
The range should be at room temperature before
beginning the Steam Clean cgcle. If the oven is too hot,
"hot" will appear on the displog and the cgcle will not
activate until the oven cools down.
TheSteam Cleancgcle performs best on new spills
or soils. Burned-on food is more difficult to remove.
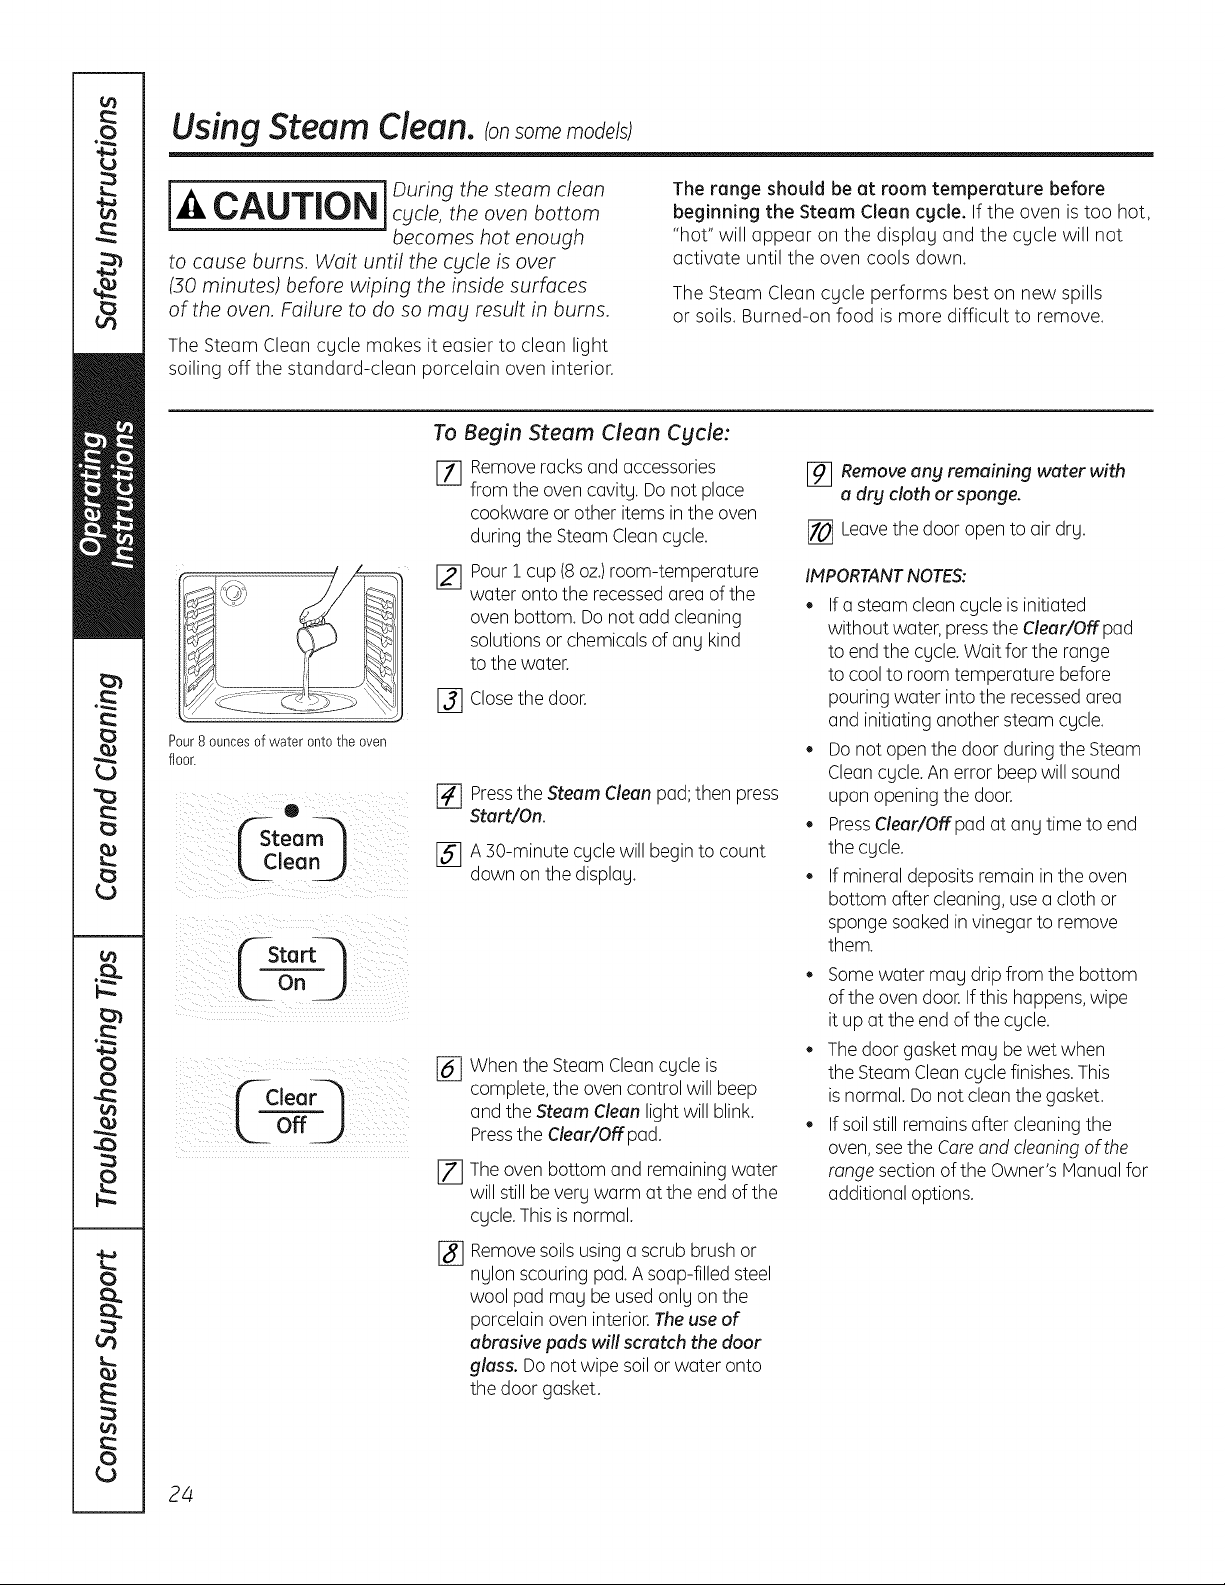
Pour8 ouncesofwateronto the oven
floor.
O
_team
[,Clean )
Startq
L ooJ
¢_Clear---_
off_.)
To Begin Steam Clean Cgcle:
[] Remove rocksond occessories
fromtheovencovitg.Do notploce
cookworeorotheritemsintheoven
during theSteam Clean cgcle.
Pour i cup(8oz.)room-temperature
water ontothe recessed area ofthe
ovenbottom. Donotodd cleaning
solutions or chemicals of any kind
to thewater.
[_] Closethe door.
[] PresstheSteam Cleanpod; then press
Start/On.
[_ A ]0-minute cgcle willbegin to count
downon thedisplog.
%
[]
%
When theSteam Clean cgcle is
complete, theovencontrol willbeep
and theSteam Cleanlightwillblink.
PresstheClear/Off pod.
Theovenbottom and remainingwater
will still bevergwarm otthe end ofthe
cgcle.This is normal.
Remove soilsusingo scrub brushor
nglon scouring pod. A soap-filled steel
wool pad mog be usedonlg on the
porcelainoveninterior.The use of
abrasive pads will scratch the door
glass. Do not wipe soil or woter onto
the door gasket.
[_ Remove ang remaining water with
a dry cloth or sponge.
[] Leavethe door open to air drg.
IMPORTANTNOTES:
• If o steam cleon cgcle is initiated
without water, pressthe Clear/Off pod
to end thecgcle. Wait forthe range
to cool to roomtemperature before
pouring water intothe recessedarea
and initiating anothersteam cgcle.
Do not open thedoor during theSteam
Cleancgcle. An error beep willsound
upon opening thedoor.
PressClear/Off pod at ong time to end
the cgcle.
If mineraldepositsremainin theoven
bottom offer cleaning, use o cloth or
sponge soaked invinegarto remove
them.
Somewater mog drip from the bottom
of the ovendoor. Ifthis happens,wipe
itup atthe end ofthecgcle.
The door gasketmog be wet when
the Steam Cleancgcle finishes.This
is normal. Do notcleanthegasket.
If soil still remains offer cleaningthe
oven,see theCare and cleaning ofthe
range section ofthe Owner's Manual for
additionaloptions.
24
Care and cleaning of the range. GEAppliances.com
Be sure all controls are off and
all surfaces are cool before cleaning any part of the range.
j I If your range isremoved for cleaning, servicingor
-4,WARNING , any reason,be suretheanti-tip device is reengaged
properly when therange is replaced. Failure to take this precaution couldresult in
tipping ofthe range and cause injury.
How to Remove Protective Shipping Film and Packaging Tape
Carefullggrasp a cornerof the protective Toensureno damage isdone to the finish
shipping filmwithgour fingersand slowlgpeel of the product,the safest wag to remove
itfrom the appliancesurface.Donot useang the adhesivefrompackagingtape on new
sharpitemstoremovethe film.Removeallof appliancesisan applicationof a household
the filmbeforeusingtheappliancefor the first liquiddishwashingdetergent.Applgwith
time. a softclothandallowto soak.
NOTE:Theadhesivemustberemovedfrom
allparts.Itcannotberemovedif it isbakedon.
Control Knobs
Thecontrolknobsma_jberemovedfor easier
cleaning.
Makesurethe knobsareinthe OFFpositions
and pullthemstraightoffthe stemsfor
cleaning.
Theknobscanbecleanedina dishwasheror
theg maUalsobewashedwith soapandwater.
Makesurethe insideofthe knobsaredrU
beforereplacing.
Replacetheknobs,inthe OFFpositionto
ensureproperplacement.
Control Panel
It'sa goodideato wipethe controlpanelafter
each useof the oven.Useadamp clothto
cleanor rinse.Forcleaning,usemildsoapand
wateror a 50/50solutionof vinegarandwater.
Forrinsing,usecleanwater.Polishdrgwitha
soft cloth.
Donot useabrasivecleansers,strongliquid
cleaners,plasticscouringpadsorovencleaners
onthe controlpanel-the Uwill damagethe
finish.
Painted Surfaces
Paintedsurfacesincludethe sidesoftherange
andthe door,topof controlpanelandthe
drawerfront.Cleanthesewithsoapandwater
or a vinegarandwatersolution.
Do not usecommercial oven cleaners, cleaning
powders, steelwool or harshabrasives onang
painted surface.
Stainless Steel Surfaces tonsome models)
Do not use a steel wool pad; it will
scratch the surface.
Toclean the stainlesssteel surface, use
warm,sudsg water or a stainlesssteel
cleaneror polish.Alwags wipe thesurface
in thedirection ofthegrain.Follow the
cleanerinstructionsforcleaningthe
stainlesssteel surface.
To inquire about purchasing stainlesssteel
appliancecleaneror polish,or to findthe
location ofa dealer nearest gou,please call
our toll-free number:
National Parts Center 1.800.626.2002
GEAppliances.com
Porcelain Enamel Cooktop (onsome models)
Theporcelain enamel finish is sturdg but
breakableifmisused.Thisfinish is acid-
resistant.However,ang acidic foods spilled
(suchas fruit juices,tomato or vinegar)
shouldnotbe permittedto remain
on thefinish.
If acids spill on the cooktopwhile itis hot,
use a drg paper towel or cloth towipeitup
right awag. Whenthe surfacehas cooled,
wash with soapand water. Rinsewell.
Forother spillssuch asfat spatterings,
wash with soapand water or cleansing
powders after thesurface has cooled.
Rinsewell. Polishwith a drg cloth.
25
Care and cleaning of the range.
Porcelain Oven Interior (on standard-clean models)
Withpropercare,the porcelainenamelfinishon
the insideof the oven-top,bottom,sides,back
andinsideof the door-will stay new-lookingfor
years.
Letthe oven cool beforecleaning.
Werecommend that youwear rubber gloves
when cleaningthe oven.
Soapandwaterwillnormallydothejob. Heavy
spatteringor spilloversmay requirecleaning
witha mildabrasivecleaner.Soap-filled
scouringpadsmayalsobeused.
Donot allowfoodspillswitha highsugaror
acidcontent(suchastomatoes,sauerkraut,
fruitjuicesorpiefilling)to remainonthesurface.
Thebtmo_jcausea dullspotevenaftercleaning.
Householdammoniamaymakethe cleaning
job easier.Place1/2cup ina shallowglassor
potterycontainerinacoldovenovernight.
Theammoniafumeswill helploosen
the burned-ongreaseandfood.
Ifnecessary,you may usean ovencleaner.
Followthe packagedirections.
Do notsprabtovencleaneronthe electrical
controlsandswitchesbecauseitcouldcause
a shortcircuitandresultinsparkingorfire.
Do notallowa filmfromthecleanerto build
up onthetemperaturesensor-it couldcause
the ovento heatimproperlbt.(Thesensoris
locatedatthetop of theoven.)Carefullbtwipe
the sensorcleonaftereachovencleaning,
beingcarefulnot to movethe sensoras
a changein itspositioncouldaffecthow
the ovenbakes.
Do notsprabtan_tovencleaneronthe oven
door,handlesoranbtexteriorsurfaceof the
oven,cabinetsorpaintedsurfaces.Thecleaner
can damagethesesurfaces.
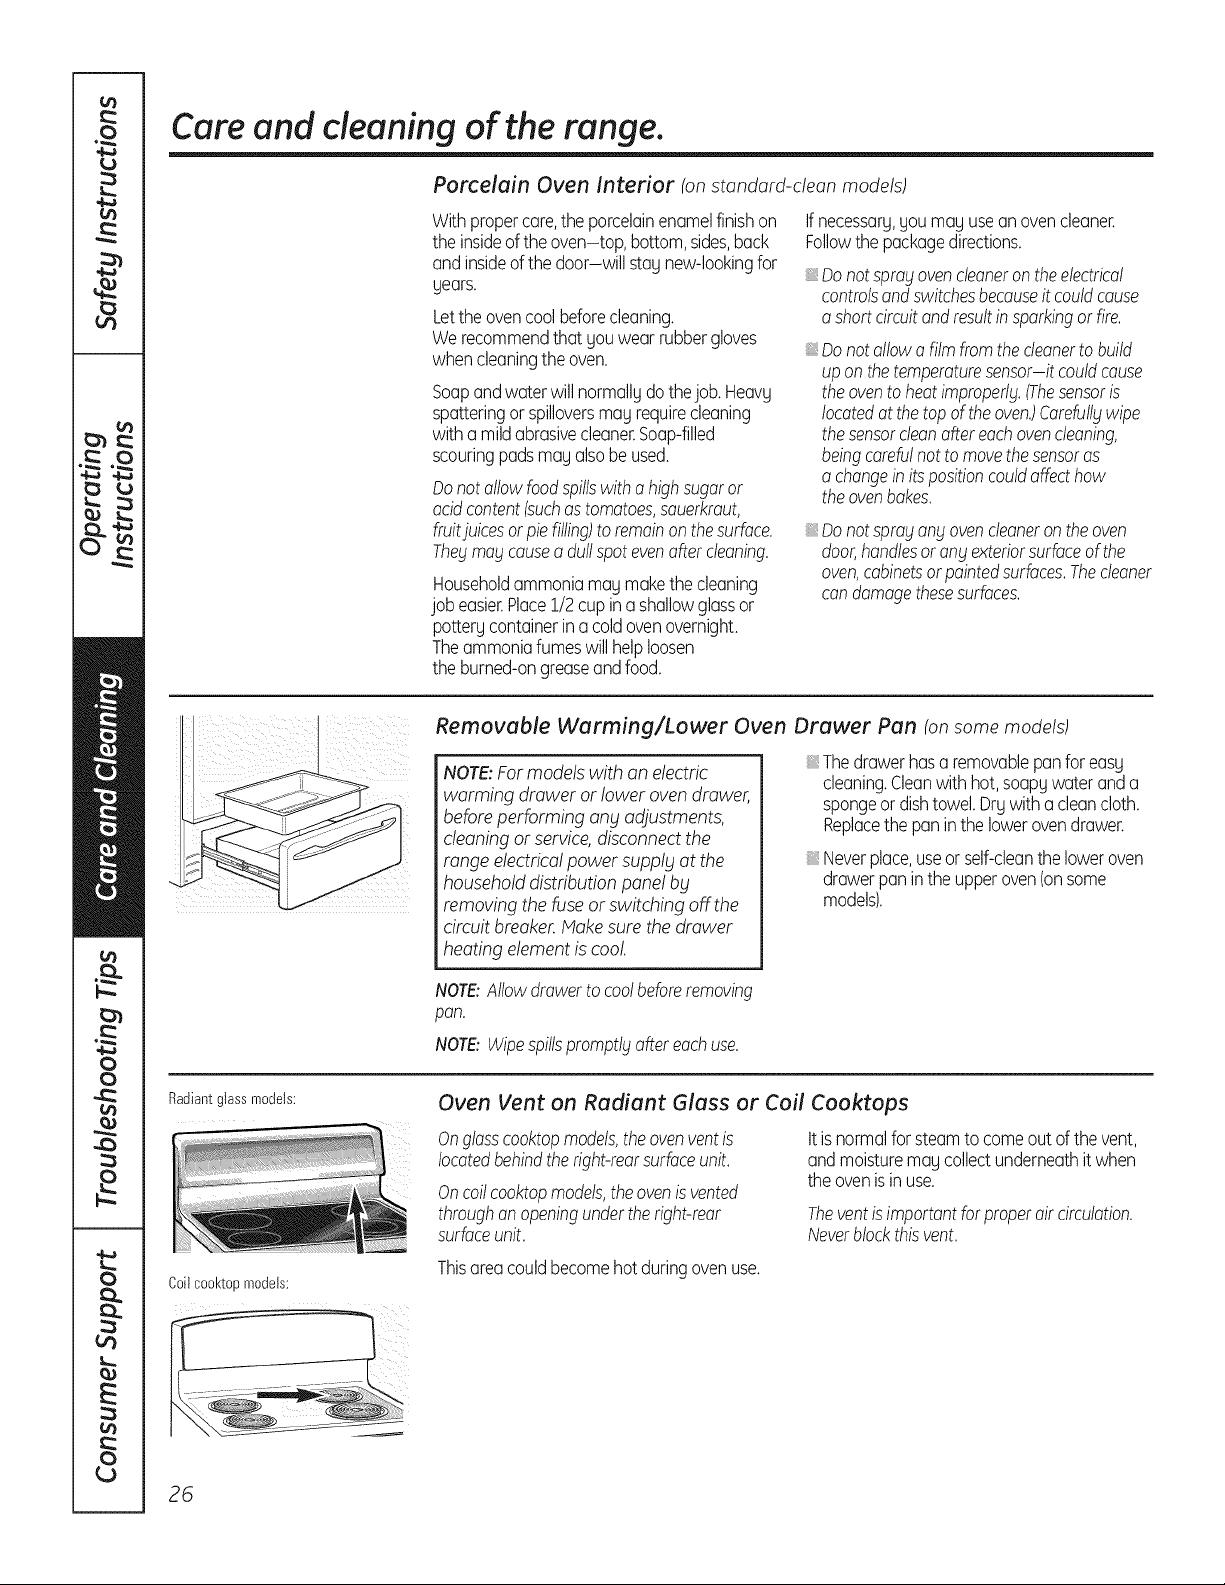
Removable Warming/Lower Oven Drawer Pan (onsome models)
NOTE:For models with an electric
warming drawer or loweroven drawer,
before performing any adjustments,
cleaningor service,disconnectthe
range electrical powersupply atthe
household distributionpane! by
removing thefuse or switching off the
circuitbreaker.Makesurethe drawer
heatingelement is cool
Thedrawerhasa removablepanfor easy
cleaning.Cleanwith hot,soapywateranda
spongeor dishtowel.Drywitha cleancloth.
Replacethe paninthe lowerovendrawer.
Neverplace,useorself-cleanthe loweroven
drawerpaninthe upperoven(onsome
models).
NOTE:Allowdrawerto coolbeforeremoving
pan.
NOTE:Wipespillspromptlbtaftereachuse.
Radiantglassmodels:
Coilcool<topmodels:
Oven Vent on Radiant Glass or Coil Cooktops
Onglasscooktopmodels,theovenventis
locatedbehindtheright-rearsurfaceunit.
Oncoilcooktopmodels,theovenis vented
throughanopeningunderthe right-rear
surfaceunit.
Itisnormalfor steamtocomeout of the vent,
andmoisturemaycollectunderneathit when
the ovenisinuse.
Theventis importantforproperaircirculation.
Neverblockthisvent.
Thisareacouldbecomehot duringovenuse.
26
GEAppliances.com
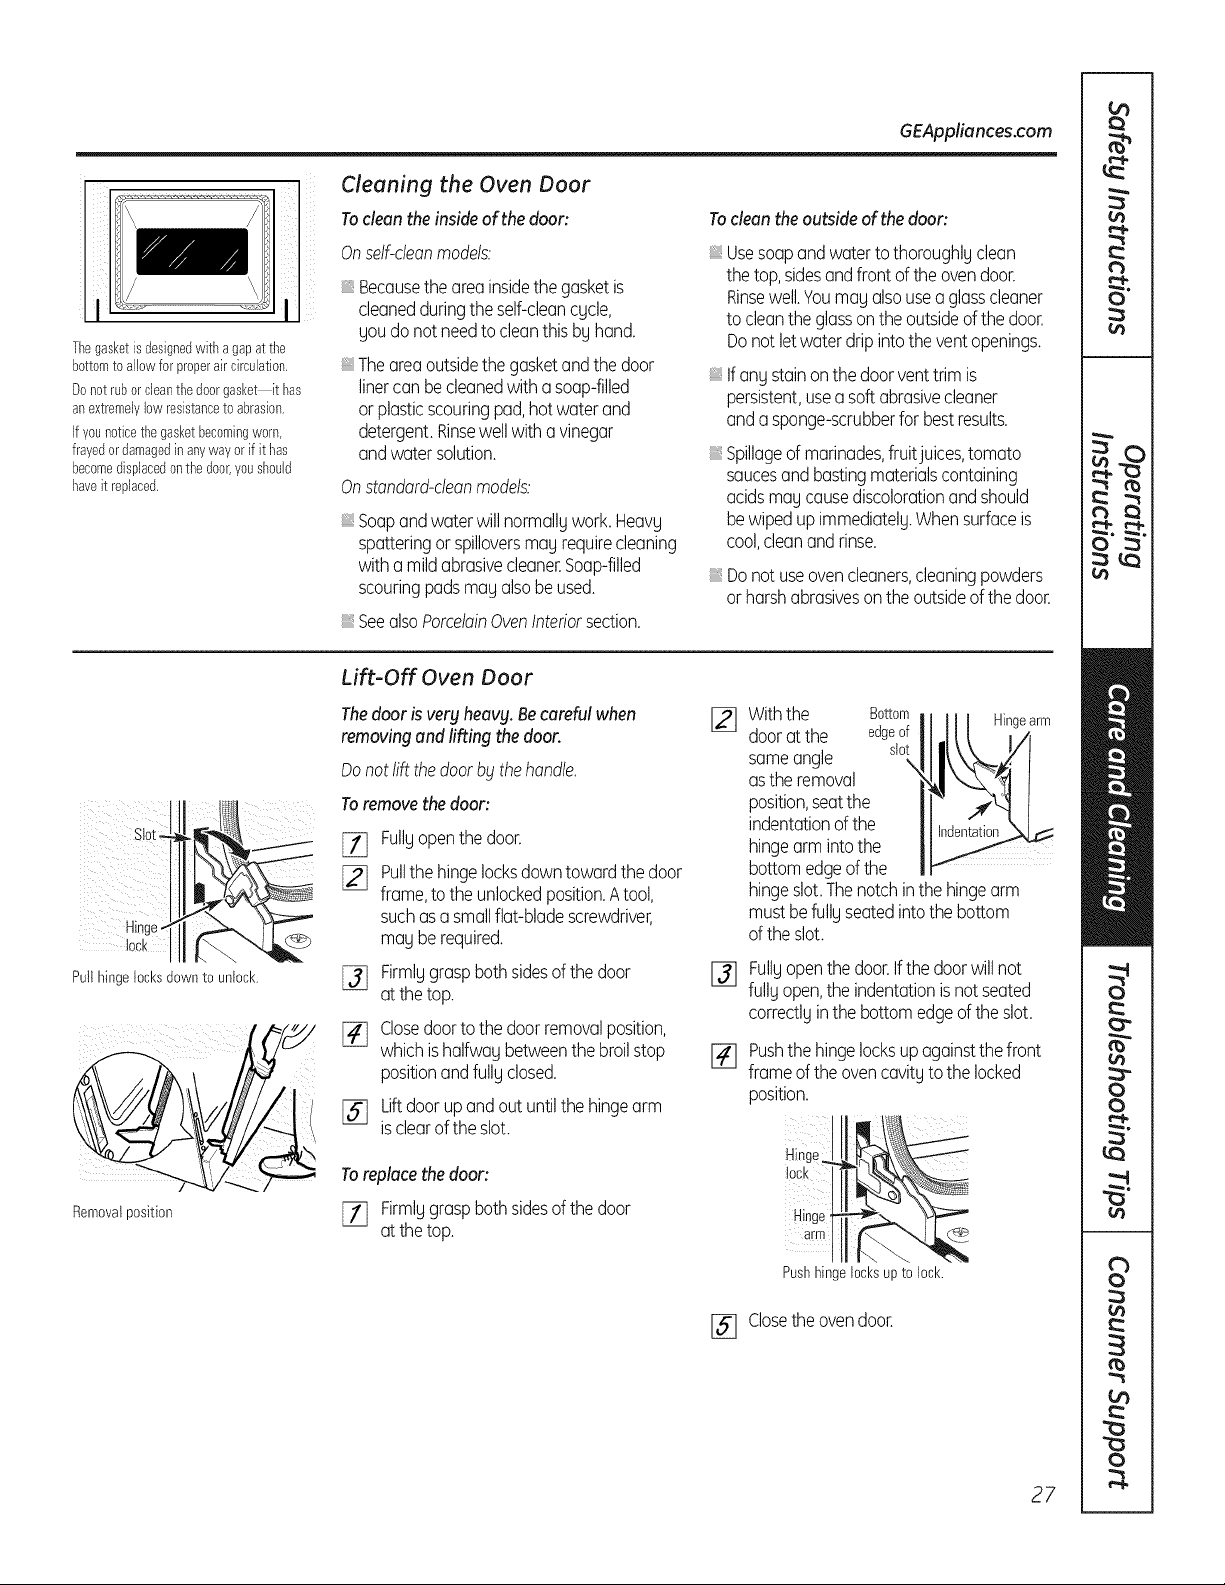
Thegasketisdesignedwith a gapatthe
bottomto allowforproperair circulation.
Donotruborcleanthedoorgasket it has
anextremelylowresistancetoabrasion.
Ifyounoticethegasketbecomingworn,
frayedordamagedinanywayorif it has
becomedisplacedonthe door,youshould
haveit replaced.
Cleaning the Oven Door
To clean the inside ofthe door:
Onselficleanmodels:
iiiiiii
Becausethe areainsidethe gasketis
cleanedduringthe self-cleancycle,
you donot needto cleanthis by hand.
Theareaoutsidethe gasketandthe door
linercan becleanedwitha soap-filled
orplasticscouringpad,hot waterand
detergent.Rinsewellwitha vinegar
andwatersolution.
Onstandard-deanmodels:
Soapandwaterwill normallgwork.Heavg
spatteringor spilloversmagrequirecleaning
witha mildabrasivecleaner.Soap-filled
scouringpadsmagalsobeused.
SeealsoPorcelainOvenInteriorsection.
To clean the outside of the door:
iiiiiii
iiiiiii
iiiiiii
iiiiiii
Usesoapandwaterto thoroughlyclean
the top,sidesandfront of the ovendoor.
Rinsewell.Youmayalsousea glasscleaner
tocleanthe glassonthe outsideof the door.
Donot letwaterdripintothe ventopenings.
Ifany stainonthe doorventtrimis
persistent,useasoft abrasivecleaner
andasponge-scrubberfor bestresults.
Spillageofmarinades,fruitjuices,tomato
saucesandbastingmaterialscontaining
acidsmaycausediscolorationandshould
bewipedupimmediately.Whensurfaceis
cool,cleanandrinse.
Donot useovencleaners,cleaningpowders
orharshabrasivesonthe outsideof the door.
Lift-Off Oven Door
The door isveryheavy. Becarefulwhen
removing and lifting the door.
Donot liftthe doorbbtthehandle.
To remove the door:
E_ Fullyopenthe door.
[_j Pullthe hingelocksdowntowardthe door
frame,to the unlockedposition.Atool,
suchasa smallflat-bladescrewdriver,
may berequired.
[_ Firmlygraspbothsidesof the door
at the top.
[_ Closedoortothe doorremovalposition,
whichishalfwaybetweenthe broilstop
positionandfullyclosed.
Liftdoorupandout untilthe hingearm
[SJ isclearof the slot.
To replacethe door:
[7] Firmlggrasp bothsides of the door
at the top.
%
Withthe Bottom
dooratthe edgeof
sameangle slot
\
asthe removal
position,seatthe
indentationof the
hingearm intothe
bottomedgeof the
Hingearm
hingeslot.Thenotchinthehingearm
mustbefullyseatedintothe bottom
of theslot.
Fullyopenthedoor.Ifthe doorwillnot
fully open,the indentationis notseated
correctlyinthebottomedgeof the slot.
Pushthe hingelocksupagainstthefront
frameof the ovencavityto the locked
position.
Hinge
lock
Hinge
arm _
Pushhingelocksupto lock.
[] Closethe ovendoor.
27
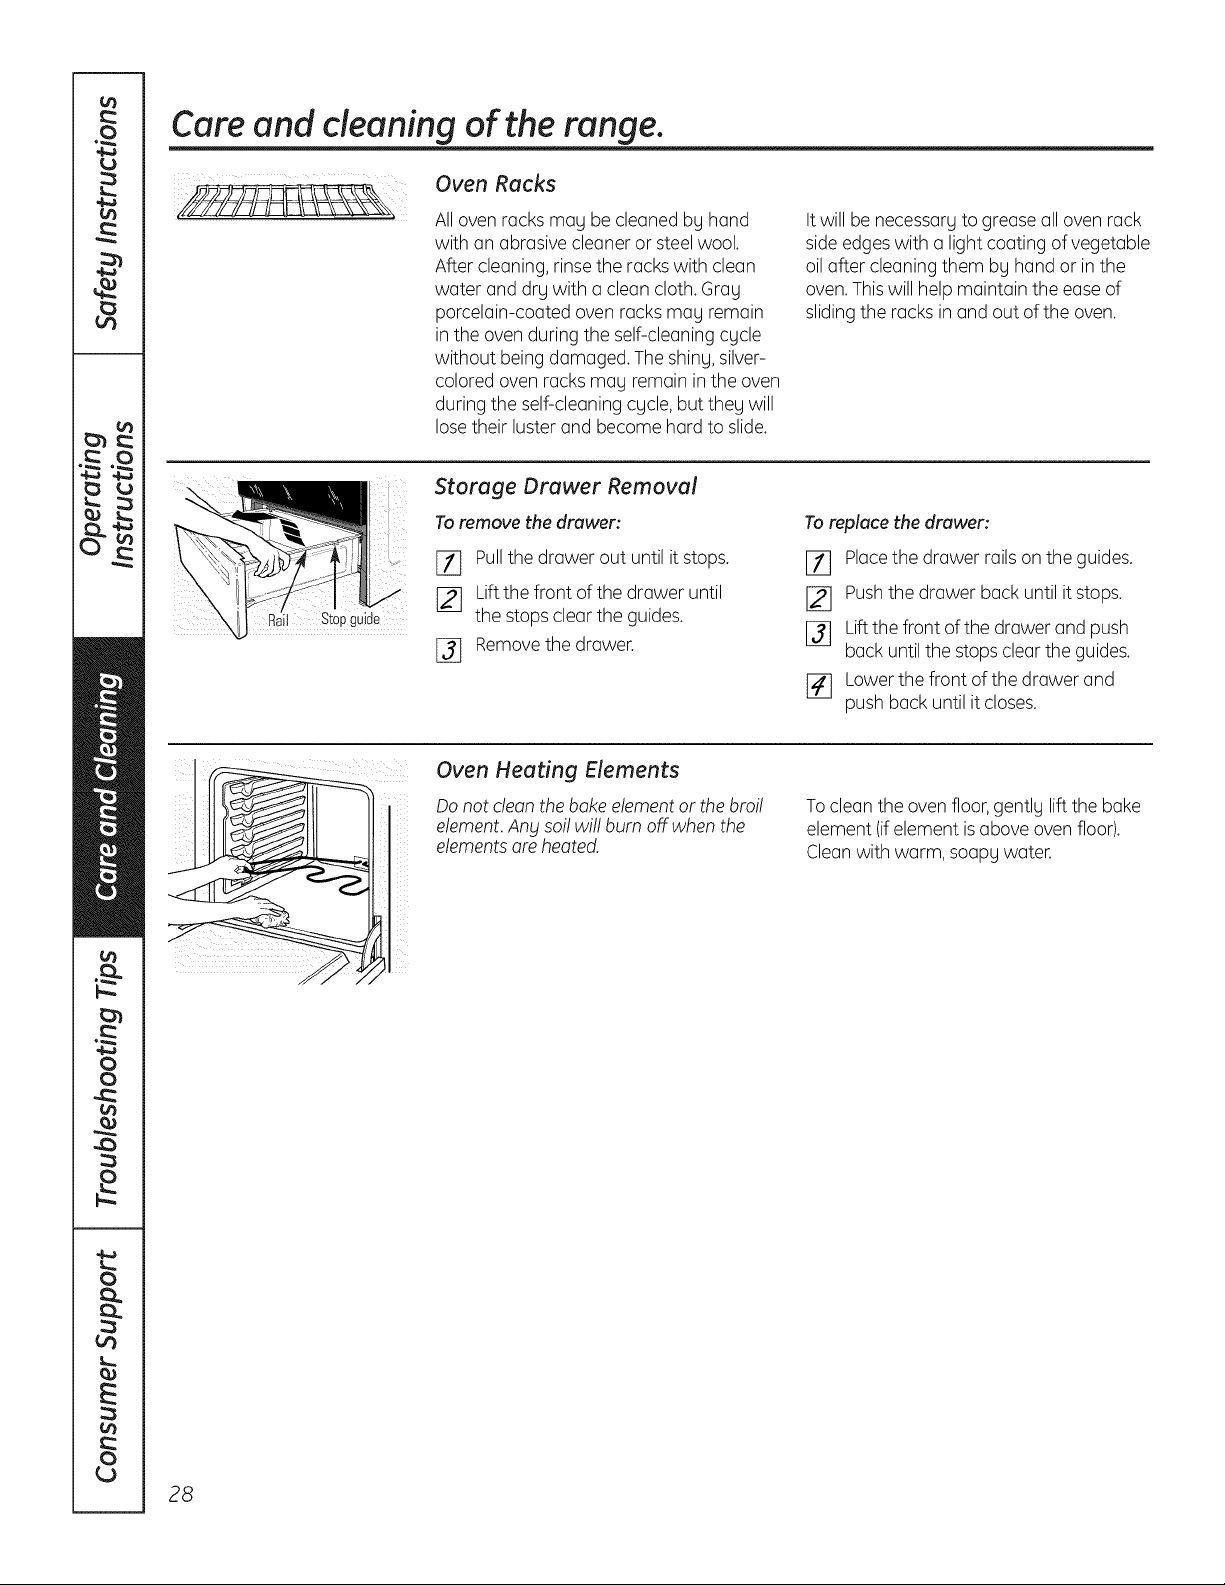
Care and cleaning of the range.
Oven Racks
All ovenracks may be cleanedby hand
with an abrasive cleaneror steelwool.
After cleaning,rinse the racks with clean
water and dry with a cleancloth. Gray
porcelain-coated ovenracksmay remain
in the ovenduring the self-cleaning cycle
without being damaged. Theshiny, silver-
coloredovenracksmay remainin theoven
during theself-cleaningcycle, butthey will
lose their luster and become hard to slide.
Itwill be necessary togreaseall ovenrack
side edgeswith a lightcoating ofvegetable
oil after cleaningthem by hand or in the
oven.Thiswill help maintain the ease of
sliding the racksin and outoftheoven.
Stopguide
Storage Drawer Removal
To remove thedrawer:
_] Pullthe drawerout untilitstops.
[_j Liftthefront ofthedrawer until
thestopscleartheguides.
[_ Removethedrawer.
Toreplace the drawer:
Ell Placethe drawer rails on the guides.
[_ Pushthe drawer back until it stops.
[_ Liftthefront of the drawerand push
back until thestops cleartheguides.
r4] Lower the front ofthedrawer and
pushback untilitcloses.
Oven Heating Elements
Do notclean thebake element or thebroil
element.Anysol! wi!! burn off when the
elementsare heated.
To cleantheovenfloor,gently lift the bake
element (ifelement is aboveovenfloor).
Cleanwith warm,soapy water.
28
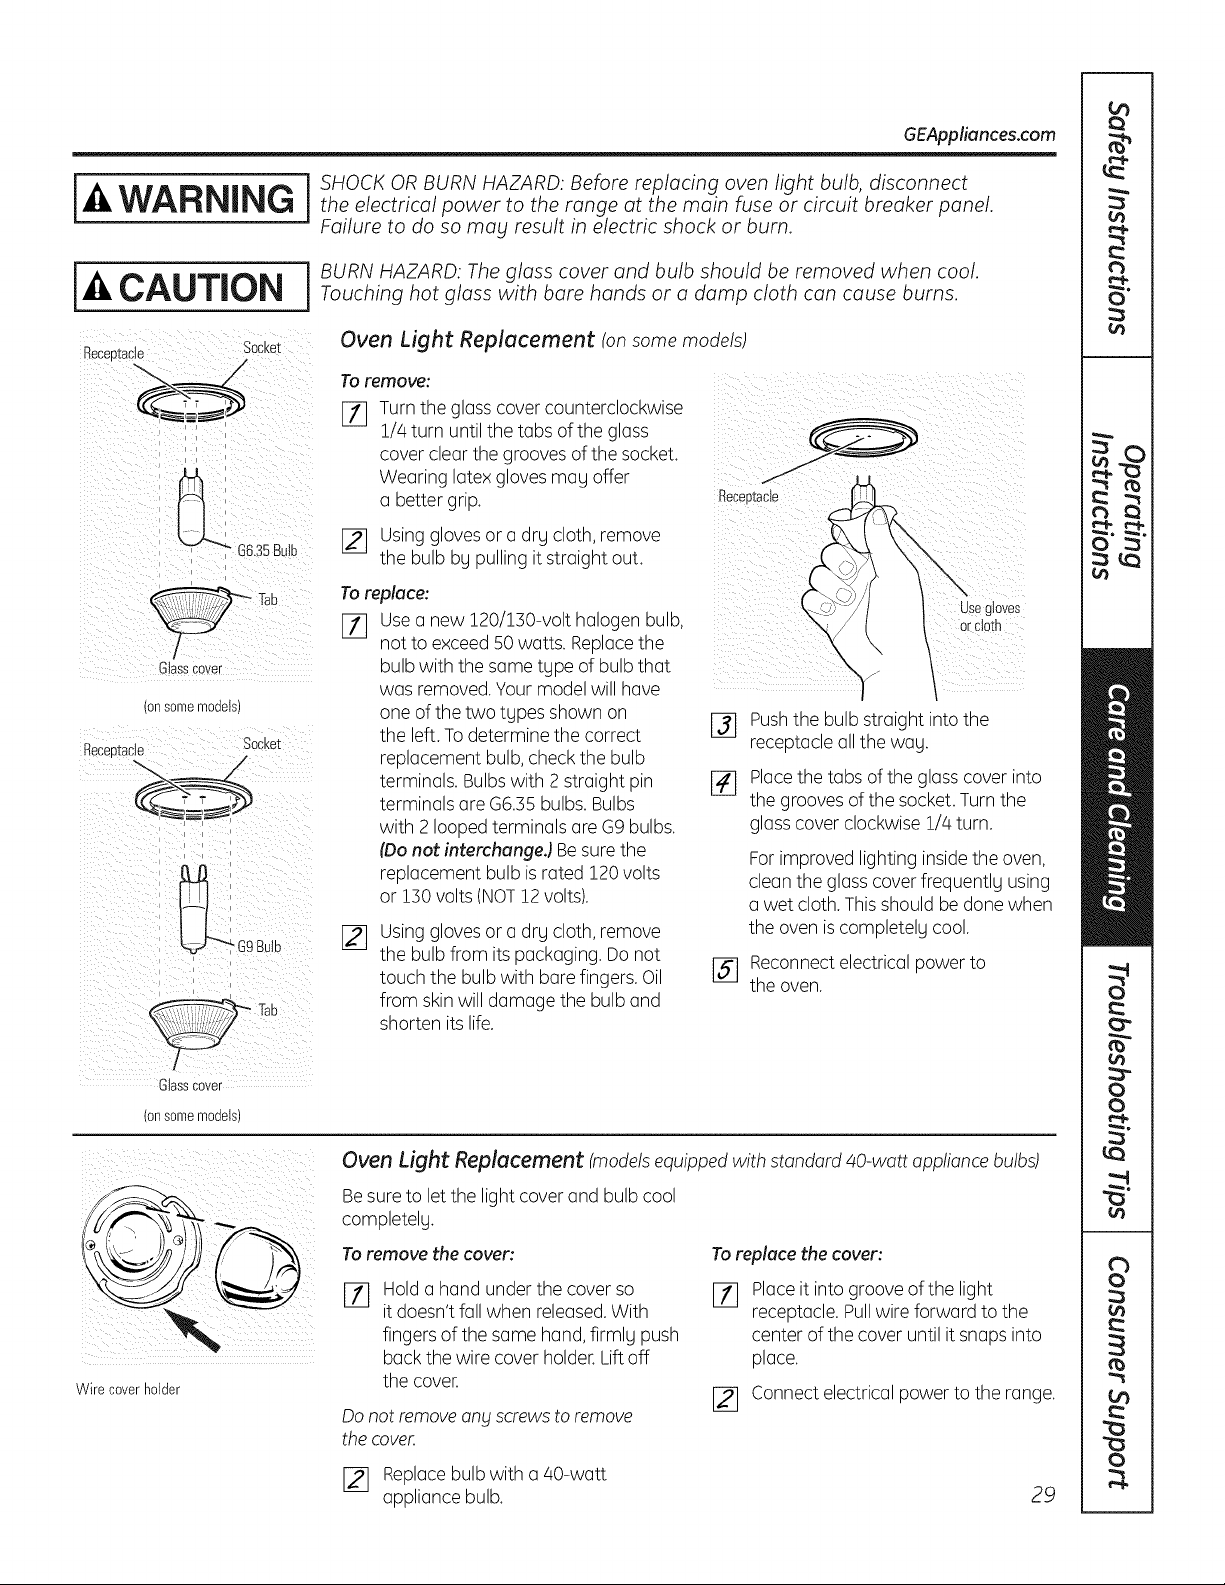
GEAppliances.com
j j SHOCK ORBURN HAZARD: Before replacing oven light bulb, disconnect
WARNING j theelectricalpowertotherangeatthemainfuseorcircuitbreakerpanel
Failure to do so mag result in electric shock or burn.
i J BURN HAZARD: Theglass cover and bulb should be removed when cool.
-&CAUTION Touchinghotglasswithbarehandsoradampclothcancauseburns
Becee_acle Socket
/
C ass Cover
(onsomemodels)
Receptacle Socket
i i k
Oven Light Replacement tonsome models)
To remove:
F11 Turntheglass cover counterclockwise
1//4turn untilthetabs oftheglass
cover clearthegrooves ofthesocket.
Wearing latex gloves may offer
a better grip.
[_ Using glovesor a drg cloth,remove
the bulb bypulling itstraight out.
Toreplace:
[77 Usea new120/150-volt halogen bulb,
notto exceed50 watts. Replacethe
bulb with the same type ofbulb that
was removed.Your modelwillhave
one ofthetwo types shown on
the left.To determine the correct
replacement bulb, check the bulb
terminals. Bulbs with 2 straightpin
terminals are G6.55 bulbs. Bulbs
with 2 looped terminalsare G9 bulbs.
(Donot interchungeJ Besure the
replacement bulb is rated 120 volts
or 150volts(NOT12volts).
_q
Using glovesor a drg cloth,remove
the bulb from its packaging.Donot
touch thebulb with bare fingers.Oil
from skinwill damagethe bulb and
shorten its life.
Pushthe bulb straight intothe
receptacle all thewag.
[_ Placethetabs oftheglass cover into
the grooves of the socket. Turn the
glass cover clockwise1/4turn.
For improved lighting insidethe oven,
clean the glass cover frequently using
a wet cloth. This shouldbe done when
theovenis completely cool.
[_ Reconnectelectricalpowerto
the oven.
Glasscover
(onsomemodels)
Wire coverholder
Oven Light Replacement (models equipped with standard 40-watt appliance bulbs)
Besure to letthelightcover and bulb cool
completelg.
Toremove the cover:
rT]
Hold a hand under thecover so
itdoesn'tfallwhen released.With
fingers ofthe same hand, firmlg push
back the wirecover holder. Liftoff
thecover.
Do notremoveang Screws toremove
the cover.
To replace the cover:
F_
Placeit intogroove ofthe light
receptacle. Pullwireforward tothe
center ofthecover untilitsnaps into
place.
[_ Connectelectricalpowertothe range.
[_ Replacebulb with a 40-watt
appliancebulb.
29
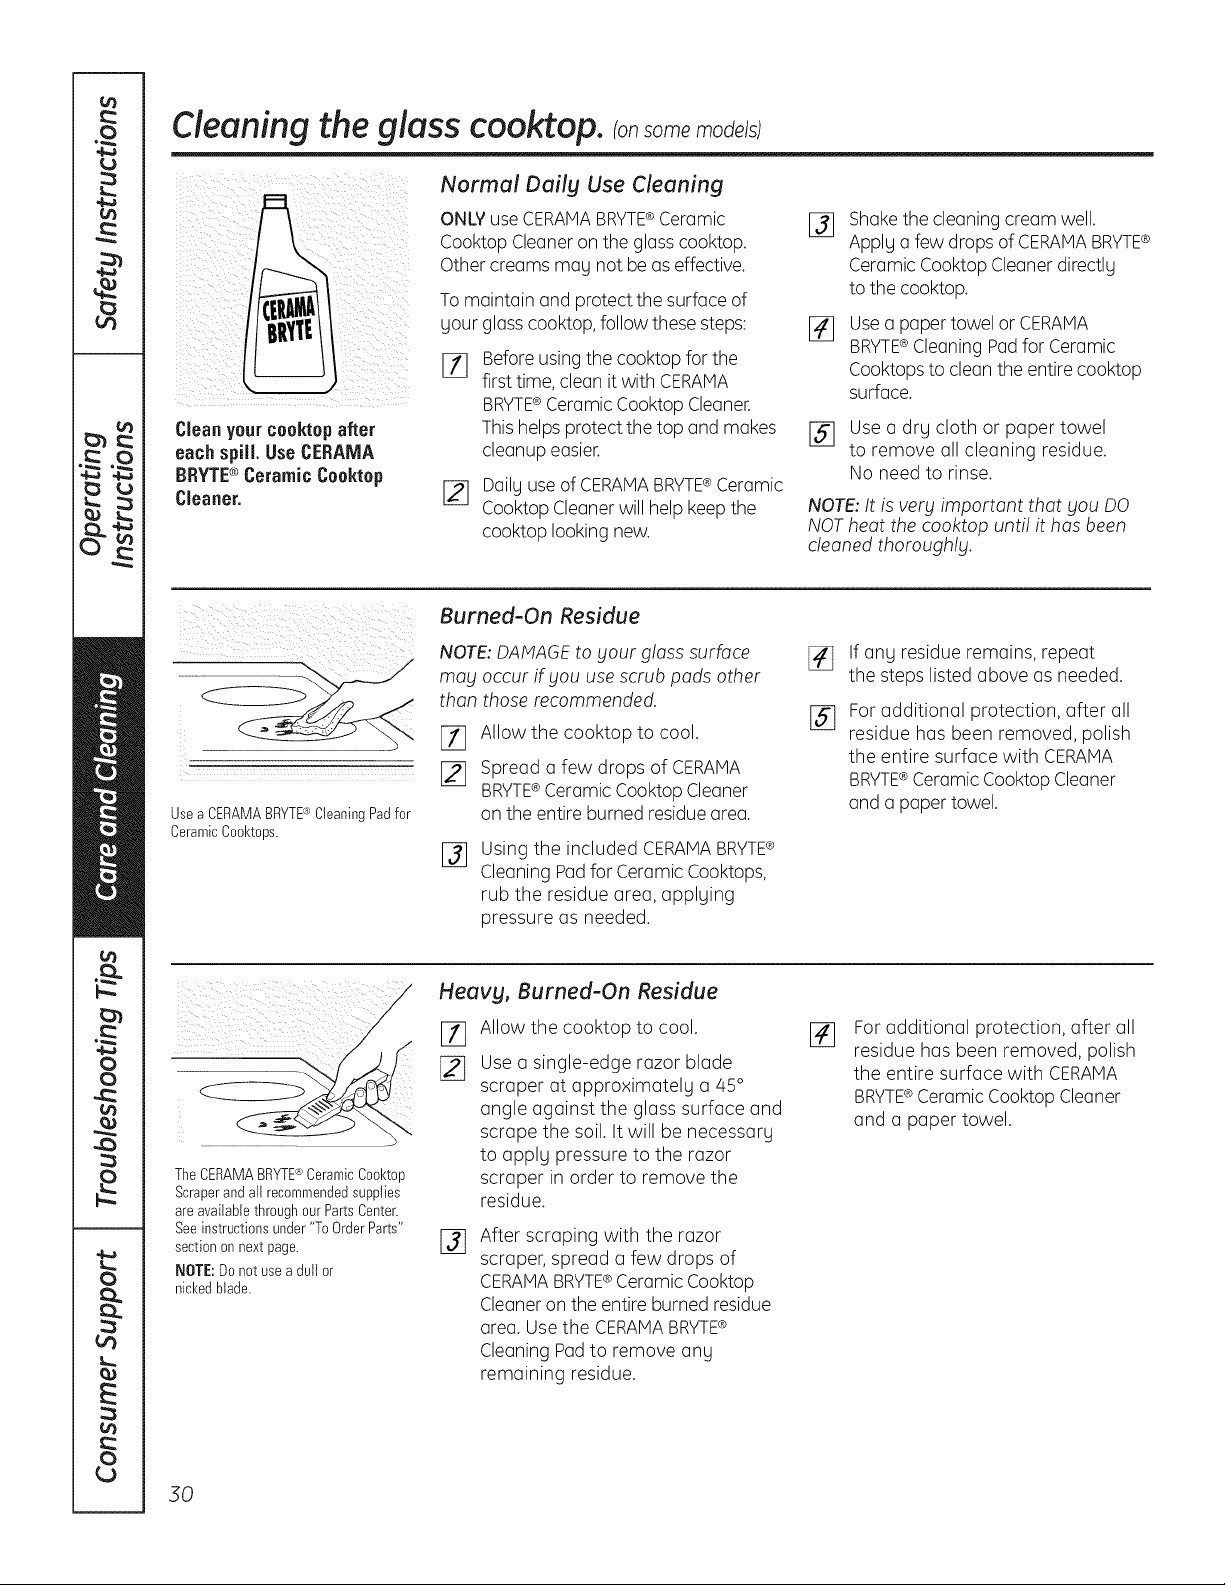
Cleaningthe glass cooktop, ransomemode/s
Cleanyourcooktopafter
each spill.Use CERAMA
BRYTE® CeramicCooktop
Cleaner.
Normal Dailg Use Cleaning
ONLY useCERAMABRYTE®Ceramic
CooktopCleaneron theglass cooktop.
Othercreamsnag notbe aseffective.
Tomaintain and protect thesurfaceof
gour glass cooktop, follow these steps:
Before using the cooktopforthe
first time, cleanitwith CERAMA
BRYTE® Ceramic CooktopCleaner.
This helps protectthe topand makes
cleanupeasier.
[_ Dailguse ofCERAMABRYTE®Ceramic
Cooktop Cleaner willhelp keepthe
cooktop looking new.
%
Shakethecleaningcreamwell.
Applga few dropsofCERAMA BRYTE®
CeramicCooktopCleanerdirectlg
tothecooktop.
Usea paper towel or CERAMA
BRYTE®Cleaning Padfor Ceramic
Cooktopsto cleantheentirecooktop
surface.
[] Use a drg cloth or paper towel
to remove all cleaning residue.
Noneed to rinse.
NOTE: It isvery important that you DO
NOT heat thecooktop unti! it hasbeen
cleaned thoroughly.
UseaCERAMABRYTE®CleaningPadfor
CeramicCool<tops.
Burned-On Residue
NOTE: DAMAGEto Four glass surface
may occur if you usescrub pads other
than those recommended.
I-f] Allow the cooktop to cool.
[] Spread a few drops of CERAMA
BRYTE®Ceramic CooktopCleaner
on the entireburned residue area.
%
Using the included CERAMABRYTE¢
CleaningPadfor Ceramic Cooktops,
rub the residue area, applging
pressure as needed.
[]
%
If ang residue remains,repeat
the stepslisted above asneeded.
Foradditional protection, after all
residue has been removed, polish
the entire surface with CERAMA
BRYTE®Ceramic CooktopCleaner
and a paper towel.
TheCERAMABRYTE®CeramicCool<top
Scraperand allrecommendedsupplies
areavailablethroughourPartsCenter.
Seeinstructionsunder"To OrderParts"
sectionon nextpage.
NOTE:Donot usea dull or
nickedblade.
Heavg, Burned-On Residue
[]
Allow the cooktop to cool.
Use a single-edge razor blade
scraper at approximatelg a 45°
angle against the glass surface and
scrape the soil. It will be necessarg
to applg pressure to the razor
scraper in order to remove the
residue.
%
After scraping with the razor
scraper,spread a few drops of
CERAMABRYTE®Ceramic Cooktop
Cleaneron theentireburned residue
area.Use the CERAMABRYTE®
Cleaning Padto remove any
remaining residue.
[]
For additional protection, offer all
residue has been removed, polish
the entire surface with CERAMA
BRYTE®Ceramic CooktopCleaner
and a paper towel.
30
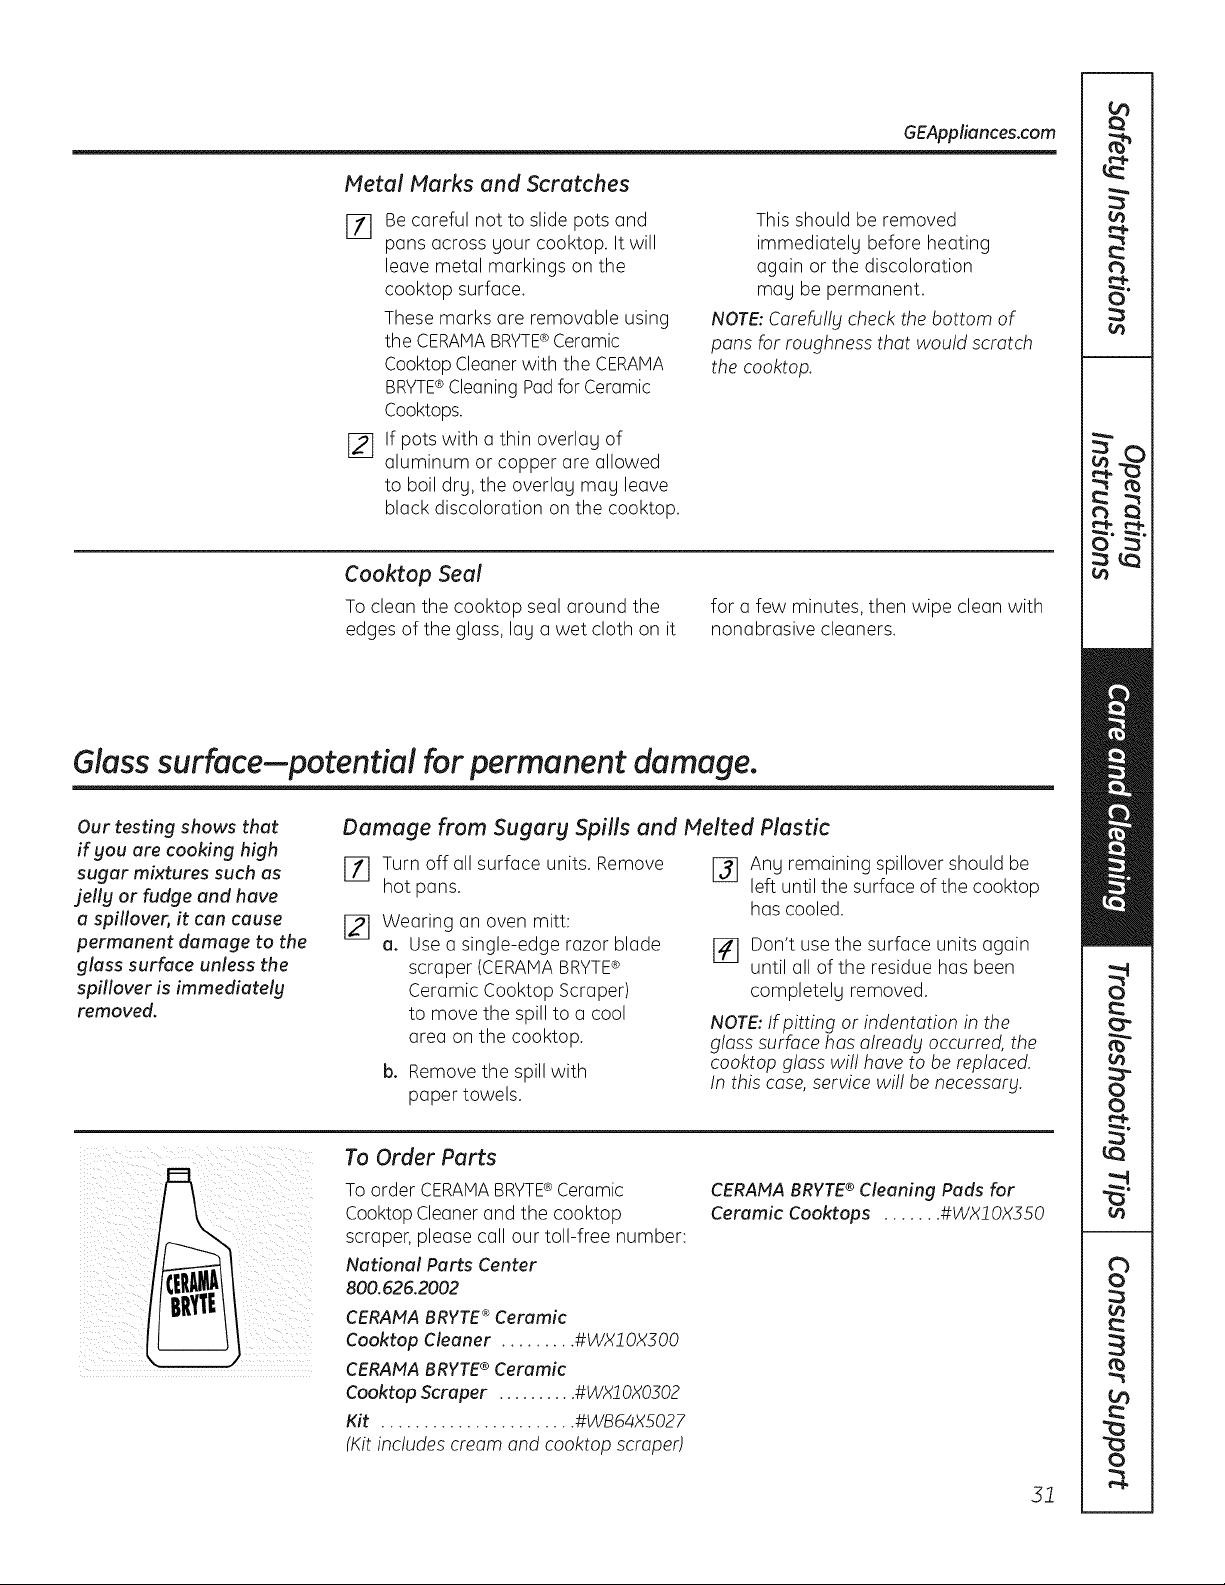
GEAppliances.com
Metal Marks and Scratches
Eli Be careful not to slide pots and
pans across your cooktop. It will
leave metal markings on the
cooktop surface.
These marks are removable using
the CERAMABRYTE®Ceramic
CooktopCleanerwith the CERAMA
BRYTE®Cleaning Padfor Ceramic
Cooktops.
j_] If pots with a thin overlay of
aluminum or copper are allowed
to boil dry, the overlay may leave
black discoloration on the cooktop.
This should be removed
immediately before heating
again or the discoloration
may be permanent.
NOTE: Carefu!lg check the bottom of
pans for roughness that would scratch
the cooktop.
Cooktop Seal
Toclean the cooktop seal around the
edgesof the glass,lay a wet cloth on it
for a few minutes, then wipe clean with
nonabrasive cleaners.
Glass surface--potential for permanent damage.
Our testing shows that
if gou are cooking high
sugar mixtures such as
jelly or fudge and have
a spillover, it can cause
permanent damage to the
glass surface unless the
spillover is immediately
removed.
Damage from Sugarg Spills and Melted Plastic
Ell Turnoff all surface units. Remove
hot pans.
[21 Wearing an oven mitt:
a. Use a single-edge razor blade
scraper (CERAMABRYTE®
Ceramic Cooktop Scraper)
to move the spill to a cool
area on the cooktop.
b. Removethe spillwith
paper towels.
J_ Any remaining spillover should be
left until the surface of the cooktop
hascooled.
]41 Don't usethe surface units again
until all ofthe residue has been
completely removed.
NOTE: If pitting or indentation in the
glass surface has already occurred, the
cooktop gloss wi!! hove to be replaced.
In this case, service wi!! be necessary.
To Order Parts
Toorder CERAMABRYTE®Ceramic
Cooktop Cleaner and the cooktop
scraper,please call our toll-free number:
National Parts Center
800.626.2002
CERAFfA BRYTE ®Ceramic
Cool<top Cleaner ......... #WX20X300
CERAMA BRYTE® Ceramic
Cool<top Scraper .......... #WXJ0X0302
Kit ....................... #WB64XS027
(Kitincludes cream and cooktop scraped
CERANA BRYTE® Cleaning Pads for
Ceramic Cool<tops ....... #WXl OX350
31
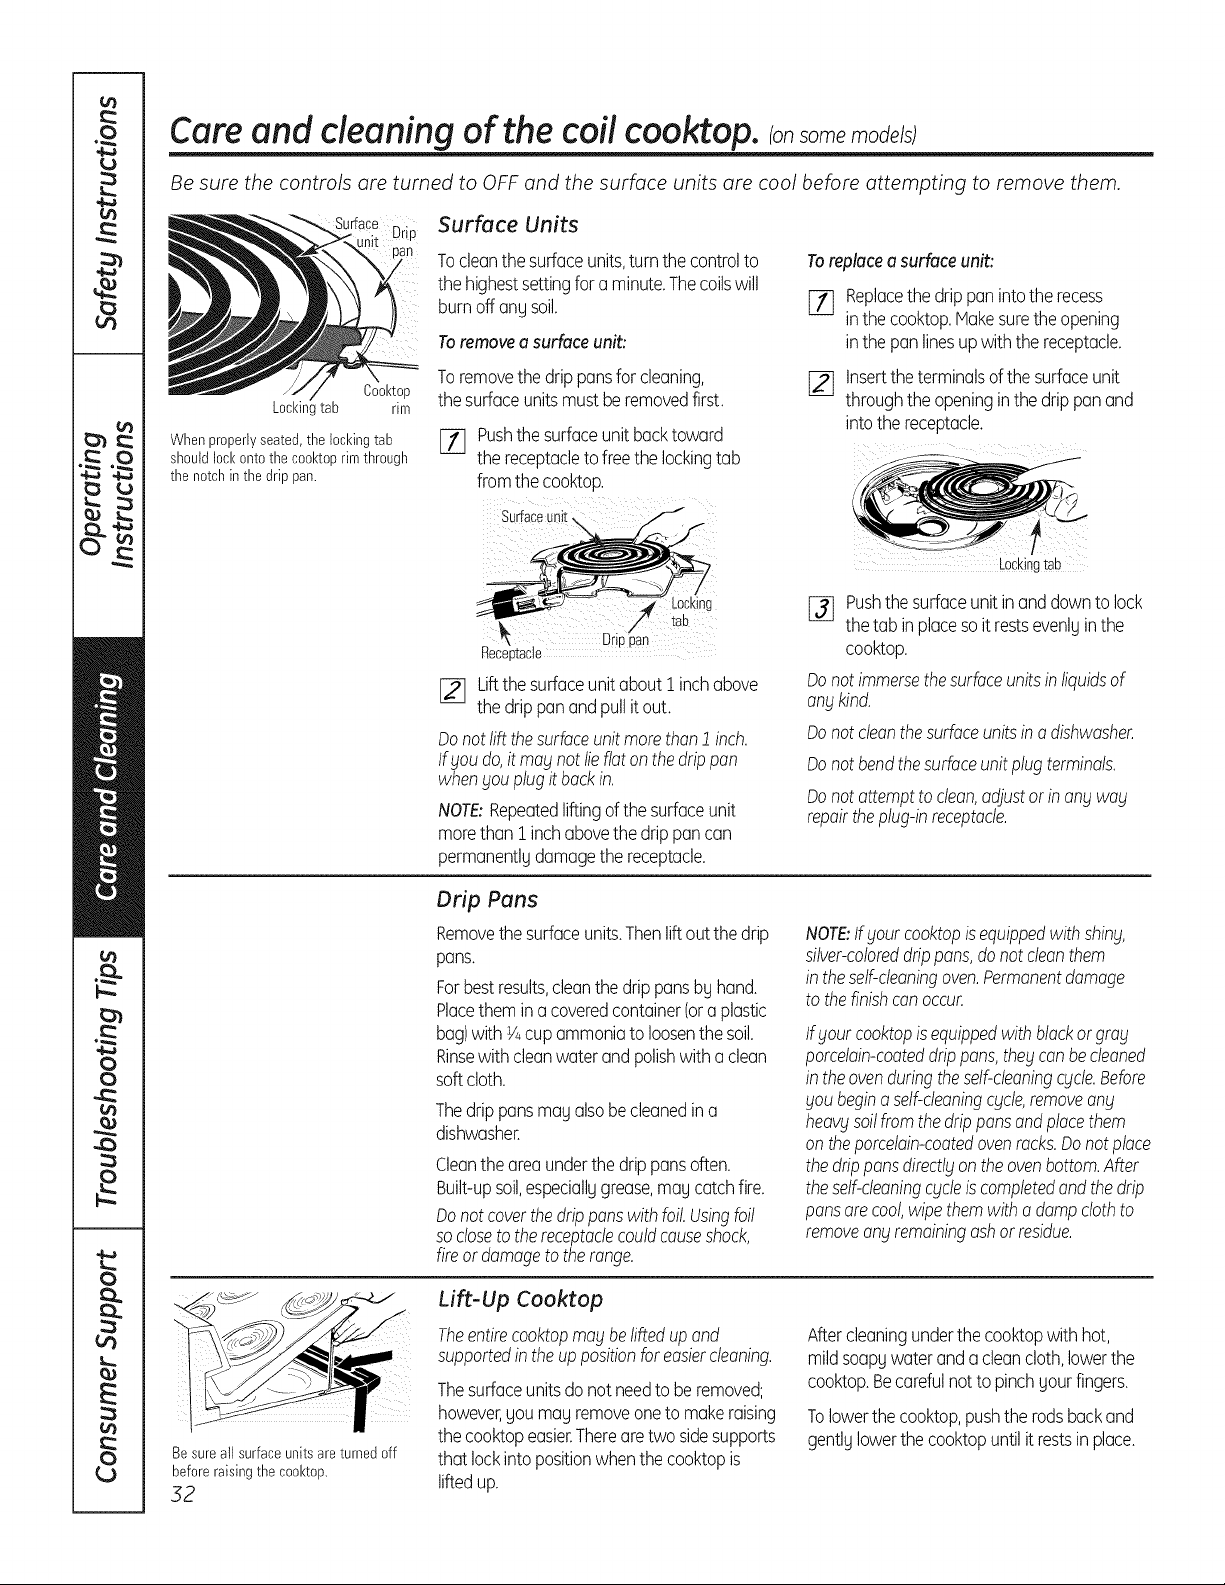
Care and cleaning of the coil cooktop, consomemode/s
Be sure the controls are turned to OFF and the surface units are cool before attempting to remove them.
Cool<top
Locl<inltab rim
Whenproperlyseated,the lockingtab
shouldlock ontothe cool<toprimthrough
the notchinthedrip pan.
Surface Units
Tocleanthe surfaceunits,turnthe controlto
the highestsettingfor a minute.Thecoilswill
burnoff anUsoil.
Toremovea surfaceunit:
Toremovethe drippansfor cleaning,
the surfaceunitsmustberemovedfirst.
[] Pushthesurfaceunit backtoward
the receptacleto freethe lockingtab
fromthe cooktop.
Toreplacea surfaceunit:
[_ Replacethe drippaninto the recess
inthe cooktop.Hakesuretheopening
inthe pan linesupwiththe receptacle.
[] Insertthe terminalsof thesurfaceunit
throughthe openinginthe drippanand
into the receptacle.
Surface unii
Drioaan
Receotacle
[_ Liftthesurfaceunitabout i inchabove
the drippanandpullit out.
Donotlift thesurfaceunit morethan1 inch.
lf goudo,it mag not lieflatonthe drippan
when£ouplugit backin.
NOTE:Repeatedliftingof the surfaceunit
morethani inchabovethe drippancan
permanentlUdamagethe receptacle.
[_ Pushthe surfaceunitinanddowntolock
the tab inplacesoitrestsevenlUinthe
cooktop.
Donot immersethesurfaceunitsinliquidsof
angkind.
Donot cleanthesurfaceunitsino dishwasher.
Donot bendthesurfaceunitplugterminals.
Donot attemptto clean,adjustorin ongwag
repairtheplug-inreceptacle.
Drip Pans
Removethe surfaceunits.Thenliftout the drip
pans.
Forbestresults,cleanthe drippansbUhand.
Placethemina coveredcontainer(ora plastic
bag)with Y4cupammoniatoloosenthe soil.
Rinsewithcleanwaterand polishwith aclean
soft cloth.
Thedrippansmau alsobecleanedina
dishwasher.
Cleantheareaunderthe drippansoften.
Built-upsoil,especiallugrease,mau catchfire.
Donotcoverthedrippanswithfoil.Usingfoil
so closeto thereceptaclecouldcauseshock,
fireordamageto therange.
NOTE:If goutcooktopisequippedwithshing,
silver-coloreddrippans,donot cleanthem
in theself-cleaningoven.Permanentdamage
tothefinishcon occur.
Ifgout cooktopis equippedwithblackorgrog
porcelain-coateddrippans,the£canbecleaned
in theovenduringtheself-cleaningcgcle.Before
goubeginaself-cleaningcgcte,removeang
heaW soilfromthe drippansandplacethem
on theporcelain-coatedovenrocks.Donotplace
the drippansdirectlgontheovenbottom.After
theself-cleaningcgcleis completedandthedrip
pansarecool,wipethemwitha dampclothto
removeangremainingashor residue.
Besure all surfaceunitsareturned off
before raising the cool<top.
32
Lift-Up Cooktop
Theentirecooktopmagbeliftedupand
supportedinthe uppositionforeasiercleaning.
Thesurfaceunitsdonot needto be removed;
however,youmayremoveonetomakeraising
the cooktopeasier.Therearetwo sidesupports
that lockintopositionwhenthe cooktopis
liftedup.
Aftercleaningunderthe cooktopwithhot,
mildsoapywaterandacleancloth,lowerthe
cooktop.Becarefulnottopinchyourfingers.
Tolowerthe cooktop,pushthe rodsbackand
gentlUlowerthe cooktopuntilit restsin place.
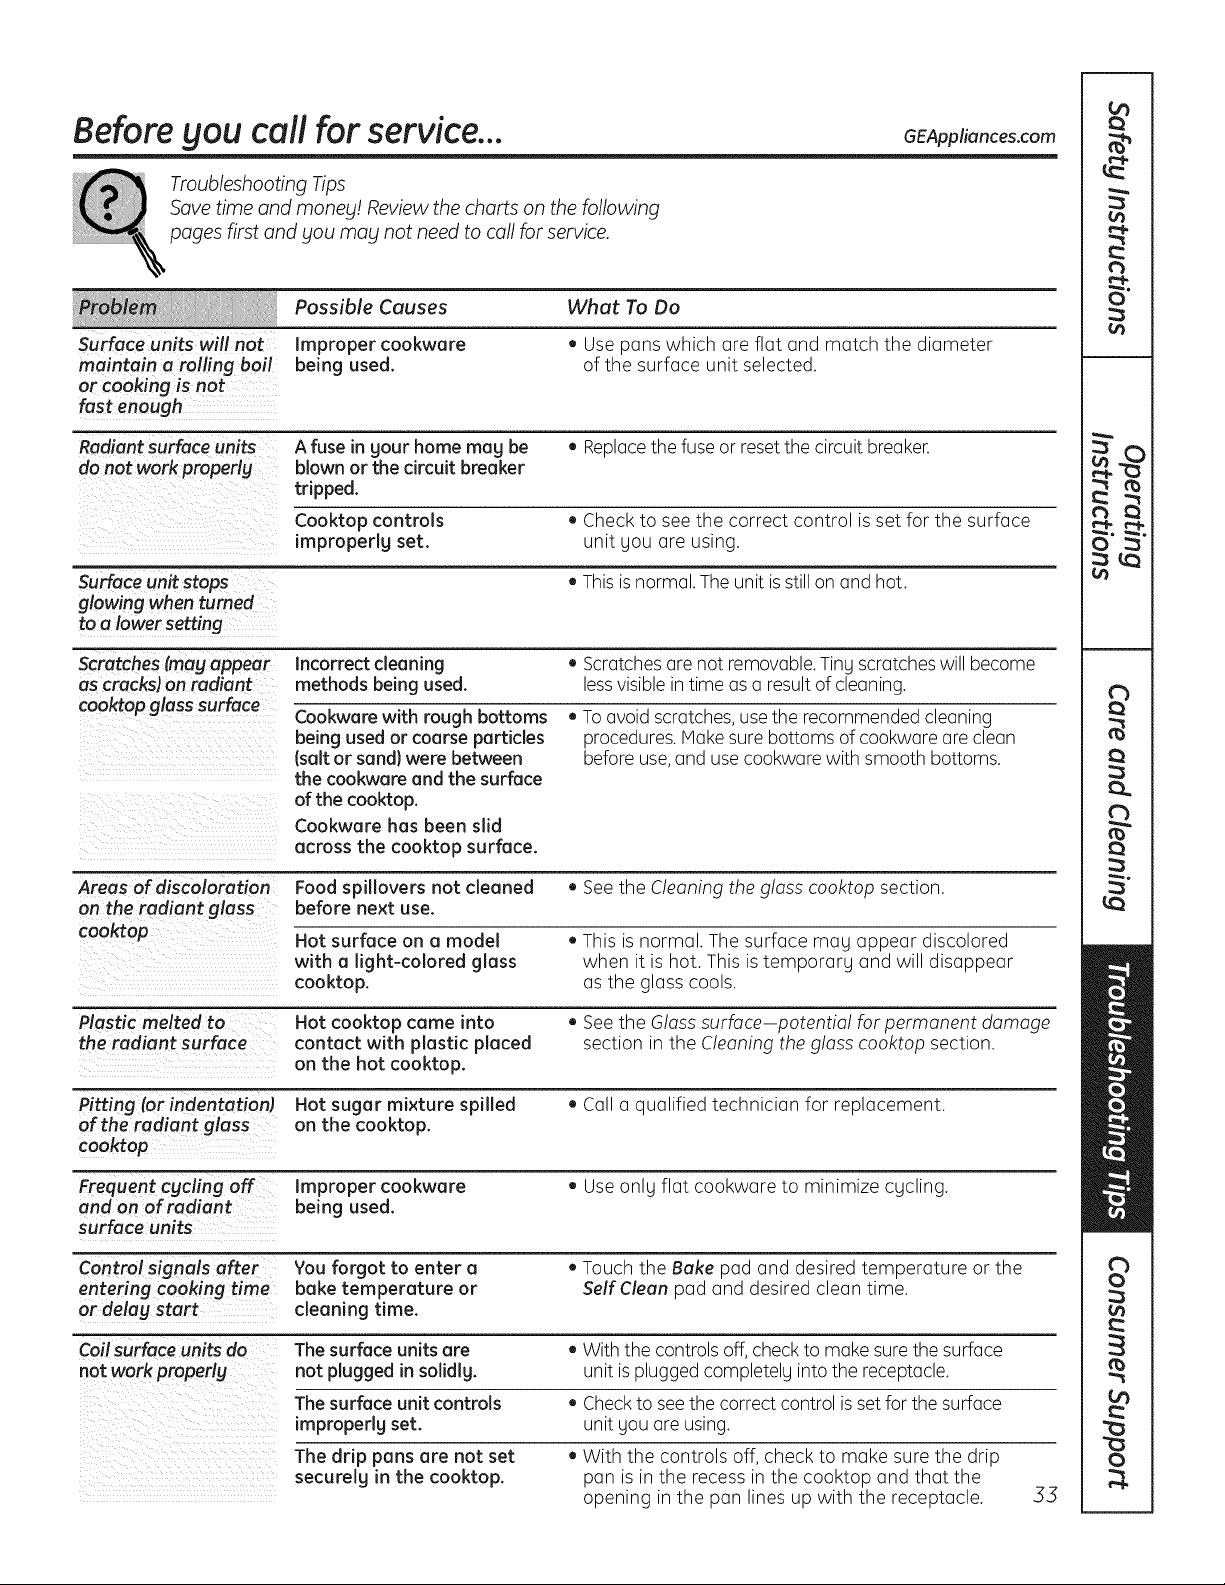
Before Sou call for service... 6EAppliances.com
Troubleshooting Tips
Save time and manes! Review the charts on thefollowing
pages first and Sou mag not need to callfor service.
Possible Causes What To Do
Surface units will not Improper cookware • Use panswhich are flat and match the diameter
maintain a rolling boil being used. of the surface unit selected.
or cooking isnot
fast enough
Radiant surface units A fuse in sour home mag be • Replacethefuse or resetthe circuitbreaker.
do not work properlg blown or thecircuit breaker
tripped.
Cooktop controls , Checkto seethe correct control is set for the surface
improperlg set. unit you are using.
Surface unitstops , Thisis normal. Theunitis still on and hot.
glowing whenturned
to a lower setting
Scratches (mag a_ear Incorrect cleaning • Scratches are not removable.Tiny scratches will become
ascracks) on radiant methods being used. lessvisible in time as a result ofcleaning.
coo_op glass surface Cookware with rough bottoms , To avoidscratches,use the recommended cleaning
being used or coarse particles procedures. Make surebottoms ofcookwareare clean
(salt or sand} were between beforeuse,and use cookwarewith smooth bottoms.
the cookware and the surface
ofthe cooktop.
Cookware has been slid
across the cooktop surface.
Areas of discoloration Food spillovers not cleaned • See the Cleaning theg!oss cooktop section.
on the radiant glass before next use.
cooktop Hot surface on a model . This is normal. Thesurface may appear discolored
with a light-colored glass when it ishot. This istemporary and will disappear
cooktop, asthe glass cools.
Plastic melted to Hot cooktop came into • See the Gloss surface potentia! for permanent damage
the radiant surface contact with plastic placed section in the Cleaning the glass cooktop section.
on the hot cooktop.
Pitting (or indentation Hot sugar mixture spilled • Calla qualified technician for replacement.
of the radiant glass on the cooktop.
cooktop
Frequent cgcling off Improper cookware • Useonly flat cookware to minimize cycling.
and on of radiant being used.
surface units
Control signals after You forgot to enter a • Touch the Bake pad and desired temperature or the
entering cooking time bake temperature or SelfClean pad and desired clean time.
or delag start cleaning time.
Coil surface units do The surface units are . With the controls off,check to make sure the surface
not work properlg not plugged in solidlg, unit isplugged completely into the receptacle.
The surface unit controls • Check tosee thecorrect control is set forthesurface
improperlg set. unit youare using.
Thedrip pans are not set , With the controls off, check to make sure the drip
securelg in the cooktop, pan isin the recessin the cooktop and that the
opening in the pan lines up with the receptacle. .53
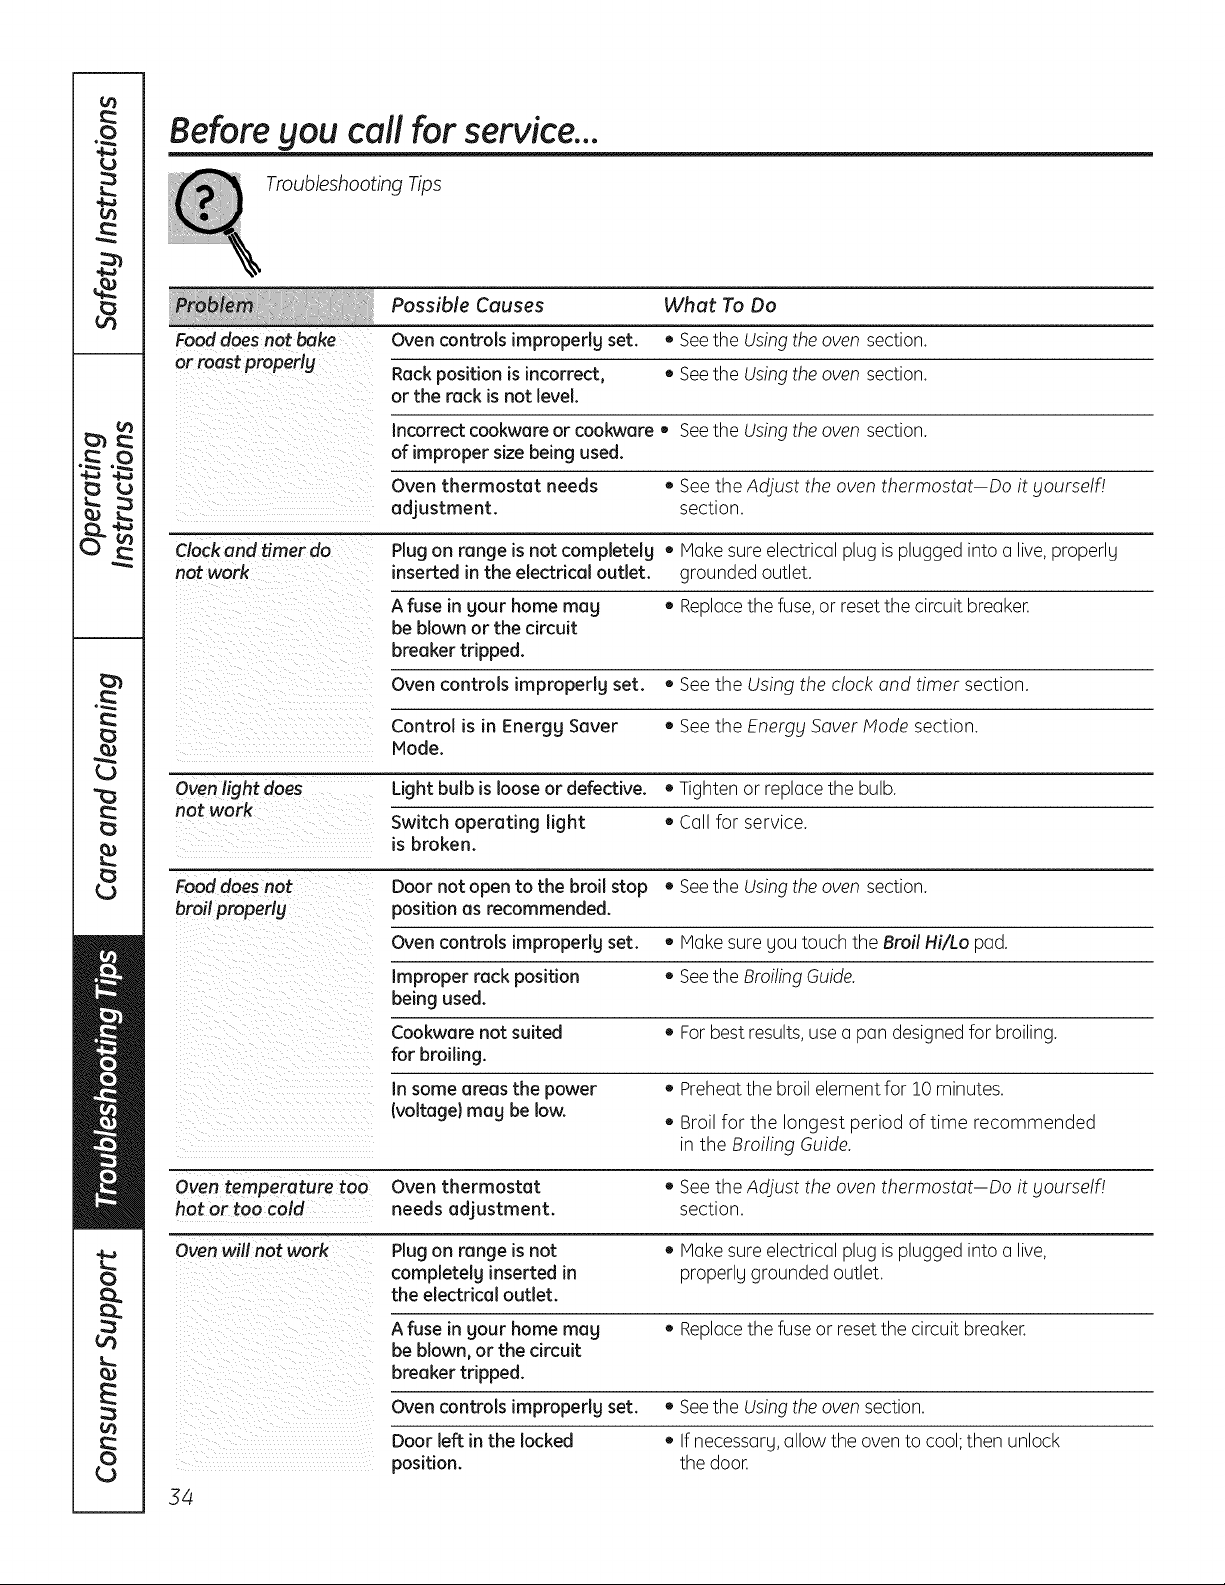
Before gou call for service...
Troubleshooting Tips
Possible Causes What To Do
Fooddoesnot bake Ovencontrols improperly set. • Seethe Usingthe oven section.
or roast properlg Rack position isincorrect, ,, Seethe Usingthe oven section.
or the rack isnot level.
Incorrect cookware or cookware, Seethe Usingthe oven section.
of improper size being used.
Oven thermostat needs , See theAdjust the oventhermostat Doit gourself/
adjustment, section.
Clockand timer do Plugon range isnot completelg • Makesureelectricalplug isplugged intoa live,properly
not work inserted in the electrical outlet, grounded outlet.
A fuse in gout home meg • Replacethefuse, or resetthe circuitbreaker.
be blown or the circuit
breakertripped.
Oven controls improperly set. • See the Using the clock and timer section.
Control is in Energy Sever • See the Energy SaverModesection.
Mode.
Oven light does Light bulb islooseor defective. • Tighten or replace the bulb.
not work
Switch operating light • Callfor service.
isbroken.
Fooddoesnot Doornot open to the broil stop • Seethe Usingthe oven section.
broil properly position as recommended.
Oven controls improperlg set. • Make sure gou touch the Broil Hi/Lo pad.
Improper rack position • See the BroilingGuide.
being used.
Cookware not suited ,, For best results,use a pan designedforbroiling.
for broiling.
In some areas the power • Preheatthe broil element for 10 minutes.
(voltage} mag be low.
• Broil for the longest period oftime recommended
in the Broiling Guide.
Oven temperature too Oven thermostat ,, See theAdjust the oventhermostat Doit yourself!
hot or too cold needs adjustment, section.
Ovenwill not work Plugon range isnot • Makesureelectricalplug isplugged intoa live,
completelg inserted in properlygrounded outlet.
the electrical outlet.
A fuse in gout home mag • Replacethefuse or reset thecircuitbreaker.
be blown, or the circuit
breakertripped.
Ovencontrols impropedg set.
Doorleft in the locked
position.
34
• Seethe Usingthe ovensection.
• If necessarg,allow theoventocool;then unlock
thedoor.
Storage drawer
is crooked
GEAppliances.com
Possible Causes
Rear drawer support is
on top of the guide rail.
What To Do
• Repositionthe drawer. See the Storage Drawer
Remova! instructions in the Care and cleaning
of the range section.
Storage drawer
won't close
Power cord mag be
obstructing drawer
in the lower back
of the range.
• Repositionthe drawer and powercord. Seethe
Storage Drawer Removal instructionsin the Careand
cleaning oftherange section.
Rear drawer support is
on top of the guide rail.
• Repositionthe drawer. See the Storage Drawer
Removal instructions in the Care and cleaning ofthe
range section.
=
Oven will not self-clean The oven temperature is • Allowthe oven to cool to room temperature and
too high to set a self-clean reset the controls.
operation.
Oven controls impropedg set. • See the Using the self-cleaning oven section.
Oven door is not inthe locked • Hake sure Sou move the door latch handle all the
position, wag to the right.
"Crackling" or This is the sound of the • This is normal.
"popping" sound metal heating and cooling
during both the cooking and
cleaning functions.
Excessive smoking Excessive soil. • Touch the Clear/Off pad. Open the windows to
during a clean cgcle rid the room of smoke. Wait until the light on the
SelfClean pad goes off. Wipe up the excess soiland
reset the clean cycle.
Oven door will not Oven too hot. • Allow the oven to cool below locking temperature.
unlock
Oven not clean after Ovencontrolsnot properlg set. • Seethe Usingtheself-cleaning oven section.
a clean cgcle Oven was heavilg soiled. • Clean up heavg spillovers before starting the clean
cgcle. Heavilg soiled ovens mag need to self-clean
again or for a longer period oftime.
"F-" and a number You havea function • Disconnect all power to the range for at least
or letter flash error code. 50 seconds and then reconnect power. If the function
in the display error code repeats, callfor service.
• On self-cleaning models, if a function error code
appears during the self-cleaning cgcle,check the oven
door latch. The latch mag have been moved, if onlg
slightlg, from the locked position. Hake surethe latch
ismoved to the right asfar asit will go.Touch the
Clear!Off pad. Allowtheoventocoolforone hour.
Putthe ovenback intooperation.
Water remaining on This is normal.
oven floor after Steam
Clean cycle
• Removeang remaining water with a drg cloth
or sponge.
55
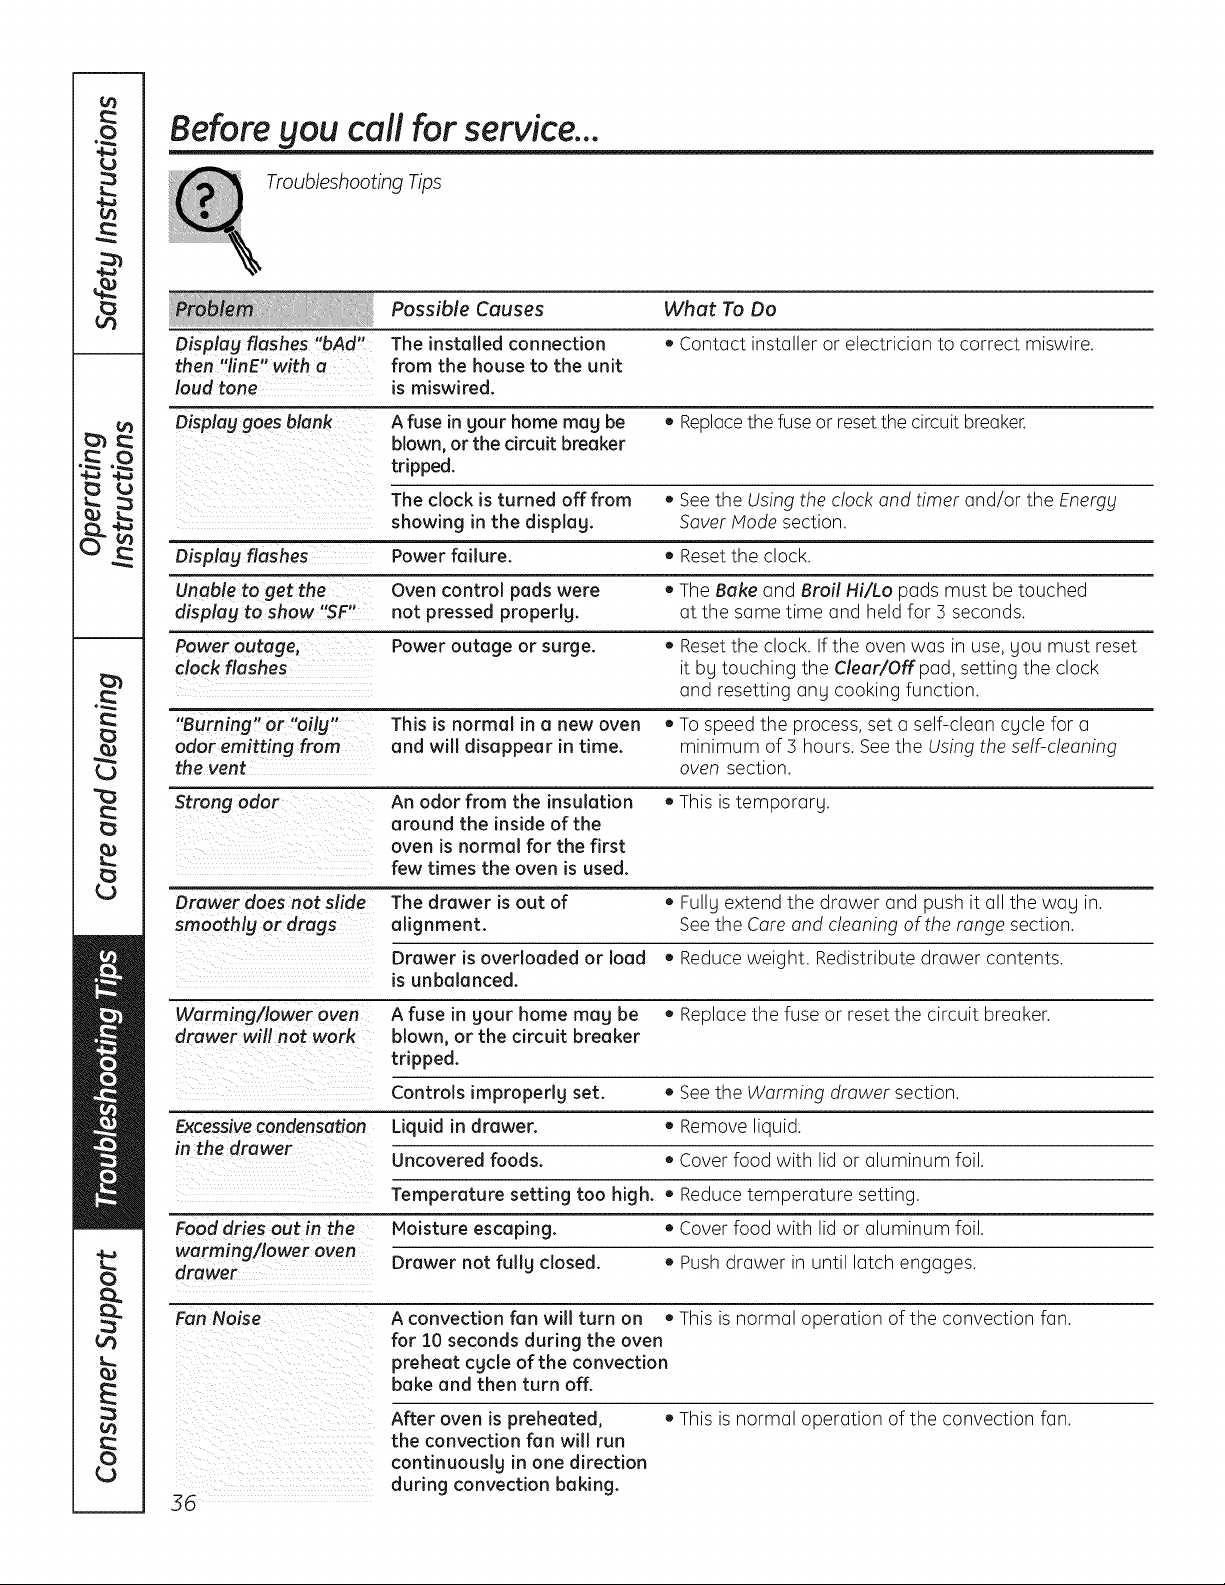
Before gou call for service...
Troubleshooting Tips
Possible Causes What To Do
Displag flashes "bAd" The installed connection • Contact installer or electrician to correct miswire.
then "linE" with a from the house to the unit
loud tone ismiswired.
Displag goes blank A fuse in gour home mug be • Replacethefuse or reset thecircuitbreaker.
blown, or the circuit breaker
tripped.
The clock isturned off from , See the Using the clock and timer and/or the Energy
showing in the displag. SaverHode section.
Displag flashes Power failure. • Reset the clock.
Unable to get the- control pads were
displag to show "SF" Oven • TheBake and Broil Hi/Lo pads must be touched
not pressed properlg, at the same time and held for 5 seconds.
Power outage, Power outage or surge. • Reset the clock. If the oven was in use, you must reset
clock flashes itby touching the Clear/Off pad, setting the clock
and resetting any cooking function.
"Burning" or "oilg" This is normal in a new oven , Tospeedthe process, set a self-clean cycle for a
odor emitting from and will disappear in time. minimum of 3 hours. See the Using the self-cleaning
the vent oven section.
Strong odor An odor from the insulation • This is temporary.
around the inside of the
oven is normal for the first
few times the oven isused.
Drawer does not slide The drawer isout of ,, Fullgextend the drawer and push it all the wag in.
smoothlg or drags alignment. See the Careand cleaning of the range section.
Drawer isoverloaded or load , Reduce weight. Redistribute drawer contents.
isunbalanced.
Warming/lower oven A fuse in gour home mug be • Replace the fuse or reset the circuit breaker.
drawer will not work blown, or the circuit breaker
tripped.
Controls improperly set. • See the Warming drawer section.
Excessivecondensation Liquid in drawer. • Removeliquid.
in the drawer
Uncovered foods. • Cover food with lid or aluminum foil.
Temperature setting too high. • Reduce temperature setting.
Food dries out in the Moisture escaping. • Cover food with lid or aluminum foil.
worming/lower oven
drawer Drawer not fullg closed. • Push drawer in until latch engages.
FanNoise A convection fan will turn on • This isnormal operation ofthe convection fan.
for 10 seconds during the oven
preheat cgcle of the convection
bake and then turn off.
After oven ispreheated, • This isnormal operation ofthe convection fan.
the convection fan will run
continuouslg in one direction
during convection baking.
36
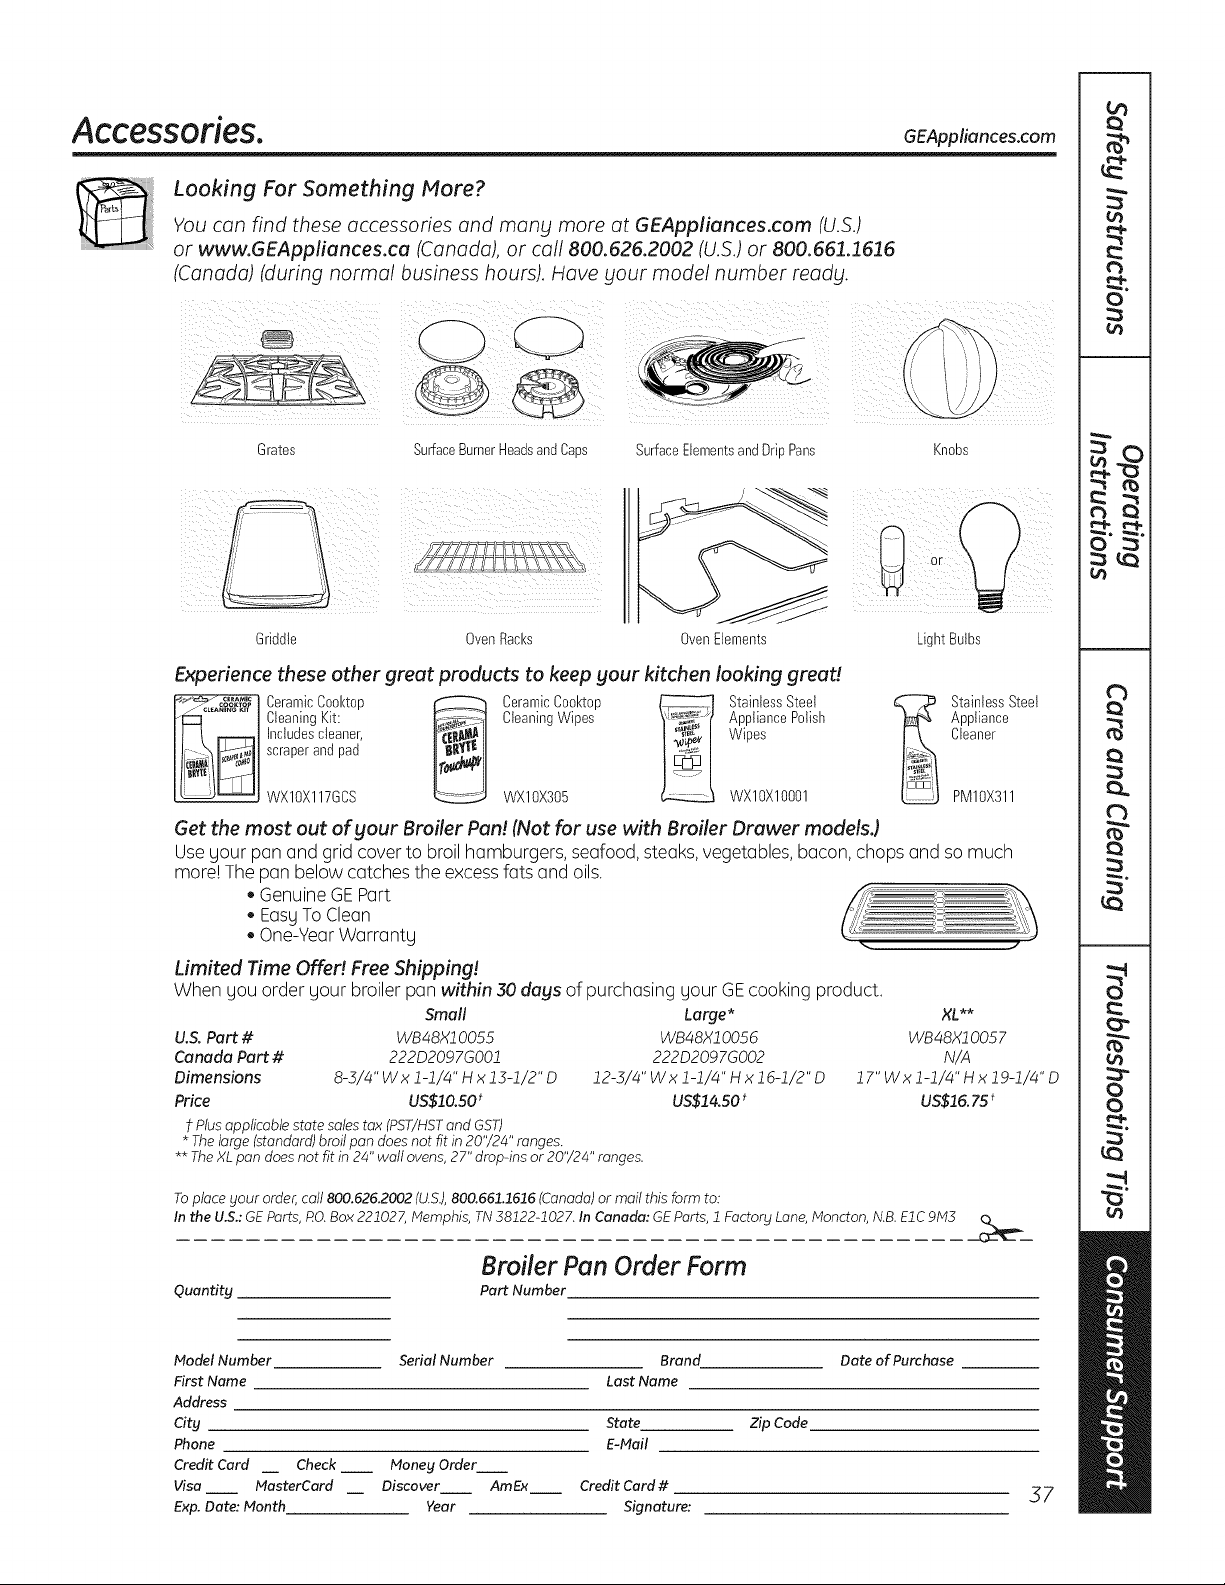
Accessories. GEAppliances.com
Looking For Something More?
You can find these accessories and many more at GEAppliances.com (U.S.)
or www.GEAppliances.ca (Canada), or call 800.626.2002 (U.S.) or 800.661.1616
(Canada) (during normal business hours). Have your model number ready.
Grates
SurfaceBurnerHeadsandCaps SurfaceElementsandDripPans
Knobs
Griddle OvenRacks OvenElements
i ¸¸
Light Bulbs
Experience these other great products to keep your kitchen looking great!
_"_ ....... Ceramic Cool<top _ Ceramic Cool<top _ Stainless Steel
/_°_'A_'I'_°_"°t Cleaning Kit: _ Cleaning Wipes _ Appliance Polish
___ Inctudes cteaner, Wipes
scraper and pad
WXIOX117GCS WXlOX305 WXlOXlO001
StainlessSteel
Appliance
Cleaner
PM10X311
Get the most out of your Broiler Pan! (Not for use with Broiler Drawer models.)
Usegour pan and grid cover to broil hamburgers,seafood, steaks, vegetables,bacon, chops and so much
more! The pan belowcatches theexcessfatsand oils.
GenuineGEPart
EasyToClean
One-YearWarranty .. ..
Limited Time Offe!! Free Shipping!
Whengou order gour broiler pan within 30 days of purchasing gour GEcooking product.
Small
U.S. Part # WB48X10055
Canada Part # 222D2097GO01
Dimensions 8-3/4" Wx 1-1/4" H x 13-1/2"D
Price US$10.50t
t Plus applicable state sales tax (PST/HSTand GST)
* The large (standard) broil pan does not fit in 20'/24" ranges.
Large* XL**
WB48X10056 WB48X1005 7
222D2097GO02 N/A
12-5/4"Wxl-1/4"Hxlg-1/2"D 17"Wxl-1/4"Hxlg-1/4"D
US$14.50 * US$15. 75t
** The XLpan does not fit in 24" wall ovens, 27" drop-ins or 20'/24" ranges.
Toplace your order,call 800.626.2002 (U.S.),800.661.1616(Canada)or mail thisformto:
Inthe U.S.:GEParts,RO.Box221027,Memphis, TN38122-1027. In Canada: GEParts, 1Factory Lane,Moncton, N.B.EIC9M3
Quantity
Broiler Pan Order Form
Part Number
Model Number
First Name
Address
City
Phone
Credit Card
Visa
Exp. Dote: Month
Serial Number Brand Date of Purchase
Last Name
State Zip Code
E-Mail
Check __ Money Order
MasterCard Discover AmEx Credit Card #
Year Signature:
37
L_
o
c)
c)
E
C)
L_
Notes.
58
GE Electric Range Warranty. GEAppliances.com
All warrant_l service provided bg our Factors Service Centers,
or an authorized Customer Care®technician. To schedule
service, visit us on-line at GEAppliances.com, or call
800.GE.CARES (800.432.2737). Please have serial number
and model number available when calling for service.
Stapleyour receipt here.
Proofof the original purchase
date is needed to obtain service
under thewarranty.
GE Will Provide:
One Year
Fromthe date of the
origina! purchase
Any pert ofthe range which fails due toa defectin materials or workmanship.
Duringthis limited one-year warranty, GEwillalsoprovide,freeofcharge, all labor
and in-homeservice to replace the defective part.
Service trips to gout home to teach SOUhow to use
the product.
Improper installation, delivers or maintenance.
Failure of the product if it isabused, misused, or used
for other than the intended purpose or used
commerdallg.
Replacement of housefusesor resetting ofcircuit
breakers.
Damage to the product caused bg accident, fire, floods
or acts of God.
Incidental or consequential damage caused bg possible
defects with this appliance.
Damage caused after delivers.
Product not accessible to provide required service.
EXCLUSION OF IMPLIED WARRANTIES--Your sole and exclusive remedy is product repair as provided in this Limited
Warranty. Any implied warranties, including the implied warranties of merchantabilitg or fitness for a particular
purpose, are limited to one year or the shortest period allowed by law.
This warranty is extended to the original purchaser and any succeeding owner for products purchased for
home use within the USA. If the product is located in an area where service by a GEAuthorized Servicer is not
available, you may be responsible for a trip charge or you may be required to bring the product to an Authorized
GEService location for service. InAlaska, the warranty excludes the cost of shipping or service calls to your home.
Some states do not allow the exclusion or limitation of incidental or consequential damages. This warranty
gives you specific legal rights, and _lOUma_l also have other rights which var_l from state to state. To know
what Four legal rights are, consult _tour local or state consumer affairs office or _tour state's Attorne_t
General.
Warrantor: General Electric Company. Louisville, KY 40225
39

Consumer Support.
GE Appliances Website GEAppliances.com
Have a question or need assistance with yourappliance? Try theGEAppliancesWebsite 24 hoursa day,
any day of the gear!For greaterconvenienceand fasterservice,you cannowdownload Owner's Manuals,
order parts or even schedule serviceon-line.
Schedule Service GEAppliances.com
Expert GErepair serviceis only one step away from your door. Get on-line and schedule your service at
your convenienceanyday ofthe gear! Or call800.GE.CARES(800./432.2737)duringnormal business hours.
Real Life Design Studio GEAppliances.com
GEsupportsthe Universal Designconcept-products, services and environments that canbe used by
people ofall ages, sizesand capabilities.Werecognizethe need todesignfora wide range ofphysicaland
mental abilities and impairments. For details ofGE'sUniversal Designapplications, including kitchen designideas
forpeople with disabilities,checkout our Websitetoday. Forthe hearing impaired, please call800.TDD.GEAC
(800.855.4522).
Extended Warranties
GEAppliances.cam
Purchasea GEextended warranty and learn aboutspecial discounts that are availablewhileyour warranty
is still in effect.You canpurchase iton-line anytime, or call 800.626.2224during normalbusiness hours.
GEConsumerHome Serviceswillstill be thereafter yourwarranty expires.
Parts and Accessories
GEAppliances.cam
Individuals qualifiedto service theirown appliances canhave parts or accessoriessent directlytotheir homes
(VISA,MasterCardand Discovercards are accepted).Orderon-line today, 24 hoursevery dayor by phone at
800.626.2002during normal business hours.
Instructions contained in this manual cover procedures to be performed by any user. Other servicing
generally should be referred to qualified service personnel. Caution must be exercised, since improper
servicing may cause unsafe operation.
Contact Us
GEAppliances.com
If you are not satisfiedwith theserviceyoureceivefrom GE,contact us on our Websitewith all thedetails
includingyour phone number,or write to: General Manager,Customer Relations
GEAppliances,AppliancePark
Louisville,KY40225
] Register Your Appliance GEAppliances.com
Register your newappliance on-line-at your convenience! Timely product registrationwillallowfor
enhancedcommunication and prompt service under thetermsof yourwarranty, shouldthe need arise.
Youmay also mail inthe pre-printed registrationcard includedinthe packing material,or detach and use
theform in theOwner's Hanual.
Printed in the United States

