Loading ...
Loading ...
Loading ...
29
OPERATIONS MANUAL
REACH-INS & ROLL-INS
INSTALLATION OF TIE-IN STRAPS
Roll-Thru Cabinets
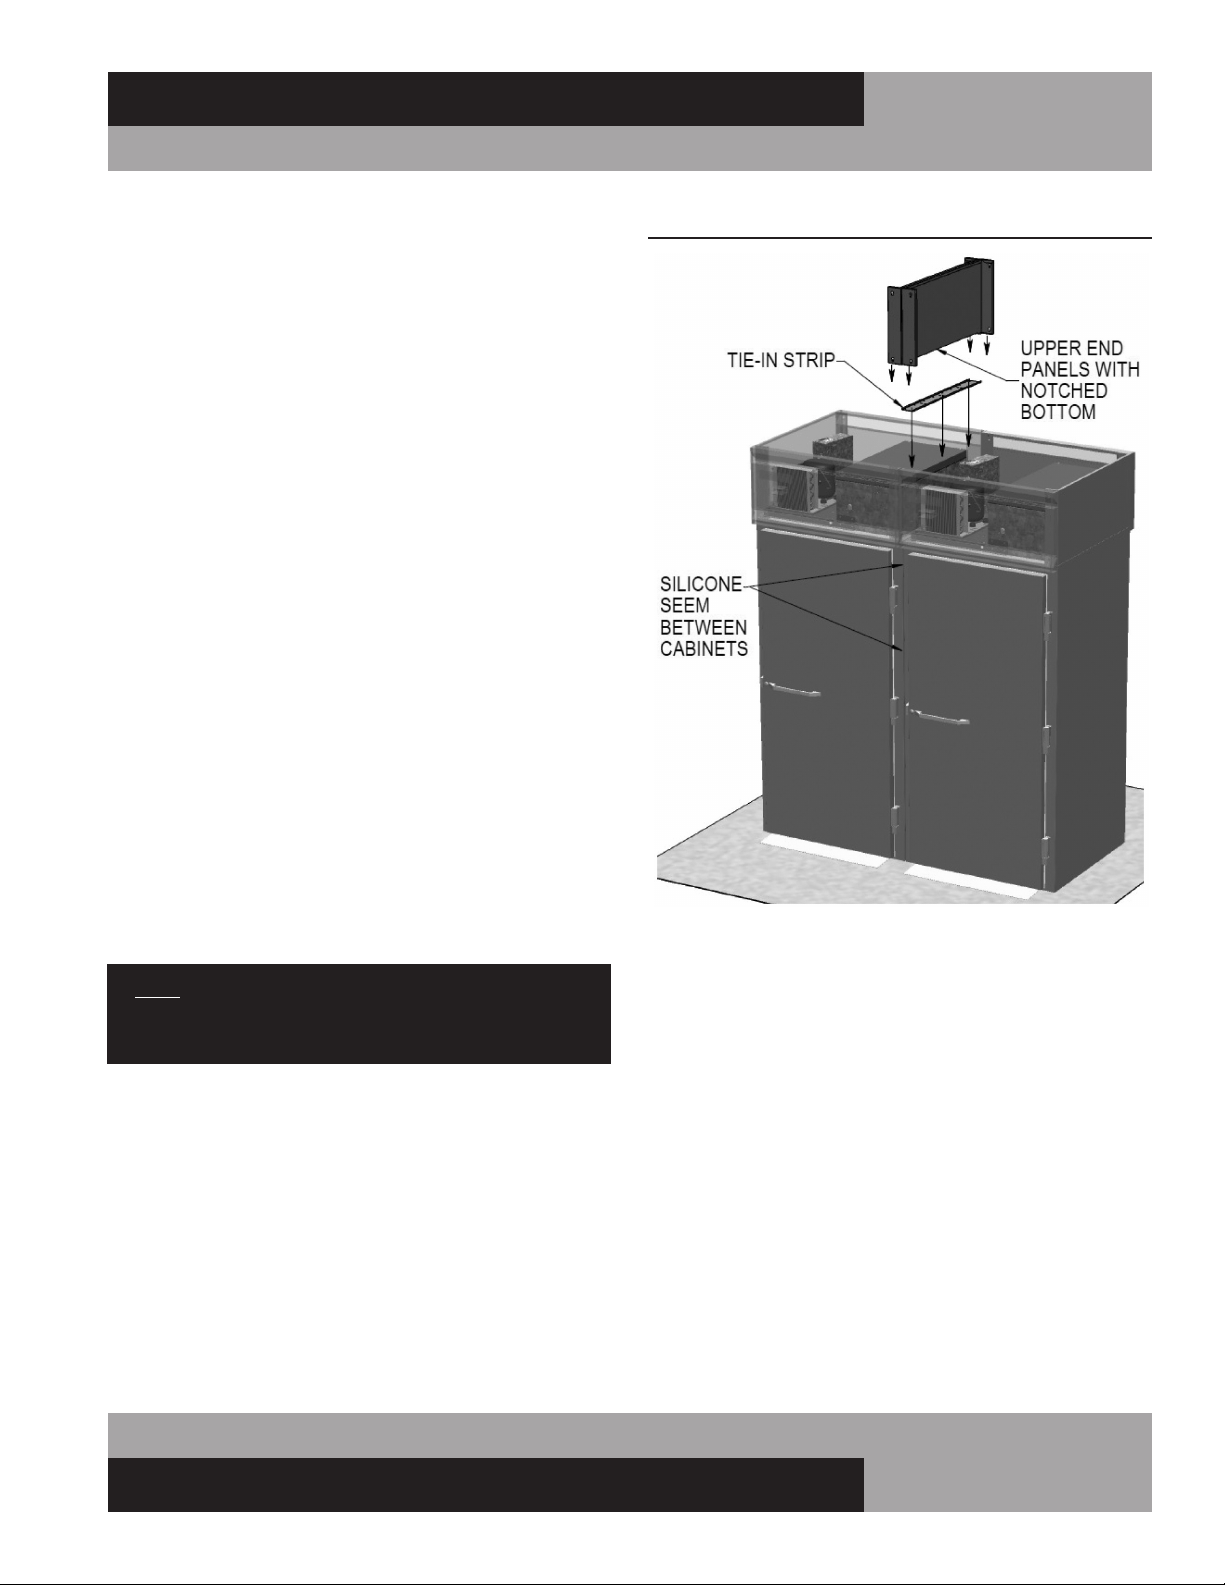
If two cabinets are installed side-by-side, a Tie-In Kit with straps
and notched upper end panels is available to attach to the cabi-
nets for rigidity. Before installing Tie-In Strips, make sure the
cabinets are close together and each unit is properly leveled (see
Installing Roll-In and Roll-Thru Models).
Remove the front and rear grill from each cabinet, by lifting off
mounting screws on the back side at each end (screws may
need to be loosened, before grill will lift up). Remove upper end
panel on the side of each cabinet located next to an adjacent
cabinet, by loosening the mounting screws along the bottom.
Make sure the cabinets are pushed tightly together. Gap between
the cabinets must be no more ¼” wide. Position Tie-In Strap
as shown in Figure 15 across the top of the gap between the
cabinets. Re-check that the cabinets are aligned properly and
secure the Tie-In Strap to the top of each cabinet with self-
drilling screws. Position one of the notched upper end panels
as shown on the first cabinet, with the notch at the bottom, and
attach to the cabinet with sheetmetal screws at front and back
corners. Position the other notched upper end panel as shown
on the second cabinet, with the notch at bottom, and attach to
the cabinet with sheetmetal screws at front and back corners.
Reinstall the front and rear grills on each cabinet by inserting
mounting screws on the back side at each end into the keyhole
slots on the end panels. Check that the grills and doors are
straight and properly aligned. Adjust if necessary. Apply a bead
of silicone in the vertical seems between the cabinets at front
and back side.
NOTE: This is necessary to comply with sanitation
requirements and also makes it apparent that the cabinets
have been attached together.
FIGURE 15: Installation of Tie Straps for Roll-Thru Cabinets
Loading ...
Loading ...
Loading ...