Loading ...
Loading ...
Loading ...
20
REACH-INS & ROLL-INS
OPERATIONS MANUAL
IMPORTANT NOTE: LOADING PRODUCT TOO CLOSE
TO THE WALLS OR PANELS WILL RESTRICT AIRFLOW,
RESULTING IN POOR PERFORMANCE AND SERVICE
ISSUES, SUCH AS COIL FREEZE-UP, WHICH WILL NOT
BE COVERED BY WARRANTY.
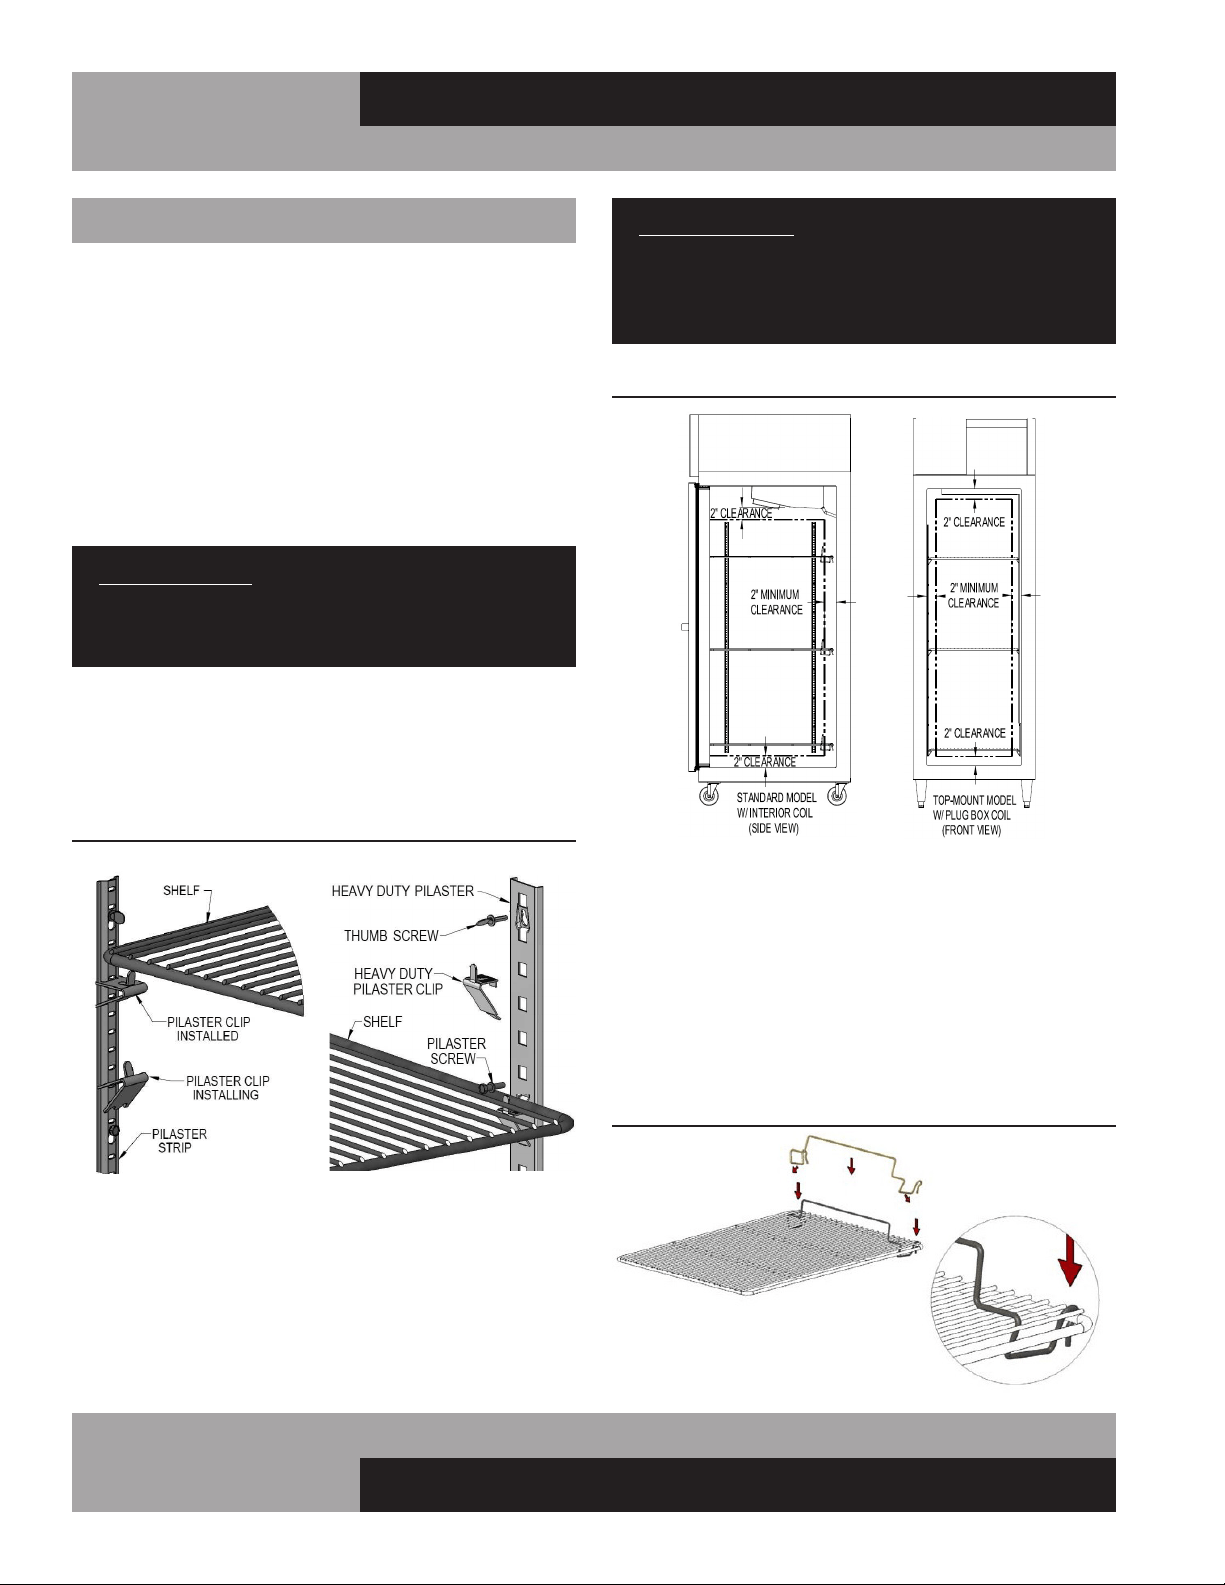
To ensure proper air flow inside wall your cabinet, some interior
standard models are provided with product stops that snap onto
the shelves (see Figure 10B). To install the product stop, place
it over the shelf as shown and press it down onto the shelf. If
necessary, carefully pull out on the ends of the product stop,
so the bottom of the rod snaps over the shelf wire. Press down
on the hooks at ends of the product stop, so they snap over the
back of the shelf frame. Repeat for remaining shelves. Make sure
all shelves are installed with the product stops positioned at the
back of your cabinet.
INTERIOR ACCESSORIES
Your new cabinet comes with (3) shelves per section for stan-
dard solid door models, or (4) shelves per section for glass door
models, and (4) support clips per shelf.
SHELVING INSTALLATION
Pilaster strips for mounting the shelves are secured to the cabi-
net walls with special screws which allow the strips to be readily
removed for cleaning without the use of tools. To install the
shelving, determine the desired location for the shelves in each
section of your cabinet. For proper airflow, the bottom shelf in
each section should be installed with the clips at the lowest posi-
tion on the pilaster strip, to provide space for sufficient airflow
under and around the product.
IMPORTANT NOTE: When locating your shelves, allow
space between each row of product. A minimum clear-
ance of 2” is recommended below the bottom product
for air circulation.
Shelf clips are easily installed by inserting them into the pilasters
at the desired shelf locations. To install a shelf, simply place it
on the (4) clips, making sure that the clips are located properly,
so the shelf is level and supported at each corner. Standard and
optional heavy duty pilasters and clips are shown in Figure 10.
PRODUCT LOADING
Product load should be evenly distributed over each shelf
and through the cabinet. For proper performance on standard
ceiling-mount coil models, maintain at least a 2” air space from
product to the back wall and to the coil housing. For top-mount
plug box models, a minimum 2” clearance should be maintained
from the face of the top and side walls (see Figure 10A).
FIGURE 10: Standard and Heavy Duty Shelf Supports
FIGURE 10A: Product Loading Limits
FIGURE 10B: Product Stop Installation
Loading ...
Loading ...
Loading ...