Loading ...
Loading ...
Loading ...

9
Owner’s Manual
Owner’s Manual
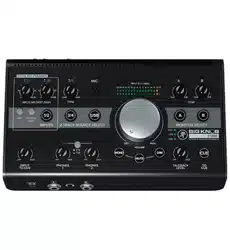
Rear Panel Description
For the most part, the rear panel is where to
connect various sources feeding IN to the Big Knob.
These signals are then routed through the Big Knob
and released through the OUTPUT jacks.
There are a few other bells and whistles, as well,
and we’ll take a look at all features, no matter how
great or small. We should probably start with how
to power the darn thing up first, though...!
USB
REC SRC
SELECT
INPUTS 1/2
2-TRACK
+18VDC
1.5A
POWER
Barrel Connector
The
Power
Block
Locking Outer Ring
12
3
4
1. Power Connector
The Big Knob Studio and Big Knob Studio
+
have a
universal external power supply that accepts any AC
voltage ranging from 100 VAC to 240 VAC. No need for
voltage select switches. It will work virtually anywhere
in the world. That’s why we call it a “Planet Earth”
power supply! It is less susceptible to voltage sags or
spikes compared to conventional power supplies, and
provides greater electromagnetic isolation and better
protection against AC line noise.
An external power supply [aka The Power Block] and
a line cord are included with the Big Knob. A locking
barrel connector resides at the end of the cord attached
to The Power Block. Attach it to the power connector on
the Big Knob and rotate the outer ring clockwise to lock.
Do not over-tighten! Screw until there is resistance,
then stop. Connect the female end of the line cord to
The Power Block and plug the male end into a live
grounded AC outlet. An LED on The Power Block will
illuminate green to indicate success (whether the Big
Knob is powered on or not).
Only use the factory-authorized power
supply that came with your
Big Knob
.
2. Power Switch
Press the top of this rocker switch inwards to turn
the Big Knob on and press the bottom of this rocker
switch inwards to turn the Big Knob off.
3. USB Input / Output Jack
The built-in USB interface allows for some powerful
and flexible routing by transferring digital audio to and
from a computer. To use this feature with a PC, first
download the PC ASIO driver from
http://mackie.com/products/big-knob-series.
If connecting to a Mac, it will show up as a 2x2 device
[Big Knob Studio] or 2x4 device [Big Knob Studio
+
]
with no driver required.
The USB routing of the Big Knob is a potent thing
to behold. Input signals are always sent directly to the
computer, yet also routable directly to the monitor and
headphones outputs.
Similarly, stereo playback and/or the 2-track outputs
are always routed back into the device for monitoring
and overdubbing (unless you choose to mute them in
software). Since the phones and monitor outputs have
separate volume controls, users are free to monitor
using either, neither or both. And because analog input
signals may be blended in with playback signals for
monitoring purposes, overdubs can occur in real-time
without the burden of computer-induced latency.
Loading ...
Loading ...
Loading ...