Loading ...
Loading ...
Loading ...

15
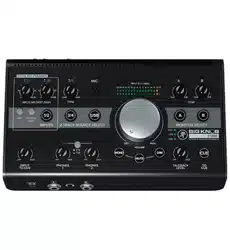
Owner’s Manual
Owner’s Manual
Never plug single-ended (unbalanced)
micro phones, or ribbon mics into the mic
input jacks if phantom power is on. Do not
plug instrument outputs into the mic XLR
input jacks with phantom power on, unless you know for
certain it is safe to do so. Be sure the channel’s gain
control is turned down when connecting microphones
to the mic inputs when phantom power is turned on,
to prevent pops from getting through to the speakers.
21. Stereo Pan Switch [Ch. 1–2]
With this switch pressed in, channel 1 will play only
in the left side of the main mix, and channel 2 will play
in the right side. Conversely, with this switch out, each
mono channel feeds both the left and right sides of the
main mix equally. For example:
• Playing a mono source: If you talk into a
microphone connected to input 1, your sweet tones
will be heard in both the left and right monitors.
• Overdubbing a mono source: if you are monitoring
directly through the headphones, you can hear the
overdub signal in both ears while you are playing.
Record output, however, is not affected by the position
of the switch. Channel 1 will always feed the recording
USB / analog left output and channel 2 will always feed
the recording USB / analog right output.
The stereo pan switch does not affect the other
channels or USB.
22. Input / 2-Track Source Select Buttons
These buttons turn the input signals connected to Big
Knob on and off. Engaged buttons route the associated
inputs to the engaged monitor outputs. Any combination
of inputs may be turned on simultaneously. Engaged
buttons will illuminate green.
Engaged source select buttons route the associated
inputs to the engaged monitor stereo outputs, the
2-track stereo output, to the studio stereo output (if
the studio outs button is engaged) or phones amp stereo
output (if the studio outs button is disengaged) and to
the phones 1 and 2 outputs located on the front panel.
The Big Knob Studio has three source
select buttons [1/2, 3/4, USB] while the Big
Knob Studio
+
possesses an additional
source select button [1/2, 3/4, 5/6, USB]
.
20 21 22
A Cautionary Note: When you have a
2-track recording device connected to both
the inputs and the outputs on Big Knob,
you run the risk of creating a feedback
loop. If the recording device is in record, record pause,
or input monitor mode, the signal can go from the 2-track
outputs through the recording device and back into the
2-track inputs, creating a circular loop that results in a
terrible howl.
You must remember to turn off the appropriate 2-track
input source select button when recording to your
2-track recorder!
23. Cue Source Knob [Big Knob Studio
+
]
The Big Knob Studio
+
has a 3-postion blend knob
that allows you to select which input source(s) level is
controlled via the direct monitoring knob (as described
below).
Knob position (L, C, R):
• Left – Only the aux mix inputs will be heard.
• Center – A masterful concoction of the aux mix
inputs, USB and inputs 3/4 will be heard...also known
as “a blend”. And you didn’t think we made blenders!
• Right – Only USB outputs 3/4 – the return from
the DAW – will be heard.
24. Direct Monitoring Knob
The direct monitoring knob adjusts the level of
inputs 1/2 [Big Knob Studio] and Cue Source selection
[as described above, Big Knob Studio
+
] to be delivered
to the phones and studio outputs. As an added bonus,
this is all at zero-latency!
Knob position (L, C, R):
• Full Left – Input 1/2 = Full Volume
Cue Source = No Volume
• Center – Input 1/2 and Cue Source = Equal Volume
• Full Right – Input 1/2 = No Volume
Cue Source = Full Volume
1
5/6
2
STEREO IN
CUE IN
AUX
MIX
SOURCES INPUTS
1(L)3/45/62-TRACKSTUDIO/
PHONES
AMP
USB
2(R)
FOOTSWITCH
MIC
L
(MONO)
R
L
(MONO)
R
L
R
L
R
BAL / UNBALBAL / UNBAL
L
R
BAL / UNBAL
L
R
BAL / UNBAL
L
R
BAL / UNBAL BAL / UNBALBAL / UNBAL
L
(MONO)
R
BAL / UNBAL
REC SRC
SELECT
TALKBACK
MONITOR
C
MONITOR
B
MONITOR
A
EXT
INT
INPUTS 1/2
2-TRACK
OUTPUTS
+18VDC
1.5A
POWER
-10dB
+4dB
-10dB
+4dB
USB
3/4
AUX
MIX
SOURCE(S)
MIC/LINE/INST GAIN
CUE
SOURCE
DIRECT
MONITORING
INPUTS
CUE
1 (L) 2 (R)
MAX
MIN
MAX
MIN
23
25
24
25. Phones Knobs and 2-Track / Cue Switch(es)
The phones knobs are used to adjust the volume
from the phones output jacks, from off (∞) to maximum
gain (MAX).
The headphone amp is loud and could
cause permanent hearing damage. Even
intermediate levels may be painfully loud
with some headphones. BE CAREFUL!
Always turn the phones knob all the way down before
connecting headphones or doing anything new that may
affect the headphone volume. Then turn it up slowly as
you listen carefully.
The accompanying 2-track / cue switch(es) control
the location of where the headphones is receiving its
source path.
Switch disengaged [up] – Phones receives the source
from the main output signal path, post-summing / pre-
volume.
Switch engaged [down] – Phones receives the same
signal as the studio outputs.
This feature allows you to choose between
hearing what is selected on the input
source section or what the musicians hear
in the cue mix.
The Big Knob Studio has one
2-track / cue switch while the
Big Knob Studio
+
possesses
an additional switch, one for each
phones knob.
26. Studio Outs On / Off Button
[Big Knob Studio
+
]
This button turns the signal path
on and off going to the studio outs
jacks on the rear panel. The button
will illuminate white when engaged
(on).
27. Studio Outs Level Knob [Big Knob Studio
+
]
The studio outs level knob is used to adjust the
volume from the studio output jacks on the rear panel,
from off (∞) to maximum gain (MAX).
1
5/6
2
STEREO IN
CUE IN
AUX
MIX
SOURCES INPUTS
1(L)3/45/62-TRACKSTUDIO/
PHONES
AMP
USB
2(R)
FOOTSWITCH
MIC
L
(MONO)
R
L
(MONO)
R
L
R
L
R
BAL / UNBALBAL / UNBAL
L
R
BAL / UNBAL
L
R
BAL / UNBAL
L
R
BAL / UNBAL BAL / UNBALBAL / UNBAL
L
(MONO)
R
BAL / UNBAL
REC SRC
SELECT
TALKBACK
MONITOR
C
MONITOR
B
MONITOR
A
EXT
INT
INPUTS 1/2
2-TRACK
OUTPUTS
+18VDC
1.5A
POWER
-10dB
+4dB
-10dB
+4dB
USB
3/4
AUX
MIX
SOURCE(S)
MIC/LINE/INST GAIN
CUE
SOURCE
DIRECT
MONITORING
INPUTS
CUE
1 (L) 2 (R)
MAX
MIN
MAX
MIN
26
27
Loading ...
Loading ...
Loading ...