
Part No. 7111522 Rev. A AUG2018
If your pressure washer is not working properly or if there are parts missing or broken,
please DO NOT RETURN IT TO THE PLACE OF PURCHASE. Contact our customer service
department at 1-844-375-7577.
IMPORTANT: Please make certain that the person who is to use this equipment carefully reads
and understands these instructions before operating.
SAVE THIS MANUAL FOR FUTURE REFERENCE
INSTRUCTION MANUAL

2
TABLE OF CONTENTS
Safety Guidelines - Definitions ....................................................................... 3
Important Safety Instructions: Gasoline or Diesel Driven .............................. 3
Important Safety Instructions: Electric Driven ............................................... 9
Important Safety Instructions ......................................................................... 9
Power Supply and Electrical Info ..........................................................11
Get to Know the Pressure Washer ...............................................................11
Get to Know the Pressure Washer Operating Features ....................... 13
Operation ..................................................................................................... 15
Before Each Start Up ............................................................................16
Shutting Down .......................................................................................17
Maintenance .................................................................................................18
Storage ..................................................................................................19
Engine .................................................................................................... 19
Motor .....................................................................................................19
Pressure washer .................................................................................... 19
Accessories ...................................................................................................19
Service Information .......................................................................................19
Troubleshooting Guide ..................................................................................20
Limited Warranty ...........................................................................................27

3
SAFETY GUIDELINES - DEFINITIONS
This manual contains information that is important for you to know and understand.
This information relates to protecting YOUR SAFETY and PREVENTING
EQUIPMENT PROBLEMS. To help you recognize this information, we use the
symbols below. Please read the manual and pay attention to thesesymbols.
DANGER: Indicates an imminently hazardous situation which, if not avoided,
will result in death or seriousinjury.
WARNING: Indicates a potentially hazardous situation which, if not avoided,
could result in death or seriousinjury.
CAUTION: Indicates a potentially hazardous situation which, if not avoided, may
result in minor or moderateinjury.
NOTICE: Indicates a practice not related to personal injury which, if not avoided,
may result in propertydamage.
IMPORTANT SAFETY INSTRUCTIONS: GASOLINE OR DIESEL DRIVEN
If you loan, rent, or sell this machine, be sure to include all instructional materials
with the unit!
DANGER: Carbon Monoxide. Using an engine indoors can kill you in
minutes. Engine/burner exhaust contains high levels of carbon monoxide
(CO), a poisonous gas you cannot see or smell. You may be breathing CO
even if you do not smell engine exhaust.
• NEVER use an engine or oil burner inside homes, garages, crawlspaces or other
partly enclosed areas. Deadly levels of carbon monoxide can build up in these
areas. Using a fan or opening windows and doors does NOT supply enough
freshair.
• ONLY use outdoors and far away from open windows, doors and vents. These
openings can pull in engine exhaust. Never operate the pressure washer in or near
a location occupied by humans oranimals.
• Even when the engine is used correctly, CO may leak into your home. ALWAYS
use a battery-powered or battery backup CO alarm in your house. Read and
follow all directions for CO alarm before using. If you feel sick, dizzy or weak
at anytime, move to fresh air immediately. See a doctor. You could have carbon
monoxidepoisoning.
WARNING: Do not operate this unit until you read this instruction manual and
the engine instruction manual for safety, operation and maintenance instructions. If
you have any questions regarding the product, please contact our customer
service department at 1-844-375-7577.
DANGER: Risk of injection or severe injury. Keep clear of nozzle. Do not
direct discharge stream at persons or live animals. This product is to be used
only by trainedoperators.
WARNING: This product and its exhaust can expose you to chemicals including
lead and lead compounds, and carbon monoxide, which are known to the State of
California to cause cancer and birth defects or other reproductive harm. For more
information go to www.P65Warnings.ca.gov.

4
WARNING: This product may not be equipped with a spark-arresting muffler.
If the product is not equipped and will be used around flam ma ble ma teri als or
on land covered with materials such as agricultural crops, forest, brush, grass or
other similar items, then an ap proved spark arrester must be installed and is legally
required in the state of California. It is a violation of California statutes section
130050 and/or sec tions 4442 and 4443 of the California Public Re sourc es Code,
unless the engine is equipped with a spark arrester, as defined in section 4442, and
maintained in ef fec tive work ing order. Spark arresters are also required on some
U.S. For est Service land and may also be legally required under other statutes
andor di nanc es.
SAVE THESE INSTRUCTIONS
DANGER: RISK OF EXPLOSION OR FIRE
WHAT CAN HAPPEN HOW TO PREVENT IT
• Spilled gas o line (diesel, kerosene,
approved alternate fuel) and it’s vapors
can be come ignited from cigarette
sparks, electrical arcing, exhaust gas-
es and hot engine components such
as themuffler.
• Shut off en gine and allow it to cool before
adding fuel to thetank.
• During refueling all ignition sources and
switches should be in the OFFposition.
• Use care in fill ing tank to avoid spill ing fuel.
Move pressure wash er away from fueling
area before start ingen gine.
• Heat will ex pand fuel in the tank which
could result in spillage and pos si ble
fireexplosion.
• Keep maximum fuel level 1/2" (12.7mm)
be low bottom of filler neck to allow
forexpansion.
• Operating the pressure washer in an
ex plo sive en viron ment could re sult in
afire.
• Operate and fuel equipment in well-
ventilat ed areas free from ob structions.
Equip areas with fire extinguisher suit able
for gas o linefires.
• Materials placed against or near the
pressure washer can in ter fere with
its proper ventilation fea tures caus ing
overheating and possible ig ni tion of
thematerials.
• Never op er ate pressure wash er in an area
containing dry brush orweeds.
• Improperly stored fuel could lead to
acciden tal ignition. Fuel im prop er ly
secured could get into the hands of
children or oth er un qual i fiedpersons.
• Store engine and burner fuel in a clean
OSHA approved con tain er, in a se cure
location away from work area. Do not
allow debris or moisture to entercontainer.
• Spraying of gasoline, kerosene or any
kind of flammable solvent with this
product could result in serious injury
ordeath.
• Do not spray flammableliquids.
• Flammable liquids can create fumes
which can ignite, causing property
damage or seriousinjury.
• Operate only where open flame or torch
ispermitted.
5
DANGER: RISK TO BREATHING (ASPHYXIATION)
WHAT CAN HAPPEN HOW TO PREVENT IT
• Breathing ex haust fumes will cause
se ri ous injury or death! En gine
exhaust contains carbon mon ox ide,
an odorless and deadlygas.
• Operate pressure washer in a well-
ventilated area. Avoid en closed areas
such as ga rages, base ments,etc.
• Never op er ate unit in or near a lo ca tion
occupied by humans oranimals.
• Never connect pressure washer to a
TYPE B gasvent.
• Some clean ing fluids con tain
substanc es which could cause injury
to skin, eyes orlungs.
• Use only clean ing fluids spe cif i cally rec-
om mend ed for high pressure washers.
Fol low manufacturers recommendations.
Do not use chlorine bleach or any other
corrosive compound.
DANGER: RISK OF FLUID INJECTION AND LACERATION
WHAT CAN HAPPEN HOW TO PREVENT IT
• Your pressure washer operates at fluid
pressures and velocities high enough
to penetrate human and animal flesh
which could result in amputation or
other serious injury. Leaks caused
by loose fittings or worn or damaged
hoses can result in injection injuries.
DO NOT TREAT FLUID INJECTION
AS A SIMPLE CUT! See a physician
immediately!
• Inspect the high pressure hose regularly.
Replace the hose immediately if it is
damaged, worn, has melted from
contacting the engine, or shows any signs
of cracks, bubbles, pinholes, or other
leakage. Never grasp a high pressure
hose that is leaking ordamaged.
• Never touch, grasp or attempt to cover
a pinhole or similar water leak on the
high pressure hose. The stream of
water IS under high pressure and WILL
penetrateskin.
• Never place hands in front ofnoz zle.
• Direct spray away from self andothers.
• Make sure hose and fit tings are tightened
and in good condition. Never hold onto
the hose or fittings duringop er a tion.
• Do not allow hose to contactmuf fler.
• Never attach or remove wand or hose
fittings while sys tem ispres sur ized.
• When using replacement lances or guns
with this pressure washer, DO NOT use
a lance and/or lance/gun combination
that is shorter in length than what was
provided with this pressure washer as
measured from the nozzle end of the
lance to the guntrigger.
• Use only accessories rated equal
to or higher than the rating of the
pressurewasher.
6
• Injuries can result if system pressure
is not reduced before attempting
maintenance ordisassembly.
• To relieve sys tem pres sure, shut off
engine, turn off water sup ply and pull gun
trigger until water stopsflowing.
DANGER: RISK OF INJURY FROM SPRAY
WHAT CAN HAPPEN HOW TO PREVENT IT
• High-velocity fluid spray can cause
objects to break, projecting particles
at highspeed.
• Always wear safety glasses. Wear
protective clothing to protect against
accidentalspraying.
• Never point wand at or spray people
oranimals.
• Light or unsecured objects can
become hazardousprojectiles.
• Always secure trigger lock when
wand is not in service to prevent
accidentaloperation.
• Never permanently secure trigger in pull-
back (open)position.
DANGER: RISK OF UNSAFE OPERATION
WHAT CAN HAPPEN HOW TO PREVENT IT
• Unsafe op er a tion of your pressure
wash er could lead to se ri ous in ju ry or
death to you orothers.
• Do not use chlorine bleach or any other
corrosivecompound.
• Be come fa mil iar with the op er a tion and
con trols of the pressurewasher.
• Keep operating area clear of all persons,
pets andobstacles.
• Do not operate the product when fatigued
or under the influence of alcohol or drugs.
Stay alert at alltimes.
• Never compromise the safety fea tures of
thisprod uct.
• Do not op er ate machine with missing,
broken or un au tho rizedparts.
• Never leave wand unattended while unit
isrunning.
• Do not obstruct the burnerexhaust.
• Do not tamper with the safety pressure
relief valve.
• Do not tamper with the unloader valve.
• Do not modify the pressurewasher.
• If proper starting procedure is not
followed, engine can kickback causing
serious hand and arminjury.
• If engine does not start after two pulls,
squeeze trigger of gun to relieve pump
pressure. Pull starter cord slowly until
resistance is felt. Then pull cord rapidly
to avoid kickback and prevent hand or
arminjury.
• The spray gun/wand is a powerful
clean ing tool that could look like a toy
to achild.
• Keep chil dren away from the pressure
washer at alltimes.
7
• Reactive force of spray will cause
gun/wand to kickback, and could
cause the op er a tor to slip or fall or
misdirect the spray. Im prop er control
of gun/wand can re sult in in ju ries to
self and others.
• Do not over reach or stand on an unstable
support.
• Do not use pressure washer while
standing on a ladder.
• Grip gun/wand firmly with both
hands. Expect the gun to kickback
whentriggered.
DANGER: RISK OF INJURY OR PROP ER TY DAMAGE WHEN
TRANSPORTING OR STORING
WHAT CAN HAPPEN HOW TO PREVENT IT
• Fuel or oil can leak or spill and could
result in fire or breathing hazard.
Se rious in ju ry or death can re sult.
Fuel or oil leaks will dam age carpet,
paint or oth er surfaces in ve hi cles
ortrailers.
• Oil could fill the cylinder and damage
the engine if the unit is not stored or
transported in an upright position.
• If pressure washer is equipped with a fuel
shut-off valve, turn the valve to the OFF
position before transporting to avoid fuel
leaks. If pres sure wash er is not equipped
with a fuel shut-off valve, drain the fuel
from tank before trans port ing.
Only trans port fuel in an OSHA-approved
container.
Al ways place pressure washer on
a protective mat when transporting
to protect against dam age to vehicle
fromleaks.
Always transport and store unit in an
upright position. Re move pres sure
washer from vehicle immediately upon
arrival at yourdestination.
DANGER: RISK OF ELEC TRI CAL SHOCK
WHAT CAN HAPPEN HOW TO PREVENT IT
• Spray di rect ed at elec tri cal outlets or
switch es, or ob jects con nect ed to an
elec tri cal circuit, could re sult in a fatal
electricalshock.
• Unplug any elec tri cal ly op er at ed product
before attempting to clean it. Direct spray
away from electric out lets andswitches.
DANGER: RISK OF CHEMICAL BURN
WHAT CAN HAPPEN HOW TO PREVENT IT
• Use of acids, toxic or corrosive
chemicals, poisons, in sec ti cides, or
any kind of flam ma ble solvent with this
product could re sult in se ri ous injury
ordeath.
• Do not spray ac ids, gasoline, ker o sene,
or any other flammable materials with this
product. Use only household de ter gents,
cleaners and degreasers recommended
for use with pres surewashers.
• Wear pro tec tive clothing to protect
eyes and skin from con tact with
sprayedmaterials.
8
WARNING: RISK OF BURSTING
WHAT CAN HAPPEN HOW TO PREVENT IT
• High-velocity fluid spray directed at
pneumatic tire sidewalls (such as
found on automobiles, trailers and
the like) could damage the sidewall
resulting in serious injury.
• On pressure washers rated above
1600 psi (11032 kPa) use the widest
fan spray (40º nozzle) and keep the
spray a minimum of 8" (20 cm) from the
pneumatic tire sidewall. Do not aim spray
directly at the joint between the tire and
rim.
WARNING: RISK OF HOT SURFACES
WHAT CAN HAPPEN HOW TO PREVENT IT
• Con tact with hot sur fac es, such as
engine exhaust com po nents, could
result in se ri ousburn.
• During op er a tion, touch only the control
surfaces of the pres sure washer. Keep
children away from the pres sure washer
at all times. They may not be able to
recognize the haz ards of thisproduct.
• Con tact with spray will result in
se riousburn.
• DO NOT touch spray, ALWAYS direct
spray away from self andothers.
WARNING: RISK OF INJURY FROM LIFTING
WHAT CAN HAPPEN HOW TO PREVENT IT
• Serious injury can result from
attempting to lift too heavy anobject.
• The pressure washer is too heavy to be
lifted by one person. Obtain assistance
from others beforelifting.
NOTICE: RISK OF PROPERTY DAMAGE
WHAT CAN HAPPEN HOW TO PREVENT IT
• Muffler and burner exhaust heat can
damage paint ed sur fac es, melt any
material sen si tive to heat (such as
siding, plas tic, rub ber, vinyl or the
pressure hose, itself), and dam age
liveplants.
• Always keep pressure washer a min i-
mum of 4' (1.2 m) away from sur fac es
(such as houses, au to mo biles or live
plants) that could be damaged from
muffler exhaustheat.
SAVE THESE INSTRUCTIONS
FOR FUTURE USE

9
IMPORTANT SAFETY INSTRUCTIONS: ELECTRIC DRIVEN
If you loan, rent, or sell this machine, be sure to include all instructional materials
with the unit!
WARNING: Please read this entire manual before attempting to assemble,
operate or install theproduct.
WARNING: This unit was designed for specific applications. It should not be
modified and/or used for any application other than that which it was designed.
NOTICE: Always store your pressure washer in a location where the temperature
will not fall below 40°F (4°C). freeze damage is not covered by thewarranty.
WARNING: This product and its exhaust can expose you to chemicals including
lead and lead compounds, and carbon monoxide, which are known to the State of
California to cause cancer and birth defects or other reproductive harm. For more
information go to www.P65Warnings.ca.gov.
READ AND SAVE THESE INSTRUCTIONS
IMPORTANT SAFETY INSTRUCTIONS
WARNING: When using this product basic precautions should always be
followed, including the following:
1. Read all the instructions before using the product.
2. To reduce the risk of injury, do not operate near children oranimals.
3. Know how to stop the product and bleed pressures quickly. Be thoroughly familiar
with thecontrols.
4. Stay alert - watch what you aredoing.
5. Do not operate the product when fatigued or under the influence of alcohol
ordrugs.
6. Keep operating area clear of allpersons.
7. Do not overreach or stand on unstable support. Keep good footing and balance at
all times.
8. Follow the maintenance instructions specified in the manual.
9. Do not touch plug or outlet with wet hands.
10. Avoid accidental starts. Move switch on unit to OFF position before connecting or
disconnecting cord to electrical outlets.
11. Water spray must never be directed towards any electric wiring or directly towards
the pressure washer machine itself or fatal electric shock may occur.
12. Never carry your pressure washer by the cord. Do not pull on the cord to
disconnect from the outlet.
13. To prevent damage, the cord should not be crushed, placed next to sharp objects
or near a heat source.
14. Check power cords before using. Damaged cords can reduce performance of
pressure washer or cause a fatal electricalshock.
15. The narrow pin point stream is very powerful. It is not recommended for use on
painted surfaces, wood surfaces or items attached with an adhesive backing.
16. Keep operating area clear of all persons andani mals.
17. Always use both hands when operating pressure washer to maintain complete
control of thewand.
18. Do not touch nozzle or water spray while operating. Never place hands in front
ofnozzle.
19. Wear safety goggles while operating. Wear protective clothing and footwear to
protect against accidentalspraying.

10
20. Disconnect power plug from the outlet when not in use and prior to the detaching
of the high pressurehose.
21. Never tie knots or kink the high pressure hose as da mage could result. Inspect the
high-pressure hose regularly. Replace the hose immediately if it is damaged, worn
or shows any signs of cracks, bubbles, pinholes, or other leakage. Never grasp a
high-pressure hose that is leaking ordamaged.
22. Do not operate or store this product in temperatures below 40°F (4°C). Freeze
damage is not covered by thewarranty.
23. Carefully observe all chemical instructions and warnings before using. Use only
approved pressure washer cleaners. Do not use bleach, chlorine, or any cleaners
containing acids. Always follow manufacturer’s label recommendations for proper
use of cleaners. Always protect eyes, skin and respiratory system fromcleaners.
24. The pressure washer should not be used in areas where gas vapors may be
present. An electric spark could cause an explosion or fire.
25. To minimize the amount of water getting into the pressure washer, the unit should
be placed as far as possible from the cleaning site duringoperation.
26. To prevent accidental discharge, the spray gun should be secured by locking the
trigger when not in use.
27. To allow free air circulation, the pressure washer should NOT be covered during
operation.
28. Never touch, grasp or attempt to cover a pinhole or similar water leak on the
high-pressure hose. The stream of water IS under high pressure and WILL
penetrateskin.
29. Use only hoses and accessories rated for pressure higher than your pressure
washer's psi. Never use with any other manufacturer’s accessories orcomponents.
30. Never defeat the safety fea tures of thisproduct.
31. Do not op er ate machine with missing, broken or un au tho rizedparts.
32. Never spray flammable liquids or use pressure washer in areas containing
combustible dust, liquid, orvapors.
WARNING: Risk of injection or injury. Do not direct discharge stream atpersons.
SAVE THESE INSTRUCTIONS FOR FUTURE USE
MOTOR OVERLOAD
This pressure washer is equipped with an overload protection device which will
automatically shut off the motor in the event the motor draws excessive current
or overheats.
GROUNDING INSTRUCTIONS
This product must be grounded. If it should malfunction or breakdown, grounding
provides a path of least resistance for electric current to reduce the risk of electric
shock. This product is equipped with a cord having an equipment-grounding
conductor and a grounding plug. The plug must be plugged into an appropriate
outlet that is properly installed and grounded in accordance with all local codes
andordinances.
WARNING: Improper connection of the equipment-grounding conductor can
result in a risk of electrocution. Check with a qualified electrician or service person
if you are in doubt as to whether the outlet is properly grounded. Do not modify
the plug provided with the product if it will not fit the outlet installed by a qualified
electrician. Do not use any type of adaptor with thisproduct.

11
GROUND-FAULT CIRCUIT INTERRUPTER PROTECTION (IF EQUIPPED)
This pressure washer is provided with a Ground-Fault Circuit-Interrupter (GFCI) built
into the plug of the power supply cord. This device provides additional protection
from the risk of electric shock. Should replacement of the plug or cord become
necessary, use only identical replacement parts that include GFCIprotection.
POWER SUPPLY AND ELECTRICAL INFO
This cord should only be connected to an electrical outlet installed in accordance
with local safety regulations.
A. Inspect cord before using. Do not use if cord isdamaged.
B. Keep all connections dry and off theground.
C. Do not touch plug with wethands.
D. For a product rated 250 volts or less, single phase: This product is provided
with a ground fault circuit interrupter built into the power plug. If replacement
of the plug or cord is needed, use only identical replacementparts.
E. For a product rated more then a single phase, or more then 250 volts: This
product shall only be connected to a power supply receptacle protected by a
ground fault circuit interrupter.
F. Read instruction manual before using.
Contact customer service for proper replacementparts.
WARNING: To reduce the risk of electrocution, keep all connections dry and off
the ground. Do not touch plug with wethands.
SAVE THESE INSTRUCTIONS FOR FUTURE USE
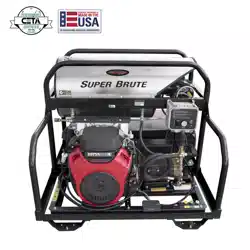
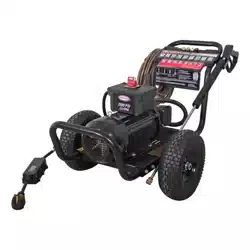
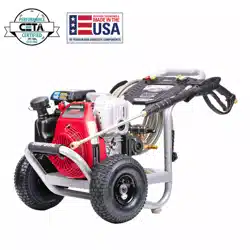
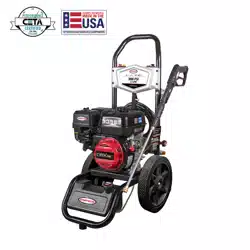
GET TO KNOW THE PRESSURE WASHER
NOTE: Photographs and line drawings used in this manual are for reference
only and do not represent a specific model. Save this manual for future reference.
NOTICE: The engine is shipped without oil. Before starting engine, add the oil
provided. Damage to the engine will occur if the engine is run without oil, this
damage will not be covered underwarranty.
PRESSURE WASHER TERMINOLOGY
PSI: Pounds per Square Inch. The unit of measure for water pressure. Also used
for air pressure, hydraulic pressure, etc. Operating at pressures exceeding the
maximum rating could result in damage to the unit and/or severe personalinjury.
GPM: Gallons per Minute. The unit of measure for the flow rate of water.
CU: Cleaning Units. GPM multiplied by PSI equalsCU.
Pressure Wand Assembly: This refers to the gun, wand andnozzle.
Pump: The pump moves the water through the system and delivers it to the
pressure wand assembly. The nozzle creates thepressure.
Bypass Mode: Allows water to re-circulate within the pump when the gun trigger is
not pulled. This feature allows the operator to release the trigger gun and reposition
themselves without having to turn the engine off in between cleaningactions.
NOTICE: Allowing the unit to run for more than two minutes without the gun trigger
being pulled could cause overheating and damage to the pump. Do not let the
pressure washer run for more than two minutes in Bypass Mode. Turn off the engine
and relieve the pressure in the gun during these extendedsituations.

12
Thermal Relief Valve: When the temperature inside the pump rises too high, this
valve will open and release a gush of water in an effort to lower the temperature
inside the pump. The valve will thenclose.
Pressure Relief Valve: The water heater coils are designed to operate safely
at normal working pressure. The safety pressure relief valve prevents over
pressurization of the high pressure system. Do not modify the pressure relief valve
inanyway.
High Pressure Pump Oil: The preferred oil is SIMPSON
®
Premium Pump
Crankcase Oil. If this oil is not available, an SAE 15W-40 oil may be used. Change
the pump oil after the first 50hours of operation and every 100 hours thereafter, or
every 3months.
Gasoline Engine Oil (if equipped):
Check engine oil level before each use. Refer to
the
Engine Owner's Manual
for correctprocedure.
12V DC Battery (if equipped):
The 12V DC battery operates the engine's electrical
start system, after the engine is started the system will charge the battery and operate
the burner. The 12V battery will need to be replaced regularly to ensure consistent
performance.
Recommended battery size:
Colbalt, Streamliner use Group 24 battery
/Patriot use U 1battery.
Burner Assembly: A device used to change fuel to heat energy. It is used to heat
the water in the coil assembly and is designed to use a NO. #2 dieselfuel.
BTU (British Thermal Unit): The amount of work or energy it takes to raise the
temperature of one pound of water by one degreeFahrenheit.
Temperature Control: The burner system is equipped with an adjustable
temperature control. Do not set thermostat above 195°F. The burner will shut off
if insufficient water flow through the burner's heater coil causes the outlet water
temperature to be excessive.
Back Flow Preventer: Prevents backflow into a potable watersystem.
WARNING: To reduce the possibility of contamination always protect
against backflow when connected to a potable water system
Pressure Switch: A switch which uses a pressure activated plunger to activate a
microswitch, used to control the fuel solenoid in the burnersystem.
Flow Switch: A switch which responds to changes in water flow, water flow
moves a magnet which ativates a reed or microswitch to control voltage to the fuel
solenoid in the burnersystem.
Chemical Injection System: Mixes cleaners or cleaning solvents with the water to
improve cleaning effectiveness.
High Pressure Hose: Only use a wire braid hose rated for the output pressure and
temperature of the high pressure pump. Additional hose lengths can be added with
quick twist couplers with a minimal loss in pressure of about .5 PSI per foot. Always
inspect hoses for wear and replace if necessary. Avoid kinking or running over the
hose to extend the hoselife.
Hour meter (if equipped): The analog hour meter operates whenever the engine is
running and keeps track of how many hours the unit has beenused.
Water Supply: The minimum requirements for a water supply are 20 psi at twice
the stated water volume for the machine. If your water source is a well, the garden
hose length can only be 30ft. (9m)maximum.
EVAP canister (if equipped): Collects fuel vapors and later purges them so they
burn in the combustionprocess.
13
Water column (if equipped): Is a measurement using a water column manometer
to measure the NG or LP gas operating pressure in units of water column inches.
GET TO KNOW THE PRESSURE WASHER OPERATING FEATURES
IMPORTANT: Become familiar with these features before operating this
pressurewasher.
PRESSURE ADJUSTMENTS
The pressure setting is preset at the factory to achieve op ti mum pres sure and
cleaning. If you need to lower the pres sure, it can be accomplished by these
methods.
1.
Back away from the sur face to be cleaned. The further away you are, the less
the pressure will be on the surface to becleaned.
2.
This pressure washer is equipped with an additional feature that allows the
pressure setting to be adjusted.
a.
To lower the pressure, turn the unloader control knob (located under the hot
water tank) counterclockwise to the desired pressure.
b.
To return the pump pressure to the factory setting, turn the unloader control
knob (located under the hot water tank) clockwise until itstops.
NOTICE: DO NOT overtighten the pressure control knob, if overtightened the knob
COULD break and result in immediate loss of water pressure and costly repairs to
theunit.
HOW TO USE SPRAY WAND
The nozzles for the spray wand are stored in the nozzle holder on the panel assembly.
Colors on the panel identify nozzle location and spray pattern. Refer to the following
chart to choose the correct nozzle for the job to beperformed.
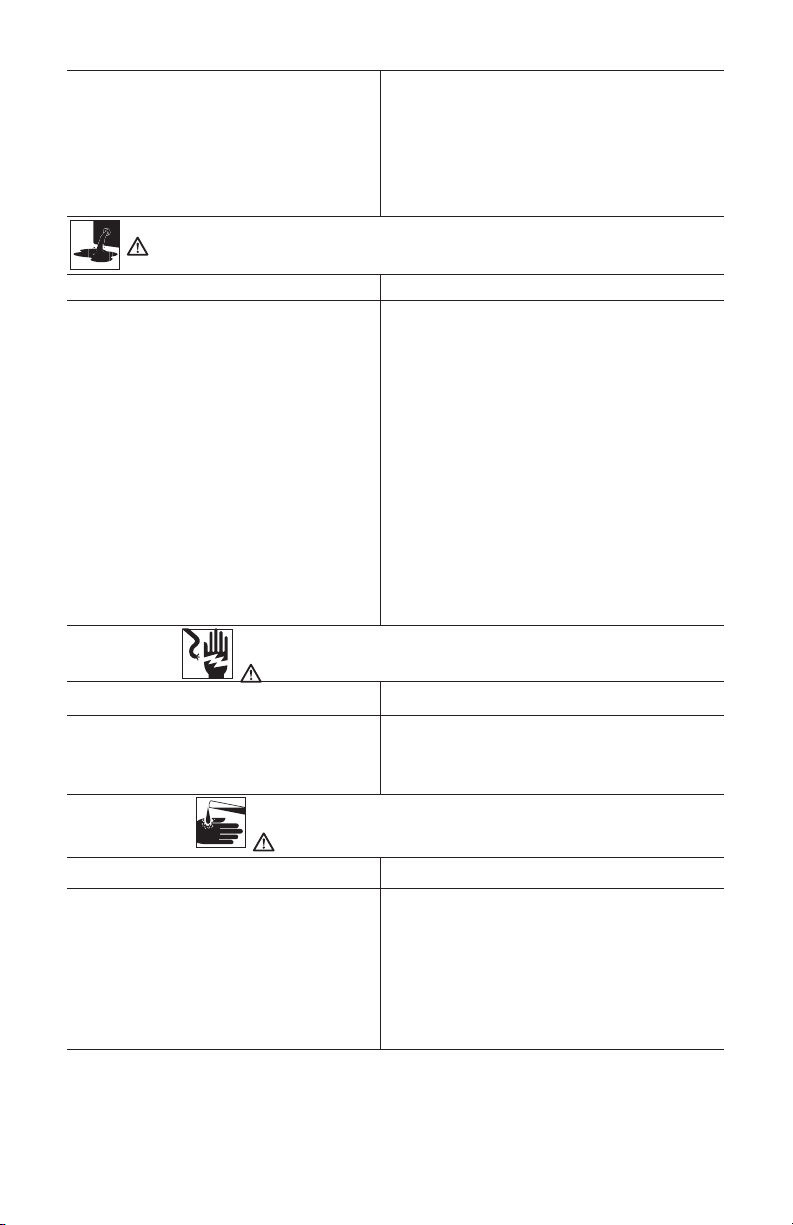
CHANGING NOZZLES ON SPRAY WAND (FIG. 1)
DANGER: Risk of fluid injection. Do not direct discharge stream toward
persons, unprotected skin, eyes or any pets or animals. Serious injury
willoccur.
WARNING: Flying objects could cause risk of serious injury. Do not
attempt to change nozzles while pressure washer is running. Turn engine off
before changingnozzles.
1. Pull quick-connect coupler (AA) back and insert nozzle (M).
1
M
AA
2. Release quick-connect coupler and twist nozzle to make
sure it is secure incoupler.
WARNING: Flying object could cause risk of serious
injury. Ensure nozzle is completely inserted in quick-
connect socket and quick-connect collar is fully engaged
(forward) before squeezing guntrigger.
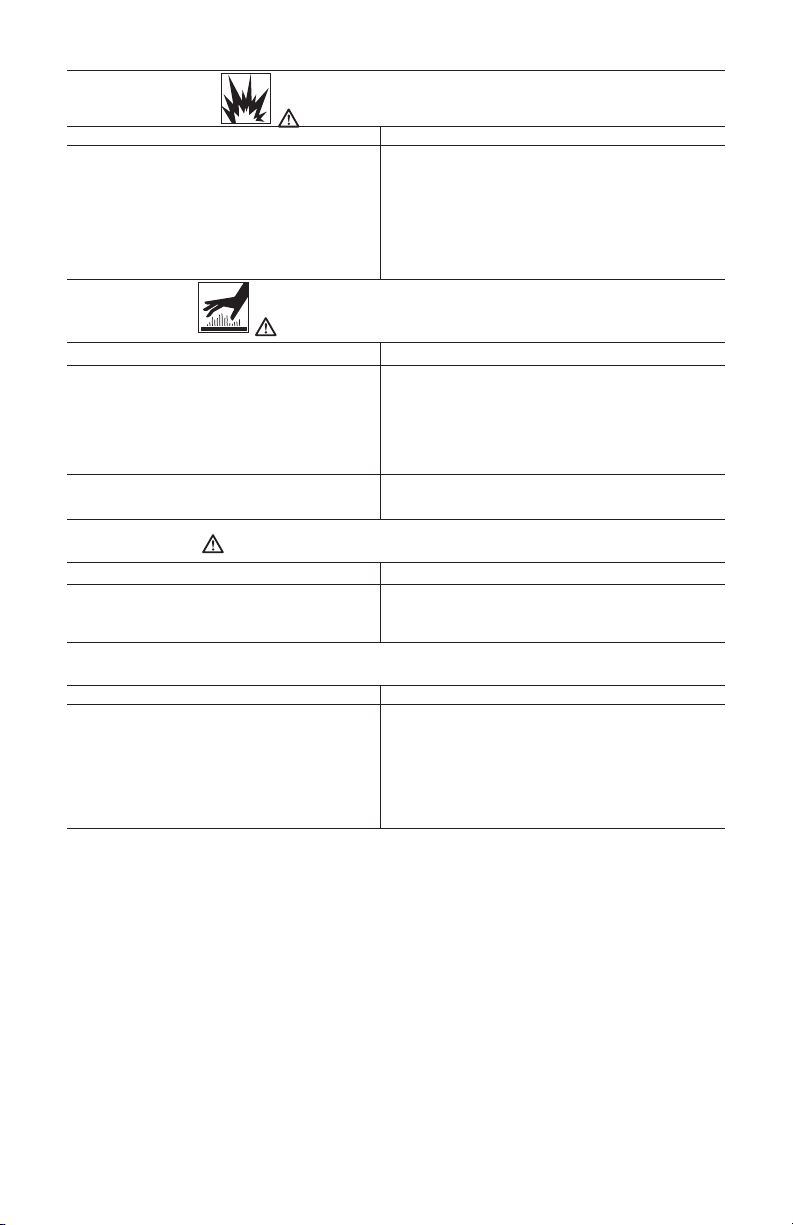
NOZZLE COLOR SPRAY PATTERN USES SURFACES*
Red
0˚
powerful
pinpoint for
spot cleaning of
hard, unpainted
surfaces or for
high reach areas
unpainted metal or concrete;
DO NOT use on wood
14
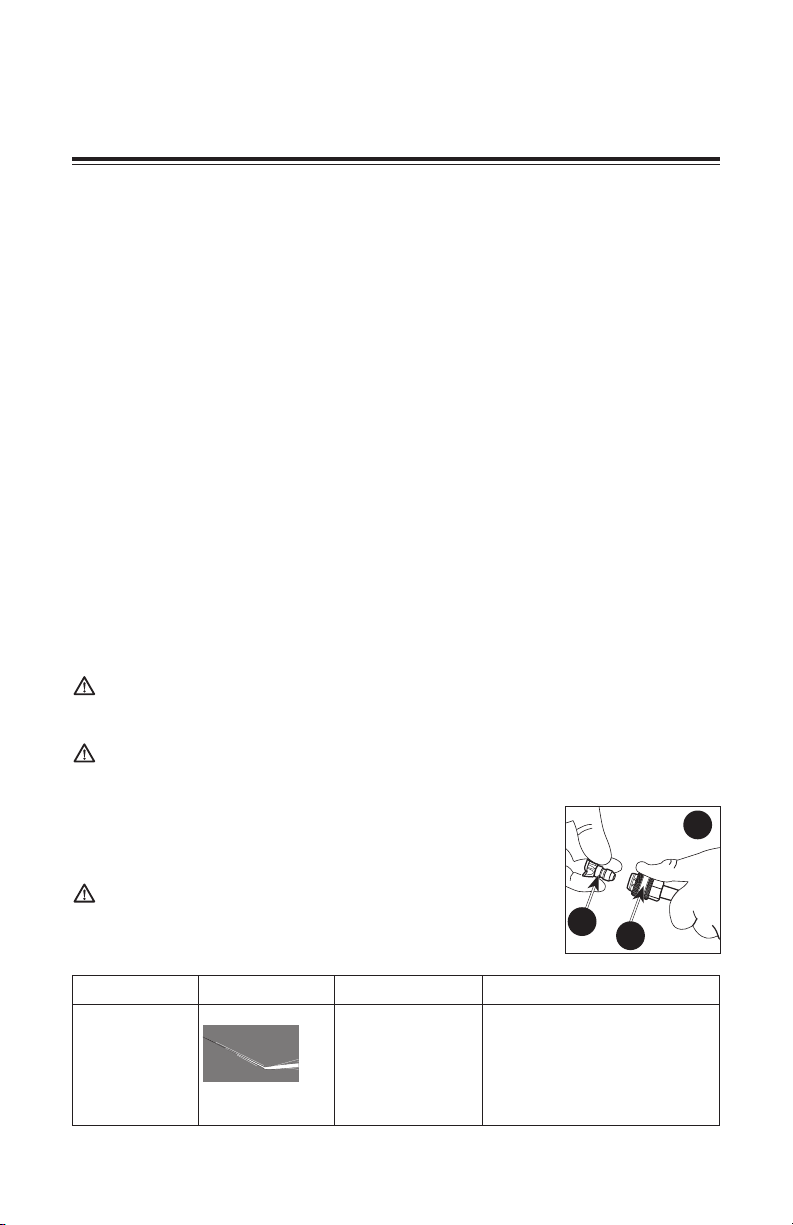
NOZZLE COLOR SPRAY PATTERN USES SURFACES*
Yellow
15˚
intense cleaning
of unpainted
hard surfaces
grills, driveways, concrete
or brick walkways,
unpainted brick or stucco
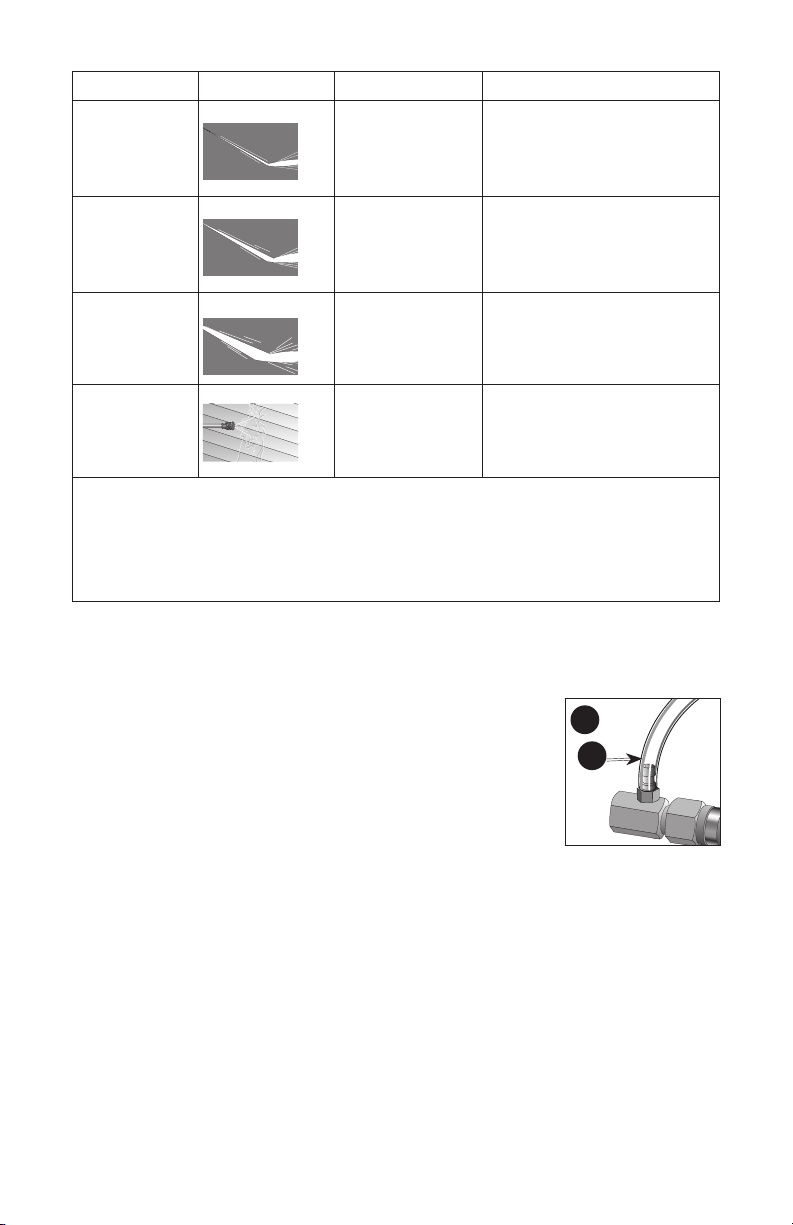
Green
25˚
standard cleaning
nozzle for most
applications
yard tools, sidewalks, lawn
furniture, unpainted siding,
stucco, gutters and eaves,
concrete, brick surfaces
White
40˚
cleaning of
painted or
delicate surfaces
auto/RV, marine, wood,
painted brick and stucco,
vinyl, painted siding
Black
low pressure
applies cleaning
solutions
Low pressure spray is safe
on all surfaces. Always verify
compatibility of cleaning
solution prior touse.
*NOTICE: The high pressure spray from your pressure washer is capable of
causing damage to surfaces such as wood, glass, automobile paint, auto striping
and trim, and delicate objects such as flowers and shrubs. Before spraying,
check the item to be cleaned to assure yourself that it is strong enough to resist
damage from the force of the spray.
HOW TO APPLY CHEMICALS/CLEANING SOLVENTS (FIG. 2)
Applying chemicals or cleaning solvents is a low pressure operation. NOTE: Use
only soaps and chemicals designed for pressure washer use. Do not use bleach.
To Apply Chemicals:
1.
Ensure chemical siphon hose (R, Figure 2) is attached to
2
R
barbed fitting location near high pressure hose connection
of pump as shown.
2.
Place the end of chemical siphon hose with filter on it into
container holding chemical/cleaningsolution.
3.
Install low pressure (black) nozzle into quick connect fitting
of spray wand, see
How To Use Spray Wand
paragraph
in thissection.
4. If equipped:
Some units have a soap control valve. Turn the valve counterclockwise
to increase the soap output and clockwise to decrease the soapoutput.
5.
After use of chemicals, place chemical siphon hose into container of clean water
and draw clean water through chemical injection system to rinse system thoroughly.
If chemicals remain in the pump, it could be damaged. Pumps damaged due to
chemical residue will not be covered underwarranty.

15
OPERATION
STARTING
WARNING: Do not operate this unit until you read this instruction manual
and the engine (if equipped) instruction manual for safety, operation and
maintenanceinstructions.
DANGER: Risk of fluid injection and laceration. When using the high
pressure setting, DO NOT allow the high pressure spray to come in contact
with unprotected skin, eyes, or with any pets or animals. Serious injury
willoccur.
• Your washer operates at fluid pressures and velocities high enough to penetrate
human and animal flesh, which could result in amputation or other serious injury.
Leaks caused by loose fittings or worn or damaged hoses can result in injection
injuries. DO NOT TREAT FLUID INJECTION AS A SIMPLE CUT! See a physician
immediately!
DANGER: Gasoline or Diesel Driven only: Carbon Monoxide. Using an
engine indoors can kill you in minutes. Engine exhaust contains high levels of
carbon monoxide (CO), a poisonous gas you cannot see or smell. You may be
breathing CO even if you do not smell engine exhaust.
• Breathing ex haust fumes will cause se ri ous injury or death! En gine exhaust
contains carbon mon ox ide, an odorless and deadlygas.
• Operate pressure washer in a well-ventilated area. Avoid en closed areas
such as ga rages, base ments,etc.
• Never op er ate unit in or near a lo ca tion occupied by humans oranimals.
WARNING: For your safety, if you smell gas: (A) turn off gas at line valve or
meter, (B) open windows, (C) do not touch electrical switches, (D) extinguish
all open flames, (E) immediately call your gassupplier.
WARNING: Gasoline or Diesel Driven only: Risk of Fire, Asphyxiation and
Burn. Never fill fuel tank when engine is running or hot. Do not smoke when
filling fueltank.
• Never fill fuel tank completely. Fill tank to 1/2" (12.7 mm) below bottom of filler
neck to provide space for fuel expansion. Wipe any fuel spillage from engine and
equipment before startingengine.
• DO NOT let hoses come in contact with very hot engine muffler during or
immediately after use of your pressure washer. Damage to hoses from contact with
hot engine surfaces will NOT be covered bywarranty.
NOTICE: Risk of property damage. Never pull water supply hose to move pres sure
washer. This could damage hose and/or pumpinlet.
• DO NOT use hot water, use cold wateronly.
• Never turn water supply off while pressure washer engine is running or damage to
pump willresult.
• DO NOT stop spraying water for more than two minutes at a time. Pump operates in
bypass mode when spray gun trigger is not pressed. If pump is left in bypass mode
for more than two minutes internal components of the pump can bedamaged.
If you do not understand these precautions, please contact our customer service
department at 1-844-375-7577.

16
Before Each Start Up (FIG. 3, 4)
1. Gasoline or Diesel Driven:
In a well-ventilated outdoor area, add fresh, high-
quality, unleaded gasoline with a pump octane rating of 86 or higher. Do not overfill.
Wipe up spilled fuel before starting the engine. Refer to
Engine Owner's Manual
for correctprocedure.
NOTICE: Gasoline only: Use of fuels with greater than
10% ethanol are not approved for use in this product
per EPA regulations and will damage the unit and void
thewarranty.
Natural Gas/Propane Units: Make sure the pressure washer has been
properly installed as outlined in Prepare the Eliminator for Operation insert.
DO NOT operate this pressure washer until it is properly installed and all
Installation Checkout (found in insert) steps have been preformed.
2.
Gasoline or Diesel Driven:
Check engine oil level. Refer to the
Engine Owner's
Manual
for correctprocedure.
3.
Check pump oil level.
The oil level should come to the dot in the middle of the sight
glass (Z, Fig 1).
4. Diesel Burner:
In a well-ventilated outdoor area, add fresh, high-quality #2 diesel
fuel to the burner fuel tankfill
.
5.
Visually inspect all electrical components, hoses, nozzles and guns to assure
they are in good condition. If replacements are necessary they must be rated to
withstand the machines operating pressure andtemperatures.
6.
Connect the water hose to the cold water source. Turn the water source on to
remove all air from the hose. When a steady stream of water is present, turn
the water source off.
NOTE: Use a 5/8" (15.9 mm) or 3/4" (19.0 mm) good
quality water hose of minimal length. NOTE: Water source pressure must be
20–60psi to ensure properoperation.
WARNING: To reduce the possibility of contamination always protect against
backflow when connected to a potable watersystem.
7.
Verify the filter screen (BB) is in the water inlet on the machine.
BB
3
NOTE:
Convex side faces out. Connect the cold water
source to pump inlet.
NOTE:
Failure to use machine without
inlet screen filter installed may voidwarranty.
8. Connect high pressure spray wand to gun. Tighten
securely.
Refer to
Spray Wand Nozzles
to select the
correct quick connect nozzle for the task beingperformed.
9. Attach high pressure hose to high pressure spray gun.
Connect the other end of the high-pressure hose to high-pressure hot water outlet
on themachine.
10.
If applying a chemical or cleaning solution, refer to
Chemicals and
CleaningSolvents.
11.
Turn the water source on. Remove all air from the pump and high pressure hose
by depressing trigger until a steady stream of water ispresent.
NOTICE: Risk of property damage. Failure to do so could cause damage to
thepump.
12.
Make sure ALL controls are in the OFFposition.
17
13.
Start engine/motor.
Gasoline or Diesel Driven: Refer to the engine instruction manual for
correct procedure. IMPORTANT: Prior to starting, refer to your engine
manual for proper startingprocedure.
WARNING: Gasoline or Diesel Driven only: Risk of unsafe operation. If engine
does not start after two pulls, squeeze trigger of gun to relieve pump pressure. Pull
starter cord slowly until resistance is felt. Then pull cord rapidly to avoid kickback
and prevent hand or arminjury.
NOTE: If the oil level in the engine is low, the engine will not start. If the engine does
not start, check the oil level and add oil asneeded.
Natural Gas/Propane Units:
Verify the control knob on the gas valve to the
ONposition.
14.
If hot water cleaning is desired
a.
Release the trigger on the gun and place the burner On/Off switch in the
ONposition.
b.
(if equipped) Turn the temperature control to the desired watertemperature.
WARNING: Risk of burns. The surfaces around the burner exhaust and the
discharged exhaust are very hot. Keep away from this area. DO NOT allow hoses
to come in contact with the very hot burner exhaustarea.
WARNING: Burner will shut off when the trigger is released. DO NOT use the
pressure washer if the burner fails to shut off when the trigger isreleased.
15.
Depress trigger on gun to start water flow and theburner.
WARNING: Risk of unsafe operation. Stand on a stable surface and grip gun/
wand firmly with both hands. Expect the gun to kickback whentriggered.
NOTICE: Allowing the unit to run for more than two minutes without the gun
trigger being pulled could cause overheating and damage to the pump. Do not let
the pressure washer run for more than two minutes in Bypass Mode. Turn off the
engine and relieve the pressure in the gun during these extendedsituations.
16.
Release trigger to stop water flow and turn the burneroff.
17.
Adjust the pressure if needed. Refer to
Pressure Adjustments
paragraph for the
correctprocedures.
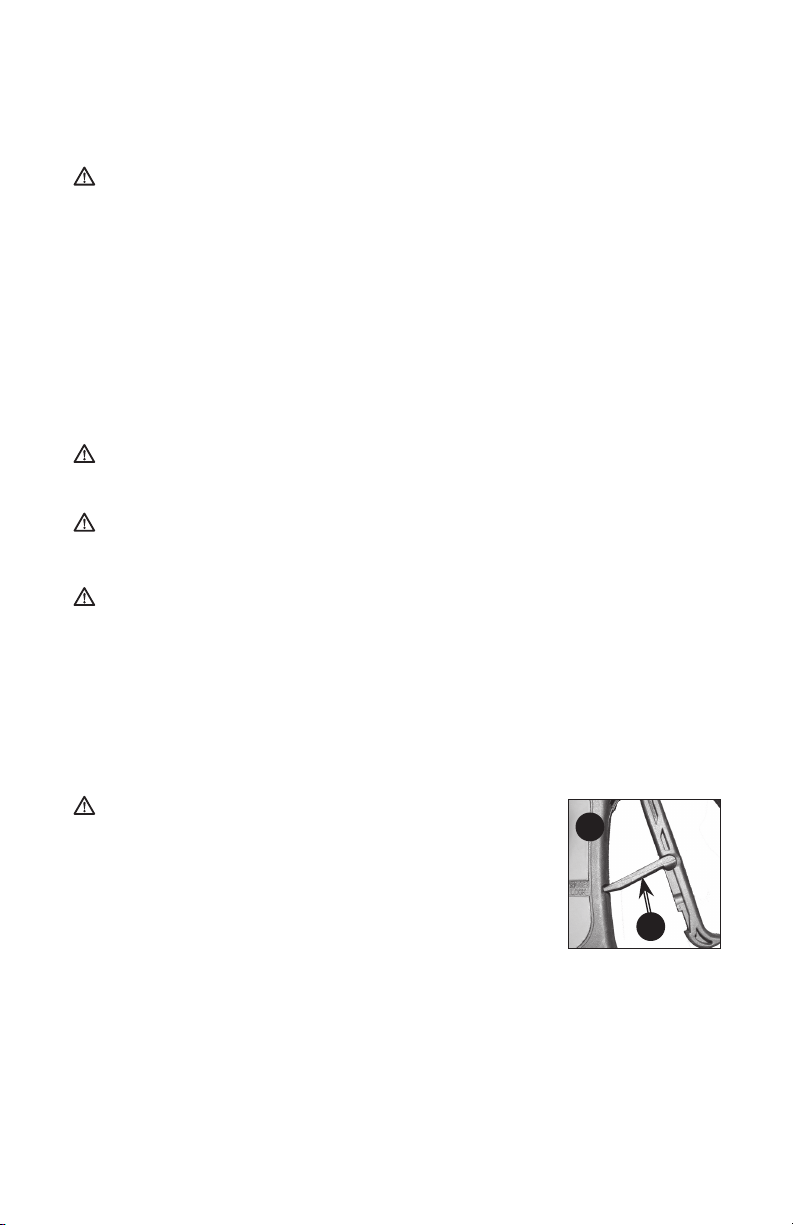
DANGER: Risk of injury from spray. Engage the trigger lock
4
CC
(CC) when gun is not in use to prevent accidentalspraying.
SHUTTING DOWN (FIG. 1)
1.
Place the burner on/off switch in the OFFposition.
2.
Depress trigger on gun and allow water to run until the
spray wand is no longer hot to thetouch.
3.
If chemicals were applied, place the chemical siphon hose
into a container of clean water and draw clean water through chemical injection
system to rinse system thoroughly.
NOTICE: Risk of property damage. Failure to rinse the chemical system can cause
damage to the high-pressure pump or the high-pressure watersystem.
4.
Turn engine/motor off.
Gasoline or Diesel Driven: Refer to the engine instruction manual for
correctprocedure.

18
NOTICE: Risk of property damage. NEVER turn water supply off while pressure
washer engine is running or damage to pump willresult.
5.
Turn water sourceoff.
6.
Pull trigger on spray gun to relieve any water pressure in hose or spray gun.
7.
Refer to
Storage
for proper storageprocedures.
MAINTENANCE
Your pressure washer has been produced with the highest quality materials and
craftsmanship, as the owner you have certain responsibilities for the correct care
of the equipment. Attention to regular preventative maintenance procedures will
assist in preserving the performance of yourequipment.
Contact your local service provider for maintenance. A small investment in
preventative maintenance will add many hours to the life of your pressure washer.
Perform maintenance more often under severe conditions. Do not spray high-
pressure water onto the machine. Not all maintenance items apply to allmachines.
MAINTENANCE SCHEDULE**
Engine Oil Inspect Daily
Change After first 10 hours then every 50 hours especially in
high ambient temperatures
Filter Every 100 hours
Air Cleaner Inspect Every 25 hours
Clean Every 3 months
Diesel Engine Coolant Check daily (maximum 50% antifreeze)
Battery Level Check monthly 12V DC Burner Systems: Replace battery every 2
years
Engine Fuel Filter 500 hours or 6 months
Spark Plug Maintenance 500 hours or 6 months
Clean Fuel Tank(s) Annually
Replace Fuel Lines Annually
Pump Oil Inspect Daily
Change After first 25 hours, then every 3 months or 150 hours
Axial pumps come filled with synthetic oil, which does not require changing
Replace Burner Fuel Filter Every 6 months (More often if fuel quality is poor)
Remove Burner Soot Annually
Burner Adjustment/Cleaning Annually
De-scale Coil Annually (More often if required)
Replace Spray Nozzle Every 6 months
Replace Quick Connects Annually (More often if required)
Clean Water Screen/Filter Weekly
Clean Float/Supply Tank Every 6 months
Replace HP Hose Annually (More often if required)
Belts Tighten Every 6 months
Inspect/Replace Annually
Trailer Tires/Bearings Monthly (Check tires for condition, tighten lug nuts, grease & check bearings)

19
MAINTENANCE INFORMATION
DESCRIPTION OIL TYPE CAPACITY
Gas Engine SAE 10W 30 motor oil ** .63 to 3qt.
Diesel Engine SAE 15W 40 OR ISO 100 ** 1.7- 3.3qt.
Pump, Cat SAE 15W 40 OR ISO 100 11 – 42oz.
Pump, Comet SAE 15W 40 OR ISO 100 11 – 42oz.
Pump, General SAE 15W 40 OR ISO 100 11 – 42oz.
** Check the engine manufacturer’s service guide for additional maintenance items and specific high ambient temperature
oilselection.
STORAGE
ENGINE
Consult the Engine Owner's Manual for manufacturer’s recommendations
forstorage.
MOTOR
Consult the Motor Owner's Manual for manufacturer’s recommendations for
storage
PRESSURE WASHER
1.
Drain all water from high-pressurehose.
2.
With nozzle pointed down and the spray gun and wand in a
vertical position, squeeze trigger to drain all water from spray gun and wand.
3.
Store chemical siphon hose so it is protected fromdam age.
CAUTION: Risk of personal injury. Avoid placing hands between handle and
frame when assembling to preventpinching.
NOTICE: Risk of property damage. Always store and transport unit in an
uprightposition.
ACCESSORIES
DANGER: Risk of fluid injection. When using replacement spray wands
or guns with this pressure washer, DO NOT use a spray wand and/or spray
gun/wand combination that is shorter in length than what was provided with
this pressure washer as measured from the nozzle end of the wand to the
guntrigger.
NOTICE: The use of any other accessory not recommended for use with this tool
could be hazardous. Use only accessories rated equal to or greater than the rating
of the pressurewasher.
SERVICE INFORMATION
Do not return this product to your retailer. Please contact our customer service
department at 1-844-375-7577.

20
TROUBLESHOOTING GUIDE
NOTE: Probable causes are listed with most likely cause first Repairs should be made by
qualified techniciansonly.
POWER SYSTEM: GASOLINE OR DIESEL DRIVEN
Problem Probable Cause Remedy
Engine will not start or
crank over (see Engine
Owner's Manual for further
engine troubleshooting)
Battery dead Where
applicable
Charge or replace battery,
add electrolyte if battery is
new
Dirty Battery Contacts Clean connections
Battery cables disconnected Connect or replace damaged
cables
Engine, pump, or gearbox is
seized
Identify, Replace or repair
seized part
Key switch, solenoid or
starter on engine defective
Repair or replace faulty
component
Pump is seized Replace pump or bearing
Engine will not start but
will crank over (see Engine
Owner's Manual for further
engine troubleshooting)
Engine power switch is off or
defective
Check engine power switch
Low oil shut down is
activated
Add oil to engine, check
more frequently
Low on fuel Fill with the appropriate
fuel, bleed injector pump on
diesel engines
Fuel filter is clogged Replace or clean fuel filter,
bleed injector pump on
diesel engines
Engine flooded or starved Choke only as required (not
applicable to diesels)
Old or dirty fuel Drain and replace with new
fuel
Engine bogs down under
load, whenever spray gun
is triggered (see Engine
Owner's Manual for further
engine troubleshooting)
Engine needs to be repaired
or replaced
See engine manual or engine
dealer
Operating in high elevation Lower the pressure on the
unit and check for correct
engine speed (RPM)
Incorrect nozzle in lance Replace with correct nozzle
size
Unloader valve improperly
adjusted
Adjust unloader valve
Carbon deposits on cylinder
head
Remove head and clean off
deposits

21
POWER SYSTEM: ELECTRIC DRIVEN
Problem Probable Cause Remedy
Electric motor does not
start
No electric power Check cord, plug, socket,
and breaker
Thermal overload in the
motor/or starter has been
tripped
Reset manual overload
by depressing the thermal
switch on the outside of the
motor or starter after the
motor has cooled.
CAUTION: Automatic
overload will restart the
motor automatically when it
hascooled.
Power switch inoperative Check power switch
Electric motor or wiring
failure
Replace or repair motor and/
or wiring
No water pressure at inlet Connect to appropriate water
supply
Machine will not auto-start
(if equipped)
Must have adequate water
supply
Check for correct pressure
and gallonage
Coil scale build up Descale coil for better water
flow
Check filter screen and inlet
pressure
Pull trigger gun to check
auto-start function
Pressure switch on unloader
is faulty
Replace
Timer is faulty Remove leads from timer at
control end, see if machine
shuts off after time out,
replace if defective
PUMPING SYSTEM
Problem Probable Cause Remedy
Trigger gun leaks or will
not shut off
Debris in gun valve assembly Clean valve assembly or
replace gun
Pump runs but there is no
spray pressure
Water turned off Turn water on
Nozzle is plugged Clean or replace with proper
size
Inlet chemical injection valve
is open, without the end of
the pickup tube inserted
into detergent. (upstream
injection systems only)
Close soap valve or
submerge detergent pickup
tube into solution
Coil on hot water machines
is obstructed
Clean obstruction or scale
deposits from coil with coil
cleaner
Pump dry, needs to be
primed
Crack open fitting on the
high pressure outlet of the
pump until water flows out

22
PUMPING SYSTEM
Problem Probable Cause Remedy
Pump runs but has low
spray pressure
Nozzle not installed Install proper sized nozzle
Dual wand valve is open Dual wand valve must be
closed and high pressure
nozzle installed
Leaky discharge hose or
quick coupler
Replace hose, quick coupler,
or O-ring in the quick coupler
Inlet strainer clogged Clean and check more
frequently
Worn or wrong size nozzle Replace nozzle of proper
size
Belt slippage Tighten or replace with
correct belt
Unloader valve worn or
improperly adjusted
Install pressure gauge
on pump head to adjust
pressure. Check valve seat
on Unloader
Air leak in inlet plumbing Reseal fittings and inspect
inlet hoses for air leaks
Pump runs but there is
erratic, fluctuating pressure
Inadequate incoming water
supply
Increase water supply flow
Stuck inlet or discharge
valves
Clean out or replace worn
valves
Restricted inlet or air entering
the inlet plumbing on the
pump
Check fittings and hose
for air tight seal, clean inlet
strainer screen
Leaking H.P. seals Replace seals
Leaking L.P. seals Pressure feed the pump and
replace L.P. seals if water
leaks from the pump head
Excessive crankshaft play
or loud, knocking noise in
pump
Broken or worn bearing or
connecting rod in crankcase
Replace pump or bearing
Oil leaking from pump Loose drain plug or
damaged seal
Locate point of oil leakage
and replace damaged O-ring
or seal
Leaking crankshaft oil seal Replace seal
Leaking Oil Sight Glass seal Replace seal
Leaking Piston Oil Seal Replace seals. Install correct
amount of oil in pump
Inlet injection will not
siphon chemical
Check valve in strainer
clogged
Clean or replace. Rinse after
each use
Chemical valve not open or
clogged
Open chemical valve or clean
Strainer not submerged in
solution
Submerge strainer and
replenish chemical
Detergent hose cut or kinked Inspect hose, replace as
necessary
Water is emitted from the
chemical pickup tube
Check valve malfunctioning Repair or replace check
valve
23
PUMPING SYSTEM
Problem Probable Cause Remedy
Downstream injector will
not siphon chemical
Adjustable knob on injector
is closed (Where applicable)
Open by turning counter
clockwise
Unit not in low pressure
mode
Open dual wand or install
low pressure (BLACK) nozzle
Detergent hose cut or kinked Inspect hose, replace as
required
Chemical Strainer plugged or
not submerged
Check screen on strainer
pickup tube
Internal injector parts
corroded or stuck
Disassemble, clean or
replace
Outlet water temperature
too high
Use with cold water (150º
Maximum)
Pressure relief reliving
water
Unloader failure / coil
overheating / Excessive
pressure
Turn machine off wait a
few minutes and restart. If
problem continues take to an
authorized repair center for
complete system check
HEATING BURNER SYSTEM – DIESEL FIRED
Problem Probable Cause Remedy
Burner will not fire
WARNING: High voltage
on igniter can cause
electrical shock. Disconnect
power beforeservicing.
Burner switch not on Turn switch on; Thermostat
on if equipped
Diesel fuel level low Fill burner tank with #2 diesel
or other approved fuel
Trigger on spray gun not
pulled
Squeeze trigger to fire burner
Fuel filter plugged Clean and / or tighten fuel
filter (Check fuel pressure)
Spray nozzle plugged Clean spray nozzle
Overload on burner motor
tripped
Reset overload, locate and
correct source of overload
Nozzle not in wand Install nozzle in wand
Low water pump pressure See pumping systems
trouble shooting
Fuel pump or nozzle stopped Check fuel pressure, filter,
fuel lines. Replace fuel pump
and/or nozzle
Vacuum, Flow, Pressure or
Temperature switch faulty
Check electrical continuity
with pump spraying and
burner on
Fuel solenoid valve faulty Replace fuel valve if it does
not open when power is
applied
Low generator voltage
output
Adjust generator RPM for
proper voltage under full load
conditions
Burner relay faulty (12-V
Burner only)
Replace burner relay

24
HEATING BURNER SYSTEM – DIESEL FIRED
Problem Probable Cause Remedy
Burner will not fire, plus
diesel fumes are emitted
from the exhaust port
WARNING: Replace
insulation. Unburned fuel
can saturate it and cause
afire.
Fuel to air ratio out of
adjustment
Set air band and fuel
pressure to specifictions
Fuel nozzle partially clogged Replace nozzle of proper
size
Ignition transformer not
providing spark to fuel
Replace ignition transformer,
clean and adjust electrodes
Burner fires and smokes Fuel to air ratio out of
adjustment
Set air band and fuel
pressure to specifictions
Excessive soot on coils Clean soot off to improve
air flow
Improper voltage at burner Adjust RPM of generator (if
equipped)
Discharge water
temperature exceeds
recommended operating
temperature
Burner input too high for
conditions
Decrease fuel pump pressure
and/or fuel nozzle size
Water flow restricted Clean or replace nozzle of
proper size. Descale coil and
clear obstructions
High temperature limit switch
faulty or set too high
Replace or reset temperature
limit switch
Burner continues to fire
even when trigger on spray
gun is released
Faulty Flow, Pressure or
Vacuum switch
Replace switch
Faulty fuel solenoid Replace solenoid
Discharge water
temperature not reaching
maximum operating
temperature
Burner input too low for
conditions
Increase fuel pump pressure
and/or fuel nozzle size
Battery keeps losing
voltage (For 12 volt burner
systems)
Battery voltage Low Have battery checked and
load test, charge if low and
replace if necessary. Allow
water to cool 2 minutes
before shutting off engine
RPM too low Engine RPM should be 3600
RPM w/no load
Engine charging system
faulty
Check engine charging
system – Must have 16 Amp
output minimum
Electrodes misadjusted Adjust electrodes to
maximum 1/8" gap
Fuel pump pressure too high Fuel pump pressure should
be approximately 100 to 140
PSI
Air band open too far Adjust for proper burn
Burner amp draw too high Check amp draw of burner
motor – should be 13 amp
or less. Check amp draw of
transformer should be 4.2
or less

25
HEATING/BURNER SYSTEM – NATURAL GAS OR LIQUID PROPANE FIRED
Problem Probable Cause Remedy
Pilot will not light, burner
will not fire
Burner switch not on Turn switch on
Trigger not pulled Pull trigger. Burner should
fireonlywhen trigger is
pulled
Gas valve turned off Turn gas valve on
No voltage to valve Check for 24 VAC between
pilot valve(PV) and PV/MV.
Valve will operate between
20.5 and 28.5 VAC
Pilot orifice plugged Remove orifice & clean
Defective ignition module Check for 24 VAC incoming
@ 24V & 24V ground. (If you
get voltage to module, but
not through module, replace.)
Defective transformer Check for 24V output. If no
voltage, replace
Defective flow switch Replace
Defective thermostat Replace
Faulty Cam switch Replace
Igniter not working Test for spark. Test for
continuity between ignition
wire and ground
WARNING: High voltage
igniter can cause electrical
shock
Pilot lights, but burner will
not fire
Check for 24 VAC between
main valve (MV) and PV/MV
If no VAC @ valve, replace
module. If you get voltage,
replace valve
Burner fires, but goes out Check for continuity between
ignition cable and ground
wire
Assure good ground
Faulty ignition module Replace module
Excess draft Protect from windy
conditions
NG or LP odor is present
WARNING: Check all NG
/ LP connections with soap
solution beforeoperation.
Gas leak ahead of valve Turn gas off. Call gas
supplier
Lockout not working Replace module
Valve stuck Turn main gas valve off.
Replace valve
Discharge water
temperature to high
Faulty thermostat Replace
Water restriction Clean or replace spray
nozzle, descale coil, remove
obstructions
Incoming gas pressure to
high
Lower gas pressure

26
HEATING/BURNER SYSTEM – NATURAL GAS OR LIQUID PROPANE FIRED
Problem Probable Cause Remedy
Discharge water
temperature not reaching
maximum operating
temperature
Worn spray nozzle Replace spray nozzle with
proper size
Gas pressure too low Increase gas pressure or
install additional jets
Draft under burner manifold Prevent down draft with
installation of down draft
diverter. Prevent side draft
with nonflammable barrier
Soot Buildup on coil Clean coil
Hard water (Scale) deposits
in coil
Descale or replace coil
Burner continues to fire
even when water is not
being sprayed
Faulty Flow switch, VAC
Switch or Pressure switch
Replace
Main gas valve stuck open Replace main gas valve
Valve has had water
sprayed on it. Has been
submerged in water and
does not work
Flood or accidental spraying Replace valve: Do not
attempt to repair or clean out
Ignition module has been
subjected to water or
moisture
Flood or accidental spraying Replace module: Do not
attempt to repair

27
LIMITED WARRANTY
All FNA GROUP
®
pressure washers are warranted by the FNA GROUP
®
to the original purchaser to be free from defects in materials and workmanship under
normal use, for the periods specified below. This Limited Warranty is subject to the exclusions shown below, applies to the original components only and, is
calculated from the date of the original purchase. Any parts replaced under this warranty will assume the remainder of the part’s original warranty period. These
warranties pass through to the original purchaser only and are nontransferable. To find the nearest Authorized Service Center (ASC) contact the customer service
group: for Cold Water service (877-362-4271) and for Hot Water service (844-375-7577). The customer is responsible to maintain and provide a copy of
the purchase receipt to the Authorized Service Center at the time of repair to prove warranty status.
Component Warranty Period Exclusions or Comments
Industrial Frame/ Handle Assemblies (Welded
Steel or Aluminum) Powershot, WaterBlaster,
Water Shotgun, Delco
®
Equipment
10 year(s) Parts, 1 year labor Rust, chemical damage, misuse/abuse
AAA
®
Triplex Pumps 5 year(s) Parts, 1 year labor Freezing, Water Quality, Chemical damage,
over pressurization, Low Water supply
GENERAL PUMP
®
Belt/Direct Drive Pumps 5 year(s) Parts, 1 year labor Pumps are evaluated by GENERAL PUMP
®
CAT
®
Belt Drive Pumps 5 year(s) Parts, 1 year labor Pumps are evaluated by CAT
®
Pump
COMET PUMP
®
Belt/Direct Drive Pumps 5 year(s) Parts, 1 year labor Pumps are evaluated by COMET PUMP
®
Coils, Coil Tanks, Fuel/Float Tanks, Belt Guards 5 year(s) Parts, 1 year labor Freezing, Water Quality, Chemical
damage, over pressurization
Simpson
®
420CC Engine 3year(s) Parts, 1 year labor Incorrect or contaminated
fuel, Low oil levels
CAT
®
Direct Drive Pumps 2 year(s) Parts, 1 year labor Pumps are evaluated by CAT
®
Pump
Simpson
®
208CC Engine 2 year(s) Parts, 1 year labor Incorrect or contaminated
fuel, Low oil levels
OEM
®
Axial Pumps 1 year Parts, 1 year labor Freezing, Water Quality, Chemical damage,
over pressurization, Low water supply
Electric Pump/motor Assemblies 1 year Parts, 1 year labor Freezing, Water Quality, Chemical damage,
over pressurization, Low water supply
Delco Engines, Simpson Generators,
Burner Assembly Components
1 year Parts, 1 year labor Freezing, Fuel Quality, damage due to
over pressurization, incorrect voltage
Consumer Frame/handle components (MegaShot) 1 year Parts, 1 year labor Rust, chemical damage, misuse/abuse
Electrical Components, Switches, Contactors, Overload
relays, Transformers, PC Boards, Control Modules
90 day Parts, 90 day labor Rust, chemical damage, misuse/abuse,
Freezing, Fuel Quality, damage due to
over pressurization, incorrect voltage
Accessory Items: Nozzles, hoses, trigger guns, wands/
lances, injectors, unloader valves, hose reels, foamers,
GFCI's, relief valves, filters, wheels, tires, surface
cleaners, soap tanks, plastic bonnet assemblies
90 day Parts, 90 day labor Rust, chemical damage, misuse/abuse,
Freezing, Fuel Quality, damage due to
over pressurization, incorrect voltage
WARRANTY PROVIDED BY OTHER MANUFACTURERS:
Electric Motors and Gasoline or Diesel engines, which are warranted by their respective manufacturers, are serviced through these manufacturers’ local authorized
service centers. The FNA GROUP
®
is not authorized and has no responsibility to provide warranty service for suchcomponents.
This warranty does not cover the following items:
1. Normal wear items, such as, seals, O-rings, packing’s, pistons, pump valve assemblies, strainers, belts, brushes, fuses, filters, fans orgaskets.
2. Damage or malfunctions resulting from accidents, abuse, modifications, alterations, incorrect installation, improper servicing, failure to follow manufacturer’s
maintenance instructions, or use of the equipment beyond its stated usage specifications as contained in the operator’smanual.
3. Damage due to freezing, chemical deterioration, scale build up, rust, corrosion, water quality or thermalexpansion.
4. Damage to components from fluctuations in electrical or watersupply.
5. Normal maintenance service, including adjustments, fuel system cleaning, and clearing of obstructions.
6. Travel expenses or shipping costs of machines or components for the purposes of repair or replacement ofequipment.
7. The Manufacturer’s warranty obligation is limited to repair or replacement of defective components as provided herein and the Manufacturer shall not be liable for
any further loss, damages, or expenses – including damages from shipping, accident, abuse, acts of God, misuse, water quality or neglect. Neither is damage from
repairs using non-OEM parts or alterations performed by non-factory authorized personnel nor Failure to install and operate equipment according to the guidelines
put forth in the instruction manual shall voidwarranty.
LIMITATION OF LIABILITY
The FNA GROUP’s liability for special, incidental, or consequential damages is expressly disclaimed. In no event shall The FNA GROUP’s liability exceed the
purchase price of the product in question. The FNA GROUP makes every effort to ensure that all illustrations and specifications are correct, however, these do
not imply a warranty that the product is merchantable or fit for a particular purpose, or that the product will actually conform to the illustrations and specifications.
Our obligation under this warranty is expressly limited at our option to the replacement or repair at a service facility or factory designated by us, of such part or
parts as inspection shall disclose to have been defective. THE WARRANTY CONTAINED HEREIN IS IN LIEU OF ALL OTHER WARRANTIES, EXPRESS OR
IMPLIED, INCLUDING ANY IMPLIED WARRANTY OF MERCANTABILITY OR FITNESS FOR A PARTICULAR PURPOSE are expressly limited to the
duration of this written warranty. The FNA GROUP® does not authorize any other party, to make any representation or promise on behalf of The FNA
GROUP
®
, or to modify the terms, conditions, or limitations in any way. It is the buyer’s responsibility to ensure that the installation and use of products conforms
to local codes. While FNA attempts to assure that its products meet national codes; it cannot be responsible for how the customer chooses to use or install the
product. Some states do not allow limitations on how long an implied warranty lasts or the exclusion or limitation of incidental or consequential damages, so the
above limitation or exclusion may notapply.
Corporate Office
7152 99th Ave
Pleasant Prairie WI, 53158
(847) 348-1500
FNA Group
www.fna-group.com
Manufacturing Operations
1265 Industrial Drive
Decatur, AR 72722

Copyright. All Rights Reserved
Assembled in U.S.A with domestic and foreign components