Loading ...
Loading ...
Loading ...
INSTALLATION INSTRUCTIONS
9
CONNECTING THE OUTDOOR UNIT
Before connecting pipes and cables, ensure the
outdoor unit is being installed in an area with
enough space for proper air fl ow and easy
maintenance.
Fasten the supports to the wall using screw anchors
that are suited to the type of wall. Use a larger
quantity of screw anchors than normally required
to avoid vibration during operation and to ensure
effi cient functioning.
The condensed water and ice formed during
operation can be drained through the drain pipe.
Fasten the drain port in the 2.5 cm hole placed in
the bottom of the unit as shown. Connect the drain
port and the drain pipe. Make sure that the water is
drained to a suitable place.
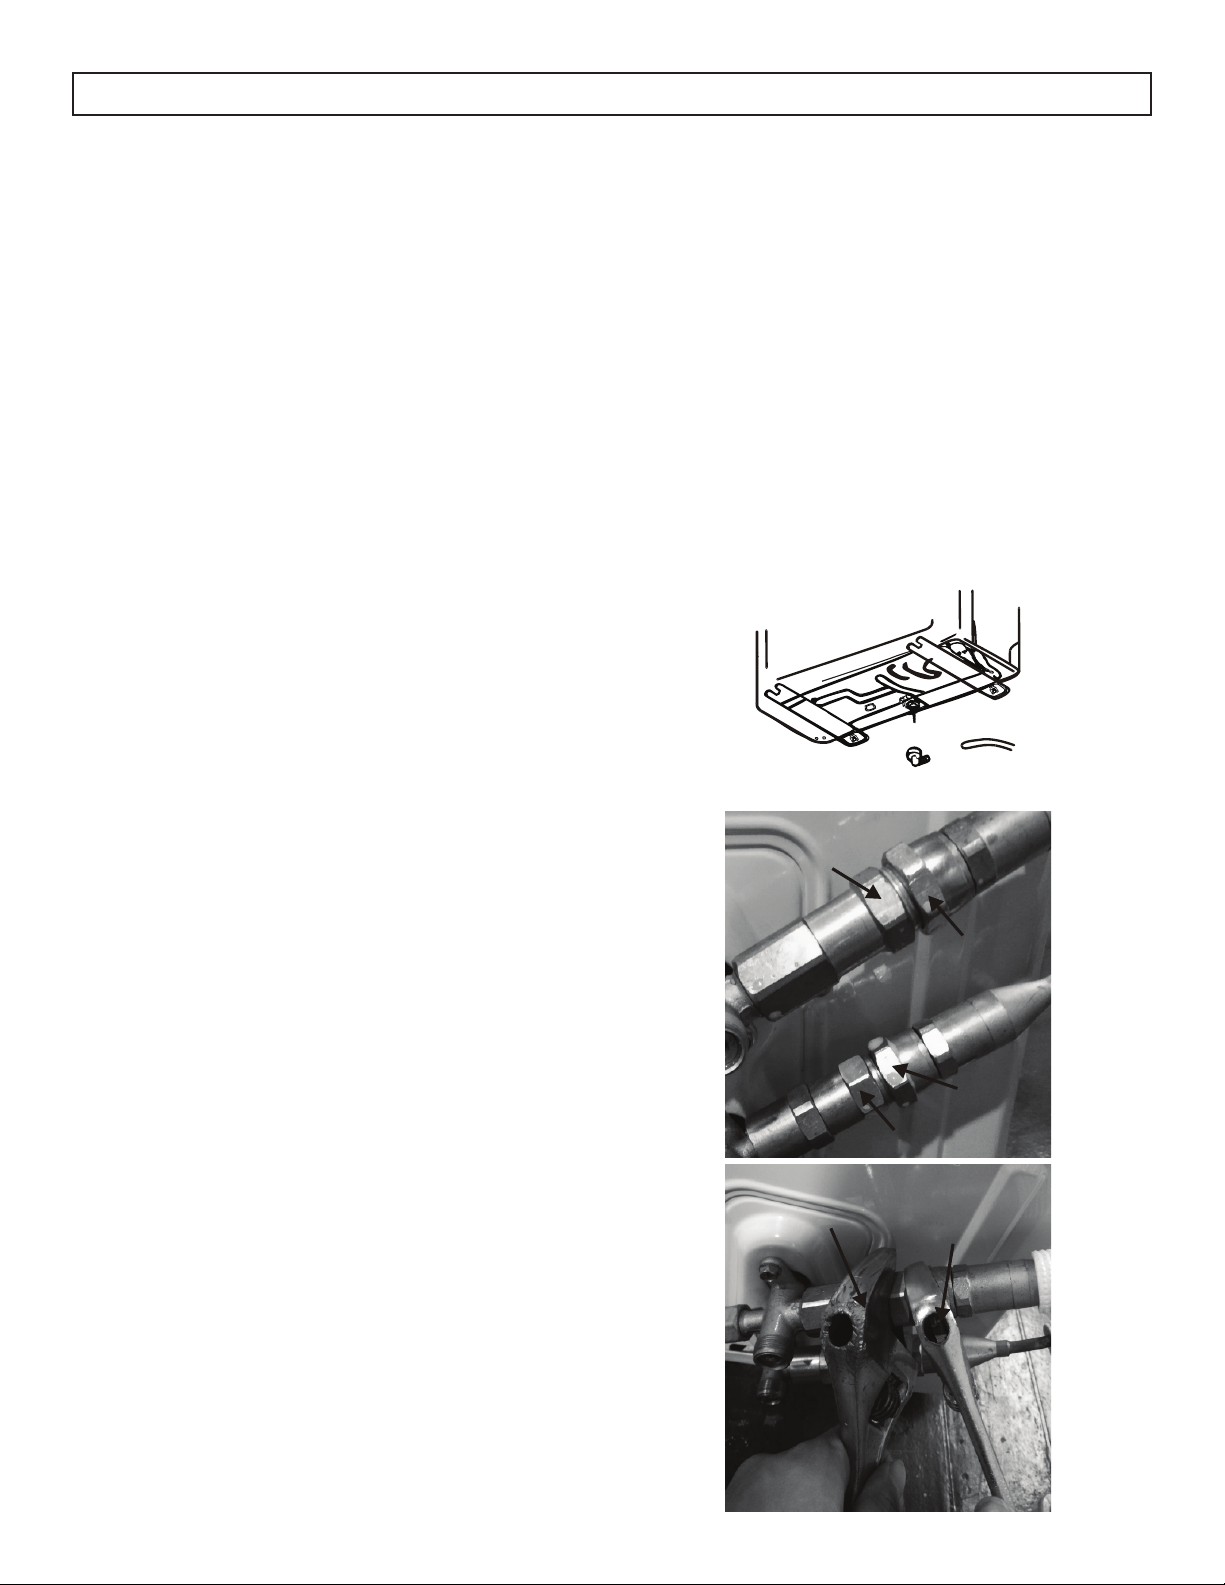
CONNECTING THE PIPES
1. Remove the plastic seals from the outdoor unit
valve and male quick connectors.
2. Align the female quick connector to the male
end and attach.
3. Hold the short position (A) of the male quick
connector by open-end spanner and do not
turn. Use a torque wrench to hold the short
position (B) of the female quick connector which
is attached with a long copper pipe and quickly
turn to tighten them. Follow the proper torque
chart.
A
B
A
B
A
B
Loading ...
Loading ...
Loading ...