IT
Tosaerba a batteria con conducente a piedi
MANUALE DI ISTRUZIONI
ATTENZIONE: prima di usare la macchina, leggere attentamente il presente libretto.
EN
Pedestrian-controlled walk-behind battery powered lawn mower
OPERATOR’S MANUAL
WARNING: read thoroughly the instruction booklet before using the machine.
171506352/0T
05/2021
NTL 430 TR-R Li 48 series
NTL 480 TR-R Li 48 series


ITALIANO -
Istruzioni Originali ...................................................................................................
IT
ENGLISH - Translation of the original instruction
..........................................................................
EN
A
B
C
D
E
F
G
H
I
J
K
L
14
2
3
6 8
5 7
11
W
12
10
9
Type:
- s/n
Art.N.
d.c.
1
2
I
3
0 mm
II

6 7
8
A
A
B
A
9
B
A
C
B A
C
EE AF
B
D
E
5-7 mm
F
4
5
OFF
ON
A
A
ON
A
ON
A
A
12
13
14
15
B
C
A
10
11
A
B
A
B
B
A
A
B
18
19
20
16
17
B
A
22
23
A
C
21
24

[18] TABELLA PER LA CORRETTA COMBINAZIONE DELLE BATTERIE
BT *20 Li 48 x
BT *40 Li 48
BT *50 Li 48
BT *20 Li 48 + BT *20 Li 48 x
BT *20 Li 48 + BT *40 Li 48
BT *20 Li 48 + BT *50 Li 48
BT *40 Li 48 + BT *40 Li 48
BT *40 Li 48 + BT *50 Li 48
BT *50 Li 48 + BT *50 Li 48
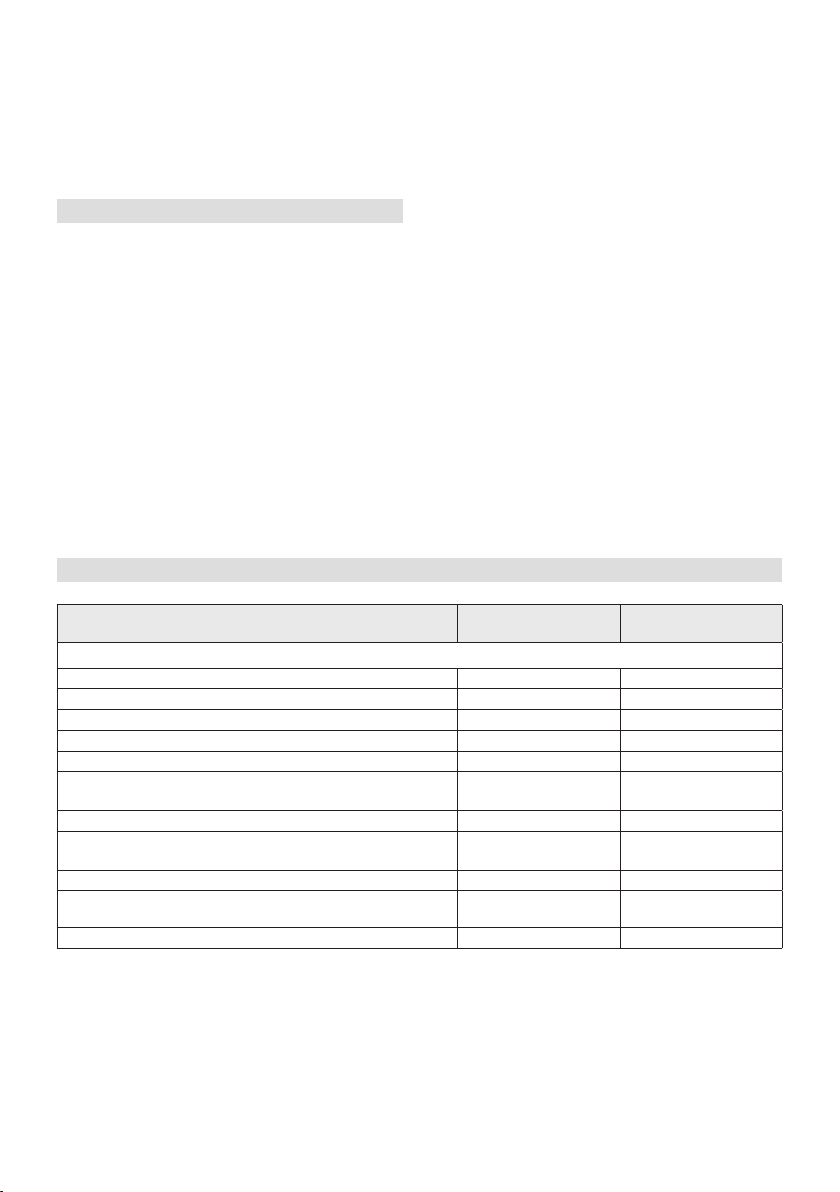
DATI TECNICI
NTL 430-R Li 48
series
NTL 480-R Li 48
series
Potenza nominale * W 1500 1500
Velocità mass. di funzionamento motore * min
-1
2900 2900
Tensione e frequenza di alimentazione MAX V / DC 48 48
Tensione e frequenza di alimentazione
NOMINAL
V / DC
Peso macchina * kg 27 ÷ 29 28
Ampiezza di taglio cm 41
Codice dispositivo di taglio
Carica batteria mod. CGF 48 Li CGF 48 Li
Livello di pressione acustica
Incertezza di misura
dB(A)
dB(A)
77
80
Livello di potenza acustica misurato
Incertezza di misura
dB(A)
dB(A)
90
94
Livello di potenza acustica garantito dB(A) 91 94
Livello di vibrazioni
Incertezza di misura
m/s
2
m/s
2
1
ACCESSORI A RICHIESTA
Kit “mulching” - -
BT 48 Li 2.0
BT 48 Li 4.0
BT 48 Li 5.0
BT 48 Li 2.0
BT 48 Li 4.0
BT 48 Li 5.0

[1] EN - TECHNICAL DATA
[2] Nominal power*
[4] Power supply frequency and voltage MAX
[5] Power supply frequency and voltage NOMINAL
[7] Cutting width
[8] Cutting means code
[9] Battery charger
[10] Acoustic pressure level
[11] Measurement uncertainty
[12] Measured acoustic power level
[14] Vibration level
[15] Accessories available on request
[17] Batteries
[18] Table for the correct combination of batteries

IT - 1
ATTENZIONE!: PRIMA DI USARE LA MACCHINA, LEGGERE ATTENTAMENTE
IL PRESENTE LIBRETTO. Conservare per ogni futura necessità.
IT
INDICE
1. GENERALITÀ ............................................................... 1
2. NORME DI SICUREZZA .............................................. 2
2.1 Addestramento .................................................... 2
2.2 Operazioni preliminari ......................................... 2
.................................................. 2
...............................
2.5 Batteria / carica batteria ......................................
................................................
..................................... 4
................. 4
..................................... 4
................................. 4
......................................... 5
4. MONTAGGIO ................................................................ 5
4.1 Componenti per il montaggio .............................. 5
4.2 Montaggio del manico ......................................... 5
........................................... 5
5. COMANDI DI CONTROLLO ......................................... 5
5.1 Chiave di sicurezza (Dispositivo di
disattivazione) ..................................................... 5
5.2 MANICO .............................................................
.......................
.............................................
.........................................
...........................................
......................................................... 7
.................................................................. 7
................................................................. 8
...................................................... 8
7. MANUTENZIONE ......................................................... 8
7.1 Generalità ............................................................ 8
7.2 Batteria ................................................................ 8
.................................................................. 9
......................................... 9
....................................... 9
............................................. 9
8. RIMESSAGGIO .......................................................... 10
8.1 Rimessaggio della macchina ............................ 10
8.2 Rimessaggio della batteria ............................... 10
9. MOVIMENTAZIONE E TRASPORTO ........................ 10
10. ASSISTENZA E RIPARAZIONI .................................. 10
11. COPERTURA DELLA GARANZIA ............................. 10
12. TABELLA MANUTENZIONI ........................................11
........................11
14. ACCESSORI A RICHIESTA ......................................
14.1 Batterie ..............................................................
14.2 Carica Batteria ..................................................
1. GENERALITÀ
1.1 COME LEGGERE IL MANUALE
NOTA oppure IMPORTANTE fornisce precisazioni
o altri elementi a quanto già precedentemente indicato,
nell’intento di non danneggiare la macchina, o causare
danni.
Il simbolo evidenzia un pericolo. Il mancato rispetto
dell’avvertenza comporta possibilità di lesioni personali o
a terzi e/o danni.
grigio indicano caratteristiche opzionali non presenti in
se la caratteristica è presente nel proprio modello.
“sinistro” si intendono riferite alla posizione di lavoro
dell’operatore.
1.2 RIFERIMENTI
1.2.1 Figure
“(Fig. 2.C)”.
1.2.2 Titoli
paragrafo “2.1 Addestramento” è un sottotitolo di “2. Norme
con l’abbreviazione cap. o par. e il numero relativo.
IT - 2
2. NORME DI SICUREZZA
2.1 ADDESTRAMENTO
Prendere familiarità con i comandi e con un
uso appropriato della macchina. Imparare ad arrestare
rapidamente la macchina. L’inosservanza delle avvertenze
e delle istruzioni può causare incendi e/o gravi lesioni.
• Non permettere mai che la macchina venga utilizzata da
bambini o da persone che non abbiano la necessaria
dimestichezza con le istruzioni. Le leggi locali possono
• L’apparecchio può essere utilizzato da bambini di
età non inferiore a 8 anni e da persone con ridotte
sotto sorveglianza oppure dopo che le stesse abbiano
ricevuto istruzioni relative all’uso sicuro dell’apparecchio
e alla comprensione dei pericoli ad esso inerenti. I
bambini non devono giocare con l’apparecchio. La
senza sorveglianza.
• Non utilizzare mai la macchina se l’utilizzatore è in
• Non trasportare bambini o altri passeggeri.
• Ricordare che l’operatore o utilizzatore è responsabile di
persone o alle loro proprietà. Rientra nella responsabilità
dell’utilizzatore la valutazione dei rischi potenziali del
le precauzioni necessarie per garantire la sua e altrui
scivolosi o instabili.
•
assicurarsi che l’utilizzatore prenda visione delle
istruzioni d’uso contenute nel presente manuale.
2.2 OPERAZIONI PRELIMINARI
2.2.1 Dispositivi protezione individuale (DPI)
•
resistenti con suole antiscivolo. e pantaloni lunghi. Non
azionare la macchina a piedi scalzi o con sandali aperti.
• L’impiego di protezioni acustiche può ridurre la capacità
di sentire eventuali avvertenze (grida o allarmi). Prestare
la massima attenzione a quanto accade attorno all’area
di lavoro.
•
cravatte e comunque accessori pendenti o larghi che
potrebbero impigliarsi nella macchina o in oggetti e
materiali presenti sul luogo di lavoro.
• Raccogliere adeguatamente i capelli lunghi.
Area di lavoro / Macchina
Ispezionare a fondo tutta l’area di lavoro e togliere tutto ciò
che potrebbe venire espulso dalla macchina o danneggiare
2.3 DURANTE L’UTILIZZO
Area di Lavoro
•
Gli utensili elettrici generano scintille che possono
incendiare la polvere o i vapori.
• Lavorare solamente alla luce del giorno o con buona luce
•
lavoro. È necessario che i bambini vengano sorvegliati
da un altro adulto.
•
lampi.
• Non esporre la macchina alla pioggia o ambienti bagnati.
L’acqua che penetra in un utensile aumenta il rischio di
scossa elettrica.
• Prestare particolare attenzione alle irregolarità del
e alla presenza di eventuali ostacoli che potrebbero
limitare la visibilità.
•
o argini. La macchina si può ribaltare se una ruota
oltrepassa un bordo o se il bordo cede.
• Lavorare nel senso trasversale del pendio e mai nel
laterale o perdita di controllo della machcina.
•
Comportamenti
• Prestare attenzione quando si procede in retromarcia
o all’indietro. Guardare dietro di sè prima e durante la
retromarcia per assicurarsi che non vi siano ostacoli.
•
• Evitare di farsi tirare dal raserba.
• Tenere sempre mani e piedi lontani dal dispositivo di
taglio sia durante l’avviamento sia durante l’utilizzo della
macchina.
•
qualche secondo anche dopo il suo disinnesto o dopo lo
spegnimento del motore.
• Stare sempre lontani dall’apertura di scarico.
In caso di rotture o incidenti durante il lavoro,
arrestare immediatamente il motore e allontanare la
macchina in modo da non provocare ulteriori danni; nel
caso di incidenti con lesioni personali o a terzi, attivare
immediatamente le procedure di pronto soccorso più
adeguate alla situazione in atto e rivolgersi ad una Struttura
Sanitaria per le cure necessarie. Rimuovere accuratamente
eventuali detriti che potrebbero arrecare danni o lesioni a
persone o a animali qualora rimanessero inosservati.
Limitazioni all’uso
• Non utilizzare mai la macchina con protezioni
scarico posteriore).
• Non utilizzare la macchina se gli accessori/utensili non
sono installati nei punti previsti.
•
sistemi di sicurezza/microinterruttori presenti.
• Non sottoporre la macchina a sforzi eccessivi e non usare
una macchina piccola per eseguire lavori pesanti; l’uso
di una macchina adeguata riduce i rischi e migliora la
qualità del lavoro.
2.4 MANUTENZIONE, RIMESSAGGIO
rimessaggio preserva la sicurezza della macchina ed il
livello delle sue prestazioni.
Manutenzione
• Non usare mai la macchina con parti usurate o
danneggiate. I pezzi guasti o deteriorati devono essere
sostituiti e mai riparati.
•
prestare attenzione ad evitare che le dita rimangano
intrappolate fra il dispositivo di taglio in movimento e le
Il livello di rumorosità e di vibrazioni riportato
nelle presenti istruzioni, sono valori massimi di utilizzo
della macchina. L’impiego di un elemento di taglio
sbilanciato, l’eccessiva velocità di movimento, l’assenza
di manutenzione inuiscono in modo signicativo nelle
emissioni sonore e nelle vibrazioni. Di conseguenza
è necessario adottare delle misure preventive atte ad
eliminare possibili danni dovuti ad un rumore elevato e alle
sollecitazioni da vibrazioni; provvedere alla manutenzione
della macchina, indossare cue antirumore, eettuare
delle pause durante il lavoro.
Rimessaggio
•
con i materiali di risulta all’interno di un locale.
2.5 BATTERIA / CARICA BATTERIA
IMPORTANTE Le seguenti norme di sicurezza integrano
le prescrizioni di sicurezza presenti nello specico libretto
della batteria e del carica batteria allegato alla macchina.
• Per caricare la batteria utilizzare solo carica batteria
raccomandati dal produttore. Un carica batteria
surriscaldamento o una fuoriuscita di liquido corrosivo
della batteria.
•
vostro utensile. L’uso di altre batterie può provocare
lesioni e rischio di incendio.
• Accertarsi che l’apparecchio sia spento prima di inserire
la batteria. Montare una batteria in un apparecchio
elettrico acceso può provocare incendi.
• Tenere la batteria non utilizzata lontana da fermagli per
metallici che potrebbero provocare un corto circuito dei
contatti. Un cortocircuito fra i contatti della batteria può
comportare combustioni o incendi.
• Non usare il carica batteria in luoghi con presenza di
il carica batteria si riscalda e potrebbe provocare un
incendio.
•
che i contatti non vengano collegati fra loro e non usare
contenitori metallici per il trasporto.
2.6 TUTELA AMBIENTALE
La tutela dell’ambiente deve essere un aspetto rilevante
convivenza civile e dell’ambiente in cui viviamo.
• Evitare di essere un elemento di disturbo nei confronti
del vicinato. Utilizzare la macchina solamente in orari
ragionevoli (non al mattino presto o alla sera tardi quando
le persone potrebbero essere disturbate).
• Seguire scrupolosamente le norme locali per lo
che provvederanno al riciclaggio dei materiali.
• Seguire scrupolosamente le norme locali per lo
smaltimento dei materiali di risulta.
•
Non gettare le apparecchiature elettriche tra i
Secondo la Direttiva Europea
ed elettroniche e la sua attuazione in conformità alle
-
reimpiegate in modo eco-compatibile. Se le apparecchiature
sostanze nocive possono raggiungere la falda acquifera ed en-
benessere. Per informazioni più approfondite sullo smaltimento
-
con la dovuta attenzione per il nostro ambiente.
La batteria contiene materiale che è pericoloso per
voi e per l’ambiente. Essa deve essere rimossa e
smaltita separatamente in una struttura che accetta
le batterie agli ioni di litio.
usati, consente il riciclaggio dei materiali e la
riutilizzazione. Il riutilizzo dei materiali riciclati aiuta
a prevenire l’inquinamento ambientale e riduce la
domanda di materie prime.
IT - 4
3. CONOSCERE LA MACCHINA
3.1 DESCRIZIONE MACCHINA E USO PREVISTO
Questa macchina è un tosaerba con conducente a
piedi.
di ruote e di un manico.
L’operatore è in grado di condurre la macchina e di azionare
e quindi a distanza di sicurezza dal dispositivo di taglio
rotante.
L’allontanamento dell’operatore dalla macchina provoca
l’arresto del motore e del dispositivo rotante entro alcuni
secondi.
3.1.1 Uso previsto
Questa macchina è progettata e costruita per il taglio (e la
di un operatore a piedi.
1. tagliare l’erba e raccoglierla nel sacco di raccolta;
2. tagliare l’erba e scaricarla a terra dalla parte posteriore.
come equipaggiamento originale o acquistabili
secondo varie modalità operative illustrate in questo
manuale o nelle istruzioni che accompagnano i singoli
accessori.
3.1.2 Uso improprio
rivelarsi pericoloso e causare danni a persone e/o cose.
–
gravi o pregiudicare una guida sicura;
– farsi trasportare dalla macchina;
– usare la macchina per trainare o spingere carichi;
– azionare il dispositivo di taglio nei tratti non erbosi;
– utilizzare la macchina per la raccolta di foglie o detriti;
–
di vegetazione di tipo non erboso;
– utilizzare la macchina in più di una persona;
IMPORTANTE L’uso improprio della macchina
comporta il decadimento della garanzia e il declino di ogni
responsabilità del Costruttore, riversando sull’utilizzatore
gli oneri derivanti da danni o lesioni proprie o a terzi.
3.1.3 Tipologia di utente
Questa macchina è destinata all’utilizzo da parte di
ad un “uso hobbistico”.
IMPORTANTE La macchina dev’essere utilizzata da un
solo operatore.
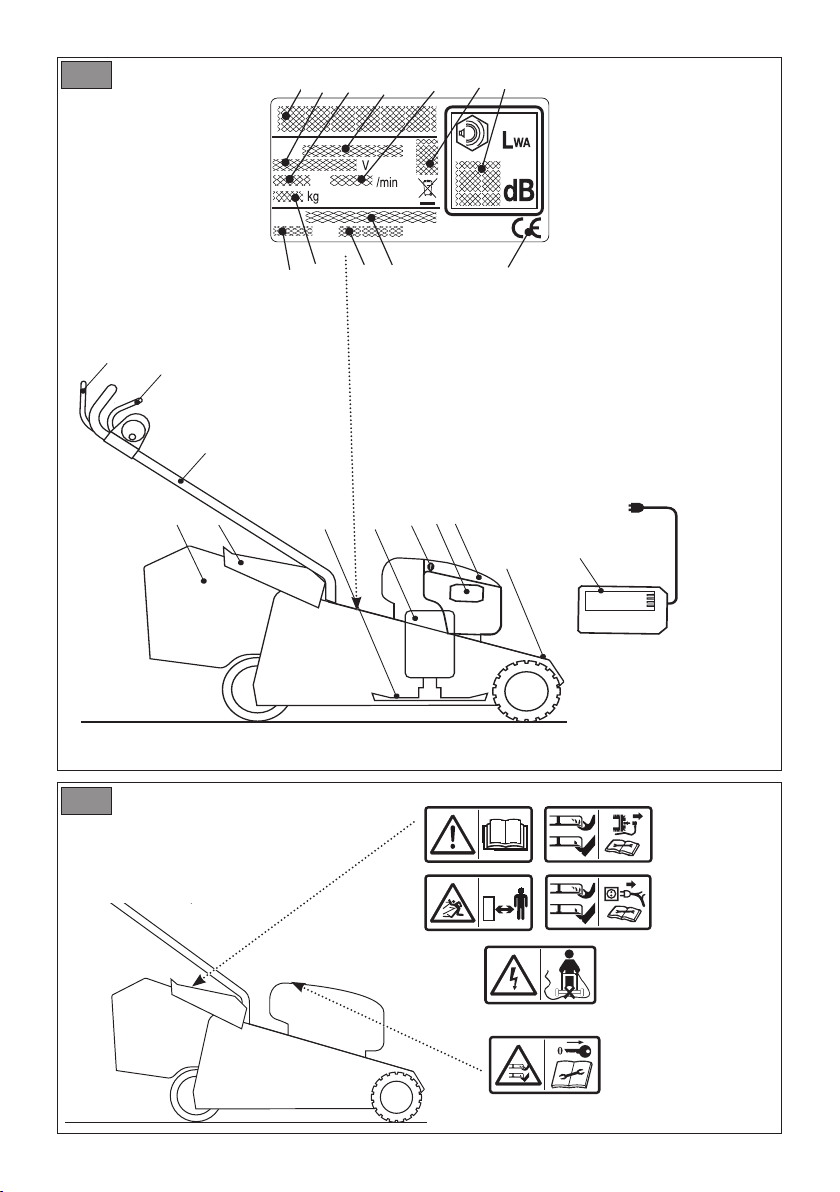
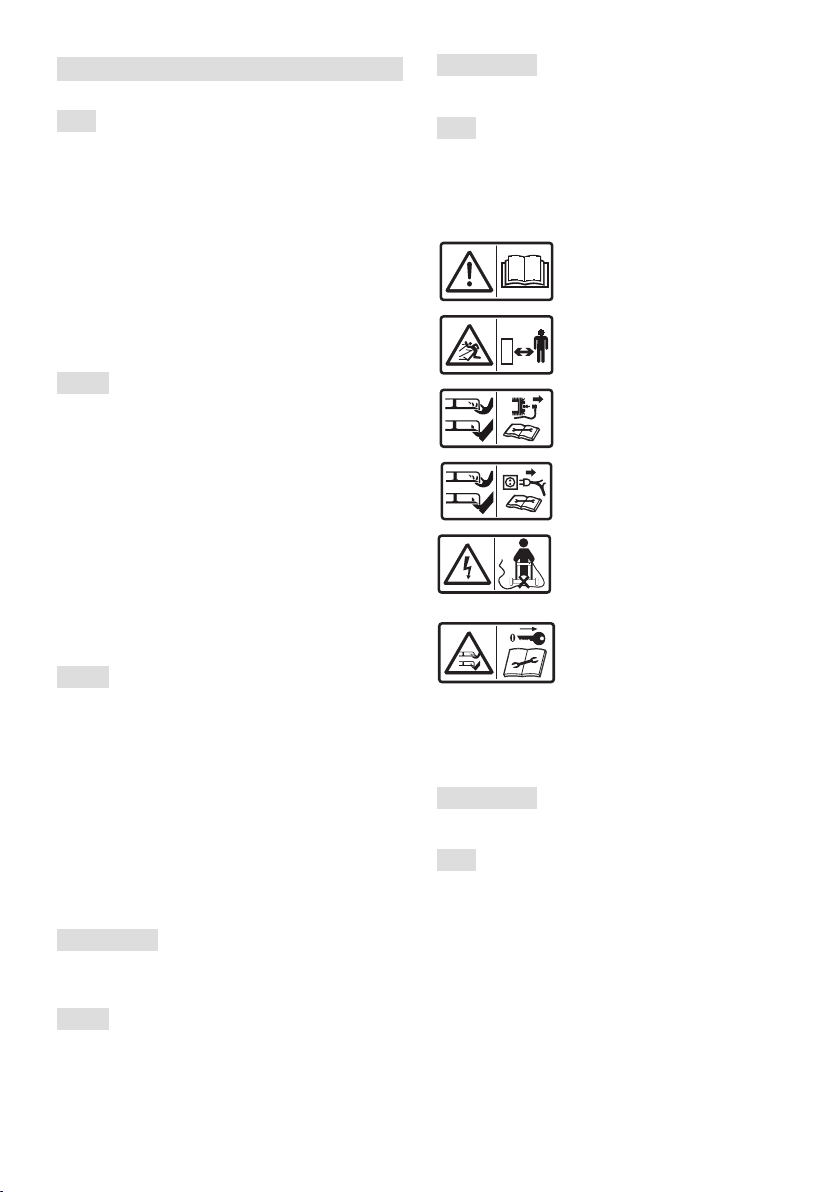
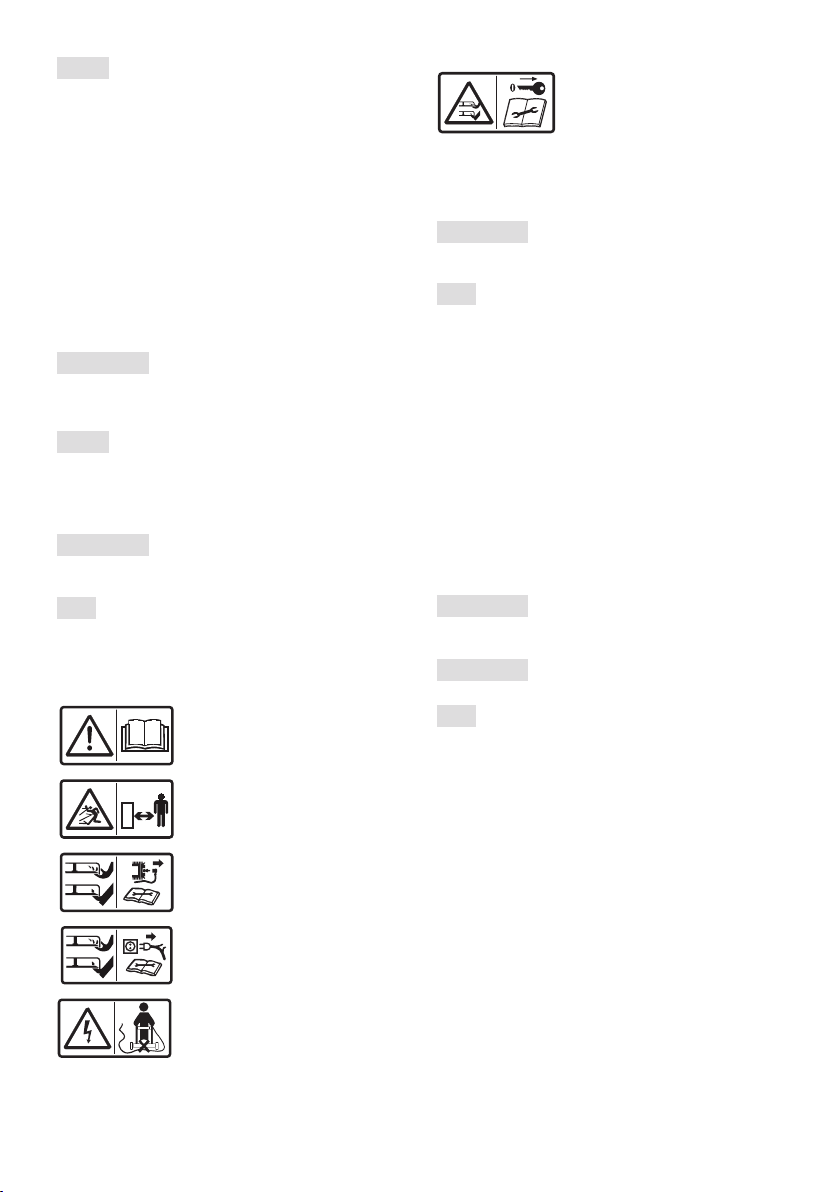
3.2 SEGNALETICA DI SICUREZZA
Sulla macchina compaiono vari simboli (Fig. 2). La loro
funzione è quella di ricordare all’operatore i comportamenti
da seguire per utilizzarla con l’attenzione e la cautela
necessari.
Attenzione
prima di usare la macchina.
Pericolo! Rischio di espulsione di
oggetti. Tenere le persone al di fuori
Solo per rasaerba con motore ter-
mico.
Solo per rasaerba elettrici con alimen-
tazione a rete.
Solo per rasaerba elettrici con alimen-
tazione a rete.
Attenzione al dispositivo di taglio
tagliente: Non introdurre mani o piedi
all’interno dell’alloggiamento del
dispositivo di taglio. Il dispositivo di
taglio continua a girare anche dopo
lo spegnimento del motore. Togliere
la chiave di sicurezza (dispositivo di
disattivazione) prima della manuten-
zione.
IMPORTANTE Le etichette adesive rovinate o divenute
illeggibili devono essere sostituite. Richiedere le nuove
etichette al proprio centro di assistenza autorizzato.
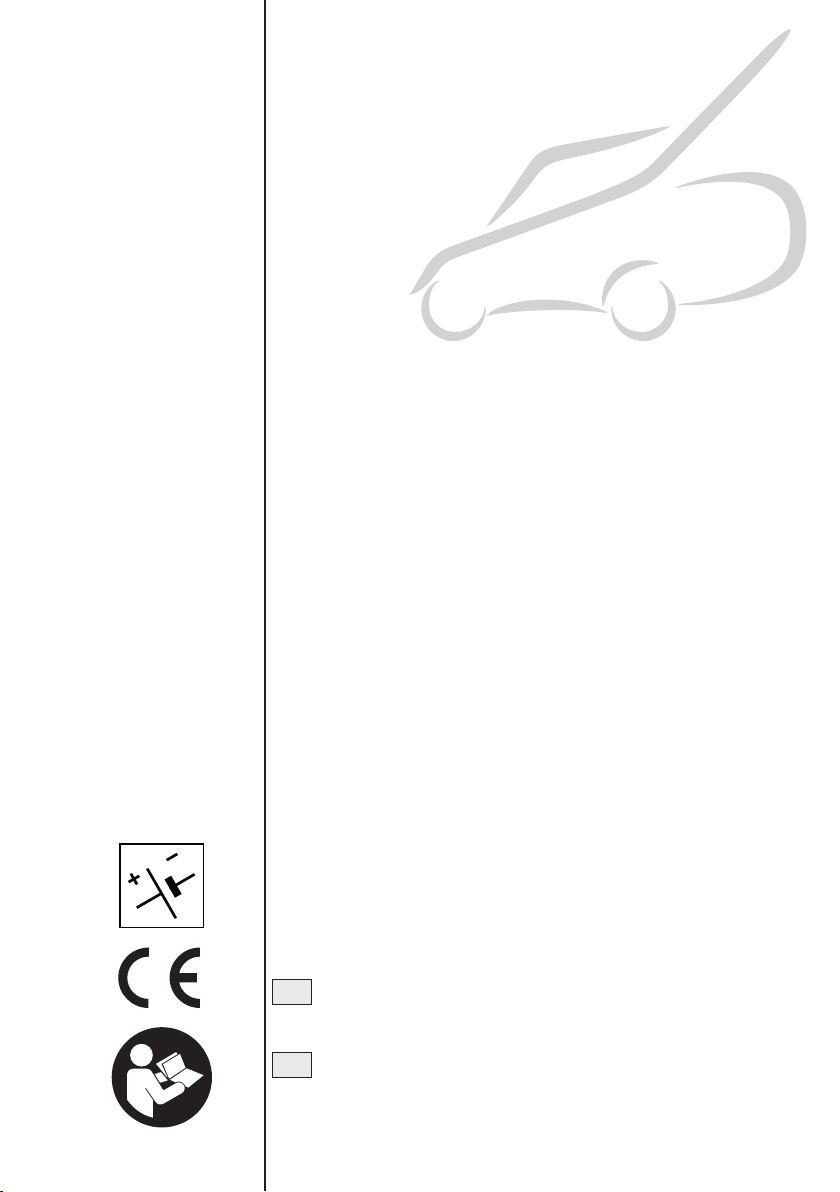
3.3 ETICHETTA DI IDENTIFICAZIONE
1. Livello di potenza acustica
2. Marchio di conformità CE
3. Anno di fabbricazione
4. Tipo di macchina
5. Numero di matricola
6. Nome e indirizzo del Costruttore
7. Codice articolo
8. Velocità mass. di funzionamento motore
9. Peso in kg
10. Tensione e frequenza di alimentazione
11. Grado di protezione elettrica
12. Potenza nominale

IT - 5
appositi spazi dell’etichetta riportata nel retro della
copertina.
IMPORTANTE Utilizzare i dati di identicazione riportati
sull’etichetta di identicazione prodotto ogni volta che si
contatta l’ocina autorizzata.
IMPORTANTE L’esempio della dichiarazione di
conformità si trova nelle ultime pagine del manuale.
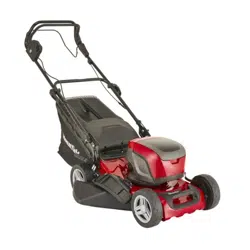
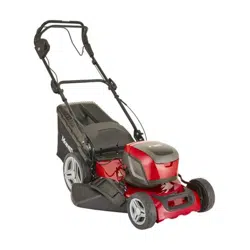
3.4 COMPONENTI PRINCIPALI
A. Chassis
taglio rotante.
B. Motore fornisce il movimento sia del dispositivo di
taglio che della trazione alle ruote (se prevista);
C. Dispositivo di taglio
dell’erba.
D. Protezione di scarico posterioreè una protezione
di sicurezza ed impedisce ad eventuali oggetti raccolti
dal dispositivo di taglio di essere scagliati lontano
dalla macchina.
E. Sacco di raccolta
impedendo ad eventuali oggetti raccolti dal dispositivo
di taglio di essere scagliati lontano dalla macchina.
F. Manico
La sua lunghezza fa si che l’operatore durante il
lavoro mantenga sempre la distanza di sicurezza dal
dispositivo di taglio rotante.
G. Batteria (se non fornita con la macchina, vedi cap.
15 “accessori a richiesta”)
l’avviamento del motore; le sue caratteristiche e
H. Leva presenza operatore
l’innesto del dispositivo di taglio e della trazione. Il
motore si arresta automaticamente al rilascio della
leva
I. Leva innesto trazione
trazione alle ruote e permette l’avanzamento della
macchina.
J. Sportello di accesso al vano batteria
K. Chiave di sicurezza (Dispositivo di
disattivazione): La chiave attiva / disattiva il circuito
elettrico della macchina.
L. Carica batteria (se non fornito con la macchina, vedi
cap. 15 “accessori a richiesta”): dispositivo che si
utilizza per ricaricare la batteria.
4. MONTAGGIO
Le norme di sicurezza da seguire sono descritte
al cap. 2. Rispettare scrupolosamente tali indicazioni
per non incorrere in gravi rischi o pericoli.
della macchina non sono assemblati direttamente in
Lo sballaggio e il completamento del montaggio
devono essere eettuati su una supercie piana e
solida, con spazio suciente alla movimentazione
della macchina e degli imballi, avvalendosi sempre
degli attrezzi appropriati. Non utilizzare la macchina
prima di aver portato a termine le indicazioni della
sezione “MONTAGGIO”.
4.1 COMPONENTI PER IL MONTAGGIO
Nell’imballo sono compresi i componenti per il montaggio.
4.1.1 Disimballaggio
1.
smarrire componenti.
2.
comprese le presenti istruzioni.
3. Estrarre dalla scatola tutti i componenti non montati.
4. Smaltire la scatola e gli imballi nel rispetto delle
normative locali.
Prima di eettuare il montaggio, vericare che
la chiave di sicurezza non sia inserita nella sua sede.
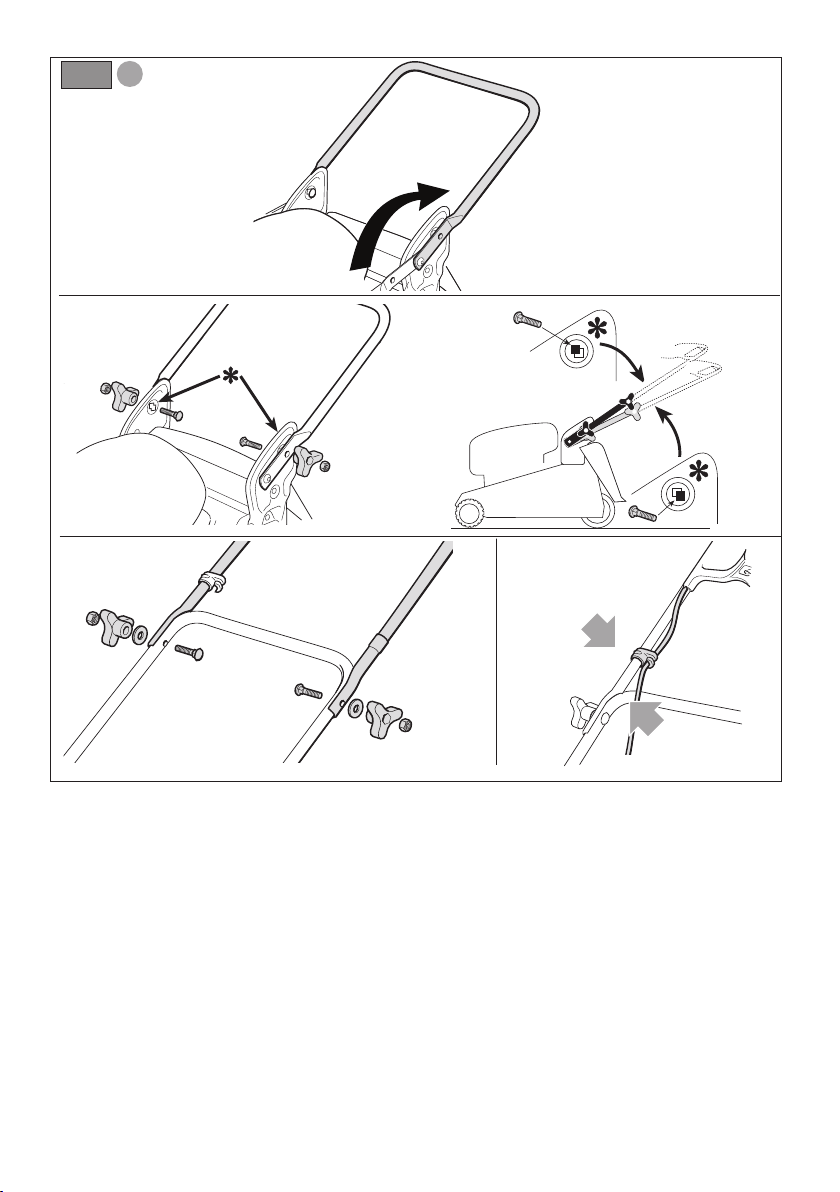
4.2 MONTAGGIO DEL MANICO
4.3 MONTAGGIO DEL SACCO
1.
telaio (Fig. 4.B) alla parte in plastica mediante le viti
(Fig. 4.C).
2. Introdurre il telaio (Fig. 4.B) nel sacco (Fig. 4.D)
3.
4. Inserire a fondo il bordo perimetrale (Fig. 4.F) della
partendo a 5-7 mm dalle estremità.
5. COMANDI DI CONTROLLO
5.1
attiva e disattiva il circuito elettrico della macchina.
Per attivare il circuito elettrico portare la chiave su “ON”.
Per disattivare il circuito portare la chiave su “OFF”.
elettrico impedendo un uso incontrollato della macchina.
IMPORTANTE Rimuovere la chiave di sicurezza ogni
qualvolta si lasci la macchina inutilizzata o incustodita.

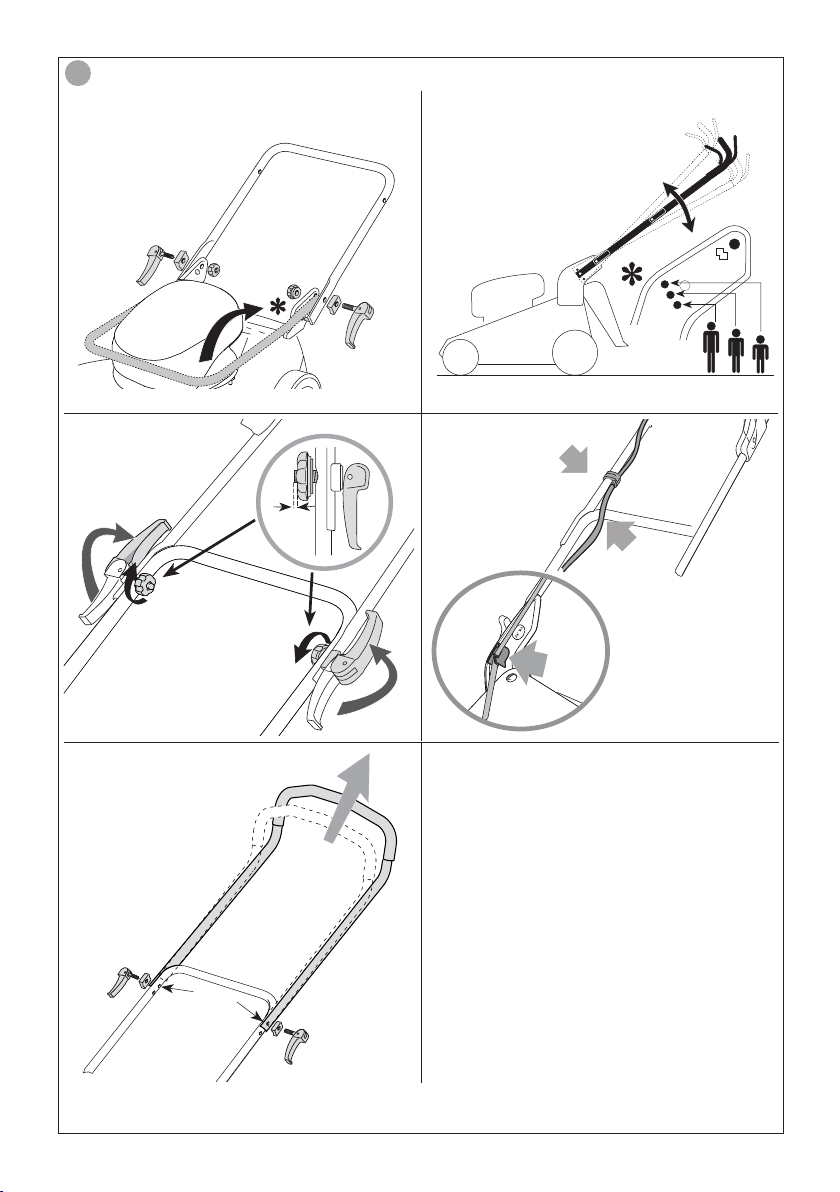
5.2 MANICO
5.2.1 Leva presenza operatore
dispositivo di taglio.
Si trova in posizione anteriore al manico.
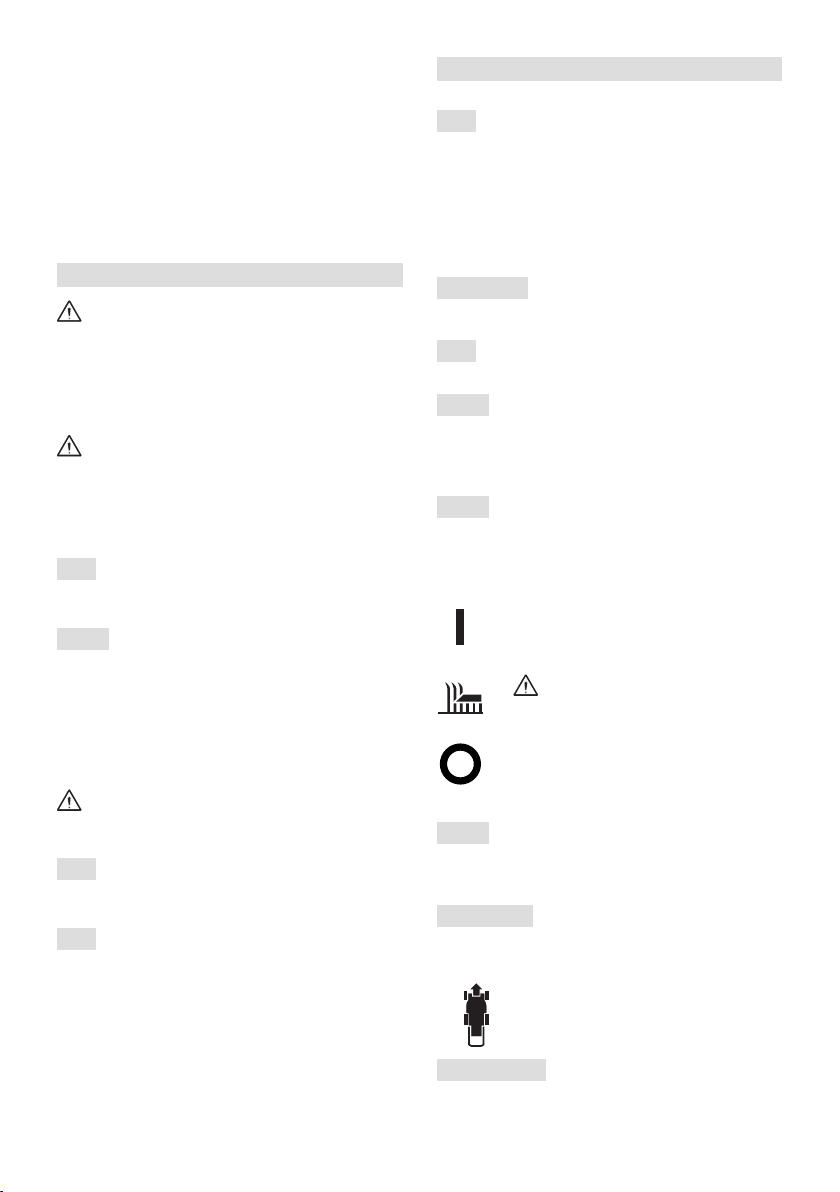
5.2.2 Comando interruttore
contemporaneamente innesta/disinnesta il dispositivo di
taglio.
1. Marcia.
prima che il motore si avvii.
2. L’avviamento del motore provoca
l’innesto contemporaneo del dispositivo
di taglio.
3. Arresto. Il motore si arresta automaticamente
al rilascio della leva presenza operatore (Fig.
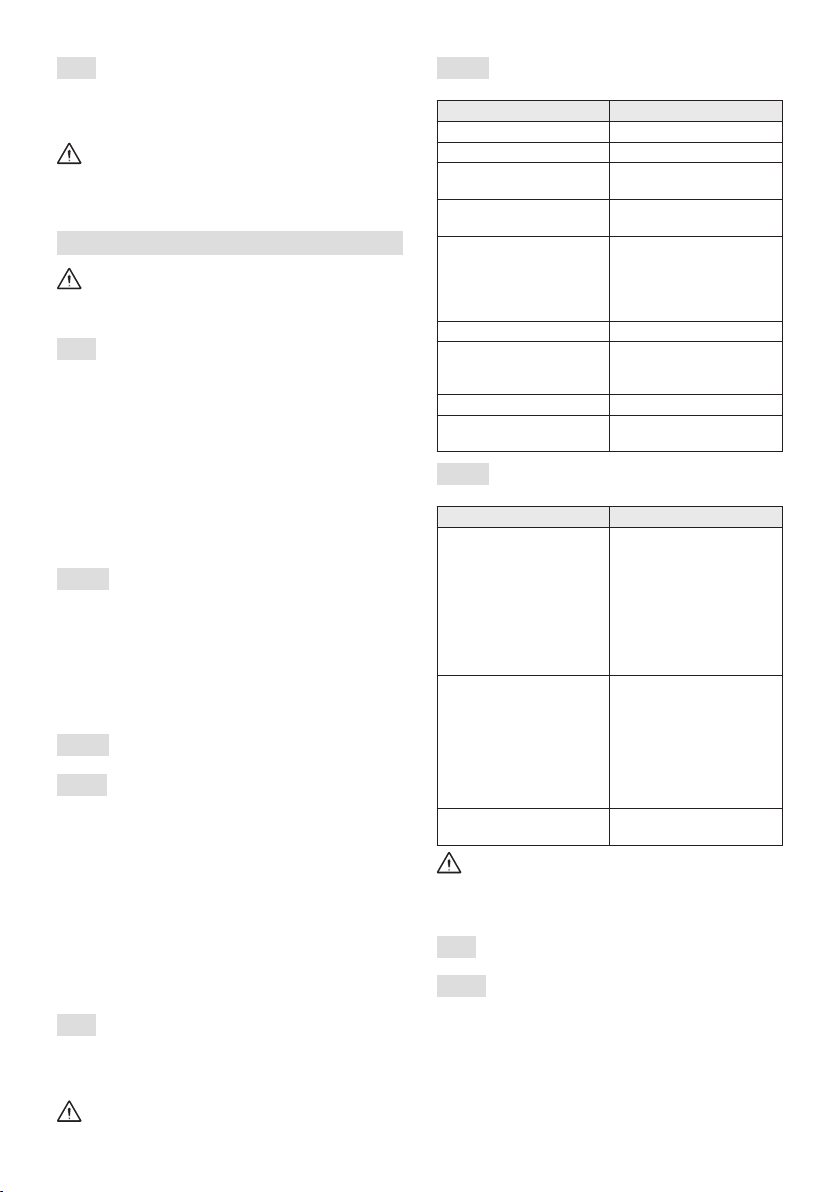
5.2.3 Leva innesto trazione
Innesta la trazione alle ruote e permette l’avanzamento
IMPORTANTE L’avviamento del motore deve avvenire
sempre con la trazione disinnestata
.
Si trova in posizione posteriore al manico.
Trazione innestata. L’avanzamento del
rasaerba avviene con la leva spinta contro
avanzare al rilascio della leva.
IMPORTANTE
Evitare di tirare all’indietro la macchina con
la trazione innestata.
5.3 REGOLAZIONE DELL’ALTEZZA DI TAGLIO
l’erba può essere tagliata a diverse altezze di taglio.
Eseguire l’operazione a dispositivo di taglio
fermo.
per mezzo
dell’apposita leva (Fig. 7.A).
6. USO DELLA MACCHINA
Le norme di sicurezza da seguire sono descritte
al cap. 2. Rispettare scrupolosamente tali indicazioni
per non incorrere in gravi rischi o pericoli.
6.1 OPERAZIONI PRELIMINARI
1. Accertarsi che la chiave di sicurezza non sia inserita
nella sua sede;
2. mettere la macchina in posizione orizzontale e ben
appoggiata sul terreno;
3.
4. predisporre la macchina nella modalità più adatta al
5. regolare l’altezza di taglio (par. 5.4).
6.1.1 Controllo della batteria
Prima di utilizzare la macchina per la prima volta dopo
seguendo le indicazioni contenute nel libretto della batteria.
–
le indicazioni contenute nel libretto della batteria.
6.1.2 Predisposizione della macchina al lavoro
NOTA Questa macchina permette di eettuare la
rasatura del prato in diverse modalità; prima di iniziare il
lavoro è opportuno predisporre la macchina in base a come
si intende eseguire la rasatura.
a. Predisposizione per il taglio e la raccolta dell’erba
nel sacco di raccolta:
– Sollevare la protezione di scarico posteriore (Fig. 8.A)
e agganciare correttamente il sacco di raccolta (Fig.
b. Predisposizione per il taglio e lo scarico posteriore
a terra dell’erba:
– Rimuovere il sacco di raccolta e assicurarsi che la
protezione di scarico posteriore (Fig. 9.A) rimanga
stabilmente abbassata.
6.2 CONTROLLI DI SICUREZZA
i risultati corrispondano a quanto riportato nelle tabelle.
Eettuare sempre i controlli
di sicurezza prima dell’uso.
IT - 7
6.2.1 Controllo di sicurezza generale
Oggetto Risultato
Impugnature
Manico
saldamente alla macchina
Dispositivo di taglio
o usurato
Protezione di scarico
posteriore; sacco
di raccolta
Integri. Nessun danno.
Montati correttamente.
Comando interruttore La leva deve avere un
forzato e al rilascio deve
tornare automaticamente
e rapidamente nella
posizione neutra.
Batteria Nessun danno al suo
involucro.
Viti/dadi sulla macchina
e sul dispositivo di taglio
Ben serrati (non allentati)
Passaggi dell’aria di
Non ostruiti
Macchina Nessun segno di
danneggiamento o usura
6.2.2 Test di funzionamento della macchina
Azione Risultato
1. Avviare la macchina
2. Rilasciare le leve
del comando
interruttore (Fig. 1.H)
1. Il dispositivo di taglio
deve muoversi.
2. Le leve devono
tornare
automaticamente
e rapidamente
nella posizione
deve spegnersi e il
dispositivo di taglio
deve arrestarsi entro
alcuni secondi.
1. Avviare la macchina
2. Azionare la leva
trazione
3. Rilasciare la
leva trazione
1.
2. Il rullo fa avanzare
la macchina
3. Il rullo si arresta e
la macchina smette
di avanzare.
Guida di prova Nessuna vibrazione
anomala.
Nessun suono anomalo
Se uno qualsiasi dei risultati si discosta da
quanto indicato nelle tabelle, non utilizzare la
macchina! Rivolgersi ad un centro di assistenza per i
controlli del caso e per la riparazione.
6.3 AVVIAMENTO
NOTA Eettuare l’avviamento su una supercie piana e
priva di ostacoli o erba alta.
1. Aprire lo sportello di accesso al vano batteria
2. inserire correttamente la batteria nel suo alloggiamento
“clic” che la blocca in posizione e assicura il contatto
elettrico.
3. Inserire a fondo la chiave di sicurezza
la chiave in posizione “ON”.
4. Richiudere completamente lo sportello.
5. Innestare il dispositivo di taglio premendo prima il
pulsante di sicurezza (Fig.12.A) e poi premendo la leva
presenza operatore (Fig.12.B)
6. Per innestare la trazione premere la leva posteriore al
manico (Fig.12.C).
6.4 LAVORO
IMPORTANTE Durante il lavoro mantenere sempre la
distanza di sicurezza dal dispositivo di taglio, data dalla
lunghezza del manico.
lavorabile prima della ricarica) è condizionata da vari fattori
descritti al (par. 7.2.1).
IMPORTANTE Nel caso il motore si arresti per
surriscaldamento durante il lavoro, è necessario attendere
circa 5 minuti prima di poterlo riavviare.
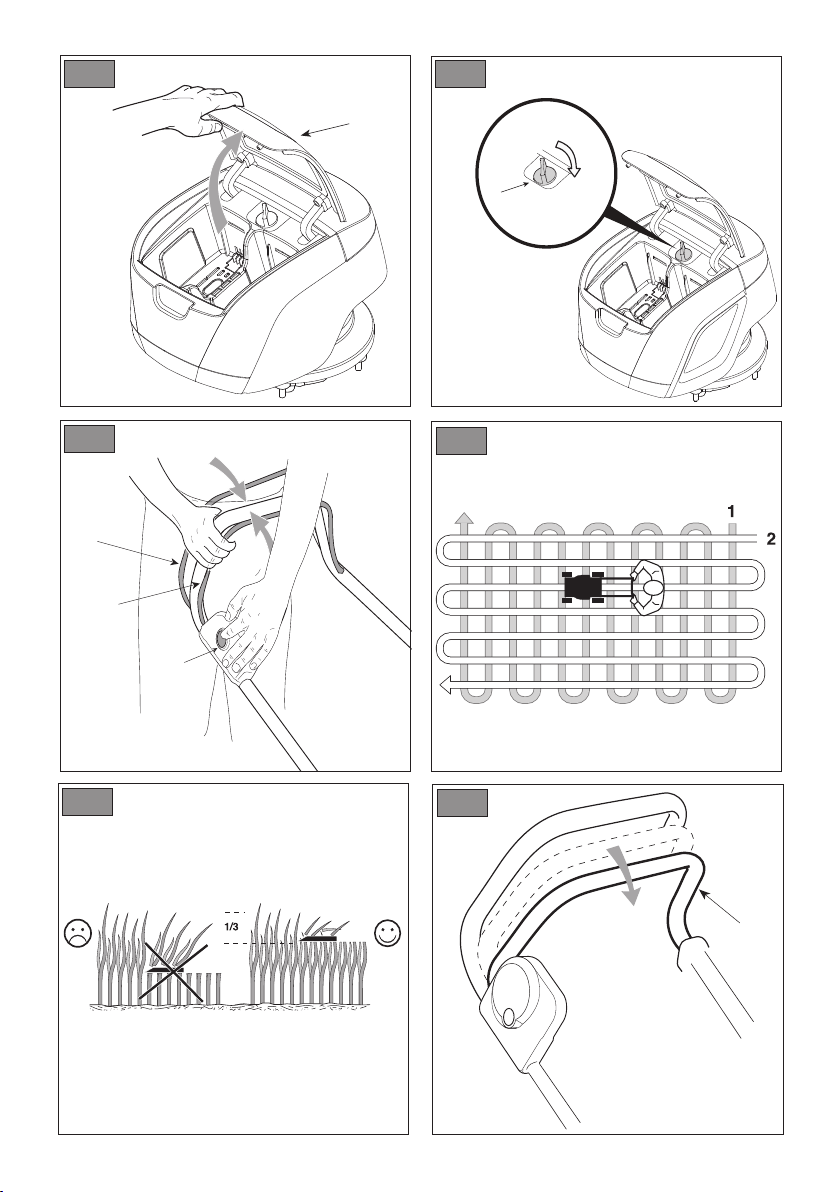
6.4.1 Taglio dell’erba
1. Iniziare l’avanzamento ed il taglio nella zona erbosa;
2. Adeguare la velocità di avanzamento e l’altezza di
densità e umidità dell’erba) e alla quantità di erba
asportata;
3. L’aspetto del prato sarà migliore se i tagli saranno
4. Non asportare mai più di un terzo dell’altezza totale
dell’erba in una sola passata (Fig.14)
5. Si consiglia di non tagliare su terreni con pendenza
superiore a 15°
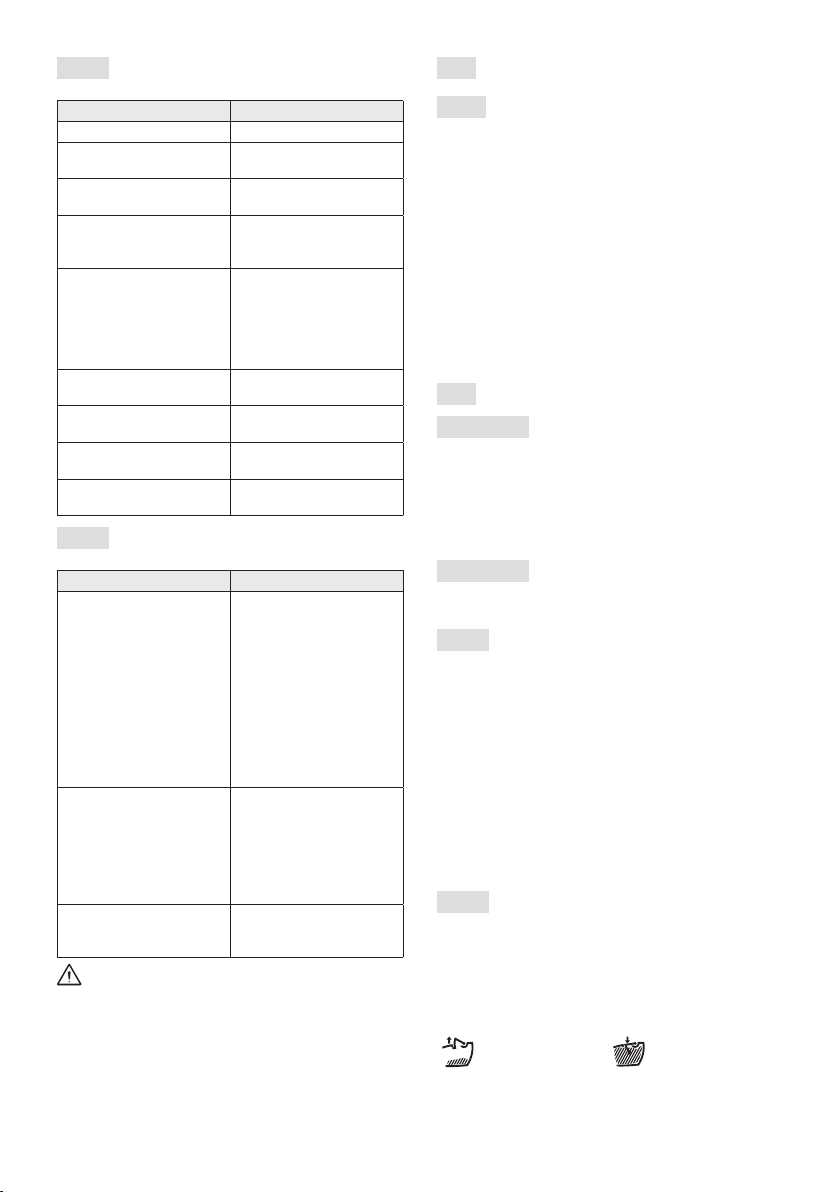
6.4.2 Svuotamento del sacco di raccolta
•
rumore del rasaerba cambia.
Il sacco di raccolta ha un dispositivo segnalatore del
Alzato = vuoto. Abbassato =
pieno*.
di

IT - 8
raccolta è in grado di ricevere l’erba tagliata; quando si
di raccolta si è riempito e
occorre svuotarlo.
1.
2.
mantenendolo in posizione eretta.
6.5 ARRESTO
1. Rilasciare la leva presenza operatore (Fig.15.A);
2. attendere l’arresto del dispositivo di taglio;
Dopo aver arrestato la macchina, occorrono
diversi secondi prima che il dispositivo di taglio si
arresti.
IMPORTANTE Arrestare sempre la macchina:
- durante gli spostamenti fra zone di lavoro.
- nell’attraversamento di superci non erbose;
- ogni volta che si rendesse necessario superare un
ostacolo;
- prima di regolare l’altezza di taglio;
- ogni volta che si toglie o si rimonta il sacco di raccolta.
6.6 DOPO L’UTILIZZO
1. Aprire lo sportello e rimuovere la chiave di sicurezza.
2. Rimuovere la batteria dalla sua sede e provvedere alla
3.
macchina in un qualsiasi ambiente.
4.
5. Controllare che non ci siano componenti allentati o
danneggiati e serrare eventuali viti e bulloni allentati o
contattare il centro di assistenza autorizzato.
IMPORTANTE Rimuovere la chiave di sicurezza ogni
qualvolta si lasci la macchina inutilizzata o incustodita.
7. MANUTENZIONE
7.1 GENERALITÀ
Le norme di sicurezza da seguire sono descritte
al cap. 2. Rispettare scrupolosamente tali indicazioni
per non incorrere in gravi rischi o pericoli.
Prima di eettuare qualsiasi controllo, pulizia
o intervento di manutenzione/regolazione sulla
macchina:
• Arrestare la macchina;
• togliere la chiave di sicurezza, (non lasciare mai la
chiave inserita o alla portata di bambini o persone
non idonee);
• accertarsi che tutte le parti in movimento si siano
completamente arrestate;
• lasciare rareddare il motore prima di collocare la
macchina in un qualsiasi ambiente;
• leggere le relative istruzioni;
• Indossare indumenti adeguati, guanti da lavoro e
occhiali di protezione.
• Le frequenze ed i tipi di intervento sono riassunti nella
“Tabella manutenzioni”. La tabella ha lo scopo di
macchina. In essa sono richiamati i principali interventi
e la periodicità prevista per ciascuno di essi. Eseguire
la relativa azione a seconda della prima scadenza che
• L’utilizzo di ricambi e accessori non originali e/o non
sul funzionamento e sulla sicurezza della macchina. Il
costruttore declina qualsiasi responsabilità in caso di
•
assistenza e dai rivenditori autorizzati.
IMPORTANTE Tutte le operazioni di manutenzione
e di regolazione non descritte in questo manuale devono
essere eseguite dal vostro Rivenditore o da un Centro
specializzato.
7.2 BATTERIA
7.2.1 Autonomia della batteria
prato lavorabile prima della ricarica) è principalmente
a.
–
b. ampiezza di taglio della macchina; maggiore è
c.
– accensioni e spegnimenti frequenti durante il lavoro;
– un’altezza di taglio troppo bassa in relazione alle
condizioni dell’erba;
– una velocità di avanzamento troppo elevata per la
quantità di erba da asportare.
NOTA Durante il lavoro la batteria è protetta contro lo
scaricamento totale tramite un dispositivo di protezione
che spegne la macchina e ne blocca il funzionamento.
Per ottimizzare l’autonomia della batteria è sempre
• tagliare l’erba quando il prato è asciutto;
• tagliare l’erba frequentemente in modo da non farle
raggiungere un’altezza elevata;
• impostare un’altezza di taglio maggiore quando l’erba è
molto alta ed eseguire una seconda passata ad altezza
inferiore.
Nel caso si volesse utilizzare la macchina in sessioni di
lavoro più lunghe rispetto a quanto consentito dalla batteria
• acquistare una seconda batteria standard per sostituire
la continuità di utilizzo;

IT - 9
• acquistare una batteria con autonomia maggiorata
rispetto alla batteria standard (par. 15.1).
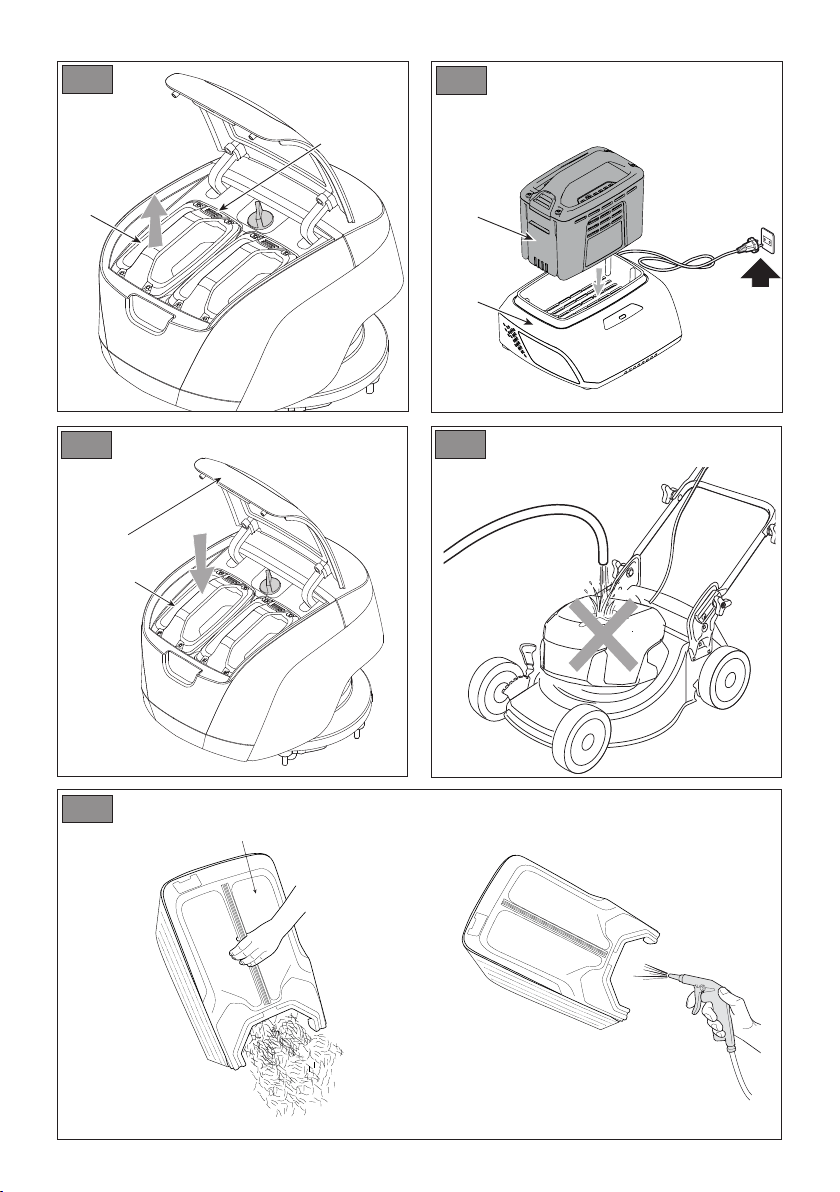
7.2.2 Rimozione e ricarica della batteria
1. Aprire lo sportello di accesso al vano batteria ed
estrarre la chiave di sicurezza;
2.
3. inserire la batteria ( nel suo alloggiamento nel
carica batteria (;
4.
con tensione corrispondente a quella indicata sulla
targhetta.
5.
indicazioni contenute nel libretto della batteria /carica
batteria.
NOTA La batteria è dotata di una protezione che
impedisce la ricarica se la temperatura ambiente non è
compresa fra 0 e +45 °C.
NOTA La batteria può essere ricaricata in ogni momento,
anche parzialmente, senza il rischio di danneggiarla.
7.2.3 Rimontaggio della batteria sulla macchina
1. Rimuovere la batteria dal suo alloggiamento nel carica
batteria (evitando di mantenerla a lungo sotto carica a
ricarica conclusa);
2. scollegare il carica batteria dalla rete elettrica;
3. aprire lo sportello di accesso al vano batteria (
inserire la batteria ( nel suo alloggiamento
blocca in posizione e assicura il contatto elettrico;
4. richiudere completamente lo sportello.
7.3 PULIZIA
seguenti istruzioni.
7.3.1 Pulizia della macchina
• Assicurarsi sempre che le prese d’aria siano libere da
detriti.
• Non usare getti d’acqua ed evitare di bagnare il motore e
• Non impiegare liquidi aggressivi per la pulizia dello
chassis.
•
grasso eccessivo.
7.3. 2 Pulizia dell’assieme dispositivo di taglio
Rimuovere i detriti d’erba e il fango accumulati all’interno
stabilità della macchina prima di eseguire qualsiasi tipo di
intervento.
La verniciatura della parte interna dello chassis può
staccarsi nel tempo per l’azione abrasiva dell’erba tagliata;
formazione di ruggine che porterebbe alla corrosione del
metallo.
7.3.3 Pulizia del sacco
1. Svuotare il sacco di raccolta (Fig.20.A.);
2. scuoterlo per ripulirlo dai residui d’erba e terriccio;
3.
favorire una rapida asciugatura.
7.4 DADI E VITI DI FISSAGGIO
macchina sia sempre in condizioni sicure di funzionamento.
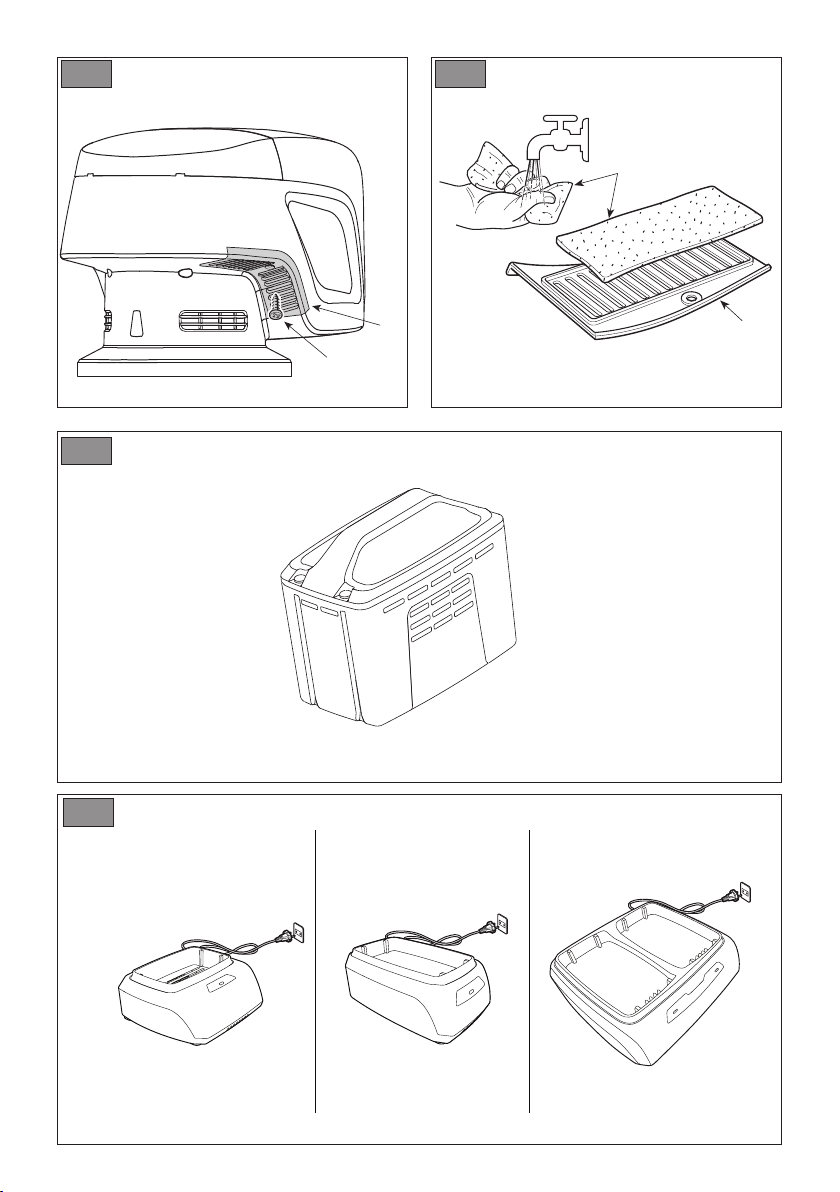
7.5 PULIZIA DEL FILTRO DELL’ARIA
pulito e deve essere sostituito se rotto o danneggiato.
1.
2.
3.
4.
IMPORTANTE Non usare benzina,
detersivi o altro per la pulizia del ltro.
5.
6.
7.
7.6 DISPOSITIVO DI TAGLIO
un ingiallimento del prato.
Non toccare il dispositivo di taglio ntanto che
non sia stata tolta la chiave e che il dispositivo di
taglio non sia completamente fermo.
Tutte le operazioni riguardanti i dispositivi
di taglio (smontaggio, alatura, equilibratura,
riparazione, rimontaggio e/o sostituzione) sono lavori
impegnativi che richiedono una specica competenza
oltre all’impiego di apposite attrezzature; per ragioni
di sicurezza, occorre pertanto che siano sempre
eseguite presso un Centro Specializzato.
Far sostituire sempre il dispositivo di taglio
danneggiato, storto o usurato, assieme alle proprie
viti, per mantenere l’equilibratura.

IT - 10
IMPORTANTE Utilizzare sempre dispositivi di taglio
originali, riportanti il codice indicato nella tabella “Dati
Tecnici”.
nella tabella “Dati Tecnici” potrebbero essere sostituiti
intercambiabilità e sicurezza di funzionamento.
8. RIMESSAGGIO
8.1 RIMESSAGGIO DELLA MACCHINA
1.
macchina in un qualsiasi ambiente.
2. Rimuovere la chiave di sicurezza.
3.
4. Controllare che non ci siano componenti allentati o
danneggiati e serrare eventuali viti e bulloni allentati o
contattare il centro di assistenza autorizzato.
5.
– in un ambiente asciutto;
– al riparo dalle intemperie;
– possibilmente ricoperta con un telo;
– in un luogo inaccessibile ai bambini;
– assicurandosi di aver rimosso chiavi o utensili usati per
la manutenzione.
8.2 RIMESSAGGIO DELLA BATTERIA
ambienti privi di umidità.
NOTA In caso di prolungata inattività, ricaricare la
batteria ogni due mesi per prolugarne la durata.
9. MOVIMENTAZIONE E TRASPORTO
–
– togliere la chiave di sicurezza;
– accertarsi che tutte le parti in movimento si siano
completamente arrestate;
– indossare robusti guanti da lavoro;
–
– impiegare un numero di persone adeguato al peso
della macchina e alle caratteristiche del mezzo di
trasporto o del posto nel quale deve essere collocata
o prelevata;
– assicurarsi che la movimentazione della cchina non
causi danni o lesioni.
Quando si trasporta la macchina con un automezzo o
1.
lunghezza adeguate;
2.
impiegando un numero adeguato di persone;
3. abbassare l’assieme dispostivo di taglio;
4. posizionarla in modo da non costituire pericolo per
nessuno;
5. bloccarla saldamente al mezzo di trasporto mediante
funi o catene per evitarne il ribaltamento.
10. ASSISTENZA E RIPARAZIONI
Questo manuale fornisce tutte le indicazioni necessarie
per la conduzione della macchina e per una corretta
manutenzione di base eseguibile dall’utilizzatore. Tutti gli
interventi di regolazione e manutenzione non descritti in
questo manuale devono essere eseguiti presso il vostro
sicurezza e le condizioni originali della macchina.
Operazioni eseguite presso strutture inadeguate o da
ogni forma di Garanzia e di ogni obbligo o responsabilità
del Costruttore.
•
•
esclusivamente ricambi originali. I ricambi e gli accessori
originali sono stati sviluppati appositamente per le
macchine.
• I ricambi e gli accessori non originali non sono
approvati; l’impiego di ricambi ed accessori non originali
compromette la sicurezza della macchina e solleva il
Costruttore da ogni obbligo o responsabilità.
•
di sicurezza.
11. COPERTURA DELLA GARANZIA
La garanzia copre tutti i difetti dei materiali e di
fabbricazione. L’utilizzatore dovrà seguire attentamente
tutte le istruzioni fornite nella documentazione allegata.
• Mancata familiarizzazione con la documentazione di
accompagnamento.
• Disattenzione.
• Uso e montaggio impropri o non consentiti.
• Utilizzo di pezzi di ricambio non originali.
• Utilizzo di accessori non forniti o non approvati dal
costruttore.
•
• Normale usura.
L’acquirente è protetto dalle proprie leggi nazionali. I diritti
dell’acquirente previsti dalle proprie leggi nazionali non
sono in alcun modo limitati dalla presente garanzia.

IT - 11
12. TABELLA MANUTENZIONI
Intervento Periodicità Note
MACCHINA
Prima di ogni uso par. 7.4
Prima di ogni uso
Prima di ogni uso
Prima di ogni uso
Prima di ogni uso *
Ricarica della batteria
Al termine di ogni uso
*
Pulizia generale e controllo
Al termine di ogni uso
Al termine di ogni uso -
Una volta al mese par. 7.5
Sostituzione dispositivo di taglio
-
**
Regolazione della trazione
*** **
* Consultare il manuale della batteria/carica batteria.
** Operazione che deve essere eseguita dal vostro Rivenditore o da un Centro specializzato
*** Contattare il vostro Rivenditore ai primi cenni di malfunzionamento
13. IDENTIFICAZIONE INCONVENIENTI
INCONVENIENTE CAUSA PROBABILE RIMEDIO
1. Azionando
motore non si avvia
Chiave di sicurezza mancante
o non inserita
correttamente
Batteria mancante o non
inserita correttamente
Aprire lo sportello ed assicurarsi che la
batteria sia ben alloggiata (par. 7.2.4)
Batteria scarica Controllare lo stato di carica e
Avviamento non immediato del motore Tenere premuto il comando interruttore
Intervento della protezione termica
per surriscaldamento del motore
Attendere almeno 5 minuti e
poi riavviare la macchina
2. Il motore si arresta
durante il lavoro
Batteria non inserita correttamente Aprire lo sportello ed assicurarsi che la
batteria sia ben alloggiata (par. 7.2.4)
Batteria scarica Controllare lo stato di carica e
Ostruzioni che impediscono la
rotazione del dispositivo di taglio
guanti da lavoro e rimuovere erba o
detriti presenti nella parte inferiore della
macchina e/o nel canale di scarico

IT - 12
INCONVENIENTE CAUSA PROBABILE RIMEDIO
Il motore si arresta
durante il lavoro e
la macchina emette
un cicalio sonoro
Intervento della protezione termica
per surriscaldamento del motore
Attendere almeno 5 minuti e
poi riavviare la macchina
Intervento della protezione termica
per un assorbimento troppo
• taglio di erba troppo alta
• ostruzioni che impediscono la
rotazione del dispositivo di taglio
• troppi detriti d’erba accumulati
all’interno dello chassis e
nel canale di scarico
• Impostare un’altezza di taglio maggiore
quando l’erba è molto alta ed eseguire una
seconda passata ad altezza inferiore.
•
•
Attendere almeno 5 minuti e
poi riavviare la macchina
4. Il motore è in moto
ma il dispositivo di
taglio non gira
Fissaggio del dispositivo
di taglio allentato
Arrestare immediatamente il motore
e togliere la chiave di sicurezza.
Contattare un Centro Assistenza
5. L’erba tagliata non
viene più raccolta nel
sacco di raccolta
Il dispositivo di taglio ha colpito un
corpo estraneo e ha subito un colpo
Arrestare il motore e togliere
la chiave di sicurezza.
Contattare un Centro Assistenza
per l’eventuale sostituzione del
L’interno dello chassis è sporco Pulire l’interno dello chassis per
facilitare l’evacuazione dell’erba verso
L’erba si taglia
Il dispositivo di taglio non
è in buono stato
o sostituzione del dispositivo di taglio
7. Si avvertono rumori e/o
vibrazioni eccessive
durante il lavoro
Fissaggio del dispositivo di
taglio allentato o dispositivo
di taglio danneggiato
Arrestare immediatamente il motore
e togliere la chiave di sicurezza.
Contattare un Centro Assistenza per
8. L’autonomia della
batteria è scarsa
Condizioni di utilizzo
gravose con maggiore
assorbimento di corrente
Ottimizzare l’utilizzo
(par. 7.2.1)
esigenze operative
Utilizzare una seconda batteria o una
batteria maggiorata (par. 14.1)
9. Il carica batteria non
della batteria
Batteria non inserita correttamente
nel carica batteria
Controllare che l’inserimento
Condizioni ambientali non idonee Eseguire la ricarica in ambiente con
temperatura adeguata (vedi libretto
istruzioni della batteria/carica batteria)
Contatti sporchi Pulire i contatti
Mancanza di tensione al carica batteria Controllare che la spina sia inserita e che
vi sia tensione alla presa di corrente
Carica batteria difettoso Sostituire con un ricambio originale
Se l’inconveniente perdura consultare il manuale
della batteria / carica batteria

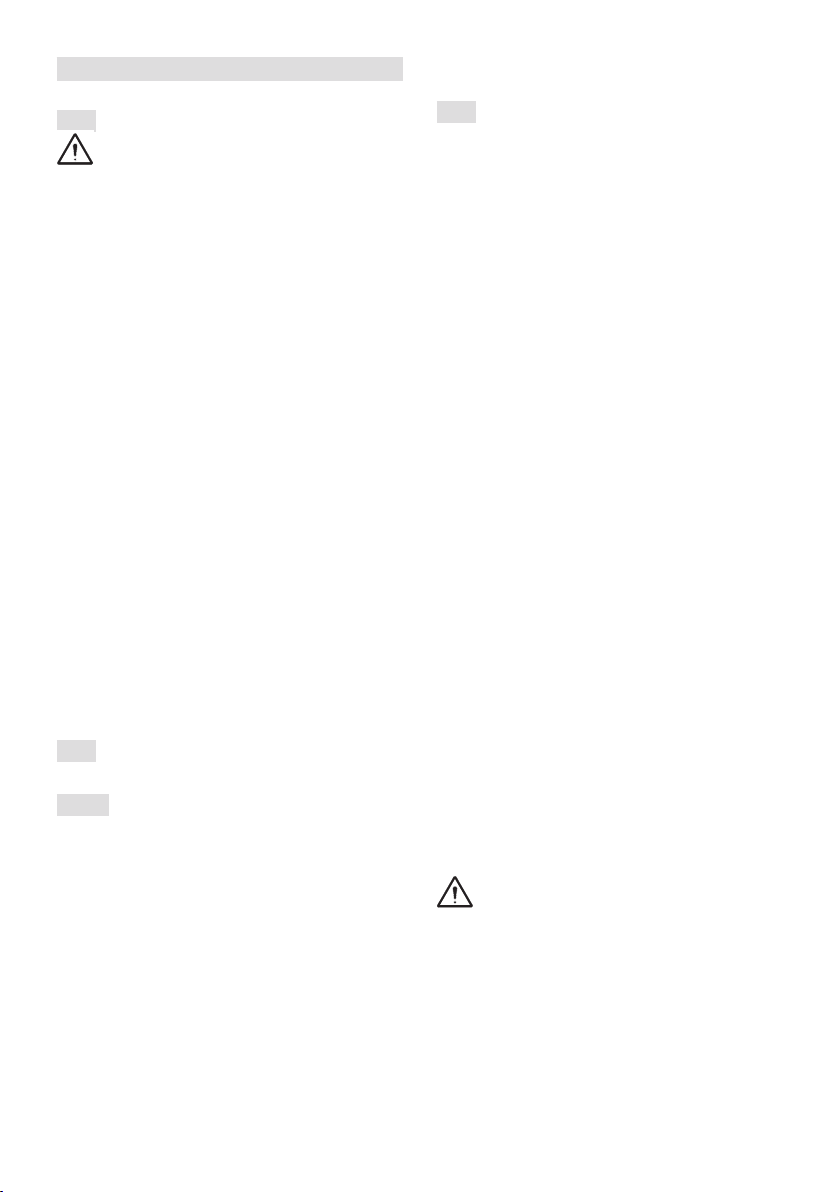
14. ACCESSORI A RICHIESTA
14.1 BATTERIE
batterie omologate per questa macchina si trova nella
tabella “Dati Tecnici”.
14.2 CARICA BATTERIA
Dispositivo che si utilizza per ricaricare la batteria (Fig. 24).
EN - 1
WARNING!: READ THOROUGHLY THE INSTRUCTION BOOKLET
BEFORE USING THE MACHINE. Keep for future reference
EN
INDEX
1. GENERAL INFORMATION .......................................... 1
2. SAFETY REGULATIONS ............................................. 1
..........................
.....
......................................................... 4
.............................................. 4
................................................ 4
4. ASSEMBLY ................................................................... 5
4.1 Assembly components ....................................... 5
4.2 Handle assembly ................................................ 5
..................................... 5
5. CONTROLS .................................................................. 5
5.1 Safety key (Deactivation device) ........................ 5
5.2 HANDLE .............................................................. 5
...................................
.................................................
.......................................
......................................................
...............................................................
............................................................... 7
.................................. 7
..................................................... 7
7. MAINTENANCE............................................................ 7
7.1 General information ............................................ 7
7.2 Batter y ................................................................. 8
.............................................................. 8
7.4 Nuts and bolts ..................................................... 8
........................................... 9
..................................................... 9
8. STORING ...................................................................... 9
8.1 Storing the machine ............................................ 9
8.2 Storing the battery ............................................... 9
9. HANDLING AND TRANSPORTATION ........................ 9
10. ASSISTANCE AND REPAIRS ...................................... 9
11. WARRANTY COVERAGE .......................................... 10
12. MAINTENANCE TABLE ............................................. 10
.....................................11
14. ACCESSORIES ON REQUEST ................................. 12
14.1 Batteries ............................................................ 12
14.2 Battery charger ................................................. 12
1. GENERAL INFORMATION
1.1 HOW TO READ THE MANUAL
Some paragraphs in the manual contain important
information regarding safety and operation and are
NOTE or IMPORTANT these give details or further
information on what has already been said, and aim to
prevent damage to the machine.
The symbol highlights danger. Non-compliance with
and or damage.
The paragraphs highlighted in a square with grey spots
indicate the optional characteristics not on all models
documented in this manual. Check if the characteristic
is on this model.
Whenever reference is made to a position on the machine
operator's working position.
1.2 REFERENCES
1.2.1 Figures
2.C" or simply "(Fig. 2.C)".
vary from those shown.
1.2.2 Titles
The manual is divided into chapters and paragraphs. The
title of paragraph "2.1 Training" is a sub-title of "2. Safety
regulations". References to titles or paragraphs are marked
with the abbreviation chap. or par. and the relevant number.
2. SAFETY REGULATIONS
2.1 TRAINING
Become acquainted with the controls and the
proper use of the machine. Learn how to stop the
motor quickly. Failure to follow the warnings and
instructions may result in re and/or serious injury.

EN - 2
Never allow children or persons unfamiliar with these
instructions to use the machine. Local regulations may
restrict the age of the operator.
This appliance can be used by children aged from 8 years
mental capabilities or lack of experience and knowledge
if they have been given supervision or instructions
concerning use of the appliance in a safe way and
understand the hazards involved. Children shall not play
with the appliance. Cleaning and user maintenance shall
not be made by children without supervision.
Do not allow children or other passengers to ride on the
machine.
Bear in mind that the operator or user is responsible for
accidents or unexpected events occurring to other people
or their property. It is the user’s responsibility to assess the
potential risk of the area where work is to be carried out
and to take all the necessary precautions to ensure his own
slippery and unstable ground.
operator looks over the user instructions contained in this
manual.
2.2 PREPARATION
Personal Protective Equipment (PPE)
•
footwear with non-slip soles and long trousers. Do not
operate the machine when barefoot or wearing open
sandals. Wear hearing protection devices.
• Use of hearing protections can reduce the ability to hear
any warnings (shouting or alarms). Be careful of what
occurs around you in the work area.
•
accessory that could catch in the machine or in any
• Tie your hair back if it is long.
Work area/Machine
• Thoroughly inspect the entire work area and remove
anything that could be thrown by the machine or damage
2.3 DURING OPERATION
Work Area
• Do not use the machine in environments at risk of
powder. Power tools create sparks which may ignite the
dust or fumes.
•
visibility conditions.
•
working area. Instruct another adult to supervise any
children in the vicinity.
•
• Do not expose the machine to rain or wet environments.
Water entering a power tool will increase the risk of
electric shock.
•
visibility.
•
The machine could overturn if a wheel slides over the
edge or if the earth gives way.
•
being very careful when changing direction. Make sure
may cause the machine to slide sideways or make you
lose control of it.
•
Behaviour
• Exercise caution when reversing or moving backwards.
Look behind you to make sure there are no obstacles
before and during operating in reverse gear.
•
• Do not allow the lawnmower to pull you along.
•
when starting and when using the machine.
•
a few seconds after disengagement or after you have
• Keep away from the discharge opening.
If something breaks or an accident occurs
during work, turn o the motor immediately and
move the machine away to prevent further damage;
if an accident occurs with injuries or third parties are
injured, carry out the rst aid measures most suitable
for the situation immediately and contact the medical
authorities for any necessary health care. Carefully
remove any debris which could cause damage or
injury to persons or animals if ignored.
Use limitations
•
• Don’t use the machine if the attachments/tools are not
installed in their seats.
•
safety systems/microswitches installed.
• Do not strain the machine too much and do not use a
small machine for heavy-duty work. If you use the right
the quality of your work.
2.4 MAINTENANCE, STORAGE
Ensure regular maintenance and correct storage to
maintain machine safety and high performance levels.
Maintenance
• Never use the machine with worn or damaged parts.
Faulty or worn-out parts must always be replaced and
never repaired.
•
The noise and vibration levels shown in these
instructions are the maximum levels for use of the
machine. The use of an unbalanced cutting element,
the excessive speed of movement, or the absence
of maintenance have a signicant inuence on
noise emissions and vibrations. Consequently, it
is necessary to take preventive steps to eliminate
possible damage due to high levels of noise and
stress from vibration. Maintain the machine well, wear
ear protection devices and take breaks while working.
Storage
•
inside a room.
2.5 BATTERY / BATTERY CHARGER
IMPORTANT The following safety instructions are in
addition to the safety requirements provided in the specic
battery and battery charger manual delivered with this
machine.
• Only use battery chargers recommended by the
manufacturer to recharge batteries. An inadequate
corrosive liquid to leak from the battery
•
•
inserting the battery. Inserting a battery in a machine
•
as contact with the same can cause short circuits. Short
circuits between battery contacts can lead to explosion
• Never use the battery charger in environments in the
The battery charger heats up during recharging and may
•
never come into contact with each other and never use
metal containers to transport them.
• Environmental protection
• Safeguarding the environment must be a relevant
community and the environment we live in.
• Avoid being a disturbance to the neighbourhood. Use this
machine at reasonable times of the day only (not early
morning or late evening when the noise could cause
disturbance).
• Scrupulously comply with local regulations for the
elements with a strong environmental impact; this waste
where the material will be recycled.
• Scrupulously comply with local regulations for the
disposal of waste materials
•
disposal facility in accordance with the local regulations
in force.
Do not throw electrical equipment away with
domestic waste.
According to the European Directive 2012/19/EU
on electrical and electronic equipment waste and
its implementation in compliance with national
harmful substances can reach the water table and enter
competent authority for the disposal of domestic waste or
your dealer.
At the end of their working life, dispose of bat-
teries paying due attention to the environment.
for you and the environment. They must be
removed and disposed of separately at a facility
that accepts lithium-ion batteries.
Separate waste collection of the products and
packaging used allows the materials to be recy-
cled and reused.
Reuse of recycled materials help to prevent
environmental pollution and reduces the demand
for raw materials.
3. GETTING TO KNOW THE MACHINE
3.1 DESCRIPTION OF THE MACHINE AND
PLANNED USE
This machine is a pedestrian controlled lawnmower.
The machine is essentially composed of a motor which
wheels and a handle.
The operator is able to operate the machine and use the
distance from the rotating cutting means.
means will stop within a few seconds.
3.1.1 Intended use
This machine was designed and manufactured for cutting
operator.
1. mow the grass and collect it in the grass catcher;
2. mow the grass and discharge it on the ground from the
rear section.
The use of special attachments provided for by the
Manufacturer as original equipment or which may be
instructions that accompany the single attachments.
EN - 4
3.1.2 Improper use
Any other usage not in keeping with the above-mentioned
ones may be hazardous and harm persons and/or damage
–
themselves or compromise safe driving by the
operator;
– letting oneself be transported by the machine;
– using the machine to tow or push loads;
– using the cutting means on surfaces other than grass;
– using of the machine for leaf or debris collection;
–
vegetation other than grass;
– use of the machine by more than one person;
IMPORTANT Improper use of the machine will invalidate
the warranty, relieve the Manufacturer from all liability, and
the user will consequently be liable for all and any damage
or injury to himself or others.
3.1.3 User types
professional operators. The machine is intended for "DIY"
use only.
IMPORTANT The machine must be used by one
operator.
3.2 SAFETY SIGNS
used to remind the operator of the behaviour to follow to use
it with the necessary attention and caution.
Warning -
fore operating the machine.
Danger! Risk of thrown objects
Keep all persons away from the work
area whilst working.
Only for lawnmowers with petrol
engines
Only for electric lawnmowers powered
by mains supply.
Only for electric lawnmowers powered
by mains supply.
Be careful when using the sharp
cutting means: Do not put hands or
feet near or under the opening of the
cutting means. The cutting means
continues to turn even after the motor
has been switched off. Remove the
safety key (deactivation device) be-
fore carrying out any maintenance.
IMPORTANT Any damaged or illegible decals must be
replaced. Order replacement decals from an authorised
assistance centre.
3.3 IDENTIFICATION LABEL
1. Sound power level
2. CE conformity marking
3. Year of manufacture
4. Type of machine
5. Serial number
6. Name and address of Manufacturer
7. Article code
8. Max. motor operation speed
9. Weight in kg
10. Power voltage and frequency
11. Electrical protection rating
12. Nominal power
space on the label on the back of the cover page.
IMPORTANT Quote the information on the product
identication label whenever you contact an authorised
service workshop.
IMPORTANT The example of the Declaration of
Conformity is provided on the last pages of the manual.
3.4 MAIN COMPONENTS
The machine is composed of a series of main components
A. Chassis: this is the casing that houses the rotating
cutting means.
B. Motor: the driving force for the cutting means and
wheel drive (if provided);
C. Cutting means
grass.
D. Rear discharge guard: it is a safety device which
hurled away from the machine.
E. Grass catcher: as well as collecting the grass
hurled away from the machine.
F. Handle: this is the operator’s work station. It is long
enough to ensure the operator remains at a safe
distance from the rotating cutting means whilst
working.
G. Battery (if it is not supplied with the machine, see
chapter 15 “accessories on request”): provides the
.
EN - 5
H. Operator presence lever
cutting means and drive to be operated. The engine
stops automatically when the lever is released.
I. Drive lever: the lever that engages the wheel drive
and allows the machine to move forward.
J. Hatch for accessing the battery compartment
K. Safety key (Deactivation device): The key enables /
disables the machine electric circuit.
L. Battery charger (if it is not supplied with the machine,
see chapter 15 “accessories on request”): device used
to recharge the battery.
4. ASSEMBLY
The safety regulations to follow are described
in chap. 2. Strictly comply with these instructions to
avoid serious risks or hazards.
the machine are not installed in the factory and have to be
assembled after unpacking. Follow the instructions below.
Unpacking and completing the assembly should
be done on a at and stable surface, with enough
space for machine handling and its packaging,
always making use of suitable equipment. Do not use
the machine until all the indications provided in the
"ASSEMBLY" section have been carried out.
4.1 ASSEMBLY COMPONENTS
The packaging includes assembly components.
4.1.1 Unpacking
1.
lose components.
2.
instructions.
3. Remove all the unassembled parts from the box.
4. Dispose of the box and packaging in accordance with
local regulations.
Before assembling, make sure the safety key is
not inserted in its housing.
4.2 HANDLE ASSEMBLY
4.3
1.
frame (Fig. 4.B) to the plastic part using the screws
(Fig. 4.C).
2. Insert the frame (Fig. 4.B) in the grass-catcher (Fig.
4.D)
3.
4. Firmly press the perimeter edge (Fig. 4.F) of the frame
mm from the end.
5. CONTROLS
5.1
The key found inside the battery compartment enables
/ disables the machine electric circuit (Fig. 5.A).
Turn the key to "ON" posistion to active the electric circuit.
deactivated.
deactivated to prevent uncontrolled use of the machine.
IMPORTANT Remove the safety key whenever the
machine is unused or left unattended.
5.2 HANDLE
5.2.1 Operator presence lever
means.
It is located in front of the handle.
5.2.2 Control lever
starts/stops the motor and
simultaneously engages/disengages the cutting means.
1. Run.
pull the operator
and wait for 2-
seconds for the motor to start running.
2. Ignition of the motor simultaneously
engages the cutting means.
3. Stop. The motor stops when the operator
5.2.3 Drive engagement lever
This engages the wheel drive and allows the machine to
IMPORTANT The engine has to be always started with
the drive disengaged.
It is located behind the handle
Drive engaged. Push the lever towards
the handle for forward movement (Fig.
forward when the lever is released.
IMPORTANT To prevent damage to the transmission,
do not pull the machine backwards with the drive engaged.
5.3 CUTTING HEIGHT ADJUSTMENT
heights.
Do this when the cutting means is stationary.
. 7.A).
6. USING THE MACHINE
The safety regulations to follow are described in
chapter 2. Strictly comply with these instructions to
avoid serious risks or hazards.
6.1 PRELIMINARY PROCEDURES
1. Make sure the safety key is not inserted in its housing;
2. place the machine in a stable horizontal position on the
ground;
3.
4. Prepare the machine in the most suitable modality for
5.
6.1.1 Checking the battery
fully charge the battery following the instructions in the
battery booklet.
– check the battery charge status according to the
instructions in the battery booklet.
6.1.2 Preparing the machine before starting work
NOTE This machine can be used to mow lawns in a
number of dierent ways; before starting work, prepare the
machine based on how the lawn is to be mowed.
a. Preparation for grass cutting and collection in the
grass catcher:
–
b. Preparation for mowing and grass rear discharge
onto the ground:
– Remove the grass catcher and check that the rear
discharge guard (Fig. 9.A) maintains its lowered
position.
6.2 SAFETY CHECKS
Run the following safety checks and check that the results
correspond to those outlined on the tables.
Always carry out the safety checks before use.
6.2.1 General safety check
Object Result
Hand grips
Handle
Cutting means
or worn.
Rear discharge guard;
grass catcher
Good condition. No
damage. Properly installed.
Control lever The lever must move
forcing and should return
automatically and rapidly
back to the neutral position.
Battery No damage to the casing.
Screws/nuts on the
machine and on the
cutting means
Correctly tightened
(not loose)
Cooling air ducts Not clogged
Machine No signs of damage
or wear
6.2.2 Machine operating test
Action Result
1. Start the machine
2. Release the control
levers (Fig. 1.H)
1. The cutting means
should move.
2. The levers should
return automatically and
rapidly to the neutral
cutting means must stop
within a few seconds..
1. Start the machine
2. Engage the drive lever
Disengage the
drive lever
1.
1.
2. The Roller should move
the machine forward.
The Roller should stop
and the machine stops
moving forward.
Test driving No abnormal vibrations.
No abnormal sound
If any of the results fails to match the indications
provided in the tables, do not use the machine!
Contact a service centre to have it checked and
repaired if necessary.
6.3
NOTE Start up the machine on a at surface without
obstacles or high grass.
1. Open the hatch for accessing the battery compartment
2. Fit the battery inside its housing correctly (par. 7.2.4)
pressing down until the end and until you hear the click
3.
to "ON" position.

EN - 7
4. Completely close the hatch again.
5.
button (Fig. 12.A) and then pressing the operator
presence lever (Fig. 12.B)
6.
handle (Fig. 12.C)
6.4 WORKING
IMPORTANT When working, always keep
a safe distance from the cutting means,
given by the length of the handle.
Battery power reserve (therefore the mowable lawn surface
before recharging is required) depends on many factors
described in (par. 7.2.1).
IMPORTANT If the motor stops while mowing due to
overheating, you must wait approximately 5 minutes before
restarting it.
6.4.1 Grass cutting
1. Start moving forward and mowing in the grass area;
2. Regulate the forward speed and the cutting height
(par. 5.4) considering the conditions of the lawn (the
amount of grass collected;
3. The appearance of the lawn will improve if you alternate
4. Never cut more than one third of the total grass height
per single pass (Fig.14).
5. It is recommended to avoid mowing on slopes with a
degree higher than 15°.
6.4.2 Emptying the grass catcher
changes.
Alzato = vuoto. Abbassato =
pieno*.
remains raised for as long as the grass catcher is able
catcher is full and must be emptied.
1. release the switch lever and wait for the cutting means
2.
handle and remove the grass catcher keeping it in an
erect position.
6.5 STOPPING THE MACHINE
1.
2.
When you have stopped the machine, it will
take a few seconds for the cutting means to stop.
IMPORTANT Always stop the machine:
- when moving between work areas;
- when driving on grass free surfaces;
- every time it is necessary to overcome an obstacle;
- before adjusting the cutting height.
- whenever you remove or reattach the grass catcher.
6.6 AFTER OPERATION
1.
2. Open the hatch and remove the safety key.
3. Remove the battery from its housing and recharge it
4. Allow the motor to cool before storing in an enclosed
space.
5.
6. Check there are no loose or damaged components.
tighten any screws and loose bolts or contact the
authorised service centre.
IMPORTANT Remove the safety key whenever the
machine is unused or left unattend
7. MAINTENANCE
7.1 GENERAL INFORMATION
The safety regulations to follow are described
in chap. 2. Strictly comply with these instructions to
avoid serious risks or hazards.
Before conducting any inspections, cleaning
or maintenance/adjustment interventions on the
machine:
• stop the machine;
• remove the safety key, (never leave the key in the
ignition or within reach of children or unauthorised
persons);
• make sure that all moving parts have come to a
complete stop;
• allow the motor to cool before storing in an enclosed
space.
• read the relevant instructions;
• Use suitable clothing, protective gloves and
goggles.
• The frequency and types of maintenance are summarised
in the "Maintenance Table". The table will help you
maintain your machine’s safety and performance. It lists
the main maintenance tasks and how often they need to
be performed. Carry out the relevant task as soon as it is
scheduled to be performed.
• The use of non-genuine and/or incorrectly assembled
machine operation and safety. The manufacturer shall

EN - 8
caused by such parts.
• Genuine spare parts are supplied by authorised
assistance workshops and dealers.
IMPORTANT All the maintenance and adjustment
operations not described herein must be carried out by your
dealer or Authorised Service Centre.
7.2 BATTERY
7.2.1 Battery power reserve
Battery power reserve (and therefore the mowable lawn
a.
–
b.
is the energy need;
c.
–
working;
– setting a cutting height that is too low for the lawn
conditions;
– working at a speed that is too high in relation to the
amount of grass to be removed.
NOTE During use, the battery is protected against total
drainage with a protective device that switches o the
machine and stops it from working.
To optimise battery power reserve it is always recommended
• cut the grass when the lawn is dry;
• cut the grass frequently so that it doesn't grow too tall;
•
then set a lower height and cut the lawn again;
• do not use the machine in "mulching"
mode when the grass is very tall.
If the need arises to use the machine for sessions which
• purchase a second standard battery to immediately
compromising the continuity of operations;
• – purchase a battery with an extended power reserve
compared to the standard version (par. 15.1).
7.2.2 Battery removal and recharging
1. Open the battery housing hatch and remove the safety
key.
2. and remove
the battery ;
3.
4. connect the battery charger to a power socket with the
voltage indicated on the rating plate.
5. fully charge the battery according to the instructions in
the battery/battery charger booklet.
NOTE The battery is equipped with a guard that inhibits
recharging if the environmental temperature is not between
0 and +45 °C.
NOTE The battery can be recharged at any time, even
partially, with no risk of damaging it.
7.2.3
1. Remove the battery from the housing in the battery
charger (do not keep recharging when recharging is
completed);
2. disconnect the battery charger from the mains;
3. open the battery housing hatch (g. 18.A)
battery (g. 18.B) into its housing pressing down until
electrical contact;
4. completely close the hatch again.
7.3 CLEANING
Clean thoroughly following the instructions below every
time it is used.
7.3.1 Cleaning the machine
• Always make sure the air intakes are free of debris.
• Do not spray water onto the motor and electrical
• Do not use aggressive liquids to clean the chassis.
•
grease.
7.3. 2 Cleaning the cutting-means assembly
Remove grass debris and mud accumulated in the chassis
to prevent it from drying and causing problems the next time
the lawnmower is used.
Tilt the machine laterally and make sure that it is stable
before starting any work.
touch-up paint with rust-proof paint to prevent rusting that
could corrode the metal.
7.3.3 Cleaning the grass-catcher
1. Empty the grass catcher (Fig. 20.A);
2. shake it to remove grass cuttings and soil residue;
3.
dry quickly.
7.4 NUTS AND BOLTS
equipment is in safe working condition..

EN - 9
7.5 CLEANING THE AIR FILTER
and must be replaced if it is broken or damaged.
1.
2. unscrew the screw ( to remove the grid (
21.A);
3. ;
4.
dry it with a clean cloth (.
IMPORTANT Do not use petrol, detergents or any other
products to clean the ltering element.
5.
debris or dirt;
6.
perfectly dry) (;
7. and tighten in place with the
screw (
7.6 CUTTING MEANS
A badly sharpened cutting means pulls at the grass and
causes the lawn to turn yellow.
Do not touch the cutting means until the key has
been removed and the cutting means is completely
stationary.
All work on the cutting means (disassembly,
sharpening, balancing, repairing, reassembly and/or
replacing) are demanding jobs that require special
skills as well as special tools. For safety reasons,
these jobs are best carried out at a Specialised Centre.
Make sure damaged, mis-shapen or worn cutting-
means are replaced, together with its own screws in
place to preserve balance.
IMPORTANT Always use original cutting means bearing
the code indicated in the "Technical Data".
"Technical Data" table may be replaced in time with others
having similar interchangeable and operating safety
features.
8. STORING
8.1 STORING THE MACHINE
1. Wait for the motor to cool
2. Remove the safety key.
3.
4. Check there are no loose or damaged components.
tighten any screws and loose bolts or contact the
authorised service centre.
5.
– in a dry place;
– protected from inclement weather;
– covered with a sheet where possible;
– in a place where children cannot get to it;
– making sure that keys or tools used for maintenance
are removed.
8.2 STORING THE BATTERY
humidity.
NOTE If unused for any length of time, recharge the
battery every two months to prolong its working life.
9. HANDLING AND TRANSPORTATION
–
– remove the safety key;
– make sure that all moving parts have come to a
complete stop;
– wear heavy work gloves;
–
taking into account the weight and its division;
– use an appropriate number of people for the weight of
the machine and the characteristics of the vehicle or
the place where it must be placed or collected;
– make sure that machine movements do not cause
1.
length;
2.
pushed by an adequate number of people;
3. lower the cutting-means assembly;
4. position it so that it can not cause a hazard for anybody;
5.
chains to prevent it from tipping over.
10. ASSISTANCE AND REPAIRS
This manual provides all the necessary information to run
the machine and for correct basic maintenance operations
which can be performed by the user. Any regulations and
maintenance operations not described herein must be
which have the necessary knowledge and equipment to
the correct degree of safety and the original operating
conditions of the machine.
Any operations performed in unauthorised centres or by
all obligations and responsibilities of the Manufacturer.
• Only authorised service workshops can carry out
guaranteed repairs and maintenance.
• The authorised service workshops only use genuine
spare parts. Genuine spare parts and attachments have
EN - 10
12. MAINTENANCE TABLE
Operation Frequency
Notes
MACHINE
Complete bolt and screw check
Before each use par. 7.4
Safety checks/check controls
Before each use
Check the rear discharge guard/grass-catcher
Before each use
Check the cutting means
Before each use
Check the battery charge status
Before each use *
Recharge the battery
After each use
*
General cleaning and inspection
After each use
contact the authorised assistance centre.
After each use -
Once a month par. 7.5
Replacing the cutting means
-
**
*** **
* Refer to the battery/battery charger manual.
** The operation must be carried out by your Dealer or a specialised Service Centre
• Non-original parts and attachments are not approved;
use of non-original spare parts and attachments will
Manufacturer from all obligations or liabilities.
• It is advisable to send your machine once a year to an
and safety device inspection.
11. WARRANTY COVERAGE
The warranty covers all material and manufacturing
defects. The user must follow all the instructions provided
in the accompanying documentation.
• Failure to become familiar with the documentation
accompanying the machine
• Carelessness
• Incorrect or prohibited use or assembly
• Use of non-genuine spare parts
• Use of attachments not supplied or approved by the
manufacturer
•
• Normal wear and tear
The purchaser is protected by his or her own national
legislation. The purchaser’s rights under the national laws
or his or her own country are not in any way restricted by
this warranty.

EN - 11
13. PROBLEM IDENTIFICATION
PROBLEM PROBABLE CAUSE REMEDY
1. The motor does
not start when the
switch is pressed
Safety key is not inserted or is inserted
incorrectly
Battery is not inserted or is
inserted incorrectly
Open the hatch and check that the battery is
Low battery Check the battery status and
Motor start-up is slow Press and hold the control lever
The thermal protection has tripped
due to overheating of the motor
Wait for at least 5 minutes and then restart
the machine
2. The motor shuts
down whilst working
Battery is not inserted correctly Open the hatch and check that the battery is
Low battery Check the battery status and
Obstructions that prevent
rotation of the cutting means
gloves and remove any grass remains
or debris from the lower part of the
machine and/or the discharge channel
The motor stops while
working and the machine
alarm buzzer is triggered
The thermal protection has tripped
due to overheating of the motor
Wait for at least 5 minutes and then restart
the machine
Thermal protection has tripped due to
• excessively high grass cutting
• obstructions that prevent
rotation of the cutting means
• too much grass debris accumulated in
the chassis and discharge channel
• Set a higher cutting height when the
height and cut the lawn again
•
•
Wait for at least 5 minutes and then restart
the machine
4. The motor is running
but the cutting means
is stationary
and remove the safety key.
Contact an authorised Technical Assistance
Centre for correct fastening support (par. 7.5)
5. The cut grass is
not collected in the
grass catcher
The cutting means has collided with a
and remove the safety key.
Inspect for damage and
Contact a Technical Assistance Centre
for the replacement of the cutting
means if necessary. (par. 7.5)
The inside of the chassis is dirty Clean the inside of the chassis to
ease the grass discharge towards
The cutting means is not
in good condition
Contact a Technical Assistance
Centre for the sharpening or
replacement of the cutting means
7. Excessive noise
and/or vibration
is experienced
whilst working
the cutting means is damaged
and remove the safety key.
Contact an authorised Technical

EN - 12
PROBLEM PROBABLE CAUSE REMEDY
8. Battery power
reserve is low
Severe working conditions
requiring greater
current absorption
Optimise operations
(par. 7.2.1)
operating requirements
Use a second battery or an
extended battery (par. 14.1)
9. The battery charger
is not recharging
the battery
Battery is not correctly inserted
in the battery charger
Unsuitable environmental conditions Recharge the battery in places with
suitable temperatures (see battery/
battery charger instruction manual)
Dirty contacts Clean the contacts
The battery charger is not energised Check it is plugged in and the
power socket is energised
Faulty battery charger Replace with an original spare part
battery charger manual
14. ACCESSORIES ON REQUEST
14.1 BATTERIES
The list of approved batteries for this machine
is found in the "Technical Data" table.
14.2 BATTERY CHARGER
Device used to recharge the battery (Fig. 24).


doc_base r.15 – WBH-El_Bat-0
DICHIARAZIONE CE DI CONFORMITÁ (Istruzioni Originali)
(Direttiva Macchine 2006/42/CE, Allegato II, parte A)
1. La Società: ST. S.p.A. – Via del Lavoro, 6 – 31033 Castelfranco Veneto (TV) – Italy
2. Dichiara sotto la propria responsabilità, che la macchina: Tosaerba con conducente a piedi/ taglio erba
a) Tipo / Modello Base
NTL 480 TR-R Li D48
b) Mese/Anno di costruzione
c) Matricola
d) Motore
batteria
3. É conforme alle specifiche delle direttive:
• MD: 2006/42/EC
e) Ente Certificatore /
f) Esame CE del tipo: /
• OND: 2000/14/EC, ANNEX VI - 2005/88/EC
• D. Lgs. 262/2002, ANNEX VI, proc. 1 (Italy)
e) Ente Certificatore: N°0197 – TÜV Rheinland LGA Products GmbH
Tillystrasse 2, 90431 Nürnberg – Germany
• EMCD: 2014/30/EU
• RoHS II: 2011/65/EU - 2015/863/EU
4. Riferimento alle Norme armonizzate:
EN 60335-1:2012+A13:2017
EN 60335-2-77:2010
EN IEC 63000:2018
EN 55014-1:2017+A11
EN 55014-2:2015
g) Livello di potenza sonora misurato
94
dB(A)
h) Livello di potenza sonora garantito
94
dB(A)
i) Ampiezza di taglio
46
cm
n) Persona autorizzata a costituire il Fascicolo Tecnico: ST. S.p.A.
Via del Lavoro, 6
31033 Castelfranco Veneto (TV) - Italia
o) Castelfranco V.to, 20.05.2021 CEO Stiga Group
Sean Robinson
171514257_0
EN (
Translation of the original instruction)
EC Declaration of Conformity
(Machine Directive 2006/42/EC, Annex II, part A)
1. The Company
2. Herby declares under its own responsibility that the machine: Pedestrian-controlled lawn
mower / grass cutting
a) Type / Base Model
b) Month / Year of manufacture
c) Serial number
d) Motor: battery-operated
3. Conforms to directive specifications:
e) Certifying body
f) EC examination of Type
4. Reference to harmonised Standards
g) Sound power level measured
h) Sound power level guaranteed
i) Range of cut
n) Person authorised to create the Technical Folder:
o) Place and Date
EXAMPLE

doc_base r.15 – WBH-El_Bat-0
DICHIARAZIONE CE DI CONFORMITÁ (Istruzioni Originali)
(Direttiva Macchine 2006/42/CE, Allegato II, parte A)
1. La Società: ST. S.p.A. – Via del Lavoro, 6 – 31033 Castelfranco Veneto (TV) – Italy
2. Dichiara sotto la propria responsabilità, che la macchina: Tosaerba con conducente a piedi/ taglio erba
a) Tipo / Modello Base
NTL 430 TR-R Li D48
b) Mese/Anno di costruzione
c) Matricola
d) Motore
batteria
3. É conforme alle specifiche delle direttive:
• MD: 2006/42/EC
e) Ente Certificatore /
f) Esame CE del tipo: /
• OND: 2000/14/EC, ANNEX VI - 2005/88/EC
• D. Lgs. 262/2002, ANNEX VI, proc. 1 (Italy)
e) Ente Certificatore: N°0197 – TÜV Rheinland LGA Products GmbH
Tillystrasse 2, 90431 Nürnberg – Germany
• EMCD: 2014/30/EU
• RoHS II: 2011/65/EU - 2015/863/EU
4. Riferimento alle Norme armonizzate:
EN 60335-1:2012+A13:2017
EN 60335-2-77:2010
EN IEC 63000:2018
EN 55014-1:2017+A11
EN 55014-2:2015
g) Livello di potenza sonora misurato
90
dB(A)
h) Livello di potenza sonora garantito
91
dB(A)
i) Ampiezza di taglio
41
cm
n) Persona autorizzata a costituire il Fascicolo Tecnico: ST. S.p.A.
Via del Lavoro, 6
31033 Castelfranco Veneto (TV) - Italia
o) Castelfranco V.to, 20.05.2021 CEO Stiga Group
Sean Robinson
171514256_0
EN (
Translation of the original instruction)
EC Declaration of Conformity
(Machine Directive 2006/42/EC, Annex II, part A)
1. The Company
2. Herby declares under its own responsibility that the machine: Pedestrian-controlled lawn
mower / grass cutting
a) Type / Base Model
b) Month / Year of manufacture
c) Serial number
d) Motor: battery-operated
3. Conforms to directive specifications:
e) Certifying body
f) EC examination of Type
4. Reference to harmonised Standards
g) Sound power level measured
h) Sound power level guaranteed
i) Range of cut
n) Person authorised to create the Technical Folder:
o) Place and Date
EXAMPLE
doc_base r. 15 – WBH-El_Bat-0
DICHIARAZIONE CE DI CONFORMITÁ (Istruzioni Originali)
(Direttiva Macchine 2006/42/CE, Allegato II, parte A)
1. La Società: ST. S.p.A. – Via del Lavoro, 6 – 31033 Castelfranco Veneto (TV) – Italy
2. Dichiara sotto la propria responsabilità, che la macchina: Tosaerba con conducente a piedi/ taglio erba
a) Tipo / Modello Base
NTL 430 TR-R Li D48
b) Mese/Anno di costruzione
c) Matricola
d) Motore
batteria
3. É conforme alle specifiche delle direttive:
• MD: 2006/42/EC
e) Ente Certificatore /
f) Esame CE del tipo: /
• OND: 2000/14/EC, ANNEX VI - 2005/88/EC
• D. Lgs. 262/2002, ANNEX VI, proc. 1 (Italy)
e) Ente Certificatore: N°0197 – TÜV Rheinland LGA Products GmbH
Tillystrasse 2, 90431 Nürnberg – Germany
• EMCD: 2014/30/EU
• RoHS II: 2011/65/EU - 2015/863/EU
4. Riferimento alle Norme armonizzate:
EN 60335-1:2012+A13:2017
EN 60335-2-77:2010
EN IEC 63000:2018
EN 55014-1:2017+A11
EN 55014-2:2015
g) Livello di potenza sonora misurato
90
dB(A)
h) Livello di potenza sonora garantito
91
dB(A)
i) Ampiezza di taglio
41
cm
n) Persona autorizzata a costituire il Fascicolo Tecnico: ST. S.p.A.
Via del Lavoro, 6
31033 Castelfranco Veneto (TV) - Italia
o) Castelfranco V.to, 20.05.2021 CEO Stiga Group
Sean Robinson
171514256_0
EN (
Translation of the original instruction)
EC Declaration of Conformity
(Machine Directive 2006/42/EC, Annex II, part A)
1. The Company
2. Herby declares under its own responsibility that the machine: Pedestrian-controlled lawn
mower / grass cutting
a) Type / Base Model
b) Month / Year of manufacture
c) Serial number
d) Motor: battery-operated
3. Conforms to directive specifications:
e) Certifying body
f) EC examination of Type
4. Reference to harmonised Standards
g) Sound power level measured
h) Sound power level guaranteed
i) Range of cut
n) Person authorised to create the Technical Folder:
o) Place and Date
doc_base r.15 – WBH-El_Bat-0
DICHIARAZIONE CE DI CONFORMITÁ
(Istruzioni Originali)
(Direttiva Macchine 2006/42/CE, Allegato II, parte A)
1. La Società: ST. S.p.A. – Via del Lavoro, 6 – 31033 Castelfranco Veneto (TV) – Italy
2. Dichiara sotto la propria responsabilità, che la macchina: Tosaerba con conducente a piedi/ taglio erba
a) Tipo / Modello Base
NTL 430 TR-R Li D48
b) Mese/Anno di costruzione
c) Matricola
d) Motore
batteria
3. É conforme alle specifiche delle direttive:
• MD: 2006/42/EC
e) Ente Certificatore /
f) Esame CE del tipo: /
• OND: 2000/14/EC, ANNEX VI - 2005/88/EC
• D. Lgs. 262/2002, ANNEX VI, proc. 1 (Italy)
e) Ente Certificatore: N°0197 – TÜV Rheinland LGA Products GmbH
Tillystrasse 2, 90431 Nürnberg – Germany
• EMCD: 2014/30/EU
• RoHS II: 2011/65/EU - 2015/863/EU
4. Riferimento alle Norme armonizzate:
EN 60335-1:2012+A13:2017
EN 60335-2-77:2010
EN IEC 63000:2018
EN 55014-1:2017+A11
EN 55014-2:2015
g) Livello di potenza sonora misurato
90
dB(A)
h) Livello di potenza sonora garantito
91
dB(A)
i) Ampiezza di taglio
41
cm
n) Persona autorizzata a costituire il Fascicolo Tecnico: ST. S.p.A.
Via del Lavoro, 6
31033 Castelfranco Veneto (TV) - Italia
o) Castelfranco V.to, 20.05.2021 CEO Stiga Group
Sean Robinson
171514256_0
EN (
Translation of the original instruction)
EC Declaration of Conformity
(Machine Directive 2006/42/EC, Annex II, part A)
1. The Company
2. Herby declares under its own responsibility that the machine: Pedestrian-controlled lawn
mower / grass cutting
a) Type / Base Model
b) Month / Year of manufacture
c) Serial number
d) Motor: battery-operated
3. Conforms to directive specifications:
e) Certifying body
f) EC examination of Type
4. Reference to harmonised Standards
g) Sound power level measured
h) Sound power level guaranteed
i) Range of cut
n) Person authorised to create the Technical Folder:
o) Place and Date
EXAMPLE

© by ST. S.p.A.
IT • Il contenuto e le immagini del presente manuale d’uso sono stati realizzati per conto di ST. S.p.A. e sono tutelati da diritto d’autore – E’
vietata ogni riproduzione o alterazione anche parziale non autorizzata del documento.
EN • The content and images in this User Manual were produced expressly for ST. S.p.A. and are protected by copyright – any unauthori-
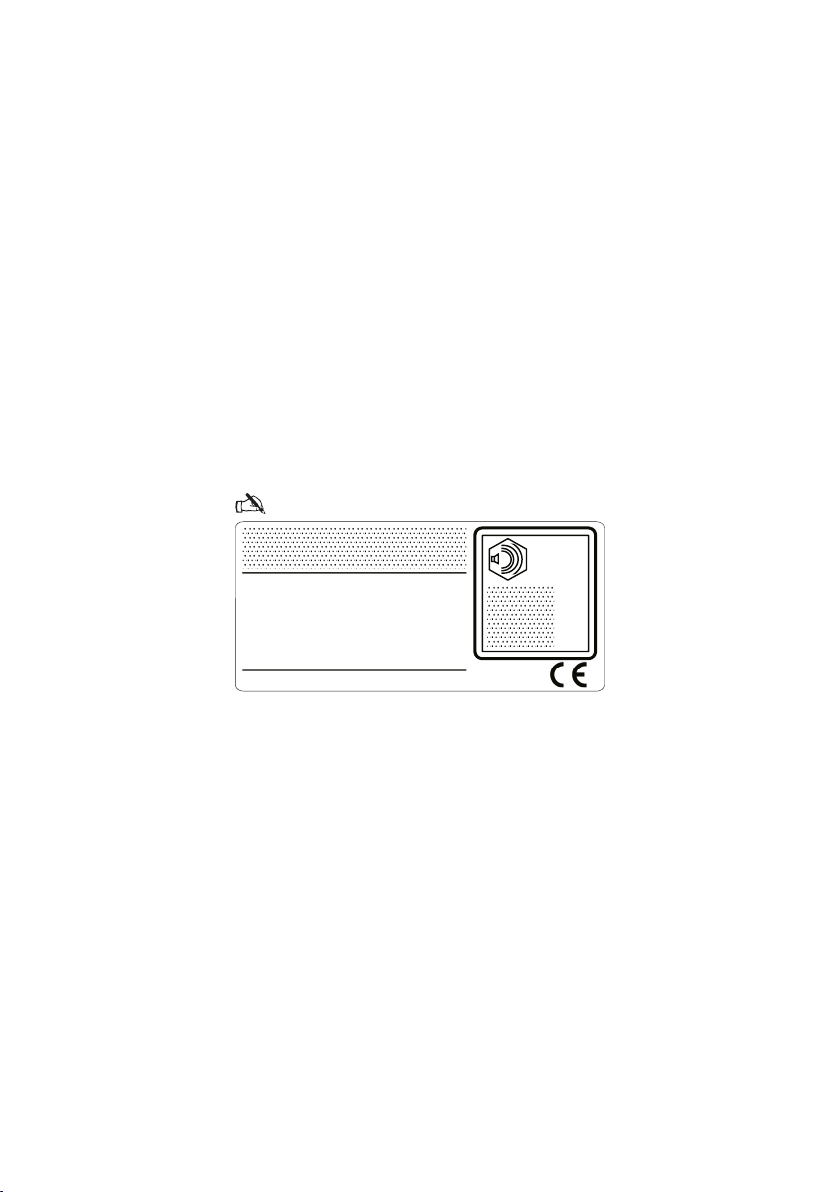
ST. S.p.A.
dB
L
WA
Type:
................................
.................. -s/n .......................... -Art.N ..............................