Coi| E|ec ric Range
Care & CJeaning ................... 17-20
Sdf-CHean Oven
Qeaning Procedures
Maintenance ......................... 21-22
Oven Window
Oven Light
Troubleshooting ................... 23-24
Warranty & Service .................... 25
Guide de utilisateur ................... 26
Gu_a del Usuario ......................... 54
Form No. B/11/04 Part No 8113P473-60 ,3;)2004 Maytag Appliances Sales Co. Litho USA
[nstaller: Please leave this rnanuaI with this appfiance
Consumer: Phase read and keep this manual for future
reference. Keep sales receipt and, or canceled check as proof
of purchase.
Mode[ Number
Serial Number
Date of Purchase
if you have questions, call:
1-800-688-1120 {U.S.A.and Canada_
1-800-688-2080 { U.S.TTY for
hearing or speech impaired}
(Mon.-FrL 8 am-8 pm Eastern Time}
in our continuing effort to [mprovethe qualityand performance
of our cooH ng products, it ma} be necessary to make changes
to the appliance without revising this guide.
For service intfermatie#, see page 25.
Warning and Important Safety Instructions appearing in this
guide are not meant to cover all possible conditions and
situations that may occur. Common sense, caution, and care
must be exercised when installing, maintaining, or operating
the appliance.
Always contact the manufacturer about problems or
conditions you do not understand.
Recognize Safety Symbols, Words, Labels
WARNnNG _ Hazards or unsafe practices which COULD
CA[JT_ON - Hazards or' unsafe practices which COULD
result in minor persona[ injury.
Read and follow aH instructions before using this
appliance to prevent the potential risk of fire, electric
shock, personal injury or damage to the appliance as a
result of improper usage of the appliance. Use appliance
only for its intended purpose as described in this guide.
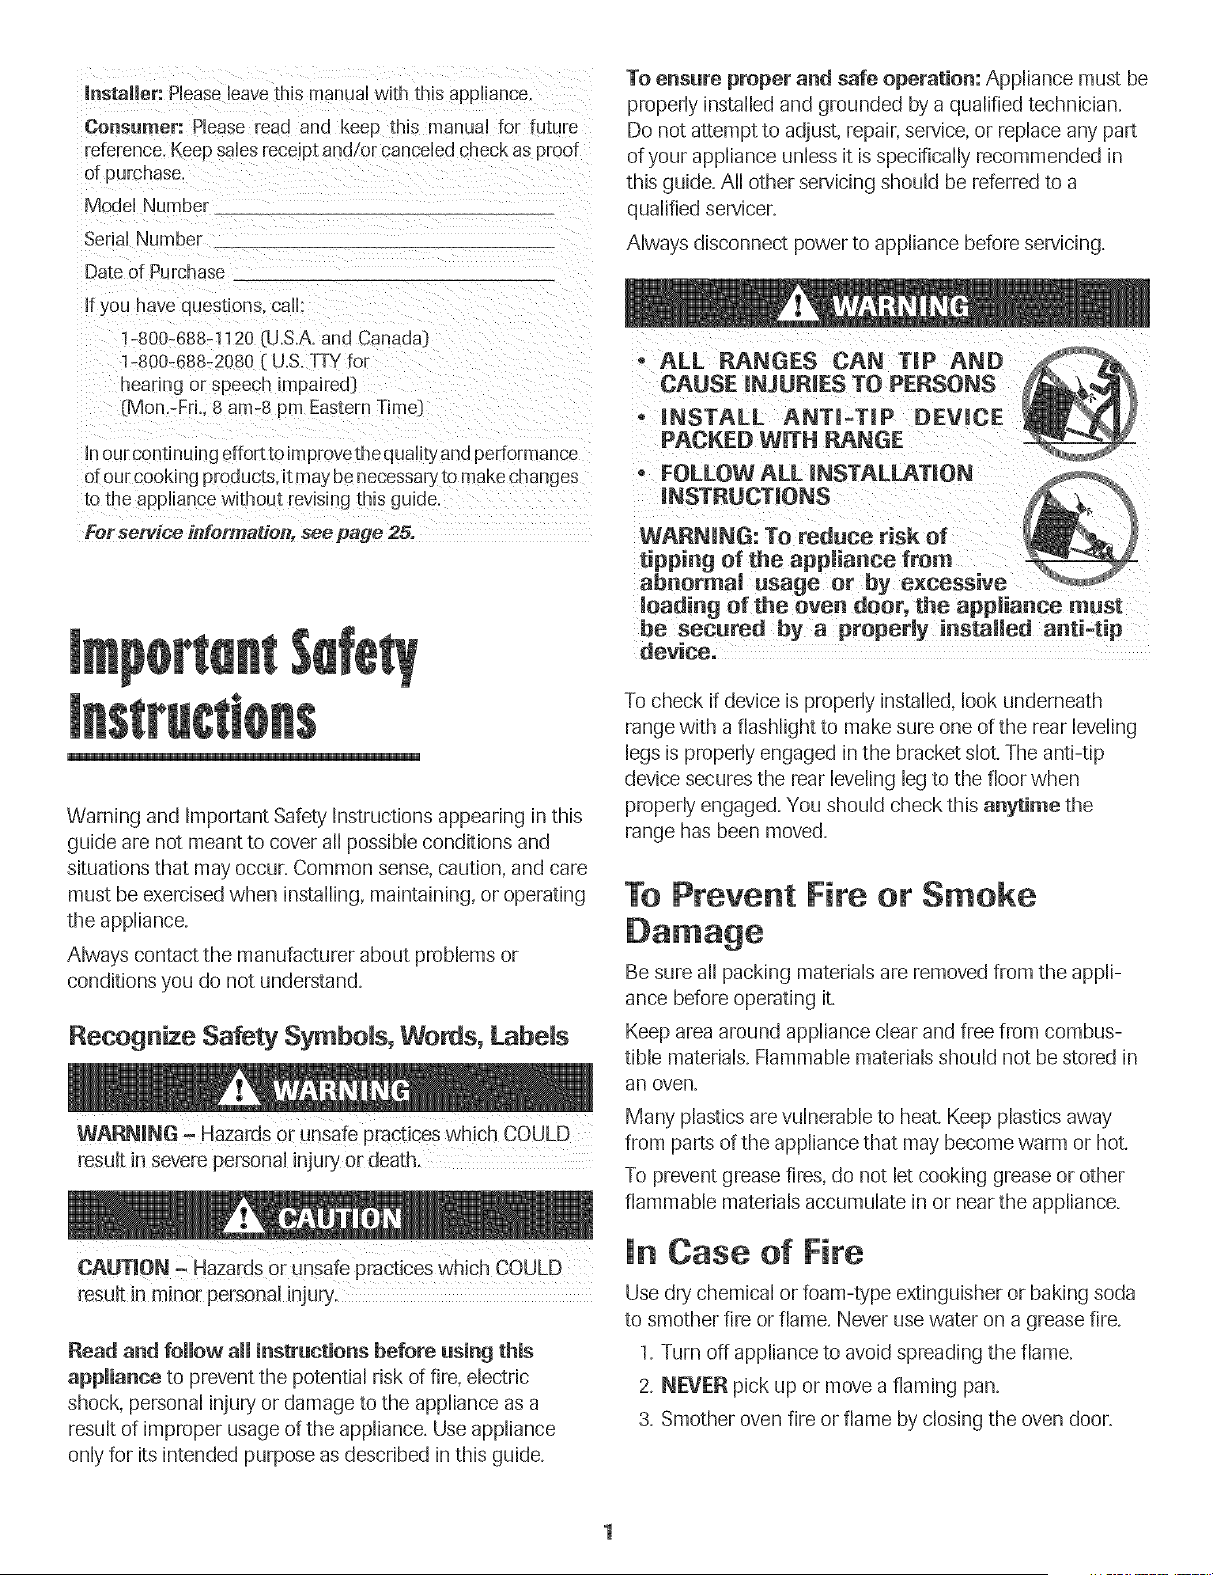
To ensure proper and safe operation: Appliance must be
properly installed and grounded by a qualified technician.
Do not attempt to adjust, repair, service, or replace any paRR
of your appliance unless it is specifically recommended in
this guide. All other servicing should be referred to a
qualified servicer.
Always disconnect power to appliance before servicing.
ALL RANGES CAN TiP AND
CAUSE iNJURiES TO PERSONS
_ INSTALL ANTra:TraP DEVICE
PACKED WiTH RANGE-
, FOLLOW ALL [NSTALLATmON
tipping of the appliance from o
abnormal usage or by
loading of the oven door, the appliance must
be secured by a properly installed anti4ip
device.
To check if device is properly installed, look underneath
range with a flashlight to make sure one of the rear leveling
legs is properly engaged in the bracket slot. The anti-tip
device secures the rear bveiing leg to the floor when
properly engaged. You should check this anytime the
range has been moved.
To Prevent Fire or Smoke
Be sure air packing materials are removed from the appli-
ance before operating it.
Keep area around appliance dear and free from combus-
tible materials. Flammable materials should not be stored in
an oven.
Many plastics are vuLnerabLeto heat. Keep plastics away
from paRRsof the appliance that may become warm or hot.
To prevent grease fires, do not Letcooking grease or other
flammable materials accumulate in or near the appliance.
in Case of Fire
Use dry chemical or foam-type extinguisher or baking soda
to smother fire or flame. Never use water on a grease fire.
1. Turn off appliance to avoid spreading the flame.
2. NEVER pick up or move a flaming pan.
3. Smother oven fire or flame by dosing the oven door.
Child Safety
NEVER store items of interest to children Jncabinets above
an appliance, Children climbing on the app!!ance or on the
appliance door to reach items could be seriously injured.
NEVER leave children alone or unsupervised near the
appliance when it is in use or is stfll hot. Children should
never be allowed to sit or stand on any part of the appliance
as they could be injured or burned.
Children must be taught that the appliance and utensils in it
can be hot. Let hot utensils cool in a safe place, out of reach
of small children. Children should be taught that an appliance
is not a toy. Children should not be allowed to play with
controls or other parts of the appliance.
About Your Appmianee
NEVER USean app!!ance aSa step to reach cabinets above,
Misuse of appliance door, such as stepping, leaning or
sitting on the dooh may result in possible tipping of the
To prevent potential hazard to the user and damage to the
appliance, do not use appliance as a space heater to heat or
warm a room. Also, do not use the oven as a storage area for
food or cooking utensils.
Do not obstruct the flow of air by blocking the oven venL
DO NOT TOUCH HFATING ELEMENTS OR iNTERiOR
SURFACESOF OVEN. Heating elements may be hot even
though they are dark in color, interior surfaces of any oven
become hot enough to cause burns. During and after use, do
not touch, or let clothing or other flammable materials contact
heating elements or interior surfaces of oven until they have
had sufficient time to cool Other surfaces of the appliance
may become hot enough to cause burns - among these
surfaces are: oven vent opening, surface near this opening,
oven door and window of oven door.
Do not touch a hot oven light bulb with a damp cloth as the
bulb could break. Should the bulb break disconnect power to
the appliance before removing bulb to avoid electrical shock
NEVER use aluminum foil to cover an oven rack or oven
bottom. Misuse could result in risk of electric shock, fire, or
damage to the appliance. Use foil only as directed in this
guide.
Cooking Safety
Never heat an unopened food container in the oven. Pressure
build-up may cause container to burst resulting in serious
personal injury or damage to the appliance.
Use dry, sturdy potholders. Damp potholders may cause
burns from steam. Dish towels or other substitutes should
never be used as potholders because they can trail across hot
elements and ignite or get caught on appliance parts.
Wear proper apparel. Loose fitting or long hanging-sleeved
apparel should not be worn while cooking. Clothing may
ignite and cause burns if garment comes in contact with
heating elements.
Always place oven racks in the desired positions while oven is
cool. Slide oven rack out to add or remove food, using dry,
sturdy potholders. Always avoid reaching into the oven to add
or remove food. If a rack must be moved while hot, use a dry
potholder. Do not let potholder contact hot element in oven.
Use racks only in the oven in which they were shipped/
purchased.
Use care when opening the oven door. Let hot air or steam
escape before removing or replacing food.
PREPARED FOOD WARNING: Follow food manufactureCs
instructions. If a plastic frozen food container and/or its cover
distorts, warps, or is otherwise damaged during cooking,
immediately discard the food and its container. The food
could be contaminated.
Do not allow aluminum foil or meat probe to contact heating
element.
Always turn off allcontrols when cooking is completed.
Utensim Safety
Follow the manufacturer's directions when using oven
cooking bags.
This appliance has been tested for safe performance using
conventional cookware. Do not use any devices or accesso-
ries that are not specifically recommended in this guide. Do
not use eyelid covers, stove top grills or add-on oven convec-
tion systems. The use of devices or accessories that are not
expressly recommended in this guide can create serious
safety hazards, result in performance problems, and reduce
the life of the components of the appliance.
2
If pan is smaller than element, a portion of the element will be
exposed to direct contact and could ignite clothing or
potholder.
Only certain types of glass, glass!ceramic, ceramic, eaRRhen-
ware, or other glazed utensils are suitable for cooktop or oven
service without breaking due to the sudden change in
temperature. Follow utensil manufacturer's instructions when
using glass.
Turn pan handle toward center of cooktop, not out into the
room or over another surface elemenL This reduces the risk
of burns, ignition of flammable materials, or spillage [f pan is
accidently bumped or reached by small children.
Be sure utensil is large enough to properly contain food and
avoid boi[overs. Pan size is particularly important in deep fat
frying. Be sure pan will accommodate the volume of food that
is to be added as we[[ as the bubble action offal
Never let a pan boil dry as this could damage the utensil and
the appliance.
NEVER leave surface units unattended especially when using
high heat An unattended boi[over could cause smoking and
a greasy spi[[over can cause a fire.
This appliance is equipped with different size surface ele-
ments. Select pans with flat bottoms large enough to cover
element. Fitting pan size to element will improve cooking
efficiency.
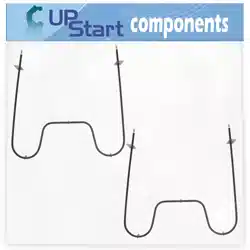
Coim Emements
To prevent damage to removable heating elements, do not
immerse, soak or clean in a dishwasher or self-clean oven. A
damaged element could short resulting in a fire or shock
hazard.
Make sure drip bowls are in place as absence of these bowls
during cooking could damage wiring.
Protectmve Liners: Do not use aluminum foil to line surface
unit drip bowls or oven bottoms, except as suggested in the
manual Improper installation of these liners may result in a
risk of electric shock or fire.
Deep Fat Fryers
Use extreme caution when moving the grease pan or dispos-
ing of hot grease. Allow grease to cool before attempting to
move pan.
Ventimating Hoods
Clean range hood and filters frequently to prevent grease or
other flammable materials from accumulating on hood or
filter and to avoid grease fires.
When flaming foods under the hood, turn the fan on.
C eaning Safety
Clean cooktop with caution. Turn off all controls and wait for
appliance paRRsto cool before touching or cleaning. Clean
with caution. Use care to avoid steam burns if a wet sponge
or cloth is used to wipe spills on a hot surface. Some cleaners
can produce noxious fumes if applied to a hot surface.
Clean only paRRslisted in this guide.
Se f-C ean Oven (select models}
DOnot !eaveracks,broiling pan, food orco0kJng utensils, etc.
Do not clean door gasket The door gasket is essential for a
good seal. Care should be taken not to rub, damage, or move
the gasket.
Do not use oven cleaners or oven liners of any kind in or
around any paRRof the self-clean oven.
Before self-cleaning the oven, remove broiler pan, oven racks
and other utensils, and wipe off excessive spillovers to
prevent excessive smoke or flare ups.
It is normal for the cooktop of the range to become hot
during a self-clean cycle. Therefore, touching the cooktop
during a clean cycle should be avoided.
3

l portant Safety Notice and
The California Safe Drinking Water and Toxic Enforcement
Act of 1986 (Proposition 65) requires the Governor of Califor-
nia to publish a list of substances known to the State of
California to cause cancer or reproductive harm, and requires
businesses to warn customers of potential exposures to such
substances.
Users of this appliance are hereby warned that when the
oven is engaged in the self-clean cycle, there may be some
low-level exposure to some of the listed substances, including
carbon monoxide. Exposure to these substances can be
minimized by properly venting the oven to the outdoors by
opening the windows and!or door in the room where the
appliance is located during the self-clean cycle.
UMPORTANT NOTICE REGARDUNG PET BURDS: Never
keep pet birds in the kitchen or in rooms where the fumes
from the kitchen could reach. Birds have a very sensitive
respiratory system. Fumes released during an oven self-
cleaning cycle may be harmful or fatal to birds. Fumes
released due to overheated cooking off,fat, margarine and
overheated non-stick cookware may be equally harmful.
Save These instructions for Future Reference
4
Surface Controls
Use to turn on the surface elements. An hfhite choice of
heat settings is avaiHabHefrom Low to High. The knobs can
be set on or between any of the settings.
Setting the Controls
1. Place pan on surface element.
2. Push in and turn the knob in either direction to the desired
heat setting.
° The control panel is marked to identify which _J_
element the knob controls. For example, the
graphic at right indicates left front element.
3. There is an element "ON" indicator light on the control
panel. When any surface control knob is turned on, the
light will turn on. The light will turn off when all the
surface elements are turned off.
4. After cooking, turn knob to OFF. Remove pan.
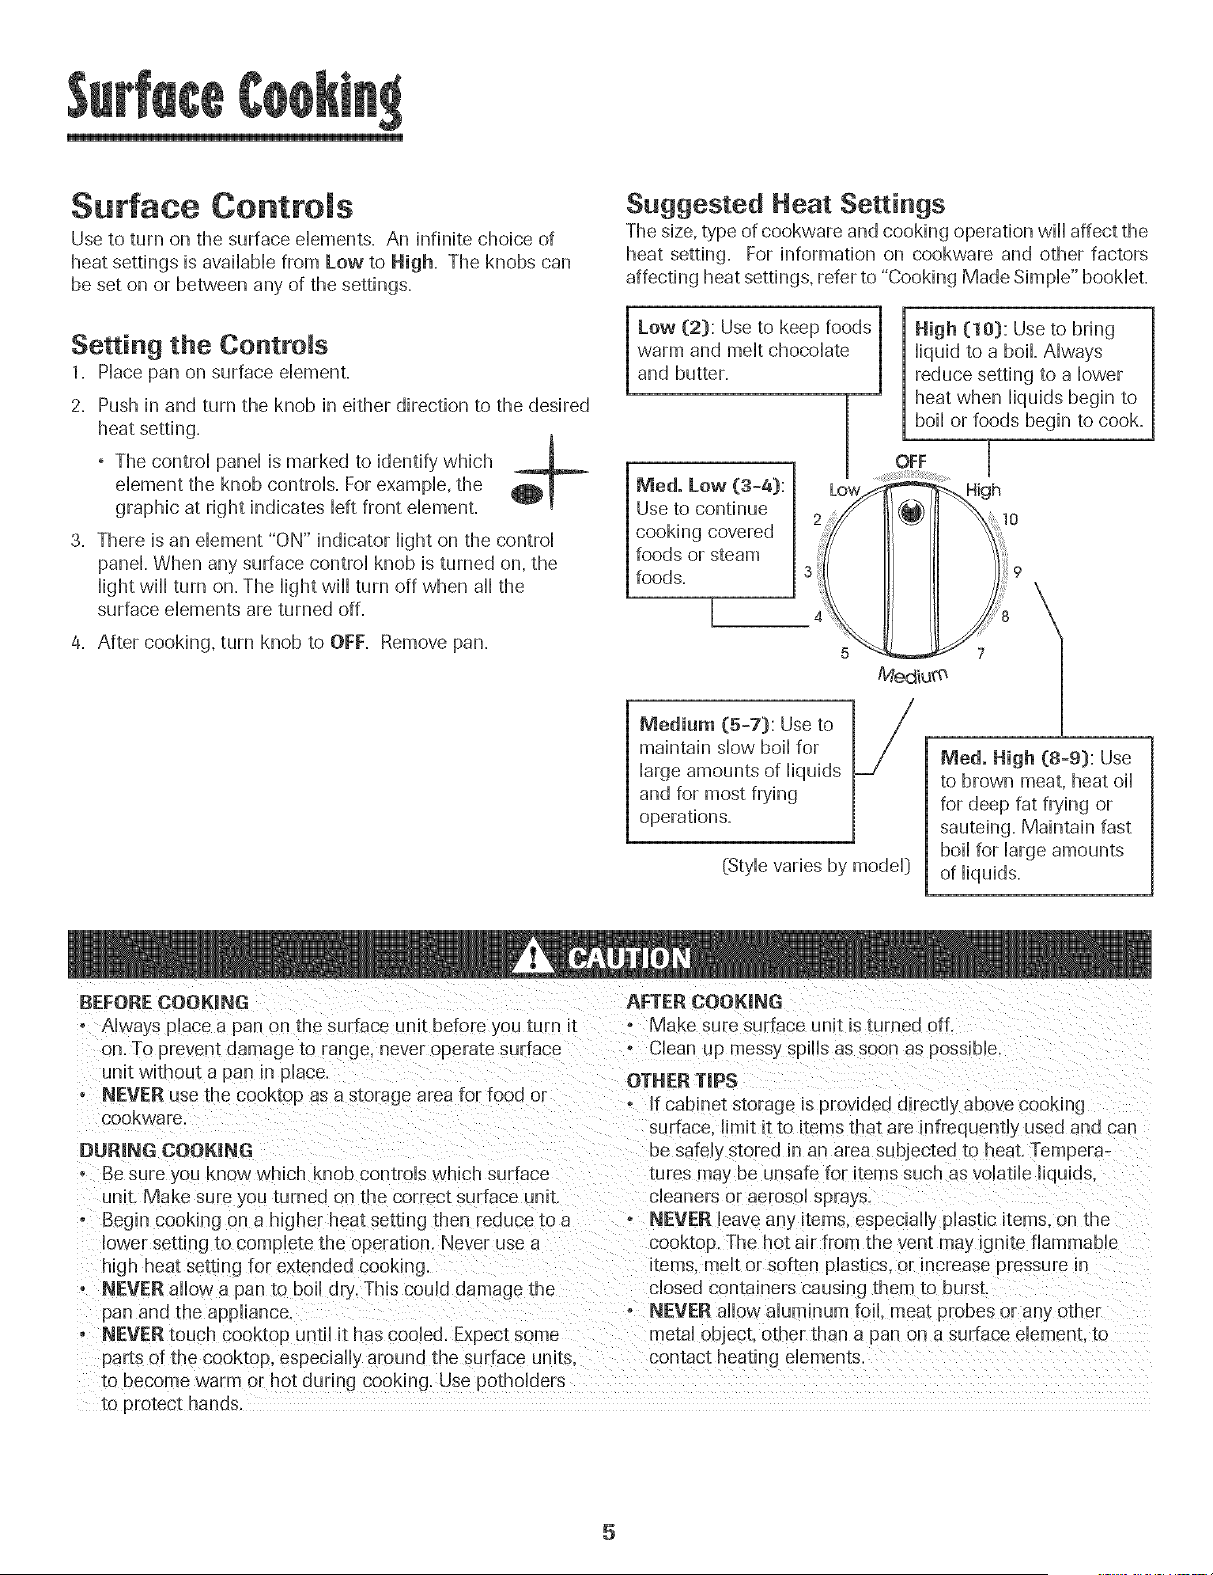
Suggested Heat Settings
The size, type of cookware and cooking operation will affect the
heat setting. For information on cookware and other factors
affecting heat settings, refer to "Cooking Made Simple" booklet.
Low (2): Use to keep foods 1
warm and melt chocolate |
and butter. |
Me& Low (3°4):
Use to continue
cooking covered
foods or steam
foods.
[
3
4
High (10): Use to bring
liquid to a boil. Always
reduce setting to a lower
heat when liquids begin to
boil or foods begin to cook.
OFF I
J
Mediu_
fVledium (5-7): Use to
maintain slow boil for
large amounts of liquids
and for most frying
operations.
(Style varies by model]
Medo High (8-9): Use
to brown meat, heat oil
for deep fat frying or
sauteing. Maintain fast
boil for large amounts
of liquids.
BEFORECOOK|N61 AFTER COOKING
o Always place a pan on the surface unit before you turn it o Make sure su trace unit is turned off.
on. To prevent damage to rail .]e. never operate surface - Clean up messy spills as soon as possible.
unit without a pan in place.
o NEVER use the cooktop as a storage area for rood or
cookware
[:)BRING COOK|NG
o Be sure you know which knob controls which surface
unit. Make sure you turned on the correct surface unit.
• Begin cooking on a higher heat setting then reduce to a
lower setting to complete the operation. Never use a
high heat setting for extended cooking.
o NEVER allow a pan to boil dry. This could damage the
pan and the appliance
o NEVER [ouch cooktop until it has cooled. Expect some
parts of the cooktop, especially around the surface units.
te uecome warm or hot during cooking. Use potholders
OTHER TraPS
° If cabinet storage msprovided directly above cooking
sur [ace. limit it to items that are infrequently used and can
be safely storee n an area subjected to heat. Tempera-
lures ma,_be unsafe for items such as volatile liquids,
cleaners or aerosol sprays.
• NEVER leave any items, especially plastic items, on the
cooktop. The hot air from the vent may ignite flammable
kems melt or soften plastics, or increase pressure in
closed containers causing them to burst
NEVER allow aluminum foil. meat probes or any other
metal obiect, other than a pan on a surface element, to
...............................
to protect hands.
5
Coi E ement Surface
° Cban cooktop after each use.
° Wipe acidic or sugary spills as soon as the cooktop
has coobd as these spills may discobr or etch the
porcelain.
To protect drip bowl finish:
° To bssen discobradon and crazing, avoid using high
heat for bng periods.
° Do not use oversized cookware. Pans shouM not
extend more than 1-2 inches beyond the dement.
° When home canning or cooking with big pots, use
the Canning Ebment [Modal CE1}. Contact your
dealer for details or caii 1-877-232-6771 USA
or 1-800-688-8408 Canada to order.
, Clean frequently. (See page 19.}
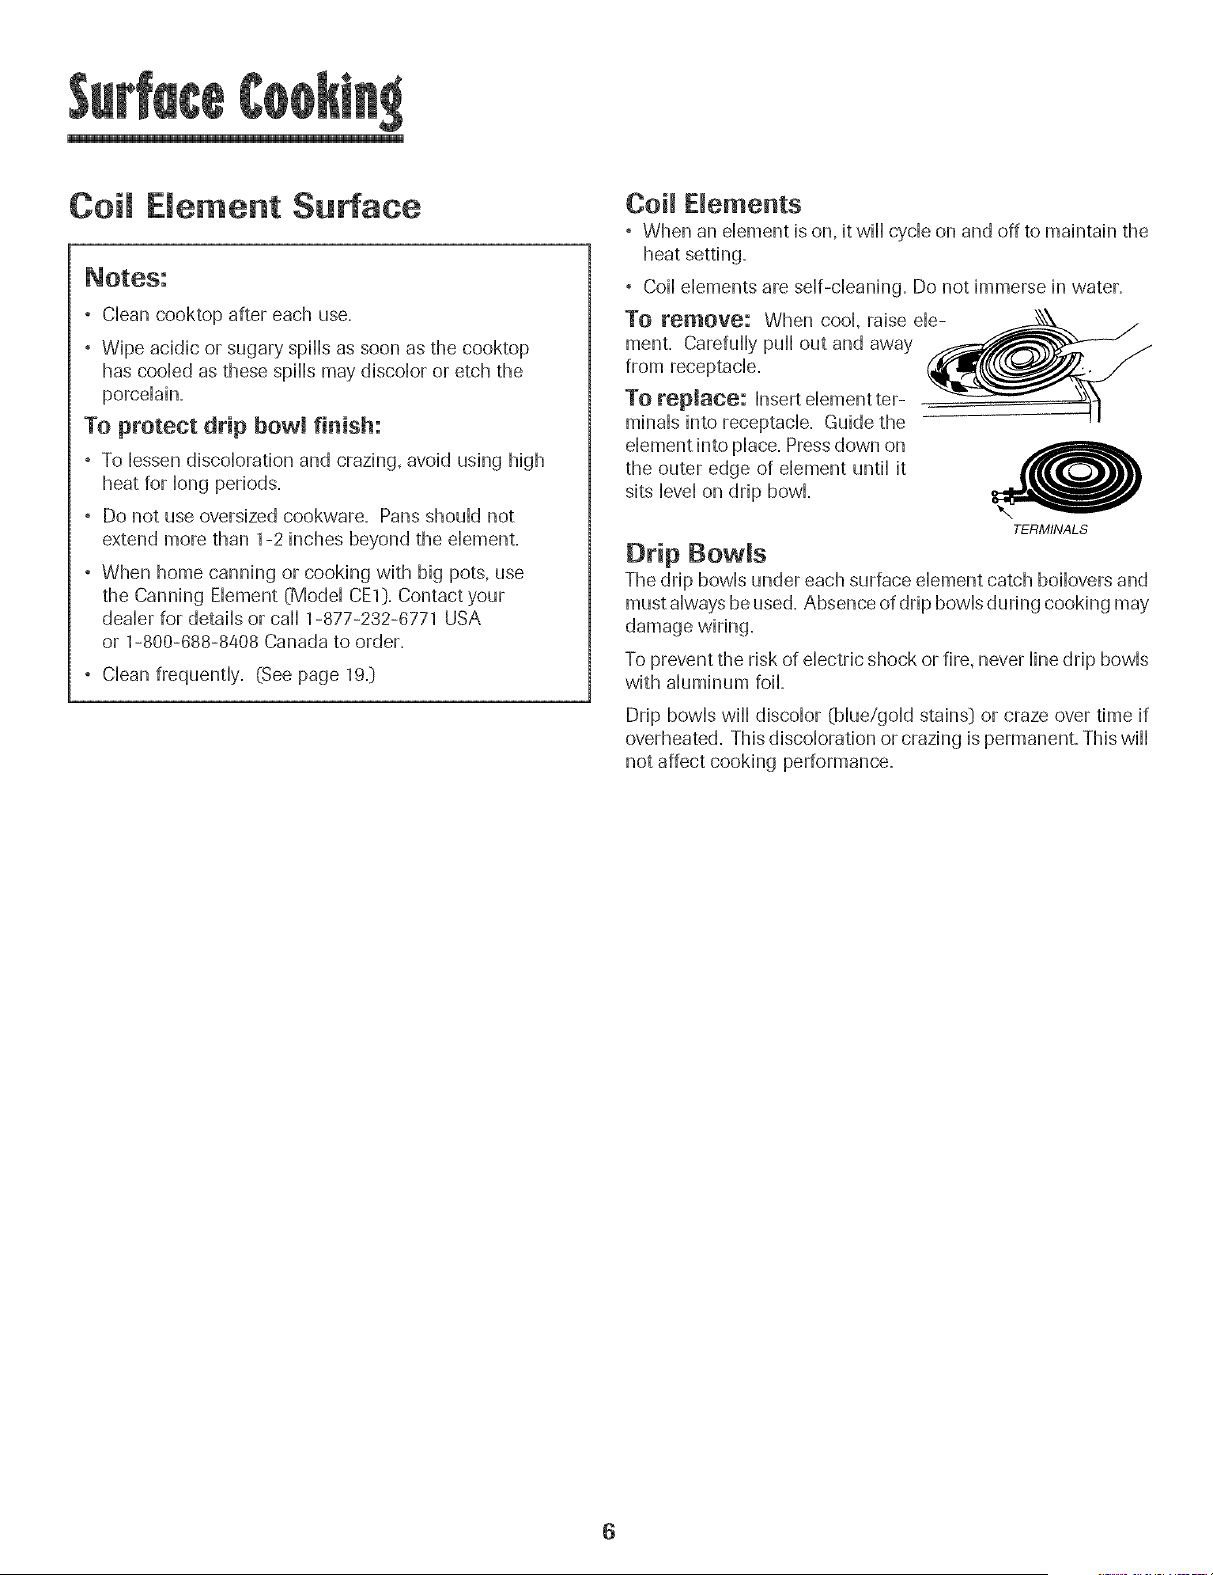
Coil Dements
, When an element is on, it will cycle on and off to maintain the
heat setting.
° Coil dements are self-cleaning. Do not immerse in water.
To remove: When cool, raise ele-
menL Carefully pull out and away
from receptacle.
To replace: Insert dement ter-
minals into receptacle. Guide the
dement into place. Pressdown on
the outer edge of element until it
sits level on drip bowl
TERMINALS
Drip BowRs
The drip bowls under each surface element catch boilovers and
must always be used. Absence of drip bowls during cooking may
damage wiring.
To prevent the risk of electric shock or fire, never line drip bowls
with aluminum foil
Drip bowls wiii discolor {blue/gold stains} or craze over time if
overheated. This discoloration or crazing is permanent. This wiii
not affect cooking performance.
6
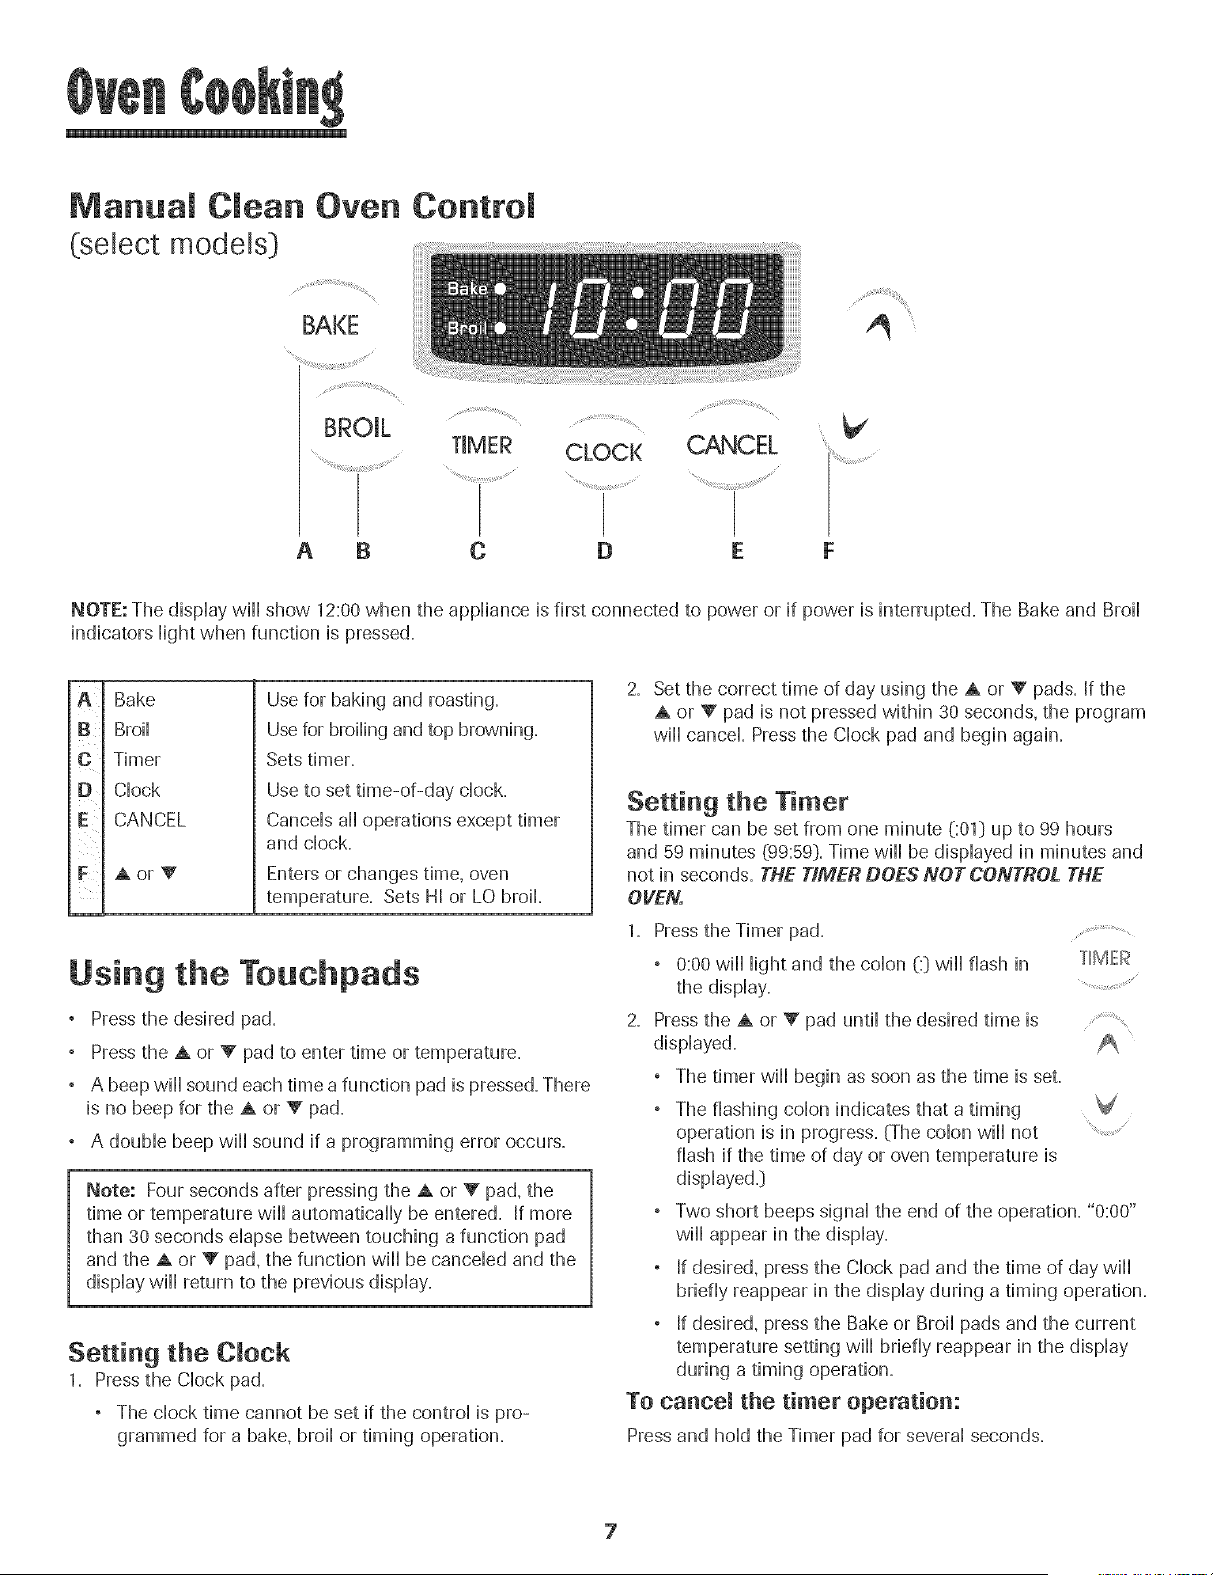
Manua C ean Oven ControJ
(select models}
BAKE
A B
TIMER CLOCK CANCEL ....
c D E F
NOTE: The dispDy wiil show 12:00 when the appliance is first connected to power or if power is interrupted. The Bake and Broil
indicators Hightwhen function is pressed.
A
B
D
E
F
Bake
BroiH
Timer
Clock
CANCEL
Aor_'
Use for baking and roasting.
Use for broiling and top browning.
Sets timer.
Use to set time-of-day clock.
Cancels all operations except timer
and clock.
Enters or changes time, oven
temperature. Sets HI or LO broil
Using the Touchpads
Pressthe desired pad.
Pressthe A or V pad to enter time or temperature.
° A beep will sound each time a function pad is pressed. There
is no beep for the A or V pad.
° A double beep wiii sound if a programming error occurs.
Note: Four seconds after pressing the A or V pad, the
time or temperature will automatically be entered. If more
than 30 seconds elapse between touching a function pad
and the A or V pad, the function will be canceled and the
display will return to the previous display.
Setting the CJock
1. Pressthe Clock pad.
° The clock time cannot be set if the control is pro-
grammed for a bake, broil or timing operation.
2. Set the correct time of day using the A or V pads. If the
A or V pad is not pressed within 30 seconds, the program
will cancel Pressthe Clock pad and begin again.
Setting the Timer
The timer can be set from one minute 001} up to 99 hours
and 59 minutes (99:59}. Time will be displayed in minutes and
not in seconds. THE TIMER DOES NOT OONTROL THE
OVEN.
1. Pressthe Timer pad.......
° 0:00 wiii iight and the coion (:} wiii flash in TIMER
the display. ...........
2. Pressthe A or Y" pad until the desired time is .....
displayed.
, The timer will begin as soon as the time is set.
° The flashing colon indicates that a timing
operation is in progress. (The colon wiii not
flash if the time of day or oven temperature is
displayed.}
° Two short beeps signal the end of the operation. "0:00"
wiii appear in the display.
If desired, press the Clock pad and the time of day wiii
briefly reappear in the display during a timing operation.
If desired, press the Bake or Broil pads and the current
temperature setting wiii briefly reappear in the display
during a timing operation.
To cancel the timer operation:
Press and hold the Timer pad for several seconds.
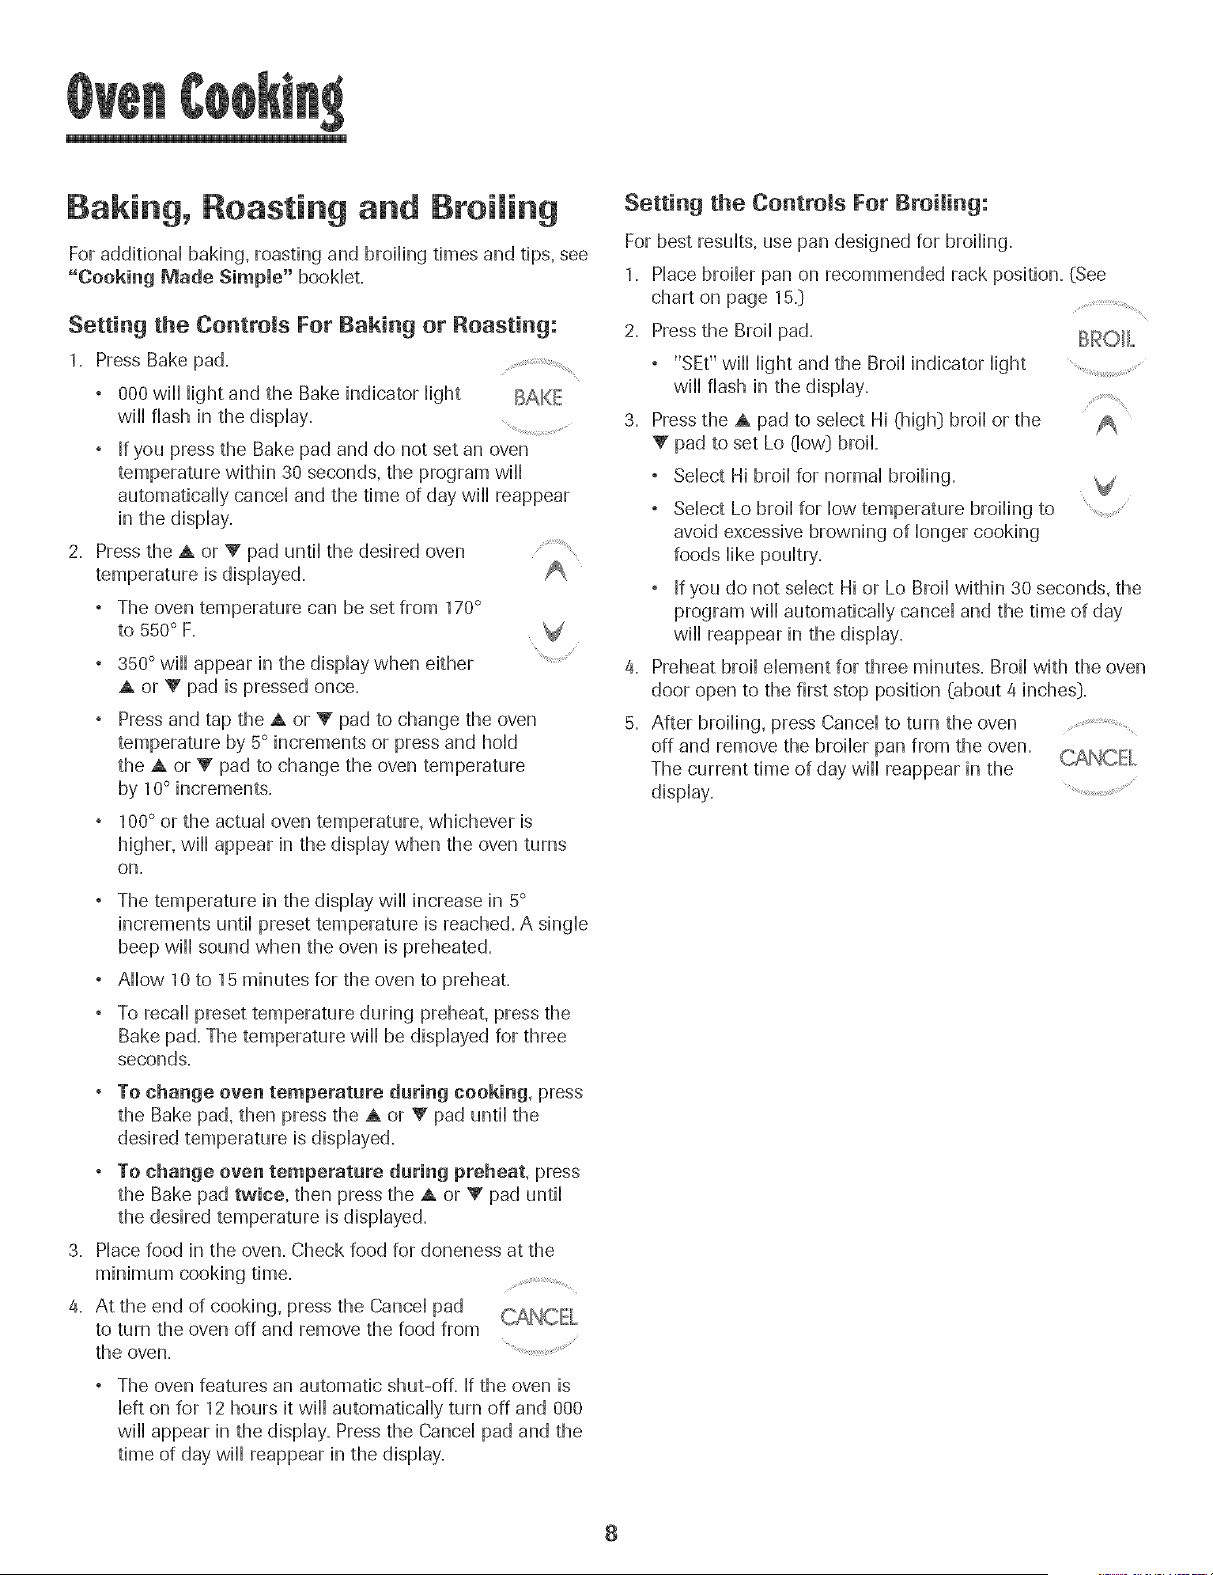
Baking, Roasting and Broiling
For addKionaHbaking, roasting and broiling thnes and tips, see
"Cooking Made Simple" booHeL
Setting the Controls For Baking or Roasting:
1. Press Bake pad.
, 000 wHHHightand the Bake indicator Hight BAK[:
wHHflash in the dispHay.
, If you press the Bake pad and do not set an oven
temperature within 30 seconds, the program wHH
automatically cancel and the time of day will reappear
in the display.
2. Press the A or V pad until the desired oven ......................
temperature is displayed.
, The oven temperature can be set from 170°
to 550° R
350° will appear in the display when either
A or V pad is pressed once.
Press and tap the A or V pad to change the oven
temperature by 5° increments or press and hold
the A or V pad to change the oven temperature
by 10° increments.
1O0° or the actual oven temperature, whichever is
higher, will appear in the display when the oven turns
on,
, The temperature in the display will increase in 5°
increments until preset temperature is reached. A single
beep will sound when the oven is preheated.
, Allow 10 to 15 minutes for the oven to preheat.
, To recall preset temperature during preheat, press the
Bake pad. The temperature will be displayed for three
seconds.
° To change oven temperatare during cooking, press
the Bake pad, then press the A or V pad until the
desired temperature is displayed.
, To change oven temperature during preheat, press
the Bake pad twice, then press the A or V pad until
the desired temperature is displayed.
3. Place food in the oven. Check food for aloneness at the
minimum cooking time.
4. At the end of cooking, press the Cancel pad
to turn the oven off and remove the food from
the oven.
The oven features an automatic shut-off. If the oven is
left on for 12 hours it will automatically turn off and 000
will appear in the display. Press the Cancel pad and the
time of day will reappear in the display.
Setting the Controls For Broiling:
For best results, use pan designed for broiling.
1. Place broiler pan on recommended rack position. (See
chart on page 15.]
2. Pressthe Broil pad. B!_OH....
° "SEt" will light and the Broil indicator light
will flash in the display.
3. Pressthe A pad to select Hi (high:) broil or the
V pad to set Lo (Jew] broil.
° Select Hi broil for normal broiling.
° Select Lo broil for low temperature broiling to
avoid excessive browning of longer cooking
foods like poultry.
° If you do not select Hi or Lo Broil within 30 seconds, the
program will automatically cancel and the time of day
will reappear in the display.
4. Preheat broil element for three minutes. Broil with the oven
door open to the first stop position (about 4 inches:).
5. After broiling, press Cancel to turn the oven .................
off and remove the broiler pan from the oven.
The current time of day will reappear in the
display.
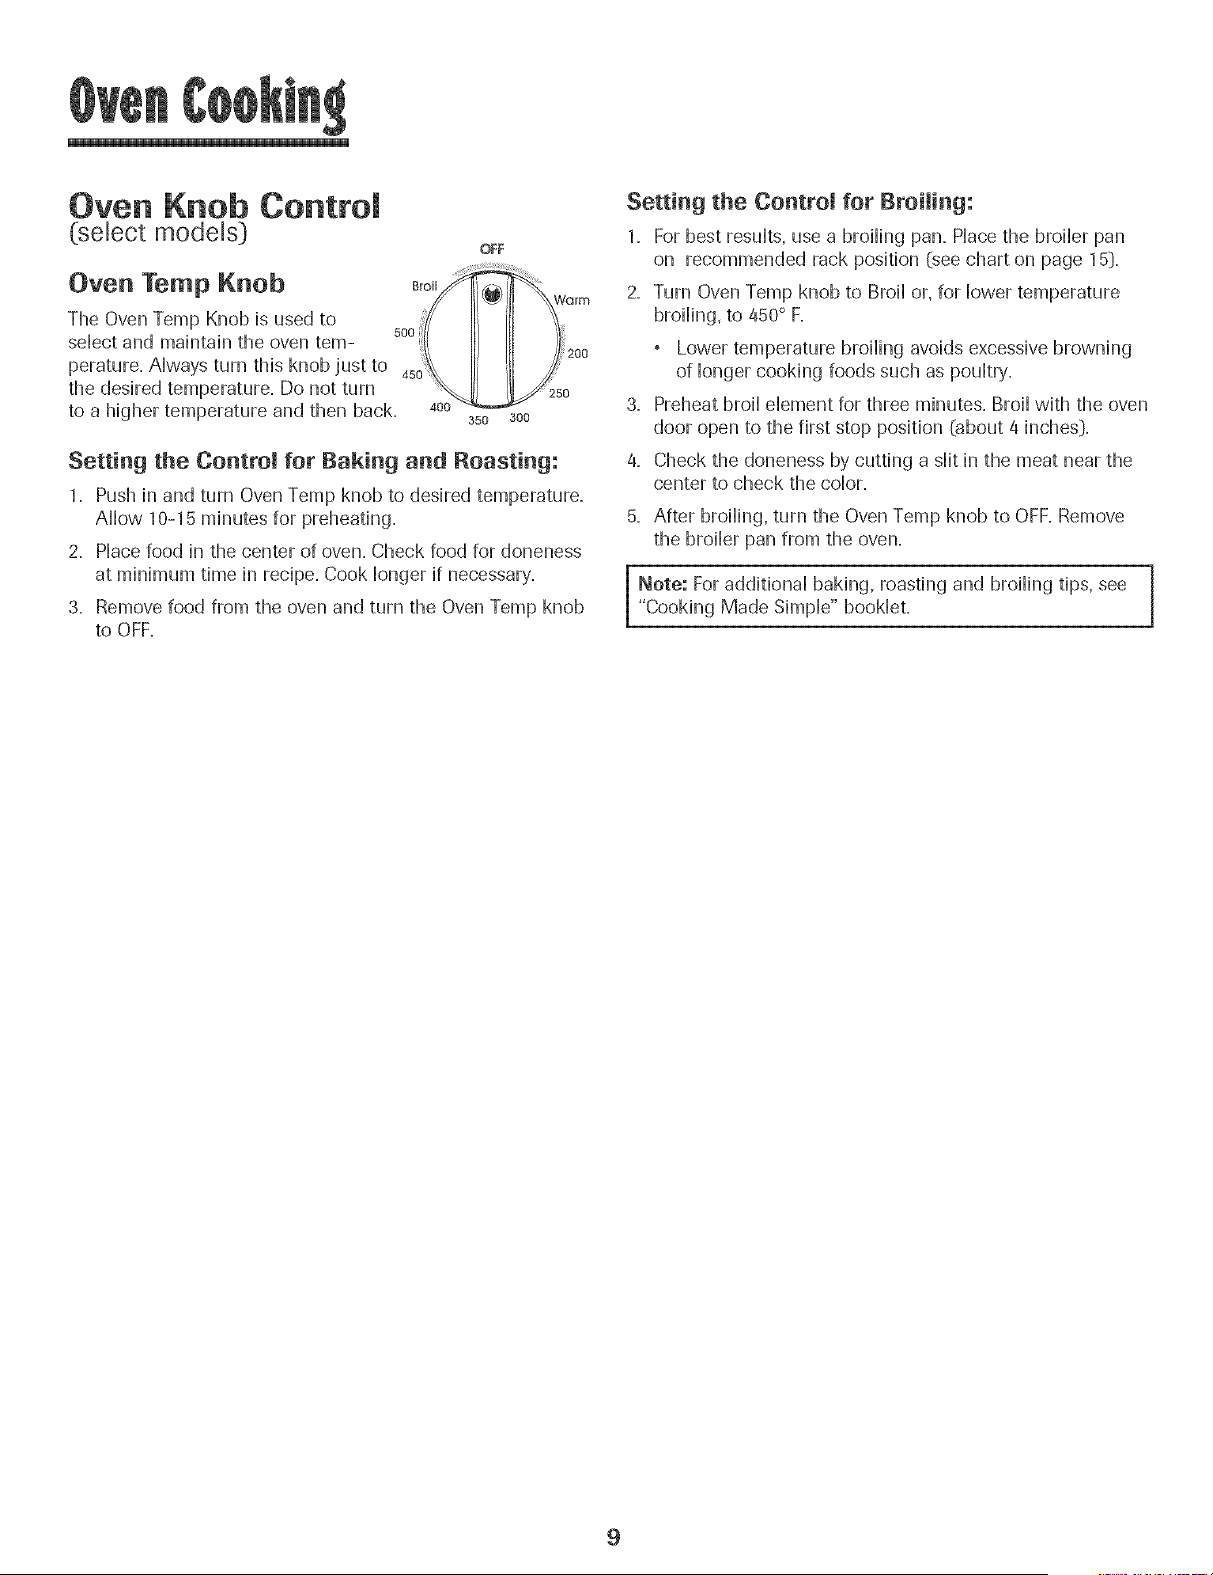
Oven Knob Control
(:select models)
OFF
Oven Temp Knob B,o,
The Oven Temp Knob is used to
500
select and mamtah the oven tem-
perature. Always turn this knob just to
the desired temperature. Do not turn
to a higher temperature and then back. 4oo
350 300
Warm
Setting the Control for Baking and Roasting:
1. Push in and turn Oven Temp knob to desired temperature.
Allow 10-15 minutes for preheating.
2. Place food in the center of oven. Check food for aloneness
at minimum time in recipe. Cook longer if necessary.
3. Remove food from the oven and turn the Oven Temp knob
to OFF.
Setting the Control for Broiling:
1. For best results, use a broiling pan. Place the broiler pan
on recommended rack position (see chart on page 15).
2. Turn Oven Temp knob to Broil or, for lower temperature
broiling, to 450° F.
Lower temperature broiling avoids excessive browning
of longer cooking foods such as poultry.
3. Preheat broil element for three minutes. Broil with the oven
door open to the first stop position (about 4 inches).
4. Check the aloneness by cutting a slit in the meat near the
center to check the color.
5. After broiling, turn the Oven Temp knob to OFF. Remove
the broiler pan from the oven.
Nete: For additional baking, roasting and broiling tips, see
"Cooking Made Simple" booklet.
9
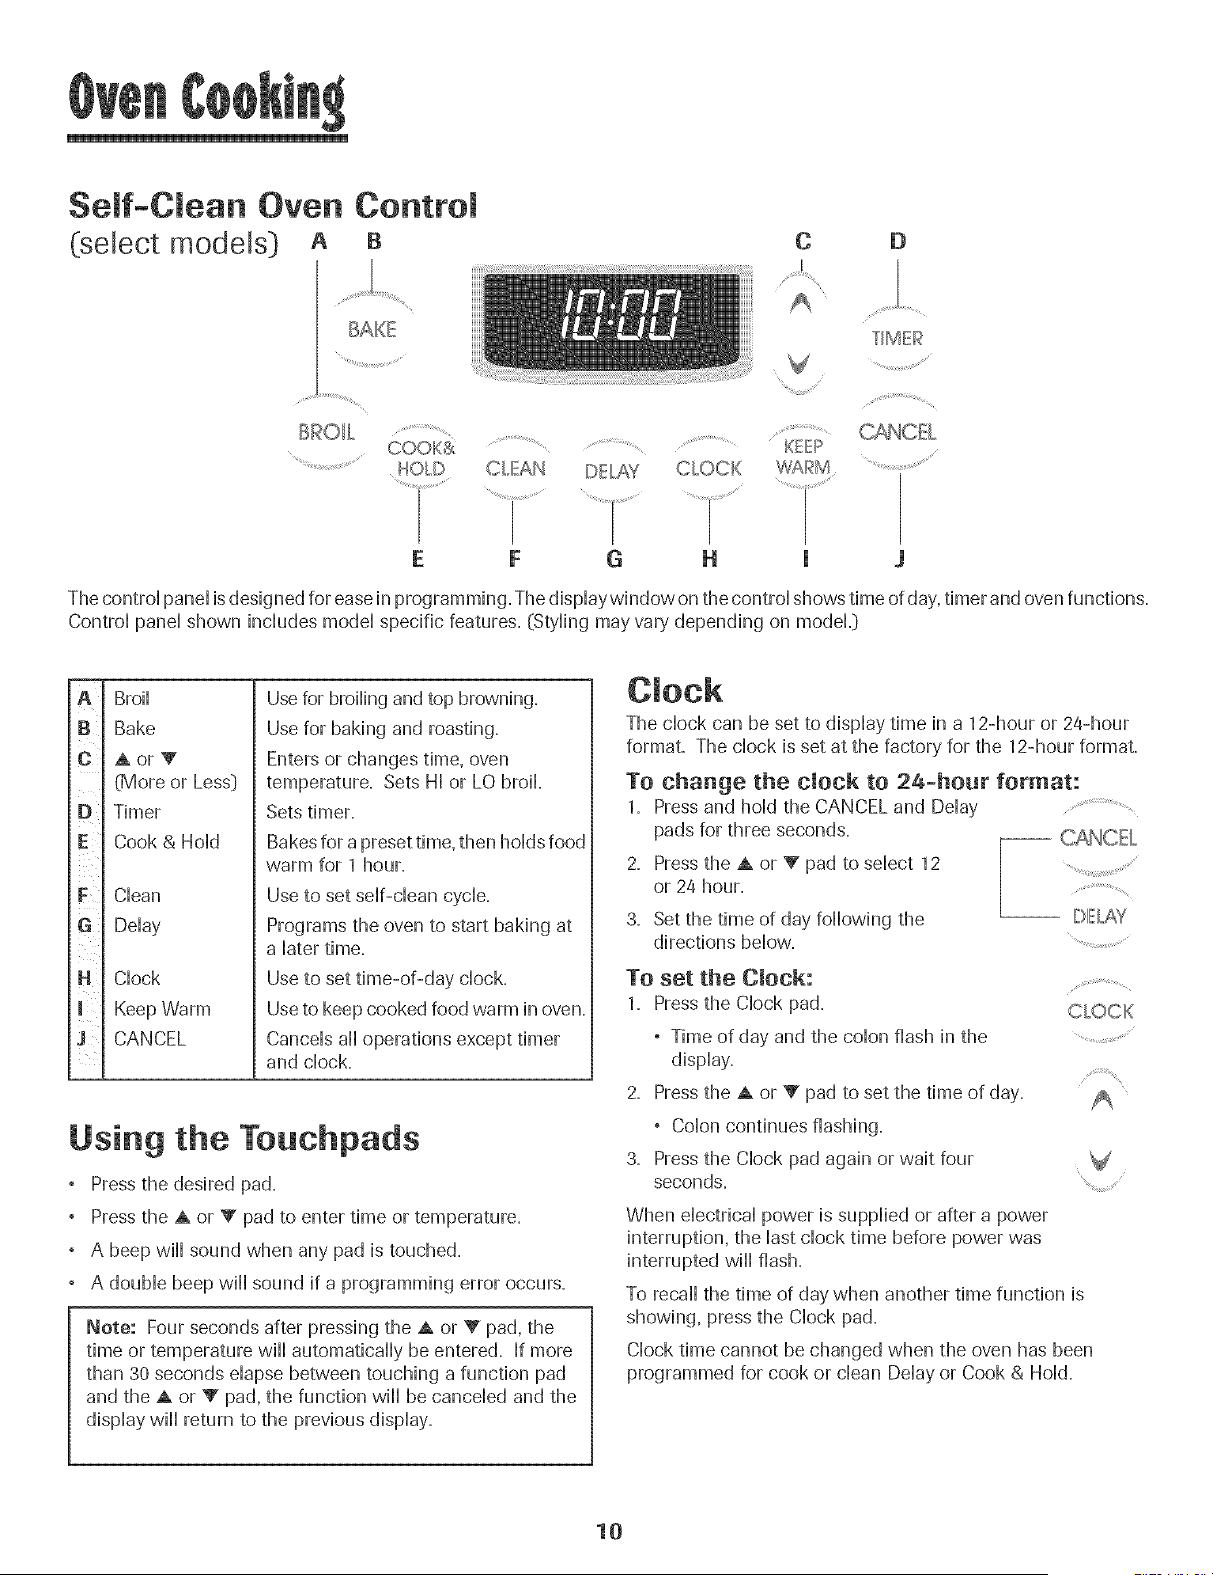
Seff Clean Oven Control
(select models)
A B
BAKE
COOl@,
........... HOLD
E
C
V
........................................ ............ KEEP
CLEAN DELAY CLOCK
F G H J
D
TIMER
The control panel is designed for ease in programming. The dispiaywindow on the control shows time of day, timer and oven functions.
Control panel shown includes model specific features. (Styling may vary depending on modeL}
A
B
C
D
G!
H
Broil
Bake
Aor_
L'Moreor Less}
Timer
Cook & Hold
Clean
Delay
Clock
Keep Warm
CANCEL
Use for broiling and top browning.
Use for baking and roasting.
Enters or changes time, oven
temperature. Sets HI or LO broil
Sets timer.
Bakes for a preset time, then holds food
warm for 1 hour.
Use to set self-clean cycle.
Programs the oven to start baking at
a later time.
Use to set time-of-day clock.
Use to keep cooked food warm in oven.
Cancels all operations except timer
and clock.
Using the Touchpads
Pressthe desired pad.
Pressthe A or _' pad to enter time or temperature.
° A beep wiii sound when any pad is touched.
° A double beep wiii sound if a programming error occurs.
Note: Four seconds after pressing the A or V pad, the
time or temperature will automatically be entered. If more
than 30 seconds elapse between touching a function pad
and the A or V pad, the function will be canceled and the
display will return to the previous display.
The clock can be set to display time in a 12-hour or 24-hour
format. The clock is set at the factory for the 12-hour format.
To change the clock to 24-hour format:
2.
3.
Pressand hold the CANCEL and Delay
pads for three seconds.
Pressthe A or Y" pad to select 12
or 24 hour.
Set the time of day following the
directions below.
-- DELAY
To set the Clock:
1. Pressthe Clock pad.
° Time of day and the colon flash in the
display.
2. Pressthe A or V pad to set the time of day.
° Colon continues flashing.
3. Pressthe Clock pad again or wait four
seconds.
CLOCK
When electrical power is supplied or after a power
interruption, the last clock time before power was
interrupted wiii flash.
To recall the time of day when another time function is
showing, press the Clock pad.
Clock time cannot be changed when the oven has been
programmed for cook or clean Delay or Cook & Hold.
10
To cancem the Clock display:
If you do not want the thne of day to dispiay:
Press and hoid the CANCEL and CHockpads .... .....
for three seconds. The time of day wiii
disappear from the dispiay
When the chock dispiay is cancelled, press
the CHockpad to brbfiy dispiay the time
of day.
To restore the Clock display:
Press and hoid the CANCEL and CHockpads for three sec-
onds. The time of day wiii reappear in the dispiay.
-- CLOCK
The timer can be set from one minute (00:01} up to 99 hours
and 59 minutes @9:59}.
The timer can be used independently of any other oven
activity. It can also be set while another oven function is
operating.
The Timer does not control the oven. It only controls a
beeper.
To set the Timer:
1.
3,
s¢_ ¸_¸ ,_
Press the Timer pad. nMER
.0:00 iights in the dispiay.
, The coion flashes in the dispiay.
Press the A or V pad untii the
correct time appears in the dispiay.
, The coion wiii continue to flash.
PressTimer pad again or wait four seconds.
° The colon continues flashing and the time begins
counting down.
° The last minute of the timer countdown wiii be displayed
as seconds.
4. At the end of the set time, one long beep wiii sound.
To cancel the Timer:
1. Press and hold the Timer pad for three seconds.
OR
2. Press the Timer pad and set the time to 00:00.
Locking the Controms
The touchpad controls can be locked for safety',cleaning, or
to prevent unwanted use. They will not function when locked.
If the oven is currently in use, the controls cannot be locked.
The current time of day will remain in the display when the
controls are locked.
To leek:
Press and hold the CANCEL and Cook &
Hold pads for three seconds.
LOCK flashes in the display.
To unmoek:
Press and hold the CANCEL and Cook & Hold
pads for three seconds.
LOCK disappears from the display.
COOK&
HOLD
Fault Codes
BAKE or LOCK may flash rapidiy in the dispiay to aiert you if
there is an error or a problem. If BAKE or LOCK flash in the
display, press CANCEL pad. If BAKE or LOCK continue to
flash, disconnect power to the appliance. Wait a few minutes,
and then reconnect power. If the flashing still continues,
disconnect power to the appliance and call an authorized
servicer.
To set Bake:
1.
Pressthe Bake pad. BAKE
° "BAKE" wiii flash.
° 000 wiii iight in the display.
2. Select the oven temperature. The oven tempera-
ture can be set from 170° to 550°. Press or press
and hold the A or V" pads.
° 350° wiii iight when either pad is first pressed.
, Pressthe A pad to increase the temperature.
, Pressthe V pad to decrease the temperature.
3. Press Bake pad again or wait four seconds.
° BAKE will stop flashing and light in the display.
V
11
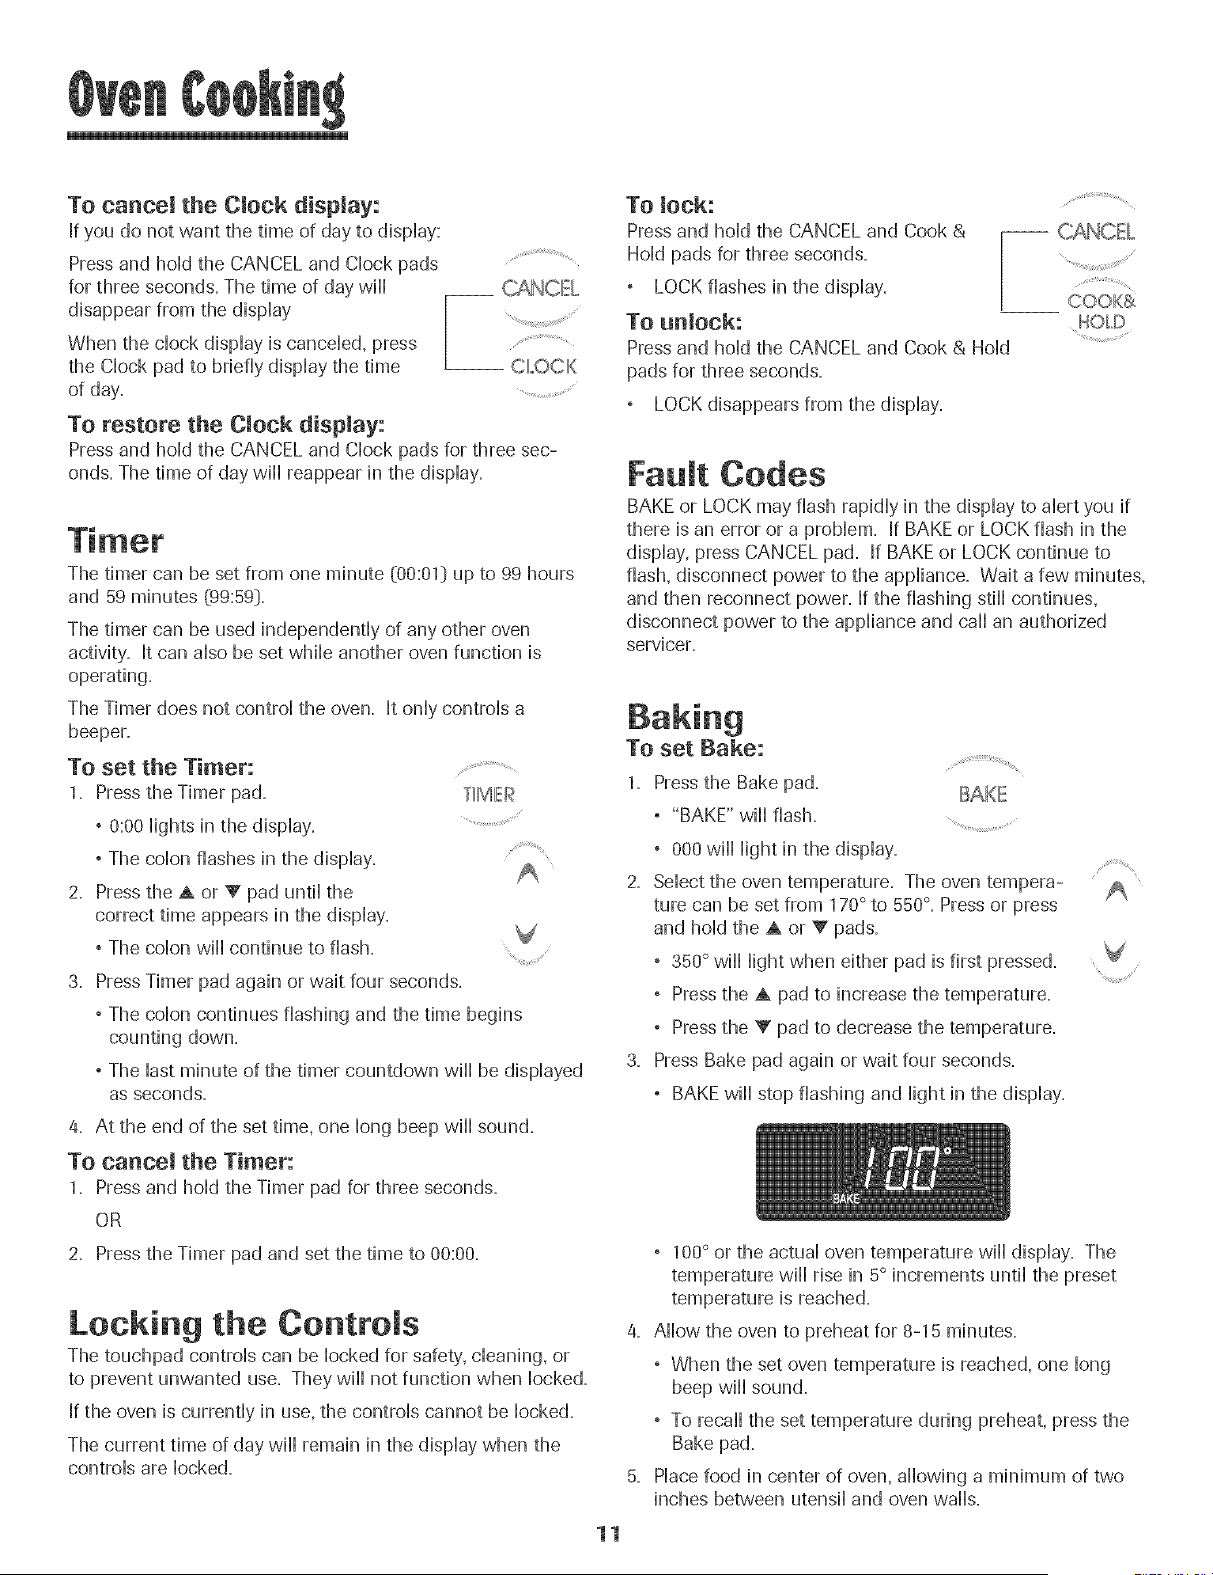
° 100° or the actual oven temperature wiii display. The
temperature will rise in 5° increments until the preset
temperature is reached.
4. Allow the oven to preheat for 8-15 minutes.
° When the set oven temperature is reached, one long
beep will sound.
° To recall the set temperature during preheat, press the
Bake pad.
5. Place food in center of oven, allowing a minimum of two
inches between utensil and oven walls.
0. Checkcookingprogress.CookHongerif needed.
7. Whencookingisfinished,pressCANCEL.
8. Removefoodfromtheoven.
Baking Notes:
To change oven temperature daring cooking, press
the Bake pad, then press the A or V pad untiHthe
desired temperature is dispHayed.
To change oven temperature during preheat, press
the Bake pad twice, then press the A or V pad untiH
the desired temperature is dispHayed.
If you forget to turn off the oven, it will automatically turn
off at the end of 12 hours. If you wish to deactivate this
feature, see page 14.
For additionaHbaking and roasting tips, see "Cooking
Made SimpW' booHet.
Baking Differences Between Your OJd
and New Oven
It is normal to notice some baking time differences between a
new oven and an old one. See"Adjusting the OvenTemperature"
on page 14.
Cook & HoJd
Cook & Hold allows you to bake for a preset amount of time,
followed by a one-hour Keep Warm cycle.
TO set Cook & Hemal: ............
1. Press the Cook & Hold pad. HOLD
° "BAKE" and "HOLD" flash.
, 000 lights in the display.
2. Select the oven temperature. The oven tempera- A
ture can be set from 170° to 550°- Pressor press
and hold the A or V pad.
° Press the A pad to increase the temperature. V
° Press the _' pad to decrease the temperature.
3. Press Cook & Hold again OR wait four seconds.
° "HOLD" flashes.
° 00:00 flashes in the display.
Enter the amount of time you want to bake by pressing the
A or V pad. Bake time can be set from ten minutes
(00:10:)to 11 hours, 59 minutes (11:59}.
, "BAKE" and "HOLD" light in the display.
° The baking time wiil light in the display.
° The baking time wiil start counting down.
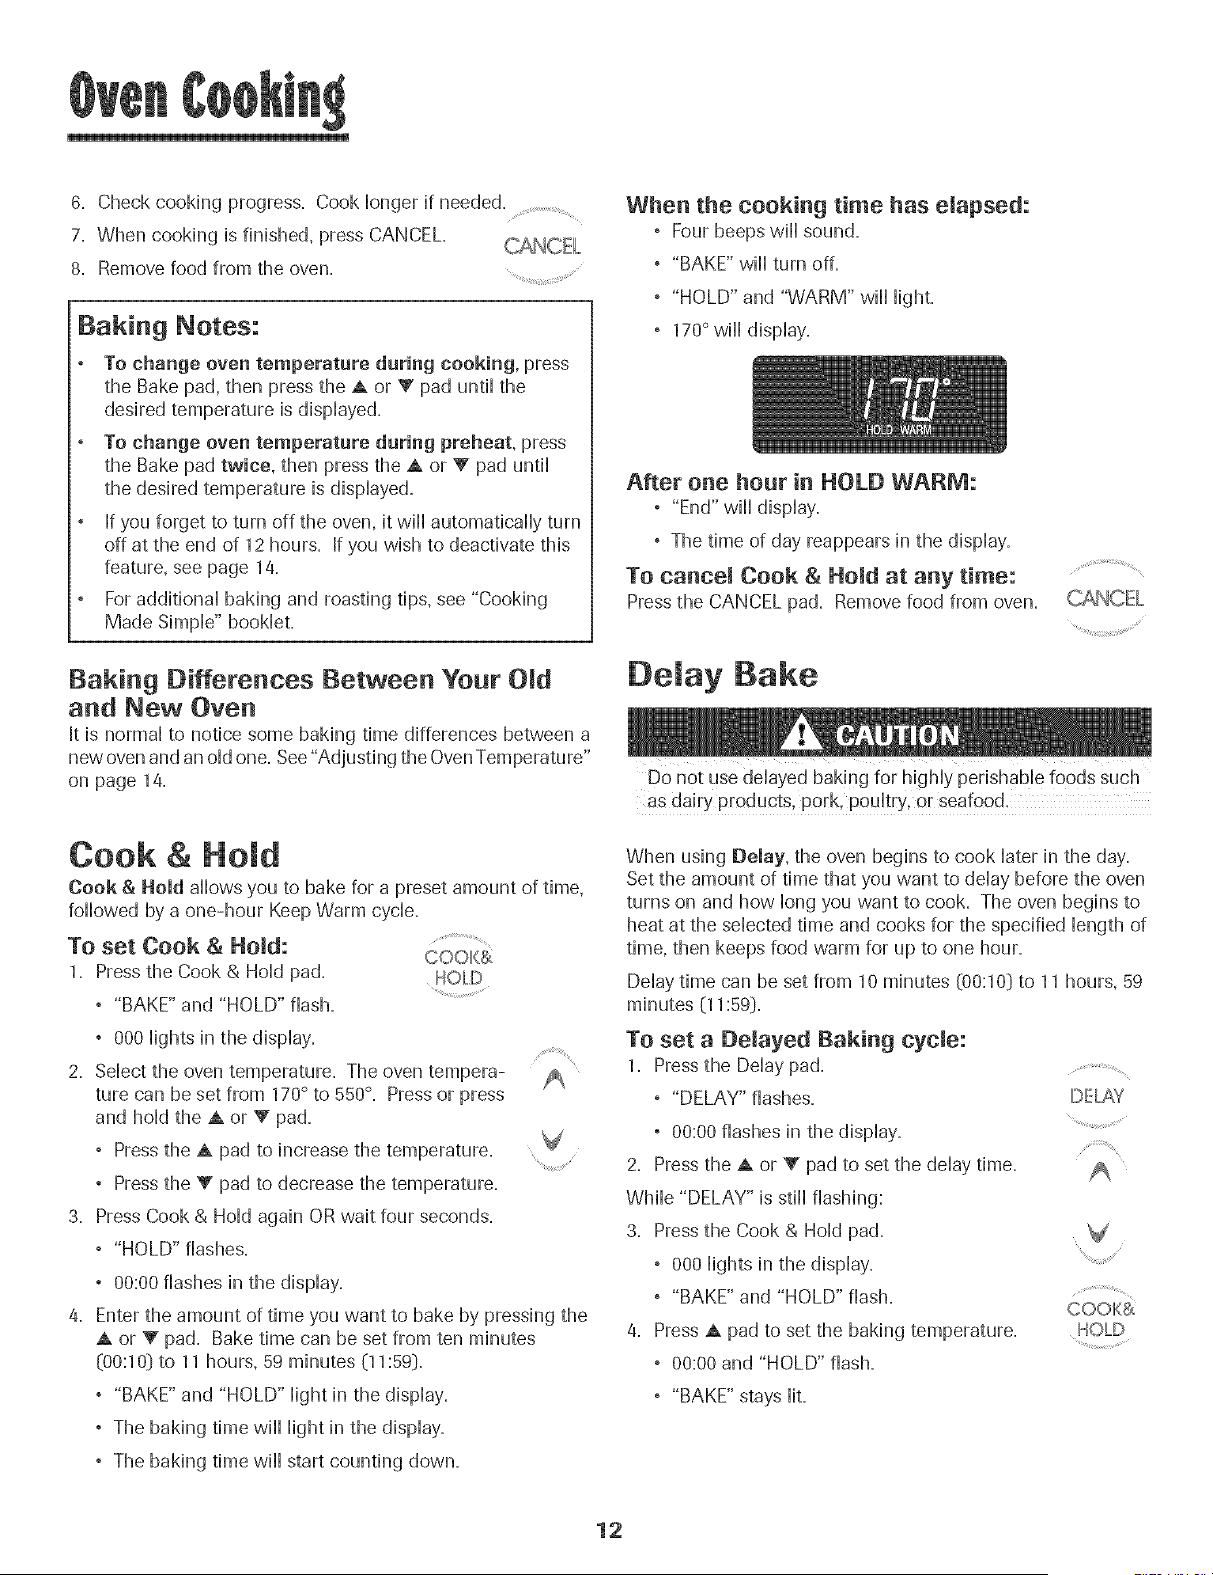
When the cooking time has eJapsed:
, Four beeps will sound.
, "BAKE" will turn off.
, "HOLD" and "WARM" will light.
, 170°will display.
After one hoar in HOLD WARM:
, "End" wiii display.
° The time of day reappears in the display.
TO canceJ Cook & Hold at any time:
Press the CANCEL pad. Remove food from oven.
De ay Bake
as dairy products, pork, poultry, or seafood.
When using Belay, the oven begins to cook later in the day.
Set the amount of time that you want to delay before the oven
turns on and how long you want to cook. The oven begins to
heat at the selected time and cooks for the specified length of
time, then keeps food warm for up to one hour.
Delay time can be set from 10 minutes (00:10] to 11 hours, 59
To set a Demayed Baking cycle:
1. Pressthe Delay pad..........
° "DELAY" flashes. DEL_?f
, 00:00 flashes in the display. '.............
2. Press the A or V pad to set the delay time.
While "DELAY" is still flashing:
3. Pressthe Cook & Hold pad.
, 000 lights in the display.
, "BAKE" and "HOLD" flash. ..........
COOH{&
4, Press A pad to set the baking temperature,
° 00:00 and "HOLD" flash.
, "BAKE" stays lit.
12
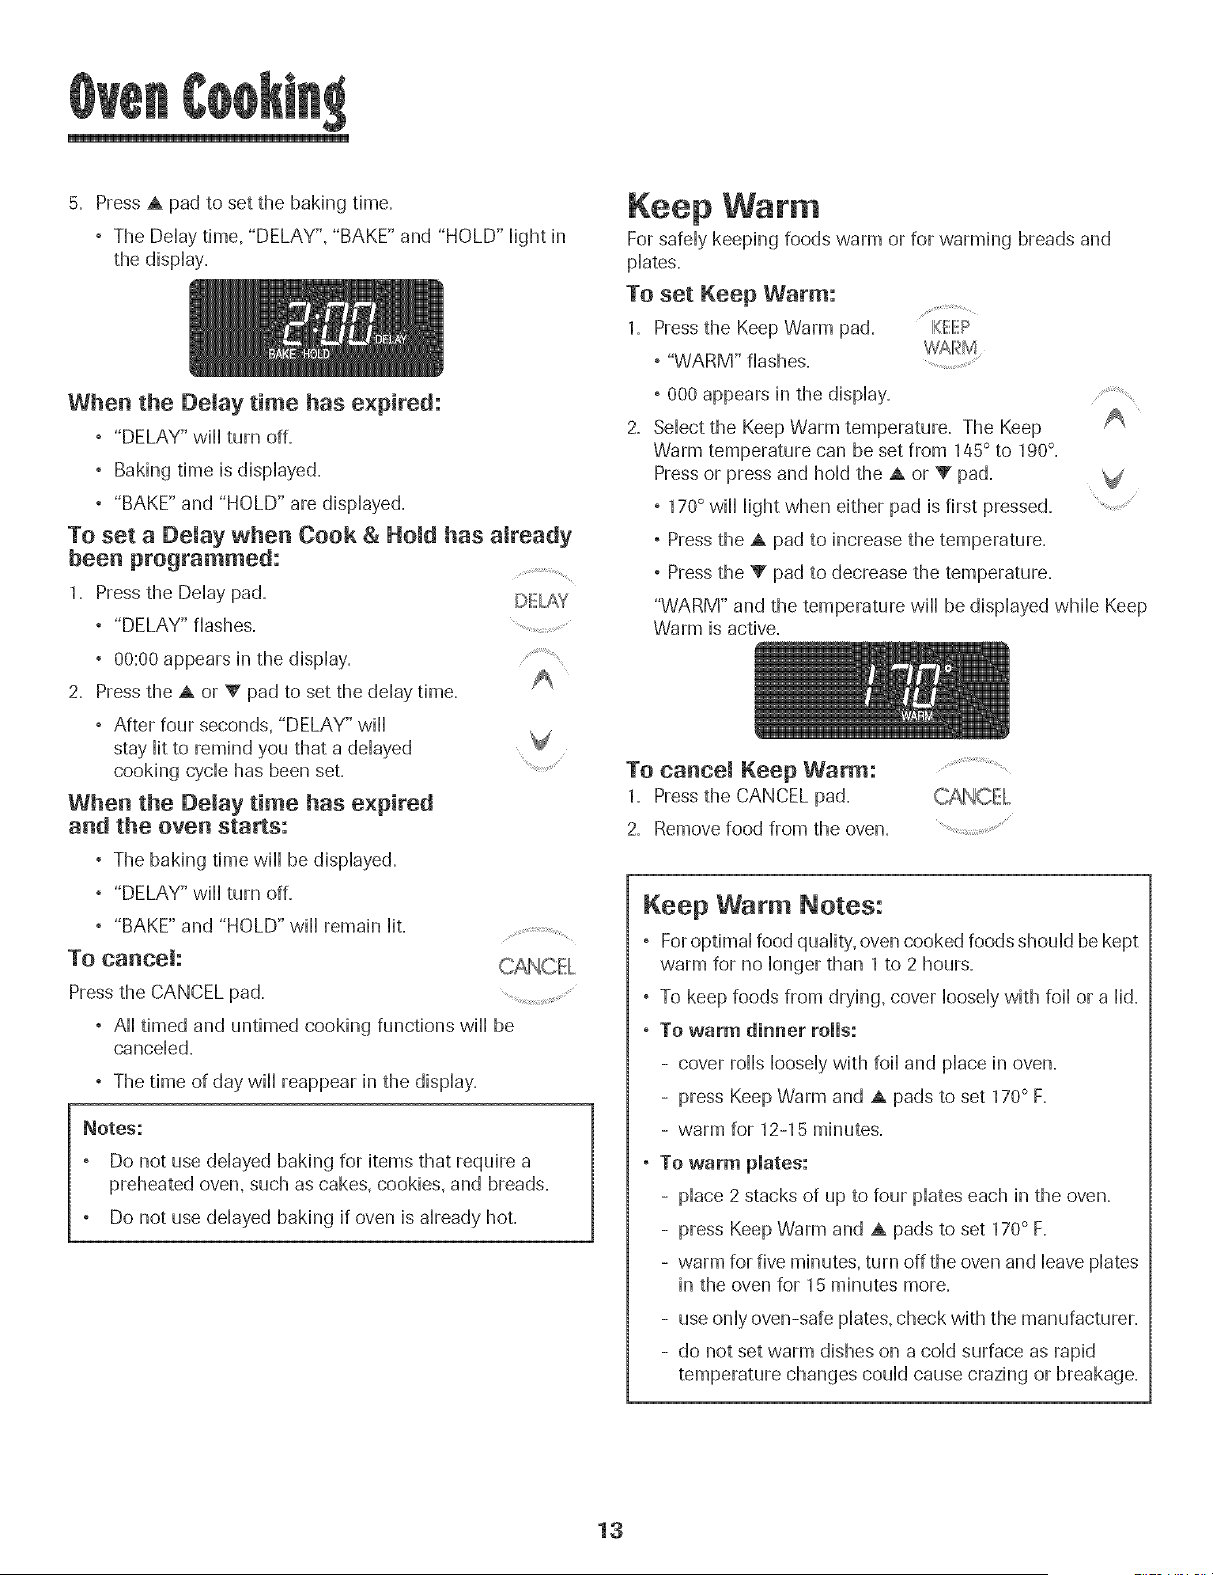
5. Press A pad to set the baking time+
, The Dday time, "DELAY", "BAKE" and "HOLD" Hightin
the dispiay.
When the Delay time has expired:
, "DELAY" will turn off=
, Baking time is dispiayed=
, "BAKE" and "HOLD" are dispiayed=
To set a Delay when Cook & Hold has already
beea programmed:
1. Press the Delay pad. DELAY
° "DELAY" flashes. ............................
, 00:00 appears .......
2. Press the A or V pad to set the dday time+
, After four seconds, "DELAY" will
stay Hitto remind you that a de.,layed
cooking cycle has been set. ........................
When the Delay time has expired
and the oven starts:
, The baking time will be dispiayed.
, "DELAY" will turn off=
, "BAKE" and "HOLD" will remain Hit=
To cancel:
Press the CANCEL pad...................................... .................
, AHtimed and untimed cooking functions will be
canceled+
, The time of day will reappear in the display.
Notes:
Do not use delayed baking for items that require a
preheated oven, such as cakes, cookies+ and breads.
Do not use delayed baking if oven is already hot.
Keep Warm
For safely keeping foods warm or for warming breads and
plates+
To set Keep Warm:
1. Pressthe Keep Warm pad. Ii(EIIxCP
WAII_M
° "WARM" flashes. ...........
° 000 appears in the display.
/¸.>¸¸¸%¸
Select the Keep Warm temperature. The Keep
Warm temperature can be set from 145° to 190°.
Pressor press and hold the A or V pad.
° 170° will light when either pad is first pressed.
, Press the A pad to increase the temperature.
° Pressthe V pad to decrease the temperature.
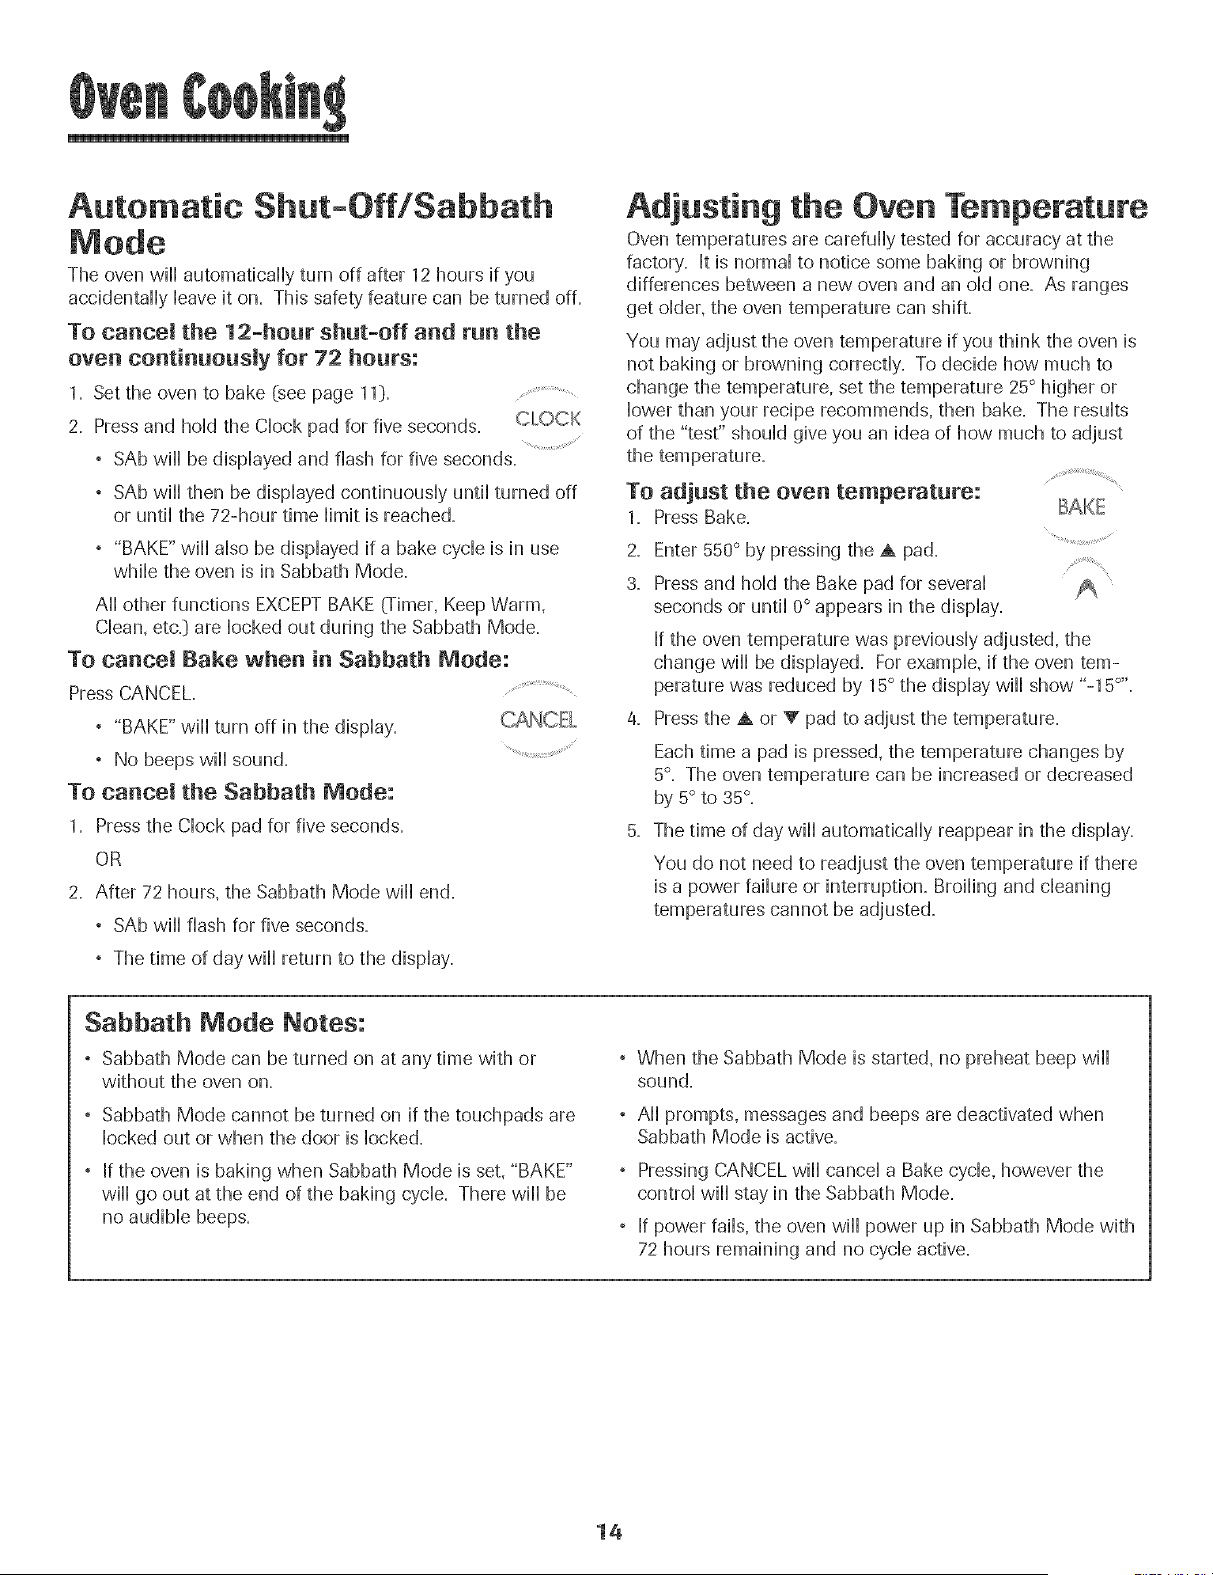
"WARM" and the temperature wiii be displayed while Keep
Warm is active.
To cancel Keep Warm:
1. Pressthe CANCEL pad.
2. Remove food from the oven.
Keep Warm Notes:
° For optimal food quality, oven cooked foods should be kept
warm for no longer than 1 to 2 hours.
° To keep foods from drying, cover loosely with foil or a lid.
° To warm dinner rolls:
- cover rolls loosely with foil and place in oven.
- press Keep Warm and A pads to set 170° F.
- warm for 12-15 minutes.
, To warm plates:
- place 2 stacks of up to four plates each in the oven.
- press Keep Warm and A pads to set 170° F.
- warm for five minutes, turn off the oven and leave plates
in the oven for 15 minutes more.
- use only oven-safe plates, check with the manufacturer.
- do not set warm dishes on a cold surface as rapid
temperature changes could cause crazing or breakage.
13
Automatic Shut-Off/Sabbath
Mode
The oven will automatically turn off after 12 hours if you
accidentally Heaveit on. This safety' feature can be turned off.
TO cancel the 12-hour shut-off and run the
oven continuously for 72 hours:
1. Set the oven to bake Cseepage 11}....................
2. Press and hoid the CHockpad for five seconds. C_OCK
, SAb wifl be dispiayed and flash for five seconds.
, SAb wifl then be dispiayed condnuousiy until turned off
or until the 72-hour time limit is reached.
, "BAKE" will also be displayed if a bake cycle is in use
while the oven is in Sabbath Mode.
All other functions EXCEPTBAKE {Timer. Keep Warm.
Clean, etc.} are locked out during the Sabbath Mode.
To cancel Bake when in Sabbath Mode:
Press CANCEL. ................
, "BAKE" will turn off in the display.
, No beeps will sound.
To cancel the Sabbath Mode:
1. Press the Clock pad for five seconds.
OR
2. After 72 hours, the Sabbath Mode will end.
, SAb will flash for five seconds.
, The time of day will return to the display.
Adjusting the Oven Temperature
Oven temperatures are carefully tested for accuracy at the
factory. It is normal to notice some baking or browning
differences between a new oven and an old one= As ranges
get older, the oven temperature can shift.
You may adjust the oven temperature if you think the oven is
not baking or browning correctly. To decide how much to
change the temperature, set the temperature 25° higher or
lower than your recipe recommends, then bake. The results
of the "test" should give you an idea of how much to adjust
the temperature=
To adjust the oven temperature:
1. Press Bake.
2.
3.
BAKE
Enter 550° by pressing the A pad.
Pressand hold the Bake pad for several
seconds or until 0° appears in the display.
If the oven temperature was previously adjusted, the
change wiii be displayed. For example, if the oven tem-
perature was reduced by 15° the display wiii show "-15 °''.
Pressthe A or V pad to adjust the temperature.
Each time a pad is pressed, the temperature changes by
5°. The oven temperature can be increased or decreased
by 5° to 35°.
The time of day will automatically reappear in the display.
You do not need to readjust the oven temperature if there
is a power failure or interruption. Broiling and cleaning
temperatures cannot be adjusted.
Sabbath Mode Notes:
, Sabbath Mode can be turned on at any time with or
without the oven on.
° Sabbath Mode cannot be turned on if the touchpads are
locked out or when the door is locked.
, If the oven is baking when Sabbath Mode is set. "BAKE"
will go out at the end of the baking cycle. There will be
no audible beeps.
, When the Sabbath Mode is started, no preheat beep wiii
sound.
, Aii prompts, messages and beeps are deactivated when
Sabbath Mode is active.
, Pressing CANCEL wiii cancel a Bake cycle, however the
controi wiii stay in the Sabbath Mode.
° If power faiis, the oven wiii power up in Sabbath Mode with
72 hours remaining and no cycle active.
14

To set Broih
1. Press the Broil pad.
BRQ_ ....
" "BROIL" flashes.
° SET is dispiayed.
2. Press the A pad to set HI broii or press the V pad to set
LO broil
° HI or LO wiii be dispiayed.
° Seiect HI broii (550° F} for normai broiiing. Seiect
LO broii (450° F])for How-temperature broiiing of ionger
cooking foods such as pouitry.
3. After four seconds, the oven wiii start.
° "BROIL" wiii remain Hit.
4. For optimum browning, preheat broii eiement for 3-4
minutes before adding food.
5. Piace food in the oven. Leave oven door open about four
inches (the first stop]).
6. Turn meat once about haifway through cooking.
7. When food is cooked, press the CANCEL pad.
Remove food and broiier pan from the oven.
, The time of day wiii reappear in the
dispiay.
Broil Notes:
, For best results when broiling, use a pan designed for
broiiing.
, Expect broi[ times to increase and browning to be
siightiy [ighter if appiiance is instaiied on a 208-voit
circuit.
, HI is used for most broiling. Use LO broil when broiling
longer cooking foods. The lower temperature allows
food to cook to the well done stage without excessive
browning.
, Broil times may be longer when the lower broiling
temperature is selected.
, For additional broiling tips and temperatures, refer to the
"Cooking Made Simple" bookleL
Broiling Chart
I j
FOODS POSiTiON + , DONENESS COOK TiME
4
4
4
4
4
4
Medium
Weii Done
Weii Done
Beef
Steak, 1" thick
Hamburgers, 3/4" thick
Pork
Bacon
Chops, 1"
Ham - precooked slice, 1/2" thick
Poamtry
Chicken Pieces
Seafood
Fish Steaks, buttered, 1" thick
Fillets
* The top rack position is #5.
Weii Done
Weii Done
Warm
15 - 18 minutes
19 - 23 minutes
15 - 18 minutes
6 - 10 minutes
22 - 26 minutes
8 - 12 minutes
LO Broii
3 or 4 Weii Done 28 - 38 minutes
Flaky
Flaky
10 - 15 minutes
8 - 12 minutes
Note: This chart is a suggested guide. The times may vary with the food being cooked.
15
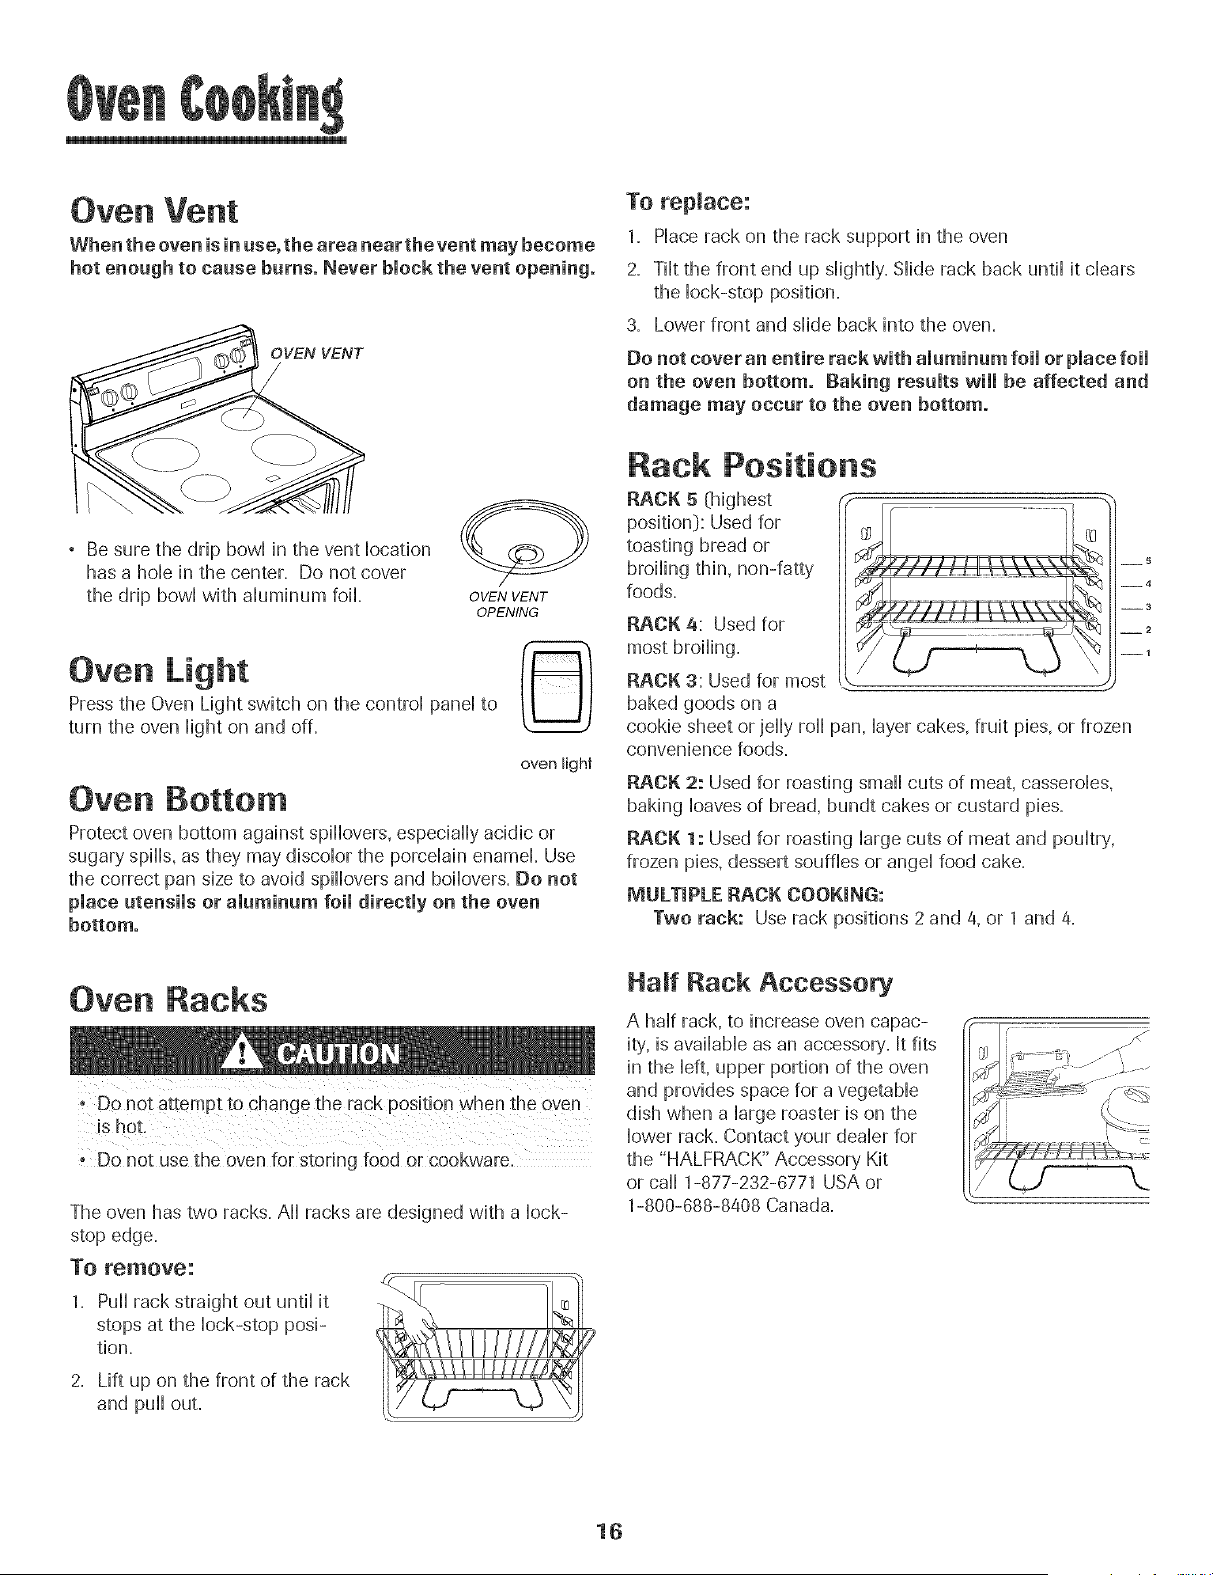
Oven Vent
When the oven is in use, the area near the vent may become
hot enough to cause burns. Never block the vent opening.
OVEN VENT
/
Be sure the drip bow[ in the vent location
has a hole in the center. Do not cover
the drip bowHwith aHuminum fo&
OVEN VENT
OPENING
Oven Light
Press the Oven Light switch on the controH pand to
turn the oven Highton and off.
Oven Bottom
oven Hght
Protect oven bottom against spiHHovers,especiaHHyacidic or
sugary spiHHs,as they may discoHorthe porceHainenamel Use
the correct pan size to avoid spiHHoversand boiHovers.Do not
place utensils or aluminum foil directly on the oven
bottom.
To replace:
1. Place rack on the rack support in the oven
2. Tilt the front end up slightly. Slide rack back until it clears
the lock-stop position.
3. Lower front and slide back into the oven.
Do not cover an entire rack with aluminum foil or place foil
on the oven bottom. Raking results will be affected and
damage may occur to the oven bottom.
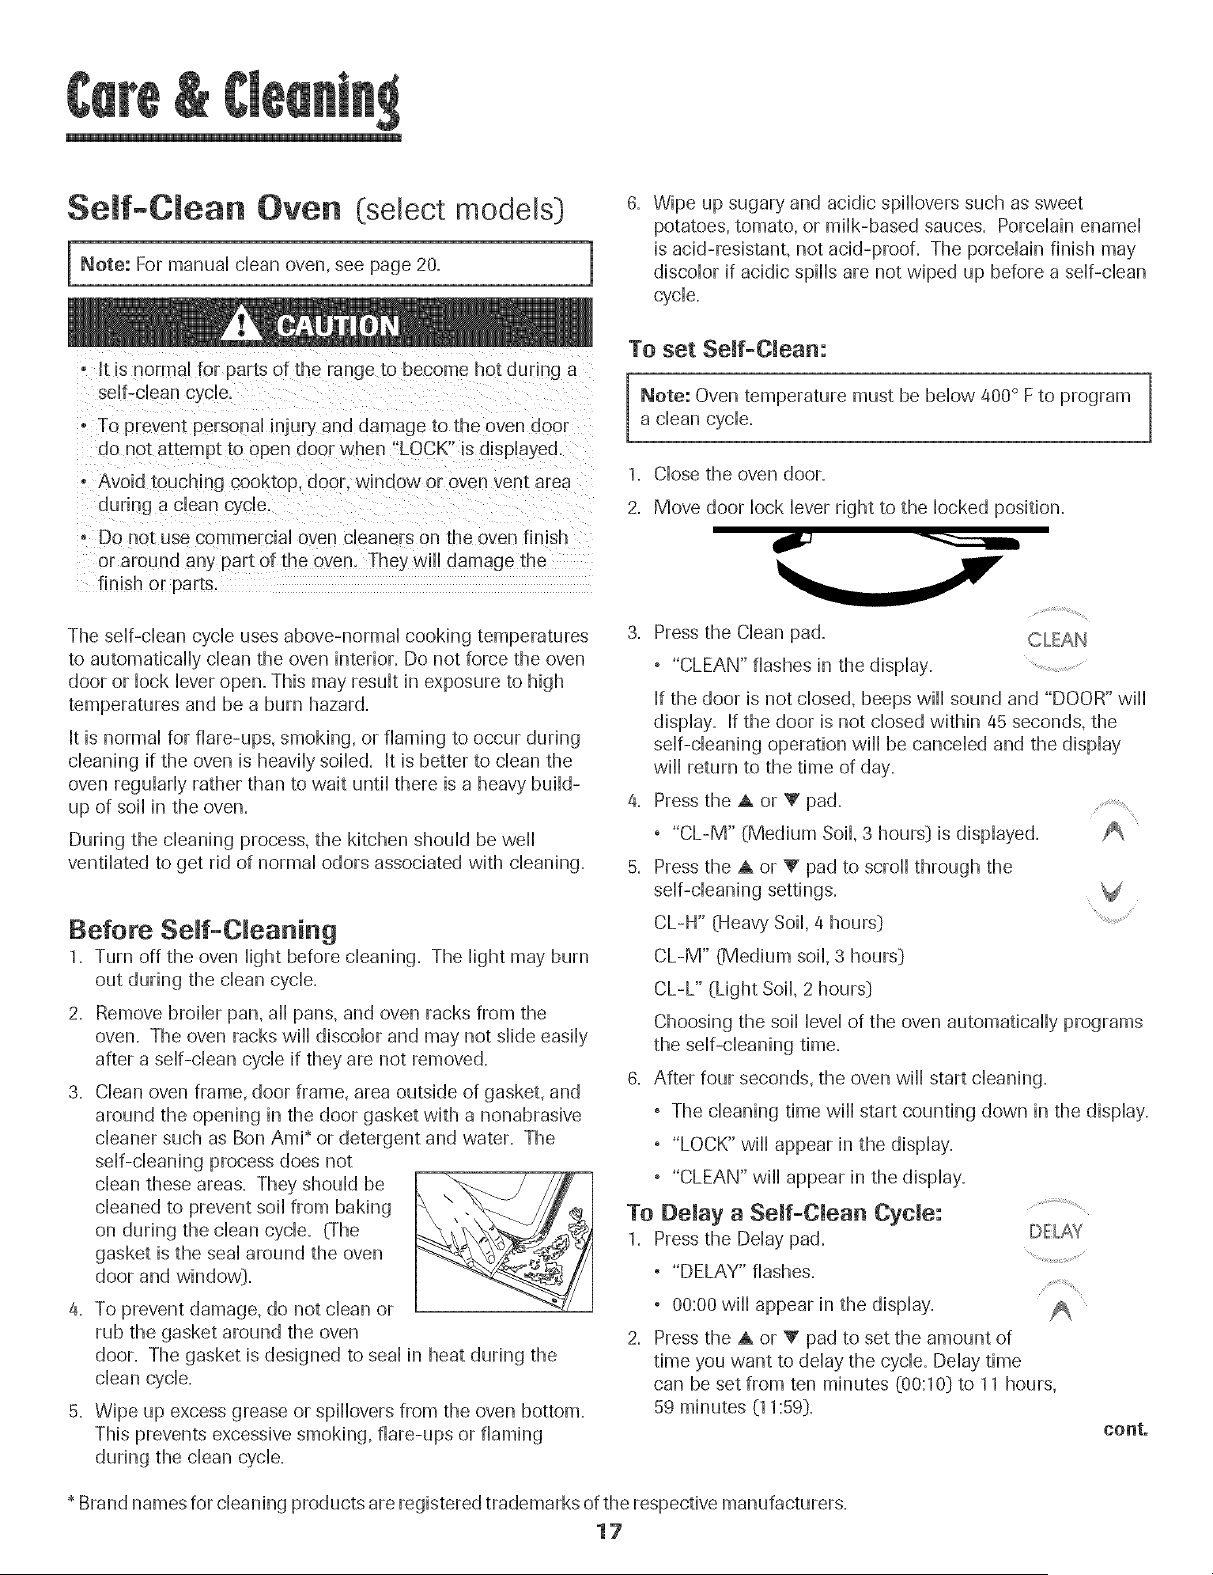
Rack Positions
RACK 5 (highest
position): Used for
toasting bread or
broiling thin, non-fatty
foods.
RACK 4: Used for
most broiling.
RACK 3: Used for most
baked goods on a
5
__4
--3
__2
--!
/
cookie sheet or jelly roll pan, layer cakes, fruit pies, or frozen
convenience foods.
RACK 2: Used for roasting small cuts of meal casseroles,
baking loaves of bread, bundt cakes or custard pies.
RACK 1: Used for roasting large cuts of meat and poultry,
frozen pies, dessert souffles or angel food cake.
MULTIPLE RACK COOKING:
Two rack: Use rack positions 2 and 4, or and 4,
Oven Racks
° DO not attempt to change the rack position when the oven
is hot.
. Do nut use the oven for storing food or cookware,
The oven has two racks. All racks are designed with a lock-
stop edge.
To remove:
1. Pull rack straight out until it
stops at the lock-stop posi-
tion.
2, Lift up on the front of the rack
and pull out,
Haft Rack Accessory
A half rack, to increase oven capac-
ity, is available as an accessory'. It fits
in the left, upper portion of the oven
and provides space for a vegetable
dish when a large roaster is on the
lower rack. Contact your dealer for
the "HALFRACK" Accessory Kit
or call 1-877-232-8771 USA or
1-800-888-8408 Canada.
16
Se f-C ean Oven (select models}
Note: For manuai dean oven, see page 20. 1
• It is normal for parts of the range to become hot duripg a
self-dean cycle,
6. Wipe up sugary and acidic spiiiovers such as sweet
potatoes, tomato, or miik-based sauces. PorceHainename]
is acid-resbtant, not acid-proofi The porceiain finish may
discoior if acidic spiiis are not wiped up before a seif-ciean
cycie.
To set Self-Clean:
Note: Oven temperature must be bellow 400° Fto program
a dean cycie.
• To prevent personal injur_ and damage to the oven door
do not attempt to open door when "LOCK" is displayed,
o Avoid touching cooktop door. window or oven vent area
Do not use commercial oven cleaners on the oven finish
or around any part of the oven. The} wiii damage the
finish or parts.
The self-clean cycle uses above-normal cooking temperatures
to automatically clean the oven interior. Do not force the oven
door or lock lever open. This may result in exposure to high
temperatures and be a burn hazard.
It is normal for flare-ups, smoking, or flaming to occur during
cleaning if the oven is heavily soiled. It is better to clean the
oven regularly rather than to wait until there is a heavy build-
up of soii in the oven.
During the cleaning process, the kitchen should be well
ventilated to get rid of normal odors associated with cleaning.
Before Seff-CJeaning
1. Turn off the oven light before cleaning. The light may burn
2. Remove broiler pan, all pans, and oven racks from the
oven. The oven racks wiii discolor and may not slide easily
after a self-clean cycle if they are not removed.
3. Clean oven frame, door frame, area outside of gasket, and
around the opening in the door gasket with a nonabrasive
cleaner such as Bon Ami* or detergent and water. The
self-cleaning process does not
clean these areas. They should be
cleaned to prevent soil from baking
on during the clean cycle. (The
gasket is the seal around the oven
door and window}.
a. To prevent damage, do not clean or
rub the gasket around the oven
door. The gasket is designed to seal in heat during the
clean cycle.
5. Wipe up excess grease or spillovers from the oven bottom.
This prevents excessive smoking, flare-ups or flaming
during the clean cycle.
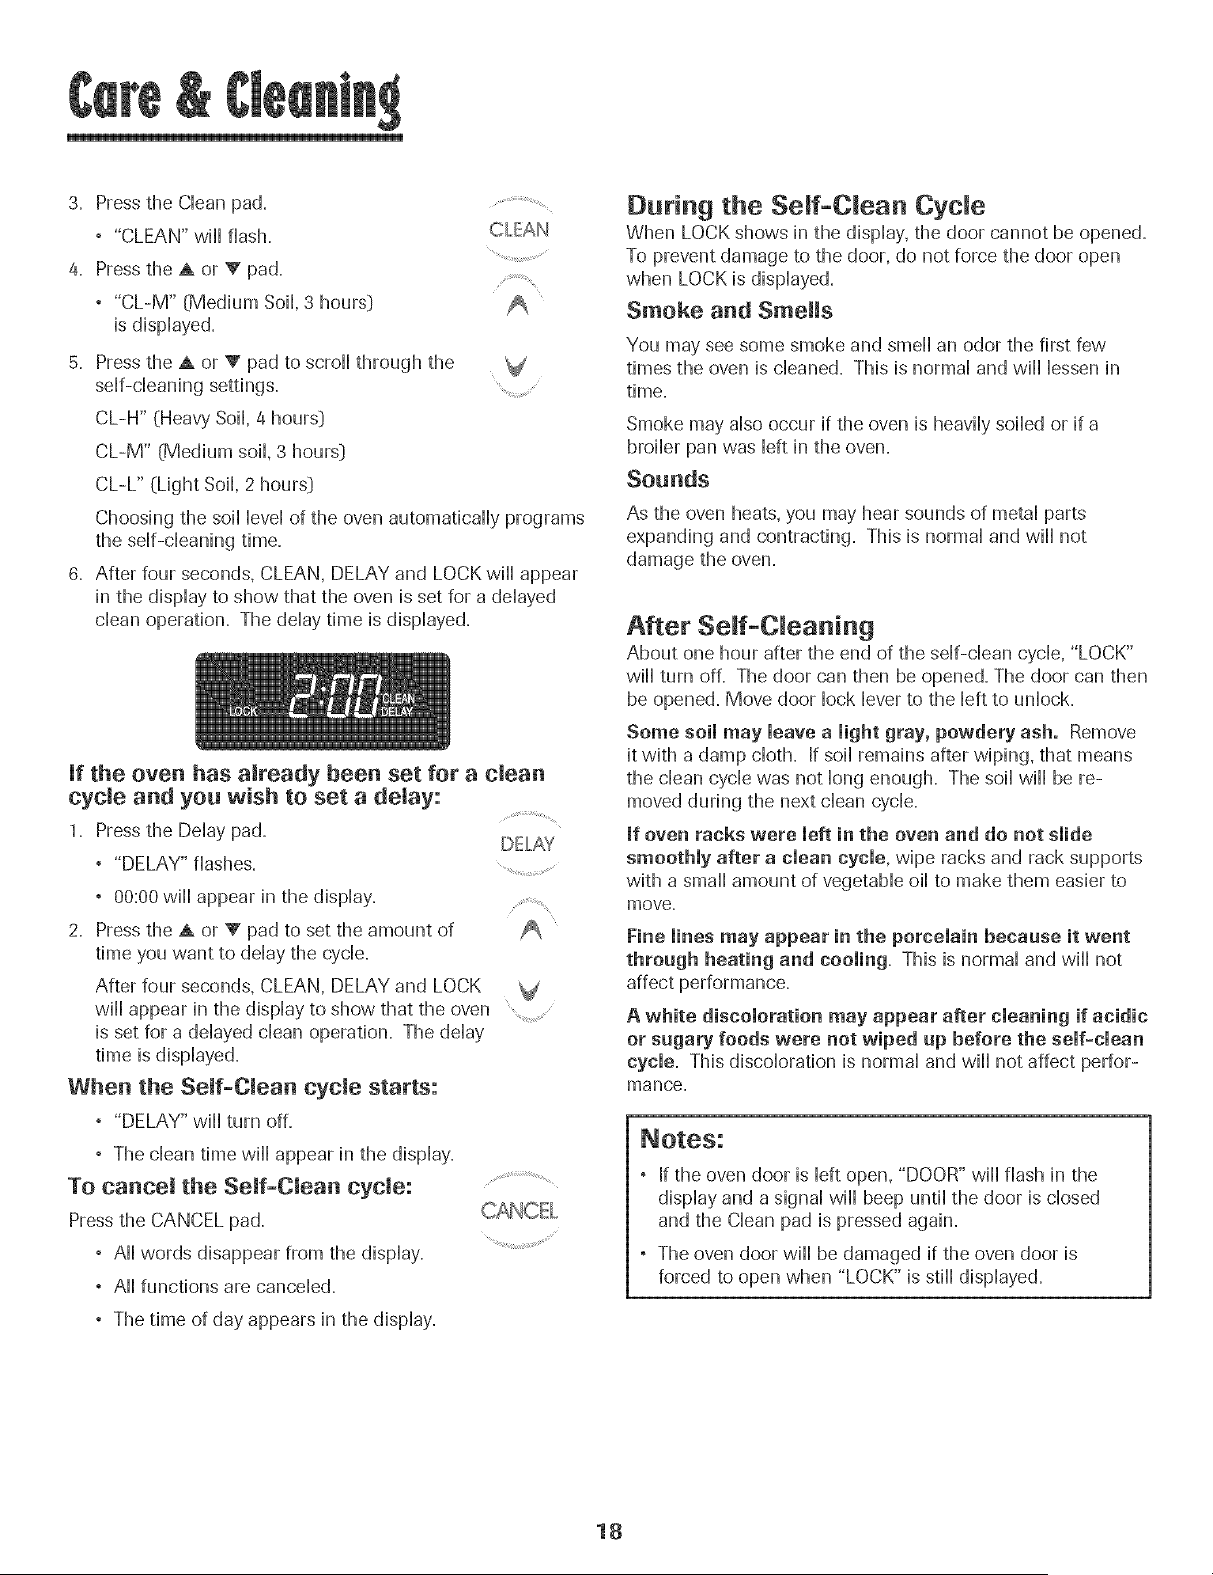
1. Close the oven door.
2. Move door lock lever right to the locked position.
3. Press the Clean pad. CLEAN
, "CLEAN" flashes in the display. ................
If the door is not closed, beeps wiii sound and "DOOR" wiii
display. If the door is not closed within 45 seconds, the
self-cleaning operation wiii be canceled and the display
will return to the time of day.
4. Press the A or Y pad...........................
° "CL-M" (Medium Soil, 3 hours} is displayed.
5. Press the A or V pad to scroii through the
self-cleaning settings.
CL-H" (Heavy Soil, 4 hours} ..................
CL-M" (Medium soil, 3 hours}
CL-L" (Light Soil, 2 hours}
Choosing the soil level of the oven automatically programs
the self-cleaning time.
6. After four seconds, the oven will start cleaning.
° The cleaning time will start counting down in the display.
"LOCK" wiii appear in the display.
"CLEAN" wiii appear in the display.
To
1.
Delay a SeJf-Ciean Cycle: ...........................
Press the Delay pad. DELAY
° "DELAY" flashes.
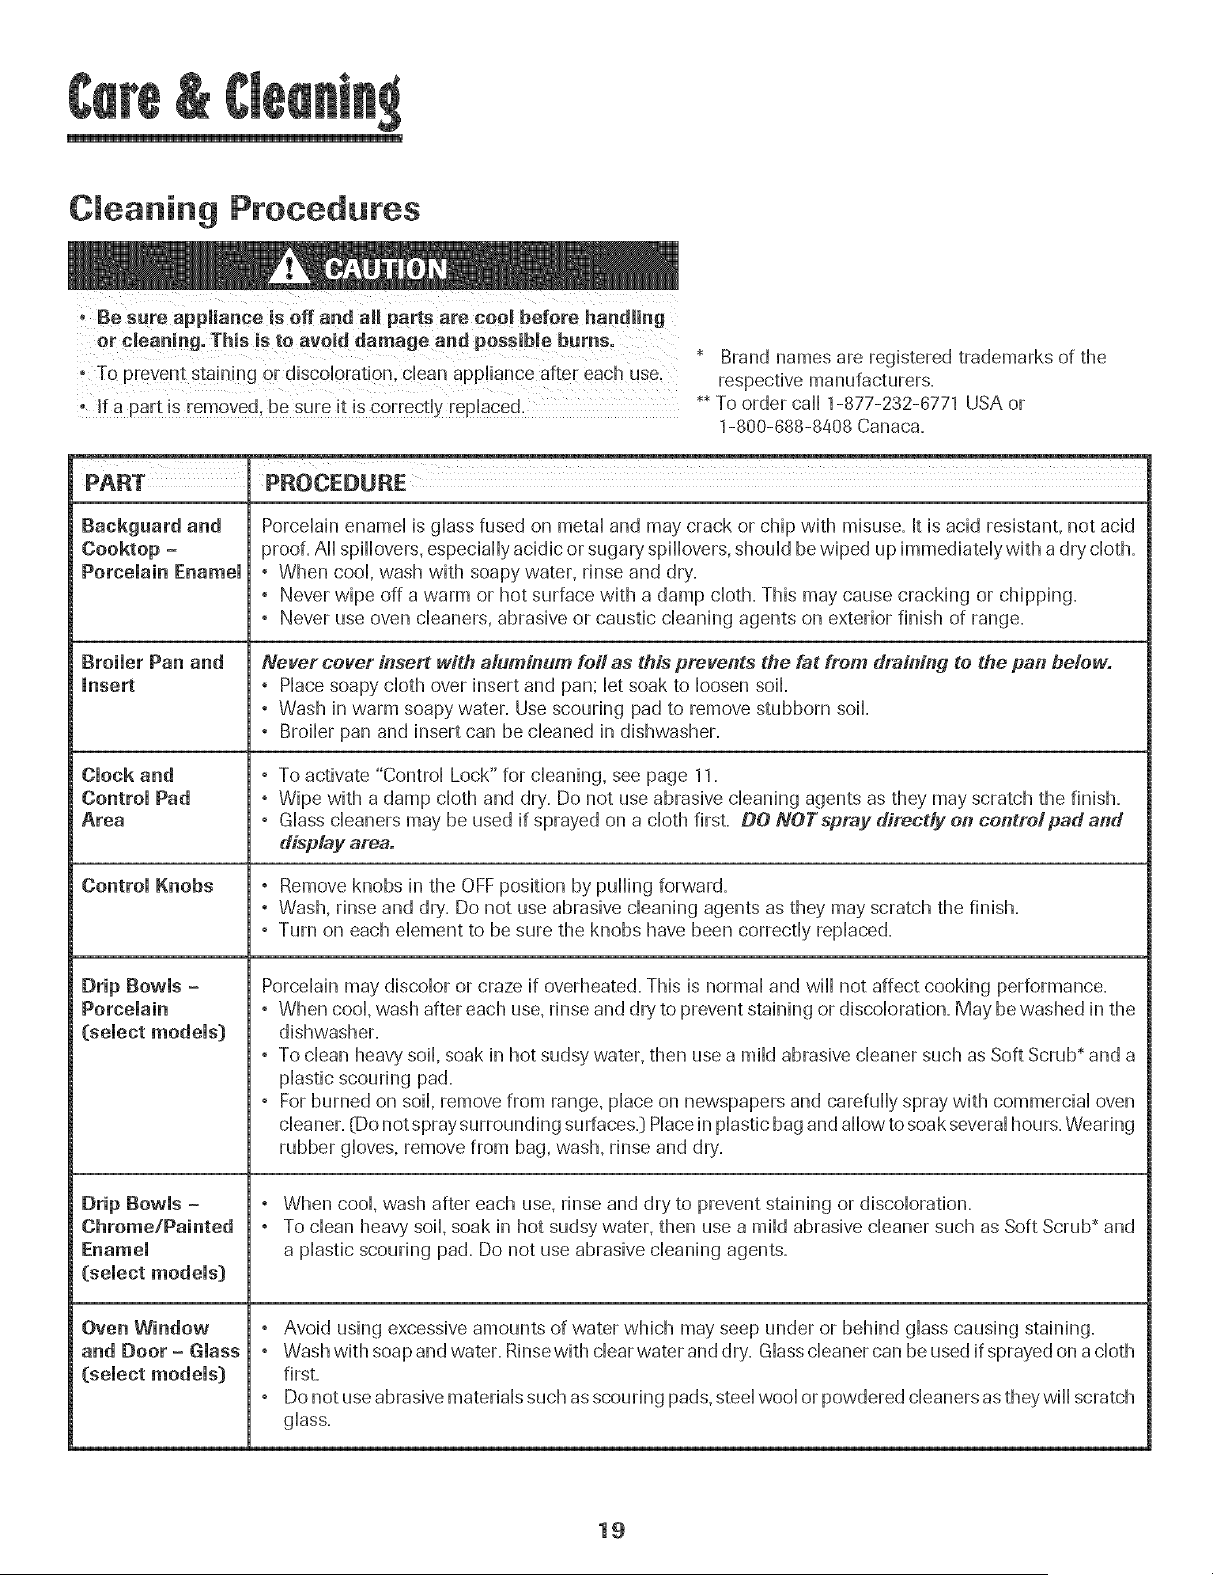
00:00 wiii appear in the display.
Press the A or V pad to set the amount of
time you want to delay the cycle. Delay time
can be set from ten minutes @0:10} to 11 hours,
59 minutes (11:59}.
eonto
* Brand names for cleaning products are registered trademarks of the respective manufacturers.
17
3. PresstheCleanpad.
, "CLEAN"wiiiflash. CLEAN
4. PresstheA orV pad. ,
, "CL-M"(MediumSoft,3hours}
isdisplayed.
5. PresstheA orV padtoscrollthroughthe
self-cleaningsettings.
CL-H"(HeavySoft,4hours}
CL-M"(Mediumsoft,3hours}
CL-L"(LightSoft,2hours}
Choosingthesoftleveloftheovenautomaticallyprograms
theself-cleaningtime.
6. Afterfourseconds,CLEAN,DELAYandLOCKwillappear
inthedisplaytoshowthattheovenissetforadelayed
cleanoperation.Thedelaytimeisdisplayed.
Jf the oven has already been set for a clean
cycle and you wish to set a delay:
1. Press the Delay pad. DELAY
, "DELAY" flashes ...........
, 00:00 will appear in the display.
2. Press the A or V pad to set the amount of
time you want to delay the cycle.
After four seconds, CLEAN, DELAY and LOCK
will appear in the display to show that the oven
is set for a delayed clean operation. The delay
time is displayed.
When the Self-Clean cycle starLs:
° "DELAY" wfl] turn off.
, The clean time will appear in the display.
To cancem the Self-Clean cycle: .................................
Press the CANCEL pad.
° All words disappear from the display. .........................................
° All functions are canceled.
° The time of day appears in the display.
During the Seff-C_ean Cycle
When LOCK shows hi the dispiay, the door cannot be opened.
To prevent damage to the door, do not force the door open
when LOCK is displayed.
Smoke and Sin!!ms
You may see some smoke and smell an odor the first few
times the oven is cleaned. This is normal and will lessen in
time.
Smoke may also occur if the oven is heavily soiled or if a
broiler pan was left in the oven.
Sounds
As the oven heats, you may hear sounds of metal parts
expanding and contracting. This is normal and will not
damage the oven.
After Seff-C_eaning
About one hour after the end of the self-clean cycle, "LOCK"
will turn off. The door can then be opened. The door can then
be opened. Move door lock lever to the left to unlock.
Some soil may leave a light gray, powdery ash. Remove
it with a damp cloth. If soft remains after wiping, that means
the clean cycle was not long enough. The soft will be re-
moved during the next clean cycle.
if oven racks were left in the oven and do not slide
smoothly after a clean cycle, wipe racks and rack supports
with a small amount of vegetable oil to make them easier to
move.
Fine lines may appear in the porcelain because it went
through heating and cooling. This is normal and wiii not
affect performance.
A white discoloration may appear after cleaning if acidic
or sugary foods were not wiped up before the self-clean
cycle. This discoloration is normal and will not affect perfor-
mance.
, If the oven door is left open, "DOOR" wiii flash in the
display and a signal will beep until the door is closed
and the Clean pad is pressed again.
, The oven door will be damaged if the oven door is
forced to open when "LOCK" is still displayed.
18
Cleaning Procedures
, Besur app a.ce a. pa , areCooMb for .an.m ng
t !f a part !s rem°ved, be sure it is correctly replaced .
Brand names are registered trademarks of the
respective manufacturers.
** To order call 1-877-232-6771 USA or
1-800-688-8408 Canaca.
PROCEDURE
Cooktop -
Porcelain Enamel
Broiler Pan and
insert
Clock and
Control Pad
Area
Control Knobs
Drip Bowls -
Porcelain
(select models}
Drip Bowls =
Chrome/Painted
Enamel
(select models}
Oven Window
and Door - Glass
(select models}
Porcelain enamel is glass fused on metal and may crack or chip with misuse. It is acid resistant, not acid
proof. All spillovers, especially acidic or sugar}, spillovers, should bewiped up immediately with a dry cloth.
, When cool, wash with soapy water, rinse and dry.
, Never wipe off a warm or hot surface with a damp cloth. This may cause cracking or chipping.
, Never use oven cleaners, abrasive or caustic cleaning agents on exterior finish of range.
Never cover insert with aluminum foil as this prevents the fat from draining to the pan below.
° Place soapy cloth over insert and pan; let soak to loosen soil=
° Wash in warm soapy water. Use scouring pad to remove stubborn soil
, Broiler pan and insert can be cleaned in dishwasher.
° To activate "Control Lock" for cleaning, see page 11.
° Wipe with a damp cloth and dry. Do not use abrasive cleaning agents as they may scratch the finish.
° Glass cleaners may be used if sprayed on a cloth first. BO NOTspray directly on controlpad and
display area.
° Remove knobs in the OFF position by pulling forward.
, Wash, rinse and dry. Do not use abrasive cleaning agents as they may scratch the finish.
, Turn on each dement to be sure the knobs have been correctly replaced.
Porcelain may discolor or craze if overheated. This is normal and wiii not affect cooking performance.
, When cool, wash after each use, rinse and dr}, to prevent staining or discoloration. May be washed in the
dishwasher.
° To clean heavy soil, soak in hot sudsy water, then use a mild abrasive cleaner such as Soft Scrub* and a
plastic scouring pad.
° For burned on soil, remove from range, place on newspapers and carefully spray with commercial oven
cleaner. {Do not spray surrounding surfaces.} Placein plastic bag and allow to soak several hours. Wearing
rubber gloves, remove from bag, wash, rinse and dr},.
, When cool, wash after each use, rinse and dry to prevent staining or discoloration.
° To clean heavy soil, soak in hot sudsy water, then use a mild abrasive cleaner such as Soft Scrub* and
a plastic scouring pad. Do not use abrasive cleaning agents.
, Avoid using excessive amounts of water which may seep under or behind glass causing staining.
° Wash with soap and water. Rinsewith clear water and dry. Glasscleaner can be used if sprayed on a cloth
first.
° Do not use abrasive materials such as scouring pads,steel wool or powdered cleaners as they wiii scratch
glass.
19
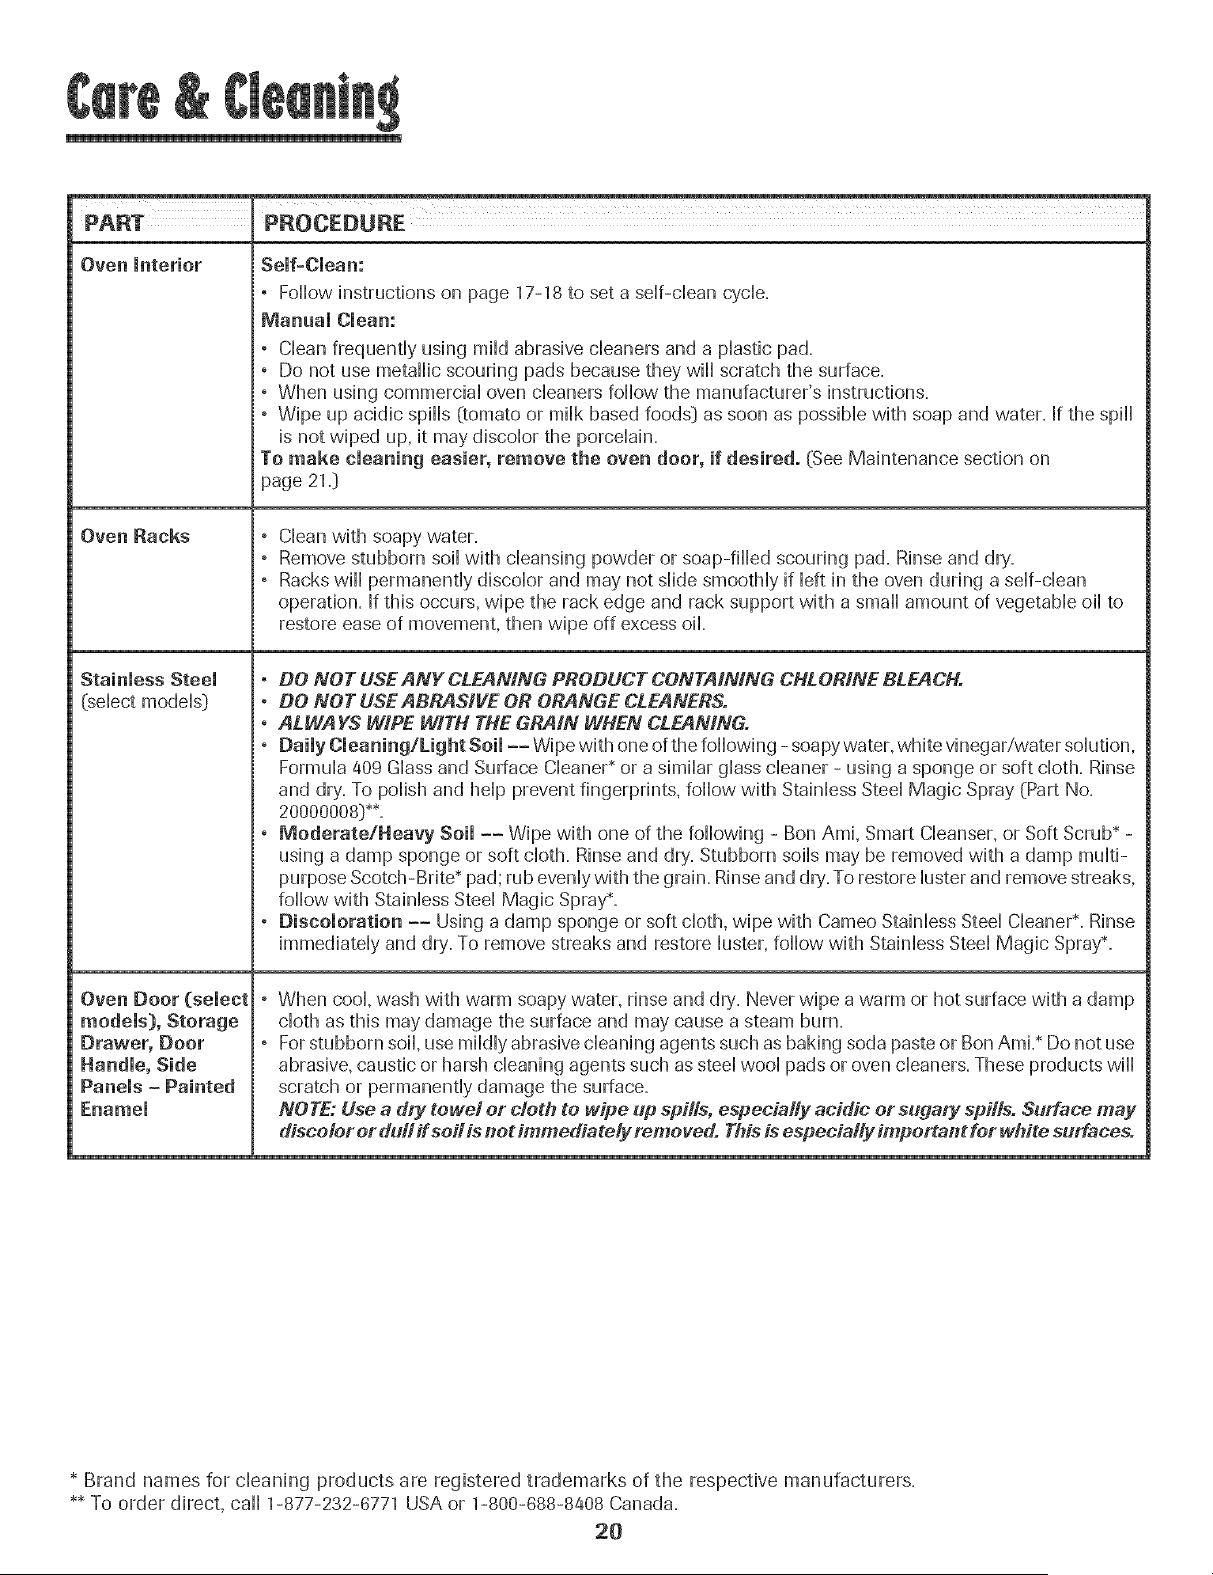
PART PROCEDURE
Oven interior Seif-Dleam
, Follow hstmctions on page 17-18 to set a self-clean cycle=
Manual Clean:
° CHeanfrequentHyusing miHdabrasive cleaners and a pHasticpad.
, Do not use metallic scouring pads because they will scratch the surface.
° When using commerciaHoven cleaners follow the manufacturer's instructions.
, Wipe up acidic spills (tomato or milk based foods:) as soon as possible with soap and water. If the spill
is not wiped up, it may discolor the porcelain.
To make cleaning easier, remove the oven door, if desired. (See Maintenance section on
page 21,_
Oven Racks , Clean with soapy water.
° Remove stubborn soil with cleansing powder or soap-filled scouring pad. Rinse and dr},.
, Racks will permanently discolor and may not slide smoothly if left in the oven during a self-clean
operation. If this occurs, wipe the rack edge and rack support with a small amount of vegetable oil to
restore ease of movement, then wipe off excess oil.
Stainless Steel ° DO NOT USE ANY CLEANING PRODUCT CONTAINING CHLORINE BLEACH.
(select modds_) ° DO NOT USE ABRASIVE OR ORANGE CLEANERS.
° ALWAYS WIPE WITH THE GRAIN WHEN CLEANING.
. Daily Cleaning/LigM Soil -- Wipe with one of the following - soapy water, white vinegar/water sohJtion,
Formula 409 Glass and Surface Cleaner* or a similar glass cleaner - using a sponge or soft cloth. Rinse
and dry. To polish and help prevent fingerprints, follow with Stainless Steel Magic Spray (Part No.
20000008)**.
° Moderate/Heavy Soil -- Wipe with one of the following -Bon Ami, Smart Cleanser, or Soft Scrub* -
using a damp sponge or soft cloth. Rinse and dry'.Stubborn soils may be removed with a damp multi-
purpose Scotch-Brite* pad; rub evenly with the grain. Rinse and dr},.To restore luster and remove streaks,
follow with Stainless Steel Magic Spray_,
, Discoloration -- Using a damp sponge or soft cloth, wipe with Cameo Stainless Steel Cleaner*. Rinse
immediately and dry,.To remove streaks and restore luster, follow with Stainless Steel Magic Spray_,
Oven Door (select , When cool, wash with warm soapy water, rinse and dry'. Never wipe a warm or hot surface with a damp
models:), Storage cloth as this may damage the surface and may cause a steam burn.
Drawer, Door ° For stubborn soil, use mildly abrasive cleaning agents such as baking soda paste or Bon AmL* Do not use
Handle, Side abrasive, caustic or harsh cleaning agents such as steel woo] pads or oven cleaners. These products wi]]
Panels - Painted scratch or permanently damage the surface.
Enamel NOTE: Use a dry towel or cloth to wipe up spills, especially acidic or sugary spills. Surface may
discolor or dull if soil is not immediately removed. This is especially important for white surfaces.
* Brand names for cleaning products are registered trademarks of the respective manufacturers.
*_ To order direct, call 1-877-232-8771 USA or 1-800-888-8408 Canada.
20
Oven Door
o Do net place excessive weight on or stand on an open
oven door. This could cause the range to tip over. break
Do not attempt to open or close door or operate oven until
door is properly replaced.
Never place fingers between hinge and front oven frame.
Hinge arms are spnng mounted. If accidentally hit. the
hinge will slam shut against oven frame and could injure
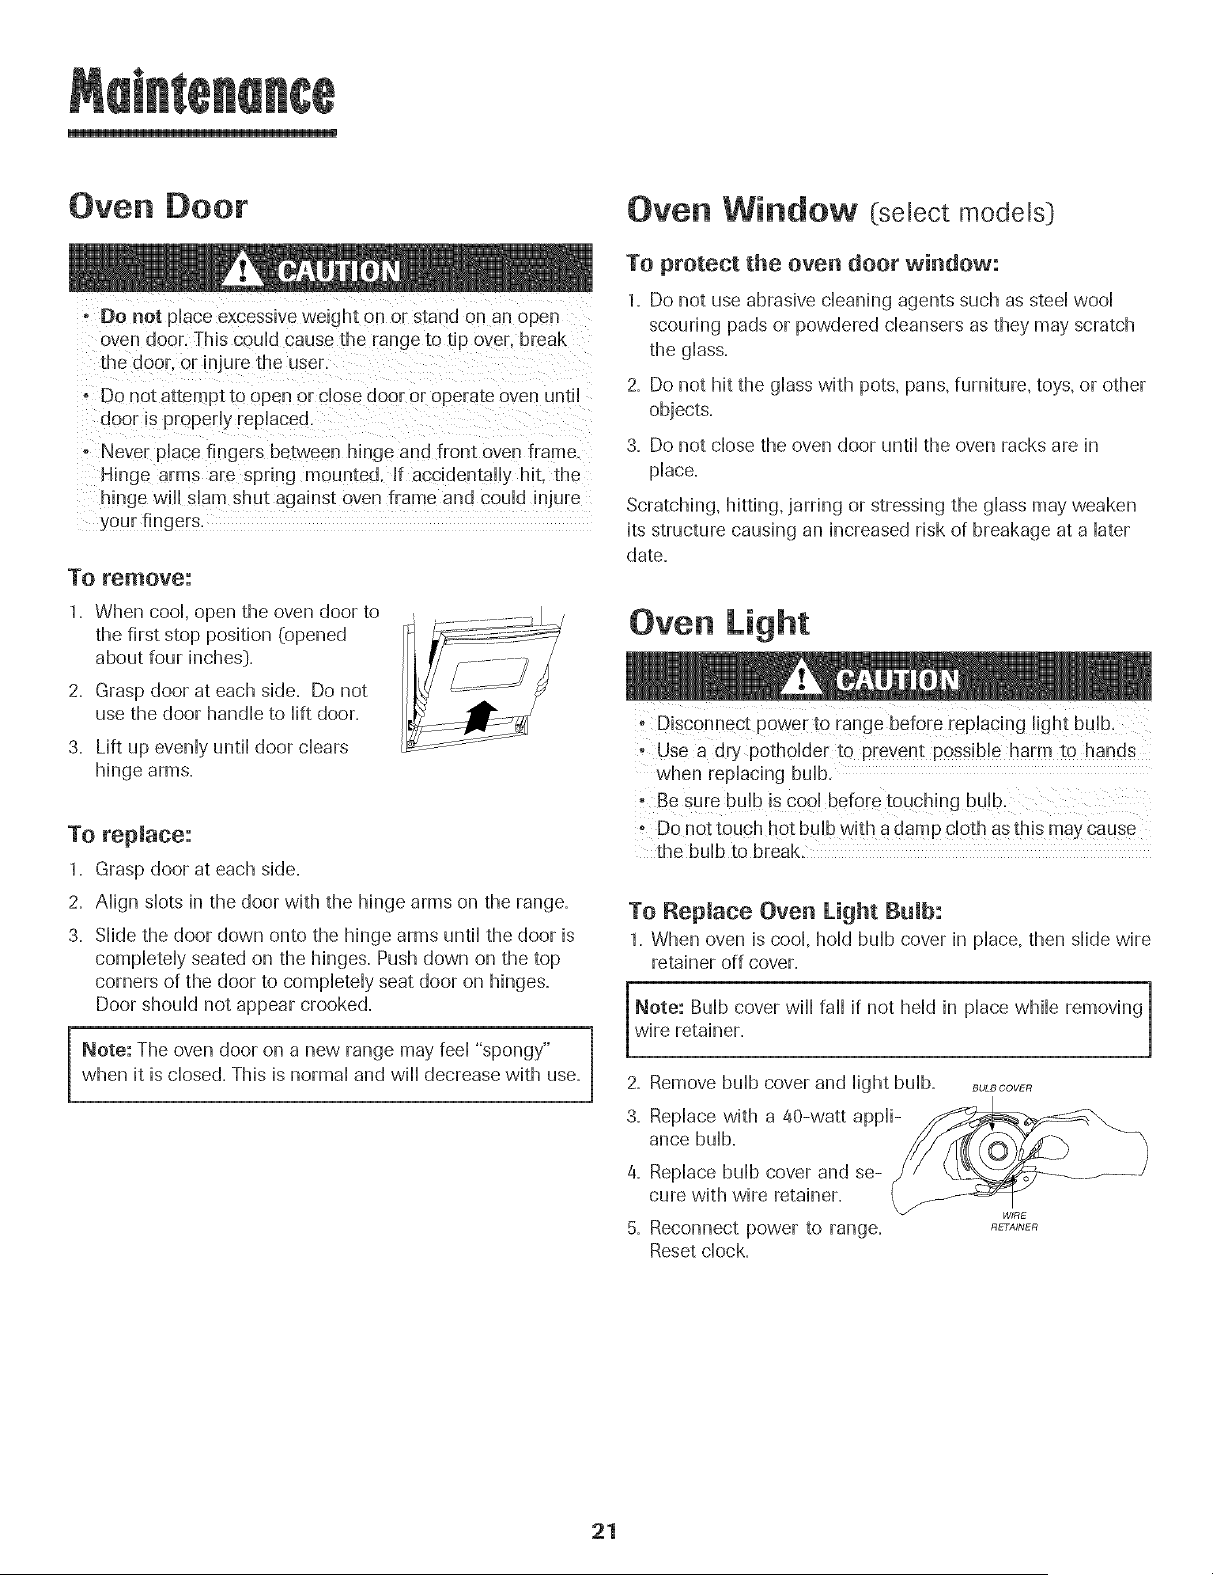
To remove:
1. When cool, open the oven door to
the first stop position (opened
about four inches}.
2. Grasp door at each side. Do not
use the door handle to lift door.
3. Lift up evenly until door clears
hinge arms.
Oven Window (select models}
To protect the oven door window:
1. Do not use abrasive cleaning agents such as steel wool
scouring pads or powdered cleansers as they may scratch
the glass.
2. Do not hit the glass with pots, pans, furniture, toys, or other
objects.
3. Do not close the oven door until the oven racks are in
place.
Scratching, hitting, jarring or stressing the glass may weaken
its structure causing an increased risk of breakage at a later
date.
i Disconnect p0wei to range be[ore replacing l!ght bu!b.
when replacing bulb,
To replace:
1. Grasp door at each side.
2. Align slots in the door with the hinge arms on the range.
3. Slide the door down onto the hinge arms until the door is
completely seated on the hinges. Push down on the top
corners of the door to completely seat door on hinges.
Door should not appear crooked.
Note: The oven door on a new range may feel "spongy"
when it is closed. This is normal and will decrease with use.
o Do not touch hot bulb with adamp cloth as this may cause
the bulb to break.
To Replace Oven Light Bulb:
1. When oven is cool, hold bulb cover in place, then slide wire
retainer off cover.
Note: Bulb cover wiii fail if not held in place while removing
wire retainer.
2. Remove bulb cover and light bulb. BuL_covER
3. Replace with a @-watt appli-
ance bulb.
4. Replace bulb cover and se-
cure with wire retainer.
5. Reconnect power to range.
Reset clock.
RETAINER
21
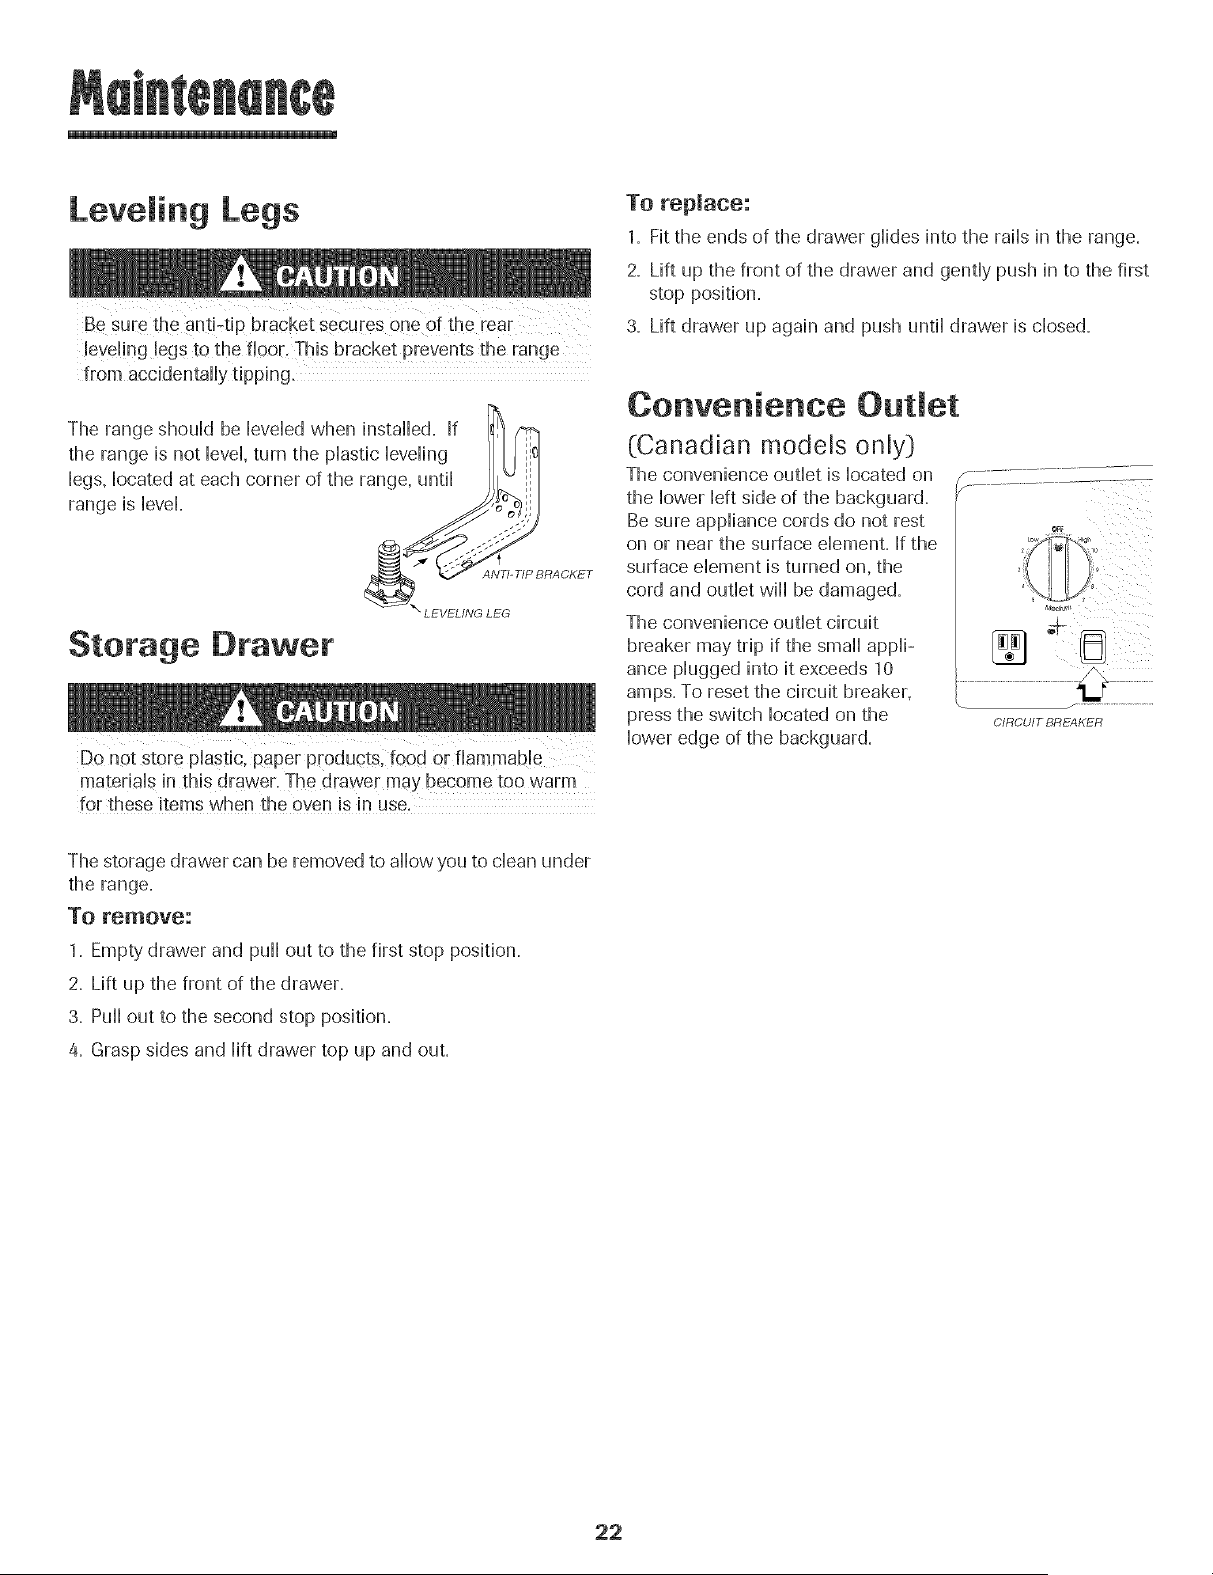
Leve ing Legs
Be suEethe ant!-tip bracket secures one of the rear
from accidentafly tipping,
Storage [}rawer
Do not store phstic, paper products, food or flammab!e
materials in this drawer. The drawer may become too warm
for these items when the oven is in use.
To replace:
1. Fit the ends of the drawer glides into the rails in the range.
2. Lift up the front of the drawer and gently push in to the first
stop position.
3. Lift drawer up again and push until drawer is closed.
Convenience Outlet
(Canadian models only}
The convenience outlet is located on
the lower left side of the backguard.
Be sure appliance cords do not rest
on or near the surface element. If the
surface element is turned on, the
cord and outlet wiii be damaged.
The convenience outlet circuit
breaker may trip if the small appli-
ance plugged into it exceeds 10
amps. To reset the circuit breaker,
press the switch located on the
lower edge of the backguard.
CIRCUIT BREAKER
The storage drawer can be removed to allow you to clean under
the range.
To remove:
1. Empty drawer and puff out to the first stop position.
2. Lift up the front of the drawer.
3. Puffout to the second stop position.
a. Grasp sides and lift drawer top up and out.
22
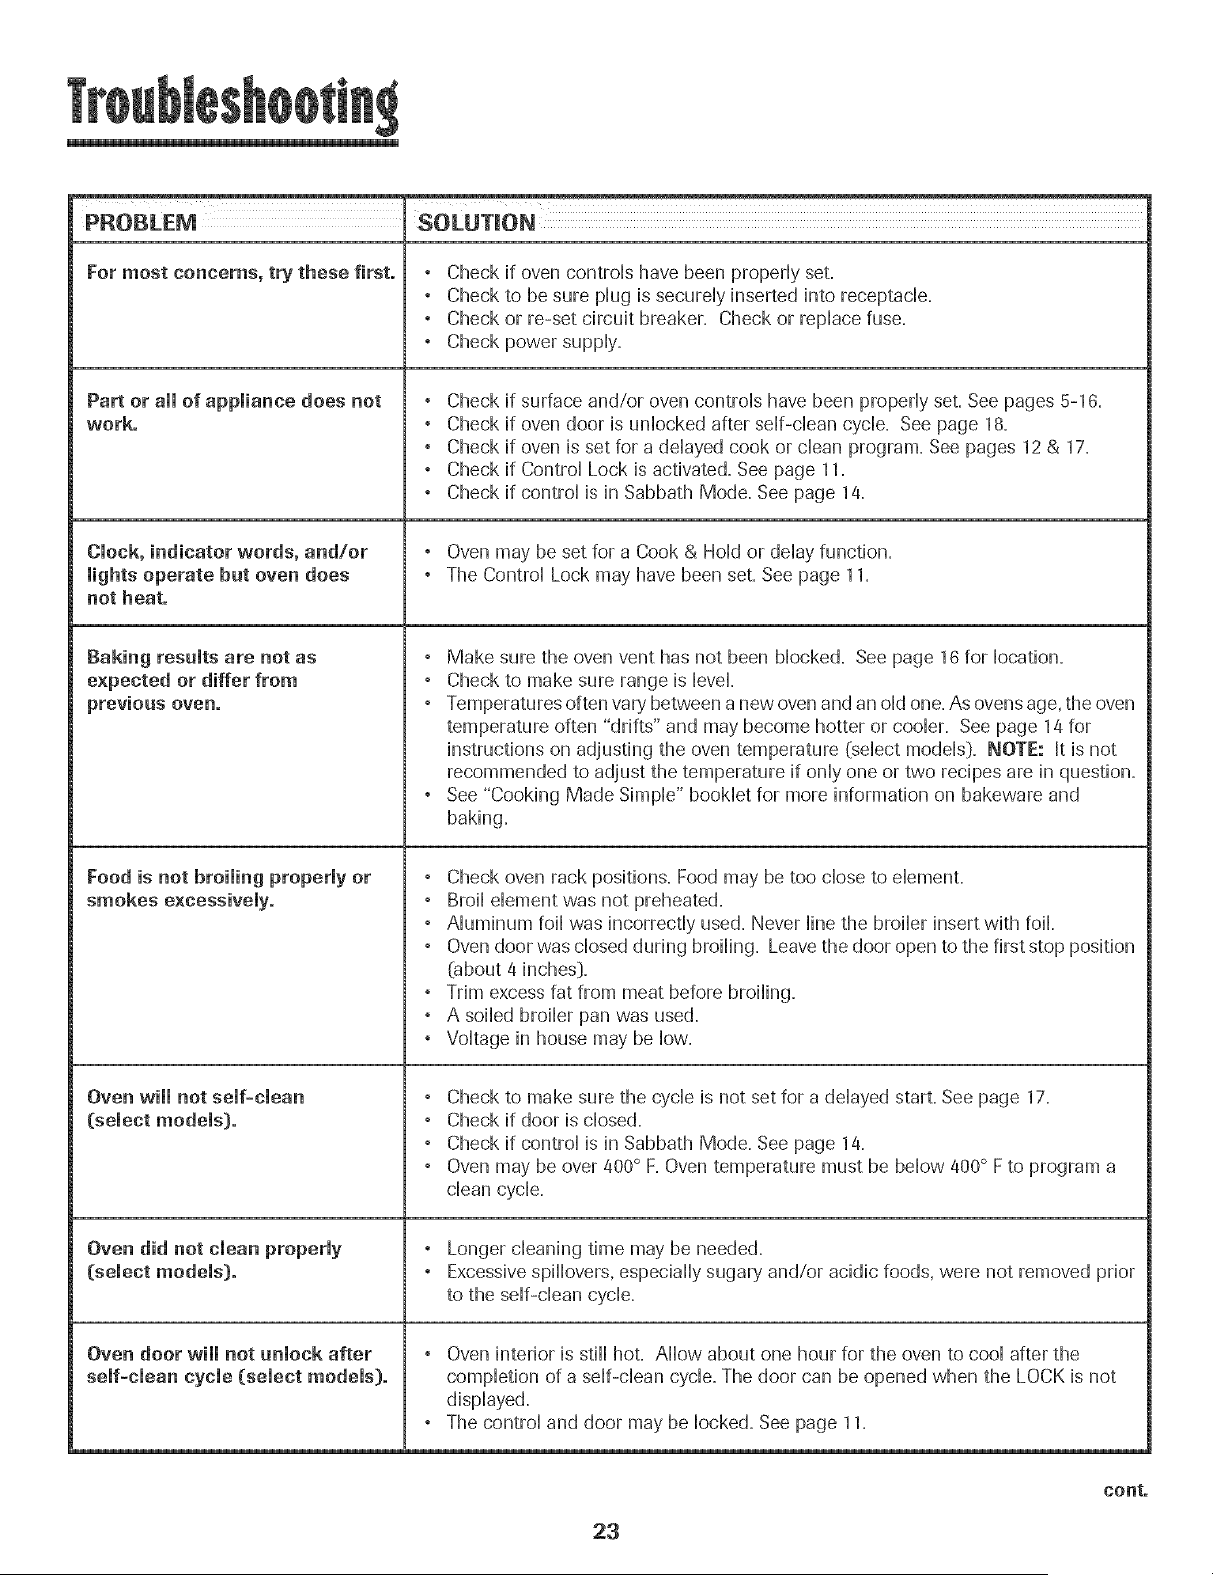
PROBLEM SOLUTION
For most concerns, try these first. , Check if oven controb have been properiy set.
° Check to be sure piug is secumiy inserted into receptacle.
° Check or re-set circuit breaker. Check or repiace fuse.
, Check power suppiy.
Part or atomof appmiance does not
work.
Clock, indicator words, and/or
lights operate but oven does
not heat.
Baking resumts are not as
expected or differ from
previous oven.
Food is not broiming properly or
smokes excessively.
Oven wimmnot semf-cmean
(select models).
Oven did not cmeanproperly
(semect modems).
Oven door will not unlock after
self-clean cycle (select models).
° Check if surface and/or oven controb have been properiy set. See pages 5-16=
° Check if oven door is unbcked after serif-dean cycb. See page 18.
° Check if oven is set for a ddayed cook or clean program. See pages 12 & 17.
° Check if Control Lock is activated=See page 11.
° Check if control is in Sabbath Mode. See page 14.
° Oven may be set for a Cook & Hold or delay function.
° The Control Lock may have been set. See page 11.
° Make sure the oven vent has not been blocked. See page 16 for location.
° Check to make sure range is level.
° Temperatures often var},'between a new oven and an old one. As ovens age, the oven
temperature often "drifts" and may become hotter or cooler. See page 14 for
instructions on adjusting the oven temperature (select models[). NOTE: It is not
recommended to adjust the temperature if only one or two recipes are in question.
° See "Cooking Made Simple" booklet for more information on bakeware and
baking.
° Check oven rack positions. Food may be too close to dement.
, Broil dement was not preheated.
° Aluminum foil was incorrectly used. Never line the broiler insert with foil.
° Oven door was closed during broiling. Leave the door open to the first stop position
@bout 4 inches}.
, Trim excess fat from meat before broiling.
° A soiled broiler pan was used.
, Voltage in house may be low.
, Check to make sure the cycle is not set for a delayed start. See page 17.
° Check if door is closed.
° Check if control is in Sabbath Mode. See page 14.
° Oven may be over 400° F.Oven temperature must be below 400° F to program a
clean cycle.
° Longer cleaning time may be needed.
° Excessivespillovers, especially sugar}, and/or acidic foods, were not removed prior
to the self-clean cycle.
, Oven interior is still hot. Allow about one hour for the oven to cool after the
completion of a self-clean cycle. The door can be opened when the LOCK is not
displayed.
° The control and door may be locked. See page 11.
23
cont.
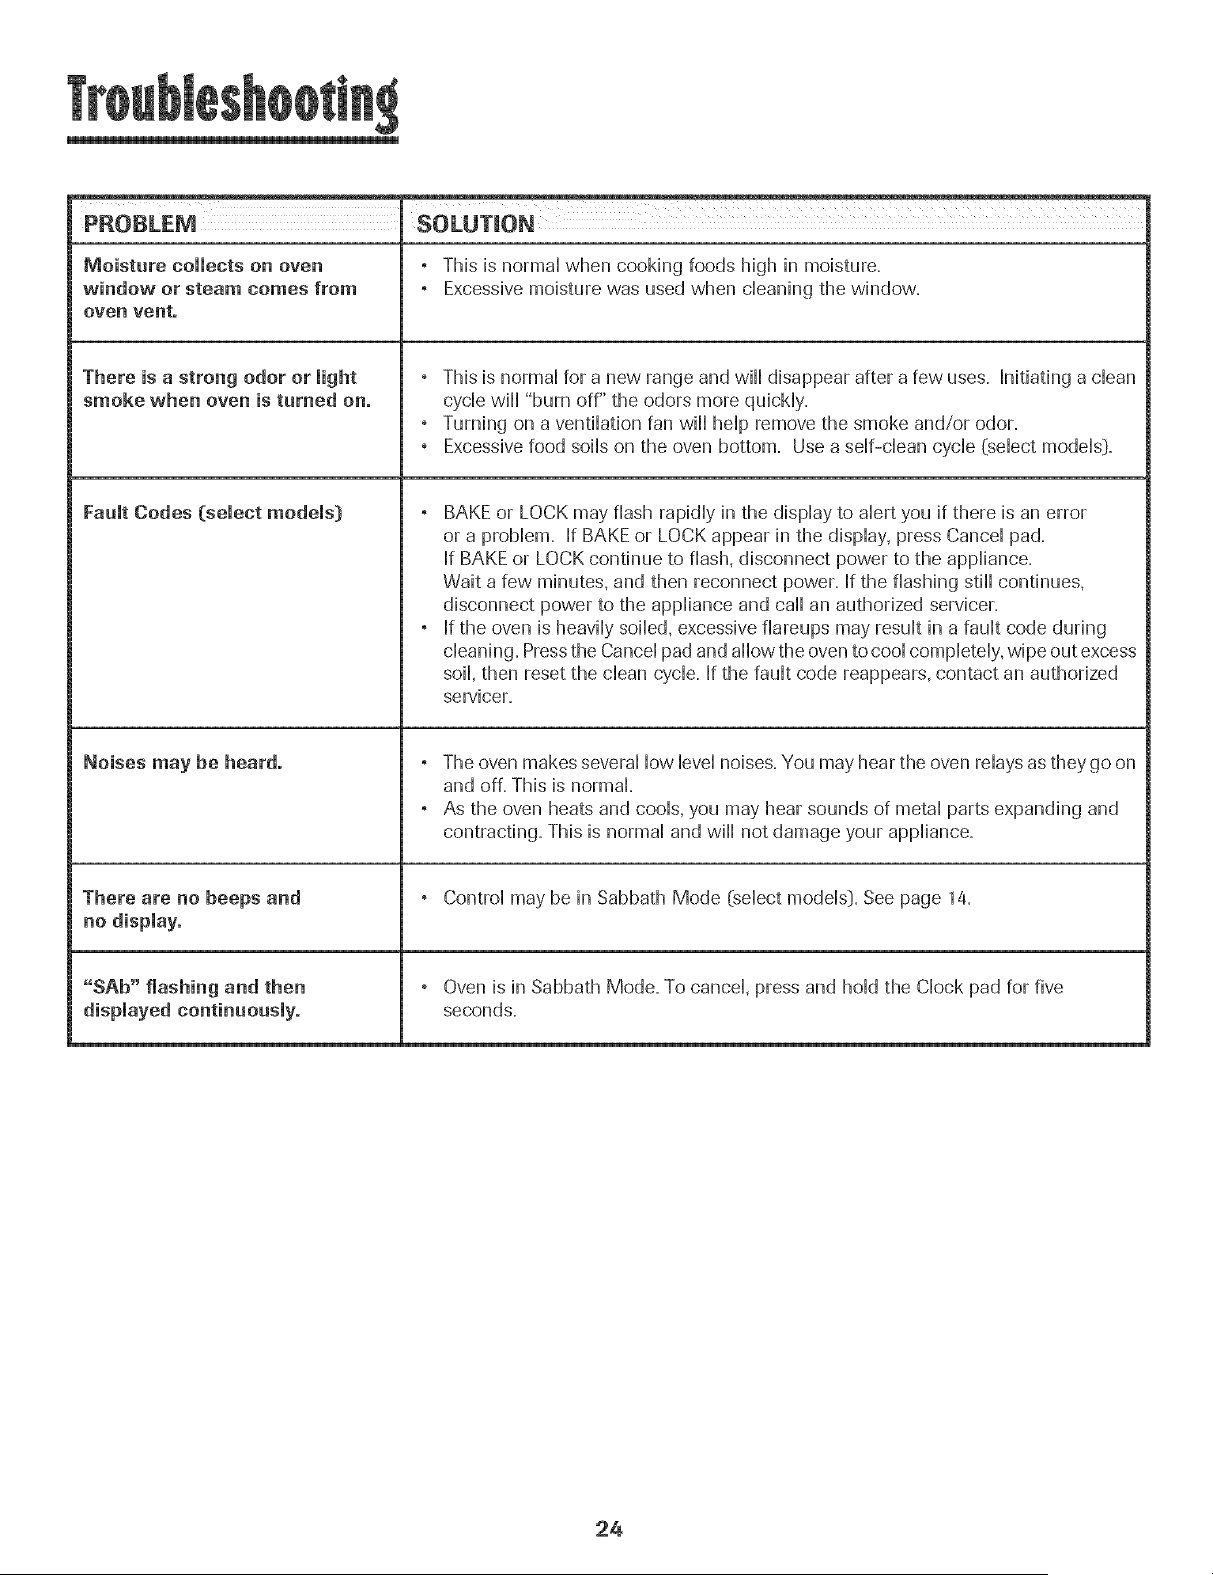
Moisture collects on oven
window or steam comes from
oven vent.
There is a strong odor or light
smoke when oven is turned on.
Fault Codes (select models)
Noises may be heard.
There are no beeps and
no dispiayo
"SAb" flashing and then
displayed continuousiyo
° This is normaHwhen cooking foods high in moisture.
° Excessive moisture was used when cHeaningthe window.
° This is normal for a new range and will disappear after a few uses. Initiating a clean
cycle will "burn off" the odors more quickly.
° Turning on a ventilation fan will help remove the smoke and/or odor.
° Excessive food soils on the oven bottom. Use a self-clean cycle (select models:).
° BAKE or LOCK may flash rapidly in the display to alert you if there is an error
or a problem. If BAKE or LOCK appear in the display, press Cancel pad.
If BAKE or LOCK continue to flash, disconnect power to the appliance.
Wait a few minutes, and then reconnect power. If the flashing still continues,
disconnect power to the appliance and call an authorized servicer.
° If the oven is heavily soiled, excessive fiareups may result in a fault code during
cleaning. Pressthe Cancel pad and allow the oven to cool completely, wipe out excess
soil, then reset the clean cycle. If the fault code reappears, contact an authorized
servicer.
° The oven makes several low level noises. You may hear the oven relays as they go on
and off. This is normal.
° As the oven heats and cools, you may hear sounds of metal parts expanding and
contracting. This is normal and will not damage your appliance.
° Control may be in Sabbath Mode (select models:).See page 14.
° Oven is in Sabbath Mode. To cancel, press and hold the Clock pad for five
seconds.
24
Fuji One Year Warranty =
Parts and Labor
For erie (1} year from the original
retail purchase date. any part which
hils in normal home use wHUbe
repaired or repBced free of charge.
Canadian Residents
The above warranties only cover an
appliance installed in Canada that has
been certified or listed by ap propriate
test agencies for compliance to a
National Standard of Canada unless
the appliance was brought into
Canada due to transter of residence
from the Upited States to Canada.
Limited Warranty Outside the
United States and Canada -
Parts Only
For one (1} yea from the date of
original retai purchase, any part which
fails in normal home use will be
repaired or rephced free of charge fo[
the part itself, with the owner paying
aii other costs, including labor, mib-
age, transportation, trip charge and
diagnostic chart ge, if required.
The @edfb warranties expressed
above are the ONLY warranties
prodded by me manutacturef: These
wa#antles give you specific legal tights.
and you may also have other rights
which vary fi'om state to state.
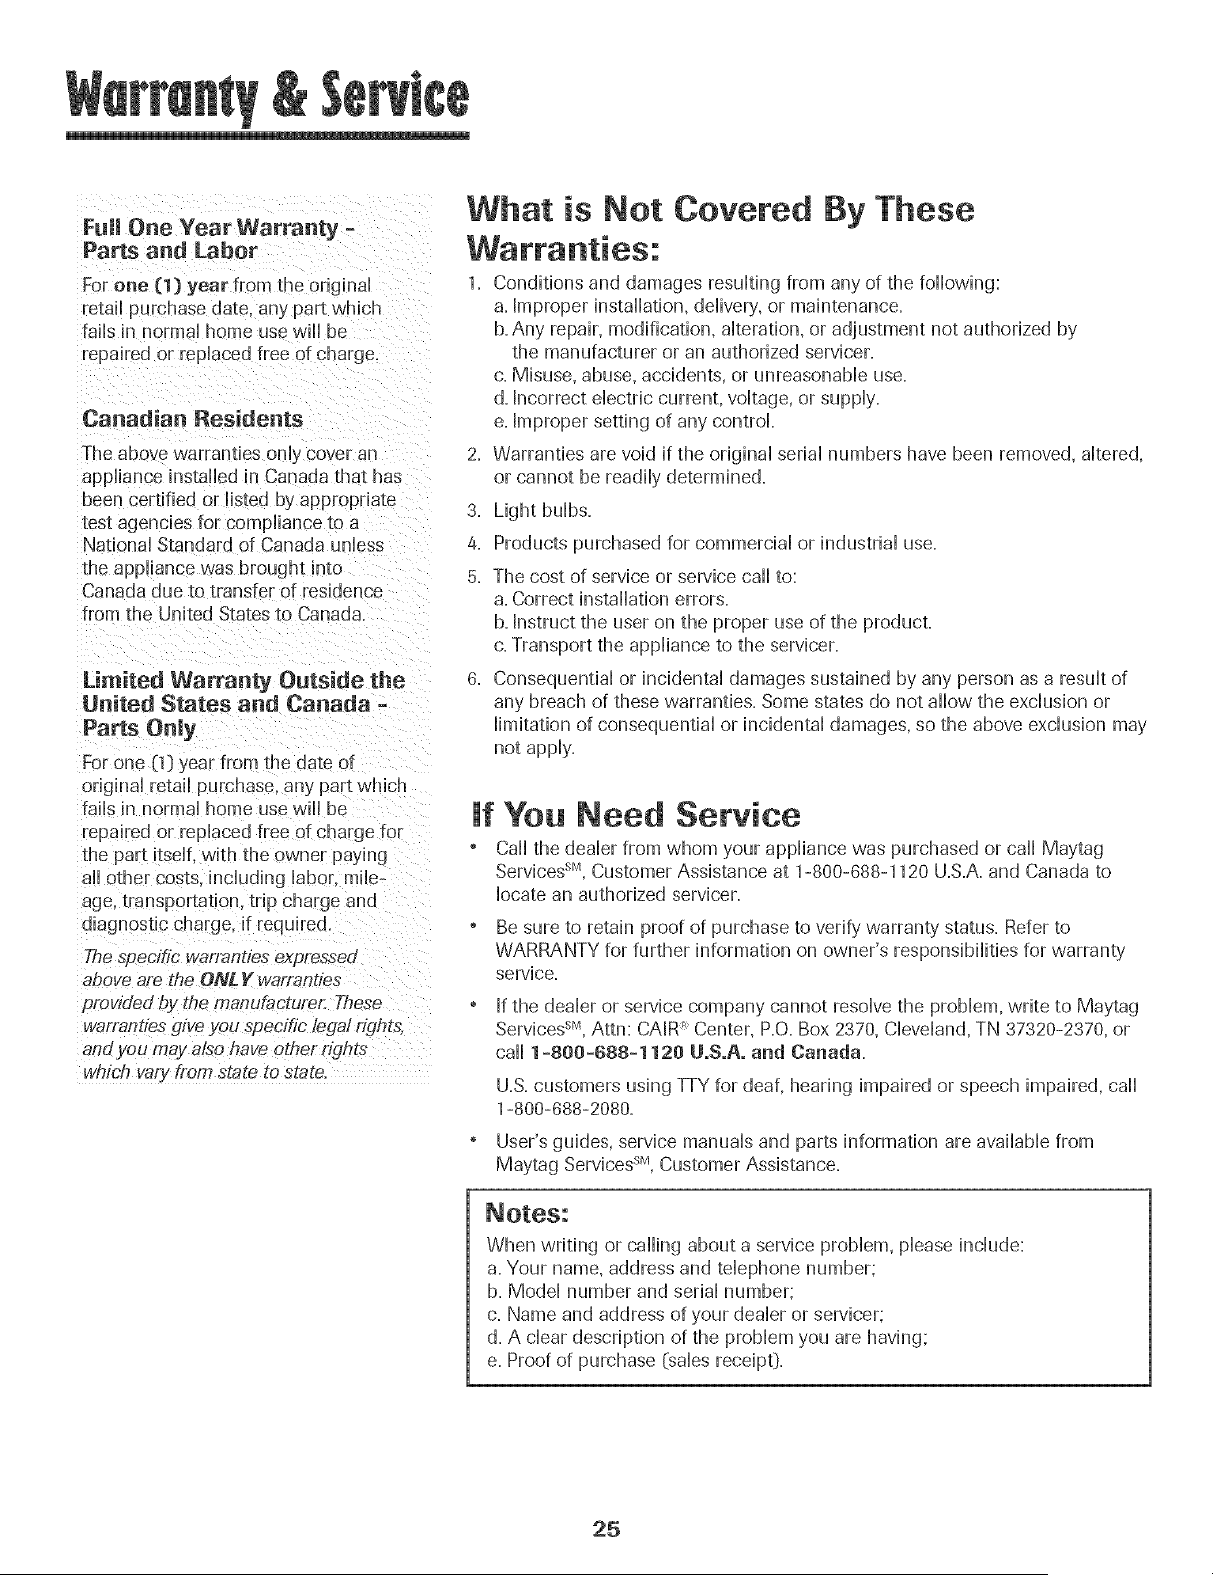
What is Not Covered By These
1. Conditions and damages resulting from any of the following:
a. Improper installation, delivery, or maintenance.
b. Any repair, modification, alteration, or adjustment not authorized by
the manufacturer or an authorized servicer.
c. Misuse, abuse, accidents, or unreasonable use.
d. Incorrect electric current, voltage, or supply.
e. Improper setting of any control
2. Warranties are void if the original serial numbers have been removed, altered,
or cannot be readily determined.
3. Light bulbs.
4. Products purchased for commercial or industrial use.
5. The cost of service or service caii to:
a. Correct installation errors.
b. Instruct the user on the proper use of the product.
c. Transport the appliance to the servicer.
6. Consequential or incidental damages sustained by any person as a result of
any breach of these warranties. Some states do not allow the exclusion or
limitation of consequential or incidental damages, so the above exclusion may
not apply.
If You Need Service
® Call the dealer from whom your appliance was purchased or call Maytag
Services sM,Customer Assistance at 1-800-688-1120 U.S.A. and Canada to
locate an authorized servicer.
® Be sure to retain proof of purchase to verify warrant}/' status. Refer to
WARRANTY for further information on owner's responsibilities for warranty
service.
o If the dealer or service company cannot resolve the problem, write to Maytag
Services sM,Attn: CAIR _ Center, P.O. Box 2370, Cleveland, TN 37320-2370, or
call 1 =800=688=1120 UoSoAoand Canada.
U.S.customers using TTY for deaf, hearing impaired or speech impaired, caii
1-800-688-2080.
User's guides, service manuals and parts information are available from
Maytag Servicess_a,Customer Assistance.
When writing or calling about a service problem, please include:
a. Your name, address and telephone number;
b. Model number and serial number;
c. Name and address of your dealer or servicer;
d. A clear description of the problem you are having;
e. Proof of purchase {sales receipt}.
25
Cuisini_re _|ectrique
en _|6_ents spira|_s
sut masurface ............. 31-32
Nettoyage ...................................44-47
Four autonettoyant
M6thodes de nettoyage
Entretien ...................................... 48-49
Hublot du four
Lampe du four
Recherche des paaaes ............ 50-51
Garaatie et service apres-veate ... 43
Guia dem Usuario ............................... 54
M nuterie Maintien au chaud
Cuisson courante Gril
Cuisson et maintien Grilles du four
Jnstallateur: Laissezce guideavecI'appareiJ.
Censemmateur : VeuiHezlire Jeguide et le conserverpour
consu_[ationulterieure.Conservez_afactured'achat oule cheque
enca_ssecommepreuvede I'acha[
Num6rode modeLe
Num6rode s6rJe
Dated'acha[
Pour toute question, contacter Maytag a:
1-800-688-1120 (E,-U. et Canada;.
(Lundi - vendredi. 8 h - 20 h - heure de R'Est)
DonsLecadrede nosprat_quesd'am61iorationconstantede ia
quaiit6 et de la performanceue nos produitsde cuisson des
modificationsde J'appareilqul nesont pas mentionndesdonsce
guide ont pu 6tre Jntroduites,
Repertez=veus _ la page z_3pout plus d'iufermations
ceneemaut te se_dee apt_s-venteo
Les instructions de secur[te [mportantes et [es paragraphes
<<avertissement >>de ce guide ne sont pas destines a couvrir
toutes los conditions et situations qui pourraient se presenter,
II faut loire preuve de bon sons, de prudence et de soin Iors de
I'installation, de I'entretien ou du fonctionnement de I'appareil,
Toujours prendre contact avec le fabricant dons le cos de
problemes ou de conditions qui ne seraient pas comprises,
Reconnoitre Jes 6tiquettes, paragraphes
et symboJes sur Ja s6curit6
mort.
ATTENTION .- Dange[s ou pratiques dangereuses qui
POURR,AtENTresulter en des Nessures mineures.
Lire toutes ies instroctions avant d'utiliser cot appareii;
observer toutes los instructions pour eliminer los risques
d'incendie, choc electrique, dommages materiels et corporels
que pourrait susciter une utilisation incorrecte de [appare&
Utiliser I'appareil uniquement pour los fonctions prevues,
decrites dons ce guide,
Pour une utilisation ad6quate et en s6curit6, il faut que
I'appareil soit convenaNement installe par un technicien
qudifie, et relic a la terre,
Ne pas regler, rearer ni remplacer un composant, a moins
que cola ne soit specifiquement recommande dons ce guide,
Toute autre reparation doit etre effectuee par un technicien
Toujours debrancher ['apparei[ avant d'y faire de ['entretien,
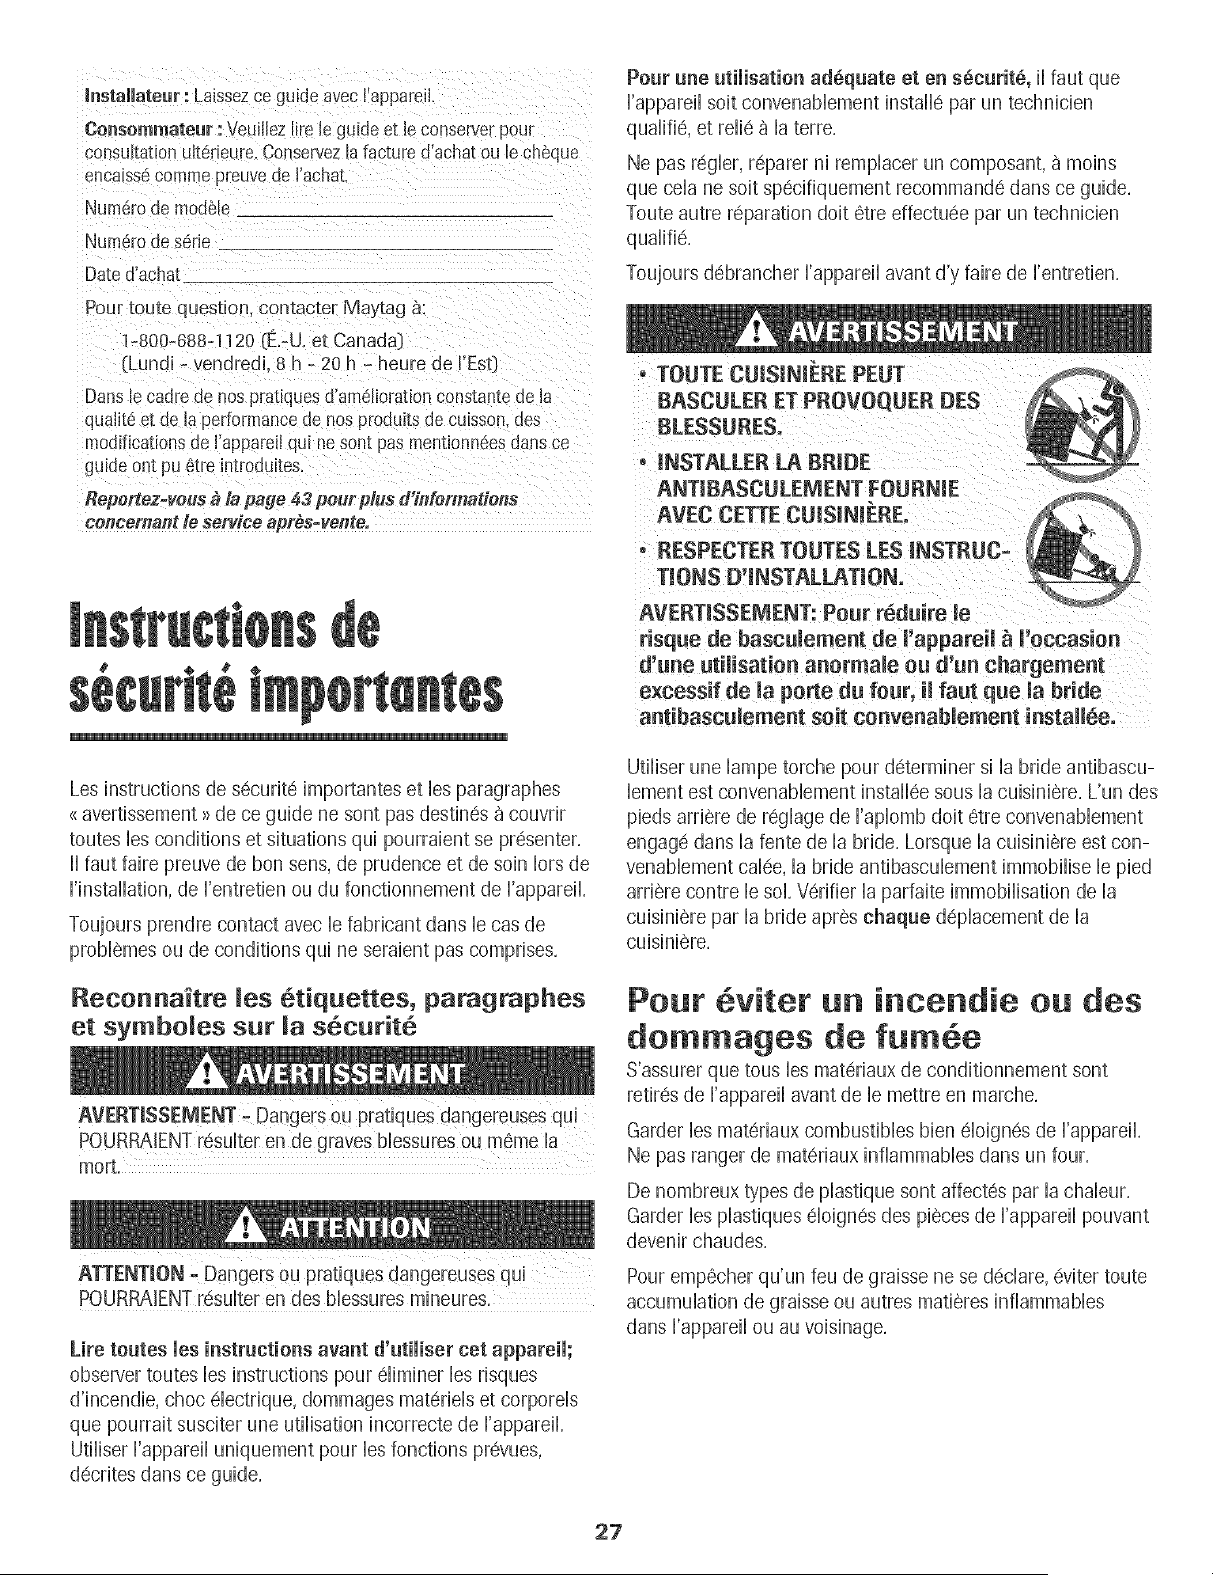
8ASCULER ET PROVOQUER DES
. NSTALLERBRIDE
ANTJBASCULENENT FOURNIE
RESPECTER TO[
risque de bascumement de I!appareil _ l,occasion
d'une utilisation aaormale ou d'un chargement
excessif de maporte du four, H faut que Ja bride
antibascumement soit convenablemeat iastaH_eo
Utiliser une lampe torche pour determiner sila bride antibascu-
lement est convenaNement instdlee sous la cuisiniere, L'un des
pieds arriere de reglage de Faplomb doit etre convenaNement
engage dons la lento de la bride, Lorsque la cuisiniere est con-
venaNement calee, la bride antibasculement immoNise le pied
arriere contre le sol, Verifier la parfaite immoNisation de la
cuisiniere par la bride apres chaque d@hcement de la
culsmlere,
Pour viter un incendie ou des
dommages de fum6e
S'assurer que tous los materiaux de conditionnement sont
retires de [appareil avant de le mettre en marche,
Garder los materiaux combustibles bien eloignes de Fappare&
Ne pas ranger de materiaux inflammables dons un four,
De nombreux types de plastique sont affectes par la chdeur,
Garder los plastiques eloignes des pieces de I'appareil pouvant
devenir chaudes,
Pour empecher qu'un feu de graisse nese declare, eviter toute
accumulation de graisse ou autres matieres inflammables
dons Fappareil ou au voisinage,
27
En cas d'incendie
Ne jamais utfliser d'eau pour 6teindre de la graisse
enflammee. Utfliser du bicarbonate de soude ou un extincteur
poudre chimique ou a mousse pour etouffer les flammes.
1. Interrompre I'alimentation 61ectrique de Fapparefl pour
minimiser la propagation des flammes.
2. NE JAB/JAmSsaisir ou d@lacer un ustensfle de cuisine
enflamme.
3. Fermer la porte du four pour 6touffer les flammes du four.
S6cutit pour les enfants
parefl des articles auxquds Jesenfants peuvent s'int@essen
pour atte[ndre un objet, pourrait se blesser gravement.
NE JAMAIS laisser des enfants seuls ou sans supervision
Iorsque I'apparefl est en service ou encore chaud, Ne jamais
laisser un enfant s'asseoir ou se tenir sur une partie qudconque
de Fappareil, II pourrait se blesser ou se br01er,
II est important d'enseigner aux enfants que Fapparefl et les
ustensfles places dedans peuvent 6tre chauds, Laisser refroidir
les ustensfles en un lieu s0r, hors d'atteinte des enfants, II est
important d'enseigner aux enfants qu'un apparefl mdnager n'est
pas un jouet, et qu'fls ne doivent toucher aucune commande ou
autre composant de Fapparefl,
Familiarisation avec l'appareil
NE JAMAJS uti!iser un apparei! cemme escabeau pour
atteindre les armoires se trouvant au-dessus, Le mauvais
empl0i de porte d apparei! comme par exemp!e en tant
qu'escabeau, le fait de s'appuyer ou de s'asseoir surJa POrte,
peuvent entra!ner !e renversement de I'appare!!, casser Ja
porte et gravement blesser.
Ne pas utiliser cet appareil pour chauffer ou pour garder
chaude une piece, sinon des dommages a i'appareii pourraient
s'ensuivre et cela pourrait 6tre dangereux pour I'utilisateur.
Aussi, ne pas utiiiser ie four pour ranger des aliments ou des
ustensiles de cuisine.
Ne pas bloquer ou obstruer 1'6ventdu four.
NE JAMAIS TOUCHER LES ELEMENTSCHAUFFANTSNI LES
PAROISINTERIEURESDU FOUR,Les eldments chauffants
peuvent 6tre brQlants meme s'ils ne sont plus rouges. Les
surfaces intdrieures du four peuvent atteindre une temperature
suffisamment dlevee pour infliger des br01ures. Pendant et
apres usage, ne pas toucher les elements chauffants ni les
parois intdrieures du four et 6viter leur contact avec des
vetements ou autres matdriaux inflammables avant qu'fls
n'aient eu le temps de refroidir suffisamment. D'autres surfaces
peuvent egdement atteindre une temperature suffisamment
6levee pour bn31er:le ouverture d'dvent et le surface
avoisinante, ainsi que le porte et le hublot de four.
Ne pas toucher Fampoule du four bn31anteavec un chiffon
humide car elle pourrait se briser. Si tel est le cas, debrancher
Fapparefl avant de retirer Fampoule pour eviter une decharge
electrique.
NE JAI_AIS gamir la sole du four ou une grille du four avec
de la feuflle d'duminium. Ceci pourrait susciter un risque de
decharge electrique ou d'incendie, ou une deterioration de
Fapparefl. Utfliser de la feuflle d'duminium uniquement selon
les instructions de ce guide.
Cuisson et s6cutit6
NE JAMAIS faire chauffer un recipient non ouvert dans le
four, L'accumuiation de pression dans ie recipient pourrait
provoquer son eclatement et de graves dommages matdriels
ou corporeis,
Utiliser des maniques robustes et seches, Des maniques
humides peuvent provoquer ia formation de vapeur brQiante,
Ne jamais utiliser un torchon a vaisselle ou autre article textile
la place de maniques; un tel article pourrait trainer sur un
element et s'enflammer, ou accrocher un ustensile ou un
composant de i'appareii,
Porter un vetement approprid, @iter de porter des vetements
amples ou a Iongues manches pendant I'utilisation de
I'appareil, lls peuvent prendre feu si le vetement entre en
contact avec un el6ment de cuisson brQlant,
Placer toujours les grilles a la position appropriee dans le four
Iorsque le four est froid. Faire coulisser la grille vers Fextdrieur
avant d'ajouter ou enlever un plat; utfliser pour cela une
manique robuste et seche. @iter d'introduire la main darts le
four pour y placer ou retirer un plat. S'fl est necessaire de
deplacer une grille Iorsqu'elle est chaude, utfliser une manique
seche. Ne pas toucher un element chaud avec une manique.
N'utfliser les grilles que darts le four darts lequel elles ont dte
achetees/expediees.
28
Ouvrir toujours la porte du four tres prudemment. Laisser Fair
chaud ou la vapeur s'echapper avant de retirer ou d'introduire
un plat.
AVERTISSEMENT - METS PREPARES : Respecter les
instructions du fabricant. Si le contenant ou le couvercle en
plastique d'un mets surgele se ddorme ou est endommage
durant la cuisson, jeter immediatement le recipient et son
contenu. Les aliments pourraient etre contamines.
Ne pas permettre le contact de papier d'aluminium ou de la
sonde a viande avec les elements chauffants.
Toujours eteindre toutes les commandes une lois la cuisson
terminee.
Ustensiles et s cutit
Appliquer les instructions du fabricant Iors de Femploi d'un
sachet pour cuisson au four.
La securite de fonctionnement de cet appareil a ere testee
I'aide d'ustensiles de cuisine traditionnels. Ne pas utiliser un
ustensile ou accessoire qui n'est pas specifiquement
recommande darts ce guide. Ne pas utiliser de couvre-
element, gril place sur la table de cuisson ou systeme de
convection additionnel. L'utilisation d'un dispositif ou
accessoire qui n'est pas expressement recommande darts ce
guide peut degrader la securite de [appareil ou sa perfor-
mance, ou reduire la Iongevite des composants.
Si un ustensile est plus petit que I'element utilise, une partie
de I'element chauffant est exposee et peut provoquer
I'infiammation d'un vetement ou des maniques.
Seuls certains materiaux en verre, vitroceramique, ceramique,
gres, ou certains ustensiles vitrifies/emailles peuvent etre
utilises sur la table de cuisson ou darts le four sans risque de
bris sous I'effet du choc thermique. Observer les instructions
du fabricant Iors de I'utilisation d'un ustensile en verre.
Orienter la poignee de chaque ustensile vers le centre de la
table de cuisson et non vers I'exterieur ou vers un autre
element; ceci reduira le risque de brOlure, inflammation de
matiere inflammable ou renversement Curtjeune enfant
pourrait saisir et renverser un ustensile dont le manche est
oriente vers I'exterieuO.
Veiller a utiliser un ustensile de taille suffisante pour que le
contenu ne risque pas de deborder. Ceci est particulierement
important pour un ustensile rempli d'huile de friture. Verifier
que la taille de I'ustensile est suffisante pour qu'il puisse
recevoir les produits alimentaires a cuire, et absorber
I'augmentation de volume suscitee par I'ebullition de la
graisse.
Veiller a ne jamais laisser le contenu liquide d'un ustensile
s'evaporer completement; I'ustensile et [appareil pourraient
subir des dommages,
Table de cuisson
NE JAMAIS laisser un element de surface allume sans
surveillance, particulierement avec chauffage eleve. Le
debordement du contenu de I'ustensile pourrait provoquer la
generation de fumee abondante et [inflammation de la
graisse.
Cet appareil comporte des elements chauffants de differentes
tailles. Utiliser toujours un ustensile a fond plat, de taille
suffisante pour qu'il puisse recouvrir completement I'element.
Pour optimiser I'efficacite, choisir un ustensile de meme taille
que I'element.
1
Elements spirales
Pour eviter de deteriorer les elements chauffants amovibles, ne
pas les immerger / tremper / nettoyer darts un hve-vaisselle,
ou darts un four autonettoyant. Un element chauffant
endommage pourrait provoquer un court-circuit suscitant un
incendie ou un choc electrique.
Veiller ace que la cuvette de recuperation soit toujours en
place Iors de I'utilisation de I'element; I'absence de la cuvette
de recuperation Iors d'une cuisson peut faire subir des
dommages au cQbhge.
Garnitures de protection : Ne pas garnir les cuvettes de
recuperation sous les elements ou le fond du four avec de la
feuille d'duminium, saul Iorsque ceci est suggere darts le
guide. La mise en place d'un tel garnissage peut susciter un
risque de choc electrique ou d'incendie.
Exercer une prudence extreme Iors du deplacement du
recipient de graisse ou Iors de I'elimination de graisse chaude.
Laisser la graisse refroidir avant de deplacer [ustensile.
Hottes d'e×traction
Nettoyer frequemment les filtres et la hotte de la cuisiniere
pour empecher la graisse ou d'autres produits inflammables
de s'accumuler sur les filtres ou la hotte en provoquant des
feux de graisse.
Pour fiamber des aliments sous la hotte, mettre le ventilateur
en marche.
29
Nettoyage et securit
Nettoyer prudemment la table de cuisson, Arreter routes les
commandes et attendre le refroidissement de tousles
composants avant de les toucher ou d'entreprendre le
nettoyage, Nettoyer I'appareil avec precaution, Travailler
prudemment pour eviter des brQlures par la vapeur en cas
d'utilisation d'un chiffon ou d'une eponge humide lots de
I'elimination d'un produit renverse sur une surface chaude,
Certains produits de nettoyage peuvent generer des vapeurs
nocives Iorsqu'on les applique sur une surface chaude,
Nettoyer uniquement les pieces mentionnees darts ce guide,
Four autenetteyant
(certains modeles)
16chefrite dans le four lots de I'autonettoyage,
Ne pas nettoyer le joint de porte; le joint joue un r01eessentiel
quanta I'etancheite, Ne pas frotter, endommager ou deplacer
le joint,
Ne pas utiliser de produits de nettoyage pour four ou enduits
de four, darts le four autonettoyant ou sur les zones voisines,
Avant d'executer une operation d'autonettoyage, retirer la
lechefrite, les grilles du four et les autres ustensiles, et eliminer
par essuyage tout exces de residus renverses pour eviter la
formation de fumee ou I'infiammation de ces residus,
II est normal que la surface de cuisson devienne chaude
durant une operation d'autonettoyage; par consequent, eviter
de toucher la surface de cuisson durant I'autonettoyage,
Avertissement et avis
important pour la s6curit6
La Ioi cdifomienne _Safe Drinking Water and Toxic Enforce-
ment Act >>de 1986 Cproposition 65:)stipule la publication par
le gouvemeur de la Californie d'une liste de substances que
I'etat de Californie considere comme cancerigenes ou
dangereuses pour le systeme reproducteur, et impose aux
entreprises commercides Fobligation de signaler aleurs
clients les risques d'exposition a de telles substances,
Nous informons les utilisateurs de cet appareil que lots d'une
operation d'autonettoyage, ils peuvent etre exposes a une
faible concentration de certaines substances figurant darts la
liste mentionnee ci-dessus, dont le monoxyde de carbone,
Pour minimiser [exposition, veiller a ce que la piece o_ se
trouve le four soit convenablement aeree durant une operation
d'autonettoyage par I'ouverture d'une fenetre ou d'une porte,
AViS IMPORTANT - OiSEAU× FAMiLIERS : Les oiseaux ont
un systeme respiratoire tres sensible, Ne pas garder un oiseau
familier darts la cuisine ou darts une piece ou il pourrait etre
expose aux fumees, Les fumees emises durant une operation
d'autonettoyage peuvent etre dangereuses ou mortelles pour
un oiseau, de meme que les fumees emises lots du chauffage
excessif de graisse, huile, margarine, et du chauffage excessif
dans un ustensile a revetement antiadhesif,
Conserver ces instructions pout consultation ult6tieute
3O
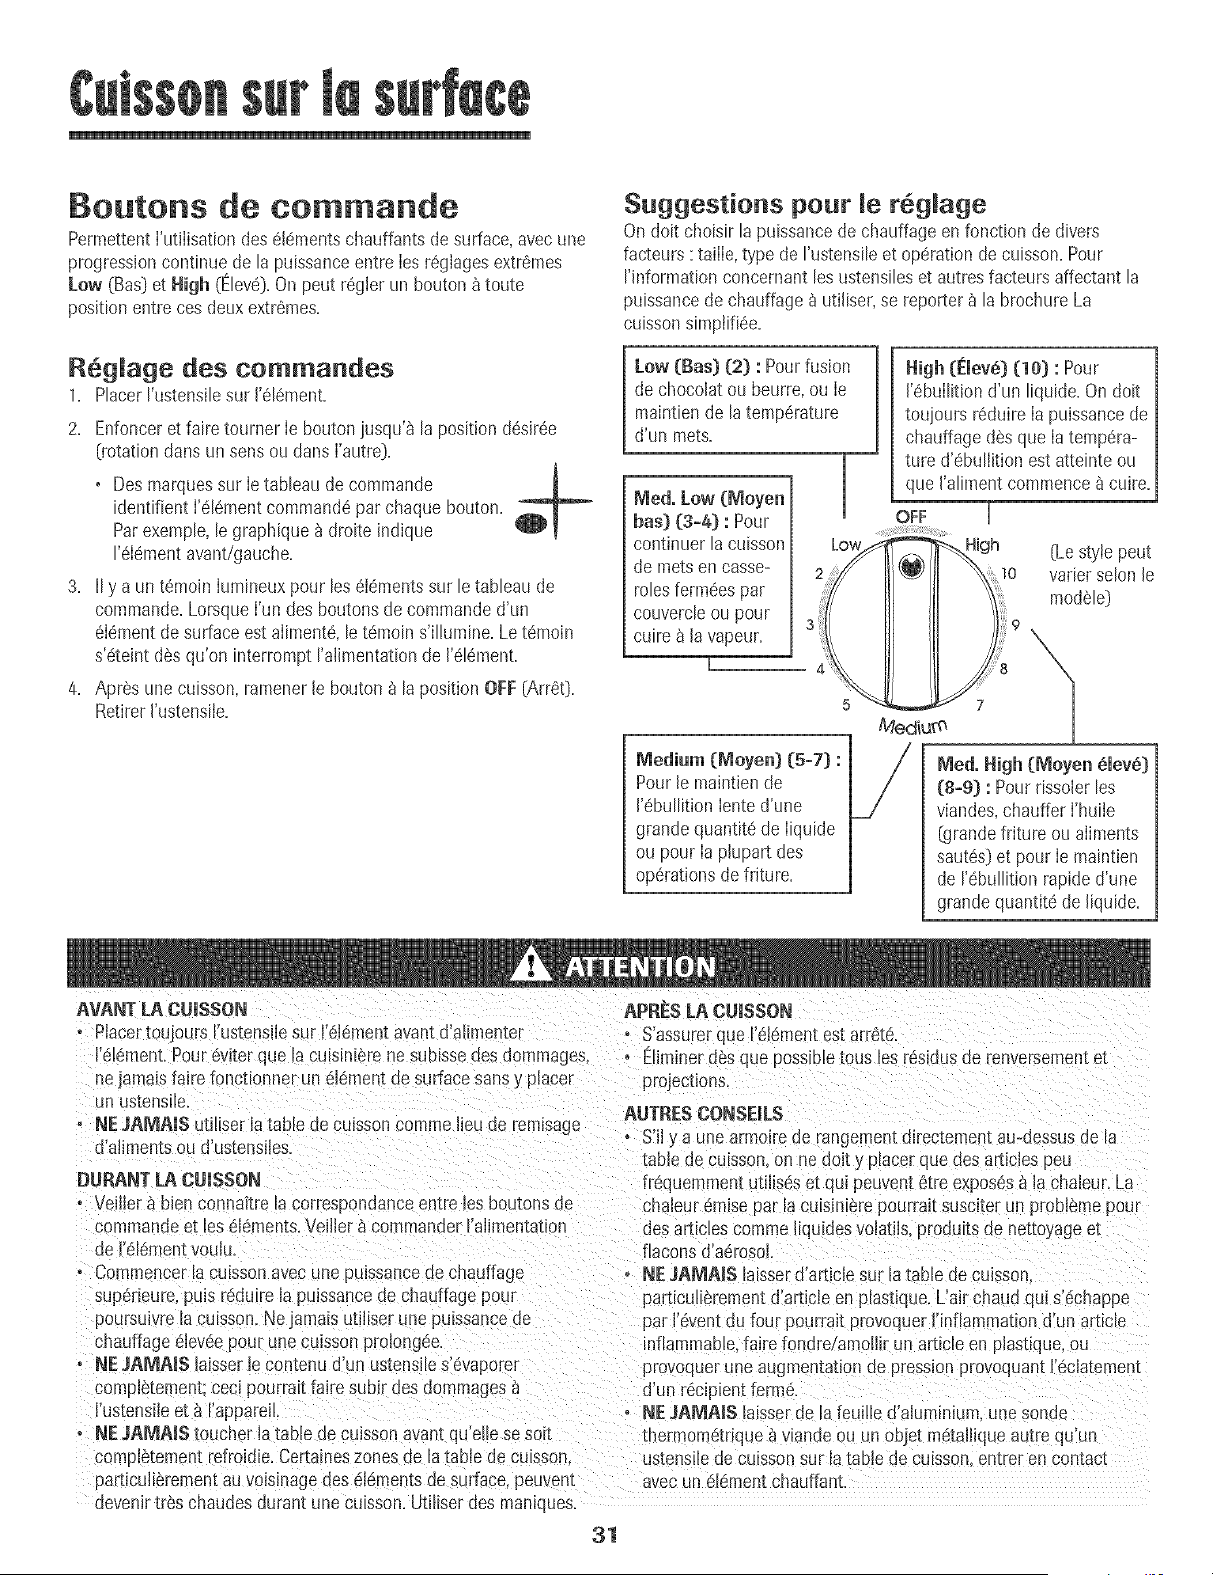
Boutons de commande
PermettentI'utNisationdes 616mentschauffants desurface,avecune
progressioncontinue de la puissanceentre Iesreglagesextremes
Low (Bas]et High (l_leve].On pout regierun bouton_ toute
positionentre cesdeux extremes.
Regtage des commandos
1. PlacerI'ustensilesur 1'element.
2. Enfonceret faire tourner Ie bouton jusqu'_ la positiondesiree
(rotationclansunsensou dans I'autre}.
, Desmarquessur Ietableau de commande 1
identifient I'elementcommand6par chaque bouton.
Parexemple,le graphique_ droite indique
1'6Iementavant/gauche.
3. Ny a un temoin Iumineuxpour les616mentssur le tableau de
commande.LorsqueI'un des boutonsde commandod'un
6Iementde surfaceestaliment& le temoins'iNumine.Letemoin
s'eteint dSsqu'oninterrompt I'aNmentationde 1'element.
4. Apres unecuisson,ramenerle bouton _ laposition OFF(Arret].
RetirerI'ustensile.
Suggestions pour le reglage
On doit choisirla puissancede chauffageen fonction de divers
facteurs :taiNe,type de I'ustensileet operation decuisson.Pour
rinformation concemantlos ustensileset autresfacteursaffectant la
puissancede chauffage_ utiliser,se reporterb la brochureLa
cuissonsimpti%e.
Low (Bas) (2) : Pourfusior[
de chocolatou beurre,ou [e
1
maintiende latemperature
d'un mets.
Meal.Low (Moyen
bas) (3-4) : Pour
continuer la cuisson
de mets encasse-
rolesfermeespar
couvercleou pour
cuire _ lavapeun
/
Y
4' 5__
High (i_lev_} (10) : Pour
1'ebullitiond'un Nquide.On doit
toujours reduireIa puissancede
chauffage dSsque Ia tempera-
ture d'ebuNitionestatteinte ou
que I'alimentcommence&cuire.
OFF i
_.,High [Le style pout
_I0 varier solonle
/J71 module)
Medium (Moyen} 1:5+7}:
Pourle maintiende
1'ebullitionIented'une
grande quantit6de Iiquide
ou pour Ia phpart des
operationsdefriture.
led. High (l'doyen 61eve}
(8-9) : Pourrissolerlos
viandes,chauffer I'huile
[grandefriture ou aliments
sautes]et pourIe maintien
de I'ebullitionrapided'une
grandequantitede Iiquide.
AVANr [A CWSSON
, Placertoujours I'ustensilesur 1'616mentavantd'alimen_ei
1'6!6mont.Pour6v+terque laculsmm"ene subisseues dommages,
nejamalsfaire fonctionner un 616mentde surfacesansy placer
un ustenslle.
• NEJAMAIS uti!lser latable de cuissoncomme lieude remlsage
d'alimentsou d'ustensiles.
[}URANT LA CUISSON
, Veiller_ bien connaftrela correspondanceentre les boutonsde
commandoet les 616ments.VeiNe+_commander!'aNmentat_on
de 1'elernen_voulu.
, Commencerlacumsonavecune puissancede chauffage
supeneure,puis reduirela pu+ssancede chauffagepour
poursuivrelacuisson.NejamaisutiNserunepuissancede
APRESLA CUISSON
, S'assurerque f'61dmentest arret&
- E!iminerdesque possibletous los residusde renversememe_
project+ons.
AUTRESCONSEILS
- S'il_a unearmoirede rangementdirectementau-dessusde la
table de cumson,on nedoit y pincerque desarticlespeu
fr6quemmentutiliseset qui peuvent6tre exposes_ la chaleur.La
cnaleuremisepar la cummlerepourra+tsusciterun problemepour
desarticles commeIiquldesvolatils,produitsde nettoyageet
flaconsd'a6rosol.
- NEJA_AIS laisserd'articlesur latable decuisson.
particulierementd'articleen plastique.L'airchaud qui s'6chappe
par 1'eventdu four pourralt provoquerI'inflammationd'un article
chauffage6leveepour unecuisson prolong6e, inflammable,faire fondre/amollir un articleen plastique+ou
, NEJAMAIS laisserlecontenu d'un ustensiles'evapote+
comp+e:ement;cec+pourraitfa+resubir (_esdommages
I'ustensileet _ ['appareiL
, NE,_AMAI$ toucher +atable de cumsonavantqu'elle se soil
compie[emen[refro+die.Certameszonesde la +ablede cumson+
particuNerementauvois+nagedes elementsde sudace,peuven[
devenirtres chaudesdurant une cu[sson.UtiNserdes maniques.
provoquerune augmentationGepress+onprovoquan_!'6clatement
d'un r6c_p[entform&
, NEJA_AIS laisserde la feui!led'aluminium,unesonae
mermom6trique_ vlan(]eou un ODjetmeta[liqueau]re qu'un
ustensfledeculsso_ sur latable de cuisson en_rerencon[ac_
avecun 6[dmentchauffant.
31
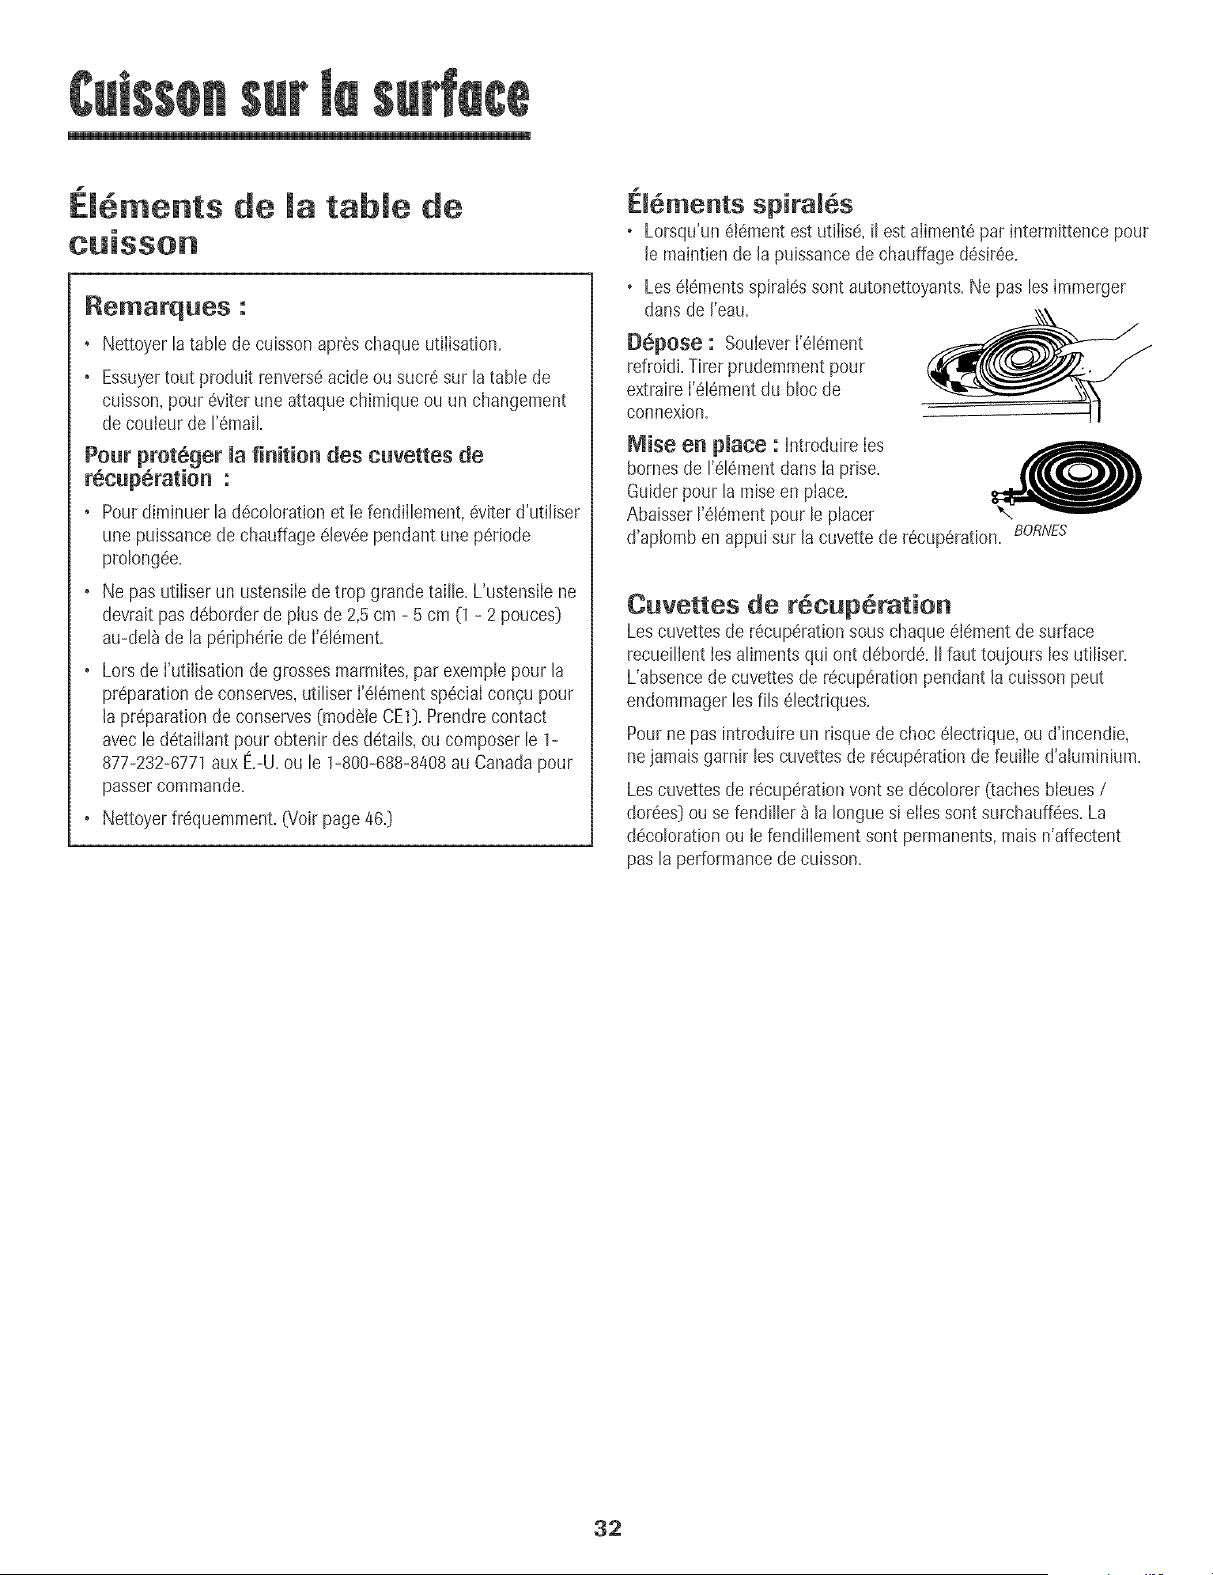
1
El .ments de la table de
Remarques :
• Nettoyerlatable decuissonapr6schaqueutiIisation.
• Essuyertout produit renvers6acideou sucr6sur latable de
cuisson,pour 6viterune attaquechimiqueou un changement
de couleurde 1'6mail
Pour prot6ger la finition des cuvettes de
r_cup6ration :
• Pourdiminuer la d6colorationet iefendiIlement,6viterd'utiliser
une puissancede chauffage61ev6ependant une p6riode
prolongee.
• Ne pas utiIiserun ustensiIede trop grandetaille.L'ustensiIene
devraitpas d6borderde plus de 2,5crn - 5 cm (1- 2 pouces}
au-del_de la p6ripheriede I'616ment.
• Lorsde RJtilisationde grossesmarmites,parexemplepour la
preparationde conserves,utiliserI'6t6mentsp6ciaIcongu pour
la pr6parationde conserves0nod6leCE1}.Prendrecontact
avecle d6taiIIantpour obtenir desd6tails,ou composerle 1-
877-232-6771aux E.-U.ou le 1-800-688-8408au Canadapour
passerconsmande.
• Nettoyer%quemment. (Voirpage46.}
EI6ments spiral6s
o Lorsqu'un6!6mentestutiIis6,il est aliment6par intermittencepour
le maintiende la puissancede chauffaged6sir6e.
®
dans de [eau.
[}6pOSe : SouleverI'616ment
refroidi.Tirer prudemmentpour
extraireI'616mentdu blocde
connexion.
Mise en place : IntroduireIes
homesde rel6ment dansIa prise.
Guiderpour la raiseen place.
Abaisser1'61ementpour le placer
Leselementsspiral6ssont autonettoyants.Ne pas lesimmerger
d'ap[omben appuisur [a cuvettede r6cup6rat[on. 80RtVES
Cuvettes de r6cup6ration
Lescuvettesde r6cup6rationsouschaque616mentde surface
recueillenties alimentsqui ont d6borde.IIfaut touiours lesutiliser.
L'absencede cuvettesde recuperationpendantlacuisson peut
endommagerlesills 61ectriques.
Pourne pas introduire un risquede choc 61ectrique,ou d'incendie,
nejamaisgarnir les cuvettesde recup6rationde feuille d'aluminium.
Lescuvettesde r6cup6rationvont se d6colorer(tachesbieues/
dor6es}ou se fendiller _ la Ionguesi eIIessontsurchauff6es.La
decolorationou le fendiIIementsont permanents,maisn'affectent
pas la performancede cuisson.
32

Cemmande du feur netteyage manuel (certains modeles)
BAKE
A B
BROIL
REIVIARQUE: L'afficheurindique 12:00iorsque I'appareilest branch6la premierelois ou en casde pannede courant=Lestemoins lumineux
de cuissoncouranteet de cuissonau gril s'aflumentIorsqueFonappuiesur la touchede fonction correspondante=
B
c
D
Cuissoncourante
Gril
Minuterie
Hodoge
ANNULER
A (Plus)ou
_'(Moins)
S'utiiisepour]a cuissoncouranteet ]e
retissage=
S'utiiisepouria cuissonau gril et le
rissolagesur partiesuperieure=
Programmelaminuterie=
S'utiiisepourprogrammerI'heureduiour=
Annuletoutes lesoperationssaufminuterie
et horloge=
S'utiiisepourentrer ouchangerladuree,]a
temperaturedu four.Etabiitie gril
temperatureeleveeou basse=
Uti isation des touches
• Appuyer sur la touchedesiree=
• Appuyer sur A (Plus)ou V (Moins] pour entrer la dureeou la
temperature.
• Un bip retentit Iorsque!'on appuiesur unetouche de fonction=II
n'y a pasde hip pour la touche A ou _'=
• Un doublehip retentit encasd'erreur de programmation=
Remarque : QuatresecondesaprSsavoirappuyesur lestouches
A ou V, la dureeou la temperatureserontautomatiquement
entrees.Si pius de 30secondess'ecoulententre la pressionsur
une touchede fonction et sur les touchesA ou V, la fonction
seraannuleeet I'afficheur reviendra_ I'affichageprecedent.
Reglage de rhorloge
1= Appuyersur Ia toucheCIock [Horloge)=
• L'horloge nepeut pas 6tre regleesi lefour estdei_ programme
pourune operationde cuissoncourante,de grfl ou une
operationminutee.
2. Mettre _ Fheure_ ['aidedes touchesA ou V SiFonn'appuie
pas sur cestouches en moinsde 30secondes,Ieprogrammeest
annule=Appuyer sur la toucheClock et recommencer=
Programmation de la minuterie
La minuteriepeut 6tre programmeedeune minute [:01)iusqu'_99
heureset 59minutes (99:59).Laduree seraaffichee en minuteset
non ensecondes=LA MINUTERtENE COMMANDE PAS LEFOUR.
1. Appuyer sur la toucheTimer(Minuterie]= ..............................
TIMER
• 0:00s'ailumeet lesdeux points [:) c@notent
I'afficheur= ...............................
2. Appuyersur A ou V iusqu'a ce que la dureedesiree
soit affichee.
Laminuteriecommenceb decompterdesque la
duree aet6 programmee=
o Lesdeux pointsqui clignotent indiquentqu'un
decompteest en cours=[Lesdeux points neclignotent pas si
I'heureou la temperaturedu four sont affichees=)
Deuxhips courts signalentla fin de I'operation=0:00parait
['afficheur.
• Si I'on veut, appuyer sur Ia touche Clock et i'heule du jour
reapparait briSvement _ I'afficheur pendant une operation
minutee.
• Si I'onveut, appuyersur Iestouches Bakeou Broil et le reglage
de temperatureactuellereapparaitbriSvement_ I'affichage
pendantune operationminutee=
Annuiation de la minuterie :
Appuyersur latoucheTimeret la maintenirainsJpendant plusieurs
secondes.
33
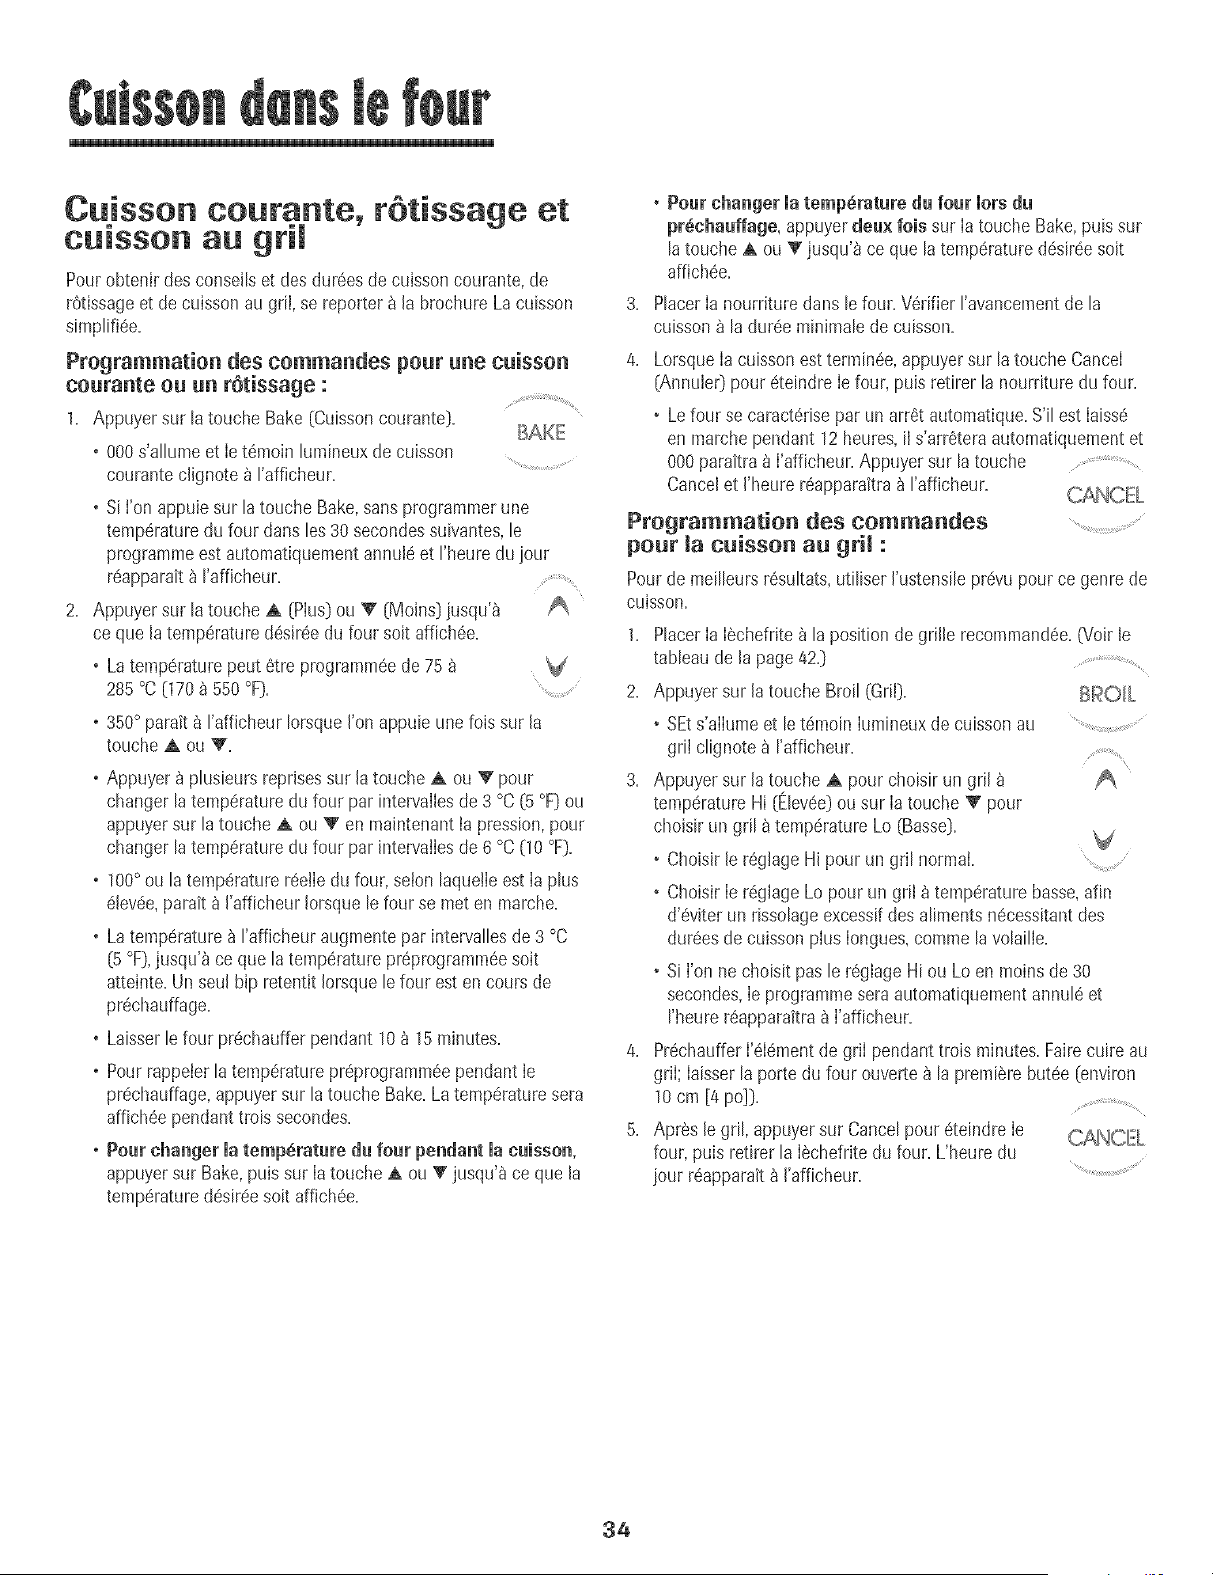
Cuisson courante, rStissage et
cuisson au gri
Pourobtenir desconseiBet des dur@s decuissoncourante,de
rOtissageet de cuissonan gril, se reporter/_la brochureLa cuisson
simplifi@=
Programmation des commandes pour une cuisson
coarante on nn rStissage :
1= Appnyersur latouche Bake[Cuissonconrante}=
BAKE
o 000s'attnmeet Jet6moin Inmineuxde cnJsson
courantecJignote_ I'affJcheur.
o 8i I'onappuiesur latouche Bake,sansprogrammerune
temp@raturedu four dans les 30secondessuivantes,le
programmeest automatiquementannul6et Fheuredu iour
r6apparait_ I'afficheur.
2. Appuyersur latouche A [Pins}on V [Moins}iusqu'_ A
ce que la temperatured@ir@ du four soit affich6e=
o Latemp6raturepent 6tre programm@de 75
285 °C [170 _ 550 °F}.
o 350°parait _ I'afficheur IorsqueJ'onappuie unefoJssur Ja
touche A ou W.
o Appuyer_ plusieursreprisessur la touche A ou V pour
changer latemperaturedu four par intervaibs de 3 °C (5°F}on
appuyersnr latouche A on V en maintenantIapression,pour
changer latemperaturedu four par intervalIesde 6 °C (10°F}.
o 100° on la temperatureree!Iedn four,setonlaque!IeestIa plus
61ev6e,parait _ I'afficheur Iorsquelefour se met en marche.
o Latemp6rature_ I'affbhenr augmentepar intewalles de3 °C
(5°F},jusqu'_ ceque la temperaturepr@rogramm@soit
atteinte.Un seul hip retentit Iorsquelefour est en coursde
pr@hauffage.
o Laisserle four pr@haufferpendant 10/_15minutes.
o Pourrappeierlatemp6raturepr@rogramm6ependant ie
pr@hauffage,appuyersnr latouche Bake.Latemp6raturesera
affich6e pendanttrois secondes.
o Pour changer la temp6rature du four pendant la nuisson,
appuyersur Bake,puissnr Ia toucheA on _r jusqu'a ce que la
temperatured@ir@ soit affbh@=
• Pour changer matemperature du four morsdu
pr_chauffage, appuyer deu× lois sur Ia touche Bake, puis sur
la touche ,& ou _' jusqn'_ ce que la temp6rature d6sir@ soit
affich@,
Placer Ia nourriture dans le four. Verifier I'avancement de la
cuisson _ la dur@ minimab de cuisson.
4. LorsqneIacuissonestterrain@,appnyersur latouche CanceI
[AnnuIe0 pour 6teindreIe four, puis retirer la nourriture du four.
• Lefour se caract6risepar un arr6t automatique.S'il est Iaiss6
en marchependant 12heures,iI s'arr_?teraautomatiquementet
000paraitra _ I'afficheur.Appnyersur la touche ..........................................
Cancelet I'heure reapparakra_ I'affbheur.
Programmation des commandes ...............................................
pour la cuisson au grii :
Pourde meilleursr6sultats,utiliserI'ustensilepr@u pource genrede
onisson.
],
2,
PlacerIa I6chefrite_ la positionde grille recommand@.(Voir le
tabbau de la page4£} ............
Appuyer sur la toucheBroil (Gr[I}. BI_OH_,
• SEts'alIumeet le t6moinIumineuxde cuissonan .....
gril clignote_ I'afficheur.
Appuyer sur la touche_ pour choisirun gril
temperatureHi {Elev@}ou sur Ia touche W pour
choisir un gril _ temperatureLo (Basse}.
• Choisirle r6glageHi pour un gril normal
• ChoisirIe r6glageLo pour un gril _ temperaturebasse,afin
d'@iter un rissolageexcessifdes alimentsn@essitantdes
duties de cuissonplus Iongues,commelavolailIe.
• S[ I'on nechoisit pasle r6glageHi ou Loen moinsde 30
secondes,Ie programmeseraautomatiquementannule et
I'heurer6apparattra_ I'afficheur.
Pr@haufferI'SIementde griI pendanttrois minutes.Fairecuire an
griI; Iaisserla portedu four ouverte_ la premierebut@ (environ
10cm [4 po]).
Apres le gril, appuyersur Cancelpour eteindreIe
four, puis retirer la I@hefrite du four. L'heuredu
iour r6apparait_ I'afficheur.
34
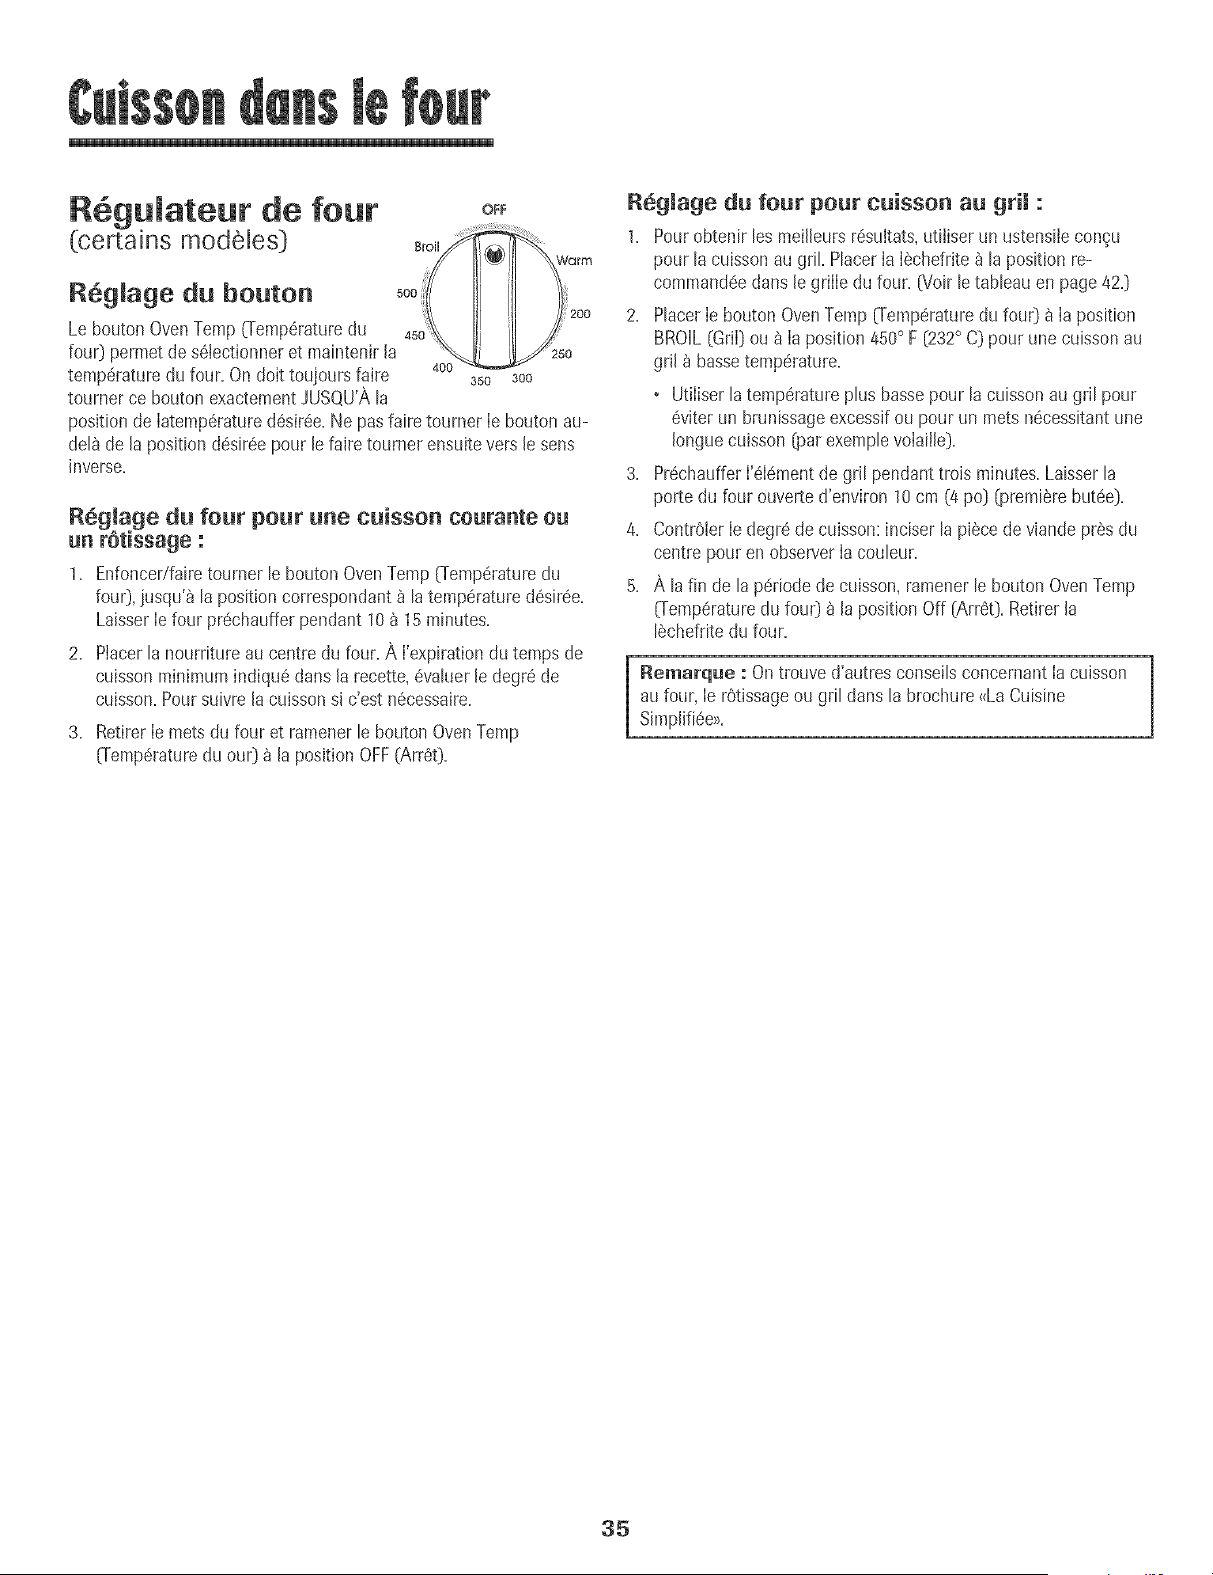
R6guJateur de four
(certains modeJes) _,o,,
R6gJage du bouton
2OO
Le bouton OvenTemp[Temp@aturedu
four) permetdes6Jectionneret maintenirla
temp@aturedu four.On dolt toujoursfaire 400 35o 30o
tourner ce boutonexactementJUSQU'Ala
positionde Iatemp@atured6sir6e.Ne pas faire tourner Ie bouton au-
del8de la positiond6sir@ pour le faire tourner ensuiteversle sens
inverse.
Reglage du four pour une cuisson courante ou
un r6tissage :
1. Enfoncedfairetourner le boutonOvenTemp[Temp@aturedu
fou0, iusqu'_ la positioncorrespondant_ latemperaturedSsiree.
LaisserIefour prechauffer pendant 10_ 15minutes.
2. Placerlanourriture au centredu four. A I'expirationdu temps de
cuissonminimumindique dans la recette,@aluerle degrede
cuisson.Poursuivrela cuissonsi c'est necessaire.
3. RetirerIe mets du four et ramenerle bouton OvenTemp
[Temperaturedu our} _ la position OFF(Arret}.
R6glage du four peur cuissen au griJ :
1. Pourobtenir les meilleursresuItats,utiliser un ustensiJecon_u
pour lacuissonau gril. PlacerIa Iechefrite_ la positionre-
commandeedartsle grille du four. [Voir le tableauen page420
2. PlacerIe bouton OvenTemp[Temperaturedu fou0 _ Ia position
BROIL[GriI)ou ;2_Ia position 450° F [232° C) pour unecuissonau
griJh bassetemp@ature.
• Utiliserla temperatureplus bassepour la cuissonau gril pour
@iter un brunissageexcessifou pour un mets necessitantune
Jonguecuisson[par exemplevolaiJJe).
3. PrechaufferI'elementde grJlpendanttrois minutes.Laisserla
porte du four ouverted'environ 10cm [4 po) [premierebutee).
4. Contr01erIe degrede cuisson:inciser lapiece devJandepres du
centre pouren observerIa couleur.
5. A lafin de laperiodede cuisson,ramenerlebouton OvenTemp
[Temperaturedu fou0 h JapositionOff [,a,rret).RetirerJa
lechefdtedu four.
Remarque : Ontrouved'autres conseilsconcemant Iacuisson
aufour, Ie rOtissageou gril clansla blochure {<LaCuisine
SJmplJ%e>>.
35
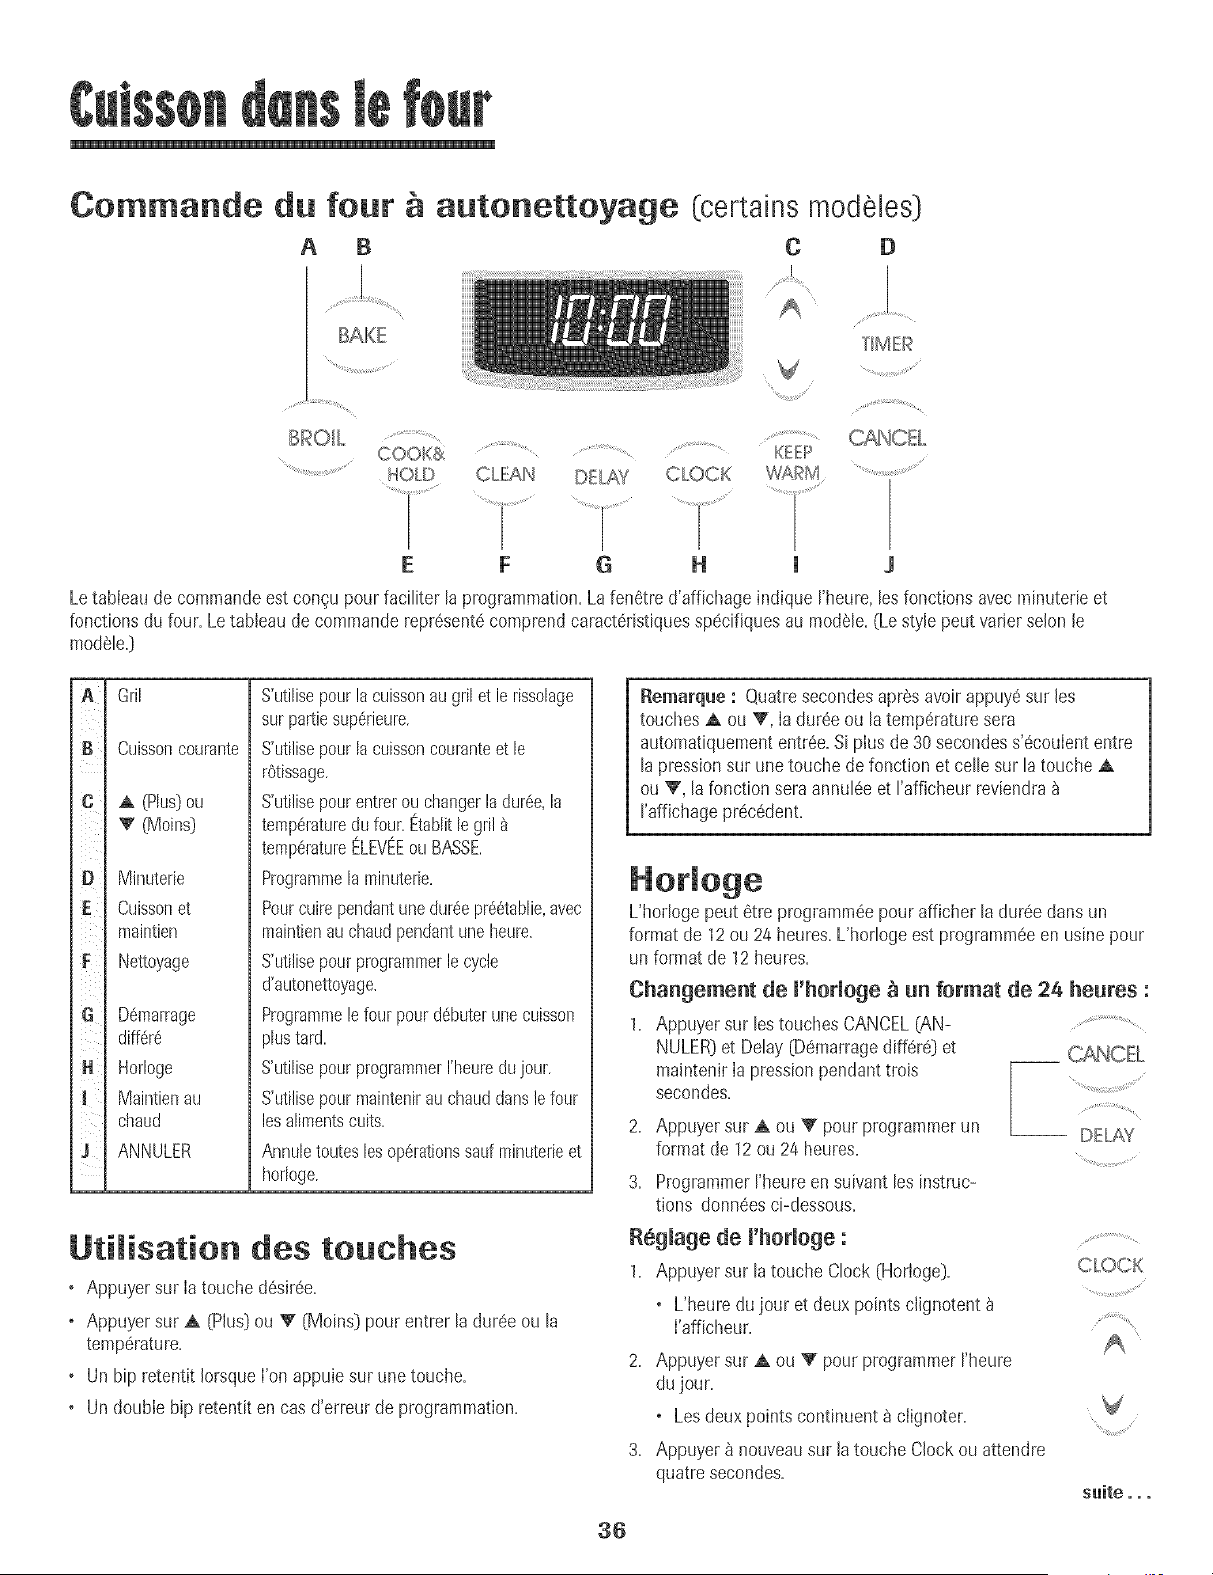
Commande du four autonettoyage
A B
(certains modeles)
C D
/IMER
....._'_ 2 _ _
COOK& (EI[]P
HOlD CLIL_AN DEfrAY CLOCK WARM
E F G H J
Letableaude commandoestcongu pourfaciliter la programmation.Lafen6tre d'affichageindique I'heure,lesfonctions avecminuterieet
fonctions du four.Letableau de commanderepr6sent6comprendcaract6rist[quessp6cifiquesau modSle.(Lestyle peut varier seJonJe
mod_le.)
A
B ¸
D
E
iiii_
G
H ¸
3
Gril
Cuissoncourante
A (Plus]ou
T (Moins)
Minuterie
Cuissonet
maintien
Nettoyage
D6marrage
diff6r6
Horloge
Maintienau
chaud
ANNULER
S'utilisepourlacuissonau grilet lerissolage
surpartiesup_rieure.
S'utilisepourlacuissoncouranteet le
rbtissage.
S'utilisepourentrerouchangerladur6e,la
temperaturedufour.Etablitle gril
temperatureELEVEEouBASSE.
Programmela minuterie.
Pourcuirependantunedureepr_6tablie,avec
maintienauchaudpendantuneheure.
S'utiiisepourprogrammerlecycle
d'autonettoyage.
Programmelefour pourd6buterunecuisson
plustard.
S'utilisepourprogrammerI'heuredujour.
S'utilisepourmaintenirauchauddansle four
losalimentscuits.
Annuletouteslesop6rationssaulminuterieet
horloge.
UtiJisation des touches
o Appuyersur Iatouche d(_sir6e.
o Appuyersur ,A (Plus)ou V (Moins] pour entrer la dur6eou la
temp6rature.
o Un hip retentit IorsqueI'on appuiesur une touche.
o Un double hip retentit en casd'erreur de programmation.
Remarque : Quatresecondesapr_s avoirappuy6sur les
touches A ou V, Ia dur6eou latemp6raturesera
automatiquemententr6e.Siplus de 30secondess'_coulententre
la pressionsur unetouche de fonction et celle sur la touche,A
ou V, la fonction seraannul6eet I'afficheur reviendra
I'affichagepr6c6dent.
L'horJogepeut 6tre programm6epour affichel [a dur6edans un
format de 12ou 24 heures.L'hollogeest programm6een usinepour
un format de 12heures.
Changement de l'horloge _ un format de 24 he_res :
Appuyersur les touchesCANCEL(AN-
NULER)et Delay(D_marragedill#re] et
maintenirIa pressionpendanttrois
secondes.
2. Appuyersur _ ou V pour programmerun
format de 12ou 24 heures.
3. ProgrammerI'heureen suivantles instruc-
tions donn_esci-dessous.
R_glage de l'horloge :
1. Appuyersur la touche Clock (Horloge].
o L'heuredu jour et deux pointsc@notent
I'afficheur.
J
%¸¸¸¸¸¸¸¸¸%¸¸;¸¸¸¸¸¸¸¸¸¸¸;;¸::¸¸¸¸¸¢¸"
-- DELAY
CLOCK
2. Appuyersur ,_ ou _ pour programmerI'heure
dujour.
o Lesdeux pointscontinuent _ clignoter.
3. Appuyera nouveausur latouche Clock ou attendre
quatresecondes.
V
s_ite oo.
36
LorsqueIe courant6bctrique arriveou apr_sune interruptionde
courant,ta derniSreheureavantt'interruptionde courantva ciignoter.
Pourrappebr t'heuredujour brsqu'une autre fonction de dur@
s'affbhe,appuyersur latouche CIocL
L'heurede I'hodogenepeut 6tre chang6eIorsqueb four a 6t6
programm6pour une cuissonou un nettoyaged+ff6r6ou pour la
fonction de cuissonet maintien.
Annumation de m'affichage de m'heure:
Si I'onne desire pasI'affichagede I'heuredu jour :
Appuyersur Iestouches CANCEL(ANNULER}et
Clock (Horloge)et ies maintenirainsi pendant
trois secondes.L'heuredu jour disparaitde
I'afficheur.
LorsqueJ'affichagede I'heureest annul6,
appuyersur Ia touche Clockpour afficher
bri@ementI'heuredu jour.
R6affichage de m'heure:
Appuyersur bs touches CANCELet CIocket les maintenirains+
pendanttrois secondes.L'heuredu jour rSapparatt_ I'afficheur.
-- CLOCK
La minuterie peut 6tre programm@ de une minute (00:01} jusqu'a
99 heures et 59 minutes (99:59}.
La minuterb peut 6tre utilis6e ind@endamment de toute autre
activit6 du four. Elle peut 6tre aussi programm@ alors qu'une autre
fonction du four est en cours d'utilisation.
La minuterb necommandopas le four.Elienese_ qu'&6mettredes
bips.
Pregrammatien de maminuterie :
1. Appuyer sur JatoucheTimer (MJnuterie}. T+MEP
+ 0:00s'aJJumea J'affbheur.
+ Losdeuxpointsclignotent.
2. Appuyer sur Ia toucheA {PIus}ou V [Moins}
jusqu'_ ceque I'heurejuste paraisse_ I'afficheur.
+ Losdeuxpointscontinuent _ clignoter.
3. Appuyer _ nouveausur latouche Timerou attendrequatre
secondes.
+ Les deux points continuent _ clignoter et le d@ompte de la
dur_e commence.
+ Laderni6reminutedu d@omptesera affich@ sousformede
secondes.
4. A la fin de ladur6e programm@,un hip long retentit.
Annumation de maminuterie :
1. Appuyer sur la toucheTimeret la maintenirainsipendant trois
secondes.
OU
2. Appuyer sur la toucheTimeret r6glerI'heurea 00:00.
Verrouimmage des commandos
Lostouches peuvent6tre verrouiII@spour des raisonsde s@ur+t6,
nettoyageou pouremp@hertoute utiIisationnon souhait@.Ellesne
pourront 6tre utilis@s si elles sontverrouill6es.
Si lefour esten cours d'utilisation,les commandesne peuvent6tre
verrouJll@s.
L'heureactueIIedujour resteraa I'afficheurIorsquelescommandos
serontverrouiil@s.
Verrouimmage:
Appuyersur lostouches CANCELet Cook&
HoId {Cuissonet maintien)et les maintenirainsi
pendanttrois secondes.
, Le mot LOCK(VERROUILLAGE}clignote _ .................................
COOK&
I'afficheur. +o_(,')LD
B_verro_illage : ..........................
Appuyersur lestouches CANCELet Cook& Hold et les maintenir
ainsi pendanttrois secondes.
, Le mot LOCKdisparaitde I'afficheur.
Codes d'a omalie
Les rootsBAKE{CUISSONCOURANTE}ou LOCK6/ERROUILLAGE}
peuventcIignoter rapidement_ I'afficheurpour pr@eniren cas
d'erreurou de problSme.Si to! est lecas,appuyersur Iatouche
CANCEL.Si bs rootsBAKEou LOCKcontinuent _ ciignoter,
d6brancherI'appareiL£_tendrequelquesminutes,puis rebrancher
I'appareiLSi I'un des rootscontinue_ cIignoter,d6brancherI'appareil
et prendrecontactavecun r@arateurautoris_.
37
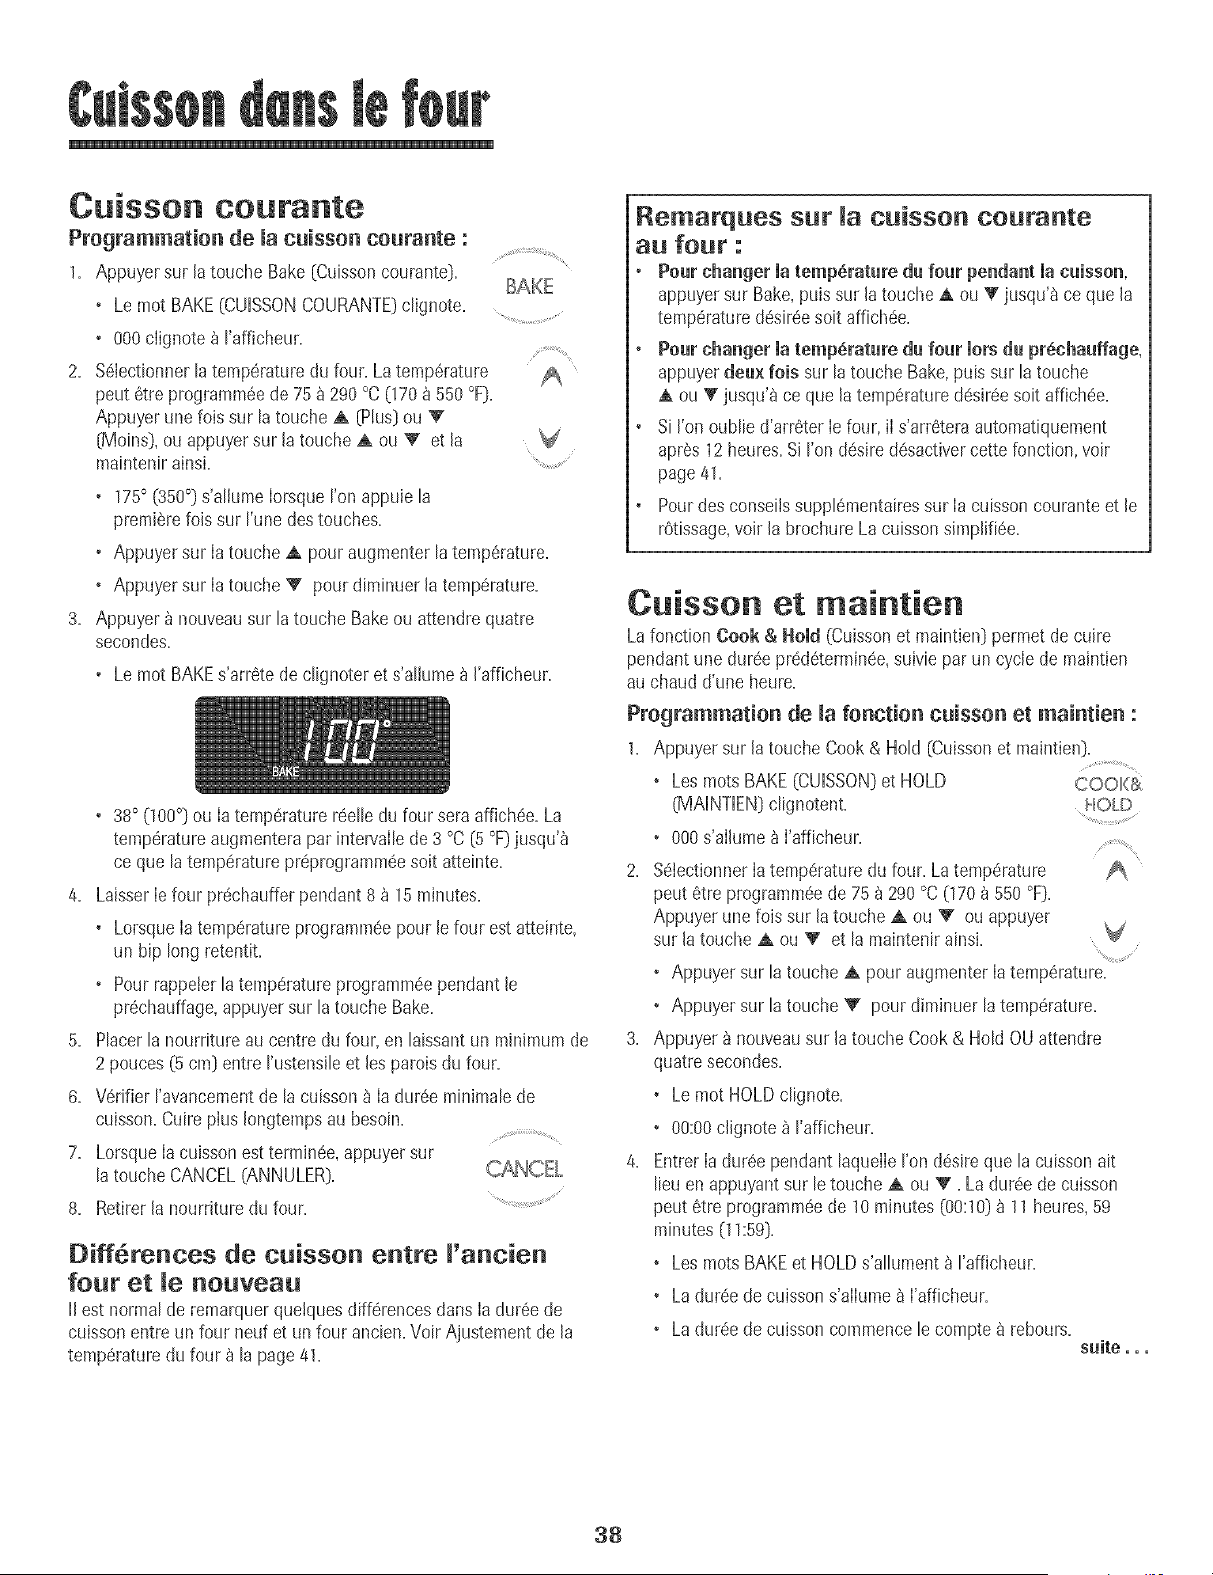
Cuisson courante
Pregrammatien de macuisson ceurante :
1. Appuyer sur la touche Bake(Cuissoncourante}.
BAKE
• Lemot BAKE(CDISSONCOURANTE)c@note.
• 000clignote _ I'afficheur.
2. %bctionner latemperaturedu four.Latemperature _
peut 6tre programm@de75 a 290°C070 8 550°F}.
Appuyer unefois sur latouche A {Plus}ou V"
{Moins},ou appuyersur latouche A ou V et la V
maintenirainsi. .....
• 175° (350°} s'allumeIorsqueron appuie la
premierefois sur I'unedestouches.
• Appuyer sur Ia toucheA pouraugmenterla temperature.
• Appuyer sur Ia toucheV pour diminuer la temperature.
3. Appuyer _ nouveausur latouche Bakeou attendrequatre
secondes.
• Lemot BAKEs'arretede clignoteret s'allume_ I'afficheur.
• 38° 000°} ou Ia temperaturer@lb du four sera affichee.La
temperatureaugmenterapar intervailede 3 °C {5°F}jusqu'a
ce que latemperaturepr@rogramm@soit atteinte.
4. LaisserIefour pr@haufferpendant 8 _ 15minutes.
• LorsqueIatemperatureprogramm@pour lefour est atteinte,
un bip long retentit.
• Pourrappeterla temperatureprogrammeependant le
pr@hauffage,appuyersur la touche Bake.
5. Placerlanourriture au centredu four, en laissantun minimum de
2 pouces{5 cm} entre I'ustensib etlespatoisdu four.
6. Wrifier I'avancementde la cuisson_ Ia dureeminimab de
cuisson.Cuirepius Iongtempsau besoin.
7. LorsqueIacuissonest terrain@,appuyer sur
latouche CANCEL(ANNULER}.
8. Retirerla nournture du four.
Differences de cuisson entre I'ancien
four et nouveau
II est normalde remarquerquetquesdifferencesdans Iadur@ de
cuissonentre un four neuf et un four ancien.VoirAjustementde la
temperaturedu four _ la page41.
Renlarques sur _a cuisson courante
all fOUr :
• Pour changer matemperature du four pendant macuisson,
appuyersur Bake,puis sur latouche A ou _" jusqu'a ce que la
temperature@sir@ soit affich@.
• Pour changer matemperature du four morsdu pr_ehauffage,
appuyerdeu× lois sur la toucheBake,pub sur la touche
A ou _' jusqu'a ceque la temperature@sir@ soit affbh@.
• Si I'onoublied'arreter Iefour,iI s'arreteraautomatiquement
apres 12heures.Si I'on desired@activercette fonction,voir
pageal.
Pourdesconseilssupplementairessur Ia cuissoncouranteet le
retissage,voir la blochure Lacuissonsimplifi@.
Cuisso et mai tie
Lafonction Cook & ltold (Cubsonet maintien}permet decuire
pendant unedur@ predetermin@,suivie parun cycle de maintien
au chaud d'uneheure.
Progra_atio_ de _a fo_ctio_ c_isso_ et _ai_tie_ :
1. Appuyer sur la toucheCook& Hold {Cuissonet maintien}.
• LosrootsBAKE(CUISSON}et HOLD COOl@,
(MAINTIEN}clignotent. HOlD
• 000s'allumea I'afficheur.
2. SelectionnerIatemperaturedu four. Latemperature
pout 6tre programmeede 75 _ 290°C070 _ 550°F}.
Appuyer unefob sur latouche _ ou _ ou appuyer
sur latouche _ ou Y et la maintenirainsi. '_
• Appuyer sur la touche_ pour augmenterIatemperature.
• Appuyer sur la toucheV pour diminuer latemperature.
3. Appuyer a nouveausur latouche Cook& Hold OU attendre
quatre secondes.
• Lemot HOLDclignote.
• 00:00clignote_ I'afficheur.
4. EntrerIadur@ pendant laquelIeI'ondesireque la cuissonait
lieuen appuyantsur le toucheA ou V. La dur@ de cuisson
peut etre prograrnpa@de 10minutes (00:10}a 11heures,59
minutes(11:59}.
• LosrootsBAKEet HOLDs'allument _ I'afficheur.
• Ladur@ de cuissons'alIumea I'afficheur.
• Ladureede cuissoncommencele comptea rebours.
s_ite...
38
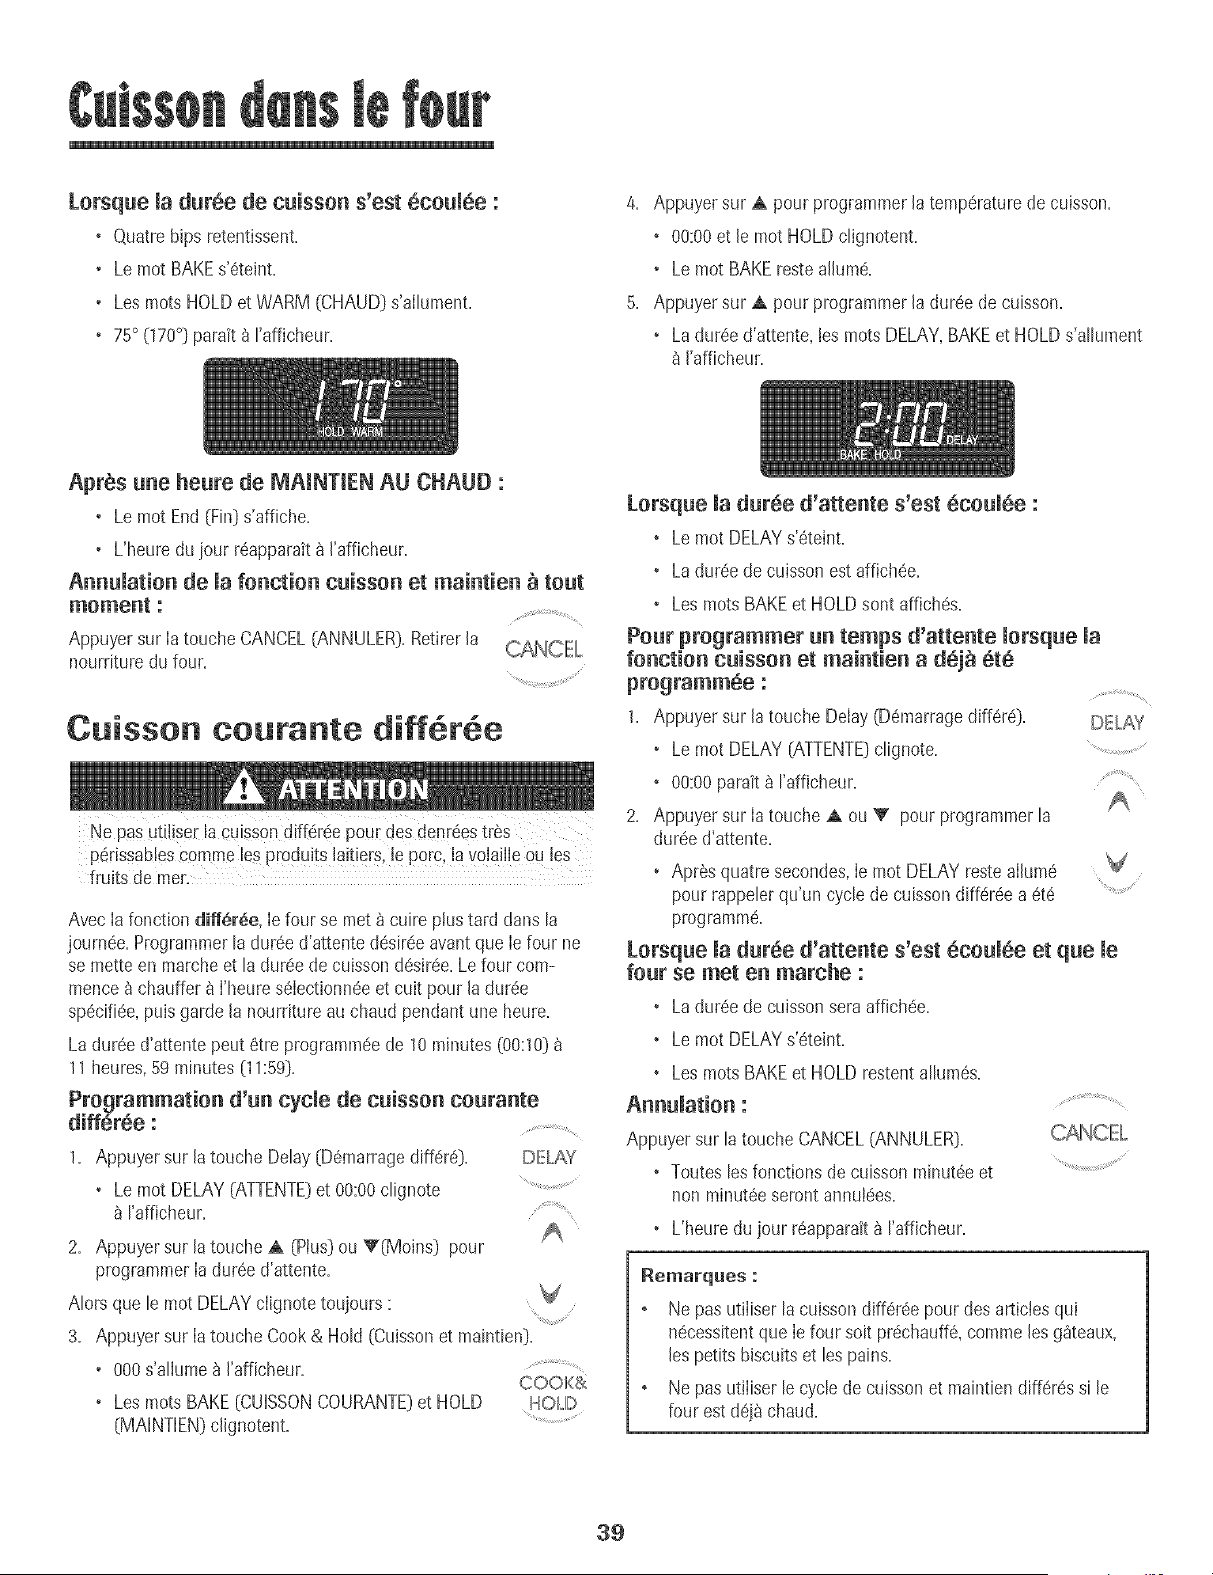
[orsque la dur6e de cuissou s'est 6coul6e :
• O,uatre hips retentissenL
° Lemot BAKEs'6teint.
° LesrootsHOLDet WARM (CHAUD}s'ailument.
• 75° 070°} parak _ rafficheur.
4. Appuyersur ,A pour programmerla temp6raturede cuisson.
• 00:00et b motHOLDc%notent.
° Lemot BAKErestealhrn6.
5. Appuyersur ,A pour programmerla dur@ decuisson.
• Ladur@ d'attente,les rootsDELAY,BAKEet HOLDs'allupaent
I'afficheur.
Apr_s uue heure de _,_AINTIENAU CHAUD :
• Lemot End(Fin)s'affiche.
• L'heuredu jour r6apparaft_ I'afficheur.
Auuulatiou de la fouctiou cuissou et maiutieu _ tout
momeut :
Appuyersur Iatouche CANCEL(ANNULER}.Retirerla
nourriture du four.
Cuisson courante diff r e
Ne pas utiliseEla¢U[SSOndiff6r@ pourdes denr6estr_s
p_rbsabbs comme les pro@its laitiers,le porc,la volailleou les
fruits de rner.
AvecIa fonction diff6r6e, Ie four se met _cuire plustard dans la
joum@. Programmerla dur@ d'attente@sir@ avantque Ie four ne
se mette en marcheet la dur@ de cuisson@sir@. Lefour com-
mence_ chauffer_ I'heures6Iectionn@et cuit pour la dur@
sp@ifi@,puis gardela nourriture au chaud pendantune heure.
La dur@ d'attentepeut 6tre programpa@de 10minutes(00:10}
11heures,59 minutes (11:59}.
Programmatiou d'uu cycle de cuissou couraute
diff6r6e :
1. Appuyer sur la touche Delay(D6marragediff6re}. DELAY
• Lemot DELAY(ATTENTE)et 00:00clignote ......
I'afficheur.
2. Appuyersur la toucheA (Plus}ou V(Moins) pour
programmerIadur6e d'attente.
AIorsque le mot DELAYclignotetoujours : -
3. Appuyer sur Ia toucheCook& Hold (Ouissonet maintien}.
• 000s'allume _ J'afficheur. ................
COOl(&
• LesrootsBAKE(CUiSSONCOURANTE}et HOLD HOLD
(MAiNTiEN}clignotent. .................
[orsque la dur6e d'atteute s'est 6coulee :
• Lemot DELAYs'6teiNt,
• Ladur@ de cuissonestaffich@.
• LesrootsBAKEet HOLDsont affich@.
Pour programmer uu temps d'atteute lorsque la
fouctiou cuissou et maiutieu a d_]_ 6t6
programmee :
1. Appuyer sur la toucheDeIay(D6marragediff6r@. DELAY
• Lemot DELAY(ATTENTE}clignote. ..........................
• 00:00parait _ I'afficheur. .........................
2. Appuyer sur Ia touche,A ou V pour programpaerla
duree d'attente.
• Apt@ quatre secondes,Ie mot DELAYrestealhme
pourrappebr qu'un cycb de cuissondiffer@ a 6t6 ............................
programme.
Lorsque la dur6e d'atteute s'est 8coul6e et que le
four se met eu marche :
• Ladur@ de cuissonseraaffich@.
• Lemot DELAYs'6teint.
• LesrootsBAKEet HOLDrestentallupa@.
Auuulatiou : ..........................................
Appuyersur latouche CANCEL(ANNULER}.
• Toutesles fonctionsde cuissonminut@ et
non minut@serontannul@s.
• L'heuredu jour r@pparait _ rafficheur.
_emarque$ :
Ne pas utiIiser lacuissondiff6r6e po_rdes articles qui
n@essitentque Iefour soit pr@hauff6,commeles g_teaux,
les petits biscuitset lespains.
Ne pas utiIiser lecycle de cuissonet maintiendiff6r_s si le
four est d6i$chaud.
39
Maintien au ehaud
Pourmaintenirauchaud dans le four des alimentscuits et chauds
ou pour r6chaufferpains et assiettes.
Programmatien du maintien au chaud :
1= Appuyersur Iatouche KeepWarm ..................................
(Maintienau chaud). KEEP
• Le motWARM (CHAUD)clignote. .....................
° 000parait _ I'afficheur. A
%tectionNerlatemp6raturede maintienau chaud.
Celle-cipeut 6tre r6gl6ede 63 _90 °C (145_ 190°F).
Appuyerune fois sur la touche A ou V ou appuyer
sur latouche A ou _' et la maintenirainsi.
75° (170°) s'allumeIorsqueI'on appuiela premierefois sur
I'une destouches.
• Appuyersur Iatouche A pour augmenterlatemp6rature.
• Appuyersur Jatouche V pour diminuer Jatemperature.
Lemot WARM (CHAUD}et la temp6ratureseront affich@spendant
que lafonction maintJenauchaud est active.
Annulation du maintien au chaud :
1=Appuyersur latouche CANCEL(ANNULER:}=
2=Retirerla nourrituredu four.
Remarques sur la fonction maintien
au chaud :
o Pourobtenir des quallt6salimentaireset nutritivesoptimales,
les alimentscults au four nedoivent pas6tregard6sau chaud
plus de 1_ 2 heures.
o Pouremp6cherles alimentsde dess6cher,lesrecouvrirde
papieraluminium,sansserrer,ou d'un couvercle.
o Pour r_chauffer des pelits pains :
- recouvrirles petits pains depapier aluminiumsansserrer et
les placer aufour.
- appuyersur lestouches KeepWarmet A pour
programmer75 °C(170°F[}.
- r6chaufferpendant 12_ 15minutes.
o Pour r_chau_er des assiettes :
- placer deuxpiles de quatre assiettesmaximumdans le four.
- appuyersur lestouches KeepWarmet A pour
programmer75 °C070 °F}.
- r6chaufferpendant cinq minutes,arr6ter lefour et laisserles
assiettesau four pendantencore 15minutes.
- n'utiliserque des assiettespouvantallerau four,a v6rifier
avecle fabricant.
- ne pas poserdes assiettestiedessur une surfacefroide,les
changementsrapidesdetemperaturepouvantcasser
I'assietteou la fendiller.
40
Arr t automatique/Mode
Lefour s'arr6teautomatiquementapres12heuress'il a 6tO
accidentellementlaisseen marche.Cettecaract_rJstiquede s6curit_
pout etre arret6e.
Pour annuler l'arr_t 12 heures et faire fonctionner me
four en continu pendant 72 heures :
1. ProgrammerJefour pour une cuissoncourante(voir page38].
2. Appuyer sur Ia toucheClock (Holloge]et la maintenirainsi
pendantcinq secondes
• SAbsera affich_ et clignoterapendant CLOCK
cinqsecondes. ...................
• SAbsera ensuiteaffJch_en continujusqu'_ ce qu'on I'arrSte
oujusqu'_ ce que la dureelimite de 72heuressoit atteinte.
• Lemot BAKE(CUISSONCOURANTE]sera aussiaffichesi un
cyciede cuissoncouranteesten coursaJorsque lefour est en
modesabbat.
Toutes Iesautresfonctions (Minuterie,Maintien au chaud,
Nettoyage,etc.]sont verrouill6es,SAUFBAKE,pendant le mode
sabbat.
Annulation de la cuisson courante alors que le four
est en mode sabbat :
Appuyersur CANCEL(ANNULER].
C_NCEI .....
• Lemot BAKEs'6teint_ I'afficheur.
• Aucun bip sonorene retentit.
Annulation du mode sabbat :
1. Appuyer sur JatoucheClock pendantcinq secondes.
OU
2. Apres 72 heures,le modesabbatsetermine.
• SAbclignote pendantcinq secondes.
• L'heuredu iour revient_ J'afficheur.
A]ustement de la temp6rature
du four
La pr6cisiondes temp@aturesdu four a _t6soigneusementv@ifi6e
I'usine.iI est normalde remarquerquelquesdiff6rencesdans la
culssonentre un four neuf et un four ancien.Au fur et _ mesureque
los cuisinieressont moinsneuves,la temp6raturedu four peut varlet.
II estpossibled'ajuster latemp6raturedu four si I'on penseque Ie
four necur pasou nerissolepas correctement.Pourdecider de
J'ajustement_ apporter,r6gler le foura unetemp6raturede 15°C
(25 °F}plus 6leveeou plus bassoque la temp6ratureindiqu6edarts
Jarecette,puis faire cuire Ia pr@aration.Losr6sultatsdu _{test >_de
cuissondoiventdonner uneid6edu hombrede degr6sduquel la
temp6raturedoit 6tre ajust6e.
Ajustement de la temp@ature du four :
1. Appuyer sur Ia toucheBake [Cuissoncourante}.
BAKE
2. Entrer285 °C[550 °F]en appuyantsur la touche A
(Plus}. ..........
3. Appuyer sur la toucheBake et Ia maintenirainsi
pendant plusieurssecondesoujusqu'_ ceque 0°
paraisse_ J'afficheur.
Si Ia temperaturedu four a _t# pr#c_demmentajustee,Ie
changementseraaffich& ParexempJe,si la temp@aturedu four
a 8t_ reduitede 8 °C 05 °F],I'afficheurindiquera-8 (-15].
4. Appuyer sur Ia touche_ (Plus]ou V [MoJns]pour aiusterJa
temperature.
A chaque lois que I'onappuiesur unetouche, latempSrature
change de3 °C[5 °F].Latemp@aturedu four pout etre
augment_eou diminu#e de3 _ 20 °C [5 &35°F].
5. L'heuredu iour r_apparaitautomatiquement_ J'afficheur.
IIn'est pas n#cessairede reajusterIatempSraturedu four en cas
de panneou d'interruption de courant. Lostemp6raturesde
cuissonau griJet de nettoyagene peuvent8tre aiust6es.
Remarques sur le mode sabbat :
• Le modesabbatpout etre mis en marche_ tout moment,que
Jefour soit en marcheou non.
• Le modesabbatne pout pas #tm misen marchesi Ies
commandossont verrouill#esou laporte verrouilJ#e.
• Si lefour esten mode cuissonJorsquele modesabbatest
programme,le mot BAKE(CUISSONCOURANTE]s'8teint _ Ja
fin du cycle decuisson.IIn'y aura aucunsignal sonoreaudible.
o Lorsquele modesabbata demarre,aucun hip de prSchauffage
ne retentit.
o Tous Iesmessageset les bips sontdSsactivSsIorsquelemode
sabbatestactiE
o Si Fonappuiesur [atouche CANCEL,un cycle de cuisson
couranteaufour sera annuIe.Cependant,[e programmateur
resteraen mode sabbaL
o Apr6s unepannede courant, lefour revienten modesabbatavec
72 heuresrestanteset aucun cycleactif.
41
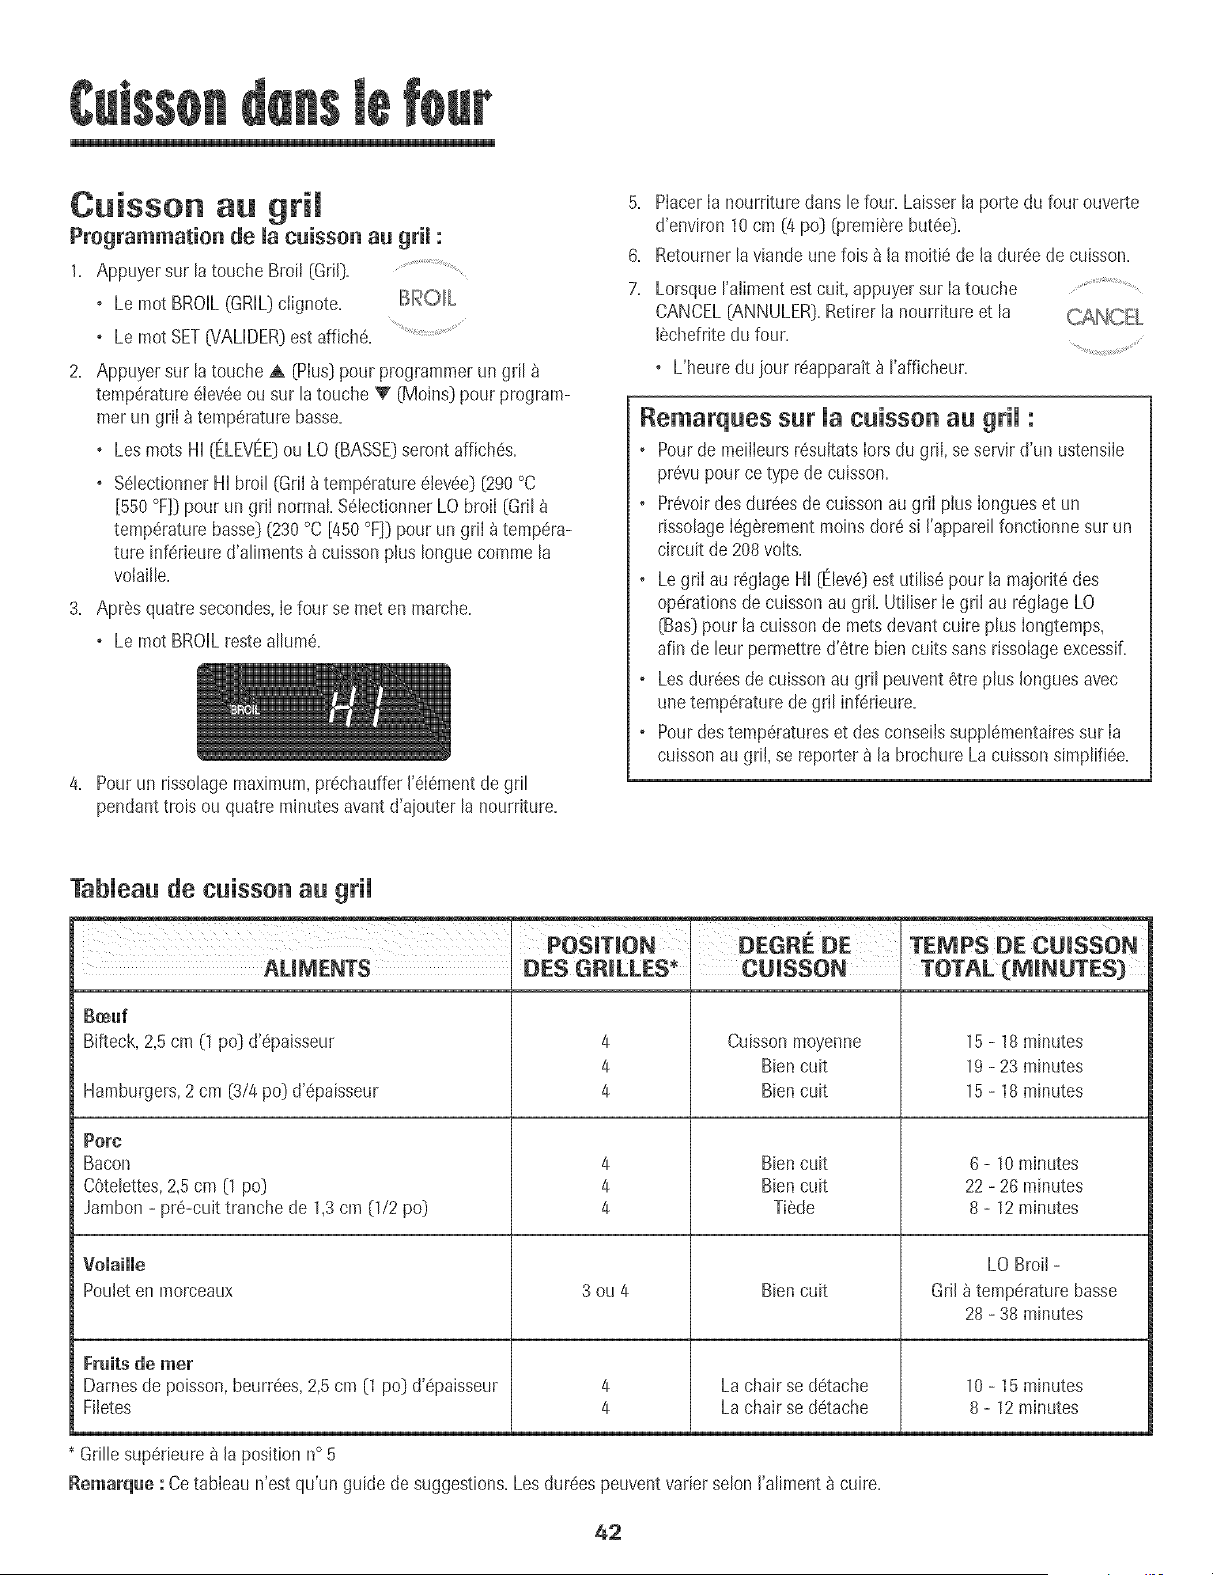
Cuisson au grim
Programmation de la cuisson au grim :
1. Appuyersur [atouche Broil (Gri[).
o Le mot BROIL(GRIL}ciignote.
+ Le motSET(VAUDER)estaffiche. .....
2. Appuyersur latouche A (Plus(}pour programmerungril
temp6rature6iev@ou sur latouche V (MoJns}pourprogram-
mer un griI _temp@aturebasse.
o Les mots HI (ELEVEE)ou LO (BASSE}serontaffich@.
o %bctionner HIbroil (GriI_temp@ature6by@) (290°C
[550°F]) pour un griI normal S_lectionnerLO broil (Gril
temperaturebass@(230°C [450°F]}pour un grii _ tempera-
ture inf_rbure d'aliments_cuisson plus Ionguecomme la
volaille.
3. Apr6s quatresecondes,Ie four se meten mar@e.
o Le mot BROILresteallum6.
4. Pourun rbso[agemaximum,pr@hauffer['616mentdegri[
pendanttrois ou quatre minutesavantd'ajouter la nourriture.
5. PlacerIa nourriture dans lefour. Laisserla porte du four ouverte
d'environ 10cm (4 po) _remi_re but@).
6. Retournerlaviande unelois _ la moiti6de la dur6ede cuisson.
7. LorsqueI'alimentest cuR,appuyersur Iatouche ................
CANCEL(ANNULER).Retirerla nourriture et la
I@hefritedu four.
o L'heuredu jour r@pparak_ I'afficheur.
Remarques sur Uacuisson au grH :
o Pourde meilIeursr@ultatsIorsdu gr[l, seservird'un ustensile
pr6vu pour ce typede cuisson.
o Pr@oirdesdur@s decuisson augriI pius Iongueset un
rissolageI6g@ementmoinsdot6 si I'appareilfonctionnesur un
circuit de 208voIts.
o LegriI au reglageHi (Elev@estutilis6 pour la majorit6des
op@ationsde cuissonau gdL UtiliserIe griI au r6glageLO
(Bas}pour lacuissonde metsdevantcuire plus Iongtemps,
afin de bur permettred'6tre biencurs sansrissoIageexcessif.
o Lesdur@s de cuissonau gril peuvent6tre plus Ionguesavec
une temp6raturede gril inf@ieure.
o Pourdes temperatureset des conseibsuppl6mentairessur Ia
cuisson augriI,se reporter_ la brochure Lacuissonsimplifi@.
TabUeaude cuisson au grH
__ ;_'_,
POS_TION DEGRE DE TEMPS OE CU_SSON
ALIMENTS DES GR_LLES_
B_uf
Bifteck, 2,5 cm (1 po] d'@aisseur
Hamburgers,2 cm (3/4 po) d'@aisseur
Pore
Bacon
COtelettes,2,5 cm (1 po}
Jambon - pr6-cuit tranche de 1,3 cm 0/2 po]
4
4
4
4
4
4
CUISSON
Cuissonmoyenne
Bbn cuit
Biencuit
Bien cuit
Bien cuit
Tilde
TOTAL (MINUTES}
15 - 18 minutes
19 - 23 minutes
15 - 18 minutes
6 - 10 minutes
22 - 26 minutes
8 - 12 minutes
Vomaille
Pouleten morceaux
Fruits de mer
Damesde poisson,beurr6es,2,5cm (1 po] d'@aisseur
FJletes
3ou4
4
4
Bien cuit
La chair se detache
La chair se d6tache
LO Broil-
GrJJ_ temperature basse
28 - 38 minutes
10 - 15 minutes
8 - 12 minutes
Grillesup6rieurea Japosition n° 5
Remarque : Cetableau n'est qu'un guide de suggestions.Les dur@speuventvarier sebn J'aliment_ cuire.
42
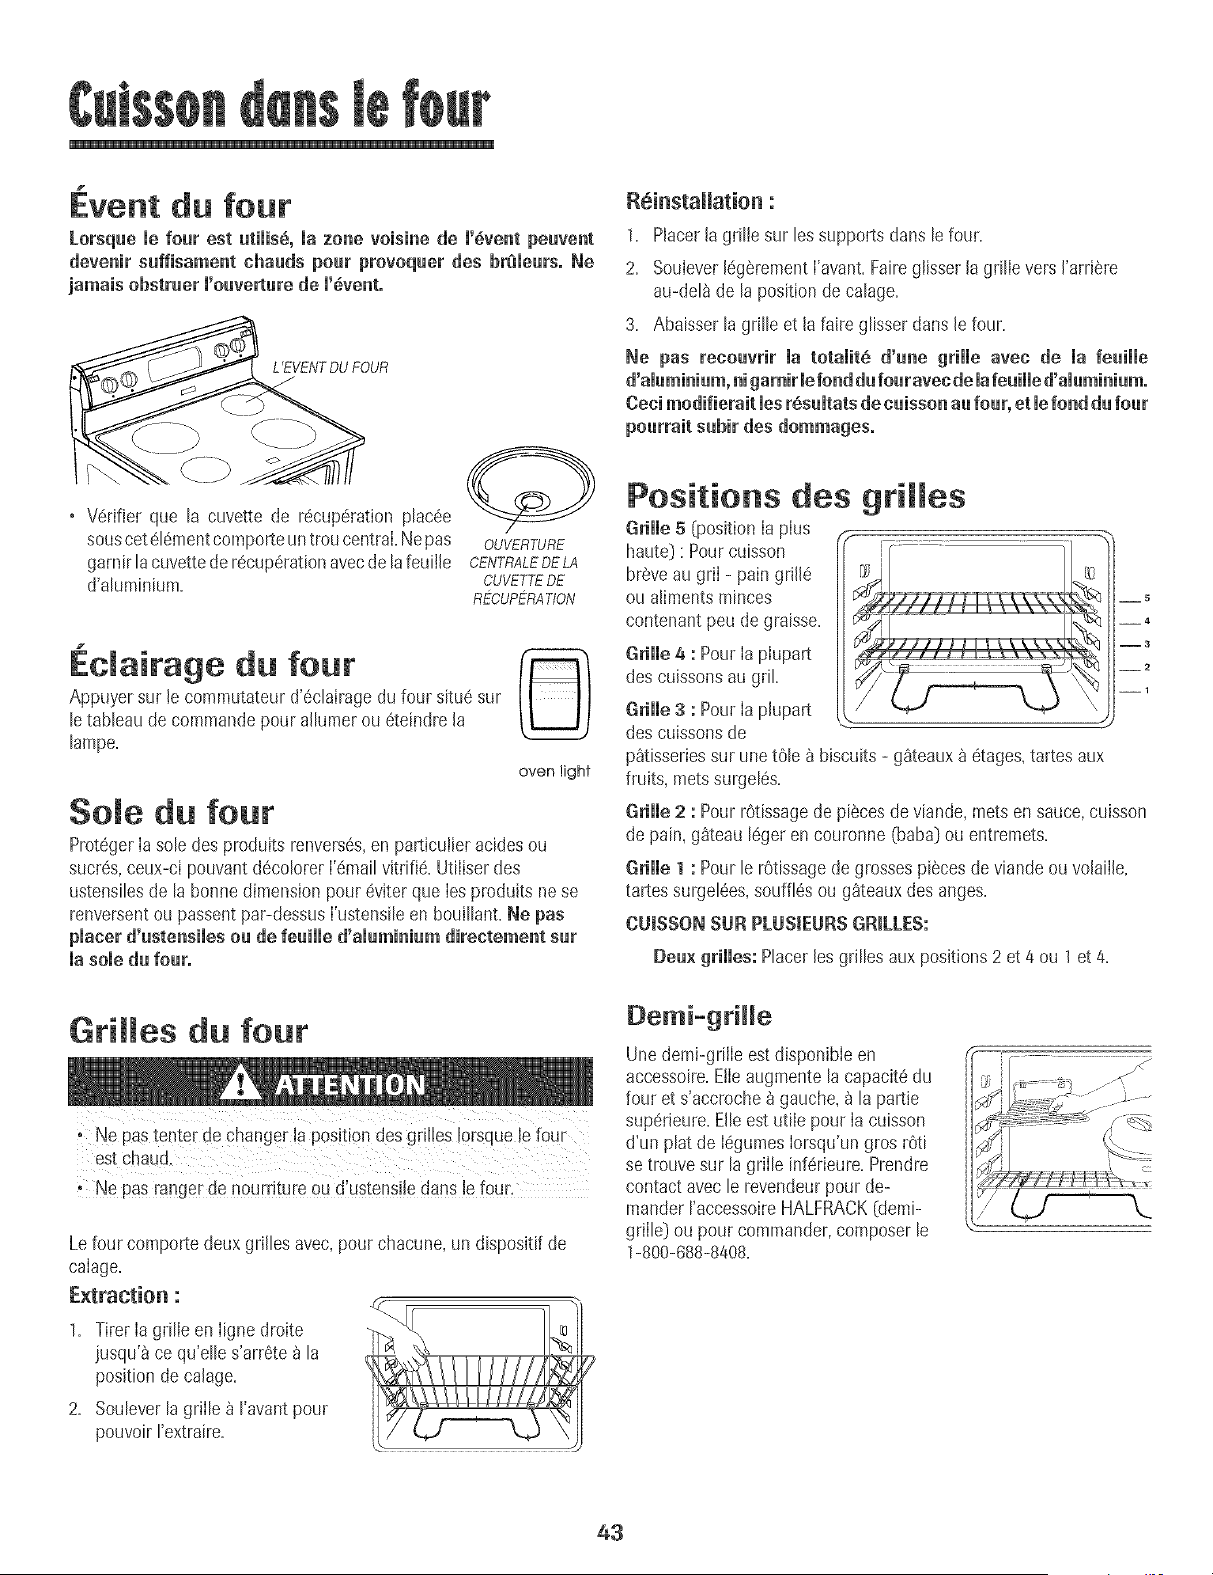
1
Event du four
Lorsque mefour est utimis_,mazone voisine de m'_ventpeuvent
devenir suffisament chauds pour provoquer des br_meurs,Ne
jamais obstruer m'ouverturede m'@ent.
L'EVENTDUFOUR
• V6rifier que la cuvette de r@up6ration plac@
souscet6tementcomporteuntroucentral.Nepas OUVERTURE
gamir lacuvettede recuperationavecdelafeuille CENTRALEDELA
d'aluminium. CUVETTEDE
Rf-°CUPERATION
-. 8}
Eclamrage du four
Appuyersur le commutateurd'@lairagedu four situesur
letabbau decommandepour allumerou eteindre la
lampe.
oven light
Sole du four
ProtegerIa sob des produits renverses,en particuibr acidesou
sucres,ceux-ci pouvantdecolorerI'emailvitrifie. Utiliserdes
ustensilesde la bonnedimensionpour@iterque Iesproduits nese
renversentou passentpar-dessusI'ustensileen bouillanLNe pas
placer d'ustensiles eu de feuille d'amuminiumdirecteruent sur
masomedu four,
R6instammation :
1. Placerla grilIe sur les supportsclansle four.
2. Soubver legerementI'avant.Faireglisserla grilIe versI'arri6re
au-deB de la positionde cadge.
3. Abaisserlagrilb et la faire glisserdansle four.
Ne pas recouvrir matotamit6d'une grille avec de ia feuiiie
d'aiuminium, nigamir mefond du fouravec de iafeuiiie d'uiuminium,
Cecimodifierait ruesrSsumtatstie cuisson aufour, et mefond dufour
pourraitsubir des dommages,
Positions des gri es
Grille 5 [position Ia pIus
haute} : Pourcuisson
br@eau griI - pain grille
ou alimentsminces
contenantpeu degraisse.
Grille 4 : Pour[a piupart
descuissonsau griL
Grille 3 : Pour[a p[upart
descuissonsde
p_tisseries sur une t61e a biscuits - g_teaux a etages, tartes aux
fruits, mets surgele&
__5
__4
--3
__2
--1
Grille 2 : PourrOtissagede piecesde viande,metsen sauce,cuisson
depain, g_teau legerencouronne (baba}ou entremets.
Grille 1 : Pourle rOtissagede grossespiecesdeviande ouvolaiile,
tartes surgelees,soufflesou g_iteauxdes anges.
CUISSONSURPLUSIEURSGR&LES:
Deux grilles: Placer les grilles aux positions 2 et 4 ou 1 et 4.
Grilles du four
° Ne pas rangerde nourdtumou d'ustens!!edans lefour.
Le four comportedeux grilbs avec,pourchacune,un dispositifde
cadge.
E×traction :
1. Tirer Ia grille en Iigne droite
iusqu'_ cequ'elle s'arrete_ la
positionde cadge.
2. Soubver B griIle _ I'avantpour
pouvoirI'extraire.
Demi-griHe
Unedemi-grilIe estdisponibleen
accessoire.Eileaugmentela capacitedu
four et s'accroche_gauche,_ la partie
supedeure.EIb estutile pour Ia cuisson
d'un platde legumesIorsqu'ungros rOti
se trouvesur la grilb inferieure.Prendre
contactavecle revendeurpour de-
manderI'accessoireHALFRACK{demi-
grille}ou pourcommander,composerle
1-800-688-8@&
43
Four autonettoyant
(certains modeles}
Remarque : Pour[a nettoyagemanuaivoir b page47.
o h _stnormal quecertalnespiecesde la cuisiniereoe_lennent
tr@ chaudesIorsd'un cyclede nettoyage.
o Pourew[erde',OUSb[esseret d'endommage_la porte du four
rfessayezpas d'ouvrir ia portequand{_LOCK
0/ERROUULLAGE}estaffiche.
5.
G.
Eliminerles residusde graisseou de produits renversessur la
soleavant b nettoyage.Ceciemp@hela formation deflammes
ou defumee @rant le nettoyage.
Essuyerlesr@idus sucreset acides,commeIespatatesdouces,
Ia tomate oubs saucesa basede lait. Laporcelainevitri%e
possedeunecertainer@istanceauxcompose acides,maisqui
n'estpas limit@. EIIepeut se d@olorersi bs r@idusacidesou
sucresne sontpas enlev@avantdecommencerI'autonettoyage.
Pregrammation de l'autenettoyage :
[ :Latemperaturedufourdoit tresitu eendessousj
de 205°C(/400°F)pour programmerun cycled'autonettoyage.
1
o Eviterde toucher lasurfacede cuisson,la porte,ie hublot et la
zonede ['eventdu four Iorsd'un cycled'autonettoyage
o Ne pasutiliser de net[oyan[pour four de cornmemesur Jefini
du four ou surtout autre composantdu four. CeJaabfmeraitle
fin[ ou les composantsdu four.
L'autonettoyageutilisedes temp@aturessuperieures_ cellesde la
cuissonnormalepour nettoyerautomatiquementI'interieur du four.
Ne forcez pasIa porte du four ni Ie levierde verrouilIagepourIes
ouvdr.Cecipeut provoquerune exposition_ des temperatures
ebv@s, et donc presenterun risquede brOlure.
Si lefour esttres sale,il estnormal qu'on observelaformation de
fume ou de flammesdurant Ienettoyage.Nettoyerlefour
intervalbs reguliersplutOtqued'attendre une accumulation
importantede r@idus.
Durant Ie processusd'autonettoyage,i! convient de bienaerer la
cuisinepour 61iminerles odeursnormalement6raisesdurant le
nettoyage.
!. Fermer [a porte du four.
2. Placer [a manette de verrouiJJage a [a position de verrouiJJage.
CLEAN
3. Appuyer sur [a toucheCban (Nettoyage}......
• Lemot CLEAN(NETTOYAGE}clignotea ['afficheur.
Si [a porte n'estpas ferm@, deships retentissentet [e mot DOOR
(PORTE}parait _ rafficheur.Si la porte n'est pasferm@ dans [es
45 secondes,['operationd'autonettoyageestannuleeet
I'afficheurrevbnt _ I'heuredu [our.
4. Appuyer sur [a toucheA (Plus}ou V (Moins}.
• CL-M (Nettoyage- sabte moyenne,3 heures}
est affiche.
5. Appuyer sur Ia toucheA ou V pourvoir defiler les differents
reglagesde I'autonettoyage.
Avant I'autonettoyage
1. Eteindrela lampe du four avant lenettoya% Celle-cipourrait en
effet griIIer.
2. Enbver la I@hefdte,tous Iesplatset tesgrilbs du four. Les griiies
risquentdese @colorer et de ne plus glisseraussibienapresun
cycled'autonettoyagesi on ne iesenl@epas.
3.
Nettoyer[e cadre du four, le cadrede [a porte (zonea l'exterieur
dujoint} et autour de I'ouverturedans Iejoint de laporte,a I'aide
d'un produitde nettoyagenonabrasifcommeBonAmi* ou d'eau
additionn@de @tergent. Le processus
d'autonettoyagenenettoie pasces
zones.EIIesdoivent6tre nettoy@spour
emp@herla saletede s%cruster
pendantle cycle de nettoyage.(Lejoint
assure1'etancheit6autour de laporte et
du hublot du four.}
i \
CL-H (Nettoyage- salete@aisse,4 heures}
CL-M (Nettoyage- salet6moyenne,3 heures}
CL-L (Nettoyage- salet6legere,2 heures}
Lechoixdu niveaudesalet6du four programme
automatiquementla dur@ du cycle d'autonettoya%
6. Apr@squatre secondes,le four commencelenettoya%
• Ladureede nettoyagecommencele d@ompte_ I'afficheur.
• Lemot LOCK07ERROUILLAGE}parait _ rafficheur.
o Lemot CLEANparait _ J'afficheur.
D_marrage diff_r_ d'_ cycle d'a_te_etteyage :
1. Appuyer sur la toucheDelay(Demarragediffere}. ......................
DELl?
• Lemot DELAY(ATTENTE}ciignote.
• 00:00parait _ I'afficheur.
4. Pourempechertout dommage,ne pasnettoyer ni frotter lejoint
qui setrouve autour de Ia porte du four. Cejoint estco%u pour
@iter les pertesde chaleur pendant lecycle d'autonettoyage.
*Lesnomsde marquedes pmduits de nettoyagesont des marquesd@oseesdes differentsfabricants.
s_ite oo°
44
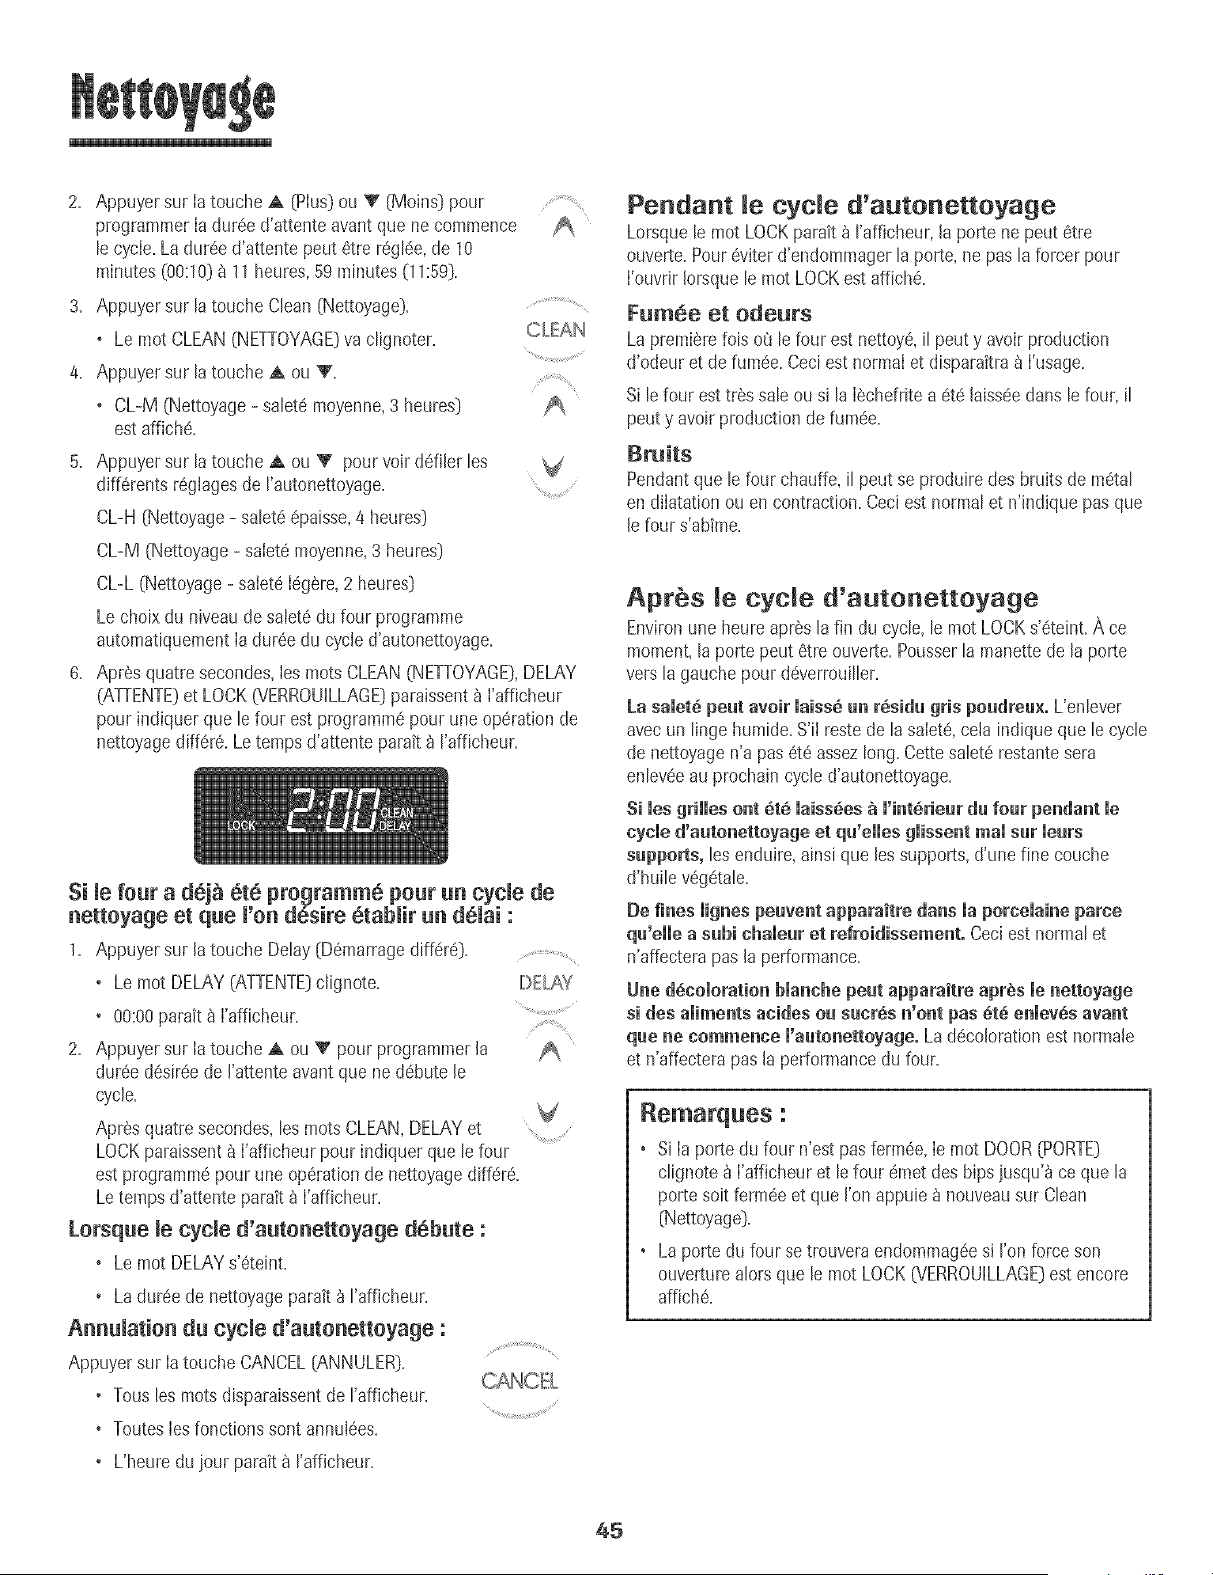
2. Appuyer sur Ia toucheA (Plus)ou V (Moins)pour
programmerIadur@ d'attenteavantque ne commence
le cycle.Ladur@ d'attentepeut 6tre regl6e,de 10
minutes(00:10]_ 11heures,59 minutes(11:59)+
3+ Appuyersur latouche Clean[Nettoyage)+ ..........
o Le mot CLEAN(NETTOYAGE)va clignoter. CLEAN
4. Appuyersur latouche A ou V.
+ CL-M (Nettoyage- sabt@moyenne,3 heures} A
estaffiche+
5. Appuyersur latouche A ou V pour voir driller les V
diff6rentsr6glagesde I'autonettoyage.
CL-H [Nettoyage- sabt6 @aisse,4 heures)
CL-M (Nettoyage- salet6moyenne,3 heures)
CL-L (Nettoyage- salet6I6gSre,2 heures}
Le choixdu niveaude salet6du four programme
automatlquementIa dur6edu cycle d'autonettoyage.
6. Apr6s quatresecondes,Iesmots CLEAN(NETTOYAGE},DELAY
(ATTENTE)et LOCK(VERROUiLLAGE)paraissent_ I'afficheur
pour indiquerque le four estprogrammepourune op6rationde
nettoyagediff6r6.Letemps d'attente parait _ I'afficheur.
Si Jefour a dej_ ete programme pour un cycle de
nettoyage et que J'on desire 8tabJir un d6Jai :
1. Appuyer sur la touche Delay[D6marragediff6re)....................
• Lemot DELAY(ATTENTE}cJignote. DELAY
• 00:00paratt8 I'afficheur.
2. Appuyer sur Ia toucheA ou T pour programmerJa
dur6ed6sir@de J'attenteavantque ned6bute Je
cycle.
Apr@squatre secondes,bs rootsCLEAN,DELAYet
LOCKparaissent_ I'afficheurpour indiquerque le four
estprogrammepour une op6rationde nettoyagediff6r@.
Letempsd'attente parait _ I'afficheur.
Lorsque Je cycle d'autonettoyage d6bute :
+ Lemot DELAYs'6teint+
+ Ladur@ de nettoyageparait _ I'affbheur+
AnnuJation du cycJe d'autonettoyage :
Appuyersur Iatouche CANCEL{ANNULER)+
+ Tousles rootsdisparaissentde I'afficheur+
+ ToutesIesfonctionssont annul@s+
• L'heuredu jour parait8 raffbheur+
Pendant Je cycle d'autonettoyage
Lorsquele mot LOCKparak _ I'afficheur,la porte ne peut 6tre
ouverte+Pour@iter d'endommagerla porte,ne pasla forcer pour
I'ouvrJrIorsquele motLOCKest affich6+
Fum6e et odeurs
La premierefob o_ lefour est nettoye,il peut y avoir production
d'odeuret de rum@.Ceciest normaIet disparaitra_ I'usage.
Si lefour esttr6s saleou si la I@hefritea 6t6 laiss@dans le four, il
peut y avoir productionde rum@+
Bruits
Pendantque lefour chauffe,[Ipeut se produiredes bruitsde mStal
en diIatationou en contraction.Ceciestnormal et n'ind+quepasque
le four s'abtme+
Apr_s _e cycle d'autonettoyage
Environuneheureapr@ la fin du cycle,le motLOCKs'6teint+Ace
moment,laporte peut 6tre ouverte+Pousserla manettede la porte
versla gauchepour d@errouiller.
La samet_pe_t avoir laiss_ _ r_s+_ gris po_re_×. L'enbver
avecun linge humide+S'ii restede lasalet6,cela indiqueque le cycle
de nettoyagen'a pas 6t6 assezlong+Cettesalet6restantesera
enlev@au prochaJncycled'autonettoyage+
Si mesgrilles om ere mabs_es_ m'iat_riearda roar peadaat me
cyemed'a_to_ettoyage et q_'emmesgmisse_troams_r me_rs
s_pports, les enduire,ainsi que lessupports,d'une fine couche
d'huib v_getale+
De fi_es iig_es pervert apparaitre da_s ia porceiai_e parce
q_'eJJea sBbi chaJe_r et refroidisseme_t. Ceciest normal et
n'affecterapas la performance.
U_e d_cobratio_ Ma_che peut apparaitre apr_s me_ettoyage
si des aliments acides o_ s_cr_s _'e_t pas _t_ e_mev_savast
q_e _e eomme_ce l'a_to_ettoyage° La@coloration estnormale
et n'affecterapas la performancedu four+
_ematq_es :
+ Si Ia porte du four n'estpas ferm@, Ie mot DOOR{PORTE)
clignote_ I'afficheur et lefour @r_etdes hips jusqu'_ ce que la
porte soitferm@ et que J'onappuiea nouveausur Cban
[Nettoyage).
• Laporte du four se trouveraendommag@si ron forceson
ouverturealors que le mot LOCK(VERROUILLAGE)est encore
affich6.
45
M6thodes de nettoyage
* Avant route manipulation ou operation de nettoyage, v_rifier que
I'appareil est arr_t_ et que teus les eempesantssent freids, afin
d'_viter des dommages ou des br_lures.
, Poureviter laformation de_acrlesou un changementde couLeur,nettoyer
o Aprestout d_montagede composan1:s,veiller a effectuerun remontage
correct.
Les noms de marque sent des maroues
deoosees des differents fabricants.
"" Pour commander directement= comooser
e 1-877-232-677" aux E=-U=eL e
1-800-688-8408 au Canada.
PIECES NET[OYAGE
Desseret et table
de euissen-
i_mailvitrifi_
L'emailvitrifie estduverre lieau metalparfusion.IIpeut sefissurerous'ecailleren casde mauvaiseutilisation.II est
resistantauxacides,maispastotalementinattaquablepar lesacides.Touslesproduitsrenverses,enparticulier
acidesou sucres,doivent6treessuyesimmediatementavecun Iingesec.
, Unelois la piecerefroidie,Ia laveravecde [eau savonneuse,rinceret secher.
, Ne jamaisessuyerunesurfacetilde ouchaudeavecun lingehumide.Cecipourraitlafissurerou I'ecaiIIer.
, Ne jamaisutiIiserde nettoyantspourfour,d'agentsde nettoyagecaustiquesou abrasifssur lefini exterieurde la
cuisiniSre.
l=_ehefriteet su Ne jamais ceuvdr la gri#e de papier d'aluminium; cela emp_ehe la graisse de ceuler dai_sla tbcheMte.
• Recouvriria lechefriteet sa grilled'un lingesavonneux;iaisseragir pourdetacheriesresidus=
, Laveravecdereausavonneuseti6de.Utiliserun tampon_ recurerpoureliminerlessouillurestenaces.
, Onpeut placerlesdeuxcomposantsde la 18chefriteclansun lave-vaisselle.
Zone de la console
de eommunde et
, Pourutiliserla fonctionVerrouillagedescommandespour Ie nettoyage,voir page37=
, Essuyeravecun linge humide,puis faire secher=Ne pasutiliserun agentde nettoyageabrasifsusceptiblede rayerla
finition=
, Onpeut utiliserunproduit de nettoyageduverre,pulverised'abordsur un chiffon=NE PAS prejeter le preduit
directeme1_tsur les touches de cemmande eu sur Faf#cheur.
Beutons de , Placerchaquebouton_ Iapositiond'ARRCT,et retirerchaqueboutonen letirant=
cemmunde , Laver,rincer et fairesecher=Ne pasutiliserunagent de nettoyageabrasifsusceptiblede rayerIa finition=
, FairefonctionnerbriSvementchaqueeIementpourverifierque leboutona ete correctementreinstaiIe=
Cuvettes de
L'emailpeutse decolorerouse fendilJers'il estsurchauffe.Ceciestnormalet n'affectepas lesperformancesde cuisson.
, Unefois lescuvettesde recuperationrefroidies,les laverapr@schaqueutilisation,Iesrinceret Iessecherpoureviter
lestachesou ladeceleration.Lescuvettesde recuperationpeuvent6treIaveesen Iave-vaisselJe.
, PoureJiminerIesgrossessouillures,faire tremperdansde I'eausavonneusechaude,puisutJJiserunproduit de
nettoyagepeu abrasifcommeSoftScrub_et untampon_ recureren plastique.
, EncasdesaleteincrusteedartsIescuvettesde recuperation,lesretirerde Ia cuisini@re,lesposersur desfeuilles
de papierjournal et les pulveriserdoucementde nettoyantcommercialpourfour.[Ne paspulveriserdeproduit
sur lessurfacesavoisinantes.]Mettrelescuvettesde recuperationdartsunsacen pJastiqueet laisserle produit
agir plusieursheures.Porterdes gantsen caoutchoucpourretirer lescuvettesde recuperationdu sac,Javerles
cuvettes,Jesrinceret lessecher.
• Apr6sle refroidissement,laverapr6schaqueutilisation,rinceret fairesecherpour@iter laformationdetachesou un
changementde couleur.
• Poureliminerdegrossessouillures,fairetremperdansdereausavonneusechaudepuisutiliserunproduitdenettoyage
peuabrasifcommeSoftScrub*et untampon_ recureren plastique.Ne pasutiliserun produitde nettoyageabrasit
suite ooo
46
NE_OYAGE
dU fOUr en verre
Int6rieur du four
Grilles du four
(terrains modeies)
PoHe du four
(ceHains modeies),
tiroir de remisage,
poign6e de porte,
panneau× iat6rau× -
• Eviterd'utilisertrop d'eau,qui risqueraitdes'infiltrersousou derriereleverreet detacher.
• Laverb I'eauet ausavon.Rinceravecde I'eaupropreet s6cher.Un produitde nettoyagedu verrepeut6tre utilis6
en levaporisantd'abordsur un linge.
• Ne pasutiliserde produitsabrasifscommetamponsb r6curer,lained'acierou produitde nettoyageen poudrequi
risqueraientde rayerleverre.
• Ex6cuterles instructions pr6sent6esaux pages44-45pour I'autonettoyagedu four.
Netteyage manual:
• Nettoyer%quemment avecun tamponde plastiqueet un produit de nettoyagemoyennementabrasif.
• Ne pas utiliser untampon _ r6curer metallique,qui formeraitdes rayuressur la surface.
• Lorsde remploi d'un produit commercialde nettoyagede four,appliquerIesinstructionsdu fabricant.
• Eliminerdesquepossiblelesproduitsacidesrenvers6s(produitsb basedehit oudetomate)aveceauet savon;ces
produitspeuventfaire changerla couleur de 1'6maillots d'un contact prolong6.
Pourfacimiterle nettoyage, oil peut enmeverla porte du four, (Voirla section Entretien,page48.]
• Nettoyeravecde I'eausavonneuse.
• Eliminerlessouillurestenacesavecune poudrede nettoyageou untampon _ r6curersavonneux.Rinceret faire
s6cher.
• Si lesgrilles sentlaiss6esdans Iefour pendant Iecycled'autonettoyage,ellessed6colorentet peLwentneplus tres
bienglisser.Sicetase produit,enduirele borddesgrilleset lesupportdesgrillesd'unefine couched'huilev6g6tale,
puis essuyerI'exc6dent.
• AlEPASUTIUSERDE PRODUffS DE NETTOYAGECONTENANTDU JAVELLISANT.
• NE PASUTIUSER DE NETTOYANTS_ ORANGE_ OU ARRASIES.
• TOUJOURSESSUYERDANS LE SENSDE LA TEXTUREDE L'ACtERLORSDU NETTOYAGE.
• Nettoyage joumumier/sumet6m_gere= EssuyeravecI'un desproduitssuivants: eausavonneuse,vinaigre blanc/
eau,produit de nettoyagepourverre et surface Formula409*ou un produit semblablepour verre - avecun linge
soupleet une6ponge.Rinceret s6cher.Pourpoliret enteverlesmarquesdedoigts,fairesuiwe parunevaporisation
de Magic Spraypour acier inoxydable[piece n° 20000008)*_-
• Salet_.med6r_e/_paisse - EssuyeravecI'un desproduitssuivants: BenAmi,SmartCleanserouSoftScrub*-
raide d'un lingesoupleou d'une 6pongehumide.Rinceret s6cher.Lestaches rebe!lespeuvent6tre enlev6esavec
untamponmulti-usagesScotch-Brite*humidi%.FrotteruniformementdansIesensdu m6taLRincerets_cher.Pour
redonnerdu lustreet retirer Iesrayures,faire suivrepar unevaporisationde Magic Spraypour acier inoxydable*.
, O_celeratien - A I'aided'une 6pongehumidi%e oud'un Iingesouple,essuyerb I'aidedu nettoyantCameo
pour acier inoxydable_-Rincerimm6diatementet s_cher.Pourenlever les marqueset redonnerdu lustre,faire
suiwe parune vaporisationde Magic Spraypour acier inoxydable*.
• Unefois les pi6cesrefroidies,laver_ I'eausavonneusetiede,rinceret s6cher.Nejamais essuyerune surfacetiede
ou chaudeavecun linge humide,ceci pouvantendommagerlasurface et entrainer unebr0Iure par Iavapeur.
• Pourlestachesrebelles,utiliserdes agentsde nettoyageI6g6rementabrasifscommela p_te au bicarbonatede
soudeou BenAmi*. Nepas utiliserd'agentsde nettoyageabrasifs,caustiquesou6nergiquescommelesnettoyants
pourfour ou lestamponsen Iained'acier.Cesproduits raieraientou endommageraientde fa_onpermanentela
surface.
REMARQUE:UtiHserun#nge eu _n terchen secpe_r essayer _espreduitsrenvem_s, surtout s'i_ssent acides
e_ sucres. La s_fface portrait se ddcelerer ell se ternff sf _asalet_ n'_tait pas fmm_dfatement enlev_e. Ced
est par'deulf_rement important dans le c_s de surfaces blanches°
*Lesnomsde marquesentdes marquesd6poseesdes diff6rentsfabricants.
** Pourcommanderdirectement,composerle 1-877-232-6771aux E.-U.ou le 1-800-688-8408au Canada.
_7
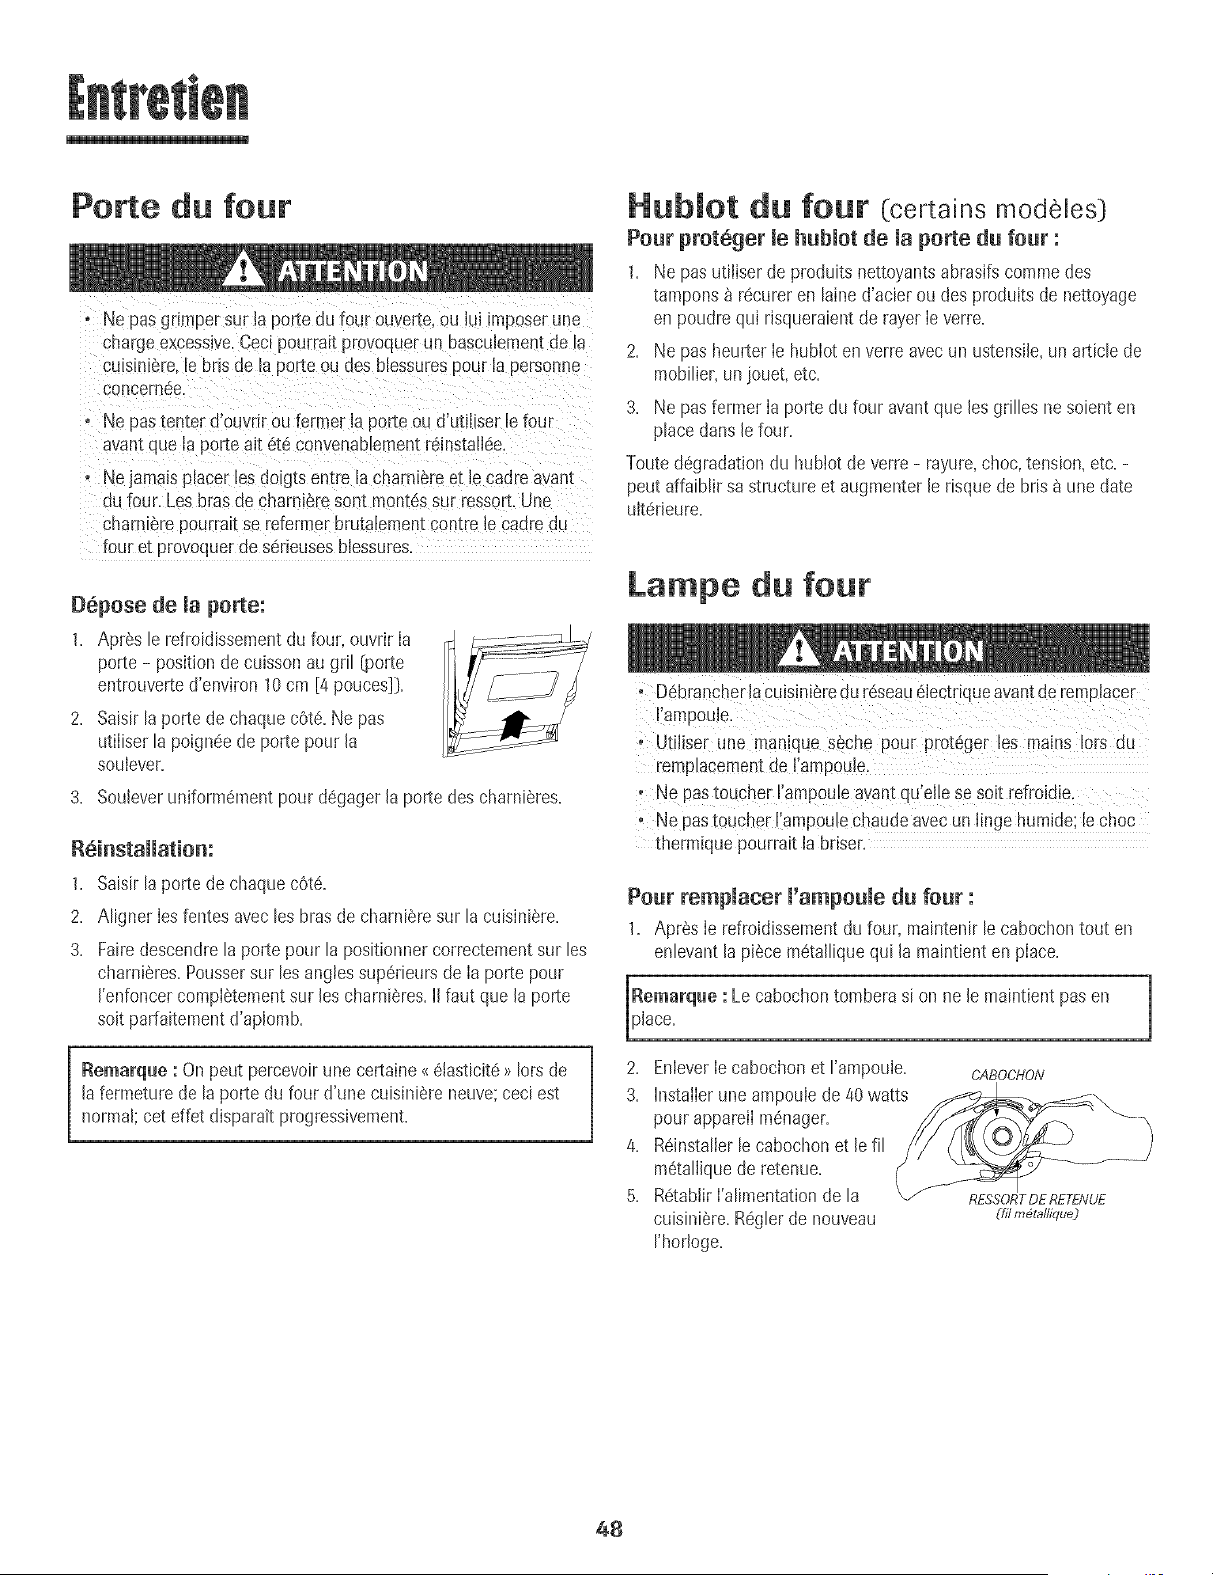
Porte du four
- Ne pasgnmper sur [aporte du four ouverte,ou [ui imposerune
charge excesswe.Cecipourrait provoquerun basculementde la
culsm_ere._ebrJsde [a porte ou oes bIessurespour la personne
eoncern6e.
, Ne pastenter douvrir ou former la porte ou d'utiiiser [e four
avantque [a porte alt ete convenabiementrdinstall6e.
• Ne jamaisplacer los doigtsentre la charni_reet le cadt_avant
du four. Los brasde charmeresont mont6ssur ressort Une
charnierepourrait se reformerbrutaiemen[con[rele cadre du
four et provoquerde serieusesblessures
Depose de la porte:
1. Apr6s lerefreidissementdu four, ouvrir Ia
porte - positionde cuissonau gril (porte
entmuverted'environ 10cm [4 pouces]).
2. Saisir laporte dechaque c6t6.Ne pas
utiliserla poign6ede porte pour [a
soulever,
3. Souleveruniform6mentpour d6gager[a porte des charni6res.
1. Saisir [aporte dechaque c6t6.
2. Aligner los fentes avec[esbrasde charniSresur [a cuisini@re.
3. Fairedescendrelaporte pour lapositionnercorrectementsur los
charni@res.Poussersur los anglessup6rieursde [a porte pour
['enfoncercompi@tementsur [escharni@res.I[faut que [a porte
soit parfaitementd'aplomb.
[ Remarque : Onpout percevoirune certaine<_6[asticit6>>lots de
[afermeture de la porte du four d'une cuisiniSreneuve;ceciest
normal;cot effet disparaitprogressivement.
Hublot du four (certains mode[es)
Pour prot_ger [e hub[or de [a porte du four :
1. Ne pasutiliser de produitsnettoyantsabrasifscommedes
tampons _ r6cureren lained'acier ou des produitsde nettoyage
en poudrequi risqueraientde foyer[e verre.
2. Ne pas heurter[e hubiot enverre avecun ustensi[e,unarticle de
mobiIier,un jouet,etc.
3. Ne pasformer [a porte du four avantque los grilles ne soienten
place duns [e four.
Touted6gradationdu hubiot de verre- rayure,choc,tension,etc. -
pout affaiblir sa structureet augmenter[e risque de bris _ unedate
ult6r[eure.
La pe du four
, D_brancherlacuisiniSredu r6seak!6[ectdqueavantde remPiacer
Iampoule."
• UtilJserune manique s_che pour pr0t6ger los mains [orsdu
rernplacementde ['ampoule.
, Ne pastoucher 'ampoue avantqu'e e se sot refrod e
, Ne pastoucher I'ampoulechaudeavecun[[ncgehumide;[echoc
thermiquepourrait [a briser.
Pour remplacer l'ampoule du four :
1. Apr6s Ie refmidissenqent du four, maintenir le cabochon tout en
enlevant la piSce metallique qui [a maintient en place.
IRemarqae : Le cabochon tombera si on ne le maintient pasen
place.
2. Enlever[ecabochonet I'ampoule. eABOCWON
3. Installeruneampoulede 40watts
pour apparel[m6nager.
4. R6JnstalJer[ecabochonet lefil
m6talJJquede retenue.
5, R6tabJirl'a[imentationde [a _ RESSORTDERETENUE
cuisini_re.Reg[erde nouveau (f_m_,//i_u_.)
rhor[oge.
48

Pieds de r glage de l'aplomb
Vdrif!eFque !a brideantibascuJementagrJppeConvenabJement
Fun des piedsarrJ_rede r6glagede i'aplomb,pour que la
cu!siniB[enePUiSSebascuJeraccidentellement.
La cuisini_redolt 6tre d'aplombune fois install6e.Si
eriene Festpas,tourner Iespieds de r6glagede I 4
['aplomben plastique,_ chacundes anglesde [a
cuisiniere,jusqu'_ ceque celle-cisoit d'aplomb. .. ,,jj
&__ULEIViENT
PIEDDEREOM OE
DEL'APLOfVlB
Tiroir de remisage
Ne pas remlseroans lebroir de remisagedes arbclesen
plastJqueou papier:ou des produitsalimentalresou mat@[aux
inflammables.Lestemp@a_ures_ Fint@ieurdu t_rolrpeuven_
devemrtrop 61ev6espources articlesIorsquelefour esten cours
d'utiJisation.
R6instaJJation :
1, Positionnerles extr6mit6sdes glissi_resdans les rails _ J'int@ieur
de la cuisini_re.
2. SouleverI'avantdu tiroir et pousserdoucementjusqu'_ la
position de la premiSrebut6e.
3. Soulever_ nouveaule tiroir et le pousseren placepour le fermer.
Prise de cow'ant au×iliaire
(modeles canadiens seulement:)
La prisede courant auxiliaireestsitu6een bas/_gauche du
dosseret.Veiiler_ ce que Ie cordon d'aiimentationde I'appareiI
utilise nereposepas sur un 616mentde Ia table de cuissonou
proximit6:la miseen marchede 1'616merit
chauffantferait subJrdes dommagesau
cordon d'alimentationet a Japrise de
courant.
Un appareilsuscitantune demandede
courantde plus de 10A provoquera
I'ouverturedu disjoncteurqui protege Ia
prise decourant auxiliaire.Pourr@rmer
Jedisjoncteur,appuyersur le
commutateursituesur le bordinf@Jeur
du dosseret.
_eaL_,
....................................................C)r
CIRCUIT BREAKER
LetJroirde remisagepeut 6tre enlev6pour pouw_irnettoyersousJa
cuisini@re.
D6pose :
1. VJderJetiroir et Ietireriusqu'_ Japositionde Japremierebut6e.
2. SouieverJ'avantdu tiroir.
3. Tirer letiroir jusqu'_ Ia positionde la deuxi@mebut6e.
4. Saisirles cOt6set souleverlet[roir pour pouvoirle retirer.
49
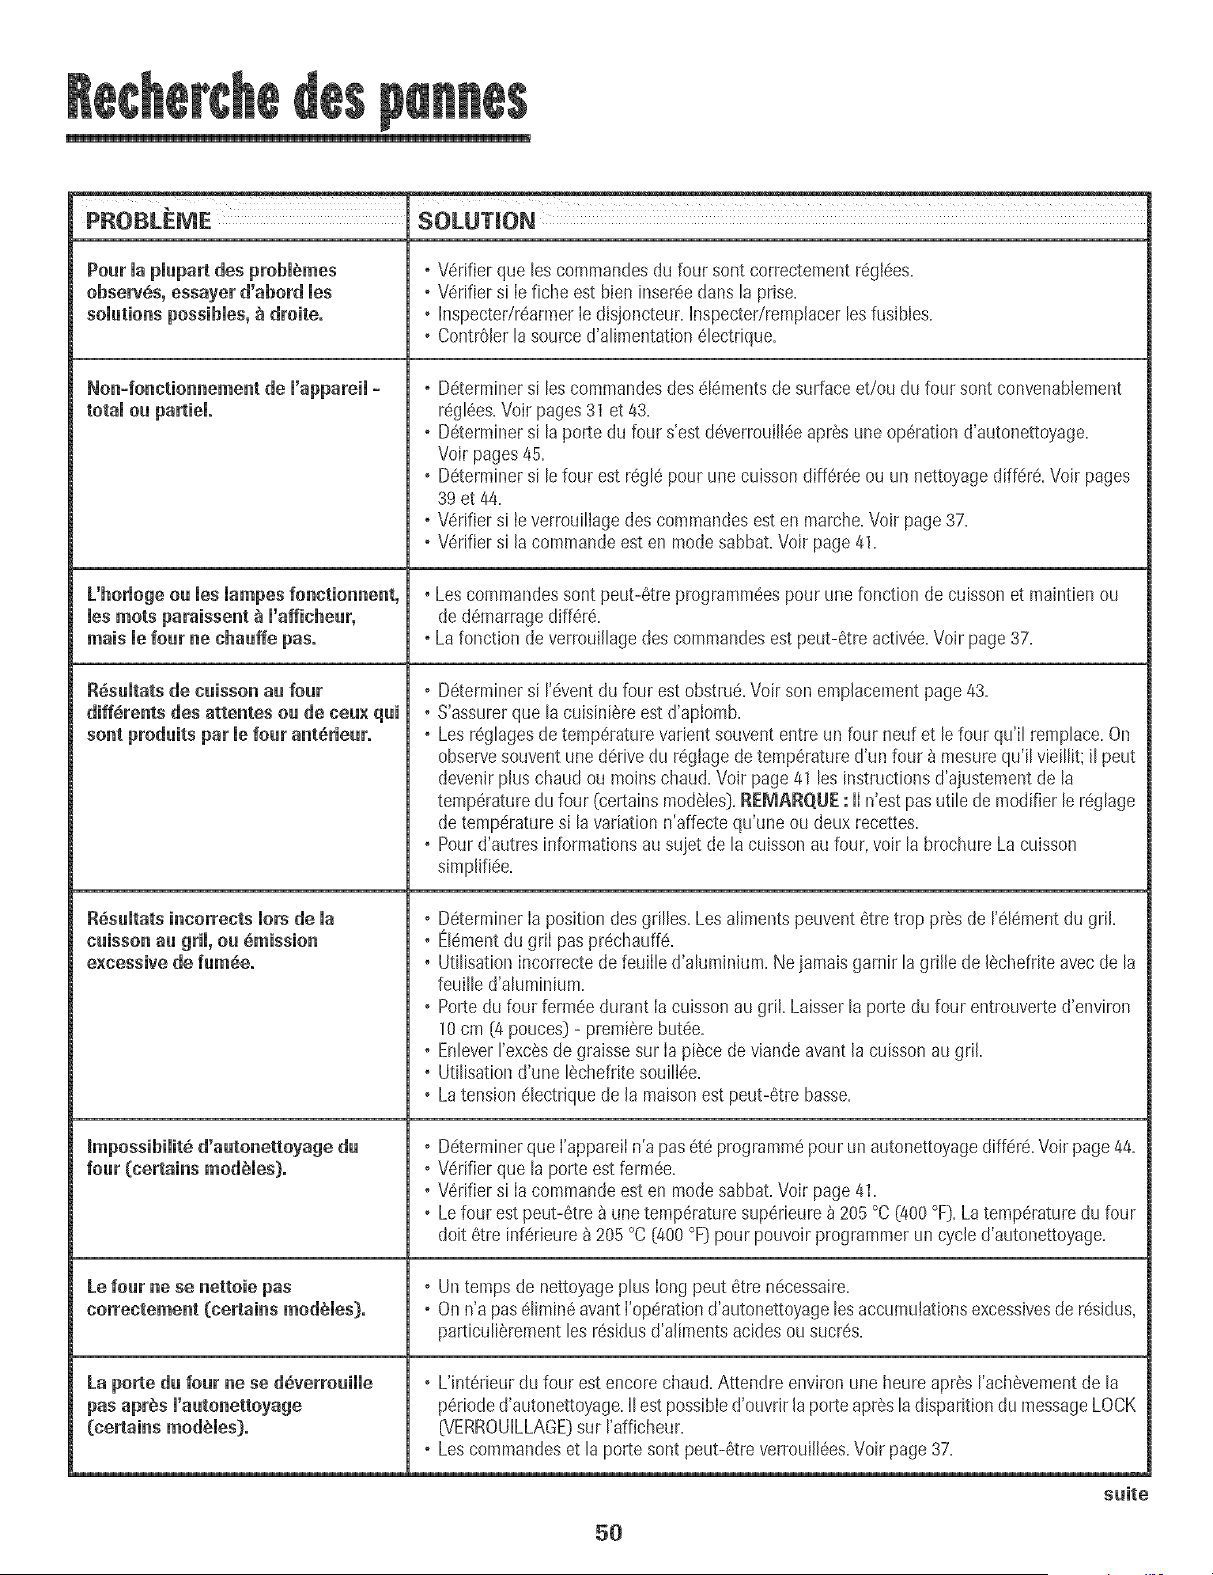
PROBLEME SOLUTION
Pour mapmupartdes probmemes oV6rifier que los commandosdu fo_Jrsontcorrectementr6gI6es.
observSs, essayer d'abord rues oV6rifier si Iefiche est bien inser6edans la prise.
solutions possibles, _ droite, o Inspecter/rearmerIe disjoncteur.Inspecter/remplacerlesfusibles.
o ContrOlerta sourced'atimentationetectrique.
Non=fonctionnement de m'appareim-
total ou partiem.
L'hormogeou ruesmampesfonetionnent,
ruesroots paraissent _ m'afficheur,
mais le four ne ehauffe pas.
R_sultats de cuisson au four
cliff, rents des attentes ou de ceux qui
soar produits par mefour ant_rieur.
R6sumtatsineerrects morsdema
cuisson au grim,ou _mission
excessive de fum_e.
_mpossibimit_d'autonettoyage du
four (terrains modSmes).
[e four nese nettoie pas
correetement (cerlains mod_mes}o
La perle du four nese dSverrouille
pas aprSs m'autonettoyage
(celtains modules),
o Determinersi los commandosdes elementsde surfaceet/ou du four sont convenablement
reglees.Voir pages31et 43.
o Determinersi la porte du four s'estdeverrouilleeapres uneoperationd'autonettoyage.
Voir pages45.
o Determinersile four est regle pourune cuissondiffereeou un nettoyagediffere.Voir pages
39 et 44.
oVerifier si ieverrou[!lagedes commandosesten marche.Voir page37.
oVerifier si lacommandoest en modesabbat.Voir page41.
oLescommandessont peut-6treprogramm6espour unefonction de cuissonet maintienou
ded6marragediff6r6.
oLafonction de verrouillagedes commandesestpeut-6tre activ6e.Voir page37.
o Determinersi I'eventdu four est obstrue.Voir son emplacementpage43,
oS'assurer(lue [acuisini_reestd'aplomb.
o Les reglagesdetemperaturevarientsouvententre un four neuf et lefour qu'il remplace.On
observesouventune d6rivedu r6giagedetemp6ratured'unfour _ mesurequ'il vieil[it;il pout
devenirplus chaud ou moinschaud.Voir page41 les instructionsd'ajustementde la
temperaturedu four (certainsmod6les).REIVIARQUE: IIn'estpasutile demodifier lereglage
detemperaturesi lavariationn'affectequ'une ou deux recettes.
o Pourd'autresinformationsausuiet de la cuissonau four,voir labrochure La cuisson
simpHfi6e.
o Determinerla positiondesgrilles.Los alimentspeuventetretrop prSsde I'elementdu griL
o Elementdu gril pas prechauffe.
o Utilisationincorrectedefeuille d'aluminium.Ne iamaisgarnir lagrille de [echefriteavecde la
feuille d'aluminium.
o Portedu four ferm6edurant lacuissonau griL Laisserla portedu four entrouverted'environ
10cm (4pouces}- premierebutee.
o EnleverI'exc6sde graissesur Iapi6ce de viandeavantla cuissonau griL
o Utilisationd'une I6chefritesouillee.
o Latensionelectriquede Jamaisonest peut-etre basse.
o DdterminerqueI'appareiIn'a pas6tOprogrammepourun autonettoyagediffere.Voir page44.
oV6rifier que la porte estferm6e.
oV6rifier si Iacommandoest en modesabbat.Voir page41.
o Lefour est peut-6tre_ unetemp6raturesup6rieure_205 °C_400°F).Latemp6raturedu four
doit 6tre inferieure_ 205°C (400°F)pour pouvoirprogrammeruncycle d'autonettoyage.
o Un temps de nettoyageplus long pout 6tre ndcessaire.
o Onn'a paselimin8avantI'operationd'autonettoyagelosaccumulationsexcessivesde residus,
particulierementles rSsidusd'alimentsacidesousucres.
o L'h_tSrieurdu four estencore chaud.Attendre environune heureapres I'achevementde la
p6rioded'autonettoyage.IIest possibled'ouvrirJaporte aprSsladisparitiondu messageLOCK
[VERROLHLLAGE]sur I'afficheur.
o Loscommandeset la porte sont peut-StreverrouiJlSes.Voir page37.
suite
5O
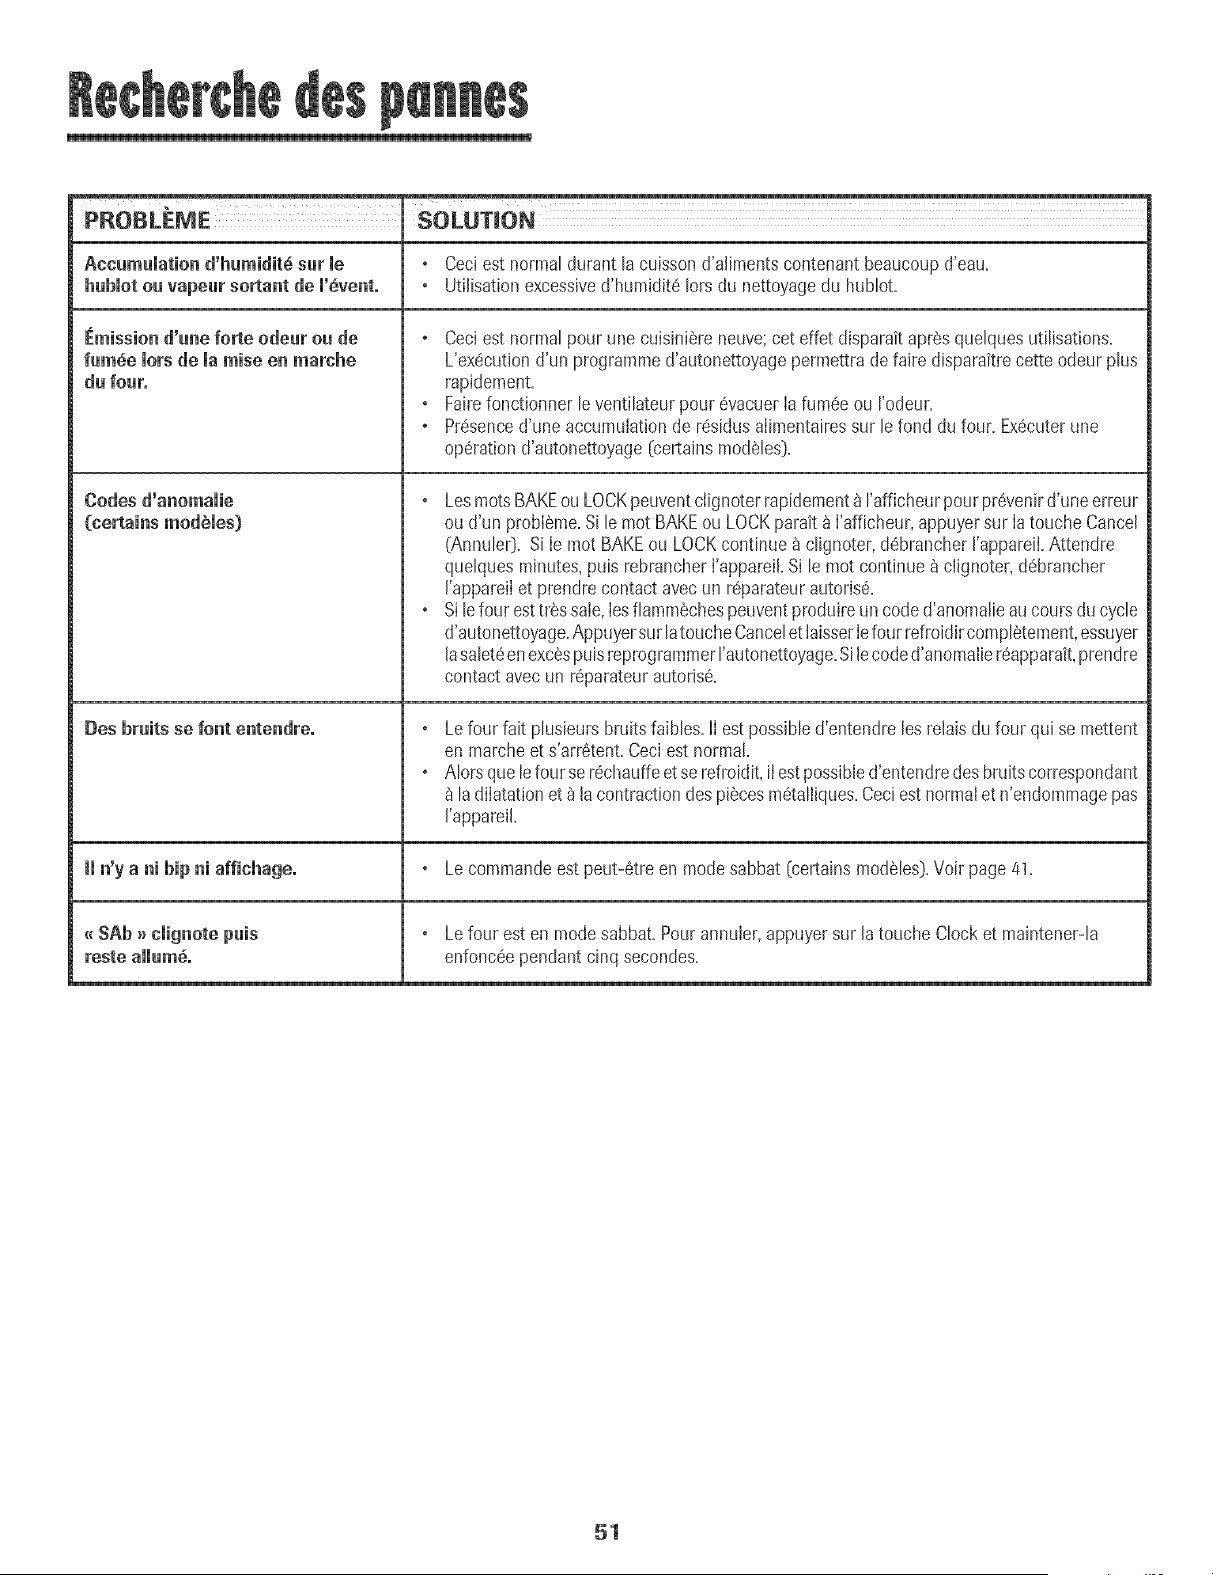
PROBLEME SOLUTION
Accumulation d'humidit6 sur me o Ceciest normaldurant lacuissond'alimentscontenantbeaucoupd'eau=
humorou vapeur soltant de l'_venL o Utilisationexcessived'humidit6 Iorsdu nettoyagedu hublot.
®
Emission d'une forte odeur ou de
fum6emorsdemaraiseenmarcm e
du four°
Codes d'unomaiie
Des bruits se font entendreo
Ceciest normalpour une cuisini6reneuve;cet effet disparaitapr_s quelquesutilisations.
L'ex#cutiond'un programmed'autonettoyagepermettrade faire disparakrecette odeur plus
rapidement.
Fairefonctionner leventilateurpour 6vacuerIafum#eou rodeur.
Presenced'uneaccumulationde r6sid[Jsalimentairessur lefond du four. Ex6cuterune
op6rationd'autonettoyage[certainsmodeles].
o LesrootsBAKEou LOCKpeuventclignoterrapidement8 I'afficheurpour pr6venird'une erreur
ou d'un probleme.Si le motBAKEou LOCKparait_ I'afficheur,appuyersur Iatouche Cancel
(Annule0. Si Ie mot BAKEou LOCKcontinue_ c@noter, d6brancherI'appareiLAttendre
quelquesminutes,puis rebrancherI'appareiLSile mot continue_ c@noter, d6brancher
I'appareiIet prendrecontact avecun r6parateurautoris6.
o Sile four esttr_ssale,IesflammSchespeuventproduireun coded'anomalieaucoursducycle
d'autonettoyage.AppuyersurlatoucheCanceletlaisserIefour refroidircompl_tement,essuyer
lasalet6enexcespuisreprogrammerrautonettoyage.Silecoded'anomalier6apparait,prendre
contactavecun r6parateurautoris6.
®
®
Le four fait plusieurs bruits faibles. II est possible d'entendre les relais du four qui se mettent
en marche et s'arr6tent. Ceci est normal.
AIors que le four se r6chauffe et se refroidit, il est possible d'entendre des bruits correspondant
la dilatation et 8 la contraction des pieces m6talliques. Ceci est normal et n'endommage pas
I'appareiL
_mn'yu ni hip ni affichageo o Le commandeest peut-6treen modesabbat (certainsmodSles).Voir page41.
reste ammum_.
o Lefour est en modesabbat.Pourannulet,appuyersur la toucheClock et maintener-la
enfonceependant cinq secondes.
51
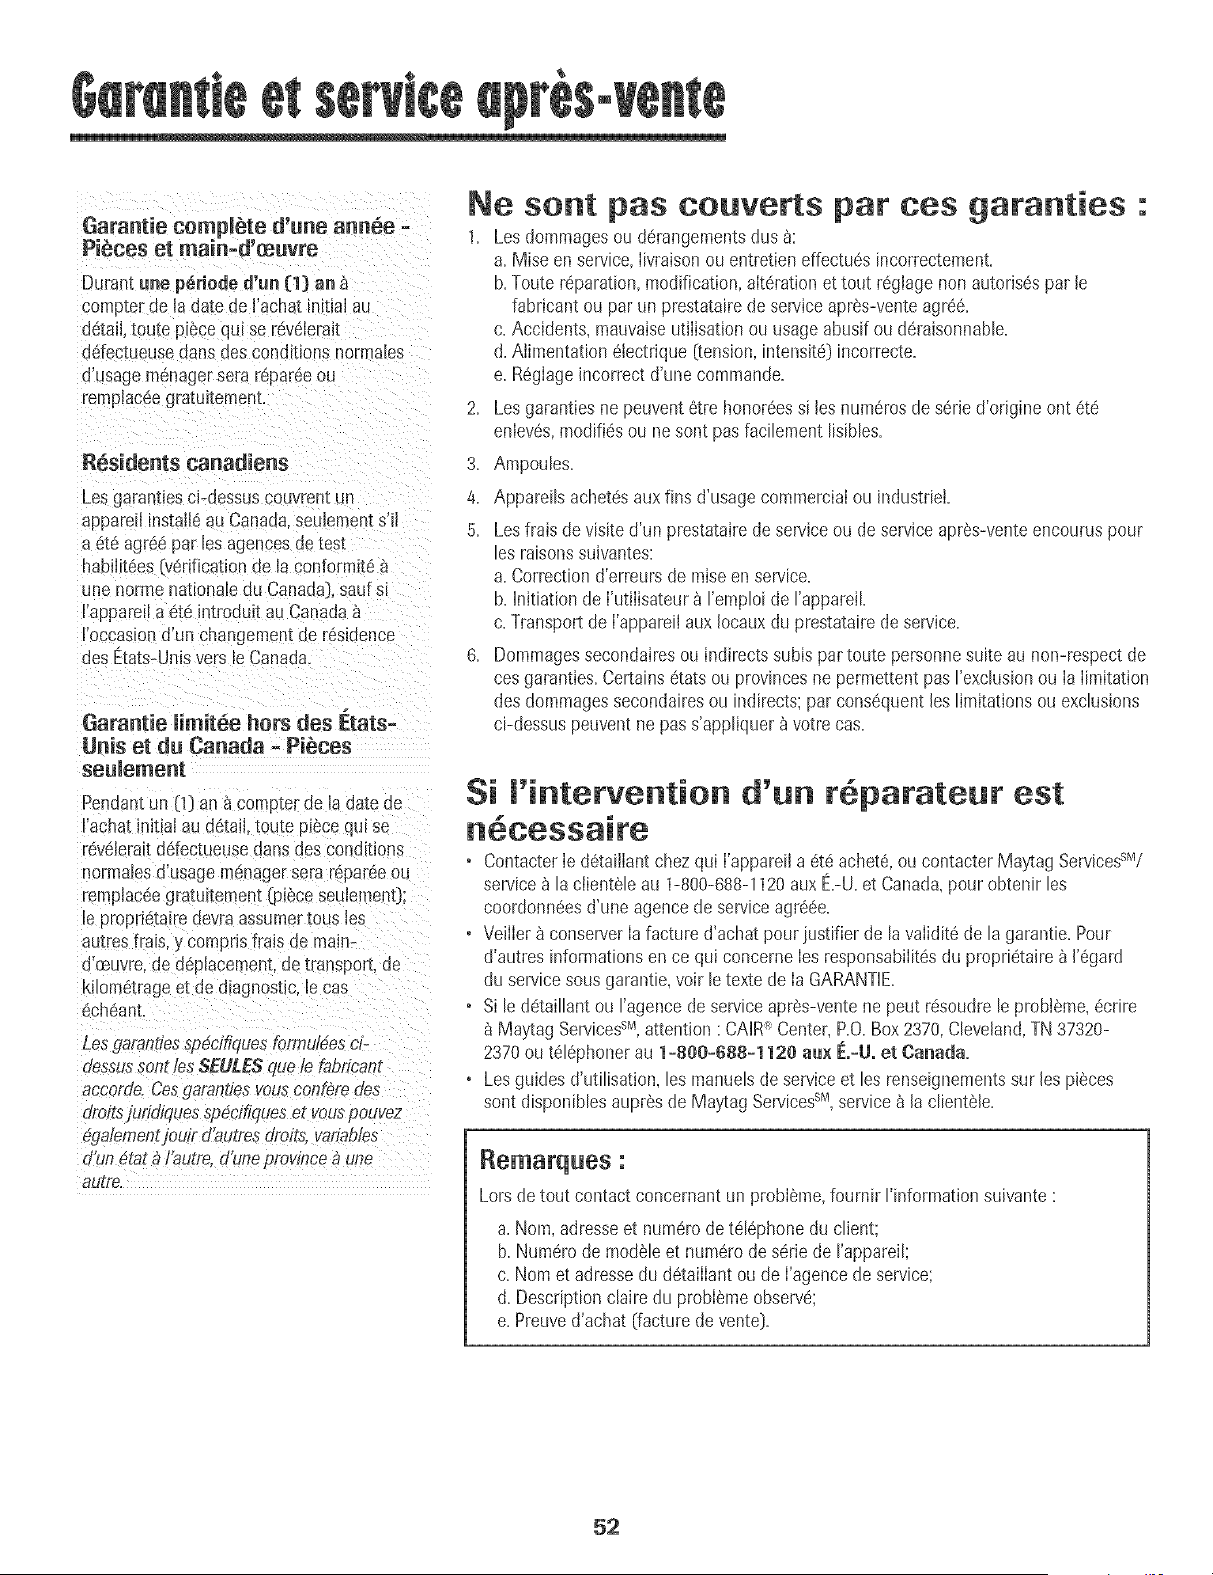
Garantie eemplbte d'une ann6e -
Pieces e| main-d'oeuvre
Durantune p_riode d'un (1) an a
compterde ia date de I'achatinitial au
d6tafl,tou[e piece qui se r_vdleraa
ddectueuse dartsdes conditionsnormales
d'usagemenagersera repareeou
remplaceegratultement.
Residents canadiens
Lesgarantiesci-dessuscouvren[un
appareilinstall6au Canada.seulements'Jl
a et6 agr_6par lesagencesdetest
habflit6es(v6dficationde la conformit6
une normenatlonaEedu Canada),sauf si
I'appare[Ia 6td introduit auCanada
!'occasiond'un changementde r6sidence
des Etats-Unisvers leCanada
Garantie limit6e hers des Etats-
Unis et du Canada - Pieces
seulement
Pendantun [1) an a compter de la datede
I'achatinitial aud6tail,toute piece qul se
r6vdlera_td6fec[ueusedans des conditions
normalesd'usagemenagersera repareeou
rempiacdegratuitement(piece seuiementj:
le propri6taireaevraassumer[ous les
autresfrais, y comprisfrais de maln-
d'(_uvre,ded6placement,de transport,de
kilorn6trageet de diagnostic=le cas
echeant.
Le_ gatanties sp6cifiques tbrrnul_es ci-
dessus sent/es SEULES que /e fa'bricant
accorde. Ces garandes vous conf_re de,_
droits juridiqL 9ssp_cifiques et vou_ oouvez
eqa/ementjouir d'autres drotts, variables
d'un _tat b/'autre, d'une province a une
au[re.
Ne sent pas couverts par ces garanties
1= Lesdommagesou derangementsdus _:
a=Miseen service,Iivraisonou entretieneffectu6s incorrectement=
b=Toutereparation,modification,alt6rationet tout r6glagenonautoris6spar le
fabricantou parun prestatairede serviceapres-venteagre6=
c=Accidents, mauvaiseutilisation ou usageabusifou d6raisonnable=
d=Atimentation6tectrique(tension,intensite)incorrecte=
e=R6glageincorrect d'une commande=
2= Lesgarantiesnepeuvent6tre honor6essi les numerosde s6ried'origine ont ete
enlev6s,modifiesou nesent pas facilementlisibles=
3= Ampoules=
4= Appareils achetesaux fins d'usagecommercialou hldustrieL
5= Lesfrais devisite d'un prestatairedeserviceou de serviceapres-venteencouruspour
les raisonssuivantes:
a=Correctiond'erreursde raiseen service=
b=Initiation de I'utilisateur_ I'emploi de rappareiL
c=Transportde I'appareiIaux Iocauxdu prestatairedeservice=
6= Dommagessecondairesou indirectssubispar toute personnesuite au non-respectde
cesgaranties=Certainsetats ou provincesne permettentpas I'exclusionou Ia limitation
desdommagessecondairesou indirects;par consequentles limitationsou exclusions
ci-dessuspeuventne pass'appliquer_ votrecas=
Si l'intervention d'un r parate r est
• Contacter[e detaiiiantchezqui ['apparefla dtd achete,ou contacterMa}_agServicesSM/
service_ la ciienteleau 1-800-688-1120auxE=-U=et Canada,pourobtenir les
coordonneesd'uneagencede serviceagreee=
• VeiIIer_ conserverIafacture d'achat pouriustifier de lavaIidit_de la garantie=Pour
d'autres informationsence qui conceme IesresponsabiIitdsdu propdetaire _ 1'egard
du servicesousgarantie,voir letexte de Ia GARANTIE=
• Si le detaillantou ragence de serviceapres-ventene peutrdsoudrele prebteme,dcrire
MaytagServicessM,attention : CAIR_Centel, P=O=Box2370,Cleveland,TN37320-
2370ou t_J_phonerau 1_8e0_688_112e aa× i_._LI,et Canada.
• Lesguides d'utilisation,les manuelsde serviceet les renseignementssur les pieces
sent disponiblesaupresde Maytag Servicessr_,service_ laclientele=
_e_a_q_es :
Lors detout contactconcemant un probJeme,fournir ['informationsuivante :
a=Nora,adresseet num_rode telephonedu client;
b=Numerode modeleet numerodeserie de I'appareil;
c=Noraet adressedu d6taiIIantou de I'agencede service;
d=Descriptionclaire du probIemeobserve;
e=Preuved'achat [facturede vente[}=
52
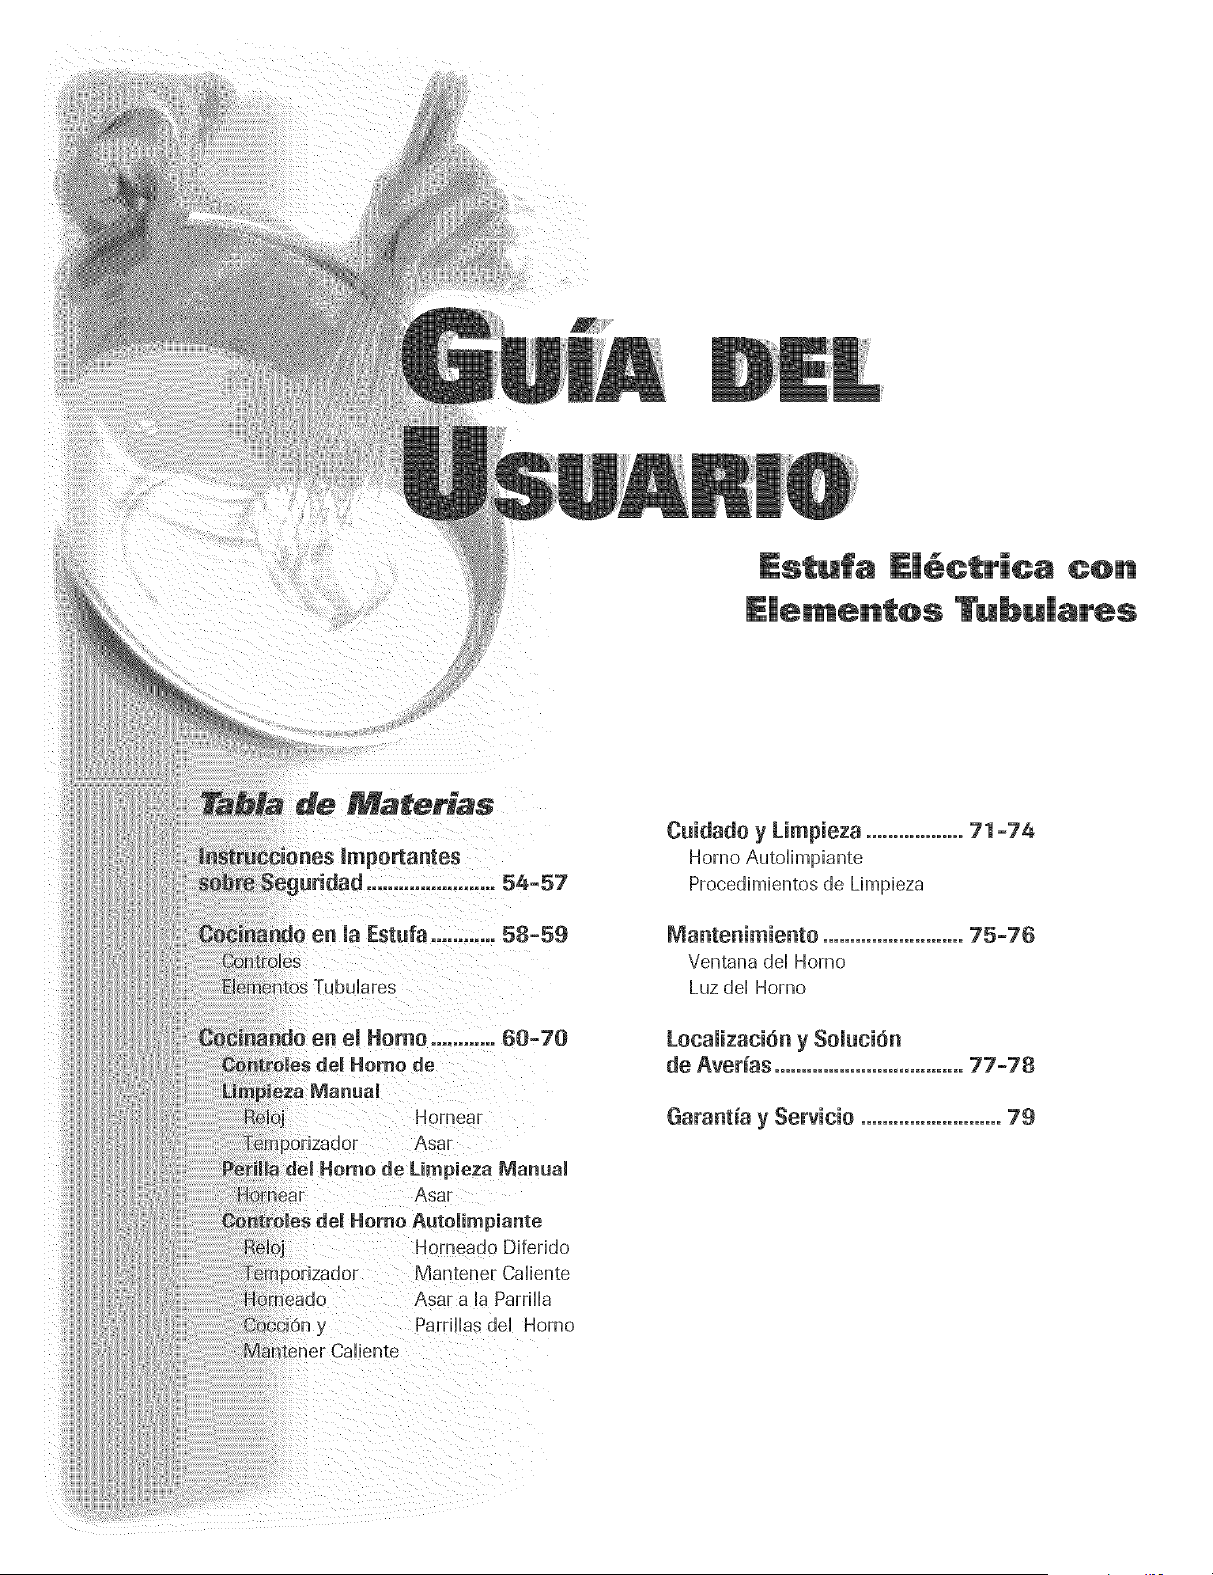
Estufa E|_ctrica con
E|e_entos Tubu|ares
_aterias
} en la Estufa ............ 58-59
Tubulares
Hornear
Asar
de Limpieza Manual
Asar
piante
Horneado Diferido
Mantener Caliente
Asar a la Parrilla
Parrillas del Homo
liente
Cuidado y Limpieza .................. 71-74
Homo Autolimpiante
Procedimientos de Limpieza
Mantenimiento .......................... 75-76
Ventana dd Horno
Luz del Homo
Locamizaci6n y Somuci6n
de Averias ...................................77-78
Garantia y Servicio .......................... 79
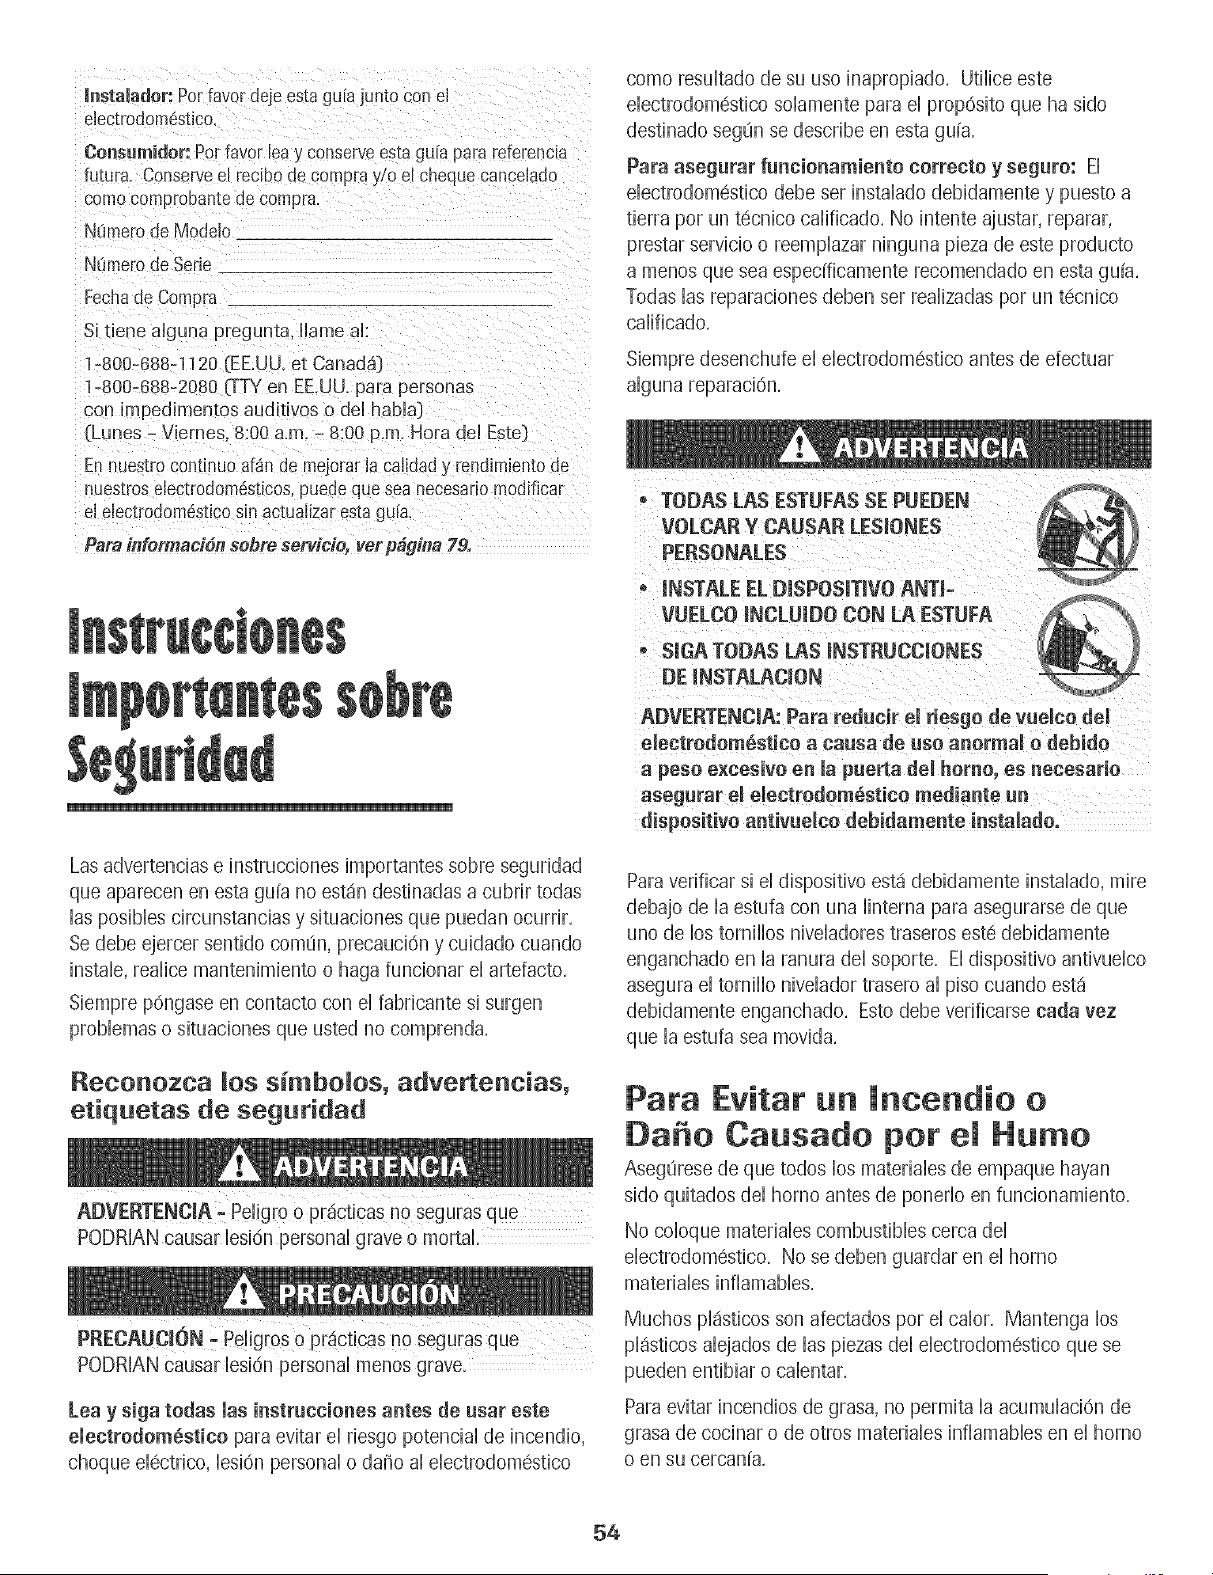
Instalador:Porfavor dejeestagalajunto con eJ
electrodom6stico.
Oonsumidor: Porfavor lea_conservees[agu_apara reterencla
futura. Conservee_recibode compray/o eEcheque canceJado
comocomproLantede compra.
N[SmerodeModelo
NOmero de Serie
Fecha de Comura
Si tiene alguna pregunta, llame al:
1-800-688-1120 _EE.UU. et Canad&}
1-800-688-2080 (TTY en EE.UU. para personas
con irnpedimentos auditivos odel habia}
(Lunes - Viernes. 8:00 a.m. - 8:00 p.m. Hora del Este}
En nuestro conttnuo af_n de mejorar la caJidad y rsndimiento de
nuestros eJectrodom6sticos, puede que sea necesano modificar
el electrodomdstico sin actua[izar es_agu[a.
Para infermaci6n seflre servicie, vet pbgh_a 79.
como resuitado de su uso inapropiado, Utiiice este
eiectrodomestico soiamente para ei prop6sito que ha sido
destinado segQn se describe en esta guia,
Para asegurar funcionamiento correcto y seguro: EI
eiectrodomestico debe set instaiado debidamente y puesto a
tierra pot un tecnico caiificado, No intente ajustar, reparar,
prestar servicio o reempiazar ninguna pieza de este producto
a menos que sea espedficamente recomendado en esta guia,
Todas ias reparaciones deben set reaiizadas pot un tecnico
calificado,
Siempre desenchufe el electrodom6stico antes de efectuar
alguna reparaci6n.
INSTALE EL DiSPOSITiVO ANTI-,
DE INSTALACION
eleetredem_stico a causa de use anormal o debide
a peso exeesivo en la puerta del homo, es neeesario
asegurar el e!ectrodem_stico mediante un
Las advertencias e instrucciones importantes sobre seguridad
que aparecen en esta guia no est_in destinadas a cubrir todas
ias posibies circunstancias y situaciones que puedan ocurrir.
Se debe ejercer sentido comuJn,precauci6n y cuidado cuando
instale, realice mantenimiento o haga funcionar el artefacto.
Siempre p6ngase en contacto con el fabricante si surgen
probiemas o situaciones que usted no comprenda.
Reconozca _os simbo_os, advertencias,
etiquetas de seguridad
ADVERTENCIA ' Peligro o pr_cticas no seguras que
PODRIAN causar lesi6n personal grave o mortal
PODRIAN causar lesi6n personal menos grave.
Lea y siga todas las instracciones antes de usar este
electrodom_stico para evitar el riesgo potencial de incendio,
choque ei6ctrico, iesi6n personal o da_o ai eiectrodom6stico
Para verificar si el dispositivo est,1debidamente instalado, mire
debajo de ia estufa con una iintema para asegurarse de que
uno de los tomiiios niveiadores traseros este debidamente
enganchado en ia ranura dei soporte. Ei dispositivo antivueico
asegura el tomillo nivelador trasero al piso cuando est,1
debidamente enganchado. Esto debe verificarse carla vez
que la estufa sea movida.
Para Evitar un lncendio o
Da o Causado per eJ Humo
AsegL_resede que todos los materiaies de empaque hayan
sido quitados dei homo antes de ponerio en funcionamiento.
No coioque materiaies combustibles cerca dei
eiectrodomestico. No se deben guardar en ei homo
materiales infiamables.
Muchos pi_sticos son afectados pot ei caior, Mantenga los
piasticos aiejados de ias piezas dei eiectrodom6stico que se
pueden entibiar o caientar,
Para evitar incendios de grasa, no permita la acumuiaci6n de
grasa de cocinar o de otros materiaies infiamabies en ei homo
o en su cercania,
54
i
En Case de lncendio
Use un extintor con producto quimbo seco o deI tipo espuma o
bicarbonato para apagar eI incendio o las llamas, Nunca use
agua en un incendio de grasa,
1, Apague eI homo para evitar que la llama se disperse,
2, NUNCA bvante o mueva una sarten en llamas,
3, Apague eI fuego o la Ihma deI homo cerrando la puerta deI
homo,
Segutidad para Ni os
armarios que estAn situados arriba de! e!ectrodom6stico,
para a!canzar 10sart!cul0s pueden les!0narse gravemente.
NUNCA deje a los ni_ios solos o sin supervisi6n cuando el
homo este en uso o cuando est6 caliente, Nunca permita que
los ni_ios se sienten o se paren en ninguna pieza del
electrodomdstico pues se pueden lesionar o quemar,
Se les debe enseSar a los ni_iosque el electrodomestico y los
utensilios que est_n en el pueden estar calientes, Deje enfriar
los utensilios calientes en un lugar seguro, fuera del alcance
de los ni_ios, Se les debe ensdiar a los ni_ios que un
eiectrodom6stico no es un juguete y que no deben jugar con
los controles u otras piezas del artefacto,
lnstrucciones Generames
NUNCA use un electrodom6stico como un peidaSo para
aicanzar los armanos superiores. El uso incorrecto de la
puerta del electrodom6stico tales como pisar sobre ella.
apoyarse o sentarse en la puerta puede resultar en que el
electrodom6stico sevuelque, se rompa la puerta y se
causen lesiones graves.
Para evitar posibles riesgos para el usuario y da_io al
electrodomestico, no use este producto como una estufa para
calentar o entibiar una habitaci6n, Adem_s no use el homo
como un lugar para guardar alimentos o utensilios de cocina,
No obstruya la circulaci6n del aire bloqueando el respiradero
dei homo,
NO TOQUE LOS ELEMENTOSCALEFACTORESNI LAS
SUPERFICIESINTERIORESDEL HORNO, Los eiementos
calefactores pueden estar calientes a_n cuando su color sea
obscuro, Las superficies interiores de cuaiquier homo se
calientan Io suficiente como para causar quemaduras, Du-
rante y despu6s dei uso, no toque ni permita que ias ropas u
otros materiales inflamables entren en contacto con los
eiementos caiefactores o ias superficies interiores dei homo
hasta que no se hayan enfriado, Otras superficies dei
electrodomestico pueden estar Io suficientemente calientes
para causar quemaduras - entre estas superficies est_in la
abertura dei respiradero dei homo y ia superficie cerca de esta
abertura, ia puerta dei homo y ia ventana de ia puerta dei
homo,
No toque un foco caliente del homo con un paso huJmedo
pues se puede quebrar, Si ei foco se quiebra, desenchufe ei
electrodomestico antes de sacar el foco para evitar sufrir un
choque el6ctrico,
NUNCA use papei de aiuminio para cubrir ias parriiias dei
homo ni el panel inferior del homo, El uso incorrecto puede
resultar en un riesgo de choque el6ctrico, incendio o da_ioal
electrodom6stico, Use papel de aluminio solamente como se
indica en esta guia,
Seguridad al Cocinat
Nunca caiiente un contenedor de aiimento cerrado en ei
homo, La acumuiaci6n de presi6n puede reventar ei
contenedor causando una lesi6n personal grave o daSo al
electrodom6stico,
Use tomaollas secos y gruesos, Los tomaollas huJmedos
pueden causar quemaduras por vapor, No se deben usar
toallas de secar los platos ni otros sustitutos en vez de los
tomaollas porque pueden pasar sobre los elementos calientes
y encenderse o pueden quedar atrapados en ias piezas dei
electrodom6stico,
Use vestimentas apropiadas, Las ropas sueltas o ropas con
mangas largas sueltas no se deben usar cuando se est,1
cocinando, La ropa se puede prender fuego y causar
quemaduras si entra en contacto con los elementos
calefactores,
Siempre coioque ias parriiias dei homo en ias posiciones
deseadas cuando el homo este frio, Deslice la parrilla del
homo hacia afuera para agregar o retirar alimentos usando
tomaollas secos y gruesos, Siempre evite colocar o retirar
alimentos del homo sin sacar la parrilla hacia afuera, Si una
parrilla debe ser movida cuando estd caliente, use un
tomaollas seco, No deje que el tomaolla entre en contacto
con el elemento caliente del homo,
55

i
Use las parriiias soiamente en eI homo en que fueron
enviadas/compradas.
Tenga cuidado cuando abra la puerta deI homo. Primero deje
que sdga eI aire o vapor caiiente antes de sacar o voiver a
coIocar eI dimento en eI homo.
ADVERTENCiA SOBRE ALiMENTOS PREPARADOS: Siga
las instrucdones deI fabricante deI dimento, Si un contenedor
de dimento congeBdo de pi4sdco y/o su tapa se deforma,
comba o de otra manera se da_ia durante la cocd6n,
inmediatamente descarte e] aiimento y su contenedor, E]
aiimento puede estar contaminado,
No permita que e] pape] de aiuminio o ]a sonda de ]a came
toque eI ebmento cabfactor,
Sbmpre apague todos los controbs cuando haya terminado
de cocinar,
Segutidad sobre el Use
de UtensiJios
Siga las instrucciones del fabricante cuando use bobas para
cocinar en el homo.
El rendimiento y funcionamiento seguro de este
ebctrodom6stico ha sido comprobado usando utensilios de
cocina tradicionabs. No use ningLin dispositivo o accesorio
que no haya sido espedficamente recomendado en esta guia.
No use cubiertas, rejilBs superiores de la estufa o sistemas de
convecci6n para homos. El uso de dispositivos o accesorios
que no sean expresamente recomendados en esta guia puede
crear peligros graves de seguridad, afectar el rendimiento y
reducir la vida Litil de los componentes de este
ebctrodom6stico.
Si e[ utensiiio es mas pequeffo que e[ ebmento, una porci6n
del elemento quedar4 expuesta y puede encender la ropa o un
tomaollas,
Solamente ciertos tipos de utensilios de vidrio, vidrio ceramico,
cer4mica, gres u otros utensilios vidriados son convenientes
para cocinar en la superficie o en el homo sin quebrarse
debido al repentino cambio de temperatura. Siga las
instrucciones del fabricante del utensilio cuando use vidrio.
Gire los mangos de los utensiiios hacia e[ centro de [a
cubierta, no hacia la habitaci6n ni sobre otro elemento
superior, Esto reduce el riesgo de quemaduras, encendido de
materiabs infiamabbs o derrames si el utensilio es tocado
accidentalmente o alcanzado por ni_ios pequeffos,
Asegurese de que el utensilio sea Io suficientemente grande
como para contener en forma debida los alimentos y evitar
derrames, Eltamaffo es particularmente importante cuando se
utilizan freidoras, Asegurese de que el utensilio tiene
capacidad para ei voiumen de aiimentos que se va a agregar
ai iguai que para ia formaci6n de burbujas de ia grasa,
Nunca deje que un utensilio hierva hasta quedar seco pues
esto puede da_iarel utensilio y la estufa,
NUNCA deje los elementos superiores sin supervisi6n,
especialmente cuando estd usando los ajustes de calor altos,
Un derrame que no reciba la debida atenci6n puede causar
humo y un derrame de grasa puede causar un incendio,
Este electrodom6stico tiene diferentes tama_ios de elementos
superiores, Seleccione utensilios que tengan bases planas Io
suficientemente grandes para cubrir el elemento, La relaci6n
adecuada entre el utensilio y el elemento mejorar4 la
eficiencia al cocinar,
EJementos TubuJares
Para evitar ddio a los elementos calefactores removibles, no
los sumerja, remoje ni lave en un lavavajillas o en un homo
autoiimpiante, Un eiemento ddiado puede producir un
cortocircuito resuitando en un incendio o riesgo de choque
ei6ctrico,
AsegOrese de que los platillos protectores esten en su lugar
pues la ausencia de estos durante la cocci6n )uede da_ar el
aiambrado,
Fortes Protectores: No use papel de aluminio para forrar los
piatiiios protectores o ia parte inferior dei homo, excepto como
se sugiera en ia guia. La instaiaci6n incorrecta de estos forros
puede resuitar en un riesgo de choque ei6ctrico o incendio.
OJJas Freidoras
Use extremo cuidado cuando mueva la olla con aceite o
descarte la grasa caliente, Deje que la grasa se enfrie antes
de intentar mover ia oiia,
Campanas de VentiJaci6n
Limpie con frecuencia ia campana y los fiitros a fin de evitar
que se acumuie en eiios grasa u otros materiaies infiamabies y
para evitar incendios de grasa,
Cuando prepare alimentos flameados debajo de la campana,
encienda el ventilador,
5B
i
Seguridad en la Li pieza
Limpie con cuidado la cubierta, Apague todos los controles y
espere que se enfrien las piezas del electrodom6stico antes de
tocarlas o limpiarlas, Limpie con cuidado, Tenga cuidado
para evitar quemaduras de vapor si usa una esponja o un
patio mojado para iimpiar derrames en una superficie caiiente,
Aigunos iimpiadores pueden producir vapores nocivos cuando
se aplican en una superficie caliente,
Limpie solamente las piezas indicadas en esta guia,
Homo Automi piante
(modelos selectos}
c0cina, etc:e n e! horno durante e! cid0 de aut0[impieza:
Aviso y Adverteneia
lmportante Sobre Seguridad
La Propuesta 65 de la Ley de 1986 del Estado de California
Sobre Seguridad y Contaminaci6n dei Agua Potable (California
Safe Drinking Water and Toxic Enforcement Act of 1986} exige
que ei Gobernador de California pubiique una iista de ias
sustancias que seg0n el estado de California causan @ncer o
da_o ai sistema reproductivo y exige que ias empresas
adviertan a sus clientes sobre la exposici6n potencial a tabs
sustancias,
Se advierte a los usuarios de este electrodom6stico que
cuando el homo est,1funcionando en el cicio de autolimpieza,
puede haber exposici6n de bajo nivei a aigunas de ias
sustancias indicadas en la lista, incluyendo mon6xido de
carbono, La exposici6n a estas sustancias puede ser reducida
a un minimo ventilando el homo al exterior en forma
adecuada, abriendo las ventanas y/o la puerta en la habitaci6n
en donde est,1ubicado el electrodom6stico durante el cicio de
No iimpie ia junta de ia puerta, La junta de ia puerta es
esencial para obtener un sellado hermetico, Se debe tener
cuidado de no frotar, da_iar ni mover la junta,
No use limpiadores de homo ni forros de homo de ning0n tipo
alrededor ni en ninguna parte del homo autolimpiante,
Antes de iniciar el ciclo de autolimpieza del homo, retire la
asadera, las parrillas del homo y otros utensilios y limpie
cualquier derrame para evitar humo excesivo o llamaradas,
Es normal que la cubierta de la estufa se caliente durante el
ciclo de autolimpieza, Por Io tanto, se debe evitar tocar la
cubierta durante un cicio de autolimpieza,
AVISO IMPORTANTE RESPECTO A LOS PAJAROS
DOMESTICOS:
Nunca mantenga los pSjaros en ia cocina o en ias
habitaciones donde puedan llegar los humos de la cocina, Los
p_jaros tienen un sistema respiratorio muy sensitivo, Los
humos producidos durante el cicio de autolimpieza del homo
pueden ser perjudiciaies o mortaies para los p_jaros, Los
humos que despide el aceite de cocina recalentado, la grasa,
margarina y los utensilios antiadherentes recalentados
tambi6n pueden set perjudiciales,
Conserve estas instrucciones para referencia futura
57
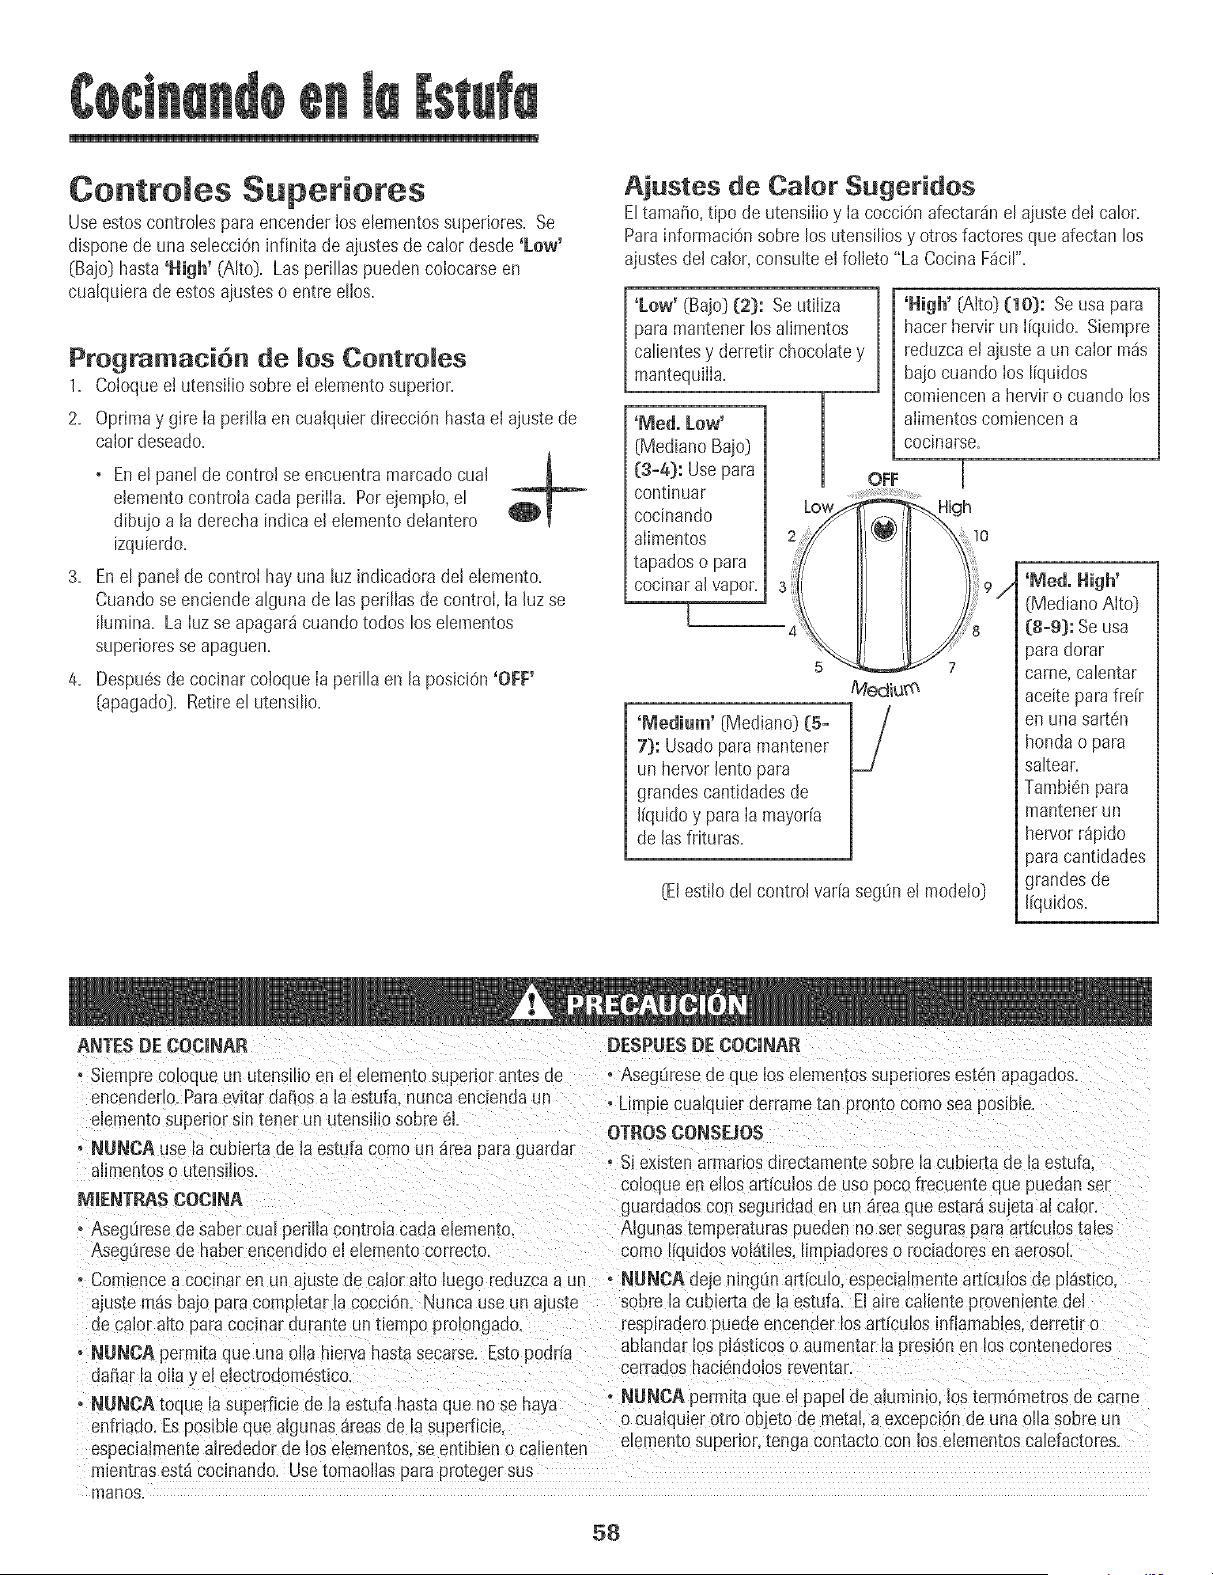
Controles Superiores
Useestoscontrolesparaencenderlos elementossupedores. Se
dlsponede una selecci6ninfinitade ajustesde calor des@ 'Low'
(Bajo] hasta'High' (Alto}. Las perillaspuedencolocarseen
cualquierade estosajusteso entre ellos.
Programaei6n de los Controles
1. Coloquee! utensiliosobre el elementosuperior.
2. Oprimay gire Ia perillaen cualquier direccienhastael ajustede
calordeseado.
3.
4.
+ Enet paneldecontro! se encuentramarcadocual
elementocontroiacada perilIa. Porejemplo,el
dibujoa laderecha indicael elementodelantero
izquierdo.
Enel paneldecontrol hayuna luzindicadoradel elemento.
Cuandose enciendealgunade las perillasde control,Ia hz se
ilumina. La Iuzse apagar_cuandotodos los elementos
superioresse apaguen.
Despuesde cocinarcoioqueIa perilla en la posiciOn'OFF'
[apagado]. Retireel utensilio.
Ajustes de Calor Sugeridos
EltamaSo,tipo de utensilioy Ia cocci@afectardnel ajustedel salon
ParainformaciOnsobre los utensiliosy otrosfactoresque afectan los
ajustesdel calor,consulte el folleto"La CocinaF_cil".
'Low' (Bajo] [2}: Seutiliza
paramantenerlosalimentos
calientesy derretir chocolatey
mantequilIa.
'Meal. Low+
[MedianoBajo]
[3-4}: Usepara
continuar
cocinando
alimentos
tapadoso para
cooinarse.
LOW _gh
coc+nara+vapon+
Medium
'Medium' [Median@(5+
7]: Usadoparamantener
un hen/or lento para
grandescantidadesde
Ifquidoy paraIa mayorfa
de las frituras.
(Elestilodel controlvarfaseg0n el modelo)
'High' (Alto} [10): Seusapara
hacerhen/it un Ifquido. Siempre
reduzcael ajustea un calor m_s
bajocuando los Ifquidos
comiencena hervir o cuando los
aiimentoscomiencena
(MedianoAlto}
(8-9]: Seusa
}ara dorar
carne,calentar
aceiteparafrefr
en una sart@l
hondao para
saltean
Tambienpara
mantenerun
hen/or r@ido
)ara cantidades
grandesde
Ifquidos.
ANTESDiEOOCINAR DESPUE$D£ COCINAR
• Smmprecoloqueun utensflloen el elementosuperiorantesde
encendedo.ParaevitardaFmsa laestufa nuncaenciendaun
elementosuperior sm[ener un utensfliosobre el.
, NUNOA .JselacubLemaae laestufa comoun areapara guardar
alimentoso utensilios.
MIENTt_S COCINA
+Asegureseae que loselemen[ossupenoresestenapagaaos.
• Limpmcuatqumrderrametan Dromocomoseaposibb
OTROS CONSEJOS
° Siexistenarmanosdlrectamentesobre +acubbrta de la estufa,
coloque eneflosarticuiosde usopoco frecuenteque puedanse
guardadoscon seguridaden un areaqueestar_sujetaal caior.
+Aseg_resedesabercual perillacontrolacada elemento........................... no ser segurasparaart(cuDstales
Aseguresede haberencendidoel elementocortes+o, como liquidosvoF{tfles,hmpladoreso rociaaoresen aerosol
• Com+encea coc+naren un ajustede calor a+toluegoreduzcaa un ° NUNOA deje nlngOnart[culo,especialmenteart(curesaepl_stico+
ajustemasbajo paracompbtar lacocc+6n.Nunca useun ajuste sobre la cubiertade laestufa. Elairecafienteprovenmntedel
de calor alto paracocmarouran[e untmmpo prolongado, respiraderopuedeencender losamcubs +nfiamabbs.derretir o
+ NUNCA permitaqueuna oila hiervahastasecarse. Estopodr[a
dal3arlaolla _el electrodom@tico.
+ NUNCAtoque iasuperficie de la estufahastaque nose haya
enfnado.Esposibb quealgunas _ireasde lasuperficie,
especialmentealrededorde los eiementos,se entibien o calien[en
mientrasest,1cocinando. Usetomaoilas parapro[egersus
rnanos.
abtandarlos plasticoso aumentarla presi6nen !oscomeneuores
serradoshaciendolosrevenmr.
• NUNOA permltaqueel papelde aluminio,los termOmetrosde came
ucualquierotto obje_ode metal a excepciende una otia sobreun
emmen[osuperior,tenga contacto con los elementoscalefactores.
58

Superfieie de los
E e entes Tubu ares
• Limpie Iacubierta de taestufa despu6sde cadauso.
• Limpie los derrames4cidoso azucaradostan pronto como ta
cubiertase hayaenfriado puesestosderramespueden
descoJoraro marcarta porcelana.
Para proteger eJ acabado de Jos pJatiJJos
protectores:
• A fin de reducir Ia descotoraci6ny fisurassuperficiaJes,evite
usarcalor alto por per[odosdetiempo prolongados.
• No use utensiliosdemasiadograndes. Los utensiJiosno
debenextenderse2,5 - 5 cm (1 - 2 pulgadas)m4sall_ del
elemento.
• Cuandoprepareconservaso cocinecon ollas grandes,usee!
Elementopara Ollasde Conservas[ModetoCE1).POngaseen
contactocon su distdbuidor paraobtenerdeta!leso Ilameal
1-877-232-6771en EE.-UU.o al 1-800-688-8408en Canad_
parahacer un pedido.
• UmpieJoscon frecuencia. [Ver p_gina71.)
EJementos TubuJares
Cuandoun eJernentose enciende,pasapor ciclos de encendidoy
apagadopara mantenerel ajustede calor seJeccionado.
Los elementostubularessonautoth_piables.No los sumeriaen
agua.
Par8 sacar: Cuandoest_frio,
levanteel elemento.
Cuidadosamentetire de 61hacia
afueray s_quelodel recept_culo.
Para voJvera coJoGar: Inserte
losterminalesdeJelementoen la
toma. Gu[eel elementohastaque
quedeen su lugar. Oprimahaciaabajoen e[
bordeexteriorde[ elementohastadejar[o
niveJadosobre el piatillo protector.
TERfVflNAL£S
PJatiHos Protectores
LosplatiJlosprotectoresdebajode carla elementosuperior recogen
los derramesy debenser usadossiempre. Sino usan los platillos
pmtectorescuando est6cocinandose puededaSarel cableado.
Paraevitarel riesgode choqueel6ctrico o de un incendio,nunca
forre los platillosprotectorescon papelde aluminio.
Losplatillos protectoresse descolorar4n(manchasazules/doradas)o
adquirir_nfisuras con el tiempo,si se sobrecalientan. Esta
descoloraci6no fisuras son permanentes.Estono afectala eficacia
al cocinar.
59
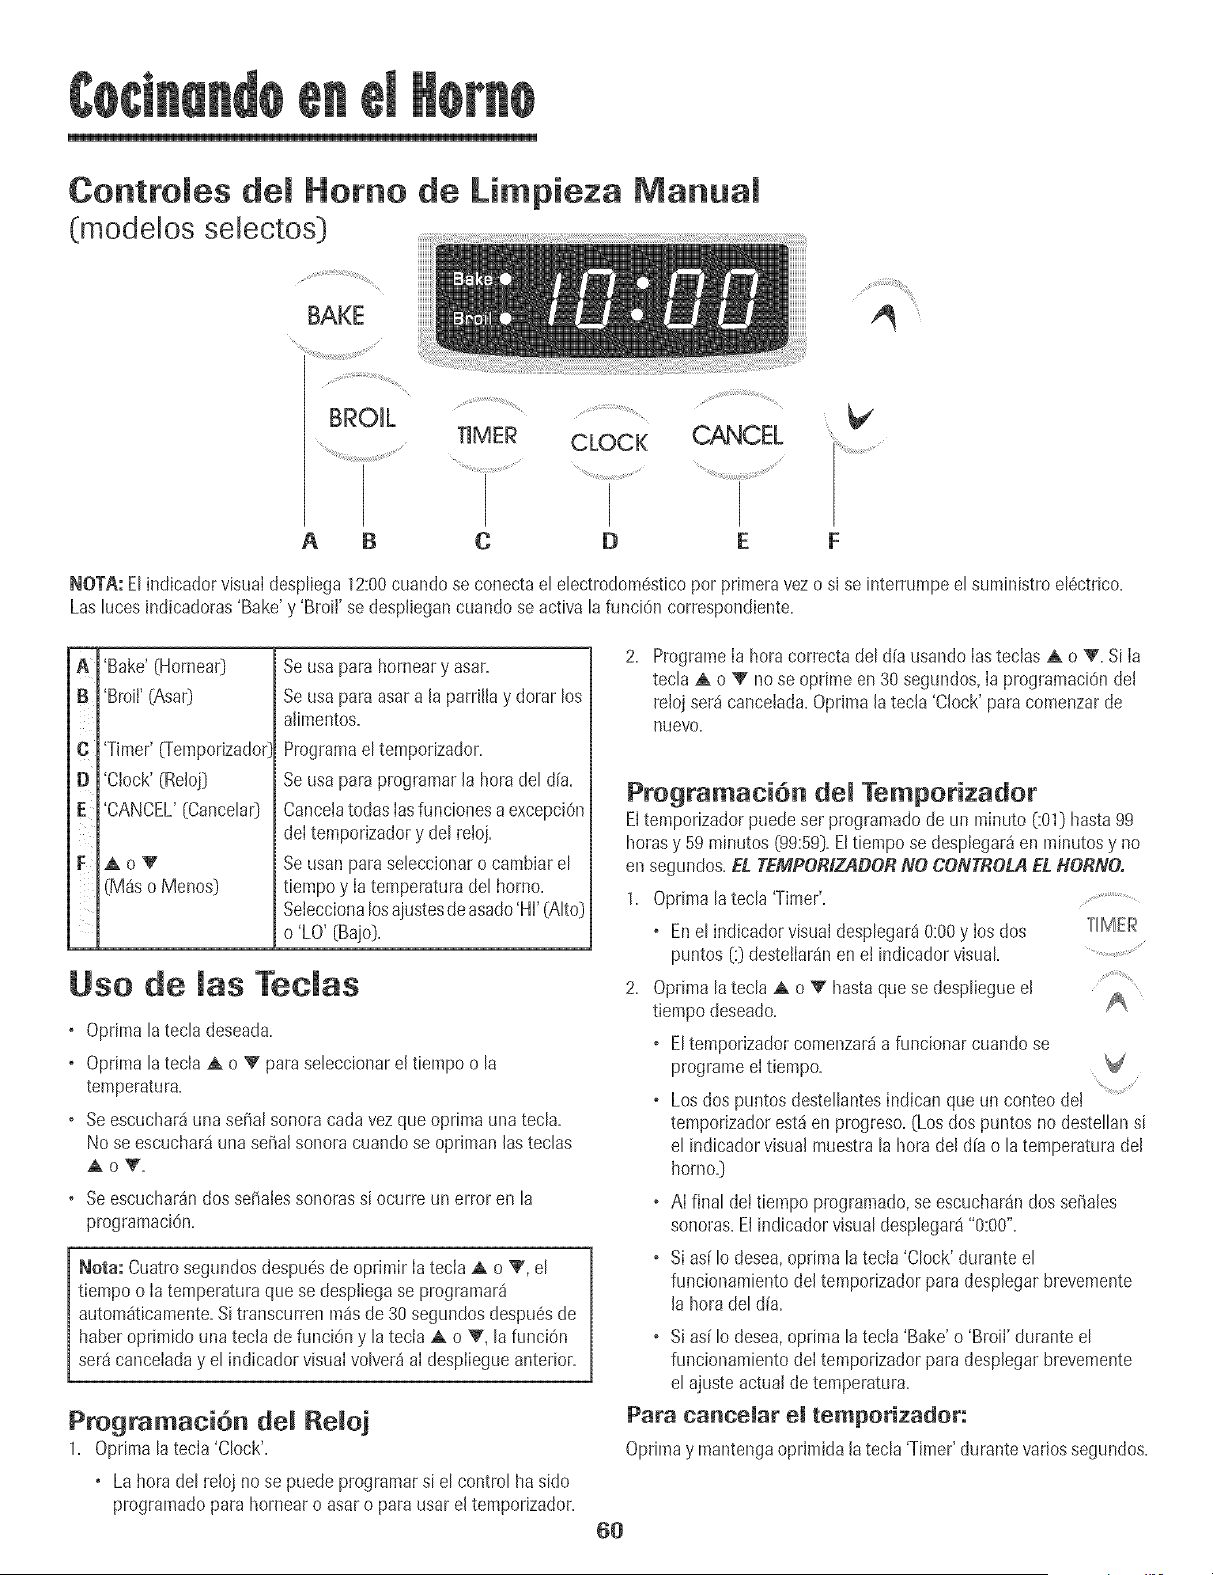
ControJes deJ Homo de Limpieza lVianua[
(modelos selectos]
BAKE
BROIL
A B
TIMER CLOCK CANCEL ...........
C D E F
NOTA: Elindicadorvisualdespliega12:00cuando se conectael eDctrodom6sticopor primeravezo si se interrumpeel suministroel6ctrico.
Laslucesindicadoras'Bake' y 'Broil' se desplJegancuandose activa lafunciOncorrespondiente.
C
D
E
F
'Bake'(Hornear]
'Broil'(Asa0
'Timer' _TemporJzador]
'Clock' (Reloj]
'CANCEL' (CanceDr]
AoV
[M4s o Menos]
Seusa para horneary asar.
Seusa paraasar a [a parrJflay dorarlos
alimentos.
Programael tempodzador.
Seusa paraprogramarla horadel dia.
CancetatodasIasfuncionesa excepciOn
deI temporizadory del retoj.
Seusan paraseleccionaro cambiarel
tiempoy Ia temperaturadel homo.
Seteccionalosajustesdeasado'Hi'(Alto}
o 'LO' (Bajo].
Use de las Teclas
+ Optima [a tecia deseada.
+ Optima [a teda ,A o 'V para seleccionar el tiempo o [a
temperatura.
o Se escuchar4 una seral sonora cada vez que oprima una tecla.
No se escuchard una serial sonora cuando se oprJman las teclas
AoV.
+ Se escuchar_n dos seraies sonoras si ocurre un error en [a
programaciOn.
Nora: Cuatrosegundosdespuesdeoprimir Iatecia A o _', el
tiempoo Iatemperaturaque se desptiegase programar4
autom4ticamente.Sitranscurren m4sde 30segundosdespu6sde
haberoprimido una teclade funciOny latecia ,A o V, lafunciOn
ser4canceIaday el indicadorvisuaIvolver_aI despiiegueanterior.
Programaci6n del Reloj
1. Optima latecIa 'Clock'.
• Lahoradel reloj no se puedeprogramarsi el control ha sido
programadoparahornearo asar o parausar e[temporJzador.
2. Programela horacorrecta del aliausandolastecias A o V. Sila
tecla A o V nose oprime en 30segundos,[a programaciOnde[
reioj seMcance[ada.OprJma[a tecia 'Clock'paracomenzarde
nuevo.
Programad6n dei Tempor+zador
Eltemporizadorpuedeser programadode un minuto [:01] hasta99
horasy 59 minutos (99:59].Eltiempose despiegar_en minutosy no
ensegundos,EL TEMPORIZADORNO CONTRODdEL HORNO.
1. Optima [atecia 'Timer'. .........
o Enel indicadorvisual desplegar40:00y los dos TIMER
puntos (:] destetlar4nenet indicadorvisual+ ................
2. Optima latecD ,A o V" hastaque se despliegueel
tiempodeseado.
o Eltemporizadorcomenzar4a funcionarcuando se
programeel tiempo.
o Los dos puntosdesteIDntesindican queun conteo de!l
temporizadorest4en progreso.(Los dos puntosno desteJDnsi
el indicadorvisual muestrala horadel dFao la temperaturadel
homo.]
+ AI final det tiempoprogramado,seescuchar4ndosserales
sonoras.El indicadorvisualdesplegar4"0:00".
o Si as{Io desea,oprima la tecla'Clock' duranteel
funcionamientodel temporizadorpara desplegarbrevemente
[a horadeld[a.
o Si asi Io desea,oprima la tecD 'Bake'o 'Broil' durante el
funcionamientodeI temporizadorpara desplegarDevemente
el ajusteactualde temperatura.
Para cancelar el temporizador:
Oprimay mantengaoprJmida[atecla 'Timer'durantevarJossegundos.
6O
Homeado, Asado y Asado
a ParriHa
Paraobtener mayorinformaci6nsobre lostiemposy Iassugerencias
de horneado,asadoy asadoa laparrilh, consulteel folleto "La
CocinaF4cil".
Ajuste de los Controles para Homeado y
Asado:
1= OprJmaJatecJa'Bake'.
BAKL_
, '000'se despJegar4y [a luz indicadora'Bake'
desteJlar4en el indicador visual. ........
• Si oprime latecla 'Bake'y no programalatemperaturaen 30
segundos,e! programase cancelar4autom4tJcamentey Ia
horadel d[ase desplegar4nuevamenteen el indicador visual.
2. OptimaIatecla A o V hastaque Iatemperatura ........................
deseadase despliegueen el indicadorvisuak
• LatemperaturadeI homo puedeset programadade
75°a 285° C [170° a 550° F).
• '175°' [350°) se despJegar4cuando oprima latecla ........................
A o V pot pdmera vez.
• Oprhrmlatecla A o T repetidamenteparacambiar
latemperaturaen incrementosde3° C [5° F], u opr{malay
mantengalaoprimida paracambiarIa temperaturaen
hlcrementosde 6°C [10° F].
• Enel indicadorvisualse desplegar438° 000°] o la
temperaturareal de! hornosi es que es superiora 38° C
[100° F]cuando se enciendeel horno.
• Latemperaturaaumentar4en incrementosde 3° C [5° F]hasta
Ilegara Iatemperatura programada.Cuandoel hornose haya
precalentado,se escuchar4una seBalsonora.
• Esperea que el homo se precalientedurante 10-15minutos.
• ParaverificarIa temperaturaprogramadadurante el
precalentamientodel horno,optima latecla 'Bake'.La
temperaturase desplegar4durantetres segundos.
+ Para camhiar matemperatlira demhomo darante el
proeeso de eeeci6n, oprima Ia tecla 'Bake',Iuegooprima
A o V hastaquese desplieguelatemperaturadeseada.
+ Para camhiar matemperatara @mhomo darante 'Preheat',
opdma dos veces Jatecla 'Bake',Iuegooprima A o V hasta
que se desplieguelatemperaturadeseada.
3. Coloqueel alimentoel en homo+Venfiqueel progresode Ja
cocci6n cuando hayatranscurrido el tiempo mfnimo
recomendado.
4. AJt6rmino de Ia cocciOn,oprima la tecla'Cancel' paraapagarel
homo y retire el alimentodeI homo+
+ Elhornocuentacon unafunci6n de apagadoautom4tico.Si se
deja encendidodurante 12horas,eJhornose apagar4
autom4ticamentey el indicadorvisualdesplegar4 ..........
'000'.Oprima latecla 'Cancel'y Ia horadelaliase
desplegar4nuevamenteen el indicador visual
Ajuste de los Controles para Asar a la ParrilJa:
paraobtener mejoresresultados,useun utensJliodiseBado
especialmenteparaasara IaparrilIa.
1. ColoqueIa asaderade asara Ia parrilJaen la posJci6n
recomendada.[Vet latabla en la p%ina 69.]
2. Optima latecla 'Broil'.
• 'SEt'se desplegar4y la Iuz indicadora'Broil'
destelJar4en eJindicador visual
3. Oprima latecla A paraprogramarel asadoenel
ajuste'Hi' {alto} o _' parael ajuste'LO' (halo}.
+ Seleccioneelajuste'Hi' [alto} paraasadoa Ja
parrillanormal.
+ Seleccioneetajuste'LO' {halo}paraasadoa laparrilla a bajas
temperaturasparaevitareJdoradoexcesJvoenaiimentosque
requierenmayorestiemposde cocciOntalescomoJacame de
ave.
• Si no seleccionaun ajustede Asado ('HI' o 'LO') en30
segundos,el programase cancelar4autom4ticamentey la hora
del d[a se desplegar4nuevamenteen el indicadorvisual
4. Precalienteet elementode asara Ia parrilJadurante 3 mJnutos.
Dejela puerta abierta hastael primer tope,aproximadamente10
cm C4pulgadas_.
5. Cuandoterminede asara la parrilIa,optima latecla ...........
'Cancel' paraapagare! hornoy retireel utensiJiodel
homo.La horadel d[avoJver4a desplegarseen el
indicadorvisual
61
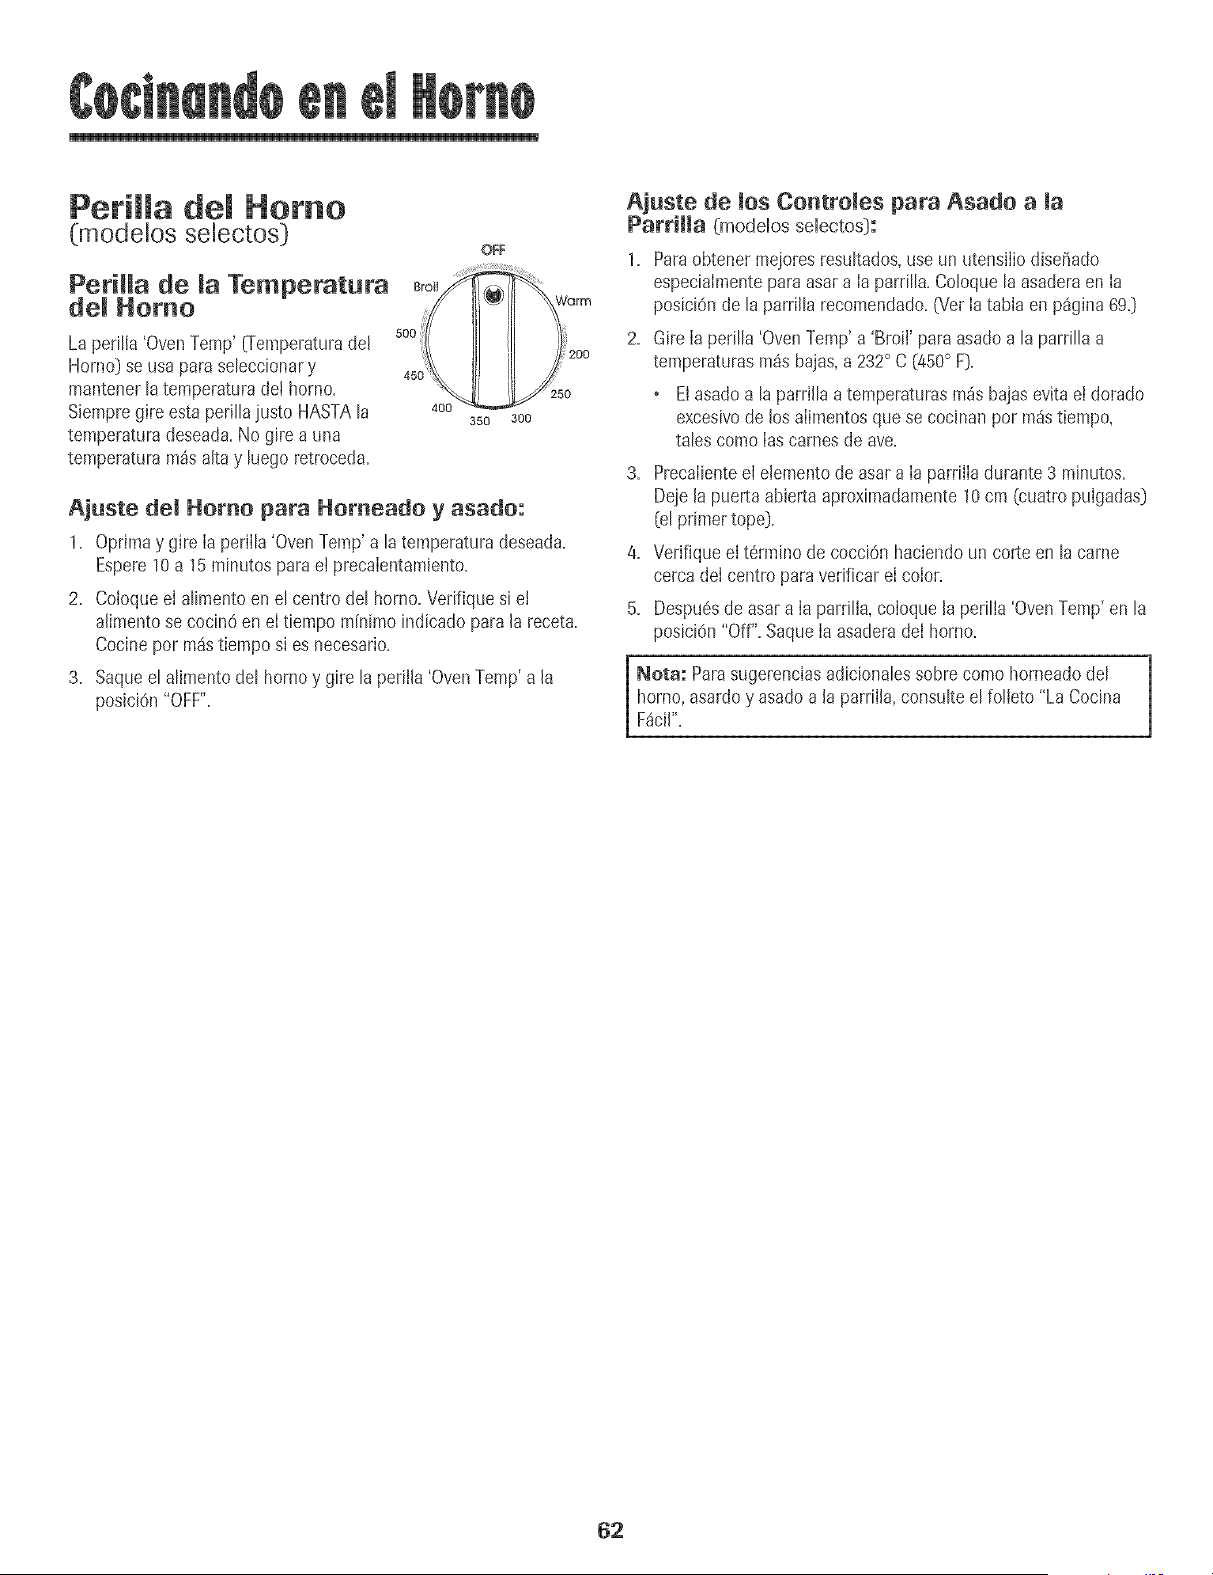
Perilla del Homo
(modelos seleotos)
PeriHa de _aTempe_tura
del Homo
La perilla'OvenTemp' 0-emperaturadel
Horno] se usaparaseleccionary
mantenerlatemperaturade!homo.
Siempregire estaperilh justo HASTAla
temperaturadeseada.No gire a una
temperatura m_saltay luego retroceda.
BroiI
500
45_
400
OFF
350 300
Warm
Ajuste dei Homo para Homeado y asado:
1. Oprimay gire Ia perilla'OvenTemp'a latemperaturadeseada.
Espere10a 15minutos paraei precalentamiento.
2. Coloqueel alimentoen el centrodel horno.Vedfiquesi ei
alimentose cocin6en eltiempo minimo indicadoparala receta.
Cocinepor m_stiemposi es necesario.
3. Saqueelalimentodel hornoy gire laperiila 'OvenTemp'a la
posici6n"OFF".
Ajuste de los Controies para Asado a la
ParriHa (moddos sdectos]:
1, Paraobtenermejoresresukados,use un utensiIiodisW+ado
especialmenteparaasar a Ia parrilla.Coloquela asaderaen Ia
posiciOnde la parrilla recomendado.(Vet Ia tabla en p%ina 89.]
2. Gire Iaperilla 'OvenTemp' a 'Broil' paraasadoa la parrillaa
temperaturasm_sbajas,a 232° C (450° F].
• EIasadoa la parrillaa temperaturasm_sbajasevitael dorado
excesivode losalirnentosquese cocinanpor m_stiempo,
tales comoIascarnesde ave.
3. PrecalienteeI elementode asara Ia parrilladurante 3 minutos.
Dejela puerta abiertaaproximadamente10cm (cuatropulgadas]
[el primer tope].
4. VerifiqueeI t6rmino de cocciOnhaciendoun corteen la carne
cercadeI centro paravedficar el color.
5. Despu6sdeasar a Ia pardlla,coloquela perilla'OvenTemp'en la
posiciOn"Off". SaqueIa asaderadeI horno.
Nora: Parasugerenciasadicionalessobre comohorneadodel
horno,asardoy asadoa la parrilla,consulteel folleto "La Cocina
F_cil".
62
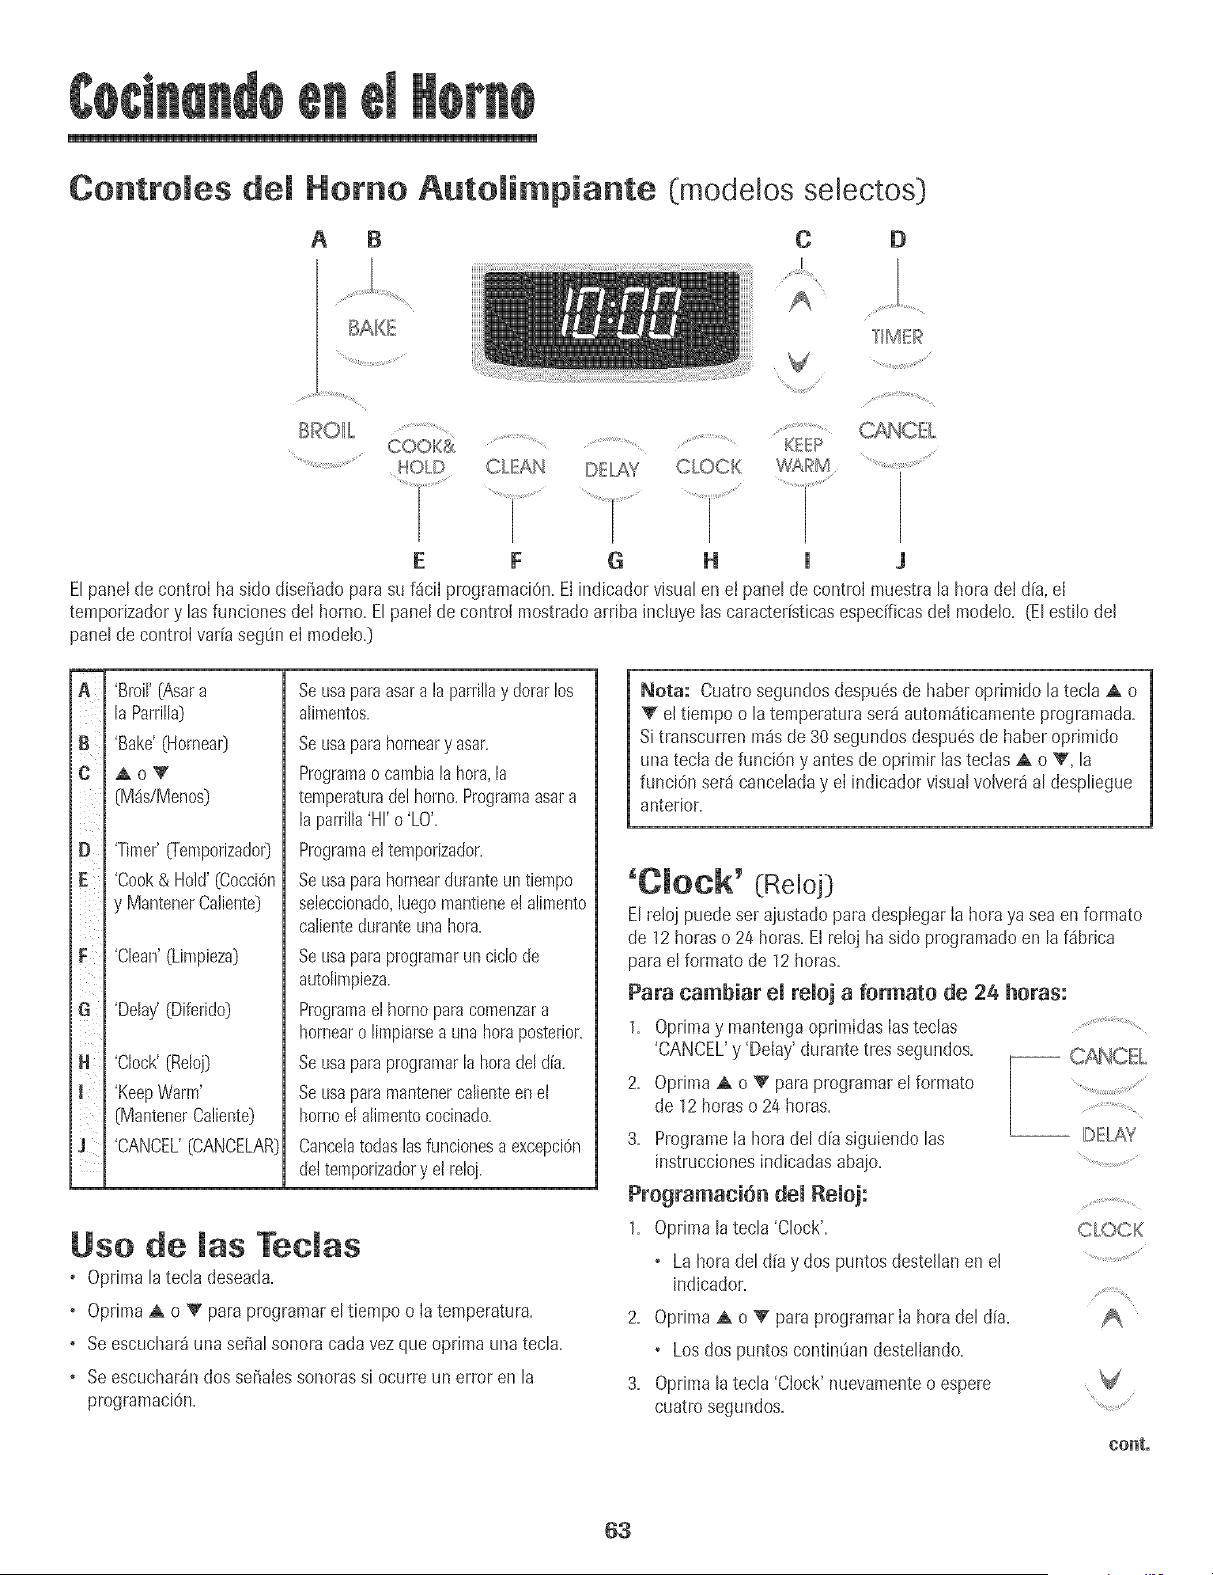
Contro es Homo AutoJimpiante (modelos sebctos}
A B
BAKE
C
V
D
+'[+ME[_
COOK& ..............................................................................KEEP
................................................HOLD CLEAN DELAY CLOCK WA+_M
E F G H j
Elpanelde controI hasido dis@ado parasu f4cil programaci6n.Elindicadorvisualen et panelde controi muestrala horadei dFa,eJ
temponzadory Bs funcionesdeI homo. Elpanelde control mostradoarriba incluyelas caracterFsticasespecificasdel modelo. "Elestilodel
paneldecontrol varFasegOnel modelo.}
Ax
ill_ii
C
i i
D
E i
F ¸
J
'Broil'{Asara
la Parrilla)
'Bake'(Hornea0
Ao_'
(M_is/Menos}
'Timer'_emporizado0
'Cook& Hold'(Cocckin
y MantenerCaliente}
'Char!'(L[mpJeza}
+Delay'(Diferido)
+Clock'(Reloj}
+KeepWarm'
[MantenerCalbnte}
'CANCEL'[CANCELAR}
Seusaparaasara lapmrillay dorarlos
alJmentos.
Seusaparahorneary asar.
Programao cambialahera,la
temperaturadelhorno.Programsasara
laparrilla'HI'o'LO'.
Programae! temporizador.
Seusaparahorrmarduranteuntiempo
seleccionado,luegomantmnee!alimento
calbnteduranteunahera.
Seusaparaprogramarun ciclode
autolimpJeza.
Programael homoparacomenzara
homearo limpiarsea unaheraposterior.
Seusaparaprograraarlahoradeldia.
Seusaparamantenercalienteenet
homoel alimentococinado.
Cancetatodaslasfuncionesaexcepci6n
dottemporizadory etreloj.
Use de Jas Teelas
+ Optimalatecla deseada.
+ OptimaA o V paraprogramareltbmpo o Ia temperatura.
+ Seescuchar_unasdial sonora cadavezqueoprJmaunatecla.
+ Seescuchar_ndos serialessonorassi ocurreun erroren la
programaciOn.
Biota: Cuatrosegundosdespu@de haberoprimido latecla A o
V el tiempoo latemperaturaser_ autom4ticamenteprogramada.
Si transcurrenm_sde 30segundosdespu6sde haberoprimido
unatecla defunciOny antesdeoprimir lastecIasA o V, la
funci6n ser_ canceladay el indicador visualvoJver4al despliegue
anterior.
'O OCk' (Reloj)
Elre!oj puedeser ajustadoparadesplegarIa horaya seaen formato
de 12horaso 24 horas.El relojha sido programadoen laf_brJca
parael formato de 12horas.
Para oambiar ei reioj a formate de 26 betas:
1. Oprimay mantengaoprimidasIasteclas .....
'CANCEL'y 'Delay' durantetres segundos.
2. OptimaA o V paraprogramarel formato
de 12 horaso 24horas.
3. ProgmmeIa horadel dFasiguiendo las
instruccionesindicadasabajo.
Programaci6n dei Reioj:
1. Oprimala tecla 'Clock'.
+ La horade[ d[a y dos puntosdesteHanen e[
indicador.
2. OptimaA o V" para programarIa horadel dia.
. Los dos puntoscontim_andestelJando.
3. Oprimala tecla 'Clock' nuevamenteo espere
cuatrosegundos.
DELAY
CLOCK
cont°
63
Cuandose conectaenergiae!6ctricaal homo o despu6sdeuna
interrupci6nde la energ[aei6ctrica,Ia likima horadel reloj previaa
la interrupciOndestellar4en el indicador.
Paradesplegarla horadeI dia cuando el indicadorest6 mostrando
otra funciOndetiempo, oprima latech 'Clock'.
La horadel reJojno puedeset cambiadacuandoel hornohayasido
programatic para'DelayCook','Delay Clean'o 'Cook& Hold'.
Para canceJar eJ despJiegue deJ reJoj:
Si nodeseaque e! indicadorvisualmuestre lahora del alia:
Oprimay mantengaoprimida Iasteclas
'CANCEL'y 'Clock' durantetres segundos.La
horadel dia desaparecer4del indicador.
Cuandose cancelael desplieguedeI reloj, .............
oprima latecia 'Clock' paradesplegar -- CLOCK
blevementeIa horadel dia. .........
Para restaurar eJdespJiegue deJ reJoj:
Oprimay mantengaoprJmidaIasteclas 'CANCEL'y 'Clock'durante
tres segundos.Lahoradel d[a reaparecer4en el indicador.
'Timer' (Temporizador)
Eltemponzadorpuedeser pmgramadode un minuto (00:01}hasta
99 horasy 59 minutos (99:59}.
Eltemporizadorpuedeser usado independientementedecualquier
otra actMdad del homo.Adem4spuedeser pmgramadocuando otra
funci6n del homo est6en funcionamiento.
Eltemporizadorno controlael horno,solamentecontmla una serial
So[_ora.
Para programar eJtemporizador: ...........
I. OptimalatecJa'Timer' (Temporizado0. T+MEB
+ '0:00'se ilumina en el indicadorvisual .......
• Losdos puntosdesteHarSn. '
2. Oprima[atecla A o V hastaquee[ tiempo correcto
parezcaen el indicadorvisual.
+ Losdospuntoscontimian desteJlando. .........
3. Oprimanuevamentelatecla 'Timer'o esperecuatm segundos.
• Losdos puntoscontintian desteJlandoy comienza[a cuenta
regresivadel tiempo.
+ El8ltimo minutode [a cuentaregresivadel temporizadorse
desplegar4ensegundos.
4. A! final del tiempo programatic,se escuchar4una serialsonora
larga.
Para canceJar eJtemporizador:
1+ Oprimay mantengaoprimJdala tecla'Timer' durantetres
segundos+
U
2. Optima latecla 'Timer'y coloque lahora a 00:00.
B oqueo de ControJes
Eltecladopuedenser bloqueadosparaseguridad,limpiezao evitar
el uso no autorizado.Loscontroles no funcionar4ncuando est6n
bJoqueados.
Siel hornoest_en uso,los controlespuedenbioquearse.
La horaactualdel aliapermanecer4en el indicador cuando los
controlesest6nbloqueados.
Para bJoquear:
Oprimay mantengaoprimidaslastecias
'CANCEL'y 'Cook& Hold'durante tres
segundos+
'LOCK'desteliaenel indicadorvisual. COOK&
t',_OLD
Para tesbJoquear: ...............................
Oprimay mantengaoprimidaslasteclas'CANCEL'y 'Cook & Hold'
durantetres segundos.
'LOCK'desaparecedei indicador visual
C6digos de Errores
'BAKE'o 'LOCK'puedendestellarr@idamenteparaadvertJdeque
hay un error o un problema.Si'BAKE'o 'LOCK'desteilanen el
indicadorvisual,optima le tecla 'CANCEL'.Si'BAKE'o 'LOCK'
continOandestellando,desconectelacorrienteel6ctrica del
artefacto.Espereunos pocosminutosyvuelvaa conectarla
corrienteel6ctrica.Si IaspalabrasaOncontinOandesteHando,
desconecteIa cornenteel6ctricadel artefactoy Ilamea unt6cnico
de servicioautorizado.
64
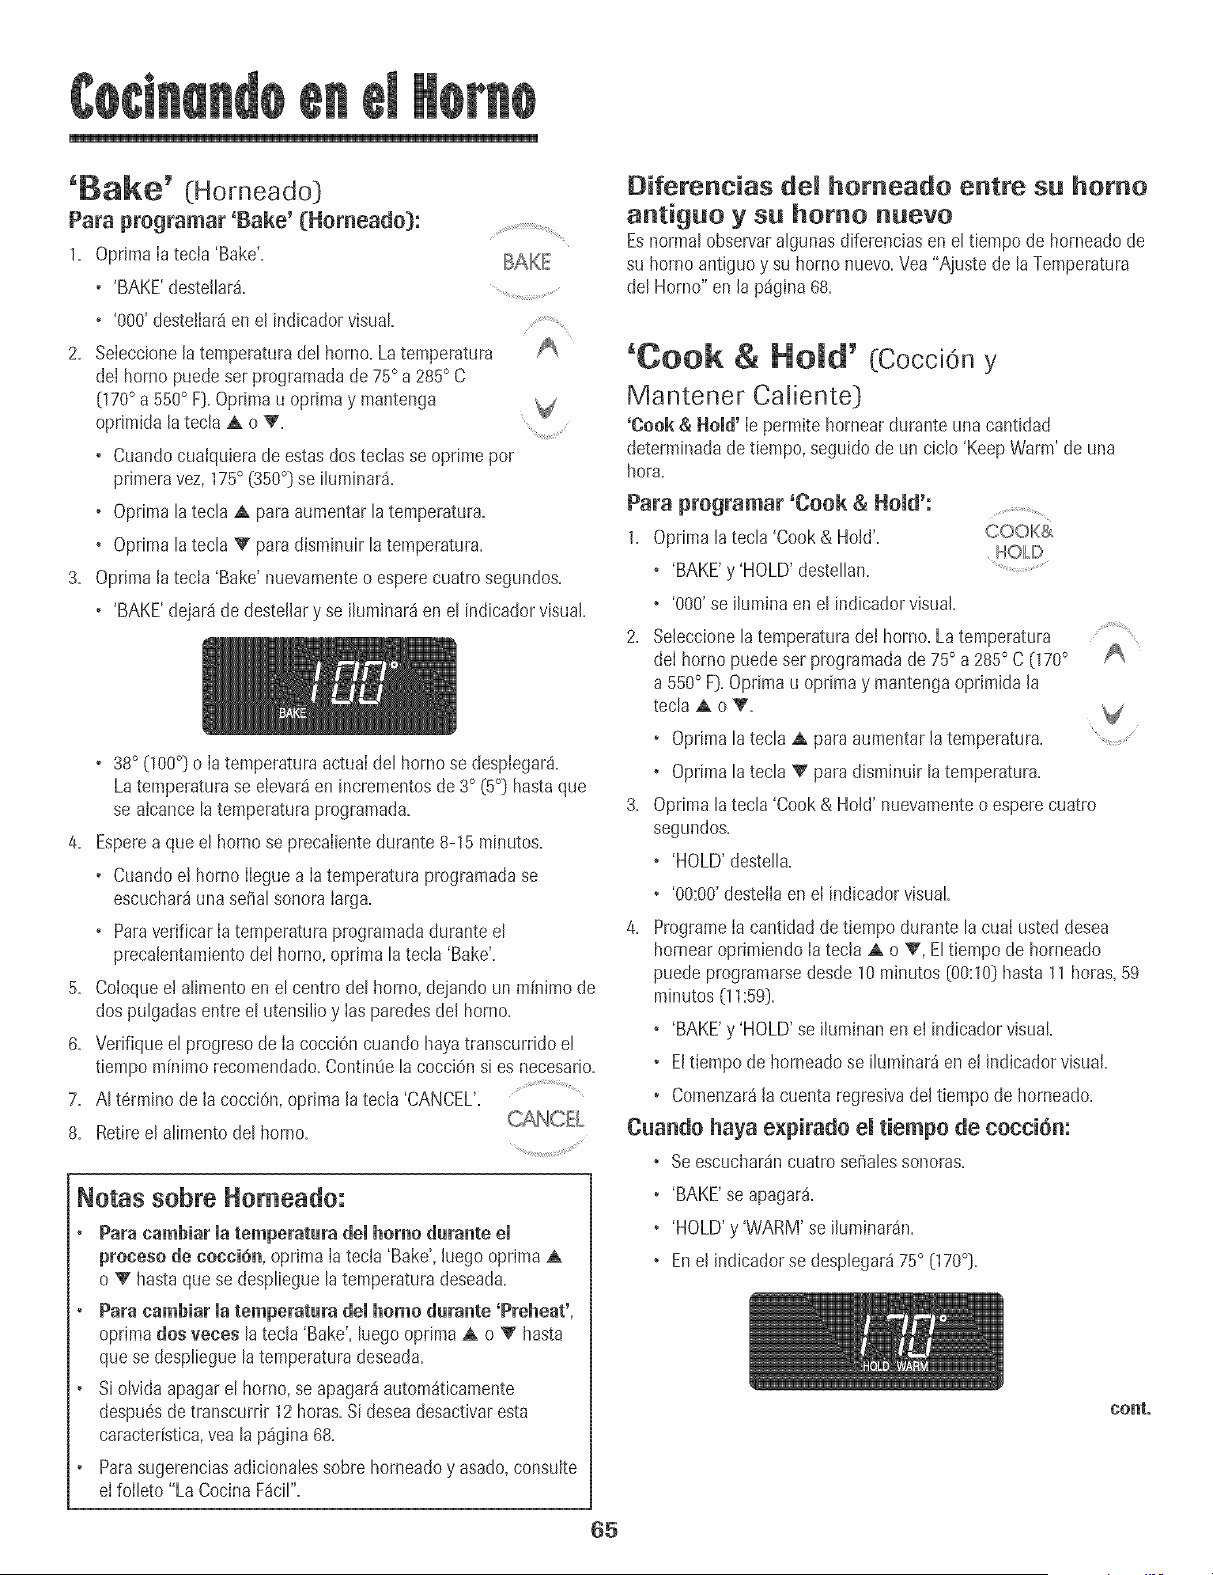
'Bake' (Horneado}
Para programar 'Bake' (Homeade}:
1. Oprimalatecia 'Bake'.
+ 'BAKE'destelBr&
+ '000'destellar_en el indicadorvisual
BAKE
2. Seleccionelatemperaturadet horno. Latemperatura
del hornopuedeset programadade 75° a285° C
070° a 550° F}.Oprimau oprimay mantenga
oprimidala tecla ,A o V.
• Cuandocualquierade estasdos techs se oprime pot
primeravez,175° {350°}se ituminar_.
+ Optimatatecta ,A paraaumentartatemperatura.
+ Optimatatecta V paradisminuirla temperatura.
3. Optimalatecla 'Bake' nuevamenteo esperecuatrosegundos.
+ 'BAKE'dejar_de @stellary se ihminar_ en el indicadorvisual.
• 38° (100°} o Ia temperaturaactuaIdel hornose despbgar&
Latemperaturase etevar_en incrementosde3° (5°} hastaque
se alcancelatemperaturapregramada.
4. Espereaque el homo se precaIbnte durante 8-15minutos.
• Cuandoel hornoIIeguea Ia temperaturaprograpaadase
escuchar_unasepal sonoraIarga.
+ ParaverificarIatemperaturaprogramadadurante el
precalentamientodel horno,oprima latecla 'Bake'.
5. CoIoquee! alimentoen el centrodel horno, dejandoun m[nimode
dospulgadasentre el utensilioy Iasparedesdel homo.
6. Venfique el progresode Ia cocci@ cuando hayatranscurridoel
tiempo minimorecomendado.ContintSela cocci@ si es necesario.
7. AI t@_ainode la cocci@, optimala tecla 'CANCEL'.
8. Retireel alimentodel homo.
Notas sebre Homeado:
+ Para cambiar matemperatara demhomo darante em
proeeso de cocci6n, oprima Ia tecla'Bake',luego opr+ma,A
o V hastaquese desplieguela temperaturadeseada.
+ Para cambiar Jatemperatara deJhomo darante 'Preheat',
optima dos veces la tecla'Bake', luegooptima,A o V hasta
que se desplbgue latemperaturadeseada.
+ Si olvidaapagarel homo,se apagar_iautom_ticamente
despu6sde transcurrir 12horas.Si deseadesactivaresta
caracterBtica,yea lap%ina 68.
+ Parasugerenciasad+cionabssobrehomeadoy asado,consu+te
eI foibto "La CocinaF_cil".
Diferenc+as de_ homeado entre su homo
antiguo y su homo nuevo
Esnormal observaralgunas diferenciasen el tiempode horneadode
su homo antiguoy su homo naevo.Vea"Ajustede laTemperatura
del Horno" en la p%ina 68.
'Cook & Hemal' (Coccion y
Mantener Caliente}
'Cook & HoJd'Ie permitehorneardurante ariacantidad
deterpainadadetbmpo, seguidode an ciclo 'KeepWarm' de una
hora.
Para programar 'Cook & Homd':
1. Optima latecla 'Cook &HoId'.
+ 'BAKE'y 'HOLD' destellan.
+ '000'se ilumina en el indicadorvisual.
COOK&,
HOLD
2. SeJeccionelatemperaturadeJhorno.La temperatura
del homo puedeset programadade 75° a 285° C 070°
a 550° F}.Opdmau optimay mantengaoprJmJdaJa
tecla A o V.
+ Oprimalatecla ,A para aumentarla temperatura. ......
+ Oprimalatecla V" para disminuirla temperatura.
3. Opnma latecla 'Cook & Hold' nuevamenteo esperecuatro
segandos.
+ 'HOLD'destella.
+ '00:00'destellaen el indicadorvisual.
4. ProgrameIacantidadde tiempo durante lacuaI asteddesea
hornearoprimiendo Iatecla A o V, Eltiempode horneado
puede programarsedesde 10minutos {00:10}hasta11horas+59
minutos (11:59).
+ 'BAKE'y 'HOLD'se iluminanen el indicador visual.
+ Eltiepapode horneadose iluminar_ enel ind+cadorvisual.
+ Comenzar_lacuenta regresivadel tiepapode horneado.
Cuande haya e×pirade emtiempe de cecci6m
+ Seescuchar_ncuatro seSalessonoras.
• 'BAKE'se apagar_.
• 'HOLD'y 'WARM'se ihminaran+
+ Enel indicadorsedesplegar_75° 070°}+
cent°
65
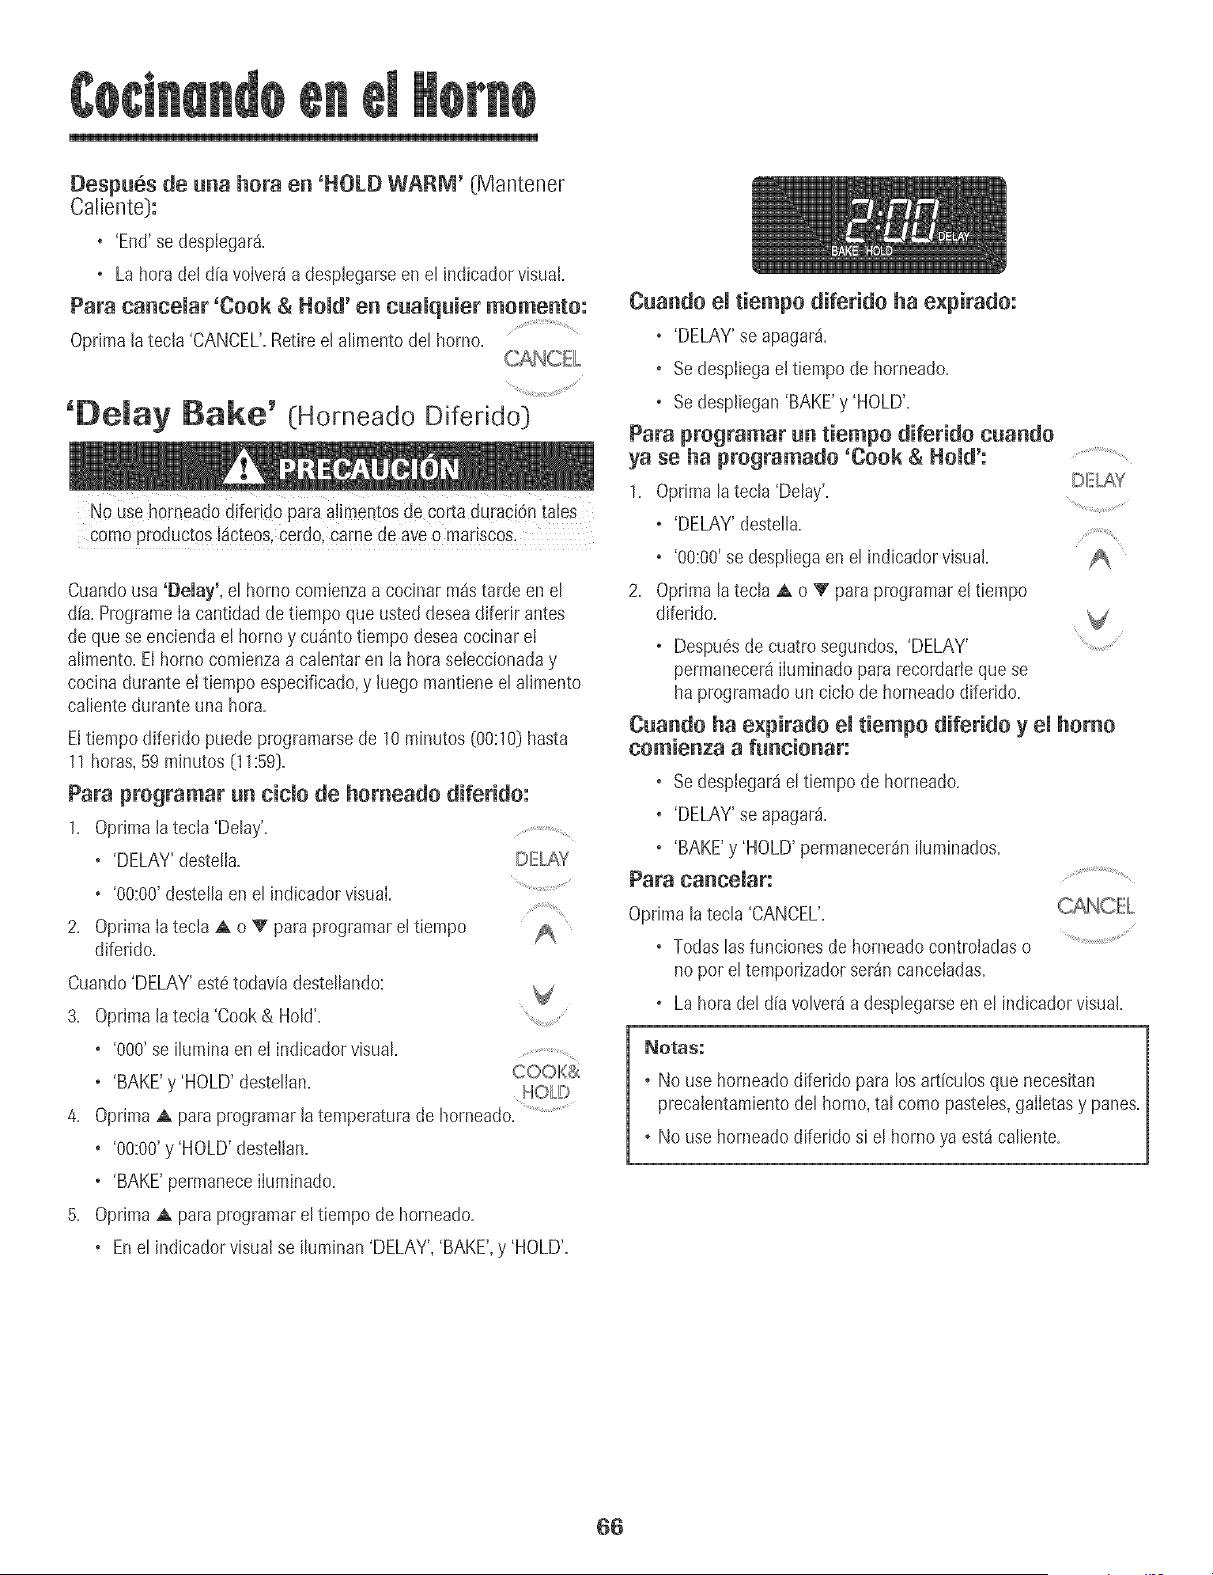
Despubs de una hora en 'HOLD WARM' (Mantener
Calbnte):
. +End'se desplegar&
. Lahoradel d[a volver_a despbgarseen el indicadorvisual.
Para cancemar 'Cook & Hold' en cuamquier memento:
OprJmala tecia 'CANCEL'.Retireel alimentodel homo+
'[}eJay Bake' (HorneadoDifeddo)
No Usehomeadodiferido paraai+mentosde c0rta duraci6ntabs
comoproductos14cteos,cerdo,Camede aveo madscos.
Cuandousa 'Delay', el hornocomienzaa cocinar m4starde en el
d[a. ProgrameIa cantidadde tbmpo queusted@sea diferir antes
de que se enciendael homo y cu_intotiempo @seacocinarel
alimento. Elhomo comienzaa cabntar en la horaseleccionaday
cocina durante eltiempo especificado,y luegomantieneel alimento
calientedurante una hora.
Eltiempo diferido puede pmgramarsede 10minutos (00:10}hasta
11horas,59 minutos (11:59}.
Para programar un cido de homeado diferido:
1. OprJmalatecia 'Delay'. .............
. 'DELAY'deste[la. DELAY
. '00:00'destellaen el indicadorvisual. +............
2. Oprima Iatecla A o V paraprogramarel tiempo
diferido.
Cuando'DELAY'est6todaviadestellando: +V
3. OprJmalatecla 'Cook& HoNk
. '000' se ilumina en el indicadorvisual.............................
COOl(&
, 'BAKE'y 'HOLD'desteHan.
HOLD
4. Oprima A paraprogramarlatemperaturade horneado. .........................
. '00:00'y +HOLD'destellan.
. +BAKE'permaneceiluminado.
5. Oprima A paraprogramareltiempo de horneado.
. Enel indicadorvisualse iluminan'DELAY','BAKE',y 'HOLD'.
Cuando el tiempo diferido ha expirado:
. 'DELAY'se apagar&
. Se despliega eJtiempo de homeado.
. Sedespliegan'BAKE'y 'HOLD'.
Para programar un tiempo diferido cuando
ya se ha programatic 'Cook & Hold': .........
DELAY
1. Oprhnalatecla 'Delay'.
%
. 'DELAY'desteJla. ,
. '00:00+se desplbga en el indicadorvisual
2. Opnmalatecla _&o V paraprogramarel tiempo
diferido.
. Despu@de cuatrosegundos, 'DELAY'
permanecer4iluminadopara recordariequese
ha programadoun ciclo de horneadodiferJdo.
Cuando ha e×pirado el tiempo diferido y el homo
comienza a funcionar:
V
_%%,,M/
. Sedesplegar4e[ tiempo de horneado.
. 'DELAY'se apagar&
. 'BAKE'y 'HOLD'permanecer_niluminados.
Para canceJar:
Optima latecla 'CANCEL'.
. Todaslasfunciones de horneadocontroladaso
no pot el temporizador ser_n canceJadas,
. La horadel diavolver4adesplegarseen el indicadorvisual.
NOtaS:
. No use horneadodiferido para los articulosque necesitan
precalentambntodel horno,tal como pasteles,gaIIetasy panes.
. No use horneadodiferJdosi el homo ya est_caliente.
66
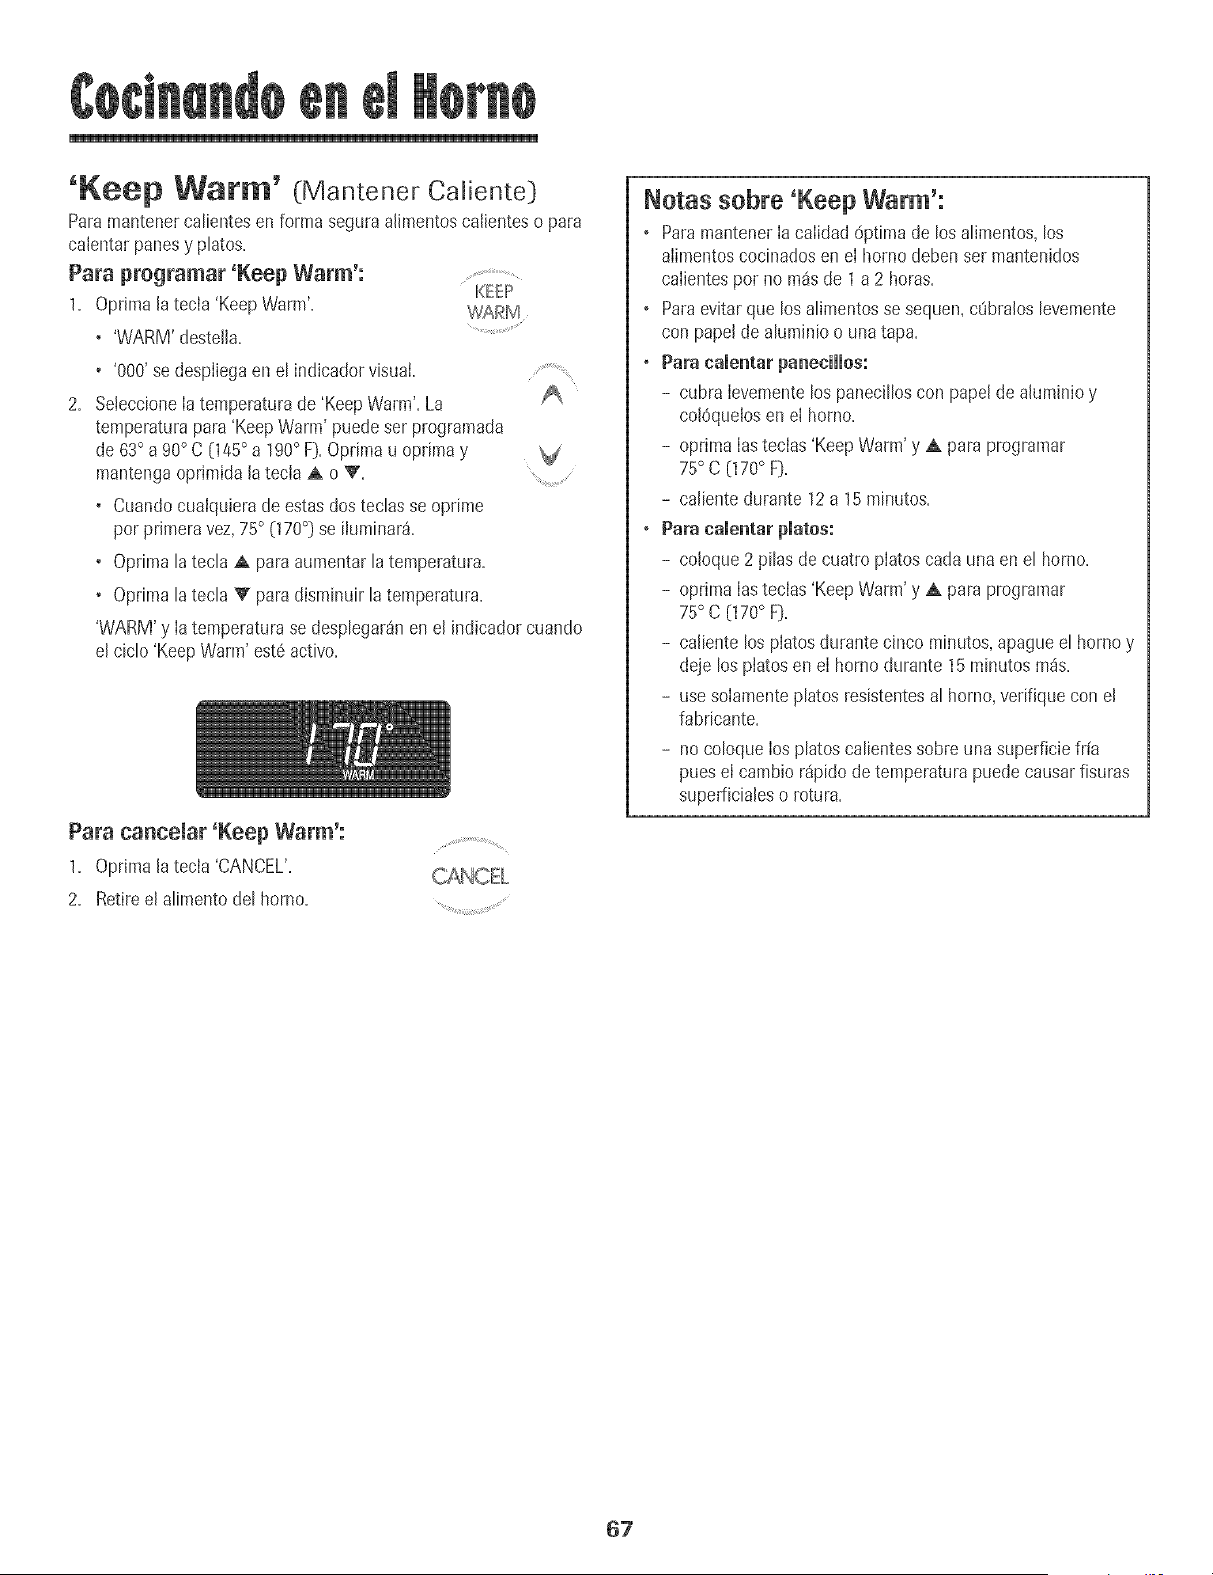
Keep Warm' (Mantener Caiiente]
Paramantenercatientesen forma seguraalimentoscaiienteso para
calentarpanesy phtos.
Para pregramar 'Keep Warm': ....................
KE_':P
1. OptimaJatecla 'Keep Warm'. WARM
• 'WARM'destella.
• '000'se despliegaenet indicadorvisual
2, SeteccioneIatemperaturade 'KeepWarm'.La _*
temperaturapara 'KeepWarm' puedeser programada
de63° a 90°C 045° a 190° F].Opnma u optimay
mantengaoprimida JatecJaA o V. , ......
• Cuandocualquierade estasdos teclasseoprime
por prJmeravez,75° (WO°] se iiuminar&
• Optimalatecla A paraaumentarlatemperatura.
• Optimalatecla V paradisminuirla temperatura.
'WARM'y Iatemperaturase desplegar_nen el indicador cuando
el ciclo'Keep Warm' est6activo.
Para caBcemar 'Keep Warm':
1. OptimalatecIa 'CANCEL'.
2. Retireel alimentodel horno.
Notas sobre +Keep Warm':
, ParamantenerIa calidad 6ptimade los al+mentos,los
alimentoscocinadosen eI hornodebenser mantenidos
calientespor no m_sde 1a 2 horas.
, Paraevitarque losalimentosse sequen,cQblaloslevemente
con papelde aluminioo unatapa.
, Para camentarpaneeiHos:
- cubra Ievementelos panecilloscon papelde ahminio y
colOqueloseneI homo.
- optima Iasteclas'KeepWarm'y A para programar
75° C (170° F].
- calientedurante 12a 15minutos.
, Para camemarplates:
- coloque 2 pilas decuatro platoscarla unaen el homo.
- optima Iastecias'KeepWarm'y A para programar
75° C (] 70° F].
- caliente los pIatosdurante cinco minutos,apagueel homo y
deje los piatosen eI hornodurante 15minutosm_s.
- use soIamenteplatos resistentesal horno,verifique con el
fabricante.
- nocoloque Iosplatoscalientessobreuna superficiefr{a
pues eI cambior_pidode temperaturapuedecausarfisuras
superficialeso rotura.
67
Cierre Autom tico/Modo Ajaste de [a Temperatara de[
Elhomo se apagar_autom_ticamentedespu6sde 12horassi usted
todeja accidentalmenteencendido. Estacaracteffsticadeseguridad
puedeset desactivada.
Para cancelar el cierre autom_tico de 12 horas y
dejar que e[ herae fuacioae ceatiauameate durante
72 horas:
1+ Programeel homo para hornear(verp4gina65)+
2. OprJmay mantengaoprimida la tecla 'Clock'durante CLOCK
cinco segundos.
o 'SAb'sedesplegar_y destellar4durantecinco segundos.
o 'SAb'sedesplegar4contlnuamentehastaquese desactiveo
hastaque transcurrael limitede 72 horas.
o 'BAKE'tambi_nse desplegar4sl seest_ usandoun ciclo de
horneadocuando el homo est4en Modo Sab4tico.
Todaslasotrasfunciones EXCEPTO'BAKE'('Timer','KeepWarm',
'Clean',etc+)est4nbJoqueadasdurante eJModo Sab4tico+
Para cancemar 'Bake' cuande e[ Mode Sab_tice est_
activo:
Optima'CANCEL'.
o 'BAKE'se apagar4en el indicadorvisual
o No se oir_ ningunaseffaJsonora.
Para cancemar e[ Medo Sab_tico:
I+ OprJma[atecla 'Clock'durante cinco segundos.
0
DespuBsde 72horas,el Modo Sab4ticoterminar&
o 'SAb'desteJiar4durante cinco segundos.
o Lahora de[ dia reaparecer4en e[ indicadorvisual.
La exactitudde [astemperaturasde[ hornoes cuidadosamente
probadaen [af_brica. Esnormal notar algunadiferenciaentre Ja
temperaturade horneadoentre un horno nuevoy un hornoantiguo.
Conet correrdeJtiempo, [atemperaturadeJhorno puedecambiar.
Ustedpuedeajustar[a temperaturadeJhomo sJconsideraque su
homo noest_ horneandoo dorandoenforma correct& Paradecidir
cu4ntodebecambiar[a temperatura,programelatemperaturade[
homo a 15° C (25° F) masaita o m4sbajaque [atemperatura
indicadaen sus recetas,Juegohornee. Los resuJtadosde Ja
"prueba" puedendarJeuna ideade cu4ntoajustar[a temperatura.
Ajuste de [a temperatura de[ home:
1+ Oprima'Bake'. BAKE
2+ Programe285° (550°) oprimiendo[atecIaA+
3+ Optimay mantengaoprimida la tecla'Bake'durante ,
variossegundoso hastaque 0° aparezcaen el
indicadorvisual
Si la temperaturade[ homo hasido previamenteajustada,el
cambioaparecer4en et indicadorvisual Porejemp[o,si la
temperaturadel hornofue reducidaen 8°C (15°F} el indicador
mostrar4- 8° (-15°}.
Optima latecia A o V paraajustarla temperatura.
Cadavezquese oprimeuna tecia, latemperaturacambiaen3° C
(5° F}. Latemperaturade[ homo puedeser aumentadao
disminuidaen 3° a 20° C (5° a 35° F}.
Lahoradel d[a reaparecer_autom4ticamenteenel indicador
visual
No necesitareajustarla temperaturadet hornosi hayuna falla o
interrupci6nde energiae!6ctrica. Lastemperaturasdeasar a la
parrJlIay limpiezano puedenset ajustadas.
Notas Sobre e[ Mode Sab tico:
+ ElModo Sab_iticopuedeseractivadoen cuaIquiermomento,
est6o no el horno encendido+
+ ElModo Sab_ticonose puedeactivar si hs teciasest4n
bloqueadaso cuando [a puerta est4bloqueada.
+ Sie! horno est_horneandocuando se programael Modo
Sab_tico,'BAKE'se apagar4al final del cic[ode horneado.No
se emRir4nserialessonoras.
+ Cuandocomienzael Modo Sab_tico,nose emitir_ laseffal
sonorade precalentamiento.
o Cuandoe[ Modo Sab4ticoest4activo,todos los avisos,
mensajesy seffaIessonorasest4ndesactivados.
o Si@rime la tecIa'CANCEL'se canceiar4un ciclo'Bake',sin
embargoel control permanecer4en Modo Sab4tico.
o SifaIIa [acorrienteet6ctrica,cuandovueiva[a energ[ael horno
se activar4enModo Sab_ticocon 72 horasrestantesy ningOn
ciclo activo.
68
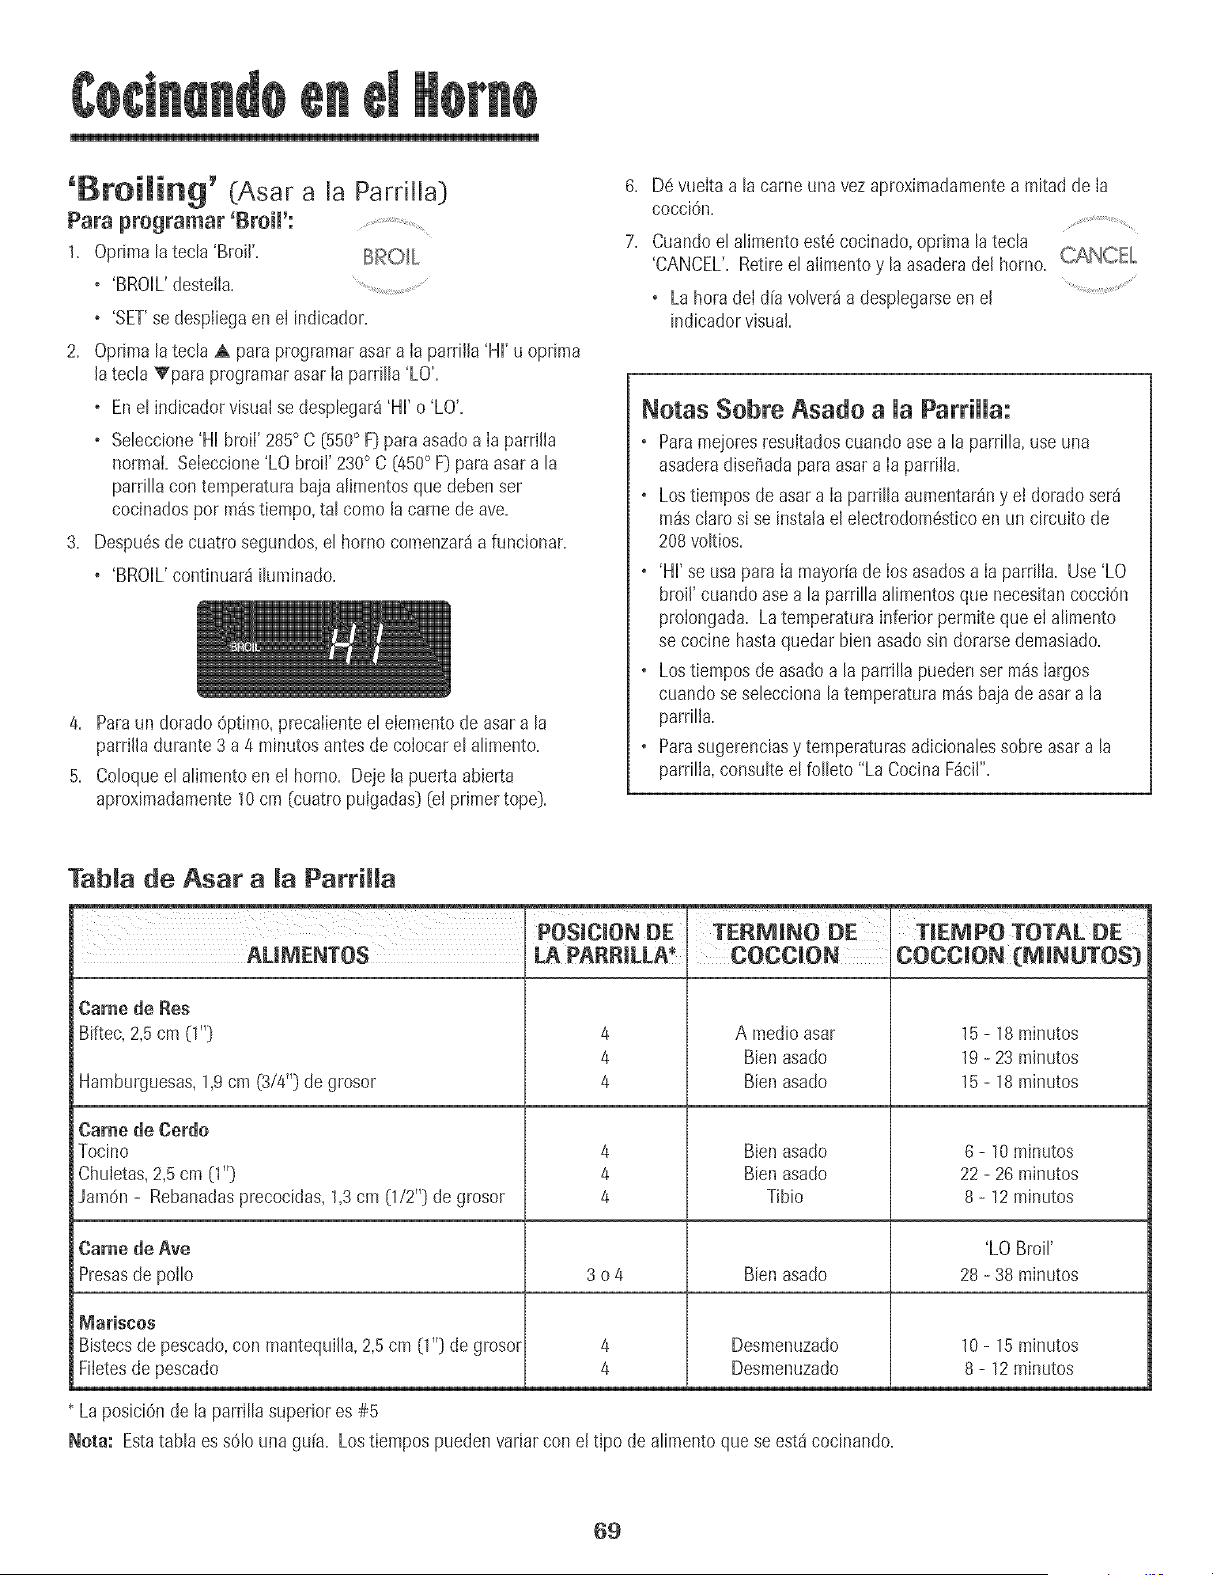
'Broiming' (Asar a [a Pardila)
Para programar 'Broil':
1. Oprima[a tech 'Broil'+
o 'BROHL'destella. + ...........
o 'SET'se despiiegaen el indicador.
2. Oprima[a teda A paraprogramarasara [aparrilla 'HH'u optima
lateda Vpara programarasar [a parrilla 'LO'.
o Ene[ indicadorvisualse despiegar8'HH'o 'LO'.
o Seleccione'HHbroi[' 285° C (550° F} paraasadoa [a parrilla
normal Seieccione'LO broil' 230° C [450° F}paraasar a [a
parrillacon temperatura bajaalimentosque debenser
cocinadospor m_stiempo,ta[ como lacame de ave.
3. Despu6sde cuatrosegundos,e[ homo comenzar8a funcionar.
o 'BROIL'continuar_ikJminado.
4. Paraun dorado6ptimo, precaIienteel eIementode asar a la
parrilladurante 3 a 4 minutosantesde co[ocarel aIimento.
5. Coloqueel aIimentoen e[ horno. Deje la puerta abierta
aproximadamente10cm (cuatropulgadas}(el primertope}.
6. D6vuelta a [a carneuna vezaproximadamentea mitadde la
cocciOn.
7. Cuandoe[ aIimentoeat6cocinado,optima [atecIa
'CANCEL'.Retiree[aiimentoy [a asaderade[ homo. C_NCEIL
o La horade[ d[avoJver_adespJegarseene[
indicadorvisual.
Notas Sebre Asado a [a ParriHa:
o Paramejoresresultadoscuando asea la parriIIa,use una
asaderadise_adaparaasar a [a parriila.
o Los tiemposde asara [aparriIIaaumentar_ny el doradoser_
m_scIaros[se instalaelelectrodomesticoen un circuito de
208w_Itios.
o 'Hi' se usapara [a mayoffade [osasadosa [a parriIla. Use'LO
broil' cuandoasea la pardIIaaIimentosque necesitancocci6n
proiongada. Latemperaturainferior permiteque e[ aIimento
se cocine hastaquedarbien asadosin dorarsedemasiado.
o Los tiemposde asadoa la parriIIapuedenser m_s[argos
cuando seseIeccionalatemperatura m_sbajadeasar a la
parri[la.
o Parasugerenciasy temperaturasadiciona[essobreasar a [a
parr[Ha,consu[tee[ fo[[eto"La CocinaF_ci["+
Tab[a de Asar a [a Parr[Ha
POS[CiON DE
ALIMENTOS
Came de Res
Biftec, 2,5 cm 0"}
Hamburguesas,1,9cm (3/4"} degrosor
Came de Cerdo
Tocino
Chuietas,2,5 cm [1"}
Jam6n- Rebanadasprecocidas,1,3cm 0/2 ++}de grosor
TERM[NO DE T[EMPO TOTAL DE
COCCWON COCC[ON (M[NUTOS)
4 A medioasar 15- 18mhutos
4 Bienasado 19- 23 mJnutos
4 Bienasado 15- 18mJnutos
4
4
4
Bienasado
Bienasado
Tibio
Came de Ave
Presasde po[[o 3 o 4 Bienasado
4
4
Desmenuzado
Desmenuzado
[V[aHSCOS
B[stecsde pescado,con mantequi[[a,2,5cm [1"} de grosor
Filetesde pescado
Laposici6nde [a parri[[asuperiores#5
Nora: Estatab[aes solo una gu[a+Lostiempos puedenvariar con e[tipo de a[imentoquese est4cocinando+
8 - 10minutos
22- 26 minutos
8 - 12minutos
'LO Broi['
28- 38 minutos
10- 15mJnutos
8 - 12minutos
69

Respiradero de[ Homo
Cuandoemhomoest6 en uso, em_reacercademrespiraderopuede
sentirse caiiente bastante pot causa quemaras. Nunca bioquee
maabe_urademrespiradero.
RESPIRAOERODELHORNO
. Aseg_iresede que e[ platii[o protector en [a
ubicaciOnde[respiraderotenga unagujeroen el
centro. Nocubraelplatilloprotectorcon papelde
ahminio=
ABERTURADEL
RESPIRAOERO
DELHORNO
'Oven Light' (Luz del Horno_) [_
Optimae[ interruptorde la hz de[ hornoen el panelde
control paraencendery apagarla hz del homo.
oven lighf
Pane[ inferior de[ Homo
Protejael panelinferior de[ homo contraderrames,especiaImente
azucaradoso acidicos,puespuedendescoiorarla porcelana
esmaitada.Useel utenslliodetamafio correctoa fin de evitar
derrames.No coioque utensiiios ni papei de aiuminio
directamente en maparte inferior demhomo°
Parriffas de[ Homo
Para reinstamar [a parrimma:
1. Coloquelaparriila ene[ soportede [a parrilla en el homo.
2. Incline[evementehacia arribael extremodeIantero;desIice[a
parriIIahacia atr_shastaque pasesobre los topesde enganche.
3. Baieelfrente de [a parriilay desIiceIahacia adentrode[ holno.
No cubra una parrimmacompmetacon papemde amuminioni comoque
papnmde amuminioen maparte inferiordemhomo. Se afectar_n mos
resumtadosdemhomeado y se puede da[iar maparte inferior dem
homo.
Posiciones de [a Parriffa
PgRRILLA5 (la posiciOn --
m_salta):Se usapara
tostar pan o asara la
parrilIa alimentos --'
delgadosno grasosos. -- _
--3
PgRRILLg 4: Seusa para ___
la mayor[ade los asadosa
[a parri[[a, --'
PARR[LLA3: Seusa para
hornearalimentosen una
bandejade hornearga[[etaso un moide para roHode merme[ada,
parapaste[es,paysde frutas o a[imentosconge[ados.
PARRiL[.g 2: Seusa paraasarcortesde camepeque_os,cacemlas,
hornearbaguetasde pan, paste[esen too[desde tubo o flanes.
PARF_[[.[.._1: Seusa paraasar pedazosgrandesde camey came
de ave,paysconge[ados,sufles de postreo paste[esesponjosos.
HORNEADOCONVAR[AS PARR[U.AS:
Dos parrimmas:Use[asposiciones2y 4, o 1y 4.
oNO use e[ homo para guardaraliment0Sni utens!!iOS,
Elhornot[ene dos parri[[as.Todas[asparrH[ast[enen un bordecon
tope de enganche.
Para retirar maparrimma:
1. Tire de [a parriIIaderecho hacia
afuerahastaquese detenga en
[a pos[ciOnde[tope de
enganche.
2. Levantee[frente de [a parriiiay
tire de [a parr[Hahaciaafuera.
Media Parri[[a
Sedispone,comoaccesorio,de unamedia
parri[[aparaaumentar[a capacidadde[
homo, Seinsta[aen [asecc[Onsuperior
de[ [ado [zqu[erdodei homo y ofrece
espaciopara unaplato de verduras
cuando se haco[ocadouna asadera
grandeen [a parr[Hainferior. P0ngaseen
contactocon su distdbuidor paraobtener
el accesodo"HALFF_,CK"o parasoIicitar, --
I[amea[ 1-877-232-6771.
7O
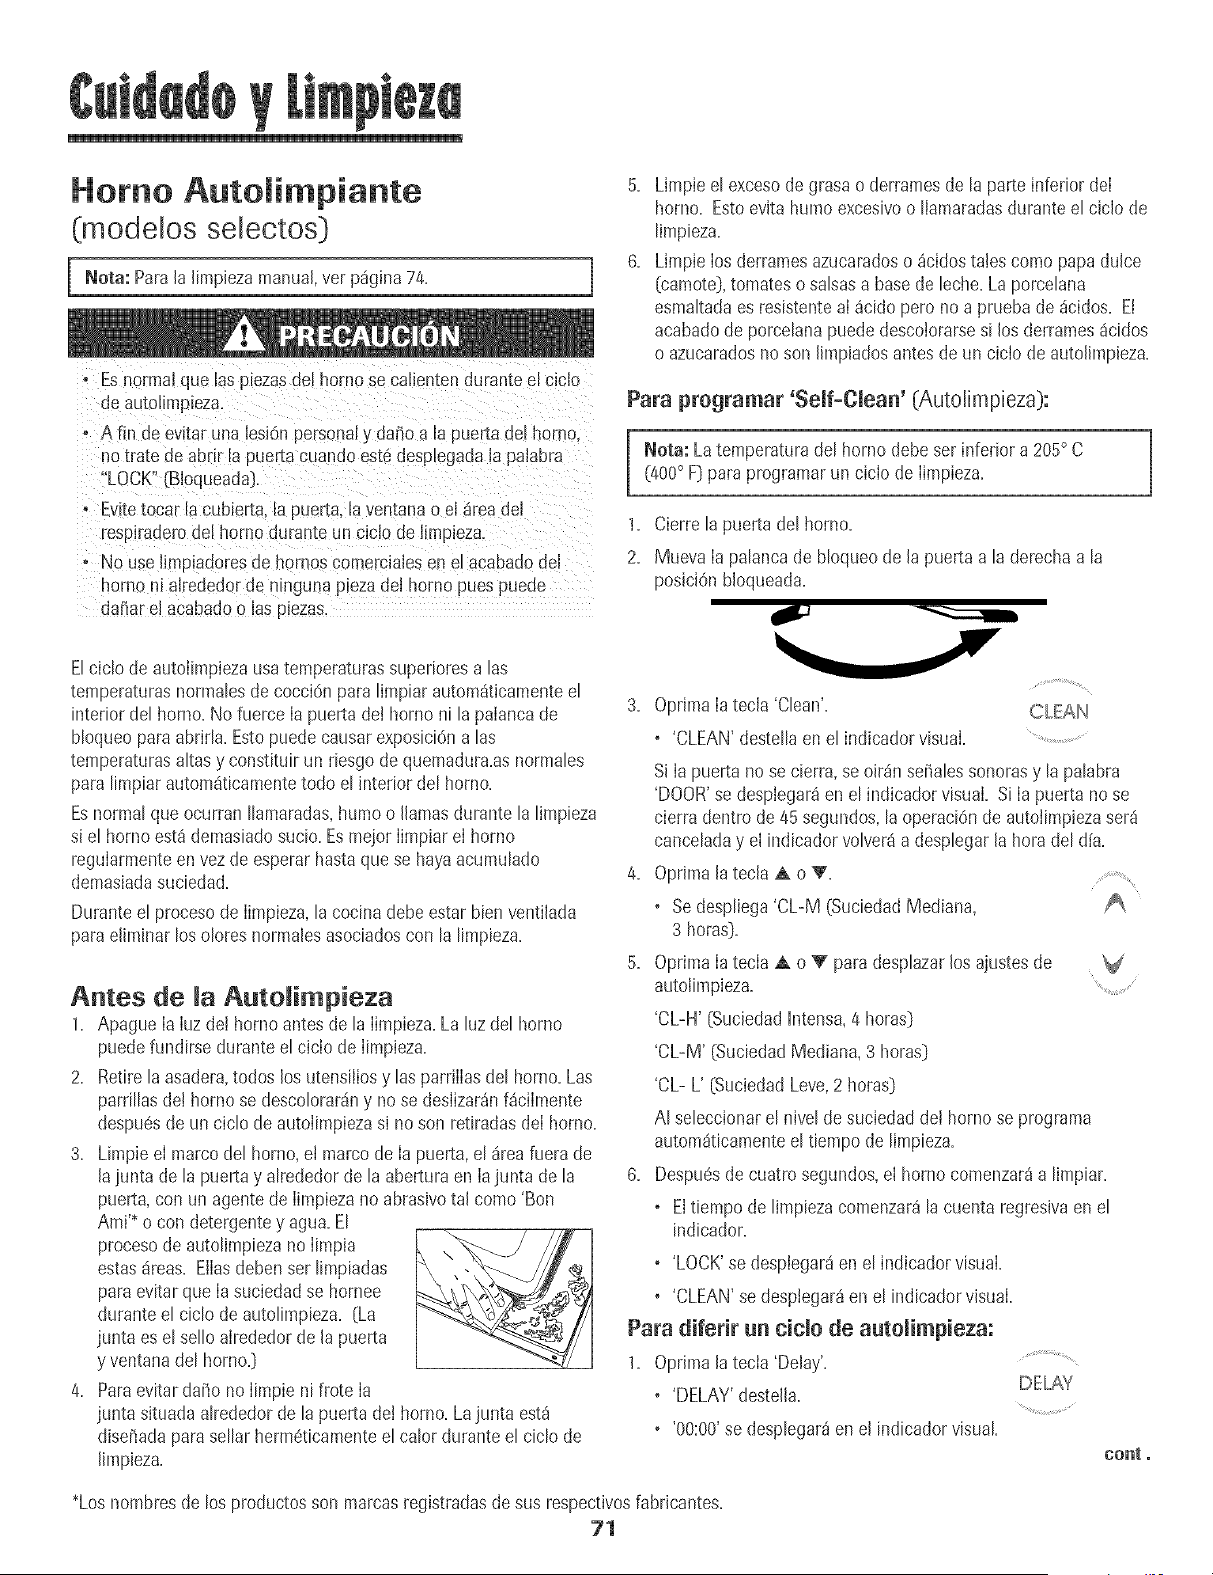
Homo AutoJimpiante
(modelos selectos)
Nora: Parala limpiezamanual,ver p%ina 74.
Esnormal que las pLezasde[ homo se calientenduranteel ciclc,
de autol_mpLeza
Afin de ewtaruna lesion personaly dai_oa [a puertadel horno.
no trate de abrir [a puerEacuando est6desplegadaia paiabra
'LOCK" (Bloqueada).
Evitetocar la cub_erta,la puerta,laventanao el _readel
resplrademdel homo durante un ciclo deHmpleza.
No use fimpiadoresde hornos comerciaJesen e_acabadodel
homo ni aJrededorde ningunapiezadel homo pues puede
da_arel acabadoo Jasplezas.
Limpie el excesode grasao derramesde la parte inferior deI
homo. Estoevita humoexcesivoo Iiamaradasdurante el ciclo de
limpieza.
Limpie Iosderramesazucaradoso _cidostalescomo papadulce
(camote),tomatesosalsasa basede leche.Laporcelana
esmaltadaes resistenteal _cido pero noa pruebade _cidos. Et
acabadode porcelanapuededescotorarsesi los derrames_cidos
o azucaradosnoson limpiadosantesde un ciclo de autolimpieza.
Para programar 'Self-Clean' (Autolimpieza):
Nora: Latemperaturadel hornodebeser inferior a 205°C
(400° FDpara programarun ciclo de Iimpieza.
].
2.
Cierrela puerta del horno.
MuevaIa palancade bloqueode la pue_a a laderechaa la
posiciOnbloqueada.
Elcic[o de autolimpiezausatemperaturassuperioresa [as
temperaturasnormalesde cocci6npara limpiar autom_ticamenteel
interiordel horno. No fuerce Ia puertadet horno ni la palancade
bloqueoparaabrirla. Estopuedecausarexposici6nalas
temperaturasaltasy constituir un desgode quemadura.asnormales
para limpiarautom_ticamentetodo el interior del homo.
Esnormal que ocurran Ilamaradas,humoo llamasdurante la limpieza
si el homo est_demasiadosucio.Esmejor IimpiareI homo
regularmenteenvezde esperarhastaquese hayaacumulado
demasiadasuciedad.
Duranteel procesode Iimpieza,la cocinadebeestarbien ventilada
para eliminarlos olores normalesasociadoscon la limpieza.
Antes de AutoJimpieza
1. Apague Ia Iuzde! homo antesde la Iimpieza.La luz del horno
puedefundirse duranteel ciclo de Iimpieza.
2. Retirelaasadera,todos Josutensiliosy las parrilIasdel horno.Las
parrillasdeÁhomo se descolorar_ny no se deslizar_nf_cilmente
despu6sde unciclo de autolimpiezasi no son retiradasdeI homo.
3. LimpieeI marcodel homo,et marcode Ia puerta,el _reafuera de
laiunta de la puertay alrededorde laaberturaen Iajunta de la
puerta,con un agentede Iimpiezanoabrasivotal como'Bon
Ami'_o con detergentey agua.El
procesode autolimpiezano Iimpia
estasdreas. EIIasdebenser limpiadas
paraevitarque Iasuciedadse hornee
durante el ciclo de autolimpieza. (La
junta es el sello alrededorde la puerta
y ventanadel horno.)
4. ParaevitardaSonoIimpie ni frote Ia
junta situadaalrededorde la puerta deÁhomo.Lajunta est_
diseSadaparasellar herm6ticamenteel calor durante el ciclo de
[impieza.
3. OprimaIa tecla 'Clean'. CLEAN
o 'CLEAN'destellaenel indicadol visual. ...........................
Si[a puerta no se cierra,seoir_n sefia[essonorasy [apa[abra
'DOOR'se despiegar_en el indicadorvisual Si la puerta no se
cierra dentro de45 segundos,la operaciOnde autoiimpiezaser_
canceladay el indicador volver_a desplegar[a horadel d[a.
Optima[a tec[a A o V.
o Sedespliega'CL-M (SuciedadMediana,
3 horas].
OprimaIa tecla A o V" paradesplazarlos ajustesde
autolimpieza.
'CL-H' (Suciedadhltensa,4 horas]
'CL-M' (SuciedadMediana,3 horas]
'CL- L' (SuciedadLeve,2 horas]
AI seleccionarel nivel de suciedadde! homo se programa
autom_ticamenteel tiempode limpieza.
Despu6sde cuatrosegundos,el homo comenzar_a limpiar.
®
EItiempode limpiezacomenzar_lacuenta regresivaen el
indicador.
o 'LOCK'se desplegar_en el indicadorvisual.
o 'CLEAN'se desptegar_en el indicadorvisual.
Para diferir un cido de autoiimpieza:
1. Optimala tecla 'Delay'.
o 'DELAY'destella.
o '00:00'se desplegar_en el indicadorvisual
DELAY
cent°
*Loshombresde los productosson marcasregistradasde sus respectivosfabricantes.
71
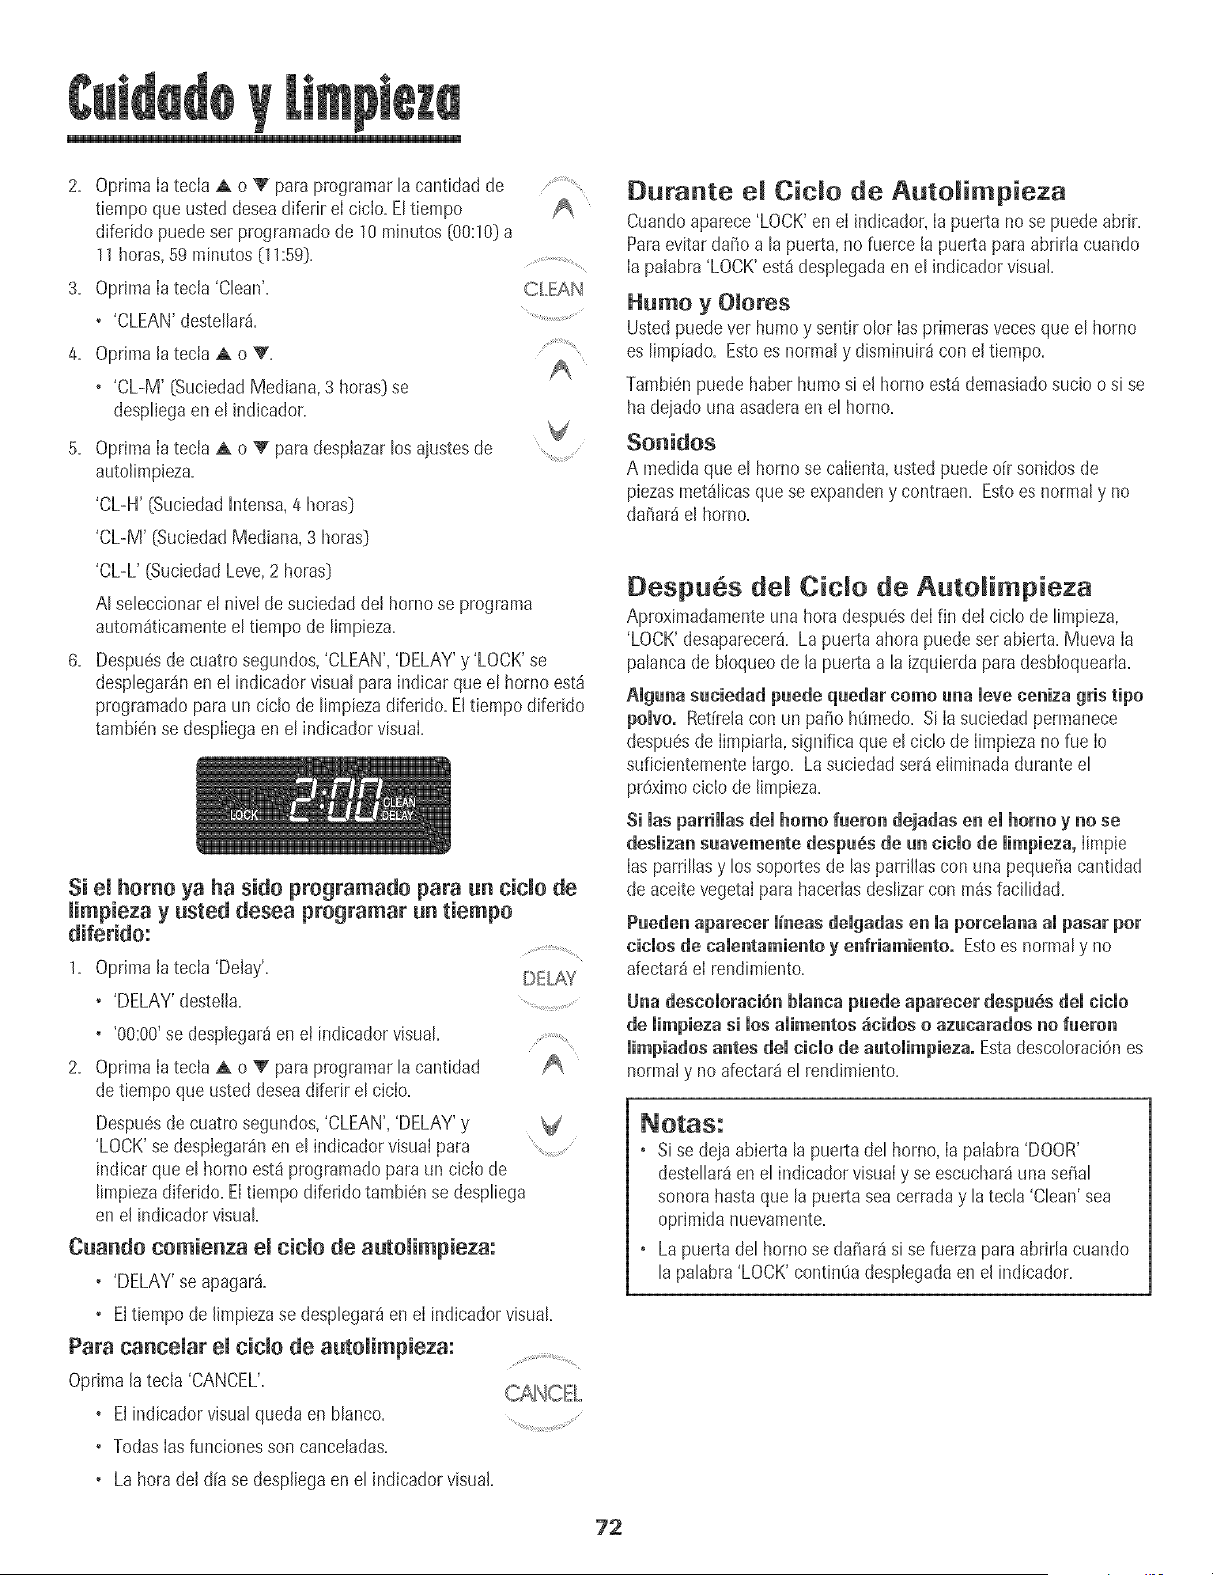
2. OprimaIatecla ,A o V paraprogramar [acantidadde .........................
tiempo que usteddeseadiferir el ciclo. Eltiempo A_
difeddo puedeser programadode 10minutes (00:10)a
11horas,59 minutos (11:59).
3. OprimaIatecla 'Clean'. C_.EAN
• 'CLEAN'destellar_i. ................................
4. Oprimalatecla ,A o Y.
+ 'CL-M' (SuciedadMediana,3 horas}se
despliegaen el indicador.
V
5. OprimaIatecla ,A o V paradesplazarlos ajustesde ......................
autolimpieza.
'CL-H' (SuciedadIntensa,4 horas}
'CL-M' (SuciedadMediana,3 horas}
'CL-L' (SuciedadLeve,2 horas}
AI seleccionarel nivel de suciedadde! homo se programa
autom_ticamenteel tiempo de Iimpieza.
6,
Despu6sde caatrosegundos,'CLEAN','DELAY'y 'LOCK'se
desplegarSnen el indicadorvisualparaindicar que el homo est_
programadopara un ciclo de limpiezadiferido+Eltiempodiferido
tambiense despliegaen el indicadorvisual+
Si el homo ya ha side programado para un cido de
limpieza y usted desea programar un tiempo
diferido:
1+ Oprimalatecla 'Delay'+ DELAY
• 'DELAY'destella+ ..............................
+ '00:00'se desplegar_en et indicadorvisual+
2+ OptimaIatecla ,A o _' paraprogramar lacantidad
detlempo queusted deseadiferir el ciclo+
Despuesde cuatrosegundos,'CLEAN','DELAY'y V
'LOCK'sedesplegar4nen el indicador visualpara ........................
indicar quee! homo estaprogramadopara un ciclo de
limpiezadiferido.Eltiempodiferido tambi6nse despliega
enel indicadorvisual
Cuando comienza el ciclo de autolimpieza:
+ 'DELAY'se apagar&
+ Eltlempo de Iimpiezase desplegar_en el indicadorvisual.
Para cancelar el ciolo de autolimpieza:
Optimala tecla 'CANCEL'.
+ Elindicadorvisualquedaen blanco+
• TodasIasfuncionesson canceladas+
+ Lahora deldia se despliegaen el indicadorvisual
Durante el Cido de Autolimpieza
Cuandoaparece'LOCK'enel indicador,Ia puerta no se puedeabrir+
Paraevitardaiio a la puerta,no fuerce la puertapara abrirtacuando
Ia palabra'LOCK'est_desplegadaen el indicadorvisual+
Humo y Olores
Ustedpuedever humoy sentiro[or Iasprimerasvecesque e[ homo
es [impiado+Estoes normal y disminuir_con el tiempo+
Tambienpuedehaberhumo si el homo est_demasiadosucio o sise
ha dejadounaasaderaenel homo+
Sonidos
A medidaque el hornose calienta,usted puedeoir sonidosde
piezasmet_licasquese expandeny contraen+Estoes normaly no
dahar_el homo+
Despu6s del Cido de Autolimp+eza
Aproximadamenteunahora despu6sdeIfin del ciclo de Iimpieza,
'LOCK'desaparecer& Lapuerta ahorapuedeset abierta+MuevaIa
palancade bloqueode la puerta a la izquierdaparadesbloquearta+
Amgunasuciedad puede quedar como aria mereeeniza gris ripe
pomvo.Retirelacon un paho hhmedo+Si Ia suciedadpermanece
despuesde Iimpiarla,significa que e[ ciclode Iimpiezano fue Io
saficientementelargo. Lasuciedadser_eliminada duranteel
pr6ximociclo de limpieza+
Si masparrimmasdemhomo fueron dejadasenel homo y no se
deamizansuavemente despu6s de un cicmode mimpieza,Iimpie
Iasparrillasy los soportesde lasparrillas con una pequefiacantldad
de acekevegetalpara hacerlasdeslizarcon m_sfacilidad+
Pueden apareeer J+neasdemgadasen maporeemanaampasar pot
cicmo+de camentamientoy enfriamiento° Estoes normaly no
afectar_el rendimiento.
Una descomomci6nblanca puede apareeer despuSs demcicmo
de limpieza si mosamimentos_cidos o azuearados no fueron
l+mp+adosantes del cicmode automimpieza.EstadescoloraciOnes
normaly no afectar_el rendimiento+
+ S[ se dejaabierta [a puertade[ homo,la palabra'DOOR'
deste[[ar_ene[ indicadorvisualy se escuchar_una seha[
sonora hastaque [a puertasea cerraday [a tec[a'Clean' sea
oprimidanuevamente.
+ Lapuerta de[ homo se daiiar_ s[se fuerzaparaabrir[a cuando
[a pa[abra'LOCK'cont[n0adesp[egadaen el [nd[cador.
72

Procedi ientos de Limpieza
fr_as antes de tocarie o limpiarlo. De este modQ se evitar_n da_os y
posibles quemaduras, _ Los hombresde los prod_Jctosson marcas
registradasde susrespectivosfabricantes=
, pars evitar manchaso dec0!oraci6nIimp!eel homo despu6Sde cadsuse.
_ Parshacer pedidos,Ilameal 1-877-232-6771en
• Sise retira alguna pieza,aseg6resedeque sea reinstaladaen forrnacorrecta: EEUU=o 1-800-688-8408en Canad&
P_EZA PROCED_M_ENTO DE LIMP_EZA
Protector Trasere
y Cabier!.a -
Porceiana
Esmaitada
Bandeja de Asar
e Inserto
Area dei Reioj y
de masTeelas
de Control
Perillasde
Control
Pmatimmos
Prntecteres,
Pnrceiana
(medelos
seiectos}
Pmatimmos
Prntectores,
Cromo/Esmalte
Pintado (modeios
seiectos}
Ventana y
Puer_adem
Homo =Vidrio
(medemos
seiectos}
Laporcelanaesmaltadaesvidriofurldidoen metaly puedeagrietarseo picarsesi nose usacorrectamente=Esresistentea
los_cidos,noapruebade_cidos=Todoslosderrames,especialmentelosderramesazucaradosoaddicosdebenset limpiados
inmediatarnentecon un patioseco=
, Cuandoseenfr[e,lavecon aguajabonosa,enjuaguey seque.
° Nurlcalimpieu[la superficietibia o calientecon un paiioh0medo.Estopuedecausaragrietamientoo picaduras.
• Nuncauselimpiadoresdehomo,agentesde limpiezaabrssivoso c_usticosenel acabadoexteriorde laestufa.
Nunca cubra el inserto cell papel de afuminio plies esto evita queta gFasase eseurm a & bandeja inferior.
• Coloqueunpanoenjabonadosobreel insertoy labandeja;dejeremojarparssoltarlasuciedad=
• Laveen aguajabonosatibia.Useunaesponjadefregarpars quitarlasuciedadpersistente.
• La bandejadeasary el insertopuedenset lavadosenel lavavajillas.
° Paraactivar'ControlLock' (BIoqueodeloscontroles}parsla limpieza,ver p_gina64.
° Limpieconun pasohOmedoy seque.No useagentesdelimpiezaabrasivospuespuedenrayarlasuperficie.
° Sepuedenusarlimpiavidriossi se rodan enel paiioprimero.NO rode directamenteell elpalleL
, Retirelasperillascuandoest@nenla posiciOn'OFF'tir_ndolashaciaadelante.
, Lave,enjuaguey seque.No useagentesde limpiezaabrasivospuespuedenrayarlasuperficie.
, Enciendacadsquernadorparsasegurarsede quelasperillashayansidocorrectamentereinstaladas.
Laporcelanapuededescolorarseo adquirirfisurassuperficialessi se sobrecalienta.Estoes normaly no afectar_el
rendimientode h cocci0n.
• Cuandoest_nfrfos,lavedespu_sde cadsuso,enjuaguey sequepars evitarmanchasy deco!oraci0n.Puedenlavsrseen
e! lavavajillas.
• Parslimpiarsuciedadexcesiva,remojeen aguacalienteconjab0n,luegouse un limpiadorabrasivosuavetalcomoSoft
Scrub_y urla esponjadefregar de pl_stico.
° Parssuciedadquemada,retireel phtillo de laestufa,co!0quelosobreperi0dicosy rode cuidadosamentecon limpiador
de homo comerciaL(No rode lassuperficiesadyacentes.)Coloqueen unabolsade pl_isticoy deje remojardurante
variashoras.Useguantesde gomapars sacarlode la bolsa,lave,enjuaguey seque.
• Cuandoestenfrfos,lavedespu6sde cadsuso,enjuaguey sequepars evitarmanchasy decoloraci0n.
• Parslimpiarsuciedadexcesiva,remojeen aguacalienteconjab0n,luegouse un limpiadorabrssivosuavetal comoSoft
Scrub_y una esponjadefregar de pl_stico. No useagentesdelimpiezaabrasivos.
• Eviteusa!cantidadesexcesivasde aguapues puedeescurrirsedebajoo detr_sdelvidrio causandomanchas.
• Lavecon aguayjab0n. Enjuaguecon agualimpiay seque. Ellimpiadordevidrio puedeusarsesi se rods en un pdio
primero.
° No usematerialesabrasivostalescomoesponjasderestregar,limpiadoresen polvoo esponjasde lanadeaceropues
puedenrayarel vidrio.
73
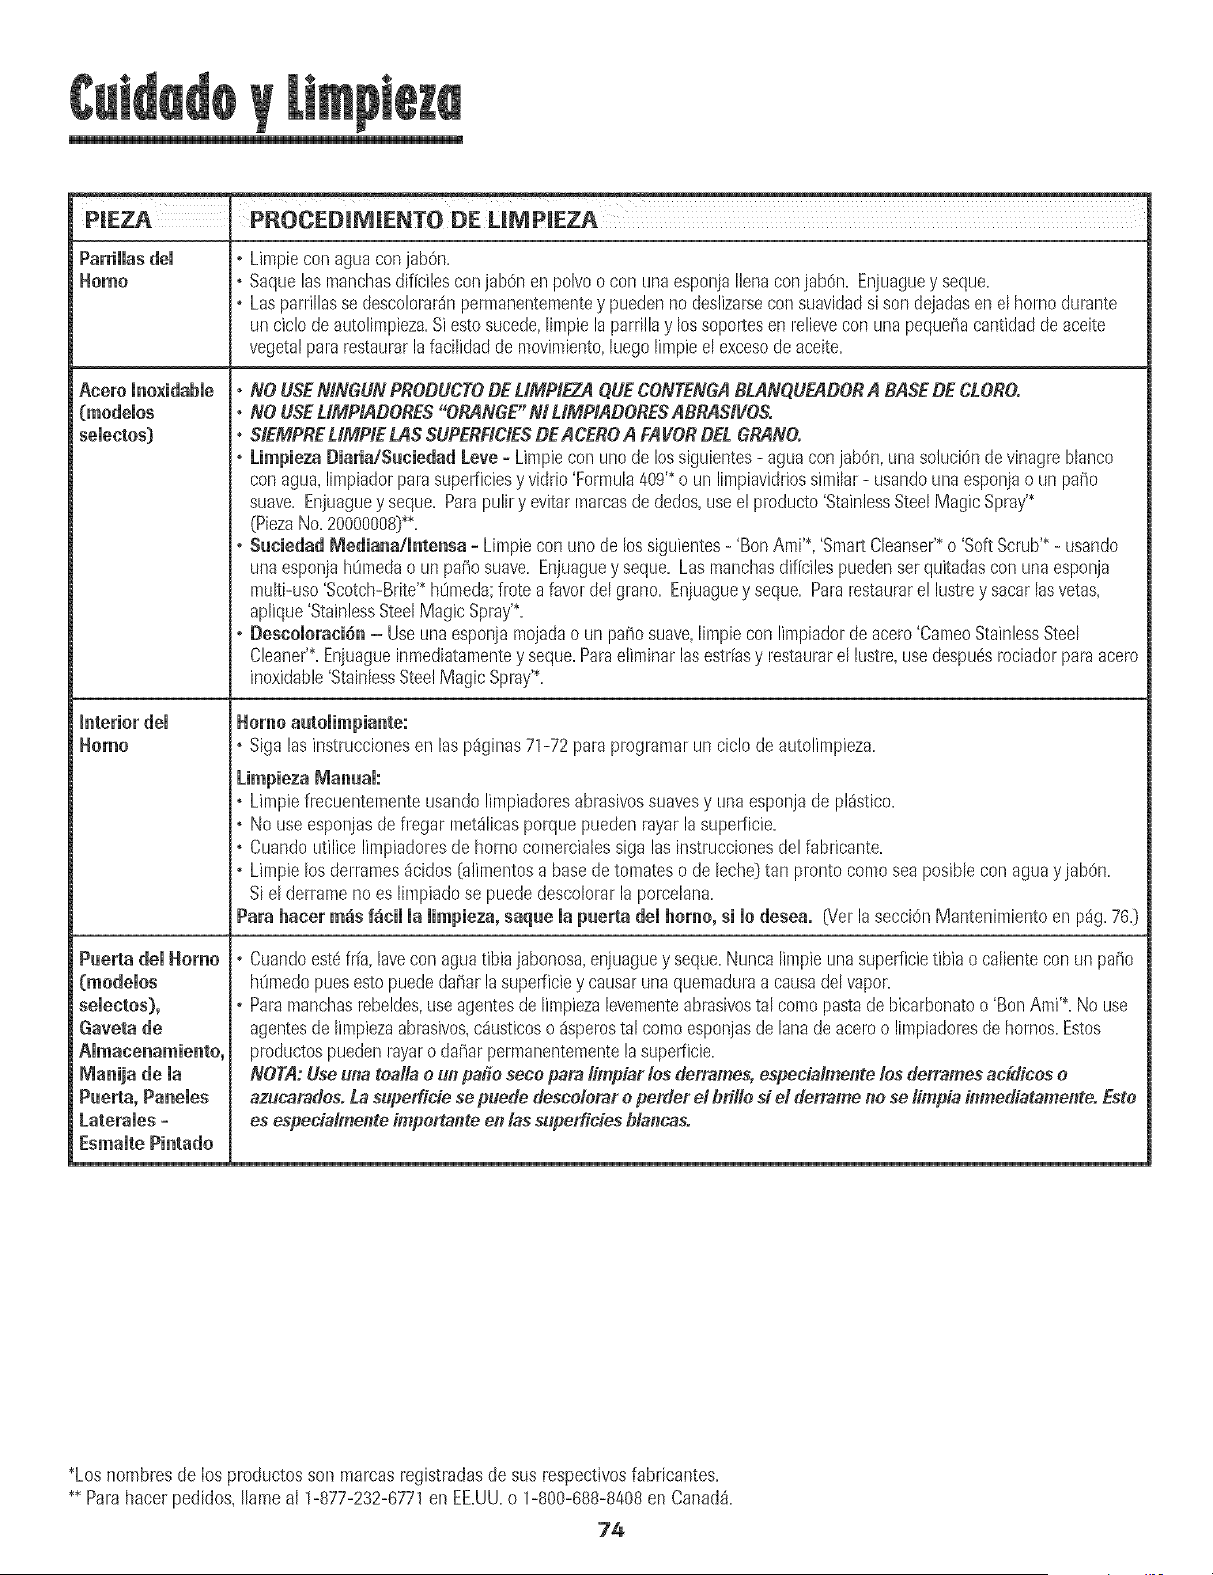
P_EZA ' PROCED_MIENTO DE LIM PIEZA
Parrillasdel • Limpiecon aguaconjab6n.
Homo ,, Ssquelas msnchasdiffcilesconjsb6n enpolvoocon unaesponjaIlenaconjabdn. Enjuaguey seque.
,° Lasparrillasse desco!orardnpermanenternentey puedenno destizarsecon suavidadsi son dejadasenel hornodurante
unciclode autolimpiezs.Siestosucede,limpielaparrillsy lossoportesen relieveconunapeque_acantidaddesceite
vegetalpararestaurarlafscilidadde movimiento,luegolimpieelexcesode aceite.
Acere lno×idabie
[medeios
seiectos}
Puerta demHomo
(modemos
semectos),
Gaveta de
Ammacenamiento,
Manija de ma
Puelta, Panemes
Laterames-
Esmaite Pintado
* NO USENINGUNPRODUCTODE LIMHEZA QUECONTENGABLANQUEADORA BASEDE CLOBO.
,* NO USEUMPIADOBES"ORANGE"Nt LIMPIADOBESABRASIVOS.
'* SIEMPRELIMPIE LASSUPERFICIESDEACEBOA fAVOR DELGRANO.
,. Limpieza Diaria/Suciedad Leve=Umpiecon unode lossiguientes- aguaconjabOn,unssoluciOndevinagrebhnco
conagua,limpiadorparssuperficiesy vidrio'Formula40g'*o un limpiavidriossimilal- usandounaesponjaoun pafio
suave. Enjuaguey seque.Parspulily evitsrmarcssde dedos,useelproducto'StainlessSteelMagicSpray'*
(PiezsNo.20000008}_*,
,, Sueiedad Mediana/lntensa =Limpieconuric delossiguientes- 'BonAnti'*,'Sinai1Cleanser'*o 'SoftScrub'_ - usando
uns esponjaht_medao un patiosuave.Enjuaguey seque.Las manchasdificilespuedenserquitadssconunaesponja
multi-uso'Scotch-Brite'_hOmeds;frote afavordel grano. Enjuaguey seque.Pararestsurare! lustrey sacarlasvetas,
aplique'StainlessSteelMagicSpray'*.
,, Descolerad6n - Useunaesponjamojadsoun patiosuave,limpiecon limpisdorde acero'CameoStainlessSteel
Cleaner'*.Enjuagueinmedistamentey seque.Paraeliminsrlasestr[asy restsurarel lustre,usedespu6srociadorpsra acero
inoxidsble'StainlessSteelMagicSpray'S.
Heine autolimpiante:
,, Sigs las instrucciones en las pdginas 71-72 pars programs, un cic!o de autolimpieza.
Limpieza lVianual:
,, Lhnpie frecuentemente usando limpiadores abrasivos suaves y una esponjs de pldstico.
,, No use esponjas de flegar metdlicas porque puederl rayar la superficie.
, Cuando utilice limpiadores de horno comerciales siga las instrucciones del fabricsnte.
,o Limpie los derrames dcidos Calimentoss base de tomates o de leche} tan pronto como sea posible con sgua yjabOn.
Si el derrame no es limpiado se puede descolorm la porcelsna=
Pars haeer m_s f_¢il la iimpieza, saque ia puella dei heine, si le desea. 07er la secci0n Mantenimiento en pdg. 76.}
Cuandoest6fr[a,laveconaguatibiajabonosa,enjuaguey seque.Nuncslimpieunasuperficietibia o cslientecon unpatio
hOrnedopuesestopuededaiisr lasupefficiey causarunaquemsduraa csusadelvapor.
Parsmanchasrebeldes,usesgentesde limpiezalevementeabrssivostsl cornopastadebicarbonatoo 'BonAmi'_.No use
agentesdelimpiezaabrasivos,cdusticosodsperostsl comoesponjssde Isnadeaceroo lirnpiadoresdehornos.Estos
productospuedenrayaro dafisrpen-nanentementelasupefficie.
NOTA: Useuna toaHae un parle sece pa_ Iimpiarlos derrame& especialmente los derrames acidices e
azucaradosoLa superficie se puede descolomre perder el bri/le si el dermme no se limpiainmediatamente. Este
es especialmente impertante ell las superficies blar_cas.
_Loshombresde los productosson marcasregistradasde sus respectivosfabricantes.
_ Parshacer pedidos,Ilameal 1-877-232-6771en EE.UU.o 1-800-688-8408en Canada.
74
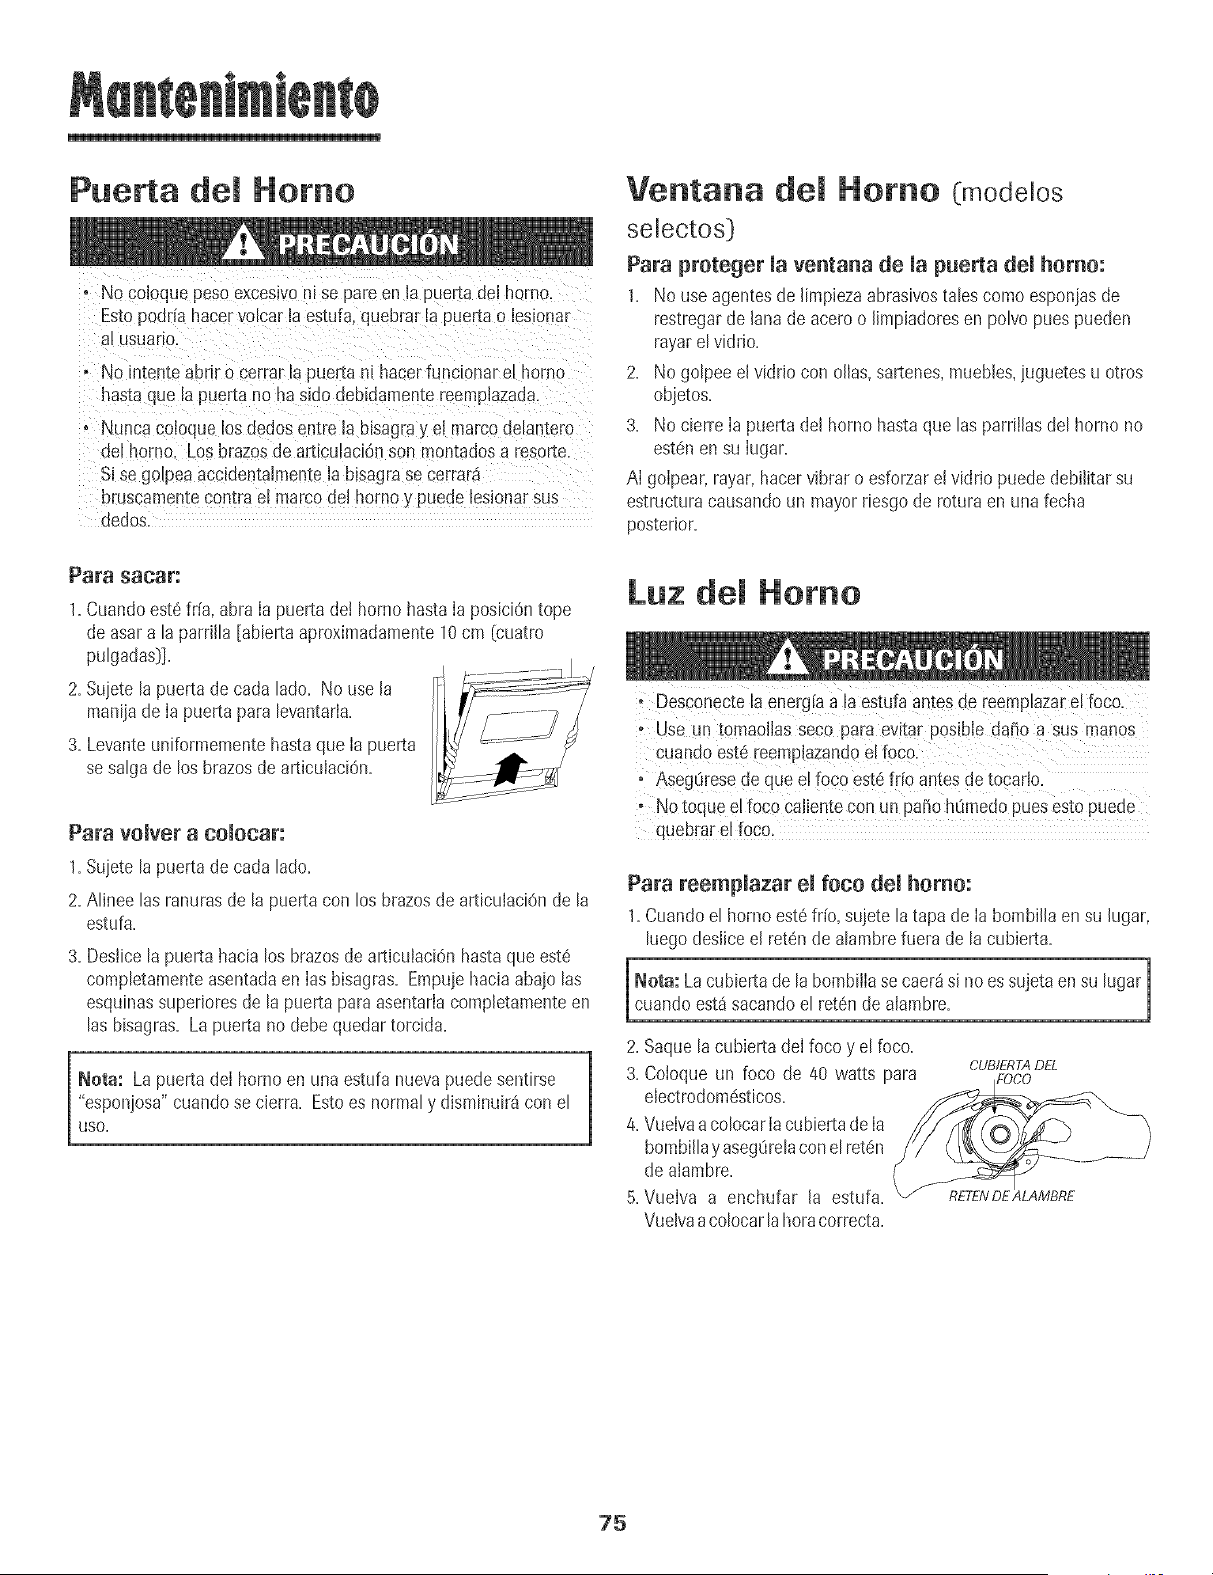
Puerta del Homo
• No eoJoque peso exceslvo mse pare en la puer[a del homo.
Esto podria hacer volcar la estufa, quebrar [a puer[a o lesiona_
al Us[Jan&
o No Ententeabrir o cerrar la puerta ni hacerfuncionarel homo
hastaque la pueRano nasido deNdamente reempiazada.
• Nunca coloquelos dedosentre la bisagray el marcoueLamero
del home Los brazosde articulaci6nson montadosa resorte.
SJse golpeaaccidentaJmenteia bisagrase cerrarai
bruscamentecontrael marcodel homo y puede lesionarsus
dodos.
Para saosr:
1.Cuandoest6if[a, abra Ia puerta de! hornohastaIa posiciOntope
de asara la parrflh [abiertaaproximadamente10cm (cuatro
pulgadas)].
2. Sujetela puerta decada lado. No use la _:::_ .....
manijadelapuertapara[evantarla, l l _/ /---- - // /
3. Levanteuniformementehastaque Ia puerta
se salgade los brazosde articulaciOn.
Para voJver a coJocar:
1. Sujete la puerta de cada lado.
2. Alinee las ranuras de la puerta con los brazos de articuiaci6n de la
estuf&
3, Desiice[a puerta hacia los brazosde articuiaci6nhastaqueest6
completamenteasentadaen [asbisagras, Empujehaciaabajolas
esquinassuperJoresde la puerta paraasentariacompletamenteen
las bisagras, Lapuerta no debequedartorcida,
I Nora: La puerta de[ hornoen unaestufa nuevapuedesentirse
%sponjosa"cuandose cierra, Estoes normaly disminuir4con el
USO.
Ventana del Homo (modelos
selectos)
Para proteger la ventana de la puerta dei homo:
1. No useagentesde limpiezaabrasivostalescomoesponjasde
restregarde lanade aceroo IJmpiadoresen polvo pues pueden
rayarelviddo.
2. No golpeeelvidrJocon ollas,sartenes,muebles,juguetesu otros
objetos.
3. No cierre Ia puerta del homo hastaque las parriilasdel horno no
est6nen su Iugar.
AI goIpear,rayar,hacervibrar o esforzaret vidrio puede debilitarsu
estructuracausandoun mayorriesgode roturaen unafecha
posterior.
Luz del Norno
i Desconectelaenerg[aa la estufa antesde reemplazare!foo0.
, use un t0maoilas Secopara evitar p0siNe dafio a Susmanes
Cuand0eSte[eemp!azand0elfoe01
, Aseg_resede qiie el foc0 est6frio antesdetocado.
o Notoque e! foc0 ca!Jentecon un patio h0medo pubsestopuede
quebrare!foce,
Para reemplazar el foco del homo:
1,Cuandoel homo est6if[o, sujetela tapa de Ia bombillaen su hgar,
luegodesliceel ret6nde alambrefuera de la cubierta,
Nora: Lacubiertade la bombillase caer_si noessujetaen su lugarj
_cuandoest4sacandoe ret6nde a ambre. 1
2. Saquela cubiertadel foco y el foco.
CLJBIERTADEL
3. Coloque un foco de 40 watts para f:oco
electrodom6sticos.
4.VuelvaacolocarIacubiertade Ia
bombillay aseg_irelaconel ret6n
de aiambre.
5.Vuelva a enchufar la estufa. RETENDEALAMBRE
Vuelvaacolocarlahoracorrect&
75
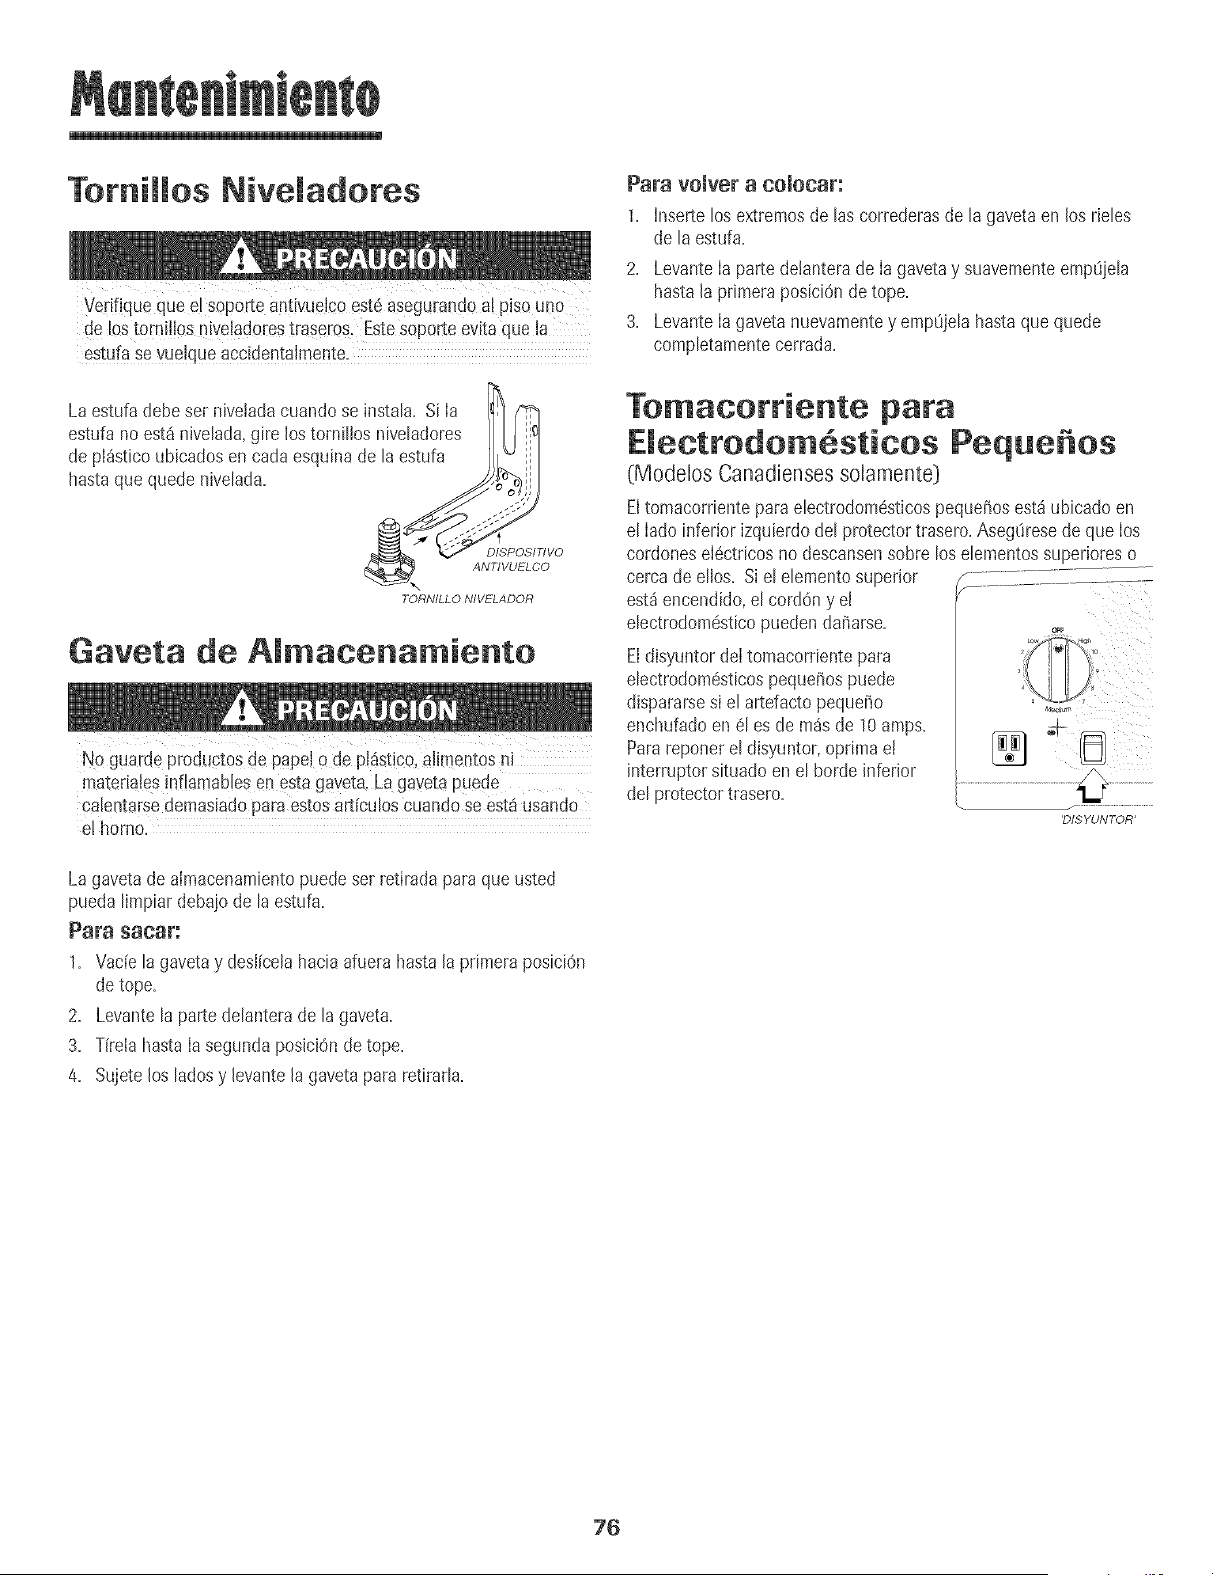
Tomillos Niveladeres
Ver!%ue que e!s0porteantivuelcoest_aseguFand0al piso up0
de lost0mfl!0s [!ive!ado[estraseros. Estesoporteevitaque !a
estu[a Sevuelqueaccidenta!mente_
La estufadebeser nivetadacuandose instah=Si Ia (_
estufa no est_nivelada,gire los tornillos nivetadores I _
de pI_sticoubicadosen cadaesquinade la estufa
hastaque quedenivetada= -- ,,jj
TORNILLO NIVELADOR
Gaveta de Almacenamiento
No g Jardeproductos de papelo de pl_stico,alirnemosn
materialesinfiamablesen _s_agaveta=Lagave[apuede
cale_ltarsedemasiadoparaestosarticuloscuando se est,1usando
e! homo.
Para vomver a comooar:
1= hlsertelos extremosde lascorrederasde la gavetaen losrieles
de la estufa=
2= LevanteIa partedetanterade Ia gavetay suavementeemp_iiela
hastala primera posiciOndetope.
3. LevanteIagavetanuevamentey emp0jelahastaquequede
completamentecerrada.
Tomacorriente para
Emectrodo sticos Peque os
(Modelos Canadienses solamente}
Eltomacorrienteparaelectrodom@sticospequeiios est_ubicadoen
el Iado inferior izquierdodel protectortrasero.Aseg8resede que Ios
cordoneselOctricosno descansensobre los elementossuperioreso
cercade elios. Siel elementosuperior
est_encendido,el cordony ei
electrodomOsticopuedendariarse.
EIdisyuntor deItomacorrientepara
electrodomOsticospeque_ospuede
dispararsesi el artefactopequeiio
enchufadoen 61es de rodsde 10amps.
Parareporterel disyuntor,opdma e!
interruptorsituadoen el borde inferior
del protectortrasero.
'DISYUNTOR'
La gavetade almacenamientopuedeset retiradaparaque usted
puedalimpiar debaiode la estufa.
Para sacar:
1= Vade la gavetay desi(celahaciaafuera hastala primeraposici0n
detope.
2= Levantela partedelanterade la gaveta=
3= T(relahastaIasegundaposiciOnde tope.
4= Sujete losladosy levantela gavetapara retirarla=
76
PRGBLEMA SGLUCION
Para mamayor_ade moaprobmemas, • Revisesi los controlesde! homo est_ndebidamenteajustados.
verifiqueprimero 1osiguienteo • Verifiquesi et enchufeest_firmementeinsertadoenel tomacorriente.
• Verifiqueo vuelvaa reponerel disyuntor.Verifiqueo reemplaceel fusible.
• Verifiqueel suministrode energ[aelectrica.
Toda la estafa o par!.ede ella no • Revisesi Ia superficiey/o los controlesdel homoest_ndebidamenteaiustados.Vet p_ginas
funcionao 58y 65.
• Verifiquesi lapuertadel homo seha desbloqueadodespu6sdelciclode autolimpieza.Ver
p_gina72.
• Revisesi el homo est_ajustadoparahomeadodiferidoo programade limpieza.Verp_ginas66
y 72.
• Verifiquesi 'ControlLock' [BIoqueode Control}est_activado.Vet p_g.64.
• Verifiquesi el controlest_en Modo Sab_tico.Verp%. 68.
El retool,maapalabras en el indicader • Elhornopuedeestarprogramadoparaunafunci6n de'Cook& Hold'o unafunci6ndiferida.
visualy/o las laces funcionan pero • Puedeestaractivadalacaracter[sticade bloqueodelos controlesdel homo.(Verp_g.64.)
el homo no se calienta,
Los reaumtadosdemhomeado no • Aseg0resede queel respiraderodel hornonoest6bioqueado.Vet p%ina 70parala ubicaciOn.
son come se esperaban o son • Verifiqueparaasegurarsede quela estufaest_nivelada.
diferentes a ruesdemhomo anterior° • Lastemperaturasa menudovar[anentreun homo nuevoy unoantigua. A medidaquepasa
eltiempo,latemperaturadel hornocambiay puedehacersem_scalienteo m_sif[a=Ver
p%ina 68 paralas instruccionescomoajustarIatemperaturadelhomo (modelosselectos}.
NOTA:NoserecomiendaaiustarIatemperaturasi hatenidoproblemasconsolounaodosrecetas.
• Consulteelfolleto"La CocinaF_cil"paramayorinformaciOnsobre losutensiliosde hornear.
Los alimentos no se asan a la • VerifiqueIasposicionesde lasparrillasdelhorno.Elalimentopuedeestarmuycercadel
parrimmaen forma debida o sale elemento.
demasiado humo. • Elelementode asar nofue precalentado.
• Elpapelde ahmmio se us6de maneraincorrecta. Nuncaforre el insertodel asadorcon papel
deaiuminio.
• Lapuerta deI homo estabacerrada mientrasse asabaa Ia parrilla. Deje la puertaabierta en la
primeraposici6n (alrededorde 10cm [4 pulgadas]}.
• Recorteelexcesodegrasade la cameantesde ponedaaasara laparrilla.
• Se us6unaasaderasucia.
• Elvoltaiedel hogarpuedeser halo.
Emhomo no se autemimpia • Verifiqueparaasegurarsede queel ciclono eat6aiustadoparaun comienzodiferido.Ver
(modelos selectos), p_gina72=
• Verifiquesi lapuertaest_cerrada.
• Verifiquesi el controlest_en Modo Sab_tico.Verp%. 68.
• Elhornopuedeestara m_sde 205° C (400° F}. Latemperaturadel hornodebeserinferior a
205° C (400° F} paraprogramarunciclo delimpieza.
El homo no se limpi6 en forma • Puedeque seanecesariountiempode limpiezam4slargo.
debida (modeios seiectos). • Losderrarnesexcesivos,especialmentedeafimentosazucaradosy/o 4cidosnofueron limpiados
antesdelciclo de autofimpieza.
La paerta demborne no se • Elinteriordel homotodav[aest_caliente. Dejeque paseaproximadamenteunahoraparaque
desbloqaea despaSadel ciclo el hornose enfr[eantesdeque secompleteunciclo de autolimpieza.Lapuertapuedeset
de automimpieza[modelos semectos), abiertacuandodesaparezcaIa palabra'LOCK'del indicadorvisual.
• Elcontroly la puertapuedenestarbloqueadas.Verp%. 64.
77
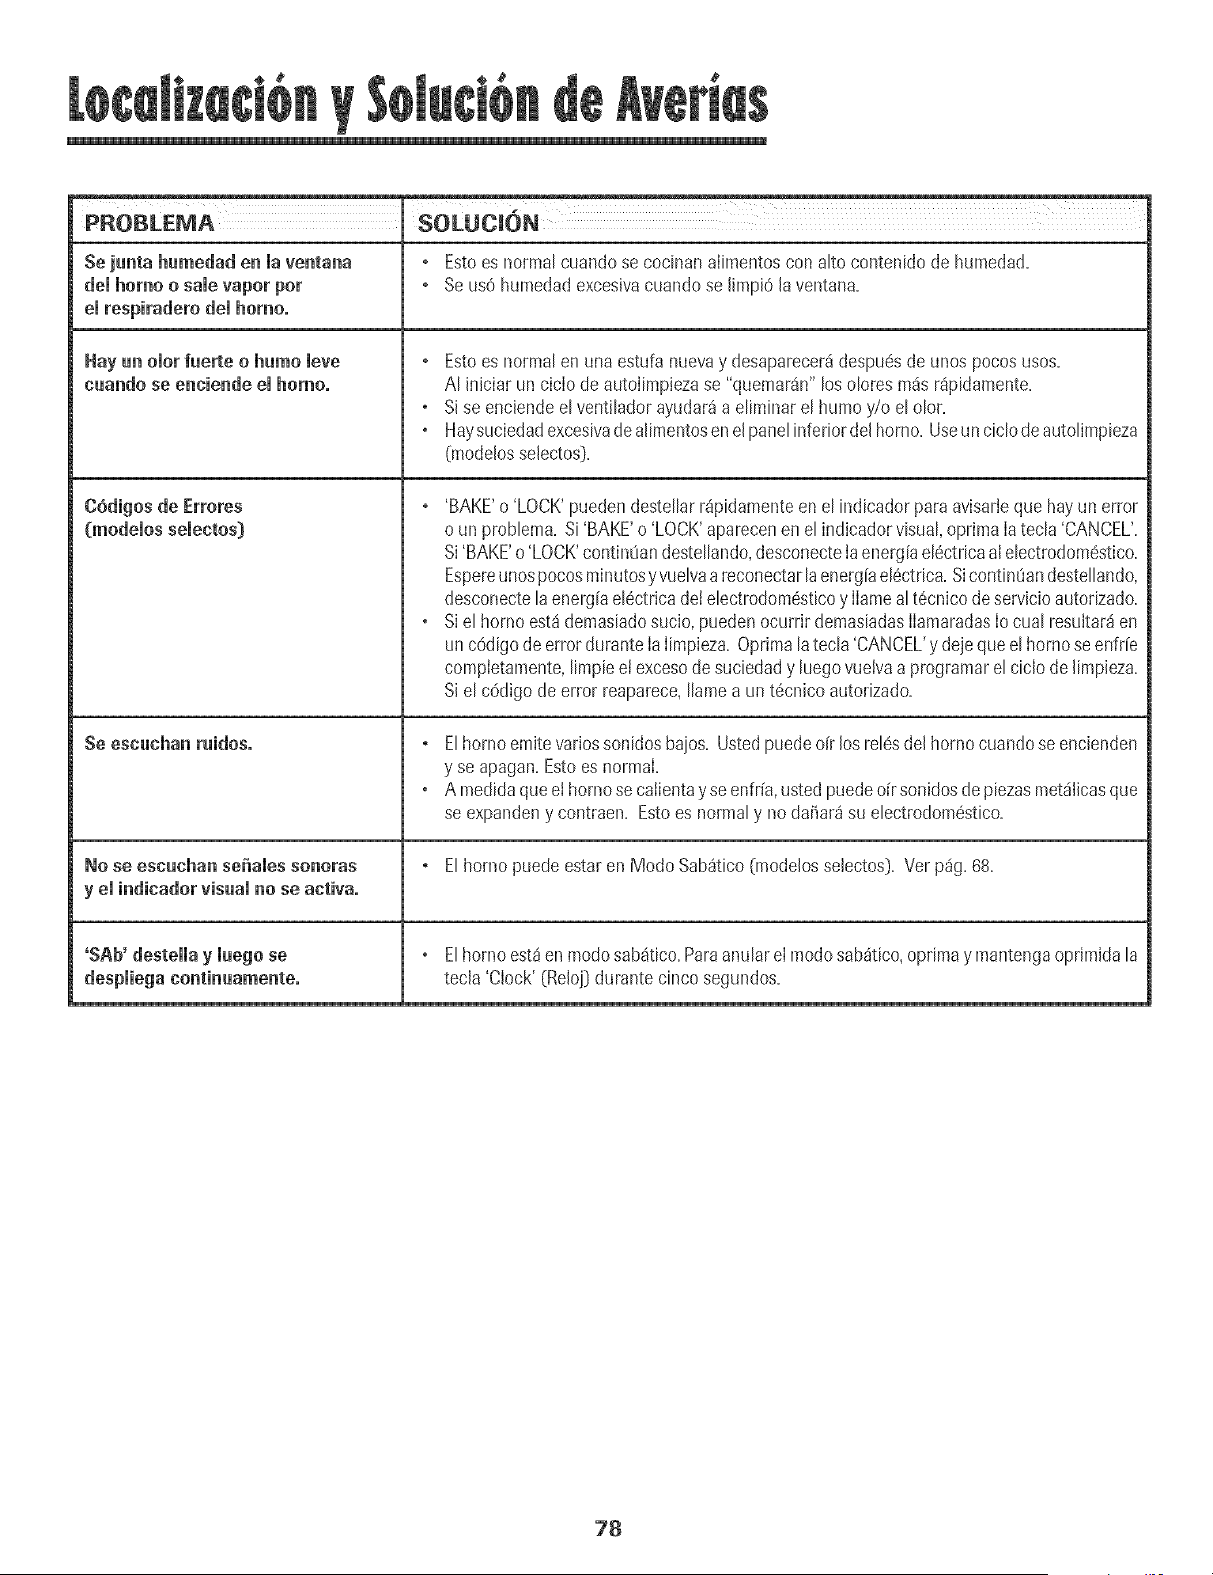
PROSLEMA SOLUC_ON
Sojunta humedad en maventana , Estoes normal cuandose cocinanalimentoscon alto contenidode humedad.
demhome o samevapor per ° Seus0 humedadexcesJvacuandose limpi6 laventana.
emrespiradoro dorahomo.
Hay un omorfuerte e hume move
cuando se onciende omhomo°
C6digosdo Errores
So osnuchan ruidoso
, Estoes normal en unaestufa nuevay desaparecer_despu6sde unos pocosuses.
AI iniciar un cicIo deautoiimpiezase "quemaran"los oloresm4s r4pidamente.
o Sise enciendeel ventiladorayudar_a eliminar el humo y/o el clot.
o Haysuciedadexcesivadealimentosenelpanelinferiordel homo.Useunciclodeautolimpieza
(modelosseJectos].
° 'BAKE'o 'LOCK'puedendestellarr4pidamenteenel indicador paraavisarleque hayun error
o un problema.Si'BAKE'o 'LOCK'aparecenen elindicadorvisual,oprimaIa tecla'CANCEL'.
Si'BAKE'o 'LOCK'contin0andestellando,desconecteJaenerg[ael6ctricaalelectrodom@stico.
Espereunospocosminutesyvuelvaareconectarlaenerg[ael6ctrica.Sicontimiandestellando,
desconectelaenerg[ael6ctricadeJelectrodom6sticoy Ilameal t6cnicodesewJcioautodzado.
o Siel borneest4demasiadosucio,puedenocurrir demasiadasIlamaradasIo cual resuJtar4en
un c6digodeerrordurante IaIimpieza.Oprimalatecla'CANCEL'y dejequeel homose enfr[e
completamente,limpieeJexcesode suciedady luegovuelvaa programarel ciclode JimpJeza.
Siel c6digo de error reaparece,Ilamea un t6cnJcoautorizado.
° Elhornoemitevariessonidosbajos. Ustedpuedeoir [osre[esde[ hornocuandose encienden
y se apagan.Estoes normal.
• A medidaqueet homosecalientayse enfr[a,ustedpuededr sonidosdepiezasmet4iicasque
se expandeny contraen. Estoes normaly no da_ar4su electrodomestico.
No se oseuchun soiiuios sonoras ° Elhomo puedeestaren Mode Sab_tico(modelosselectos}. Ver p4g.68.
y el indicadorvisual no so activa,
'$Ab' destommay luogo so
despmiega nontinuamentoo
o Elhomo est4enmodesab4tico.Paraanu[arel modesab_tico,optimay mantengaoprJmJda[a
tec[a 'Clock'(Rel@durante cincosegundos.
78
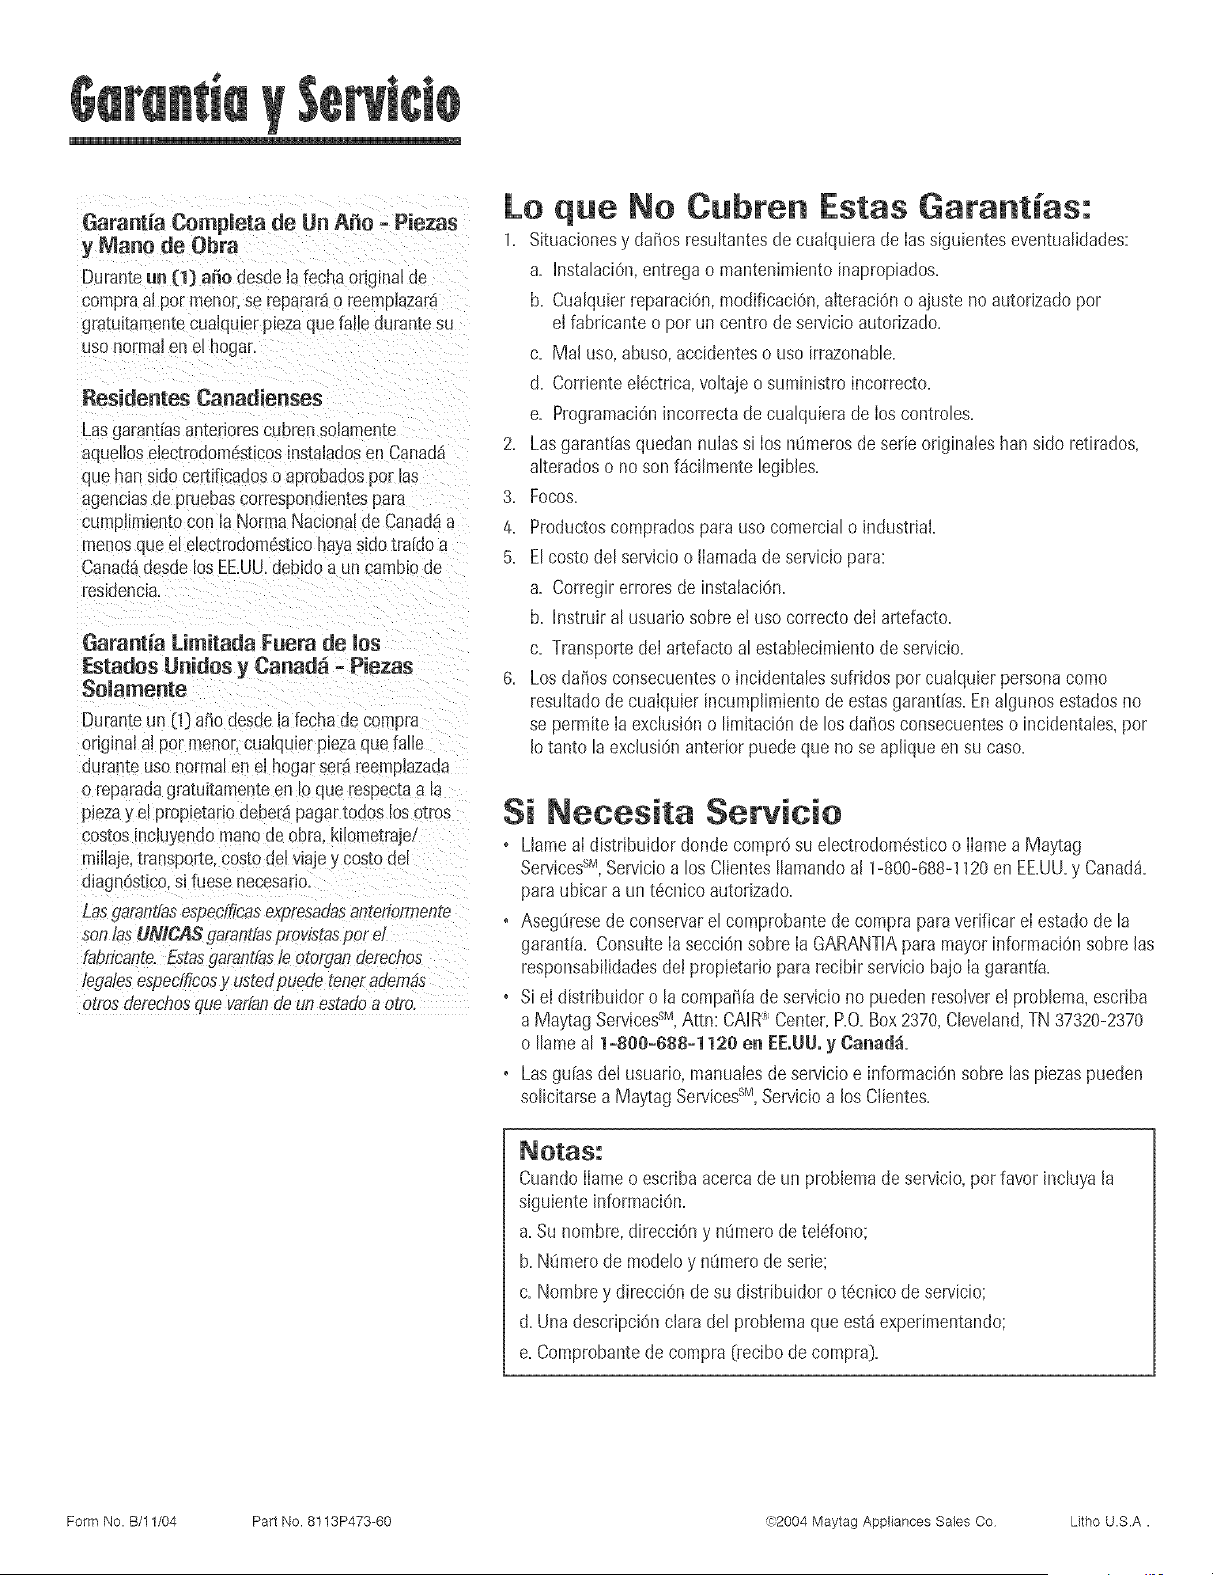
Gatant_a Completa de Un Afie - Piezas
y Mano de Obra
Duranteun (1} amieaesdelafechaanginalde
compraal par menor:se reparar_o reemplazara
gratuitamentecualquierpLezaquefaHeduran-cesu
usa normaJen el hogar.
Residentes Canadienses
Lasgarant[a_antedatescubrensolamente
aqueLJoselectrodomesticosinstaJadosen Canada1
quebansido certificauoso aprobadospar hs
agenciasde pruebascorrespondientespara
cumpJimientocon la NormaNacionalde Canad_a
menosqueel electrodom6sticohayasidotra[doa
Canad_uesdelos EEUU.debidoa un carabaode
resLdencla.
Garantia Lim[tada Fuera de les
Estades Unities y Canad_ - Piezas
$omamente
Duranceun (1}alia desdela fechadecompra
originalaJpar menor,cualquierplezaquetalle
duranteusanorma_en el hogarserareemplazaua
o reparadagratultamenteen _oque respec[aa _a
plezay el propietariodeber_pagartodoslos a[ros
cosmosincluyendomariade obra.kilometraje_
millaje,transporte,costa delviajeycostadel
diagnOsttco,si fuesenecesano
Lasgarantfasespecfficasexpresadasanrenormen[e
son/asUMCAS garantfasprovistaspar d
fabricante.Estasgatant,(as/eotorganderechos
&galesespecfficosy ustedpuede tenetadem_,s
arrasderect_osquevar&nde unestadoa otto.
Lo que No Cubten Estas Garantm'as:
1. Situacionesy dariosresultantesde cualquierade Iassiguienteseventualidades:
a. InstalaciOn,entregao mantenimientoinapropiados.
b. CualquierreparaciOn,modificaciOn,alteraciOno ajustenoautorizadopar
el fabricanteo par un centrode servicioautorizado.
c. Mal usa,abuso,accidenteso usa irrazonable.
d. Corrienteel6ctrica,voltajeo suministroincorrecto.
e. ProgramaciOnincorrectade cualquierade Ioscontroles.
2. Lasgarantiasquedan nulassi Iosn_imerosde serieoriginaleshan side retirados,
alteradoso no sonf_cilmente legibles.
3. Focos.
4. Productoscompradospara usa comercialo industrial.
5. Elcostadel servJcioo Jlamadadeserviciopara:
a. Corregirerroresde instalaci6n.
b. Instruir al usuariosabre ei usa correctodeI artefacto.
c. Transportedei artefactoal establecimientode servicio.
6. Losdarios consecuenteso incidentalessufddospar cualquier personacoma
resultadode cualquier incumplimientode estasgarantias.Enalgunosestadosno
se permiteIaexclusi6no limitaciOnde los dariosconsecuenteso incidentales,par
Jotanto laexcJusi6nanterior puedeque no se apJiqueensu caso.
Si Necesita Setvicio
o LlameaI distribuidor dondecompr6su electrodom6sticoo Ilamea Maytag
ServicessM,Servicioa los ClientesIlamandoal 1-800-688-1120en EE.UU.y Canada.
paraubicar a unt6cnico autodzado.
• AsegOresede conservarel comprobantede compraparavenficar elestadode la
garant[a. ConsulteIasecci6nsabre Ia GARANTIAparamayorinformaciOnsabrelas
responsabilidadesde! propietariopararecibir servicio bajoIa garant[a.
• Siel distribuidoro la compari[ade serviciono puedenresolvere! problema,escriba
a Maytag Services-sM,Attn: CAIR_ Centel, P.O.Box2370,Cleveland,TN37320-2370
o Ilameal l-8ee-688-112e en EE.UU.y Canadi
• Las gu[asdel usuario,manualesde servicioe informaci6nsabrelas piezaspueden
solicitarsea Maytag ServicessM,Servicioa los Clientes.
CuandoIlameo escribaacercade un problemade servicio,parfavor incluyala
siguienteinformaciOn.
a. Su hombre,direcciOny n_mero deteldono;
b.N_merode modeloy nLimerode serie;
c. Nombrey direcciOndesu distribuidoro t6cnico de servicio;
d. Una descripci6nclara del problemaqueest_experimentando;
e. Comprobantede compra0_ecibode compra}.
Form No. B/11/04 Part No. 8113P473-60 (_:'2004 Maytag Appliances Sales Co Litho U.S.A.