$moolLh op E|eclLric Range
.. 1-4
rig ...................... 5=7
......................... 8=15
Maintenance ......................... 20=21
Oven Window
Oven Light
Troubleshooting ................... 21 =22
Warranty & Service .................... 23
Guide de utilisateur ................... 24
Guia del Usuario ......................... 50
16=19
ires
Form No. A/01/06 Part No 8113P557-60 _2006 Maytag Appliances Sales Co Lithe USA
To ensure proper and safe operation: Appliance must
be properly installed and grounded by a qualified techni-
cian. Do not attempt to adjust, repair, service, or replace
any part of your appliance unless it is specifically recom-
mended in this guide. All other servicing should be
referred to a qualified servicer.
Always disconnect power to appliance before servicing.
ImponentSefet¥
Instructions
Warning and Important Safety Instructions appearing in
this guide are not meant to cover all possible conditions
and situations that may occur. Common sense, caution,
and care must be exercised when installing, maintaining,
or operating the appliance.
Always contact the manufacturer about problems or
conditions you do not understand.
Recognize Safety Symbols, Words, labels
To check if device is properly installed, look underneath
range with a flashlight to make sure one of the rear
leveling legs is properly engaged in the bracket slot. The
anti-tip device secures the rear leveling leg to the floor
when properly engaged. You should check this anytime
the range has been moved.
To Prevent Fire or Smoke
Damage
Be sure all packing materials are removed from the
appliance before operating it.
Keep area around appliance clear and free from combus-
tible materials. Flammable materials should not be stored
in an oven.
Many plastics are vulnerable to heat. Keep plastics away
from parts of the appliance that may become warm or
hot.
To prevent grease fires, do not let cooking grease or other
flammable materials accumulate in or near the appliance.
Read and follow all instructions before using this
appliance to prevent the potential risk of fire, electric
shock, personal injury or damage to the appliance as a
result of improper usage of the appliance. Use appliance
only for its intended purpose as described in this guide.
In Case of Fire
Use dry chemical or foam-type extinguisher or baking
soda to smother fire or flame. Never use water on a
grease fire.
1. Turn off appliance to avoid spreading the flame.
2. NEVER pick up or move a flaming pan.
3. Smother oven fire or flame by closing the oven door.
ImportantSafety
Child Safety
NEVER leave children alone or unsupervised near the
appliance when it is in use or is still hot. Children should
never be allowed to sit or stand on any part of the appli-
ance as they could be injured or burned.
Children must be taught that the appliance and utensils in
it can be hot. Let hot utensils cool in a safe place, out of
reach of small children. Children should be taught that an
appliance is not a toy. Children should not be allowed to
play with controls or other parts of the appliance.
About Your Appliance
To prevent potential hazard to the user and damage to the
appliance, do not use appliance as a space heater to heat
or warm a room. Also, do not use the oven as a storage
area for food or cooking utensils.
Do not obstruct the flow of air by blocking the oven vent.
DO NOT TOUCH HEATING ELEMENTS OR INTERIOR
SURFACES OF OVEN. Heating elements may be hot even
though they are dark in color. Interior surfaces of any
oven become hot enough to cause burns. During and
after use, do not touch, or let clothing or other flammable
materials contact heating elements or interior surfaces of
oven until they have had sufficient time to cool. Other
surfaces of the appliance may become hot enough to
cause burns - among these surfaces are: oven vent
opening, surfaces near this opening, oven door, and
window of oven door.
Do not touch a hot oven light bulb with a damp cloth as
the bulb could break. Should the bulb break, disconnect
power to the appliance before removing bulb to avoid
electrical shock.
NEVER use aluminum foil to cover an oven rack or oven
bottom. Misuse could result in risk of electric shock, fire,
or damage to the appliance. Use foil only as directed in
this guide.
Cooking Safety
Never heat an unopened food container in the oven.
Pressure build-up may cause container to burst resulting
in serious personal injury or damage to the appliance.
Use dry, sturdy potholders. Damp potholders may cause
burns from steam. Dish towels or other substitutes should
never be used as potholders because they can trail across
hot elements and ignite or get caught on appliance parts.
Wear proper apparel. Loose fitting or long hanging-
sleeved apparel should not be worn while cooking. Cloth-
ing may ignite and cause burns if garment comes in
contact with heating elements.
Always place oven racks in the desired positions while
oven is cool. Slide oven rack out to add or remove food,
using dry, sturdy potholders. Always avoid reaching into
the oven to add or remove food. If a rack must be moved
while hot, use a dry potholder. Do not let potholder contact
hot element in oven.
Use racks only in the oven in which they were shipped/
purchased.
Use care when opening the oven door. Let hot air or steam
escape before removing or replacing food.
PREPARED FOOD WARNING: Follow food
manufacturer's instructions. If a plastic frozen food con-
tainer and/or its cover distorts, warps, or is otherwise
damaged during cooking, immediately discard the food
and its container. The food could be contaminated.
Do not allow aluminum foil or meat probe to contact
heating element.
Always turn off all controls when cooking is completed.
ImportantSafety
Utensil Safety
Follow the manufacturer's directions when using oven
cooking bags.
This appliance has been tested for safe performance
using conventional cookware. Do not use any devices or
accessories that are not specifically recommended in
this manual. Do not use stove top grills or add-on oven
convection systems. The use of devices or accessories
that are not expressly recommended in this manual can
create serious safety hazards, result in performance
problems, and reduce the life of the components of this
appliance.
Be sure utensil is large enough to properly contain food
and avoid boilovers. Pan size is particularly important in
deep fat frying. Be sure pan will accommodate the
volume of food that is to be added as well as the bubble
action of fat.
Never let a pan boil dry as this could damage the utensil
and the appliance.
If pan is smaller than element, a portion of the element
will be exposed to direct contact and could ignite cloth-
ing or potholder.
Only certain types of glass, glass/ceramic, ceramic,
earthenware, or other glazed utensils are suitable for
cooktop or oven service without breaking due to the
sudden change in temperature. Follow utensil
manufacturer's instructions when using glass.
Turn pan handle toward center of cooktop, not out into
the room or over another surface element. This reduces
the risk of burns, ignition of flammable materials, or
spillage if pan is accidently bumped or reached by small
children.
Cooktop
NEVER leave surface units unattended especially when
using high heat. An unattended boilover could cause
smoking and a greasy spillover can cause a fire.
This appliance is equipped with different size surface
elements. Select pans with flat bottoms large enough to
cover element. Fitting pan size to element will improve
cooking efficiency.
GLASS-CERAMIC SURFACE: NEVER cook on broken
cooktop. If cooktop should break, cleaning solutions and
spillovers may penetrate the broken cooktop and create a
risk of electric shock. Contact a qualified technician
immediately.
Deep Fat Fryers
Use extreme caution when moving the grease pan or
disposing of hot grease. Allow grease to cool before
attempting to move pan.
Ventilating Hoods
Clean range hood and filters frequently to prevent grease
or other flammable materials from accumulating on hood
or filter and to avoid grease fires.
When flaming foods under the hood, turn the fan on.
Cleaning Safety
Clean cooktop with caution. Turn off all controls and wait
for appliance parts to cool before touching or cleaning.
Clean with caution. Use care to avoid steam burns if a wet
sponge or cloth is used to wipe spills on a hot surface.
Some cleaners can produce noxious fumes if applied to a
hot surface.
Clean only parts listed in this guide.
Self-Clean Oven
Do not clean door gasket. The door gasket is essential for
a good seal. Care should be taken not to rub, damage, or
move the gasket.
Do not use oven cleaners or oven liners of any kind in or
around any part of the self-clean oven.
It is normal for the cooktop of the range to become hot
during a self-clean cycle. Therefore, touching the
cooktop during a clean cycle should be avoided.
3
ImportantSafety
Important Safety Notice and
Warning
The California Safe Drinking Water and Toxic Enforce-
ment Act of 1986 (Proposition 65) requires the Governor
of California to publish a list of substances known to the
State of California to cause cancer or reproductive harm,
and requires businesses to warn customers of potential
exposures to such substances.
Users of this appliance are hereby warned that when the
oven is engaged in the self-clean cycle, there may be
some low-level exposure to some of the listed sub-
stances, including carbon monoxide. Exposure to these
substances can be minimized by properly venting the
oven to the outdoors by opening the windows and/or
door in the room where the appliance is located during
the self-clean cycle.
IMPORTANT NOTICE REGARDING PET BIRDS: Never
keep pet birds in the kitchen or in rooms where the
fumes from the kitchen could reach. Birds have a very
sensitive respiratory system. Fumes released during an
oven self-cleaning cycle may be harmful or fatal to birds.
Fumes released due to overheated cooking oil, fat,
margarine and overheated non-stick cookware may be
equally harmful.
Save These Instructions for Future Reference
4
Surfece¢ookln9
Surface Controls
Use to turn on the surface elements. An infinite choice of
heat settings is available from Low to High. The knobs can
be set on or between any of the settings.
Setting the Controls
1. Race pan on surface element.
2. Push in and turn the knob in either direction to the desired
heat setting.
• The control panel is marked to identify which
element the knob controls. For example, the
graphic at right indicates left front element.
3. There is an element "ON" indicator light on the control
panel. When any surface control knob is turned on, the
light will turn on. The light will turn off when all the
surface elements are turned off.
4. After cooking, turn knob to OFF. Remove pan.
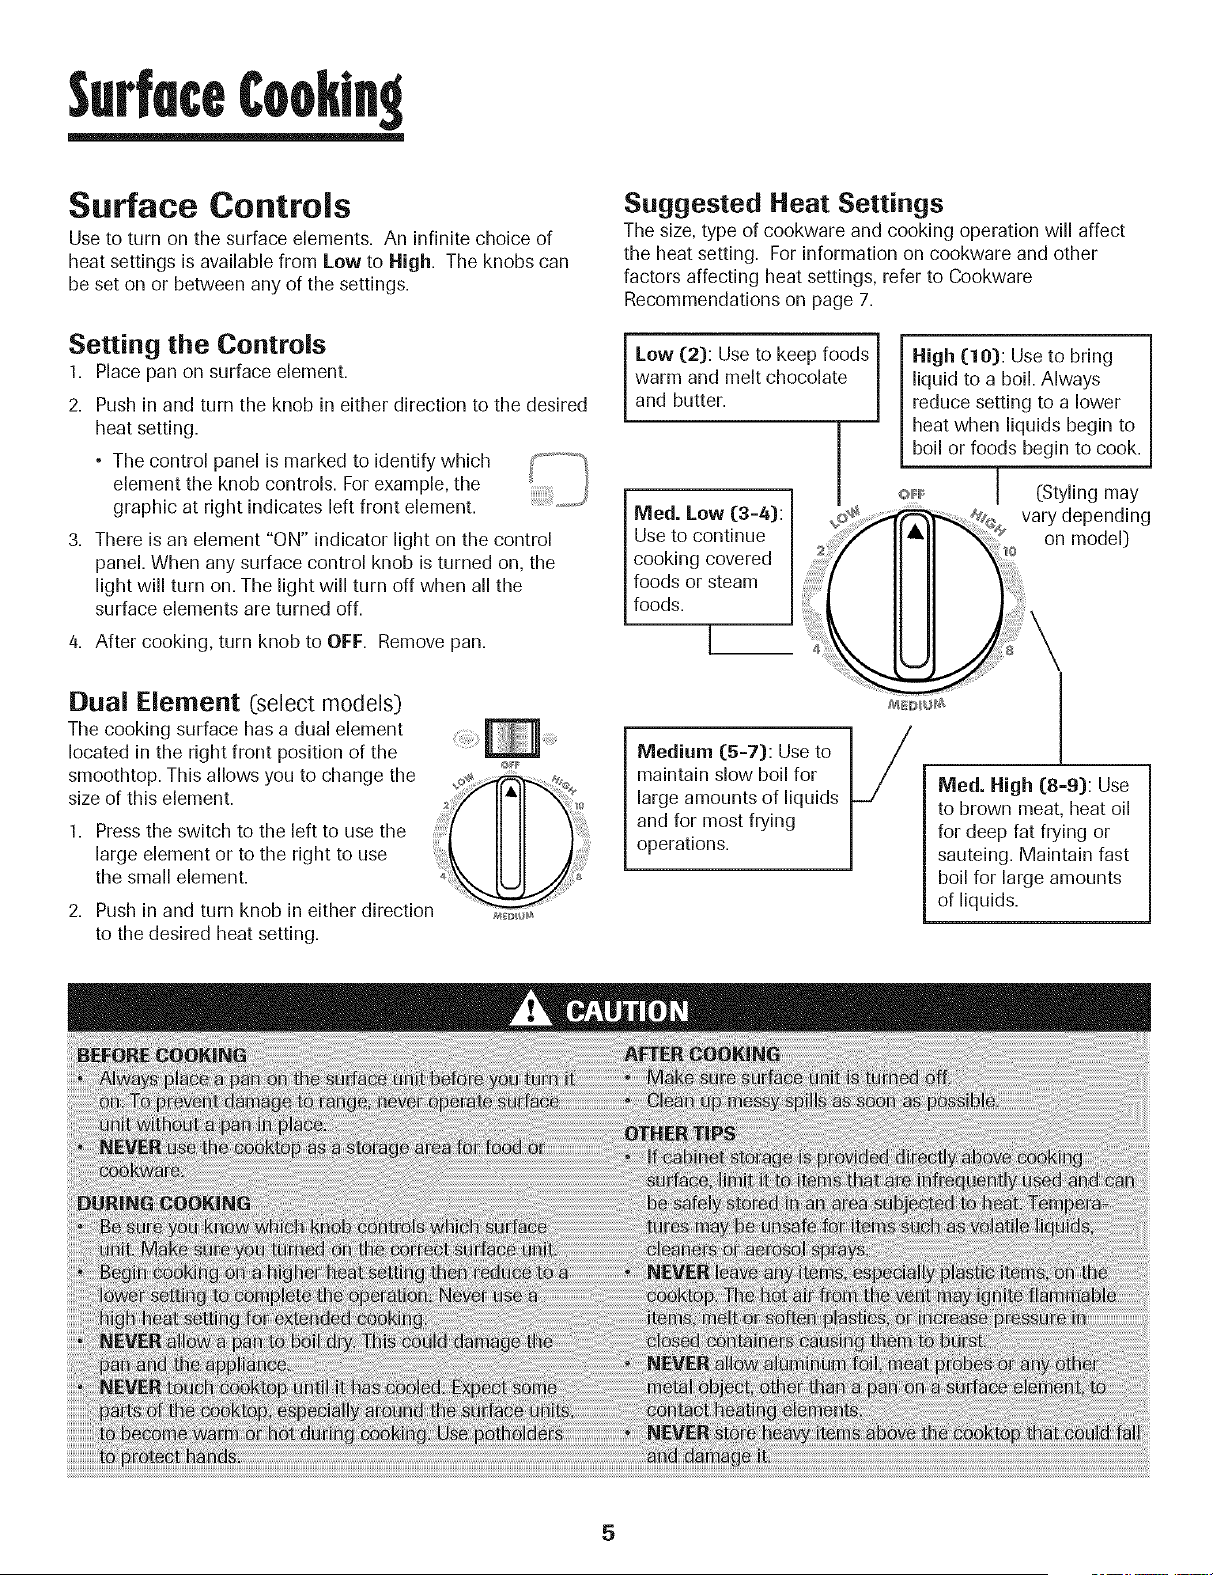
Suggested Heat Settings
The size, type of cookware and cooking operation will affect
the heat setting. For information on cookware and other
factors affecting heat settings, refer to Cookware
Recommendations on page 7.
I
Low (2): Use to keep foods I
warm and melt chocolate I
and butter.
I
IVied. Low (3=4):
Use to continue
cooking covered
foods or steam
foods.
High (10): Use to bring
liquid to a boil. Always
reduce setting to a lower
heat when liquids begin to
boil or foods begin to cook.
o_ J (Styling may
T
vary depending
on model)
Dual Element (select models)
The cooking surface has a dual element
located in the right front position of the
smoothtop. This allows you to change the _%
size of this element.
,ressthesw,tchtothe efttousethet IIII
large element or to the right to use II II
the small element. _:
2. Push in and turn knob in either direction ........._0# ...........
to the desired heat setting.
Medium (5=7): Use to
maintain slow boil for
large amounts of liquids
and for most frying
operations.
IVied. High (8-9): Use
to brown meat, heat oil
for deep fat frying or
sauteing. Maintain fast
boil for large amounts
of liquids.
5
Suffece¢ookln9
Smoothtop Surface
Smoothtop Surface Notes:
° Cooktop may emit light smoke and odor the first few
times tile cooktop is used. This is normal.
• Smoothtop cooktops retain heat for a period of time
after the element is turned off. Turn the elements off
a few minutes before food is completely cooked and use
the retained heat to complete cooking. When the hot
surface light turns off, the cooking area will be cool
enough to touch. Because of the way they retain heat, the
smoothtop elements will not respond to changes in
settings as quickly as coil elements.
• In the event of a potential believer, remove the pan from
the cooking surface.
• Never attempt to lift the cooktop.
• The smoothtop surface may appear discolored when it is
hot. This is normal and will disappear when the surface
cools.
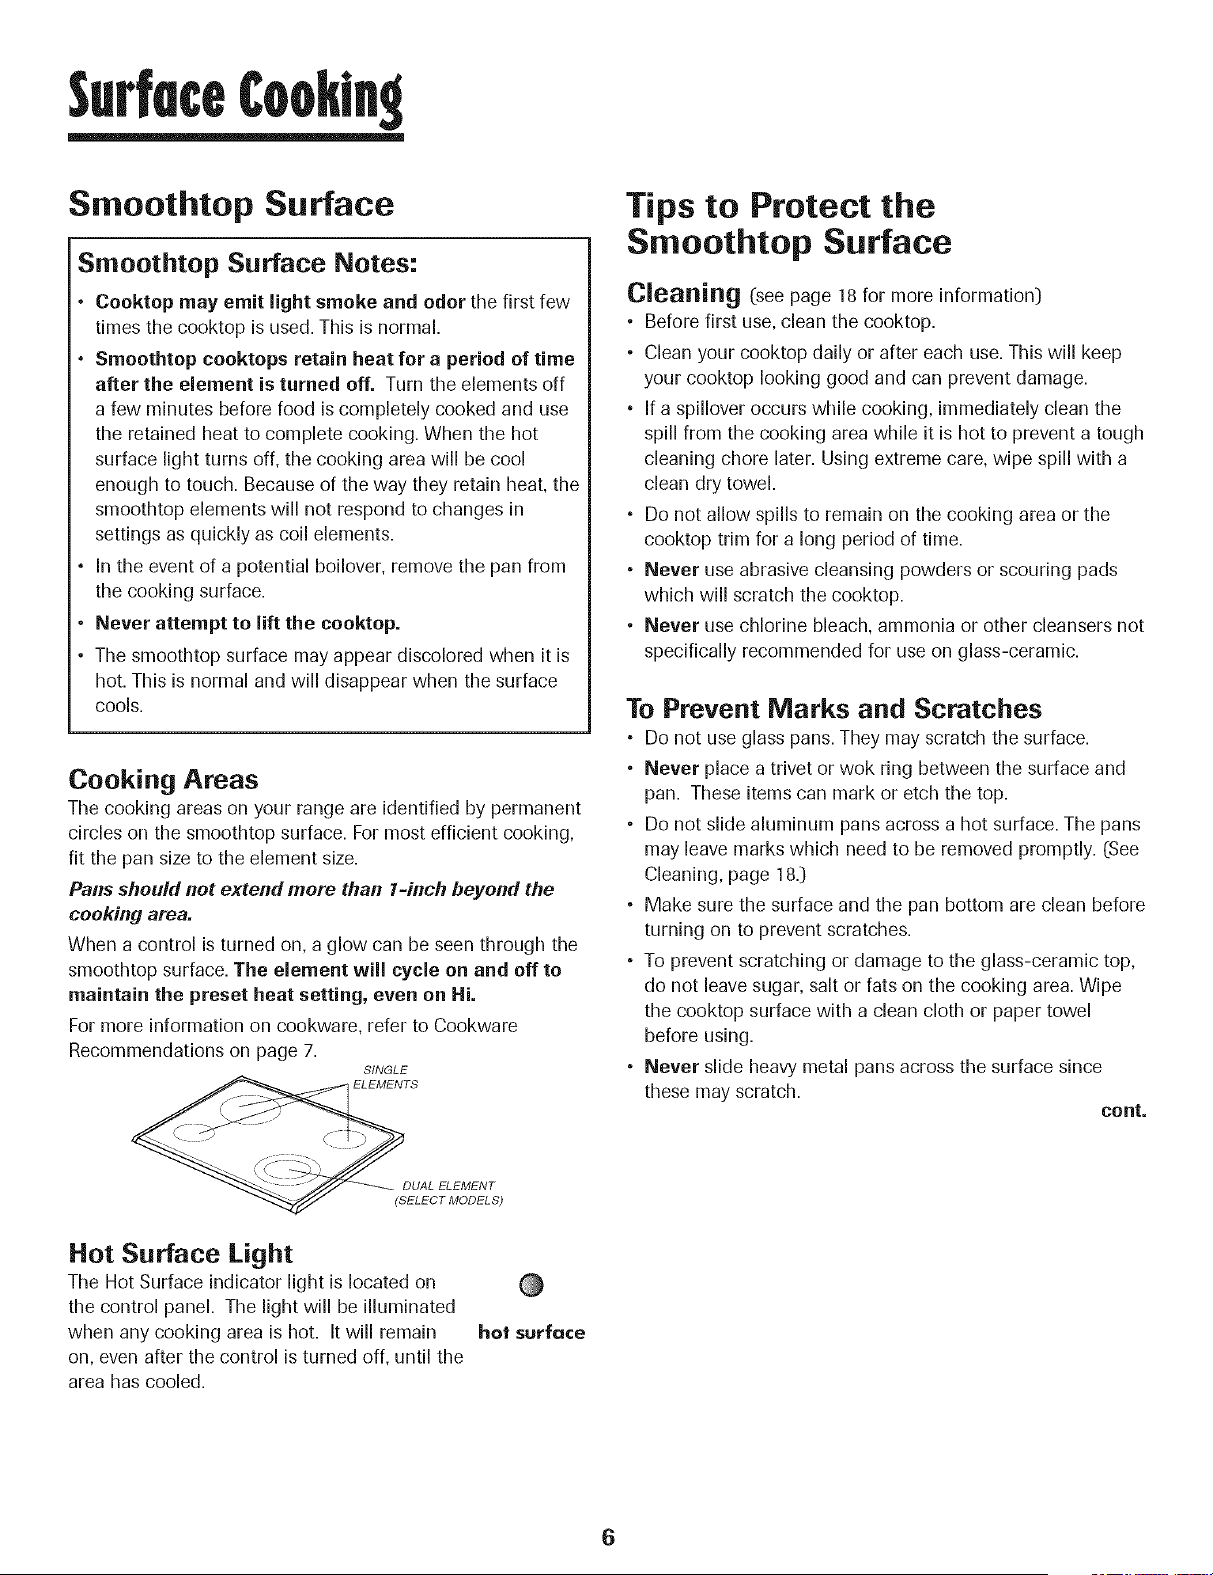
Cooking Areas
The cooking areas on your range are identifiedby permanent
circles on the smoothtop surface. For most efficient cooking,
fit the pan size to the element size.
Pans should not extend more than 1-inch beyond the
cooking area.
When a control is turned on, a glow can be seen through the
smoothtop surface. The element will cycle on and off to
maintain the preset heat setting, even on Hi.
For more information on cookware, refer to Cookware
Recommendations on page 7.
SINGLE
ELEMENTS
Tips to Protect the
Smoothtop Surface
Cleaning (see page 18 for more information)
• Before first use, clean the cooktop.
• Clean your cooktop daily or after each use. This will keep
your cooktop looking good and can prevent damage.
° If a spillover occurs while cooking, immediately clean the
spill from the cooking area while it is hot to prevent a tough
cleaning chore later. Using extreme care, wipe spill with a
clean dry towel.
° Do not allow spills to remain on the cooking area or the
cooktop trim for a long period of time.
° Never use abrasive cleansing powders or scouring pads
which will scratch the cooktop.
• Never use chlorine bleach, ammonia or other cleansers not
specifically recommended for use on glass-ceramic.
To Prevent Marks and Scratches
° Do not use glass pans. They may scratch the surface.
• Never place a trivet or wok ring between the surface and
pan. These items can mark or etch the top.
• Do not slide aluminum pans across a hot surface. The pans
may leave marks which need to be removed promptly. (See
Cleaning, page 18.)
• Make sure the surface and the pan bottom are clean before
turning on to prevent scratches.
• To prevent scratching or damage to the glass-ceramic top,
do not leave sugar, salt or fats on the cooking area. Wipe
the cooktop surface with a clean cloth or paper towel
before using.
• Never slide heavy metal pans across the surface since
these may scratch.
cont.
DUAL ELEMENT
(SELECT MODELS)
Hot Surface Light
The Hot Surface indicator light is located on
the control panel. The light will be illuminated
when any cooking area is hot. It will remain
on, even after the control is turned off, until the
area has cooled.
hot sur{ace
6
¢ooktn
To Prevent Stains
• Never use a soiled dish cloth or sponge to clean the
cooktop surface. A film will remain which may cause stains
on the cooking surface after the area is heated.
• Continuously cooking on a soiled surface may/will result in
a permanent stain.
To Prevent Other Damage
• Do not allow plastic, sugar or foods with high sugar content
to melt onto the hot cooktop. Should this happen, clean
immediately. (See Cleaning, page 183
• Never let a pan boil dry as this will damage the surface and
pan.
° Never use cooktop as a work surface or cutting board.
• Never cook food directly on the surface.
• Do not use a small pan on a large element. Not only does
this waste energy, but it can also result in spillovers burning
onto the cooking area which requires extra cleaning.
• Do not use non-fiat specialty items that are oversized or
uneven such as round bottom woks, rippled bottom and/or
oversized canners and griddles.
• Do not use foil or foil-type containers. Foil may melt onto
the glass. If metal melts on the cooktop, do not use. Call an
authorized servicer.
Cookware Recommendations
Using the right cookware can prevent many problems, such
as food taking longer to cook or achieving inconsistent
results. Proper pans will reduce cooking times, use less
energy, and cook food more evenly.
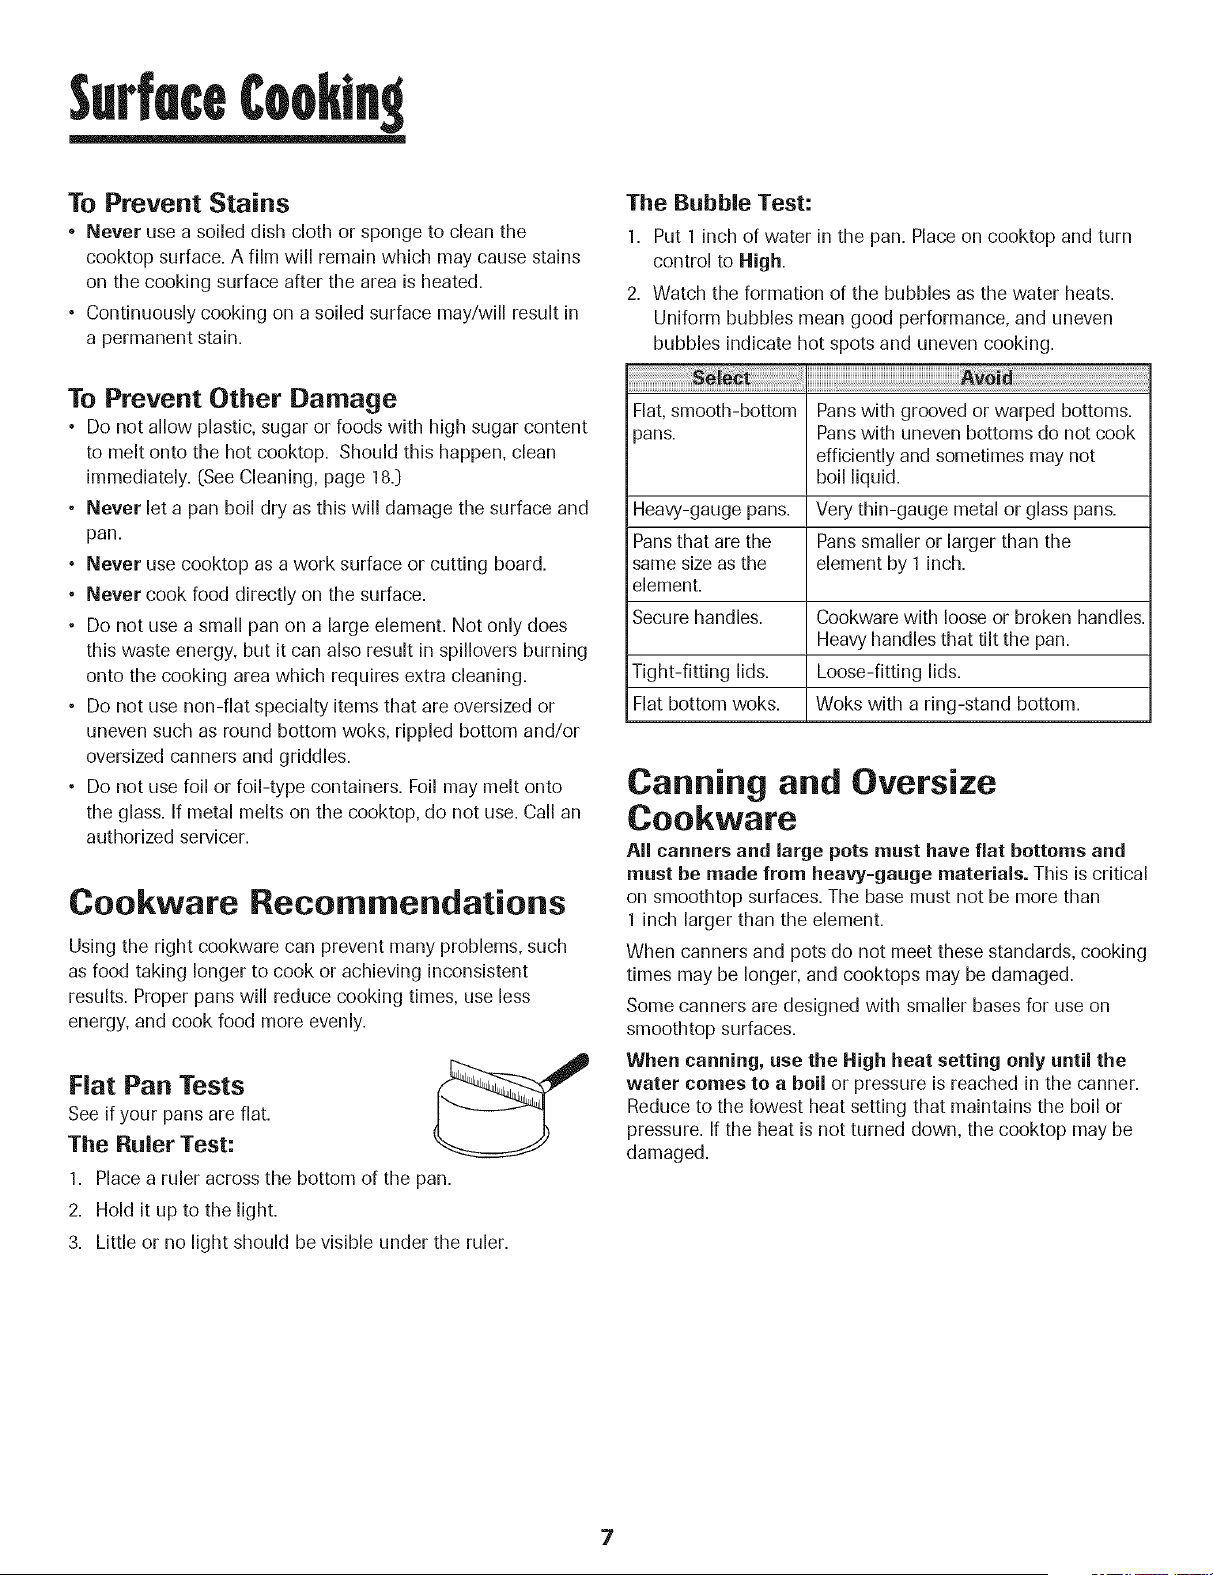
See if your pans are flat.
The Ruler Test:
1.
2.
3.
Flat Pan Tests
Place a ruler across the bottom of the pan.
Hold it up to the light.
Little or no light should be visible under the ruler.
The Bubble Test:
1. Put 1 inch of water in tile pan. Place on cooktop and turn
control to High.
2. Watch the formation of the bubbles as the water heats.
Uniform bubbles mean good performance, and uneven
bubbles indicate hot spots and uneven cooking.
Flat, smooth-bottom Pans with grooved or warped bottoms.
_ans. Pans with uneven bottoms do not cook
efficiently and sometimes may not
boil liquid.
Heaw-gauge pans. Very thin-gauge metal or glass pans.
Pans that are the Pans smaller or larger than the
same size as the element by 1 inch.
element.
Secure handles. Cookware with loose or broken handles.
Heavy handles that tilt the pan.
Tight-fitting lids. Loose-fitting lids.
Flat bottom woks. Woks with a ring-stand bottom.
Canning and Oversize
Cookware
All canners and large pots must have fiat bottoms and
must be made from heavy-gauge materials. This is critical
on smoothtop surfaces. The base must not be more than
1 inch larger than the element.
When canners and pots do not meet these standards, cooking
times may be longer, and cooktops may be damaged.
Some canners are designed with smaller bases for use on
smoothtop surfaces.
When canning, use the High heat setting only until the
water comes to a boil or pressure is reached in tile canner.
Reduce to the lowest heat setting that maintains the boil or
pressure. If the heat is not turned down, the cooktop may be
damaged.
Control Panel
A B
C
HOLD
E
KEEP
CLEAN DE_'_"; CLOCK ; WARM
F G H I
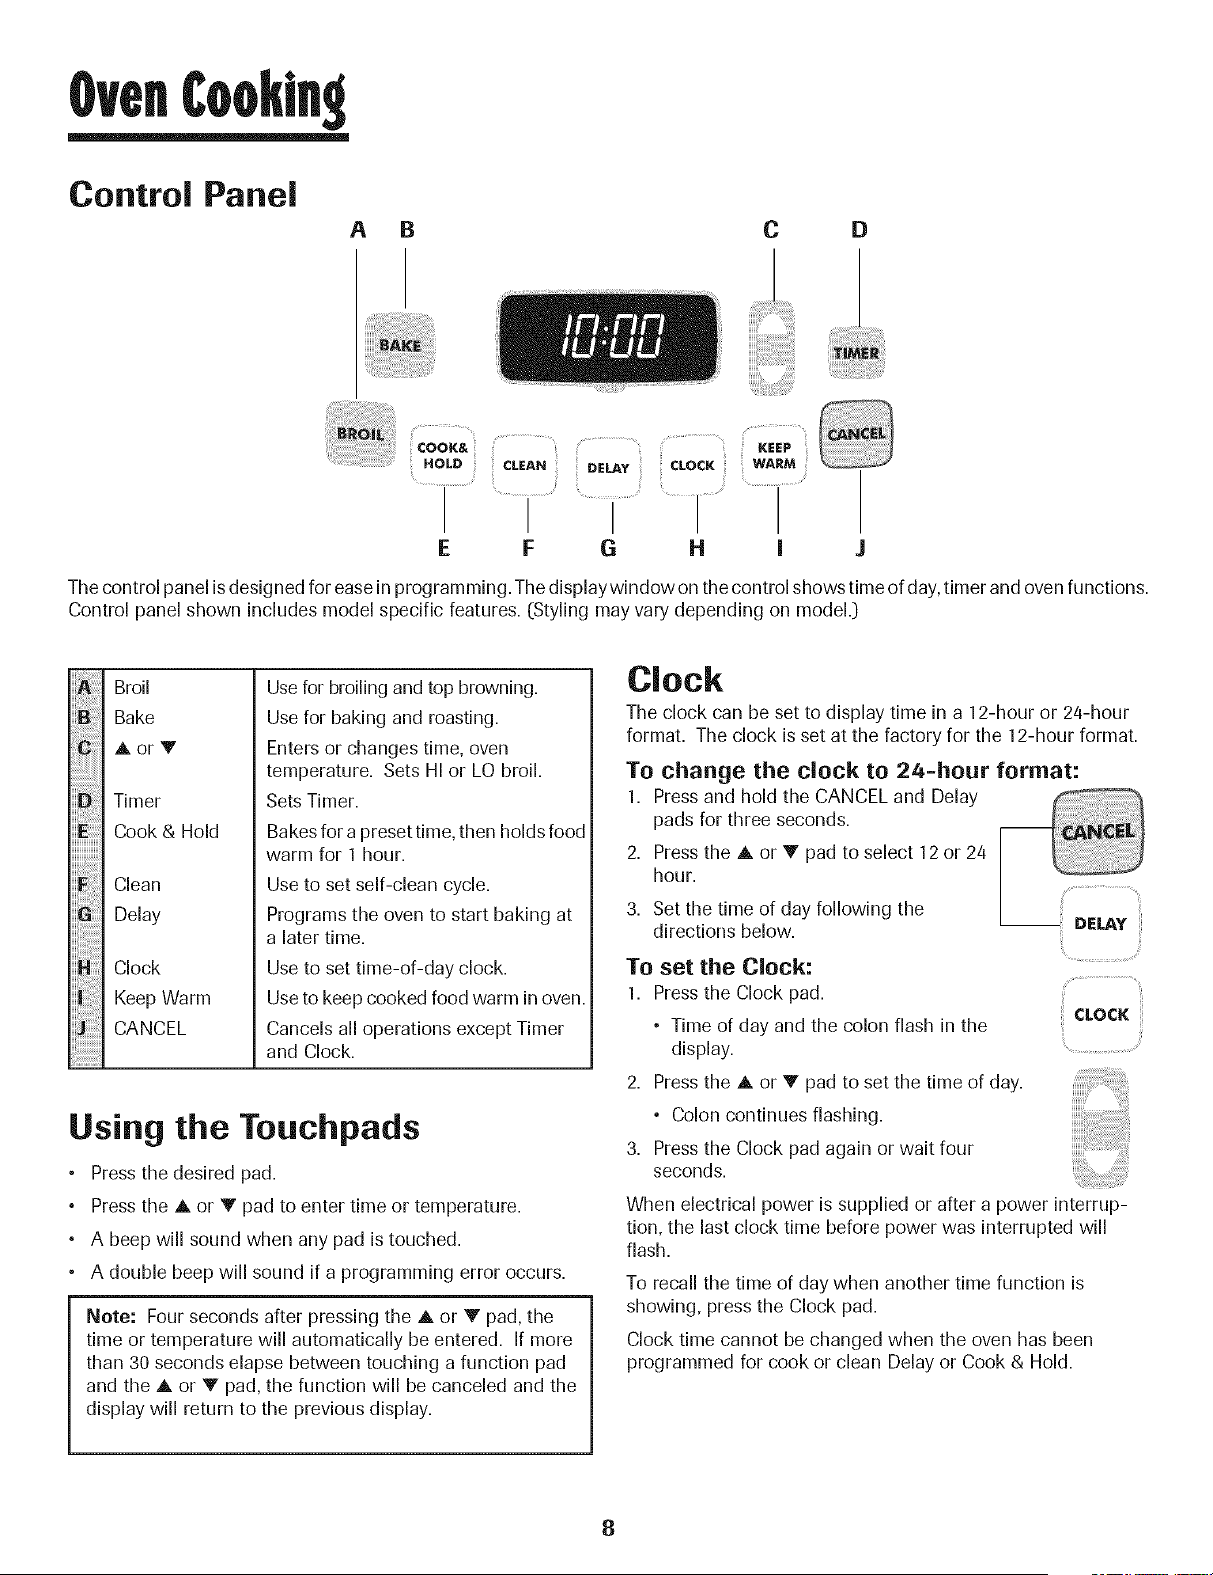
The control panel is designed for ease in programming. The displaywindow on the control shows time of day,timer and oven functions.
Control panel shown includes model specific features. (Styling may vary depending on model.:)
iBiiii!ii;i_i!i_ji
Broil
Bake
AorT
Timer
Cook & Hold
Clean
Delay
Clock
Keep Warm
CANCEL
Use for broiling and top browning.
Use for baking and roasting.
Enters or changes time, oven
temperature. Sets HI or LO broil.
Sets Timer.
Bakes for a preset time, then holds food
warm for 1 hour.
Use to set self-clean cycle.
Programs the oven to start baking at
a later time.
Use to set time-of-day clock.
Use to keep cooked food warm in oven.
Cancels all operations except Timer
and Clock.
Using the Touchpads
Pressthe desired pad.
Pressthe A or V pad to enter time or temperature.
• A beep will sound when any pad is touched.
• A double beep will sound if a programming error occurs.
Note: Four seconds after pressing the A or V pad, the
time or temperature will automatically be entered. If more
than 30 seconds elapse between touching a function pad
and the A or V pad, the function will be canceled and the
display will return to the previous display.
Clock
The clock can be set to display time in a 12-hour or 24-hour
format. The clock is set at the factory for the 12-hour format.
To change the clock to 24=hour format:
1. Pressand hold the CANCEL and Delay
pads for three seconds.
2. Press the A or V pad to select 12 or 24
hour.
3. Set the time of day following the
directions below.
To set the Clock:
1. Pressthe Clock pad.
• Time of day and the colon flash in the
display.
2. Press the A or V pad to set the time of day.
° Colon continues flashing.
3. Press the Clock pad again or wait four
seconds.
When electrical power is supplied or after a power interrup-
tion, the last clock time before power was interrupted will
flash.
To recall the time of day when another time function is
showing, press the Clock pad.
Clock time cannot be changed when the oven has been
programmed for cook or clean Delay or Cook & Hold.
8
To cancel the Clock display:
If you do not want the time of day to display:
Press and hold the CANCEL and Clock
pads for three seconds. The time of day will
disappear from the display
When the clock display is canceled, press
the Clock pad to briefly display the time of
day. CLOCK
To restore the Clock display: ....................................
Press and hold the CANCEL and Clock pads for three sec-
onds. The time of day will reappear in the display.
Timer
Tile timer can be set from one minute (00:01) up to 99 hours
and 59 minutes (99:59).
The timer can be used independently of any other oven
activity. It can also be set while another oven function is
operating.
The Timer does not control the oven. It only controls a
beeper.
To set the Timer:
1. Press the Timer pad.
• 0:00 lights in the display.
° The colon flashes in the display.
2. Press the A or V pad until the
correct time appears in the display.
• The colon will continue to flash.
3. Press Timer pad again or wait four seconds.
° The colon continues flashing and the time begins
counting down.
° The last minute of the timer countdown will be displayed
as seconds.
4. At the end of the set time, one long beep will sound.
To cancel the Timer:
1. Press and hold the Timer pad for three seconds.
OR
2. Press the Timer pad and set the time to 00:00.
Locking the Control
The touchpad controls can be locked for safety, cleaning, or
to prevent unwanted use. They will not function when locked.
If the oven is currently in use, the controls cannot be locked.
The current time of day will remain in the display when the
controls are locked.
To lock:
Press and hold the CANCEL and Cook &
Hold pads for three seconds.
LOCK flashes in the display.
To unlock: __ cooK&
Press and hold the CANCEL and Cook & HOLD
Hold pads for three seconds. ..................................
LOCK disappears from the display.
Fault Codes
BAKE or LOCK may flash rapidly in the display to alert you if
there is an error or a problem. If BAKE or LOCK flash in the
display, press CANCEL pad. If BAKE or LOCK continue to
flash, disconnect power to the appliance. Wait a few minutes,
and then reconnect power. If the flashing still continues,
disconnect power to the appliance and call an authorized
servicer.
9
Baking
To set Bake:
1. Press the Bake pad.
• BAKEwill flash.
• 000 will light in the display.
2. Select the oven temperature. The oven tempera-
ture can be set from 170° to 550°. Pressor press
and hold the A or V pads.
° 350° will light when either pad is first pressed.
• Press the A pad to increase the temperature.
• Press the V pad to decrease the temperature.
3. Press Bake pad again or wait four seconds.
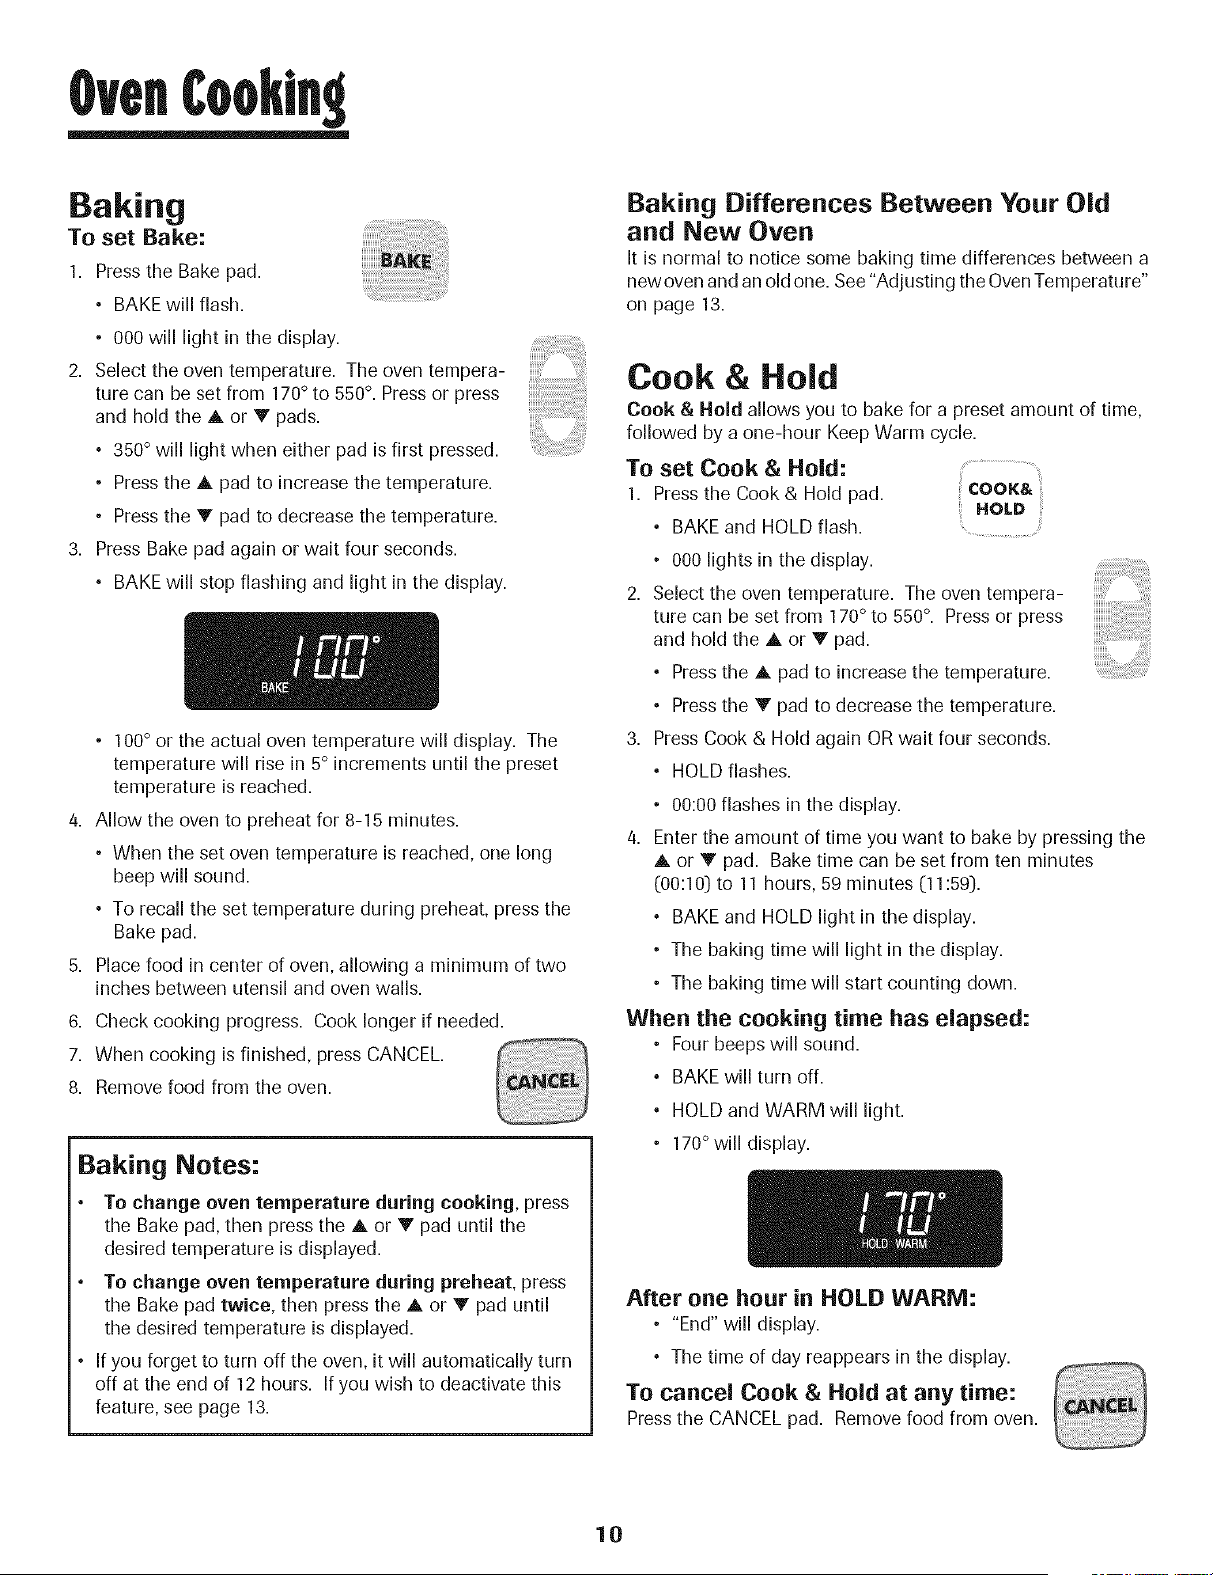
° BAKE will stop flashing and light in the display.
• 100° or the actual oven temperature will display. The
temperature will rise in 5° increments until the preset
temperature is reached.
4. Allow the oven to preheat for 8-15 minutes.
• When the set oven temperature is reached, one long
beep will sound.
° To recall the set temperature during preheat, press the
Bake pad.
5. Place food in center of oven, allowing a minimum of two
inches between utensil and oven walls.
6. Check cooking progress. Cook longer if needed.
7. When cooking is finished, press CANCEL.
8. Remove food from the oven.
Baking Notes:
To change oven temperature during cooking, press
the Bake pad, then press the A or V pad until the
desired temperature is displayed.
To change oven temperature during preheat, press
the Bake pad twice, then press the A or V pad until
the desired temperature is displayed.
• If you forget to turn off the oven, it will automatically turn
off at the end of 12 hours. If you wish to deactivate this
feature, see page 13.
Baking Differences Between Your Old
and New Oven
It is normal to notice some baking time differences between a
new oven and an old one. See"Adjusting the OvenTemperature"
on page 13.
Cook & Hold
Cook & Hold allows you to bake for a preset amount of time,
followed by a one-hour Keep Warm cycle.
To set Cook & Hold:
1. Pressthe Cook & Hold pad.
° BAKE and HOLD flash.
• 000 lights in the display.
COOK&
HOLD
2. Select the oven temperature. The oven tempera-
ture can be set from 170° to 550°. Press or press
and hold the A or V pad.
° Pressthe A pad to increase the temperature.
° Pressthe V pad to decrease the temperature.
3. Press Cook & Hold again ORwait four seconds.
° HOLD flashes.
• 00:00 flashes in the display.
4. Enter the amount of time you want to bake by pressing the
A or V pad. Bake time can be set from ten minutes
(00:10) to 11 hours, 59 minutes (11:59).
° BAKE and HOLD light in the display.
• The baking time will light in the display.
• The baking time will start counting down.
When the cooking time has elapsed:
• Four beeps will sound.
° BAKE will turn off.
° HOLD and WARM will light.
• 170°will display.
After one hour in HOLD WARM:
• "End" will display.
° The time of day reappears in the display.
To cancel Cook & Hold at any time:
Press the CANCEL pad. Remove food from oven.
10
Delay Bake
When using Delay, the oven begins to cook later in the day.
Set the amount of time that you want to delay before the oven
turns on and how long you want to cook. The oven begins to
heat at the selected time and cooks for the specified length of
time, then keeps food warm for up to one hour.
Delay time can be set from 10 minutes (00:10) to 11 hours, 59
minutes (11:59).
To set a Delayed Baking cycle:
1. Pressthe Delay pad.
• DELAY flashes. D_Y
• 00:00 flashes in the display.
2. Press the A or V pad to set the delay time.
While DELAY is still flashing:
3. Press the Cook & Hold pad.
" 000 lights in the display. .....
• BAKE and HOLD flash. .................,
COOK&
4. Press A pad to set the baking temperature. HOLD
• 00:00 and "HOLD" flash. .........
• BAKE stays lit.
5. Press A pad to set the baking time.
° The Delay time, DELAY, BAKE and HOLD light in
the display.
When the Delay time has expired:
° DELAY will turn off.
• Baking time is displayed,
• BAKE and HOLD are displayed,
To set a Delay when Cook & Hold has already
been programmed: ..........................
1. Pressthe Delay pad. DELAY
• DELAY flashes.
° 00:00 appears in the display.
2. Press the A or V pad to set the delay time.
• After four seconds, DELAY will
stay lit to remind you that a delayed
cooking cycle has been set.
When the Delay time has expired and the oven
starts:
° The baking time will be displayed.
° DELAY will turn off.
• BAKE and HOLD will remain lit.
To cancel:
Press the CANCEL pad.
• All timed and untimed cooking functions will be
canceled.
° The time of day will reappear in the display.
Notes= =
Do not use delayed baking for itemsthat require a
preheated oven, such as cakes, cookies, and breads.
Do not use delayed baking if oven is already hot.
11
Keep Warm
For safely keeping foods warm or for warming breads and
plates.
To set Keep Warm:
KEEP
1. Press the Keep Warm pad. WARM
• WARM flashes. ..............
° 000 appears in the display.
2. Select the Keep Warm temperature. The Keep
Warm temperature can be set from 145° to 190°.
Press or press and hold the A or V pad.
• 170° will light when either pad is first pressed.
• Press the A pad to increase the temperature.
° Press the V pad to decrease the temperature.
WARM and the temperature will be displayed while Keep
Warm is active.
To cancel Keep Warm:
1. Press the CANCEL pad.
2. Remove food from the oven.
Keep Warm Notes:
° For optimal food quality, oven cooked foods should be kept
warm for no longer than 1 to 2 hours.
• To keep foods from drying, cover loosely with foil or a lid.
° To warm dinner rolls:
- cover rolls loosely with foil and place in oven.
- press Keep Warm and A pads to set 170° F.
- warm for 12-15 minutes.
° To warm plates:
- place 2 stacks of up to four plates each in the oven.
- press Keep Warm and A pads to set 170° F.
- warm for five minutes, turn off the oven and leave plates
in the oven for 15 minutes more.
- use only oven-safe plates, check with the manufacturer.
- do not set warm dishes on a cold surface as rapid
temperature changes could cause crazing or breakage.
12
Automatic Shut-Off/Sabbath
Mode
The oven will automatically turn off after 12 hours if you
accidentally leave it on. This safety feature can be turned off.
To cancel the 12=hour shut=off and run the
oven continuously for 72 hours: .........................................
1. Set the oven to bake (see page 10]. CLOCK
!
2. Press and hold the Clock pad for five seconds. ...............................
• SAb will be displayed and flash for five seconds.
• SAb will then be displayed continuously until turned off
or until the 72-hour time limit is reached.
• BAKEwill also be displayed if a bake cycle is in use
while the oven is in Sabbath Mode.
All other functions EXCEPTBAKE (Timer, Keep Warm,
Clean, etc.) are locked out during the Sabbath Mode.
To cancel Bake when in Sabbath Mode:
Press CANCEL.
• BAKEwill turn off in the display.
• No beeps will sound.
To cancel the Sabbath Mode:
1. Press the Clock pad for five seconds.
OR
2. After 72 hours, the Sabbath Mode will end.
SAb will flash for five seconds.
• The time of day will return to the display.
Adjusting the Oven Temperature
Oven temperatures are carefully tested for accuracy at the
factory. It is normal to notice some baking or browning
differences between a new oven and an old one. As ranges
get older, the oven temperature can shift.
You may adjust the oven temperature if you think the oven is
not baking or browning correctly. To decide how much to
change the temperature, set the temperature 25° higher or
lower than your recipe recommends, then bake. The results
of the "test" should give you an idea of how much to adjust
the temperature.
To adjust the oven temperature:
1. Press Bake.
2. Enter 550° by pressing the A pad.
3. Press and hold the Bake pad for several
seconds or until 0° appears in the display. '"'..............................
If the oven temperature was previously adjusted, the
change will be displayed. For example, if the oven tem-
perature was reduced by 15° the display will show "-15 °".
4. Press the A or V pad to adjust the temperature.
Each time a pad is pressed, the temperature changes by
5°. The oven temperature can be increased or decreased
by 5° to 35°.
5. The time of day will automatically reappear in the display.
You do not need to readjust the oven temperature if there
is a power failure or interruption. Broiling and cleaning
temperatures cannot be adjusted.
Sabbath Mode Notes:
• Sabbath Mode can be turned on at any time with or
without the oven on.
• Sabbath Mode cannot be turned on if the touchpads are
locked out or when the door is locked.
• If the oven is baking when Sabbath Mode is set, "BAKE"
will go out at the end of the baking cycle. There will be
no audible beeps.
, When the Sabbath Mode is started, no preheat beep will
sound.
• All prompts, messages and beeps are deactivated when
Sabbath Mode is active.
• Pressing CANCEL will cancel a Bake cycle, however the
control will stay in the Sabbath Mode.
• If power fails, the oven will power up in Sabbath Mode with
72 hours remaining and no cycle active.
13
Broiling
To set Broil:
1. Press the Broilpad.
• BROIL flashes.
° SETis displayed.
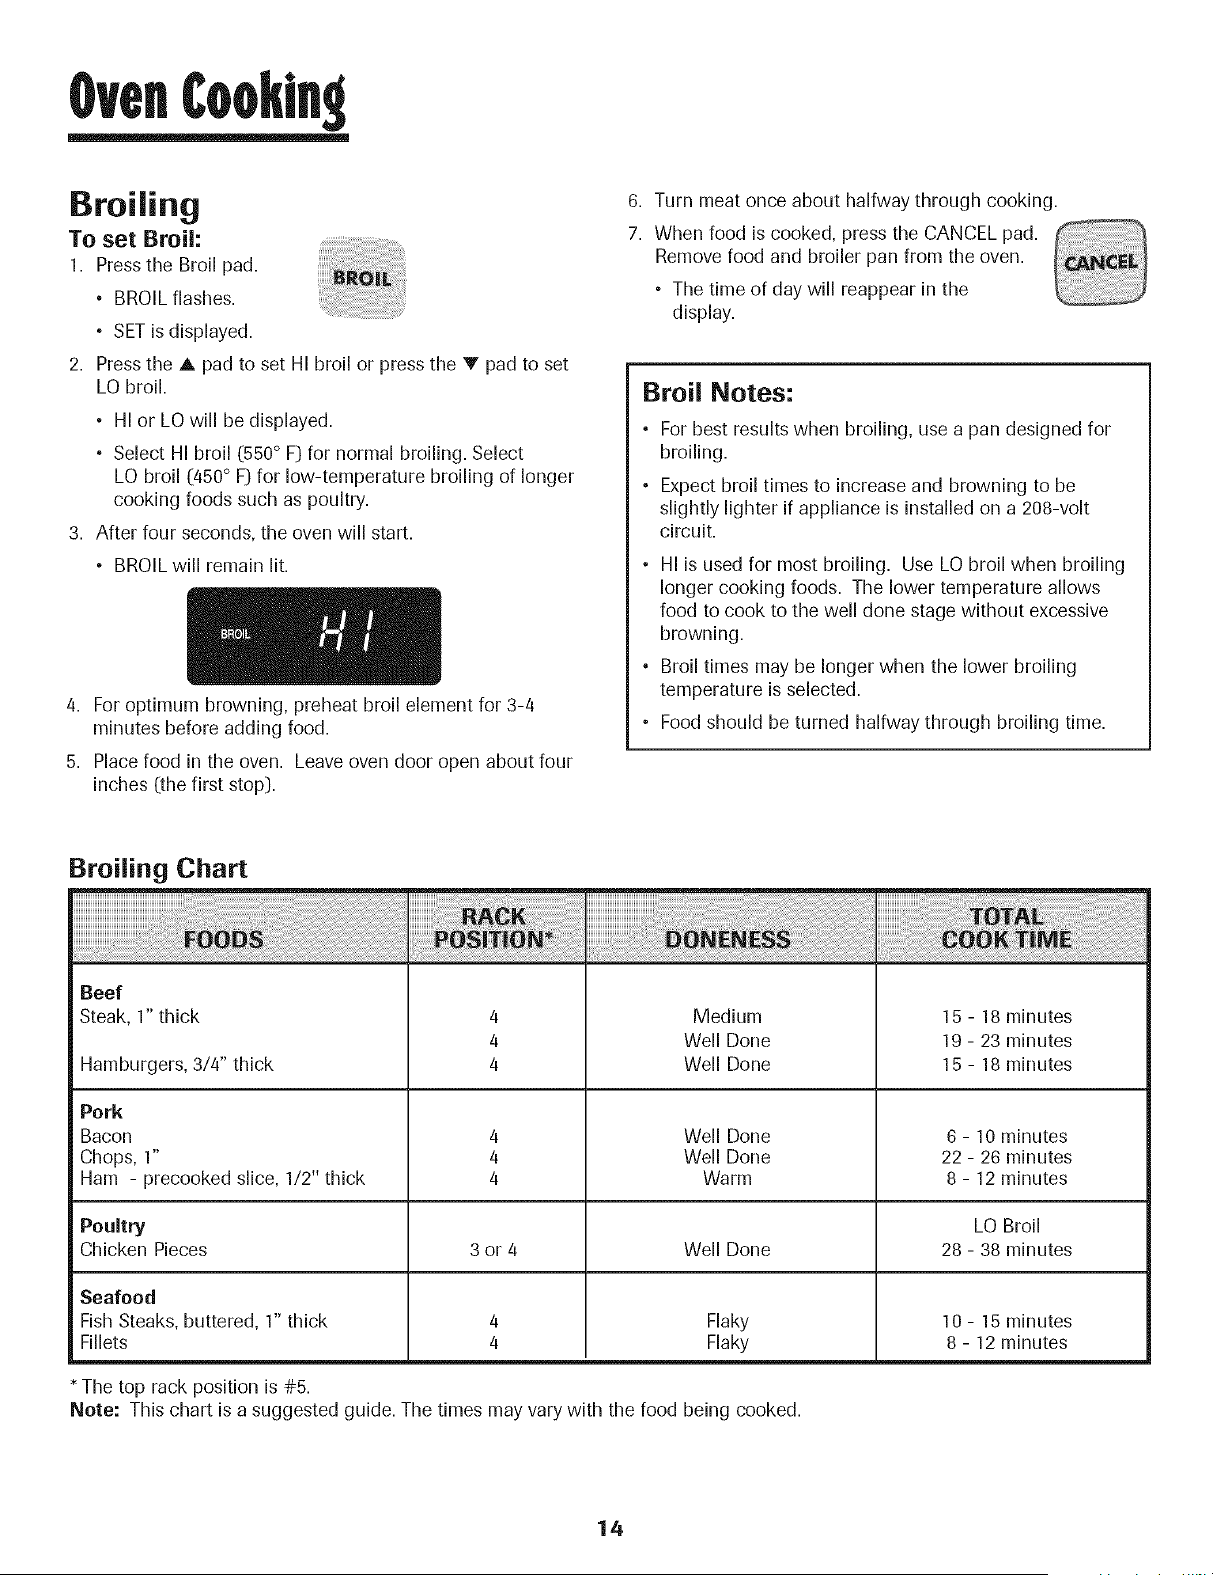
2. Press the A pad to set HI broil or press the V pad to set
LO broil.
• HI or LO will be displayed.
° Select HI broil (550° F:)for normal broiling. Select
LO broil (450° F) for low-temperature broiling of longer
cooking foods such as poultry.
3. After four seconds, the oven will start.
• BROIL will remain lit.
4. For optimum browning, preheat broil element for 3-4
minutes before adding food.
5. Place food in the oven. Leave oven door open about four
inches (the first stop:).
6,
7.
Turn meat once about halfway through cooking.
When food is cooked, press the CANCEL pad.
Remove food and broiler pan from the oven.
• The time of day will reappear in the
display.
Broil Notes:
° For best results when broiling, use a pan designed for
broiling.
° Expect broil times to increase and browning to be
slightly lighter if appliance is installed on a 208-volt
circuit.
• HI is used for most broiling. Use LO broil when broiling
longer cooking foods. The lower temperature allows
food to cook to the well done stage without excessive
browning.
° Broil times may be longer when the lower broiling
temperature is selected.
• Food should be turned halfway through broiling time.
Broiling Chart
Hamburgers, 314" thick
Pork
Bacon
Chops, 1"
Ham - precooked slice, 1/2" thick
4
4
4
4
4
4
Medium
Well Done
Well Done
Well Done
Well Done
Warm
15 - 18 minutes
19 - 23 minutes
15 - 18 minutes
6 - 10 minutes
22 - 26 minutes
8 - 12 minutes
Poultry LO Broil
Chicken Pieces 3 or 4 Well Done 28 - 38 minutes
Seafood
Fish Steaks, buttered, 1" thick
Fillets
* The top rack position is @5.
Flaky
Flaky
10 - 15 minutes
8 - 12 minutes
Note: This chart is a suggested guide. The times may vary with the food being cooked.
14
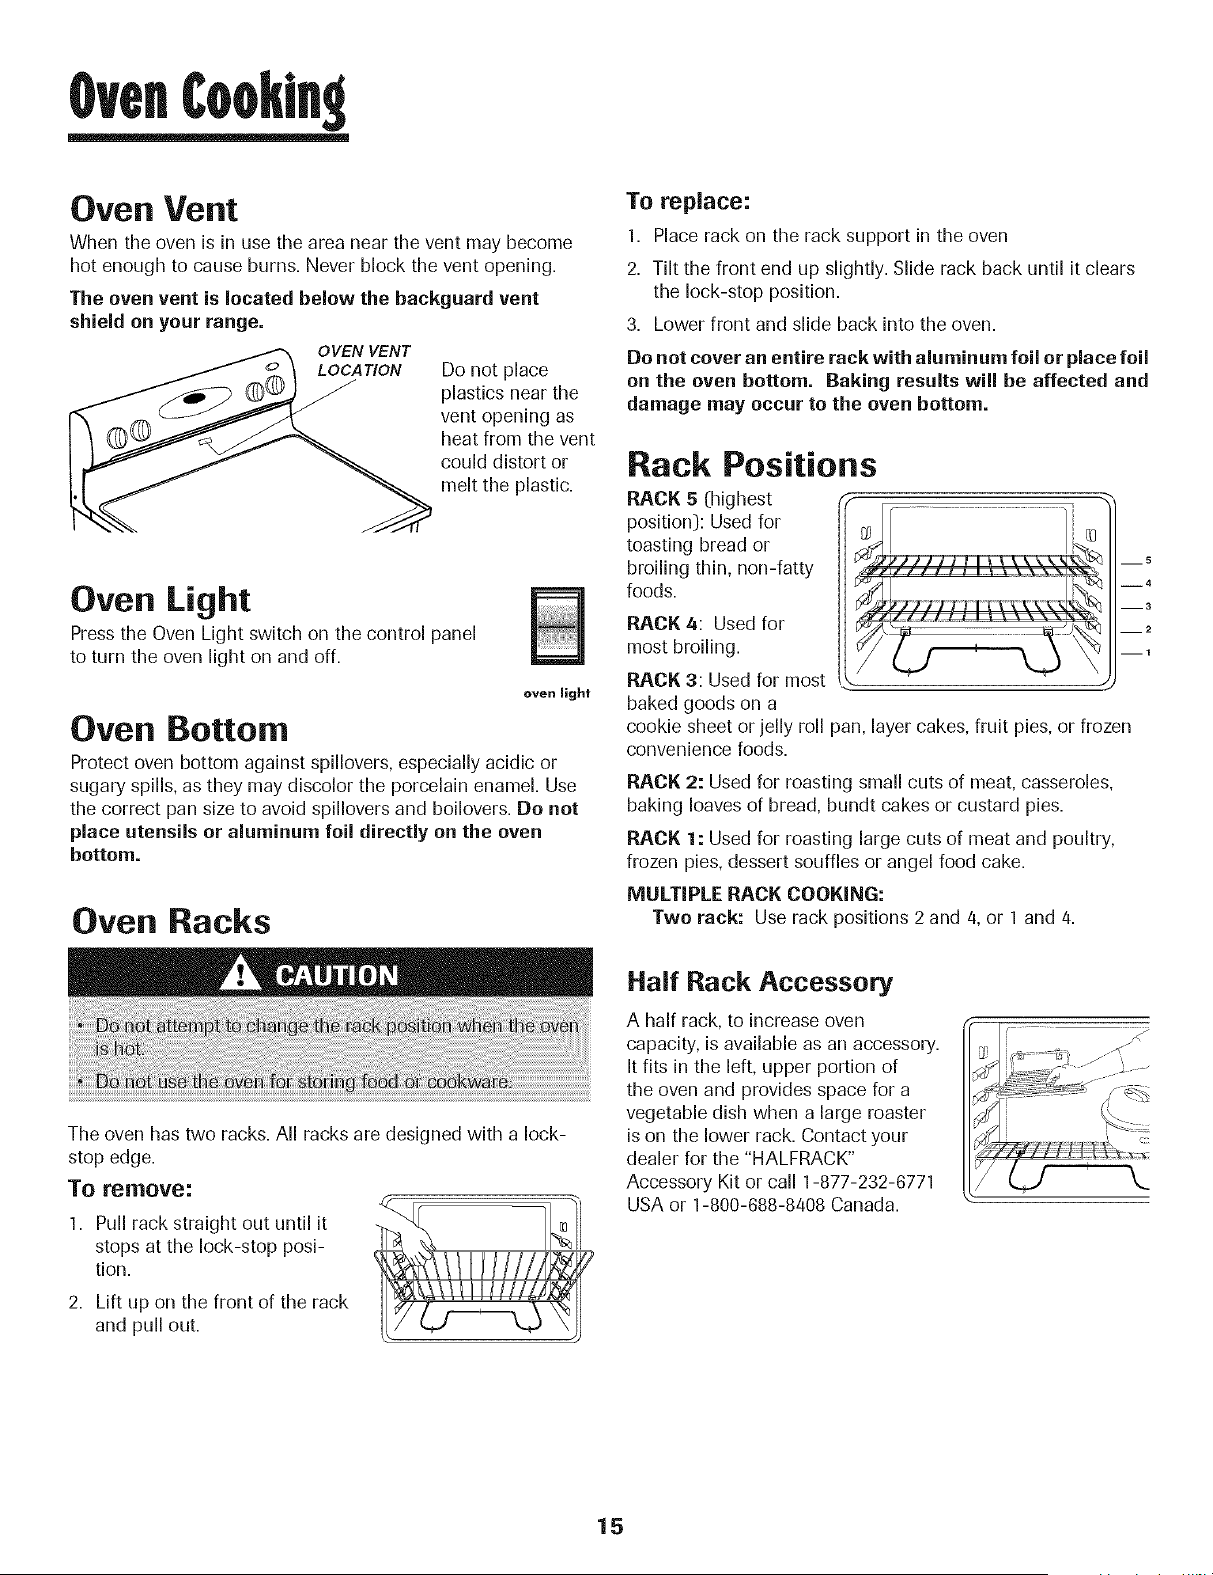
Oven Vent
When the oven is in use the area near the vent may become
hot enough to cause burns. Never block the vent opening.
The oven vent is located below the backguard vent
shield on your range.
OVEN VENT
LOCATION
Do not place
plastics near the
vent opening as
heat from the vent
could distort or
melt the plastic.
Oven Light
Press the Oven Light switch on the control panel
to turn the oven light on and off.
oven light
Oven Bottom
Protect oven bottom against spillovers, especially acidic or
sugary spills, as they may discolor the porcelain enamel. Use
the correct pan size to avoid spillovers and boilovers. Do not
place utensils or aluminum foil directly on the oven
bottom.
Oven Racks
To replace:
1. Place rack on the rack support in the oven
2. Tilt the front end up slightly. Slide rack back until it clears
the lock-stop position.
3. Lower front and slide back into the oven.
Do not cover an entire rack with aluminum foil or place foil
on the oven bottom. Baking results will be affected and
damage may occur to the oven bottom.
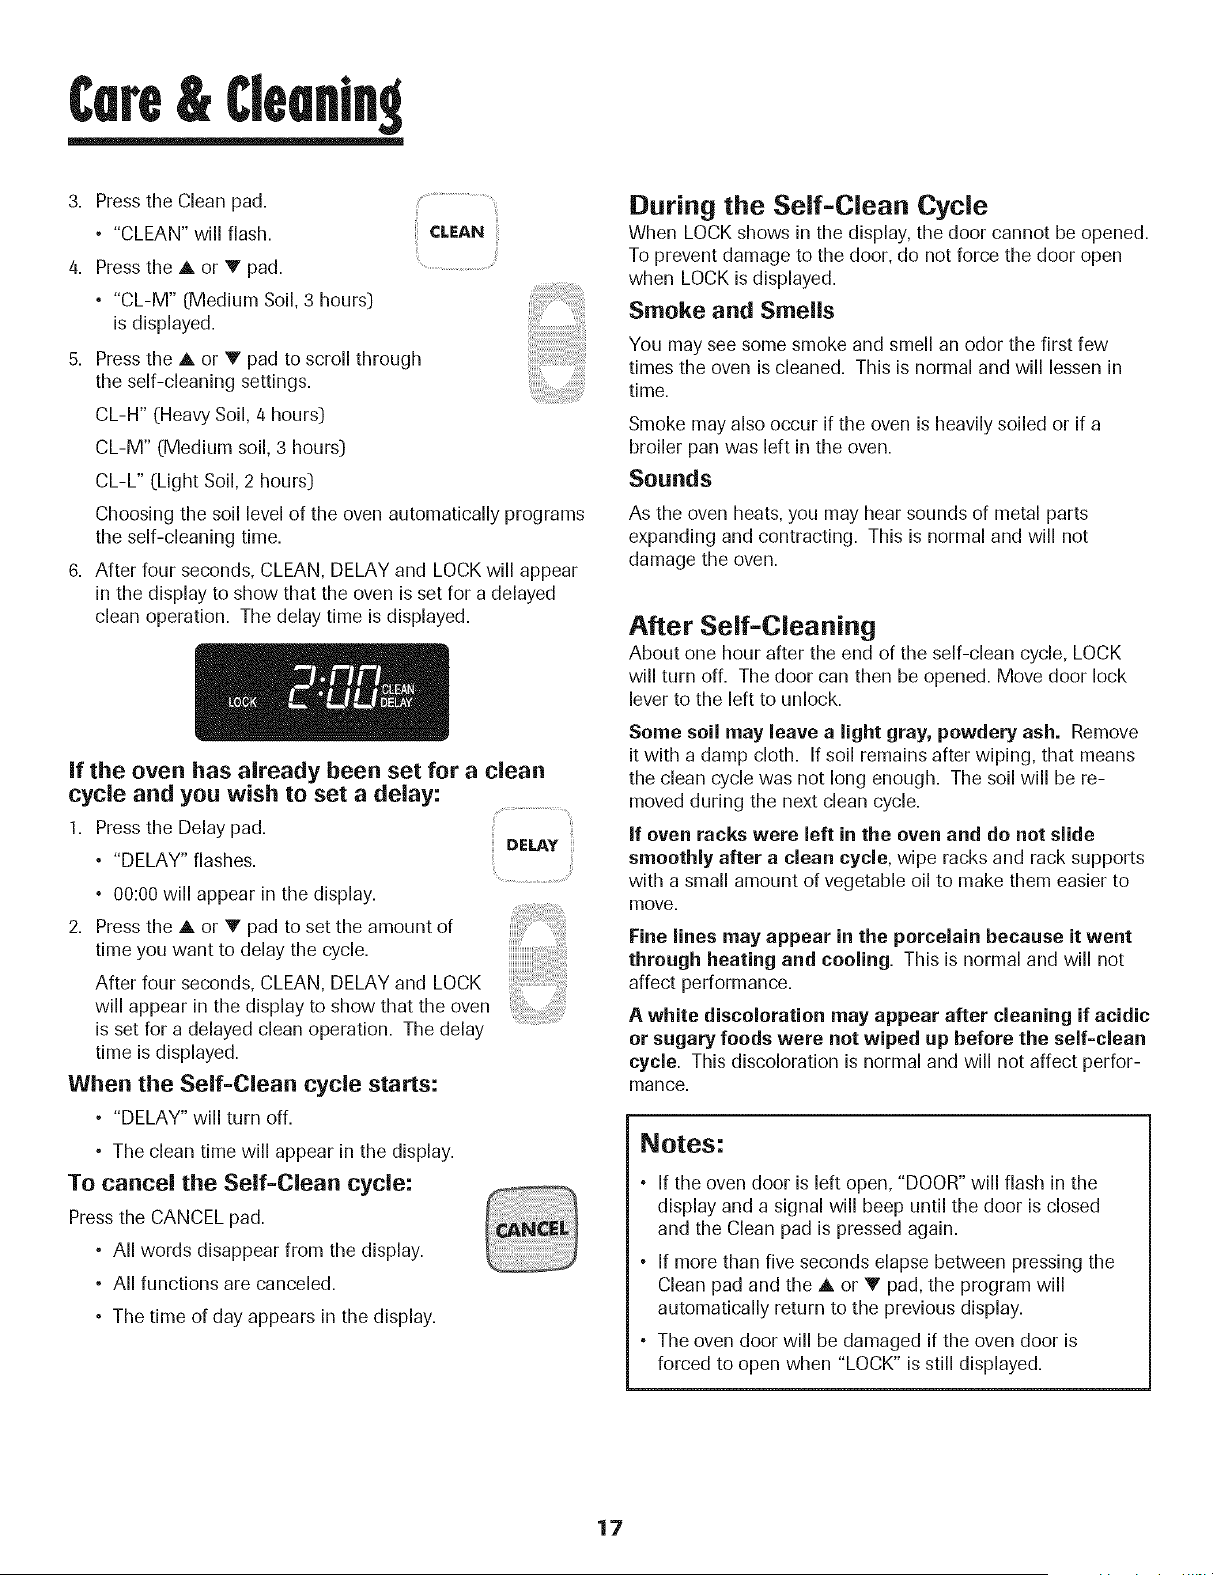
Rack Positions
RACK 5 (highest
position): Used for
toasting bread or
broiling thin, non-fatty
foods.
RACK 4: Used for
most broiling.
RACK 3: Used for most
baked goods on a
cookie sheet or jelly roll pan, layer cakes, fruit pies, or frozen
convenience foods.
5
i4
--3
__2
--1
RACK 2: Used for roasting small cuts of meat, casseroles,
baking loaves of bread, bundt cakes or custard pies.
RACK 1: Used for roasting large cuts of meat and poultry,
frozen pies, dessert souffles or angel food cake.
MULTIPLE RACK COOKING:
Two rack: Use rack positions 2 and 4, or 1 and 4.
The oven has two racks. All racks are designed with a lock-
stop edge.
To remove:
1. Pull rack straight out until it
stops at the lock-stop posi-
tion,
2. Lift up on the front of the rack
and pull out.
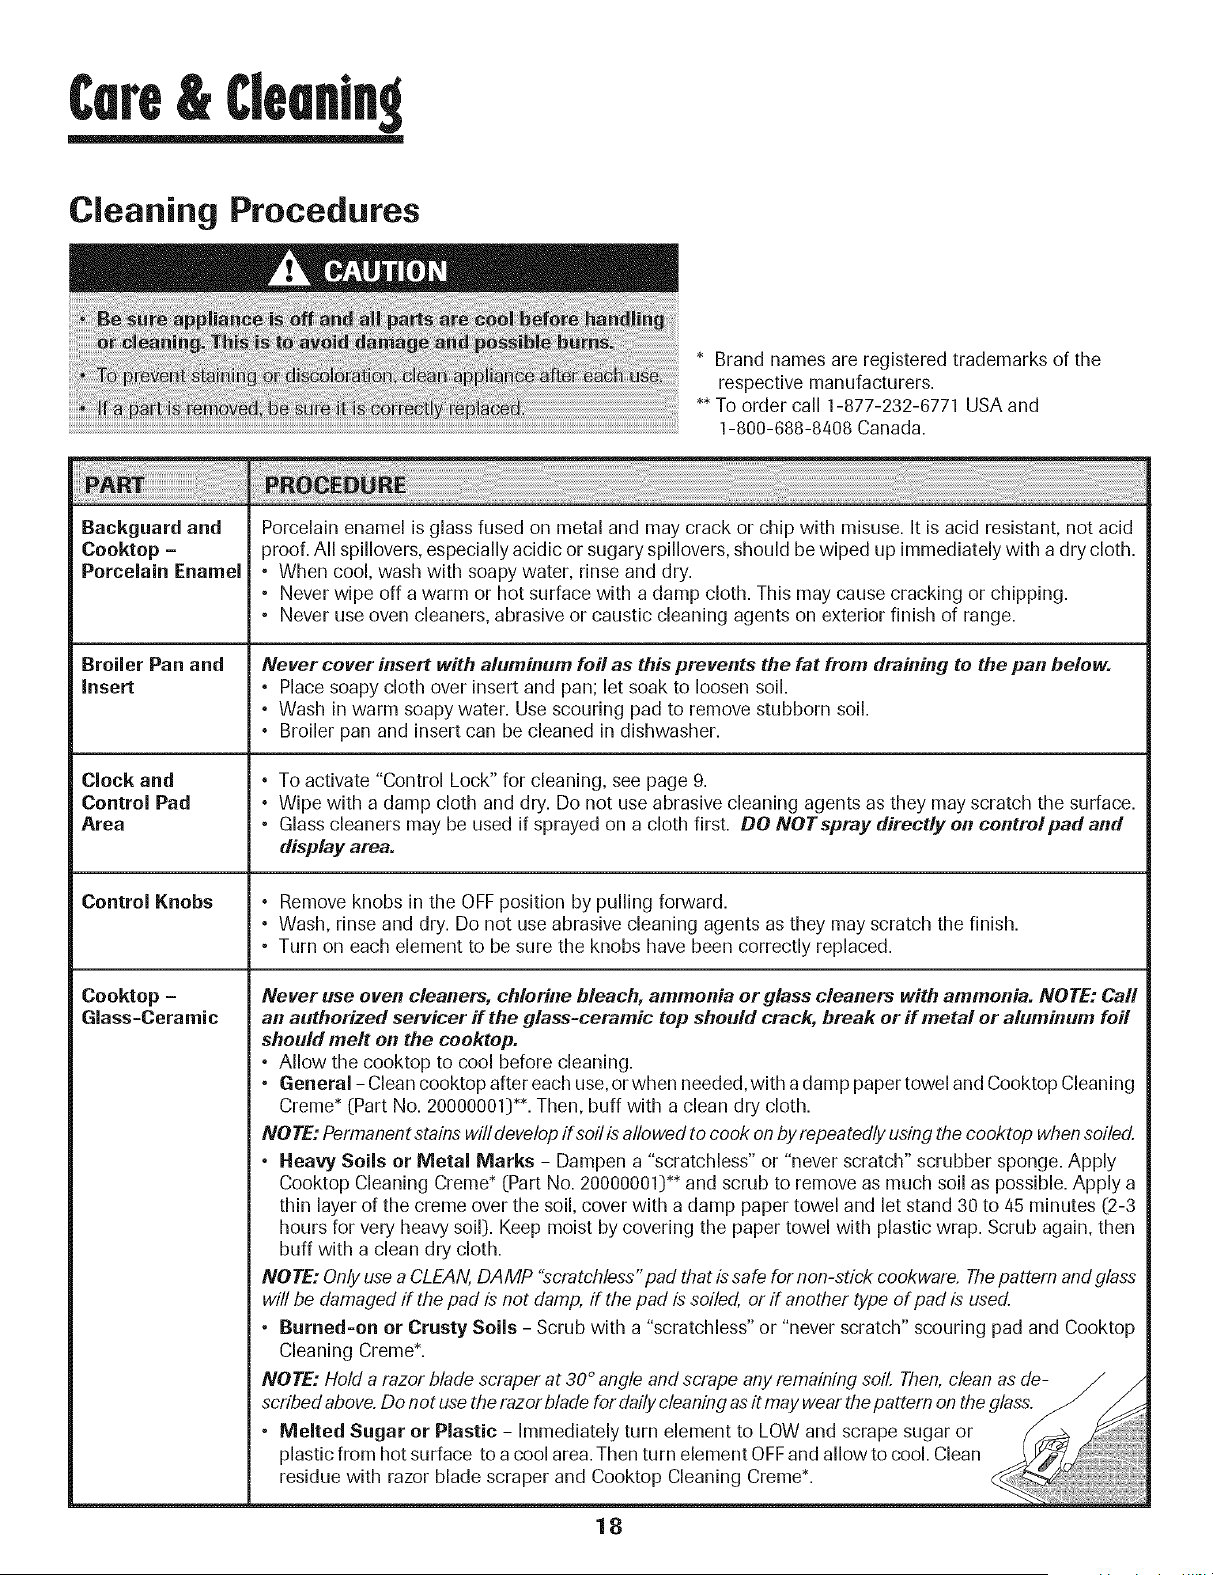
Half Rack Accessory
A half rack, to increase oven
capacity, is available as an accessory.
It fits in the left, upper portion of
the oven and provides space for a
vegetable dish when a large roaster
is on the lower rack. Contact your
dealer for the "HALFRACK"
Accessory Kit or call 1-877-232-6771
USA or 1-800-688-8408 Canada.
¢ ...........
15
Cleantn
Self-Clean Oven
The self-clean cycle uses above-normal cooking temperatures
to automatically clean the oven interior. Do not force the oven
door or lock lever open. This may result in exposure to high
temperatures and be a burn hazard.
The oven should be cleaned regularly by wiping up spillovers
to prevent excessive smoke and flare-ups. Do not allow a
heavy build-up of soil to accumulate in the oven.
During the cleaning process, the kitchen should be well
ventilated to get rid of normal odors associated with cleaning.
Before Self=Cleaning
1. Turn off the oven light before cleaning. The light may burn
out during the clean cycle.
2. Remove broiler pan, all pans, and oven racks from the
oven. The oven racks will discolor and may not slide easily
after a self-clean cycle if they are not removed.
3. Clean oven frame, door frame, area
outside of gasket, and around the
opening in the door gasket with a
nonabrasive cleaner such as Bon
Ami* or detergent and water. The
self-cleaning process does not
clean these areas. They should be
cleaned to prevent soil from baking on during the clean
cycle. 0-he gasket is the seal around the oven door and
window.:)
4. To prevent damage, do not clean or rub the gasket around
the oven door. The gasket is designed to seal in heat
during the clean cycle.
5. Wipe up excess grease or spillovers from the oven bottom.
This prevents excessive smoking, flare-ups or flaming
during the clean cycle.
6. Wipe up sugary and acidic spillovers such as sweet
potatoes, tomato, or milk-based sauces. Porcelain enamel
is acid-resistant, not acid-proof. The porcelain finish may
discolor if acidic spills are not wiped up before a self-clean
cycle.
To set Self=Clean:
i Note: Over) temperature must be below 400° F to program
a clean cycle.
1. Close the oven door.
2. Move door lock lever right to the locked position.
Pressthe Clean pad.
• CLEAN flashes in the display.
CLEA.
!
If the door is not closed, beeps will sound and "DOOR" will
display. If the door is not closed within 45 seconds, the
self-cleaning operation will be canceled and the display
will return to the time of day.
4. Press the A or V pad.
• CL-M (Medium Soil, 3 hours:) is displayed.
5. Press the A or V pad to scroll through the
self-cleaning settings.
CL-H (Heavy Soil, 4 hours:)
CL-M (Medium soil, 3 hours:)
CL-L (Light Soil, 2 hours:)
Choosing the soil level of the oven automatically programs
the self-cleaning time.
6. After four seconds, the oven will start cleaning.
• The cleaning time will start counting down in the display.
• LOCK will appear in the display.
• CLEAN will appear in the display.
To Delay a Self=Clean Cycle:
1. Pressthe Delay pad. DELAY
° DELAY flashes. .................................
• 00:00 will appear in the display.
2. Press the A or V pad to set the amount of time
you want to delay the cycle. Delay time can be
set from ten minutes (00:10:)to 11 hours, 59
minutes (11:59:).
cont.
* Brand names for cleaning products are registered trademarks of the respective manufacturers.
16
Cleantn
3. Press the Clean pad.
• "CLEAN" will flash. CLEAN
4. Press the A or V pad. .............
• "CL-M" (Medium Soil, 3 hours_)
is displayed.
5. Press the A or V pad to scroll through
the self-cleaning settings.
CL-H" (Heavy Soil, 4 hours_)
CL-M" (Medium soil, 3 hours_)
CL-L" (Light Soil, 2 hours_)
Choosing the soil level of the oven automatically programs
the self-cleaning time.
6. After four seconds, CLEAN, DELAY and LOCK will appear
in the display to show that the oven is set for a delayed
clean operation. The delay time is displayed.
If the oven has already been set for a clean
cycle and you wish to set a delay:
1. Press the Delay pad.
• "DELAY" flashes. DELAY
• 00:00 will appear in the display.
2. Press the A or V pad to set the amount of
time you want to delay the cycle.
After four seconds, CLEAN, DELAY and LOCK
will appear in the display to show that the oven
is set for a delayed clean operation. The delay
time is displayed.
When the Self=Clean cycle starts:
• "DELAY" will turn off.
• The clean time will appear in the display.
To cancel the Self=Clean cycle:
Press the CANCEL pad.
• All words disappear from the display.
• All functions are canceled.
• The time of day appears in the display.
During the Self=Clean Cycle
When LOCKshows in the display, the door cannot be opened.
To prevent damage to the door, do not force the door open
when LOCK is displayed.
Smoke and Smells
You may see some smoke and smell an odor the first few
times the oven is cleaned. This is normal and will lessen in
time.
Smoke may also occur if the oven is heavily soiled or if a
broiler pan was left in the oven.
Sounds
As the oven heats, you may hear sounds of metal parts
expanding and contracting. This is normal and will not
damage the oven.
After Self=Cleaning
About one hour after the end of the self-clean cycle, LOCK
will turn off. The door can then be opened. Move door lock
lever to the left to unlock.
Some soil may leave a light gray, powdery ash. Remove
it with a damp cloth. If soil remains after wiping, that means
the clean cycle was not long enough. The soil will be re-
moved during the next clean cycle.
If oven racks were left in the oven and do not slide
smoothly after a clean cycle, wipe racks and rack supports
with a small amount of vegetable oil to make them easier to
move.
Fine lines may appear in the porcelain because it went
through heating and cooling. This is normal and will not
affect performance.
A white discoloration may appear after cleaning if acidic
or sugary foods were not wiped up before the serf=clean
cycle. This discoloration is normal and will not affect perfor-
mance.
Notes:
If the oven door is left open, "DOOR" will flash in the
display and a signal will beep until the door is closed
and the Clean pad is pressed again.
If more than five seconds elapse between pressing the
Clean pad and the A or V pad, the program will
automatically return to the previous display.
The oven door will be damaged if the oven door is
forced to open when "LOCK" is still displayed.
17
¢leentn9
Cleaning Procedures
* Brand names are registered trademarks of the
respective manufacturers.
To order call 1-877-232-6771 USA and
1-866-688-8408 Canada.
Backguard and
Cooktop -
Porcelain Enamel
Broiler Pan and
insert
Clock and
Control Pad
Area
Control Knobs
Cooktop -
Glass=Ceramic
Porcelain enamel is glass fused on metal and may crack or chip with misuse. It is acid resistant, not acid
proof. All spillovers, especially acidic or sugary spillovers, should be wiped up immediately with a dry cloth.
• When cool, wash with soapy water, rinse and dry.
• Never wipe off a warm or hot surface with a damp cloth. This may cause cracking or chipping.
• Never use oven cleaners, abrasive or caustic cleaning agents on exterior finish of range.
Never cover insert with aluminum foil as this prevents the fat from draining to the pan below.
• Place soapy cloth over insert and pan; let soak to loosen soil.
• Wash in warm soapy water. Use scouring pad to remove stubborn soil.
• Broiler pan and insert can be cleaned in dishwasher.
• To activate "Control Lock" for cleaning, see page 9.
• Wipe with a damp cloth and dry. Do not use abrasive cleaning agents as they may scratch the surface.
• Glass cleaners may be used if sprayed on a cloth first. DO NOTspray directly on controlpad and
display area.
• Remove knobs in the OFF position by pulling forward.
• Wash, rinse and dry. Do not use abrasive cleaning agents as they may scratch the finish.
• Turn on each element to be sure the knobs have been correctly replaced.
Never use oven cleaners, chlorine bleach, ammonia or glass cleaners with ammonia. NOTE: Call
an authorized servicer if the glass-ceramic top should crack, break or if metal or aluminum foil
should melt on the cooktop.
° Allow the cooktop to cool before cleaning.
• General - Clean cooktop after each use, or when needed,with a damp paper towel and Cooktop Cleaning
Creme* _Part No. 200000011**.Then, buff with a clean dry cloth.
NOTE: Permanent stains will develop if soi/is allowed to cook on by repeatedly using the cooktop when soiled.
° Heavy Soils or Metal Marks - Dampen a "scratchiess" or "never scratch" scrubber sponge. Apply
Cooktop Cleaning Creme* _PartNo. 200000011**and scrub to remove as much soil as possible. Apply a
thin layerof the creme over the soil, cover with a damp paper towel and let stand 30 to 45 minutes _2-3
hours for very heavy sol0. Keep moist by covering the paper towel with plastic wrap. Scrub again, then
buff with a clean dry cloth.
NOTE: Only use a CLEAN,DAMP '_cratch/ess" pad that issafe for non-stick cookware. Thepattern and glass
will be damaged if the pad is not damp, if the pad is soiled, or if another type of pad is used.
• Burned=on or Crusty Soils - Scrub with a "scratchiess" or "never scratch" scouring pad and Cooktop
Cleaning Creme*.
NO TE: Hold a razor blade scraper at 30 ° angle and scrape any remaining soil. Then, clean as de- / /
_cribed above.Do not use the razor blade for daily cleaning as it may wear the pattem on the glass._
Melted Sugar or Plastic - Immediately turn element to LOW and scrape sugar or
plastic from hot surface to a cool area. Then turn element OFFand allow to cool. Clean
residue with razor blade scraper and Cooktop Cleaning Creme*. _iZ_:i_
18
Cleantn
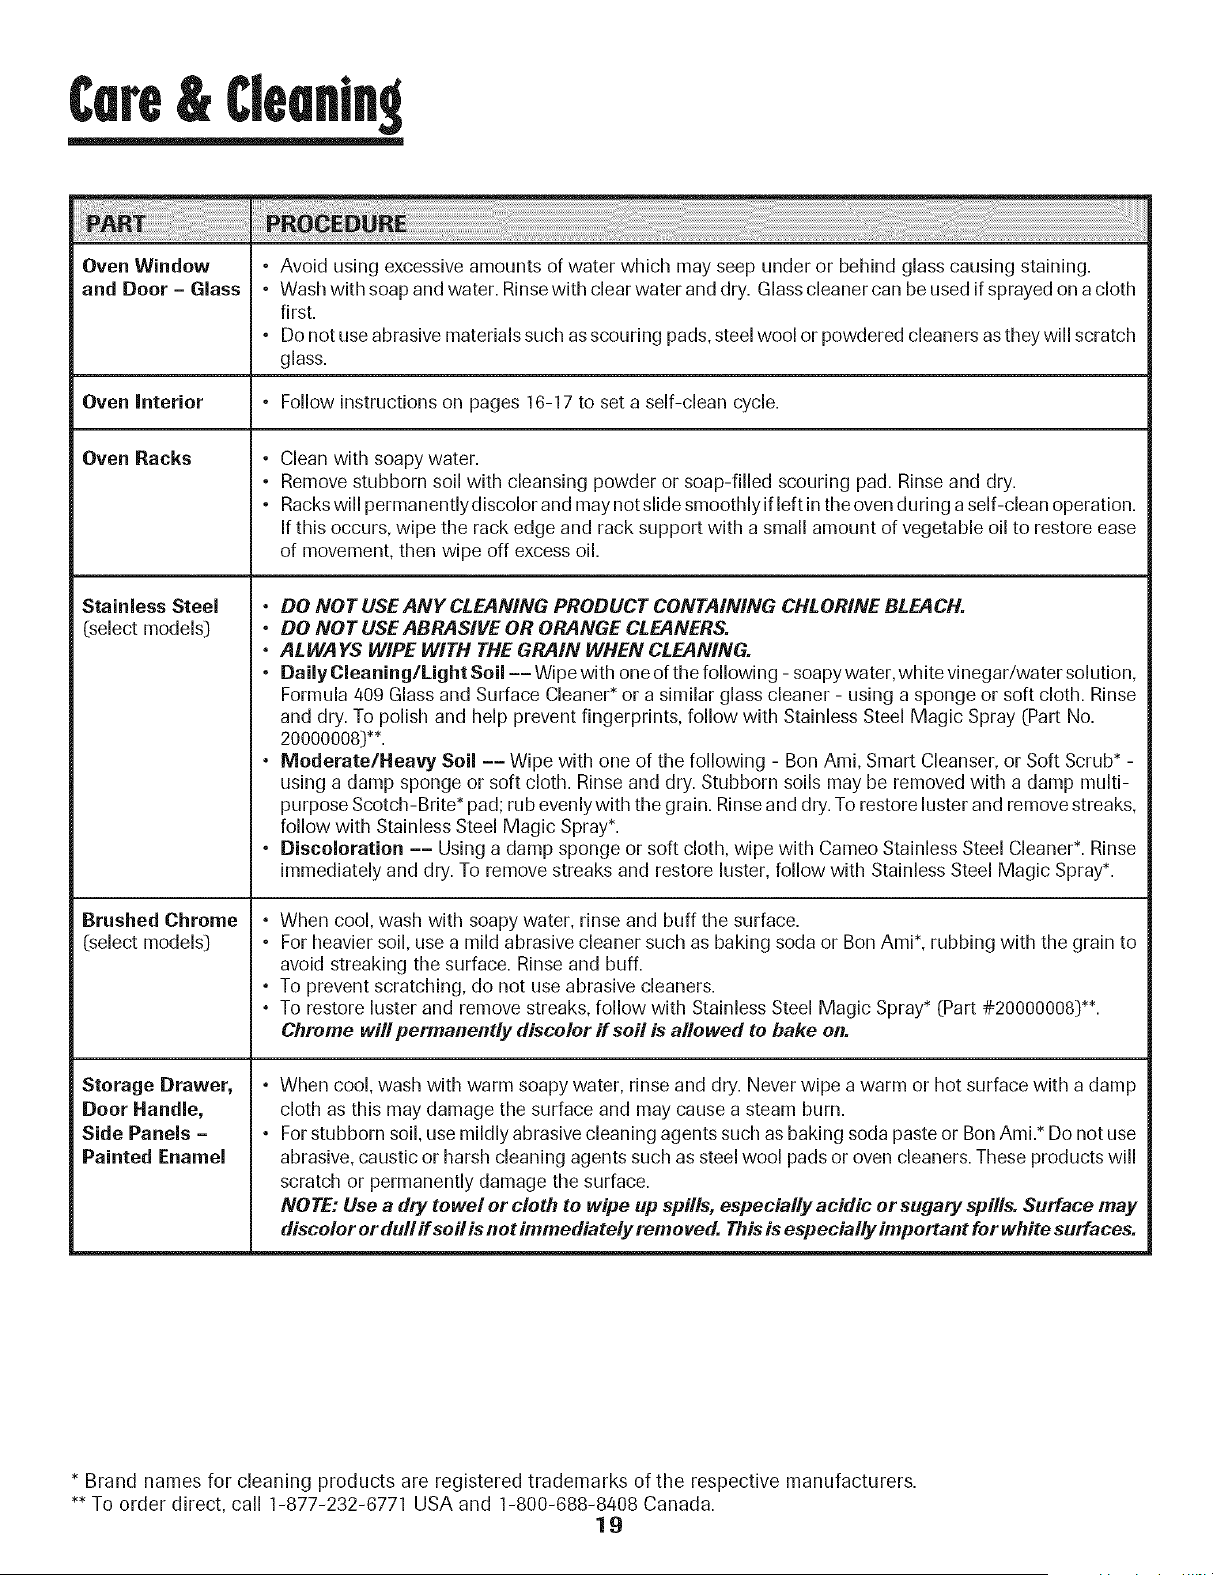
Oven Window • Avoid using excessive amounts of water which may seep under or behind glass causing staining.
and Door - Glass • Wash with soap and water. Rinsewith clear water and dry. Glasscleaner can be used if sprayed on a cloth
first.
• Do not use abrasive materials such as scouring pads, steel wool or powdered cleaners as they will scratch
glass.
Oven Interior • Follow instructionson pages 16-17 to set a self-clean cycle.
Oven Racks
Stainless Steel
(select models)
Brushed Chrome
(select models)
Storage Drawer,
Door Handle,
Side Panels -
Painted Enamel
• Clean with soapy water.
• Remove stubborn soil with cleansing powder or soap-filled scouring pad. Rinse and dry.
• Rackswill permanentlydiscolor and maynotslide smoothlyifleftin theoven during a self-clean operation.
If this occurs, wipe the rack edge and rack support with a small amount of vegetable oil to restore ease
of movement, then wipe off excess oil.
° DO NOT USE ANY CLEANING PRODUCT CONTAINING CHLORINE BLEACH.
• DO NOTUSEABRASIVE OR ORANGE CLEANERS.
° ALWAYS WIPE WITH THE GRAIN WHEN CLEANING
• _ai_y__eaning_LightS_i_-__ipewith_ne_fthef____wing-s_apywater_whitevinegar/waters__uti_n_
Formula 409 Glass and Surface Cleaner* or a similar glass cleaner - using a sponge or soft cloth. Rinse
and dry. To polish and help prevent fingerprints, follow with Stainless Steel Magic Spray (Part No.
20000008)**.
° Moderate/Heavy Soil -- Wipe with one of the following - Bon Ami, Smart Cleanser, or Soft Scrub* -
using a damp sponge or soft cloth. Rinse and dry. Stubborn soils may be removed with a damp multi-
purpose Scotch-Brite* pad; rub evenly with the grain. Rinseand dry. To restore luster and remove streaks,
follow with Stainless Steel Magic Spray*.
• Discoloration -- Using a damp sponge or soft cloth, wipe with Cameo Stainless Steel Cleaner*. Rinse
immediately and dry. To remove streaks and restore luster, follow with Stainless Steel Magic Spray*.
° When cool, wash with soapy water, rinse and buff the surface.
• For heavier soil, use a mild abrasive cleaner such as baking soda or Bon Ami*, rubbing with the grain
avoid streaking the surface. Rinse and buff.
• To prevent scratching, do not use abrasive cleaners.
• To restore luster and remove streaks, follow with Stainless Steel Magic Spray* (Part #20000008)**.
Chrome will permanently discolor if soil is allowed to hake on.
to
• When cool, wash with warm soapy water, rinse and dry. Never wipe a warm or hot surface with a damp
cloth as this may damage the surface and may cause a steam burn.
• For stubborn soil, use mildly abrasive cleaning agents such as baking soda paste or Bon Ami.* Do not use
abrasive, caustic or harsh cleaning agents such as steel wool pads or oven cleaners. These products will
scratch or permanently damage the surface.
NOTE: Use a dry towel or cloth to wipe up spills, especialiy acidic or sugary spills. Surface may
discolor or dull ff soil is /tot immediately removed. Thisis especially important for white surfaces.
* Brand names for cleaning products are registered trademarks of the respective manufacturers.
** To order direct, call 1-877-232-6771 USA and 1-800-688-8408 Canada.
19
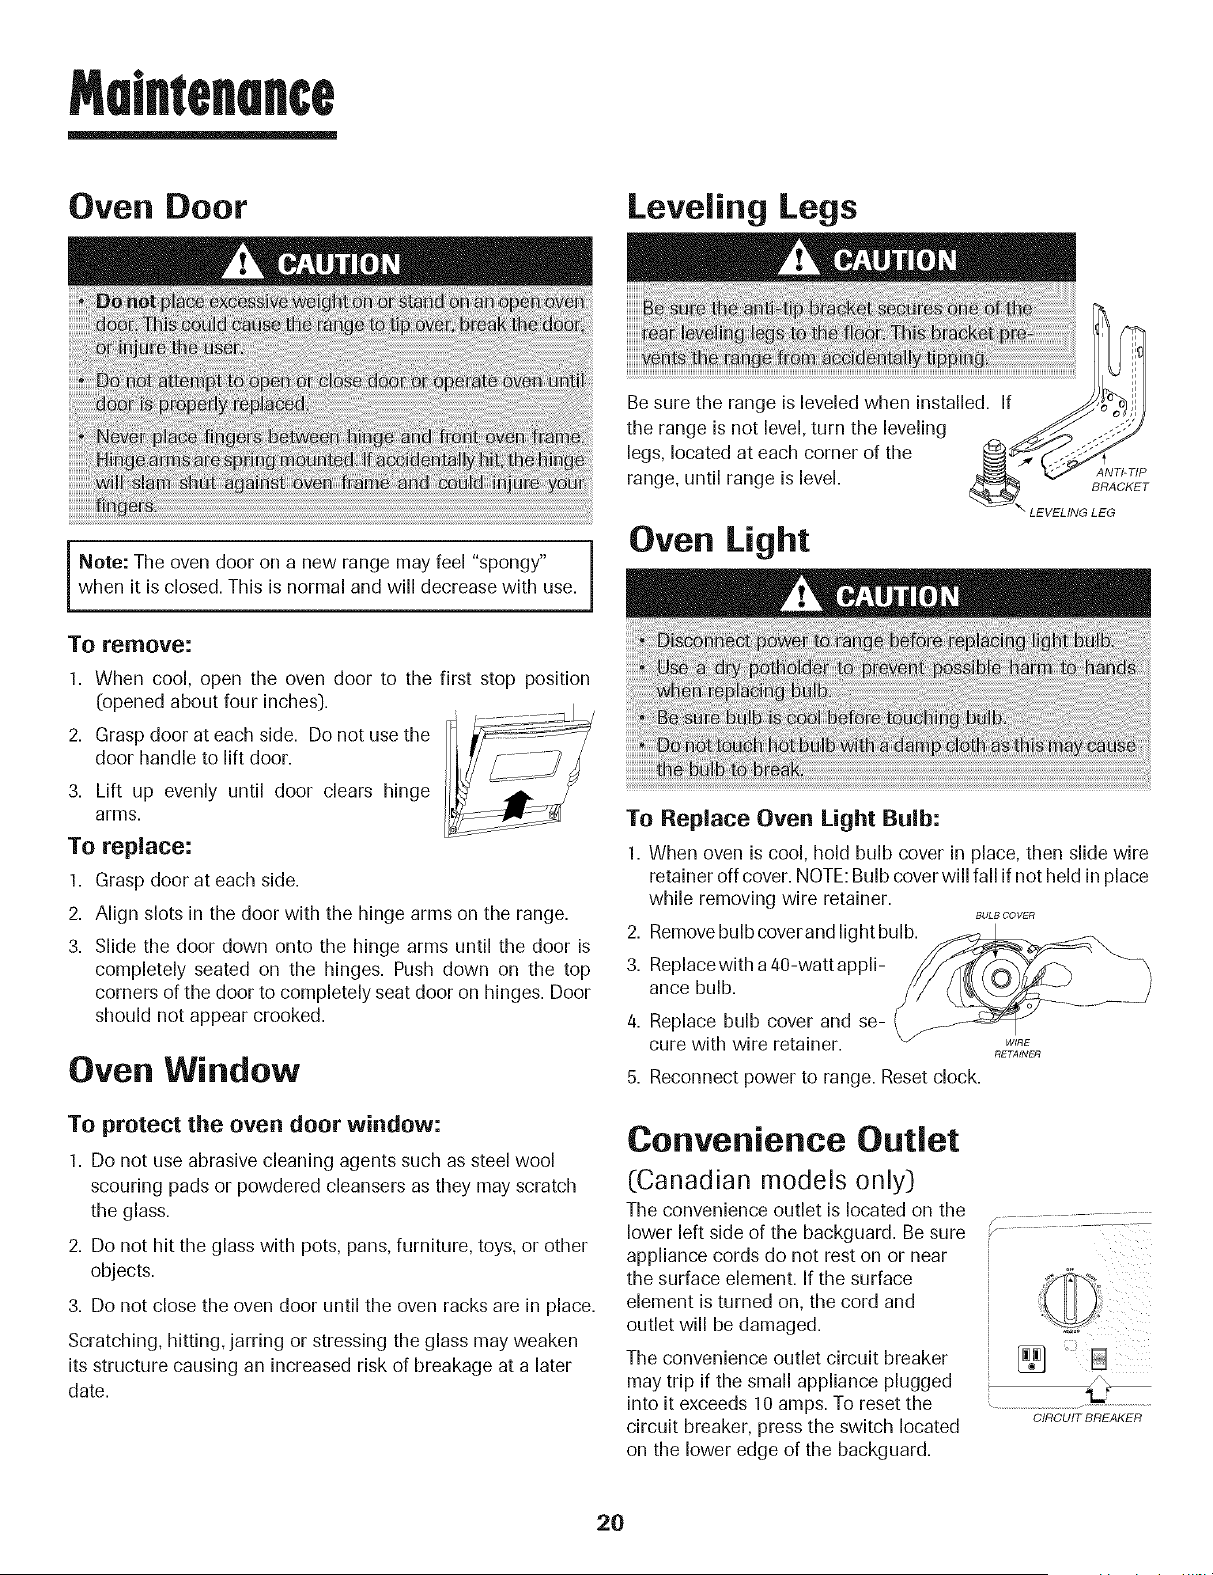
Oven Door
Leveling Legs
Note: The oven door on a new range may feel "spongy"
when it is closed. This is normal and will decrease with use.
To remove:
1. When cool, open the oven door to the first stop position
(opened about four inches}.
2. Grasp door at each side. Do not use the
door handle to lift door.
3. Lift up evenly until door clears hinge
arms.
To replace:
1. Grasp door at each side.
2. Align slots in the door with the hinge arms on the range.
3. Slide the door down onto the hinge arms until the door is
completely seated on the hinges. Push down on the top
corners of the door to completely seat door on hinges. Door
should not appear crooked.
Oven Window
To protect the oven door window:
1. Do not use abrasive cleaning agents such as steel wool
scouring pads or powdered cleansers as they may scratch
the glass.
2. Do not hit the glass with pots, pans, furniture, toys, or other
objects.
3. Do not close the oven door until the oven racks are in place.
Scratching, hitting, jarring or stressing the glass may weaken
its structure causing an increased risk of breakage at a later
date.
Oven Light
To Replace Oven Light Bulb:
1. When oven is cool, [)old bulb cover in place, then slide wire
retainer off cover. NOTE:Bulb cover will fall if not held in place
while removing wire retainer.
BULB COVER
2. Removebulb coverand light bulb.
3. Replacewith a 40-wattappli-
ance bulb.
4. Replace bulb cover and se-
cure with wire retainer.
5. Reconnect power to range. Reset clock.
RETAINER
Convenience Outlet
(Canadian models only)
The convenience outlet is located on the ............................
lower left side of the backguard. Be sure _.............................
appliance cords do not rest on or near
the surface element. If the surface
element is turned on, the cord and
outlet will be damaged.
The convenience outlet circuit breaker _ B
may trip if the small appliance plugged
into it exceeds 10 amps. To reset the
circuit breaker, press the switch located CIRCUITBREAKER
on the lower edge of the backguard.
2O
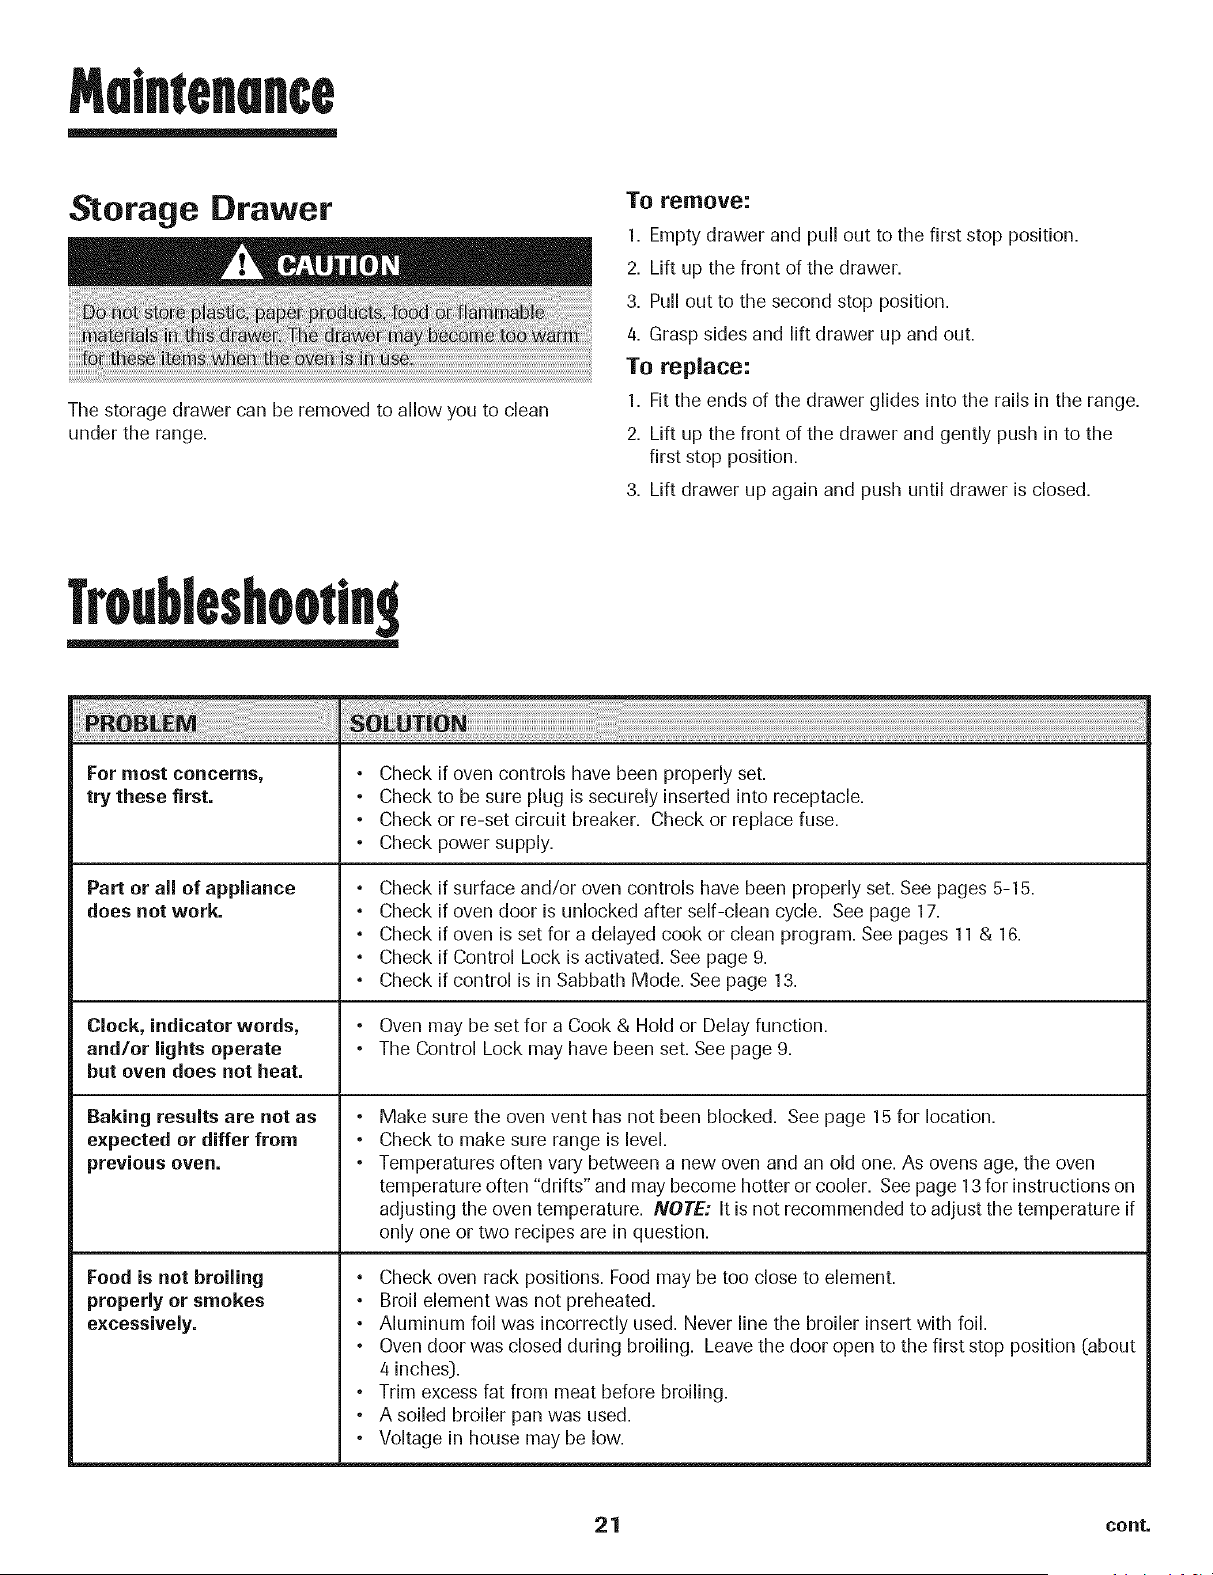
Storage Drawer
The storage drawer can be removed to allow you to clean
under the range.
TO remove:
1. Empty drawer and pull out to the first stop position.
2. Lift up the front of the drawer,
3. Pull out to the second stop position,
4. Grasp sides and lift drawer up and out.
To replace:
1. Fit the ends of the drawer glides into the rails in the range.
2. Lift up the front of the drawer and gently push in to the
first stop position,
3. Lift drawer up again and push until drawer is closed,
Troubleshootln9
[:or most concerns,
try these first.
Part or all of appliance
does not work.
Clock, indicator words,
and/or lights operate
but oven does not heat.
Baking results are not as
expected or differ from
previous oven.
Food is not broiling
properly or smokes
excessively.
o
®
®
®
Check
Check
Check
Check
if oven controls have been properly set.
to be sure plug is securely inserted into receptacle.
or re-set circuit breaker. Check or replace fuse.
power supply.
o
o
o
o
o
Check
Check
Check
Check
Check
if surface and/or oven controls have been properly set. See pages 5-15.
if oven door is unlocked after self-clean cycle. See page 17.
if oven is set for a delayed cook or clean program. See pages 11 & 16.
if Control Lock is activated. See page 9.
if control is in Sabbath Mode. See page 13.
• Oven may be set for a Cook & Hold or Delay function.
• The Control Lock may have been set. See page 9.
o
o
o
Make sure the oven vent has not been blocked. See page 15 for location.
Check to make sure range is level.
Temperatures often vary between a new oven and an old one. As ovens age, the oven
temperature often "drifts" and may become hotter or cooler. See page 13 for instructions on
adjusting the oven temperature. NOTE: It is not recommended to adjust the temperature if
only one or two recipes are in question.
° Check oven rack positions. Food may be too close to element.
° Broil element was not preheated.
° Aluminum foil was incorrectly used. Never line the broiler insert with foil.
• Oven door was closed during broiling. Leave the door open to the first stop position (about
4 inches:).
• Trim excess fat from meat before broiling.
• A soiled broiler pan was used.
• Voltage in house may be low.
21 cont.
Troub[eshootln9
;i_ ii_¸:i; _i ;;;i_ii_ _;; _ i_;;;;; ;;;; ;;; ;i_=_;_;;_;;_;;_;;_;;_;;_;;_;;_;_ _ _ _ _ _ _ _ _ _ _ _ _ _ _ _ _
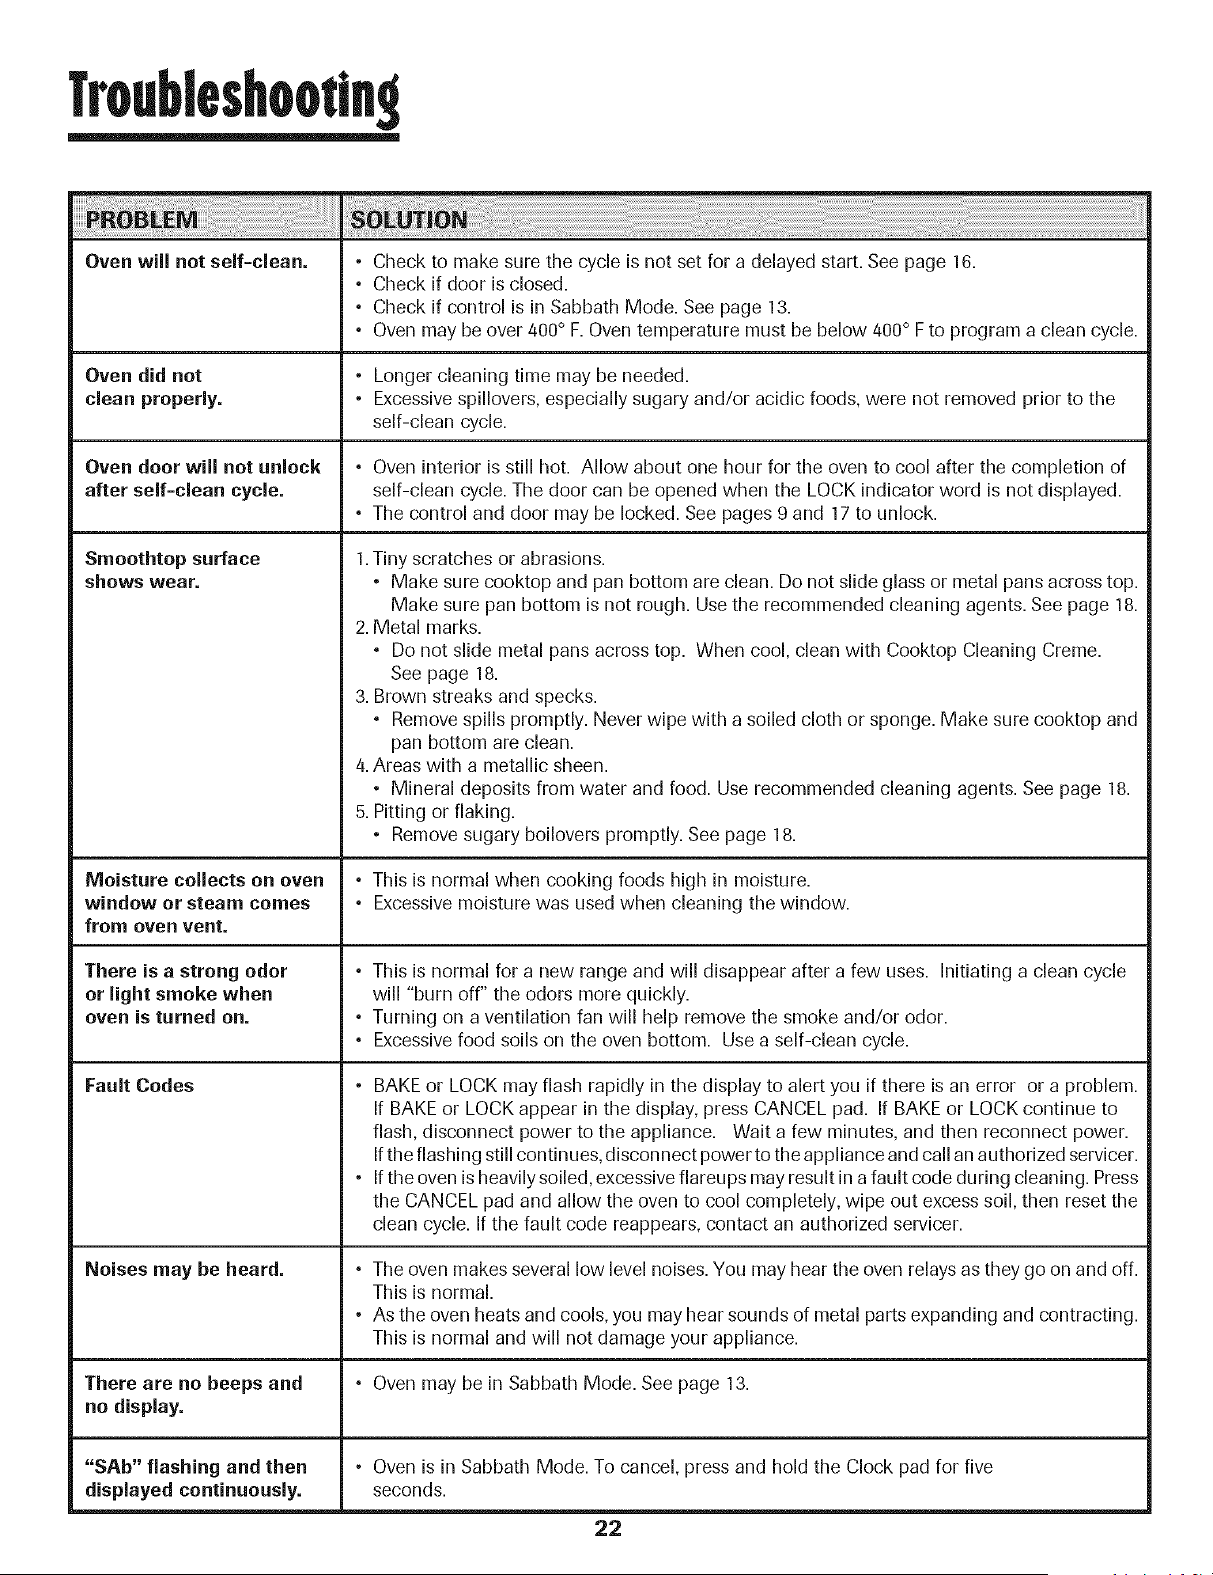
Oven will not self=clean. • Check to make sure the cycle is not set for a delayed start. See page 16.
° Check if door is closed.
° Check if control is in Sabbath Mode. See page 13.
° Oven may be over 400° F.Oven temperature must be below 400° F to program a clean cycle.
Oven did not
clean properly.
Oven door will not unlock
after self=clean cycle.
Smoothtop surface
shows wear.
Moisture collects on oven
window or steam comes
from oven vent=
There is a strong odor
or light smoke when
oven is turned on.
Fault Codes
Noises may be heard.
• Longercleaning time may be needed.
• Excessivespillovers, especially sugary and/or acidic foods, were not removed prior to the
self-clean cycle.
° Oven interior is still hot. Allow about one hour for the oven to cool after the completion of
self-clean cycle. The door can be opened when the LOCK indicatorword is not displayed.
° The control and door may be locked. See pages 9 and 17 to unlock.
1.Tiny scratches or abrasions.
• Make sure cooktop and pan bottom are clean. Do not slide glass or metal pans across top.
Make sure pan bottom is not rough. Use the recommended cleaning agents. See page 18.
2. Metal marks.
° Do not slide metal pans across top. When cool, clean with Cooktop Cleaning Creme.
See page 18.
3. Brown streaks and specks.
° Remove spills promptly. Never wipe with a soiled cloth or sponge. Make sure cooktop and
pan bottom are clean.
4. Areas with a metallic sheen.
• Mineral deposits from water and food. Use recommended cleaning agents. See page 18.
5. Pitting or flaking.
• Remove sugary boilovers promptly. See page 18.
° This is normal when cooking foods high in moisture.
° Excessive moisture was used when cleaning the window.
° This is normal for a new range and will disappear after a few uses. Initiating a clean cycle
will "burn off" the odors more quickly.
° Turning on a ventilation fan will help remove the smoke and/or odor.
° Excessivefood soils on the oven bottom. Use a self-clean cycle.
• BAKE or LOCK may flash rapidly in the display to alert you if there is an error or a problem.
If BAKE or LOCK appear in the display, press CANCEL pad. If BAKE or LOCK continue to
flash, disconnect power to the appliance. Wait a few minutes, and then reconnect power.
Ifthe flashing still continues, disconnect power to the appliance and call an authorized servicer.
• Ifthe oven is heavily soiled, excessive fiareups may result in a fault code during cleaning. Press
the CANCEL pad and allow the oven to cool completely, wipe out excess soil, then reset the
clean cycle. If the fault code reappears, contact an authorized servicer.
° The oven makes several low level noises. You may hear the oven relays as they go on and off.
This is normal.
• As the oven heats and cools, you may hear sounds of metal parts expanding and contracting.
This is normal and will not damage your appliance.
There are no beeps and ° Oven may be in Sabbath Mode. See page 13.
no display.
"SAb" flashing and then
displayed continuously.
• Oven is in Sabbath Mode. To cancel, press and hold the Clock pad for five
seconds.
22
Warranty
CUSTOMER'SSOLE AND EXCLUSIVE
REMEDY UNDER THIS LIMITED
WARRANTY SHALL BE PRODUCT REPAIR
AS PROVIDEDHEREIN. IMPLIED
WARRANTIES, INCLUDING WARRANTIES
OF MERCHANTABILITY OR FITNESSFOR A
PARTICULAR PURPOSE,ARE LIMITED TO
ONE YEAR OR THE SHORTESTPERIOD
ALLOWED BY LAW. MAYTAG
CORPORATIONSHALL NOT BE LIABLE
FOR INCIDENTAL OR CONSEQUENTIAL
DAMAGES. SOME STATESAND
PROVINCESDO NOT ALLOW THE
EXCLUSION OR LIMITATION OF
INCIDENTAL OR CONSEQUENTIAL
DAMAGES, OR LIMITATIONS ON THE
DURATION OF IMPLIED WARRANTIES OF
MERCHANTABILITY OR FITNESS,SO
THESEEXCLUSIONSOR LIMITATIONS
MAY NOT APPLY TO YOU. THIS
WARRANTY GIVESYOU SPECIFICLEGAL
RIGHTSAND YOU MAY ALSO HAVE
OTHER RIGHTS,WHICH VARY STATETO
STATEOR PROVINCETO PROVINCE.
What is Not Covered By These Warranties
1. Conditions and damages resulting from any of the following:
a. Improper installation, delivery, or maintenance.
b. Any repair, modification, alteration, or adjustment not authorized by the
manufacturer or an authorized servicer.
c. Misuse, abuse, accidents, or unreasonable use, or acts of God.
d. Incorrect electric current, voltage, electrical and/or gas supply.
e. Improper setting of any control.
2 Warranties are void if the original serial numbers have been removed, altered,
or cannot be readily determined.
3. Light bulbs, water filters and air filters.
4. Products purchased for commercial or industrial use.
5. The cost of service or service call to:
a. Correct installation errors. For products requiring ventilation, rigid metal
ducting must be used.
b. Instruct the user on the proper use of the product.
c. Transport the appliance to and from the servicer.
6. Any food loss due to refrigerator or freezer product failures.
7. Expenses for travel and transportation for product service in remote locations.
8. Outside of the United States and Canada this warranty does not apply.
Contact your dealer to determine if another warranty applies.
9. Consequential or incidental damages sustained by any person as a result of
any breach of these warranties. Some states do not allow the exclusion or
limitation of consequential or incidental damages, so the above exclusion may
not apply.
If You Need Service
First see the Troubleshooting section in your Use and Care Guide or call the
dealer from whom your appliance was purchased or call Maytag Services, LLC,
Customer Assistance at 1-800-688-9900 USA and 1-800-688-2002 Canada to
locate an authorized servicer.
• Be sure to retain proof of purchase to verify warranty status. Refer to
WARRANTY for further information on owner's responsibilities for warranty
service.
° If the dealer or service company cannot resolve the problem, write to Maytag
Services, LLC, Attn: CAIR_ Center, P.O. Box 2370, Cleveland, TN 37320-2370, or
call 1=800-688-9900 USA and 1=800=688-2002 Canada. U.S.customers
using TrY for deaf, hearing impaired or speech impaired, call 1-800-688-2080.
• User's guides, service manuals and parts information are available from Maytag
Services, LLC, Customer Assistance.
Notes= =When writing or calling about a service problem, please include:
a. Your name, address and telephone number;
b. Model number and serial number;
c. Name and address of your dealer or servicer;
d. A clear description of the problem you are having;
e. Proof of purchase (sales receipt].
23
Cuisi.i_re _|eclLrique -
dessus |isse
.............29=31
CUlSSOn
Jr ................ 32=40
Nettoyage ...................................41 =44
Four autonettoyant
M6thodes de nettoyage
Entretien ......................................45=46
Hublot du four
Lampe du four
Recherche des pannes ............ 47=48
Garantie et service apr_s=vente ... 49
Gaia del Usuario ...............................50
Pour une utiiisation adequate et en s_curit_, il faut que
I'appareil soit convenablement installe par un technicien
qualifie, et relic _ la terre. Ne pas regler, reparer ni remplacer
un composant, _ moins que cela ne soit specifiquement
recommande darts ce guide. Toute autre reparation doit ¢tre
effectuee par un technicien qualifie.
Toujours debrancher I'appareil avant d'y faire de I'entretien.
instructionsde
s
impomntes
Les instructions de secufite importantes et les paragraphes
_{avertissement _>de ce guide ne sont pas destines _ couvfir
toutes les conditions et situations qui pourraient se presenter.
II faut faire preuve de bon sens, de prudence et de soin lots de
I'installation, de I'entretien ou du fonctionnement de I'appareil.
Toujours prendre contact avec le fabricant darts le cas de
problemes ou de conditions qui ne seraient pas comprises.
Reconnaitre los etiquettes, paragraphes et
symboles sur la s6curite
Life routes les instructions avant d'utiliser cot appareil;
observer toutes losinstructionspour eliminer les risques
d'incendie, choc electrique, dommages materiels et corporels
que pourrait susciter une utilisation incorrecte de I'appareil.
Utiliser I'appareil uniquement pour los fonctions prevues,
decrites darts ce guide.
25
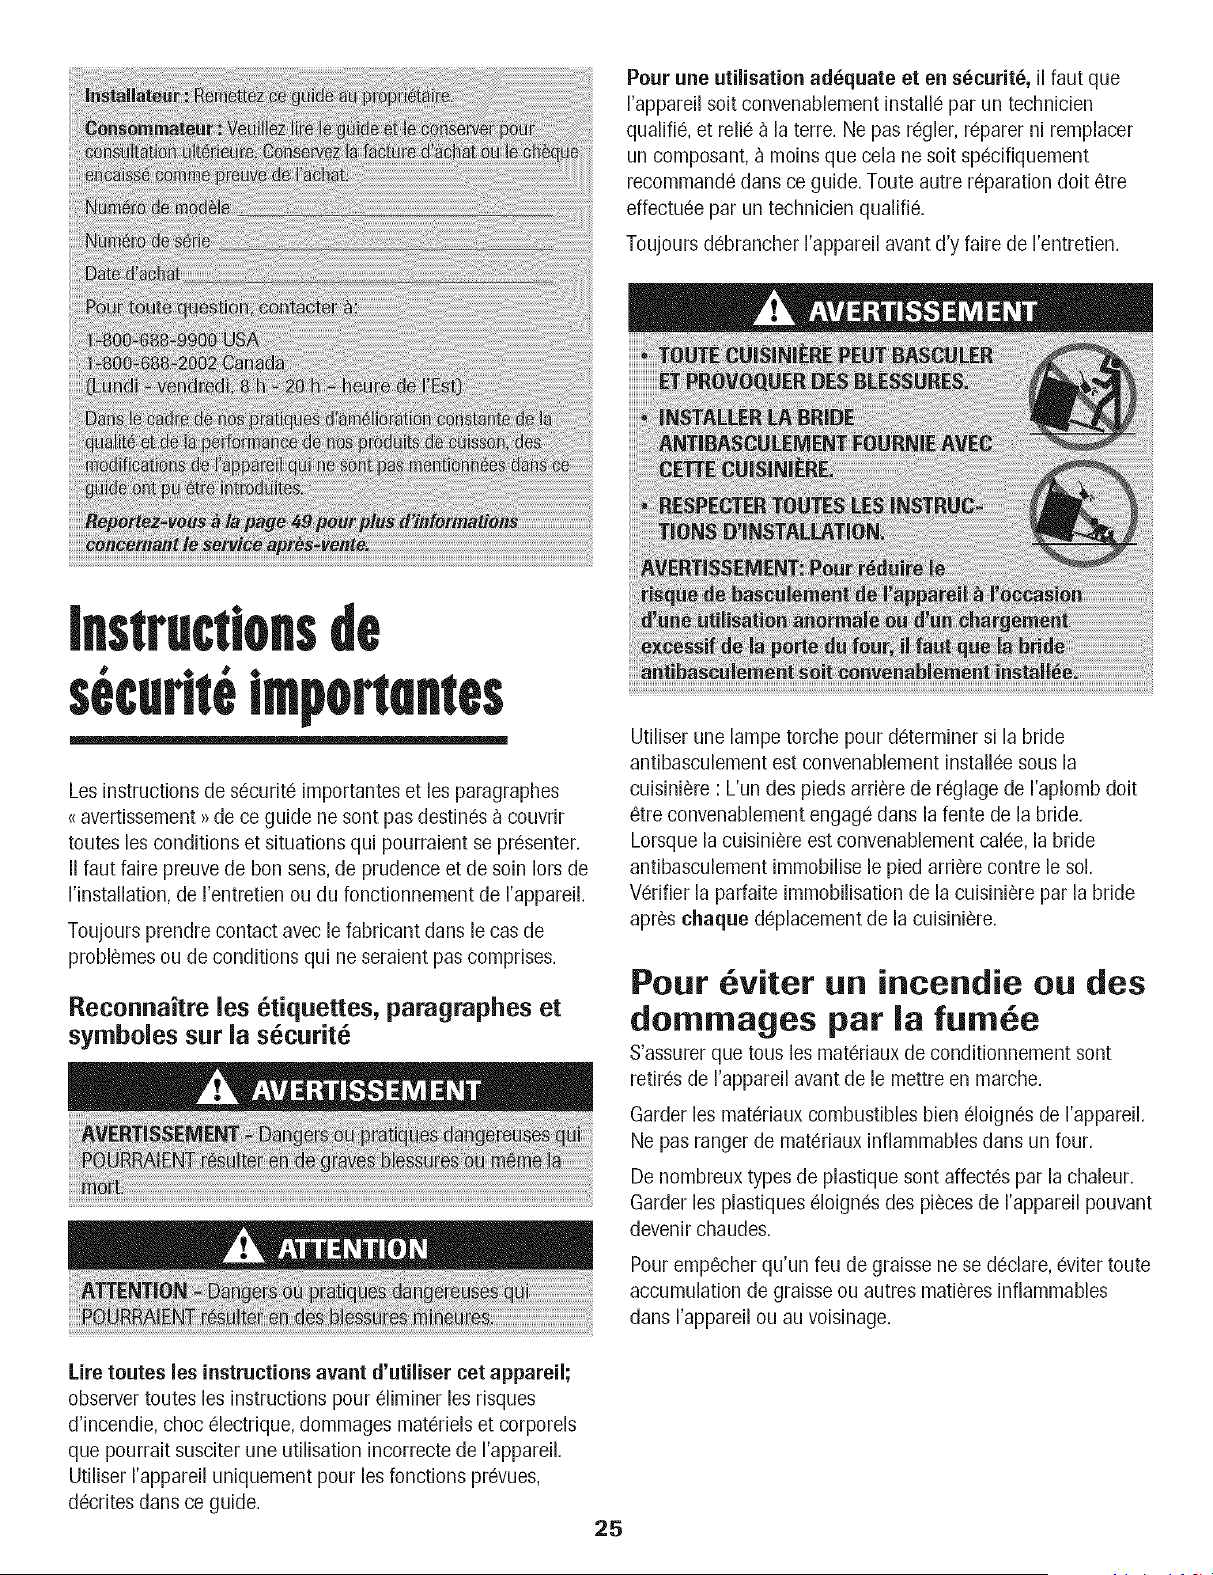
Utiliser une lampe torche pour determiner si la bride
antibasculement est convenablement installee sous la
cuisiniere : L'un des pieds arfiere de reglage de I'aplomb doit
¢tre convenaHement engage dans la fente de la bride.
Lorsque la cuisiniere est convenablement calee, la bride
antibasculement immoNise le pied arriere contre le sol.
Verifier la parfaite immoNisation de la cuisiniere par la bride
apres chaque deplacement de la cuisiniere.
Pour viter un incendie ou des
dommages par la fum e
S'assurer que tous los materiaux de conditionnement sont
retires de I'appareil avant de le mettre en marche.
Garder los materiaux combustibles bien eloignes de I'appareil.
Ne pas ranger de materiaux inflammables darts un four.
De nombreux types de plastique sont affectes par la chaleur.
Garder les piastiques eioignes des pieces de I'appareil pouvant
devenir chaudes.
Pour empecher qu'un feu de graisse ne se declare, eviter toute
accumulation de graisse ou autres matieres inflammables
darts I'appareil ou au voisinage.
securlleimponenles
En cas d'incendie
Utiliser du bicarbonate de soude ou un extinoteur _ poudre
ohimique ou _ mousse pour 6touffer les flammes. Ne jamais
utiliser d'eau pour 6teindre de la graisse enflamm6e.
1. Interrompre I'alimentation 61ectrique de I'appareil pour
minimiser la propagation des flammes.
2. NEEJAMAIS saisir ou d6placer un ustensile de cuisine
enflamm6.
3. Fermer [a porte du four pour 6touffer [es flammes du four.
S curit6 pour les enfants
NE JAIVlAIS laisser des enfants seuls ou sans supervision
Iorsque I'appareil est en service ou encore ohaud. Ne jamais
laisser un enfant s'asseoir ou se tenir sur une pattie
queloonque de I'appareil. II pourrait se blesser ou se brQler.
II est important d'enseigner aux enfants que I'appareil et les
ustensiles plao6s dedans peuvent 6tre ehauds. Laisser refroidir
les ustensiles en un lieu sQr, hers d'atteinte des enfants. II est
important d'enseigner aux enfants qu'un appareil m6nager
n'est pas un jouet, et qu'ils ne doivent toucher aucune
oommande ou autre oomposant de I'appareil.
Familiar[sat[on avec I'appareil
Ne pas utiliser oet appareil pour ohauffer ou pour garder
ohaude une piece, sinon des dommages _ I'appareil pourraient
s'ensuivre et oeia pourrait _,tredangereux pour I'utilisateur.
Aussi, ne pas utiliser le four pour ranger des aliments ou des
ustensiles de cuisine.
Ne pas bloquer ou obstruer 1'6ventdu four.
NE JAMAIS TOUCHERLES ELEMENTSCHAUFFANTS NI LES
PAROIS INTERIEURESDU FOUR. Les 616mentschauffants
peuvent _tre brQlants m6me s'ils ne sent plus rouges. Les
surfaces int6rieuresdu four peuvent atteindre une
temp6rature suffisamment 61ev6epour infliger des brQlures.
Pendant et apr_s usage, ne pas toucher les 616ments
chauffants ni les patois int6rieures du four et 6viter leur
contact avec des v_,tements ou autres mat6riaux inflammables
avant qu'ils n'aient eu le temps de refroidir suffisamment.
D'autres surfaces peuvent 6galement atteindre une
temp6rature suffisamment 61ev6epour brQler :le ouverture
d'6vent, le surface avoisinante, ainsi que le porte et le hublot
de four.
Ne pas toucher I'ampoule du four brQlante aveo un chiffon
humide car eile pourrait se briser. Si tel est le oas,d6brancher
I'appareil avant de retirer I'ampoule pour 6viter une d6oharge
6ieotrique.
NIEJ/_NIAI$ garnir la sole du four ou une grille du four aveo
de la feuille d'aluminium. Ceoi pourrait susciter un risque de
d6eharge 6[eotrique ou d'inoendie, ou une d6t6rioration de
I'appareil. Utiliser de la feuille d'aluminium uniquement seion
[es instructionsde oe guide.
Cuisson et s curit
NE JAIVlAIS faire chauffer un r6cipient non ouvert dans le
four. L'accumulation de press[on dans le r6eipient pourrait
provoquer son 6clatement et de graves dommages mat6rieis
ou corporels.
Utiliser des maniques robustes et s_ches. Des maniques
humides peuvent provoquer la formation de vapeur brQlante.
Ne jamais utiliser un torchon _ vaisselle ou autre article textile
la place de maniques; un tel article pourrait trai'ner sur un
6[6ment et s'enflammer, ou accrocher un ustensile ou un
composant de I'appareil.
Porter un v6tement appropri6. Eviter de porter des v6tements
amples ou _ Iongues manches pendant I'utilisation de
I'appareil. IIs peuvent prendre feu si le v_tement entre en
contact avec un 6i6ment de cuisson brQlant.
26
instructionsdesecudteimponentes
Placer toujours les grilles _ la position appropfie,e darts le four
Iorsque le four est froid. Faire couHsser la grille vers Fexte,rieur
avant d'ajouter ou enlever un plat; utiHser pour cela une
manique robuste et se,che.Eviter d'introduire la main dans le
four pour y placer ou retirer un plat. S'ii est ne,cessairede
de,placer une grille Iorsqu'eiie est chaude, utiiiser une manique
se,che.Ne pas toucher un e,le,mentchaud avec une manique.
N'utiliser les grilles que dans le four dans lequel eiies ont e,te,
achete,es/expe,die,es.
Ouvrir toujours la porte du four tre,s prudemment. Laisser Fair
chaud ou la vapeur s'e,chapper avant de retirer ou d'introduire
un plat.
AVERTISSEMENT - METS PREPARI'ES: Respecter les
instructions du fabficant. Si [e contenant ou le couvercle en
piastique d'un mets surgeie,se de,forme ou est endommage,
durant la cuisson, jeter imme,diatement le re,cipient et son
contenu. Les aliments pourraient e,trecontamine,s.
Ne pas permettre le contact de papier d'aiuminium ou de la
sonde _ viande avec les e,ie,mentschauffants.
Toujourse,teindretoutes lescommandesune lois la cuisson
termine,e.
Ustensiles et s6carit
Appiiquer les instructionsdu fabricant Iors de I'emp[oid'un
sachet pour cuisson au four.
La se,curite,de fonctionnement de cet appareil a e,te,teste,e
I'aide d'ustensiies de cuisine traditionneis. Ne pas utiiiser un
ustensiie ou accessoire qui n'est pas spe,cifiquement
recommande, dans ce guide. Ne pas utiiiser un gril place,sur la
table ou de syste,mede convection additionnei. L'utiiisation
d'un dispositif ou accessoire qui n'est pas expresse,ment
recommande, dans ce guide peut de,grader la se,curite,de
I'appareil ou sa performance, ou re,duire la Ionge,vite,des
composants.
Veiiier _ utiiiser un ustensiie de taiiie suffisante pour que le
contenu ne risque pas de de,border. Ceci est particuiie,rement
important pour un ustensiie rempii d'huiie de friture. Ve,rifier
que la taiiie de I'ustensiie est suffisante pour qu'il puisse
recevoir les produits aiimentaires _ cuire, et absorber
I'augmentation de volume suscite,e par I'e,buiiition de la
graisse.
Veiiier _ ne jamais laisser le contenu liquide d'un ustensiie
s'e,vaporercompie,tement; I'ustensiie et I'appareil pourraient
subir des dommages.
Si un ustensiie est plus petit que I'e,le,mentutiiise,,une partie
de I'e,le,mentchauffant est expose,eet peut provoquer
Finflammation d'un ve,tement ou des maniques.
Seuls certains mate,riauxen verre, vitroce,ramique, ce,ramique,
gre,s,ou certains ustensiles vitrifie,s/e,maille,speuvent e,tre
utilise,ssur la table de cuisson ou dans le four sans risque de
bris sous I'effet du choc thermique. Observer les instructions
du fabricant Iors de I'utilisation d'un ustensile en verre.
Or[enter la poigne,ede chaque ustensiie vers [e centre de [a
table de cuisson et non vers I'exte,rieur ou vers un autre
e,le,ment;ced re,duira le risque de brQiure, inflammation de
matie,re inflammable ou renversement (un jeune enfant
pourrait saisir et renverser un ustensiie dont le manche est
ofiente, vers I'exte,fieuO.
Table de caisson
NE JAMAiS hisser un e,le,mentde surface aliume, sans
surveillance, particulie,rement avec chauffage e,leve,.Le
de,bordement du contenu de I'ustensiie pourrait provoquer la
ge,ne,rationde fume,e abondante et I'inflammation de la
graisse.
Cet appareil comporte des e,ie,mentschauffants de diffe,rentes
taiiies. Utiiiser toujours un ustensiie _ fond plat, de taiiie
suffisante pour qu'il puisse recouvrir compie,tement ['e,le,ment.
Pour opt[miser I'efficacite,, choisir un ustensiie de me.metaiiie
que I'e,le,ment.
SURFACE EN VITROCERAMIQUE : NE JAIVlAIS utiiiser une
table de caisson casse,eou fe,le,e:les solutions de nettoyage et
renversements pourraient pe,ne,trerdans la table de cuisson en
entrainant un risque de de,charge e,lectrique. Prendre
imme,diatement contact avec un technicien qualifie,.
Friteases
Exercer une prudence extre,meIorsdu de,placement du
re,cipient de graisse ou Iors de I'e,limination de graisse chaude.
Laisser la graisse refroidir avant de de,placer I'ustensile.
Hottes d'extraction
Nettoyer fre,quemment lesfiltres et la hotte de la cuisinie,re
pour empe,cher la graisse ou d'autres produits inflammables
de s'accumuler sur les filtres ou la hotte en provoquant des
feux de graisse.
Pour flamber des aliments sous la hotte, mettre le ventilateur
en marche.
27
securJteimponentes
Nettoyage et s curit
Nettoyer prudemment la table de cuisson. ArrOter toutes les
commandes et attendre le refroidissement de tous les
composants avant de les toucher ou d'entreprendre le
nettoyage. Nettoyer I'appareil avec precaution. Travailler
prudemment pour eviter des brQlures par la vapeur en cas
d'utilisation d'un chiffon ou d'une @onge humide Iors de
I'elimination d'un produit renverse sur une surface chaude.
Certains produits de nettoyage peuvent generer des vapeurs
nocives Iorsqu'on les applique sur une surface chaude.
Nettoyer uniquement les pieces mentionnees dans ce guide.
Four autonettoyant
Ne pas nettoyer le joint de porte; le joint joue un role essentiel
quant _ I'etancheite. Ne pas frotter, endommager ou deplacer
lejoint.
Ne pas utiliser de produits de nettoyage pour four ou enduits
de four, dans le four autonettoyant ou sur les zones voisines.
II est normal que la surface de cuisson devienne chaude
durant une operation d'autonettoyage; par consequent, eviter
de toucher la surface de cuisson durant I'autonettoyage.
Avertissement et avis
important pour la s curit
La Ioi californienne _ Safe Drinking Water and Toxic Enforce-
ment Act _>de 1986 (proposition 65)stipule la publication par
le gouverneur de la Californie d'une liste de substances que
I'etat de Californie considere comme cancerigenes ou
dangereuses pour le systeme reproducteur, et impose aux
entreprises commerciales I'obligation de signaler _ burs
clients les risques d'exposition _ de telles substances.
Nous informons les utilisateurs de cet appareil que Iors d'une
operation d'autonettoyage, ils peuvent etre exposes _ une
faible concentration de certaines substances figurant dans la
liste mentionnee ci-dessus, dont le monoxyde de carbone.
Pour minimiser I'exposition, veiller _ ce que la piece ouse
trouve le four soit convenablement aeree durant une operation
d'autonettoyage par I'ouverture d'une fenetre ou d'une porte.
AVIS IMPORTANT - OISEAUX FAMILIERS : Les oiseaux ont
un systeme respiratoire tres sensible. Ne pas garder un oiseau
familier darts la cuisine ou dans une piece ou il pourrait etre
expose aux fumees. Les fumees emises durant une operation
d'autonettoyage peuvent etre dangereuses ou mortelles pour
un oiseau, de meme que les fumees emises lots du chauffage
excessif de graisse, huile, margarine, et du chauffage excessif
darts un ustensile _ revetement antiadhesif.
Conserver ces instructions pour consultation ult6rieure
28
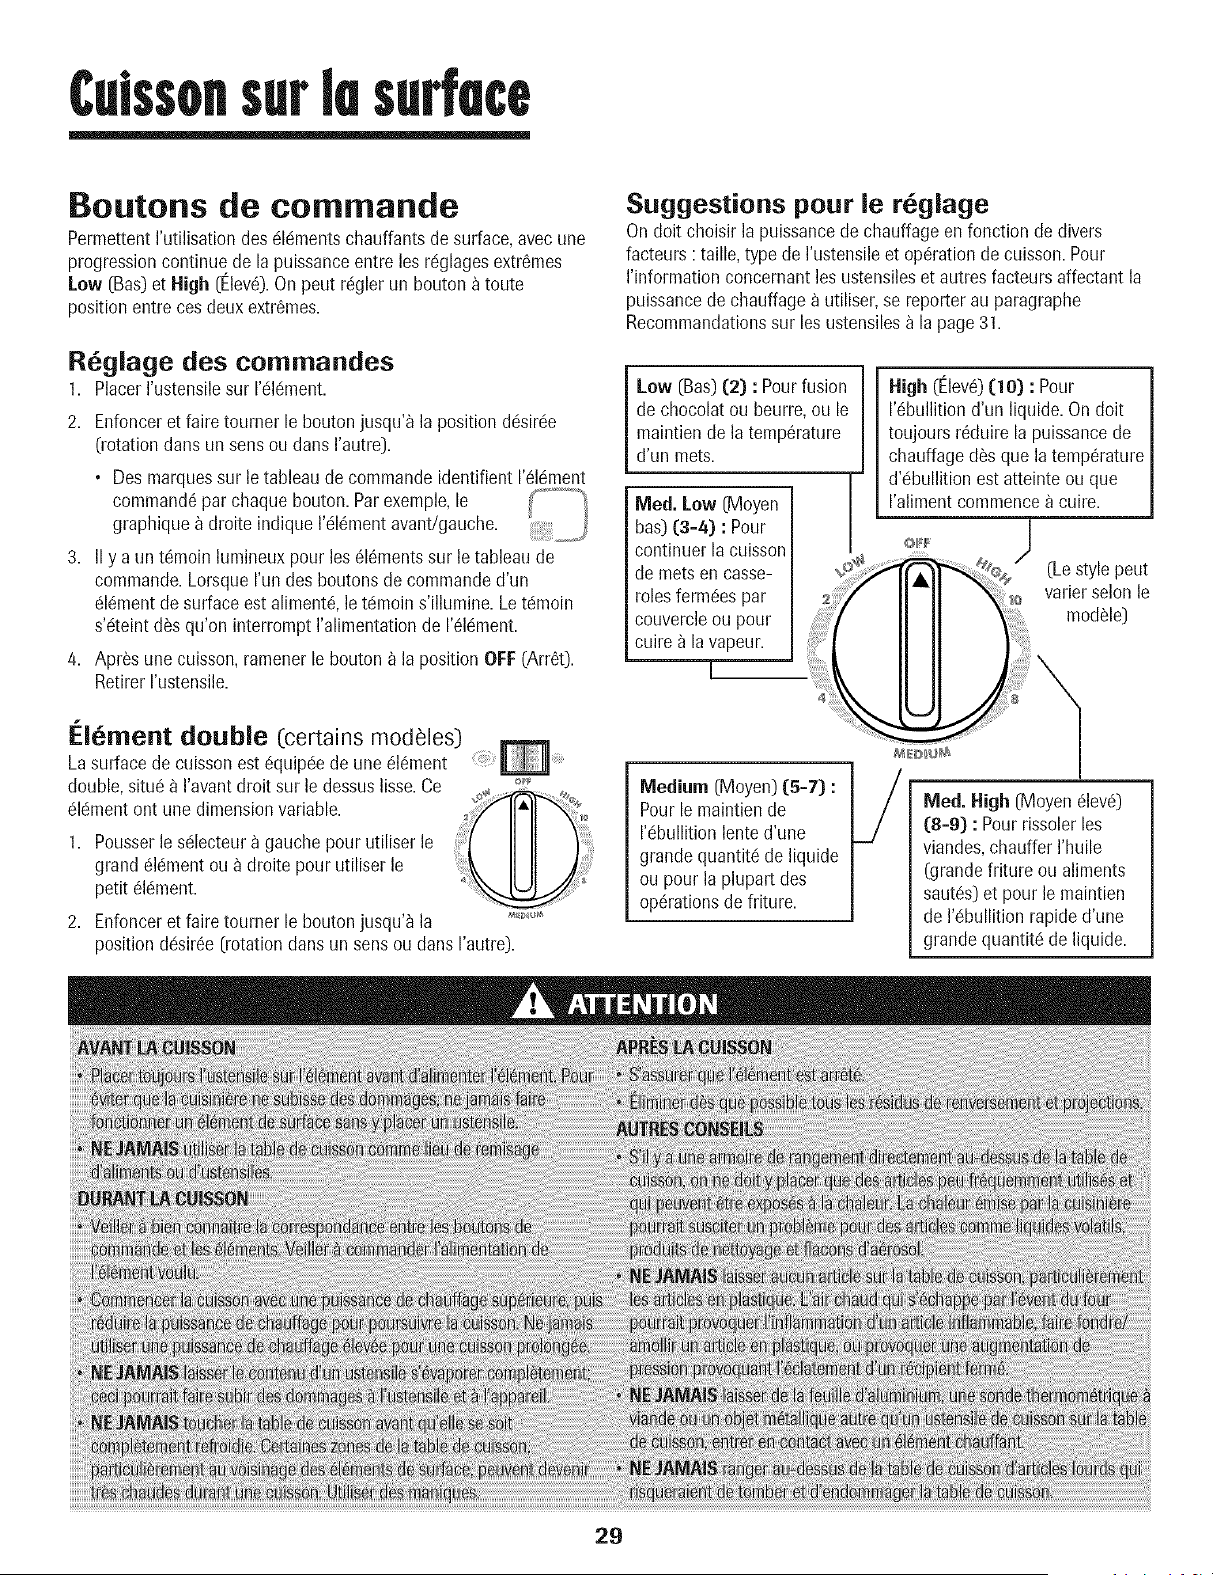
Culssonsurlesurfece
Boutons de cornmande
PermettentI'utilisationdes dldmentschauffants de surface,avecune
progressioncontinue de la puissanceentre les rdglagesextr6mes
Low [Bas)et High [Elev6).On peut rdgler un boutona toute
positionentre ces deux extr6mes.
R6glage des commandes
1. PlacerI'ustensilesur I'c!ldment.
2. Enfonceret faire tourner le boutonjusqu'_ la position ddsirde
[rotation dansun sonsou dans I'autre].
• Des marquessur letableau de commandoidentifient 1'61dment
command6par chaque bouton. Parexemple,le
graphique_ droite indique I'dl6mentavant!gauche.
3. II y a un t6moin hmineux pour los616mentssur le tableaude
commande.LorsqueI'undes boutons de commanded'un
dl6mentdesurface estaliment6,le t6moin s'illumine.Letdmoin
s'dteintd_s qu'on interrompt I'alimentationde 1'61dment.
4. Apr_s unecuisson, ramenerle bouton_ la position OFF(Arr6t).
RetirerI'ustensile.
t':16ment double I:certains modeles)
Lasurface de cuissonest 6quipde de une 616ment
double, situ6 _ I'avantdroit sur le dessuslisse.Ce
dldmentont une dimensionvariable.
1. Pousserlesdlecteura gauche pourutiliser le
grand dldmentou _ droite pourutiliser le
petit 6ldment.
2. Enfonceret faire tourner le boutonjusqu'_ la
positiond6sir6e [rotation dansun sonsou dans I'autre).
Suggestions pour ie r6glage
Ondolt choisirla puissancede chauffage en fonction de divers
facteurs: taille, typede I'ustensileet op@ationdecuisson.Pour
I'informationconcernantles ustensileset autresfacteursaffectant la
puissancede chauffagea utiliser,se reporterau paragraphe
Recommandationssur lesustensilesa la page 31.
Low (Bas)(2) : Pourfusion
de chocolatou beurre,ou le
maintiende la temperature
d'un mets.
ivied. Low [Moyen
has) (3=zo : Pour
continuerla cuisson
de metsen casse-
rolesferm6espar
couvercleou pour
cuire a la vapeur.
[
Miedium (Moyen)(5=7) :
Pourle maintiende
I'dbullition lentod'une
grandequantitd de liquide
ou pourla phpart des
op@ationsdefriture.
High [Elev_)(10) : Pour
1'6bullitiond'un Iiquide.Ondolt
toujoursr6duire la puissancede
chauffaged_s que latemp6rature
d'dbullition est atteinte ou que
I'alimentcommencea cuire.
ivied.High (Moyendlevd)
(8=9) : Pourrissolerlos
viandes,chauffer I'huile
(grandefriture ou aliments
sautSs)et pour le maintien
de I'dbullition rapided'une
grandequantitd de liquide.
29
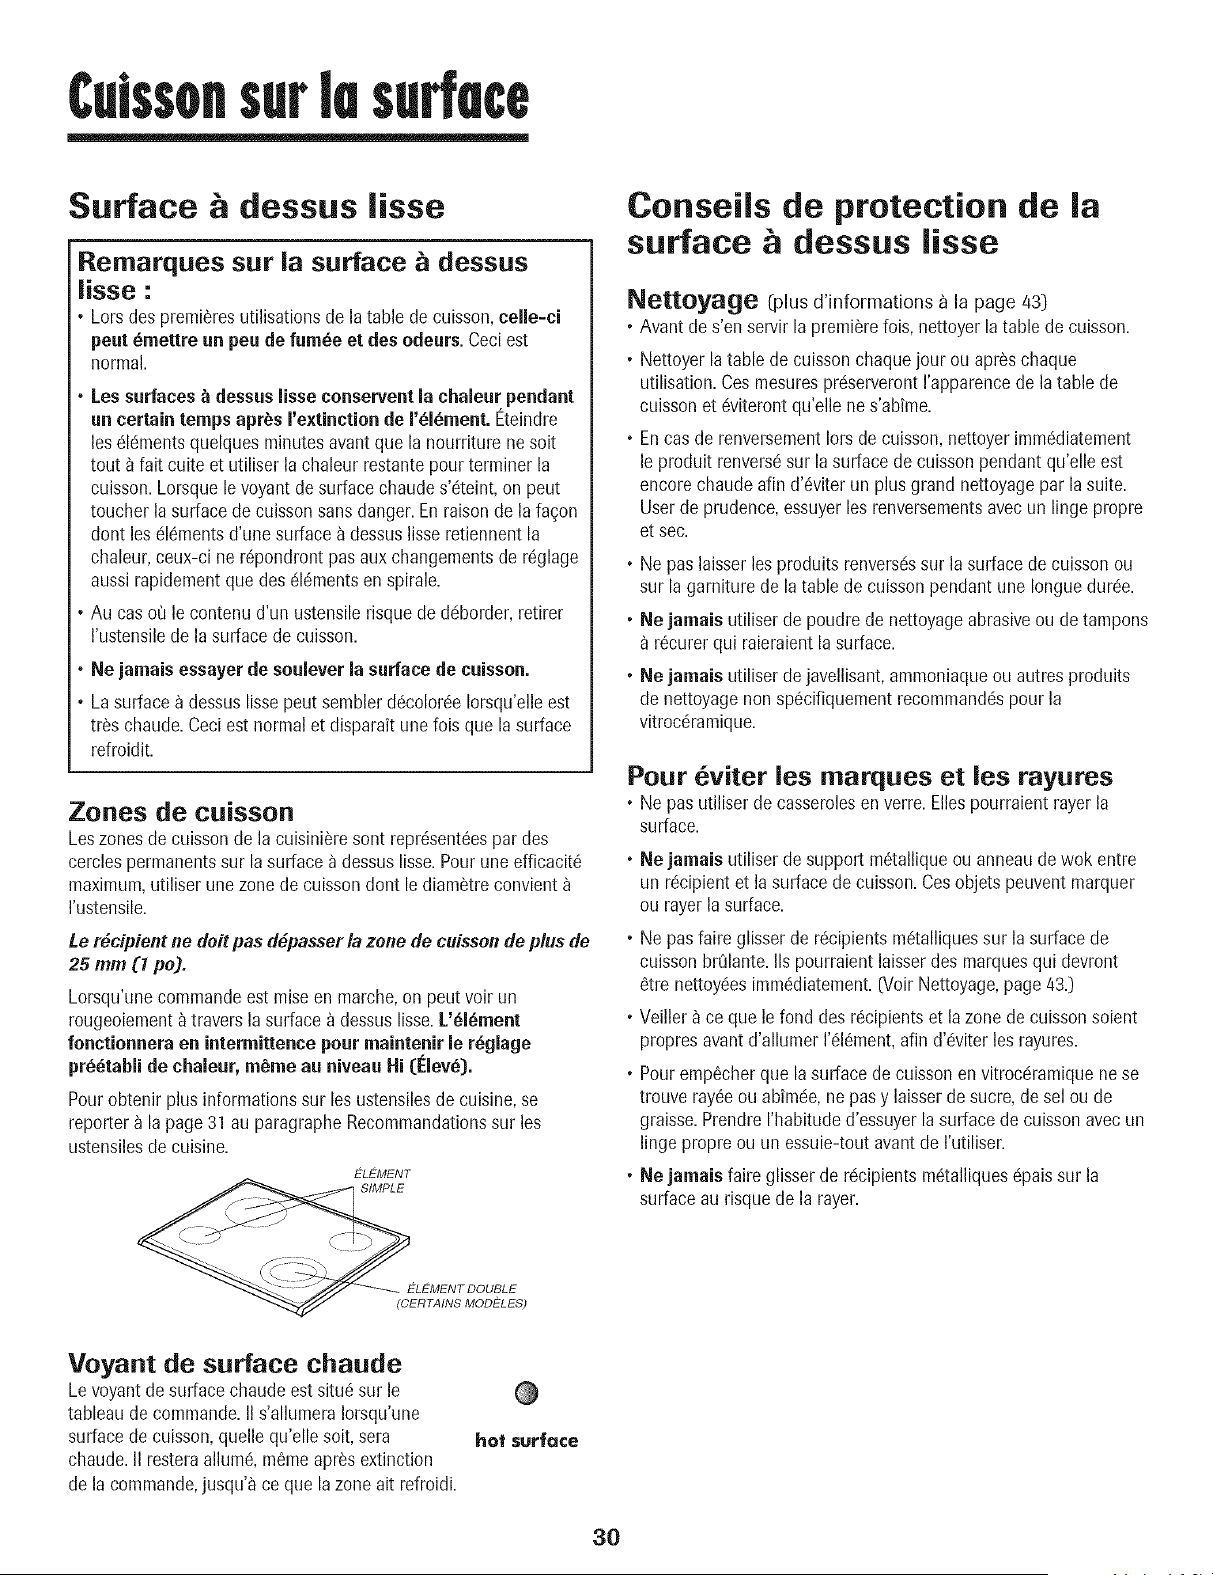
Culssonsurlesuffece
Surface & dessus lisse
Remarques sur la surface b dessus
lisse :
• Lorsdes premieresutilisationsde la table de cuisson,celle-ci
peut broettre un peu de furobe et des odeurs. Ceciest
normal.
• Les surfaces _ dessuslisse conservent la chaleur pendant
un certain temps aprbs rextinction de I'_l_roent.Eteindre
los dldmentsquelquesminutesavant que la nourriture ne soit
tout ) fait cuiteet utiliser lachaleur restantepour terminer la
cuisson.Lorsque le voyantde surfacechaudes'dteint, on pout
toucher lasurface de cuissonsans danger.En raisonde lafacon
dont los c!16mentsd'unesurface ) dessuslisseretiennentla
chaleur,ceux-ci ne r6pondrontpas auxchangementsde r6glage
aussirapidementque des dl6mentsen spirale.
• Au cas oQle contenu d'un ustensilerisquede ddborder,retirer
I'ustensilede lasurface de cuisson.
• Ne jaroais essayer de souiever la surface de cuisson.
• La surface a dessus lisse peut sembler d6color6e Iorsqu'elle est
tr_s chaude. Ceci est normal et disparaft une fois que la surface
refroidit.
Zones de cuisson
Leszones de cuissonde lacuisini_resont repr_sent6espardes
cerclespermanentssur lasurface a dessuslisse.Pouruneefficacit6
maximum,utiliser une zonede cuissondont le diam_treconvient
I'ustensile.
Le r_dpient ne dolt pas d_pa._er la zone de cuisson de plus de
25 mm (1 po).
Lorsqu'unecommandoest miseen marche,on peut voir un
rougeoiement_ travers la surface a dessuslisse.L'dldroent
fonctionnera en intermittence pour roaintenir le r_glage
pr_tabli de chaieur, to,roe au niveau Hi (Eiev_).
Pourobtenir plus informationssur los ustensilesdecuisine,se
reporter a la page 31 au paragrapheRecommandationssur los
ustensilesdecuisine.
L:LEMENT
SIMPLE
Conseils de protection de la
surface & dessus lisse
Nettoya_e (plus d'informations _ la page 43)
• Avant de s'en servir la premiere lois, nettoyer la table de cuisson.
• Nettoyer la table de cuisson chaque jour ou apr_s chaque
utilisation. Ces mesures prdserveront I'apparence de la table de
cuisson et 6viteront qu'elle ne s'abfme.
• En cas de renversement lots de cuisson, nettoyer immddiatement
le produit renvers6 sur la surface de cuisson pendant qu'elle est
encore chaude afin d'dviter un plus grand nettoyage par la suite.
User de prudence, essuyer les renversements avec un linge propre
et sec.
• Ne pas laisser les produits renversds sur la surface de cuisson ou
sur la garniture de la table de cuisson pendant une Iongue durde.
• Ne jaroais utiliser de poudre de nettoyage abrasive ou de tampons
r6curer qui raieraient la surface.
• Ne jaroais utiliser de javellisant, ammoniaque ou autres produits
de nettoyage non sp_cifiquement recommand6s pour la
vitroc6ramique.
Pour viter los marques et los rayures
• Ne pas utiliserde casserolesenverre.Ellespourraientrayer la
surface.
• Ne jaroais utiliserde supportm6talliqueou anneaude wok entre
un r6cipientet lasurface de cuisson.Cosobjetspeuventmarquer
ou rayerla surface.
• Ne pas faire glisser de r6cipientsmdtalliquessur lasurfacede
cuisson brQlante.IIspourraient laisserdes marquesqui devront
6tre nettoydesimmddiatement.[Voir Nettoyage,page 43.)
• Veiller _ ceque le fond des r6cipientset lazone decuissonsoient
propresavant d'allumerI'dl_ment,afin d'dviter los rayures.
• Pouremp_cherque lasurface decuissonen vitroc_!ramiquenese
trouve ray_eou abimde,ne pas y laisserdesucre, desol ou de
graisse.Prendrerhabitude d'essuyerlasurfacede cuissonavecun
lingopropre ou un essuie-toutavantde I'utiliser.
• Ne jaroaisfaire glisserde rdcipients m_talliquesdpaissur la
surface au risquede la rayer.
f_:LEMENT DOUBLE
(DERTAINS MODELES)
Voyant de surface chaude
Levoyantde surfacechaude estsitu_ sur le
tableau de commande.II s'allumeraIorsqu'une
surfacede cuisson,quelle qu'elle soit, sera
chaude.II resteraallured,m_meapr_s extinction
de la commando,jusqu'_ ce que lazone ait refroidi.
hot surface
3O
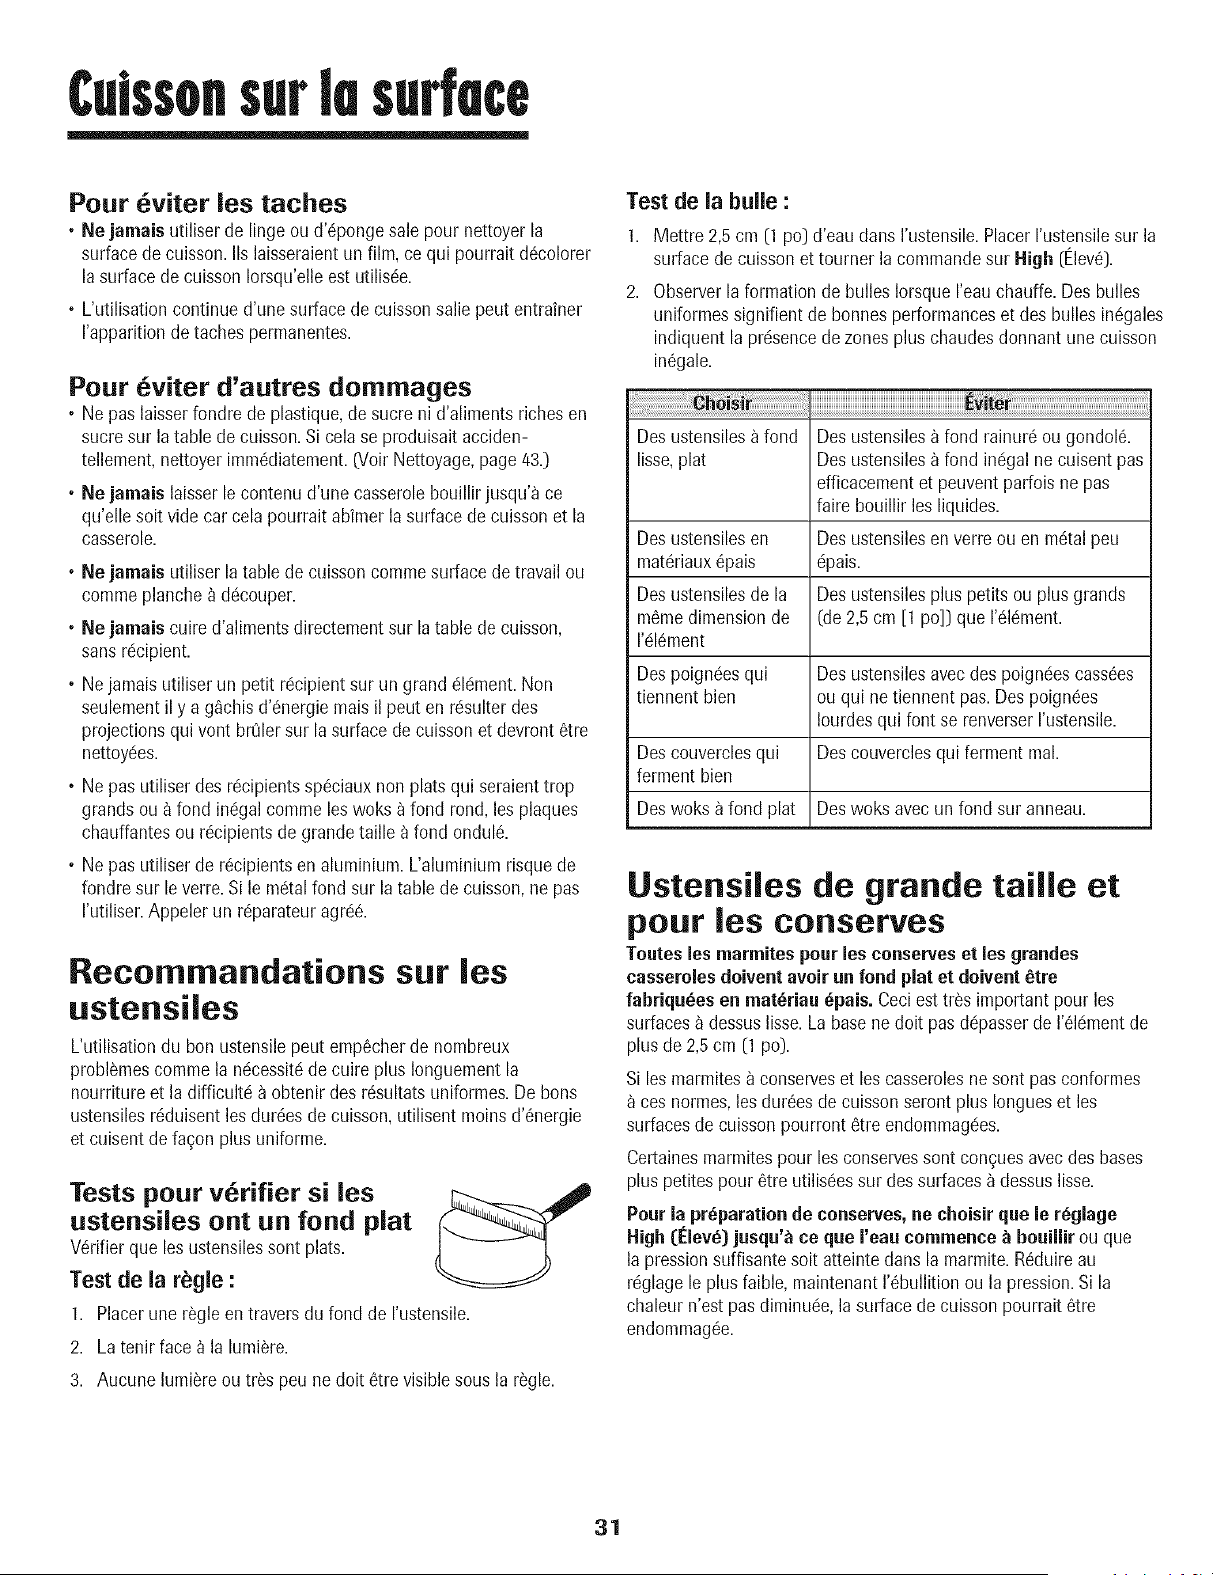
Culssonsatlesurfece
Pour 6viter los taches
• Ne jamais utiliser de lingo oud'6ponge sale pour nettoyerIn
surface de cuisson. IIs laisseraientun film, ce qui pourrait d_colorer
lasurface de cuissonIorsqu'elleestutilis6e.
L'utilisationcontinue d'une surface de cuissonsaliepout entrainer
I'apparitionde tachespermanentes.
Pour 6viter d'autres dommages
• Ne pas laisserfondre de plastique,de sucre ni d'alimentsriches en
sucresur latable de cuisson.Si cola se produisait acciden-
tellement,nettoyerimm6diatement.(Voir Nettoyage,page43.)
• Ne jamais laisserle contenud'une casserolebouillir jusqu'a ce
qu'ellesoit vide car colapourrait abimer la surfacede cuissonet la
casserole.
Ne jamais utiliser la table de cuissoncommesurfacede travailou
commeplanche_ dc!couper.
• Ne jamais cuire d'alimentsdirectement sur la table de cuisson,
sans rc!cipient.
• Nejamais utiliserun petit r6cipientsur un grand c!k!ment.Non
seulementil y a g_ichisd'6nergie mais il pout en rc!sulterdes
projectionsqui vont broilersur la surface de cuisson et devront6tre
nettoyc!es.
• Ne pas utiliserdes r_cipientssp6ciauxnon platsqui seraienttrop
grandsou _ fond inc!galcommelos woks a fond rond,los plaques
chauffantesou r6cipientsde grandetaille afond ondul&
Ne pas utiliser de r6cipientsen aluminium.L'aluminium risquede
fondre sur le verre.Sile mc!talfond sur la table de cuisson,ne pas
I'utiliser.Appelerun r@arateur agrc!&
Recommandations sur los
ustensiles
L'utilisationdu bon ustensilepout emp6cherde nombreux
probl_mescommela nc!cessit_de cuire plus Ionguementla
nourriture et la difficultc! a obtenir desr6sultatsuniformes.De bons
ustensilesr6duisentlos dur6esde cuisson,utilisent moinsd'6nergie
et cuisent de fa_on plus uniforme.
Tests pour v_rifier si los
ustensiles ont un fond plat
V6rifierque les ustensilessont plats.
Test de la r_gle :
1. Placerune r%le en traversdu fond de I'ustensile.
2. La tenir face _ la lumi_re.
3. Aucune lumi_reou tr_s peu nedolt 6tre visiblesousla r_gle.
Test de la bulle :
1. Mettre 2,5cm (1 pc] d'eau clansI'ustensile.PlacerI'ustensilesur la
surface de cuisson et tourner la commandosur High (Elev_].
2. Observerla formationde bulles IorsqueI'eauchauffe.Des bulles
uniformessignifient de bonnes performanceset des hullos in6gales
indiquent la prc!sencede zonesplus chaudesdonnant unecuisson
in,gale.
Desustensilesafond Desustensiles_ fond rainur6 ou gondol&
lisse,plat Des ustensiles_ fond inc!galne cuisent pas
efficacementet peuventparfoisne pas
faire bouillir los liquides.
Desustensilesen Desustensilesenverre ou en m6talpeu
mat6riaux_pais c!pais.
Desustensilesde la Desustensilesplus petits ou plus grands
m6medimensionde (de 2,5cm [1 pc]] que I'c!k!ment.
I'c!l_ment
Despoignc!esqui Desustensilesavecdes poignc!escass6es
tiennentbien ou qui ne tiennent pas.Despoign6es
Iourdesqui font se renverserI'ustensile.
Descouverclesqui Des couverclesqui ferment real.
ferment bien
Deswoks a fond plat Des woks avec un fond sur anneau.
Ustensiles de grande taille et
pour los conserves
Touteslos marmites pourlosconserveset los grandes
casserolesdoivent avoir un fond plat et doivent _tre
fabriqu_es en mat_riau _pais. Ceciest tr_s important pour los
surfaces_ dessuslisse.Labasene dolt pasd_!passerde I'_l_!mentde
plus de 2,5cm (1pc].
Si losmarmites_ conserveset los casserolesne sont pas conformes
cosnormes,losdur_esde cuissonseront plus Iongueset los
surfacesde cuissonpourront _tre endommag_!es.
Certainesmarmitespour los conservessont con_uesavecdes bases
plus petites pour 8tre utilis_essur dessurfaces _ dessuslisse.
Pour la preparationde conserves,ne choisir que le r_glage
High [[:iev_} jusqu'_ ce que reau commence _ bouillir ou que
la pressionsuffisantesoit atteinte dans la marmite.R_duireau
r_!glagele plus faible,maintenantI'_bullition ou la pression.Si la
chaleur n'est pasdiminu_!e,lasurface de cuissonpourrait 6tre
endommag_e.
31
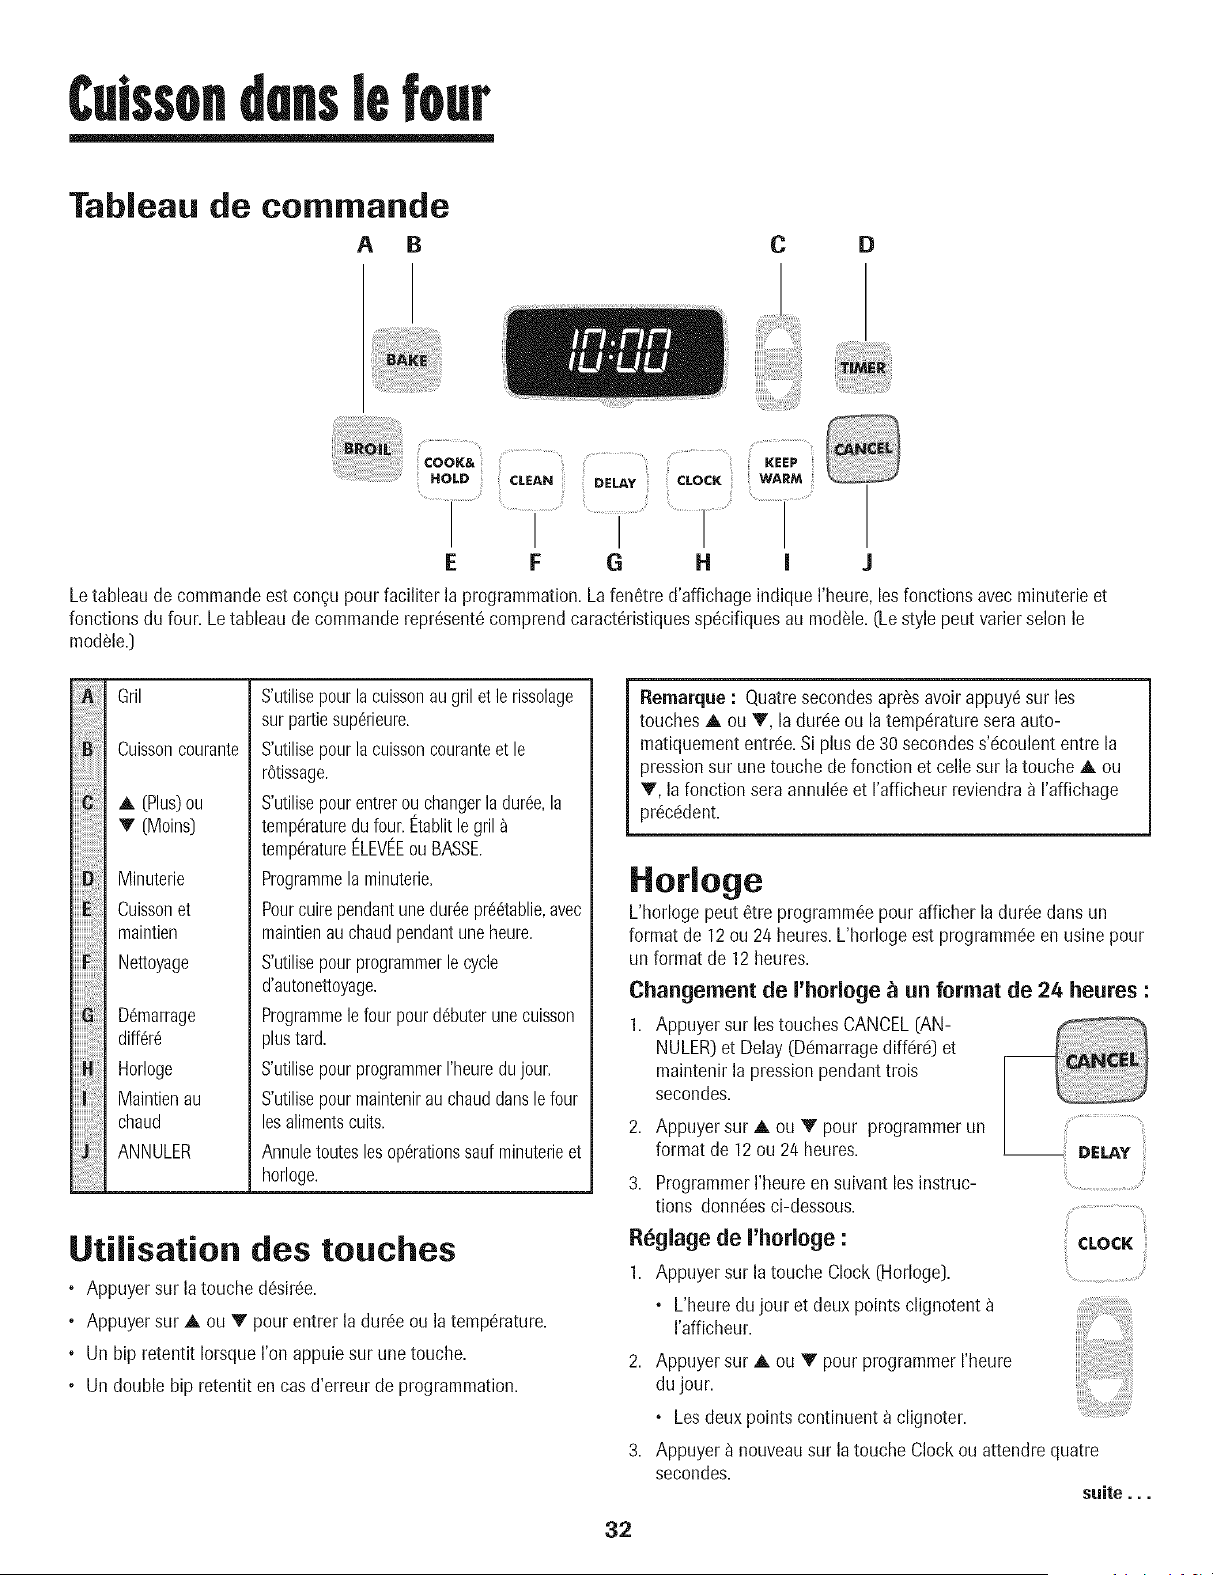
Culssondenslefour
Tableau de commande
A B C D
,i_;iiiii!ii!i!i!i!i!i!i!iiiiiiiiiiiiiiiiiiiiiiiiiiiiiiiiiiiiiiiiiiiiiii;;i_
........ .....
cooK& ;.... ....... .... ; Keep
.OLD o.,:A. D_LAY CLOCK wA..
E F G H I
Letableaude commandeestconcu pourfaciliter la programmation.Lafen_tre d'affichageindique I'heure, losfonctions avec minuterie et
fonctions du four.Letableau de commandorepresent6comprendcaract6ristiquessp_cifiquesau module.[Le style pout variersolon le
module.)
iiiiiiii!ii¸
Bi!i!_!i!i
Eiiiiii!i!i:
Gril
Cuisson courante
Minuterie
Cuissonet
maintien
Nettoyage
D6marrage
diff6re
Horloge
Maintienau
chaud
ANNULER
S'utilisepourlacuissonaugril etle rissolage
surpartiesuperieure.
S'utilisepourla cuissoncouranteet le
r0tissage.
S'utilisepourentrerou changerla duree,la
temperaturedufour.Etablitle gril
temperatureELEVEEouBASSE.
Programmela minuterie.
Pourcuirependantunedureepreetablie,avec
maintienauchaudpendantuneheure.
S'utilisepourprogrammerlecycle
d'autonettoyage.
Programmelefour pourdebuterune cuisson
plustard.
S'utilisepourprogrammerI'heuredu jour.
S'utilisepourmaintenirau chauddansle four
losalimentscuits.
Annuletouteslesoperationssaufminuterieet
horloge.
Utilisation des touches
• Appuyersur latouche d_sirc!e.
• Appuyersur A ou V pour entrer la dur6eou la temperature.
• Un hip retentit IorsqueI'on appuiesur une touche.
• Un double bip retentit en casd'erreur de programmation.
Rernarque : Quatresecondesapr6s avoirappuy6sur les
touches A ou V, la durc!eou la tempc!raturesera auto-
matiquemententrc!e.Si plusde 30 secondess'c!coulententre la
pressionsur une touche de fonction et cellesur latouche A ou
V, la fonction seraannul6e et I'afficheur reviendraa I'affichage
pr6cc!dent.
Horloge
L'horlogepeut 6tre programm6epour afficher la durc!edans un
format de 12 ou 24 heures.L'horlogeest programmc!een usine pour
un format de 12 heures.
Changement de I'horloge _ an format de 24 heures :
1. Appuyer sur les touchesCANCEL[AN-
NULER)et Delay (D6marragediffc!r_)et
maintenirla pressionpendanttrois
secondes.
2. Appuyer sur A ou V pour programmerun
format de 12ou 2/4heures.
3. ProgrammerI'heureen suivantles instruc-
tions donnc!esci-dessous.
R_glage de I'horloge :
1. Appuyer sur la touche Clock (Horloge).
, L'heuredu jour et deux pointsclignotent
I'afficheur.
!i DELAY _i!
CLOCK
Appuyer sur A ou V pour programmerrheure
dujour.
° Lesdeux pointscontinuent a clignoter.
Appuyer ) nouveausur latouche Clock ou attendrequatre
secondes.
suite...
32

Culssondenslefour
Lorsquele courant 61ectriquearriveou apr_s une interruptionde
courant,la derniSreheure avant I'intermption de courant va
clignoter.
PourrappelerI'heuredu jour Iorsqu'uneautre fonction de durde
s'affiche,appuyersur la touche Clock.
L'heure de I'horlogene peut 6tre chang6eIorsquele four a dt6
programmdpour unecuisson ou un nettoyagediffc!rdou pour la
fonction de cuissonet maintien.
Annulation de I'affichage de I'heure :
Si I'onne d6sire pasraffichage de I'heuredu jour :
Appuyer sur lestouches CANCEL(ANNULER)et
Clock (Horloge)et les maintenirainsi pendant
trois secondes.L'heuredu jour disparait de
I'afficheur.
LorsqueI'affichagede I'heureest annul& ..........
appuyersur la touche Clock pour afficher CLOCK
bri_vementrheure du jour. _................................
Reaffichage de I'heure :
Appuyer sur lestouches CANCELet Clocket les maintenirainsi
pendanttrois secondes.L'heuredu jour rc!apparaita I'afficheur.
Minuterie
La minuteriepeut 6tre programm6ede une minute (00:01]jusqu'_
99 heureset 59 minutes(99:59).
La minuteriepeut 6tre utilis6e ind@endammentde toute autre
activit(!du four. Ellepeut 6tre aussiprogramm6ealors qu'une autre
fonction du four est en cours d'utilisation.
La minuterie necommandepas le four.Elle ne sert qu'_ _mettredes
bips.
Programmation de la minuterie :
1. Appuyer sur la touche Timer (Minuterie).
• 0:00s'allume a I'afficheur.
• Lesdeux pointsclignotent.
2. Appuyer sur la toucheA (Plus)ou V (Moins)jusqu'_
ce que I'heurejuste paraisse_ I'afficheur.
• Lesdeux pointscontinuent _ clignoter.
3. Appuyer a nouveausur latouche Timerou attendre
quatre secondes.
• Lesdeux pointscontinuent _ clignoter et le d_comptede la
dur6ecommence.
• Laderni_reminutedu dc!comptesera affich6esousformede
secondes.
4. A la fin de ladur6e programmc!e,un hip long retentit.
Annulation de la minuterie :
1. Appuyersur la touche Timeret la maintenirainsi pendant trois
secondes.
OU
2. Appuyersur la touche Timer et r6gler rheure _ 00:00.
Verrouillage des commandes
Lestouches peuvent6tre verrouill6espour des raisonsde s(!curit&
nettoyageou pour emp6chertoute utilisation non souhaitc!e.Ellesne
pourront 6tre utilis6essi elles sont verrouill6es.
Si lefour esten cours d'utilisation,les commandesne peuvent 6tre
verrouill6es.
L'heureactuelledu jour restera_ I'afficheur Iorsque lescommandes
serontverrouilk!es.
Verrouillage :
Appuyersur lestouches CANCELet Cook&
Hold (Cuissonet maintien) et les maintenir
ainsi pendanttrois secondes.
• Le mot LOCK[VERROUILLAGE)clignote _ COOK&
I'afficheur. HOLi_
D_verrouillage :
Appuyersur lestouches CANCELet Cook& Hold et les maintenir
ainsi pendanttrois secondes.
• Le mot LOCKdisparaitde I'afficheur.
Codes d'anomalie
LesrootsBAKE (CUISSONCOURANTE)ou LOCK07ERROUILLAGE)
peuventclignoter rapidementa I'afficheurpour pr6veniren cas
d'erreur ou de probDme.Si tel est le cas,appuyersur latouche
CANCEL.Si lesroots BAKEou LOCKcontinuent _ clignoter,
d6brancherI'appareil.Attendre quelques minutes,puis rebrancher
I'appareil.Si run des roots continue _ clignoter,d_brancherrappareil
et prendrecontactavecun r@arateur autorisc!.
33
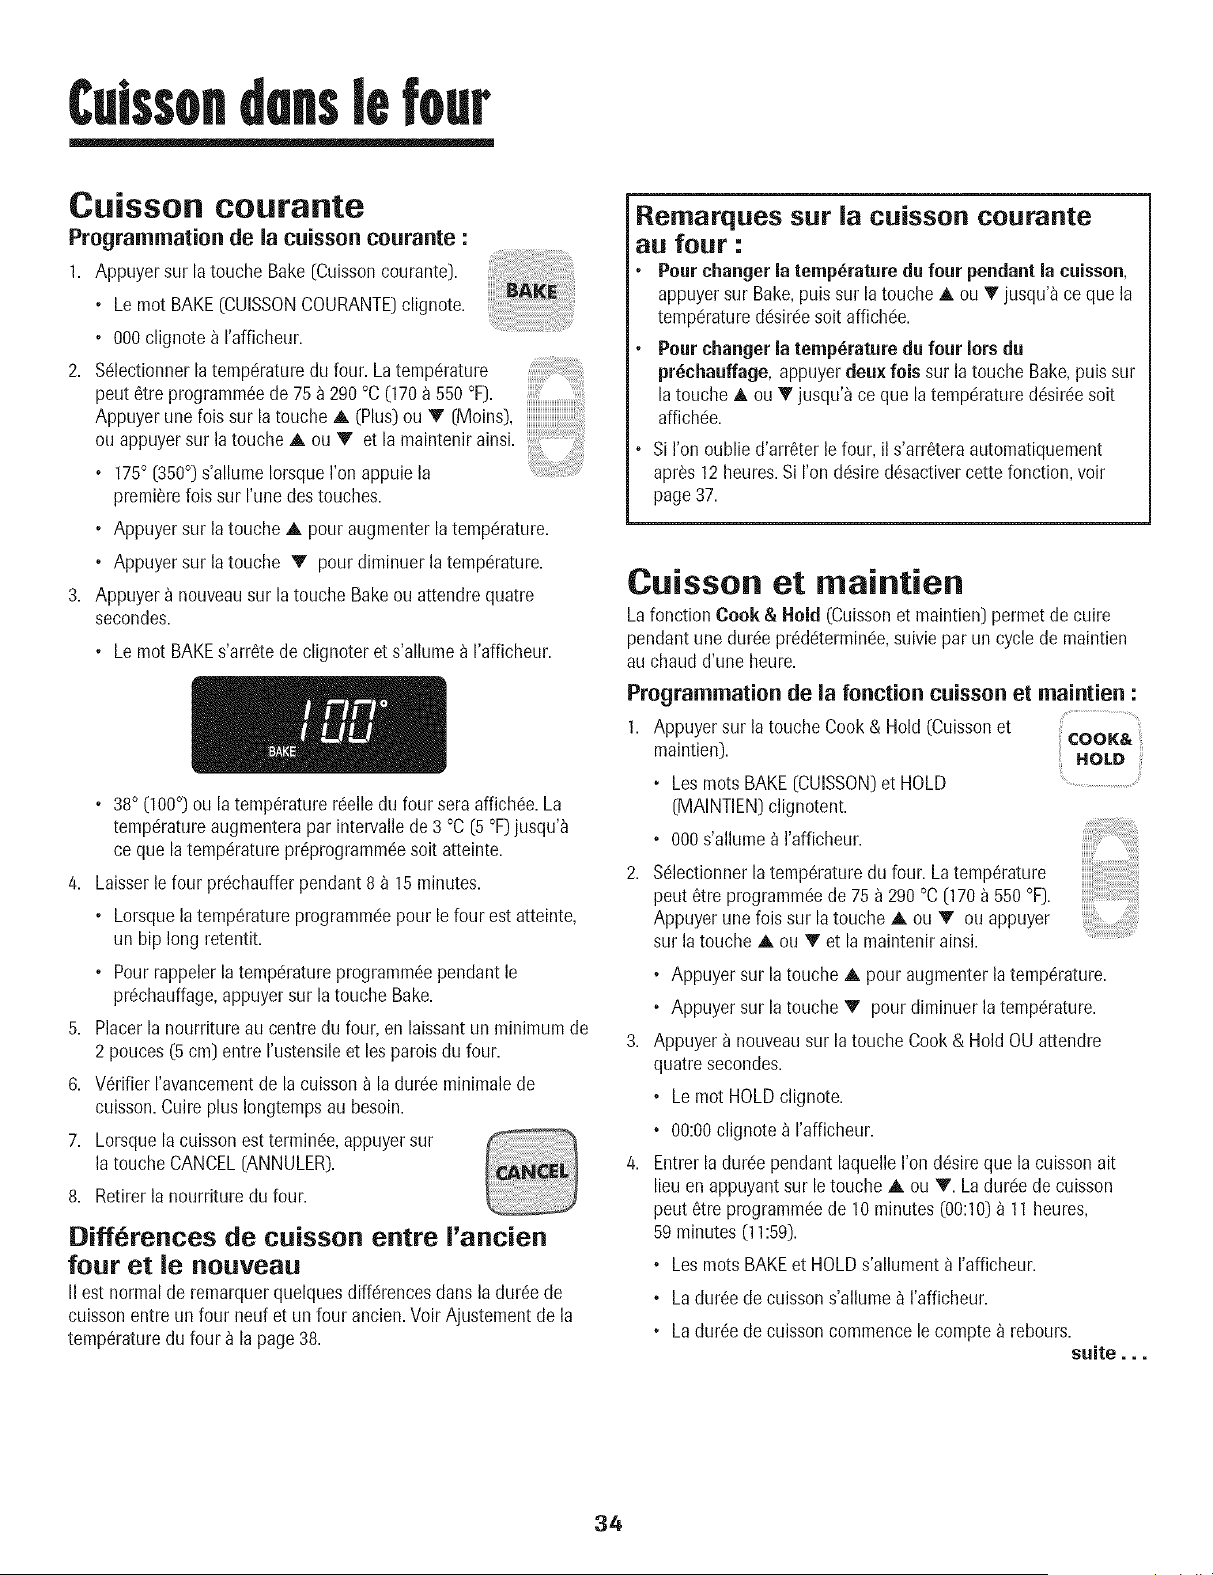
Culssondenslefour
Cuisson COUralnte
Programmation de la cuisson courante :
1. Appuyer sur la touche Bake(Cuissoncourante_.
• Lemot BAKE(CUISSONCOURANTE_clignote.
• 000clignote a I'afficheur.
2. %lectionner latemp6raturedu four. Latempc!rature
pout 6tre programm6ede 75 _ 290 °C070 a 550°F].
Appuyer une fois sur la touche A (Plus)ou V [Moins),
ou appuyersur la touche A ou Y et la maintenir ainsi.
• 175° [350°)s'allumeIorsqueI'onappuie la
premierelois sur I'unedestouches.
• Appuyer sur la toucheA pouraugmenterla tempc!rature.
• Appuyer sur la touche V pour diminuer la tempc!rature.
3. Appuyer a nouveausur latouche Bakeou attendre quatre
secondes.
• Lemot BAKEs'arr6tede clignoter et s'allumea I'afficheur.
• 38° (100°)ou la temp6raturer6elledu four sera affichc!e.La
tempc!ratureaugmenterapar intervallede 3 °C [5 °F)jusqu'_
ce que la tempc!raturepr6programm6esoit atteinte.
4. Laisserle four prc!chaufferpendant 8 _ 15minutes.
• Lorsquelatemp6ratureprogrammc!epour lefour est atteinte,
un hip long retentit.
• Pourrappelerla tempc!ratureprogramm6ependant le
pr6chauffage,appuyersur la touche Bake.
5. Placerlanourriture au centredu four, en laissantun minimumde
2 pouces(5 cm) entre I'ustensileet les paroisdu four.
6. V6rifier I'avancementde la cuissona la durc!eminimale de
cuisson.Cuire plus Iongtempsau besoin.
7. Lorsquelacuissonest terminc!e,appuyersur
latouche CANCEL[ANNULER).
8. Rotiferla nourriture du four.
Diff6rences de cuisson entre I'ancien
four et le nouveau
II est normalde remarquerquelquesdiffc!rencesdans la dur6e de
cuissonentre un four neuf et un four ancien.VoirAjustementde la
temp6raturedu four _ lapage38.
Remarques sur la cuisson courante
au four :
• Pour changer la temperature du four pendant la cuisson,
appuyersur Bake,puis sur latouche A ou T jusqu'_ ce que la
tempc!raturedc!sirc!esoit affichc!e.
• Pour changer la temperature du four lots du
pr_chauffage,appuyerdeux lois sur latouche Bake,puis sur
latouche A ou T jusqu'a ce que latempc!ratured6sirc!esoit
affichc!e.
• Si I'on oublied'arr6ter lefour, il s'arr6teraautomatiquement
apr_s 12 heures.Si I'ondc!sired6sactivercette fonction, voir
page37.
Cuisson et maintien
Lafonction Cook & Hold (Cuissonet maintien_permet de cuire
pendant une dur6e pr6dc!termin_!e,suivie par un cycle de maintien
au chaud d'une heure.
Programmation de la fonction cuisson et maintien :
1. Appuyersur la touche Cook& Hold (Cuissonet
maintien).
, Losroots BAKE(CUISSON)et HOLD
(MAINTIEN)clignotent.
• 000s'allume _ I'afficheur.
COOK&
.OLD
%lectionner la tempSrature du four. La temperature
pout Gtre programmGe de 75 a 290 °C [170 a 550 °F_.............
Appuyer une fois sur la touche A ou V ou appuyer
sur la touche A ou Tet la maintenir ainsi.
• Appuyer sur la toucheA pour augmenterlatemperature.
° Appuyer sur la toucheV pour diminuer la temp_!rature.
Appuyer a nouveausur latouche Cook& Hold OU attendre
quatre secondes.
, Lemot HOLDclignote.
, 00:00clignotea I'afficheur.
Entrerla dur_!ependant laquelleI'on d_sireque la cuissonait
lieuen appuyantsur le toucheA ou V. Ladur_!edecuisson
pout _tre programm_!ede 10 minutes (00:10)_ 11heures,
59 minutes (11:59).
, Losroots BAKEet HOLDs'allument a I'afficheur.
• Ladur_ede cuissons'allume_ I'afficheur.
. Ladur_ede cuissoncommencele compte_ rebours.
suite...
34
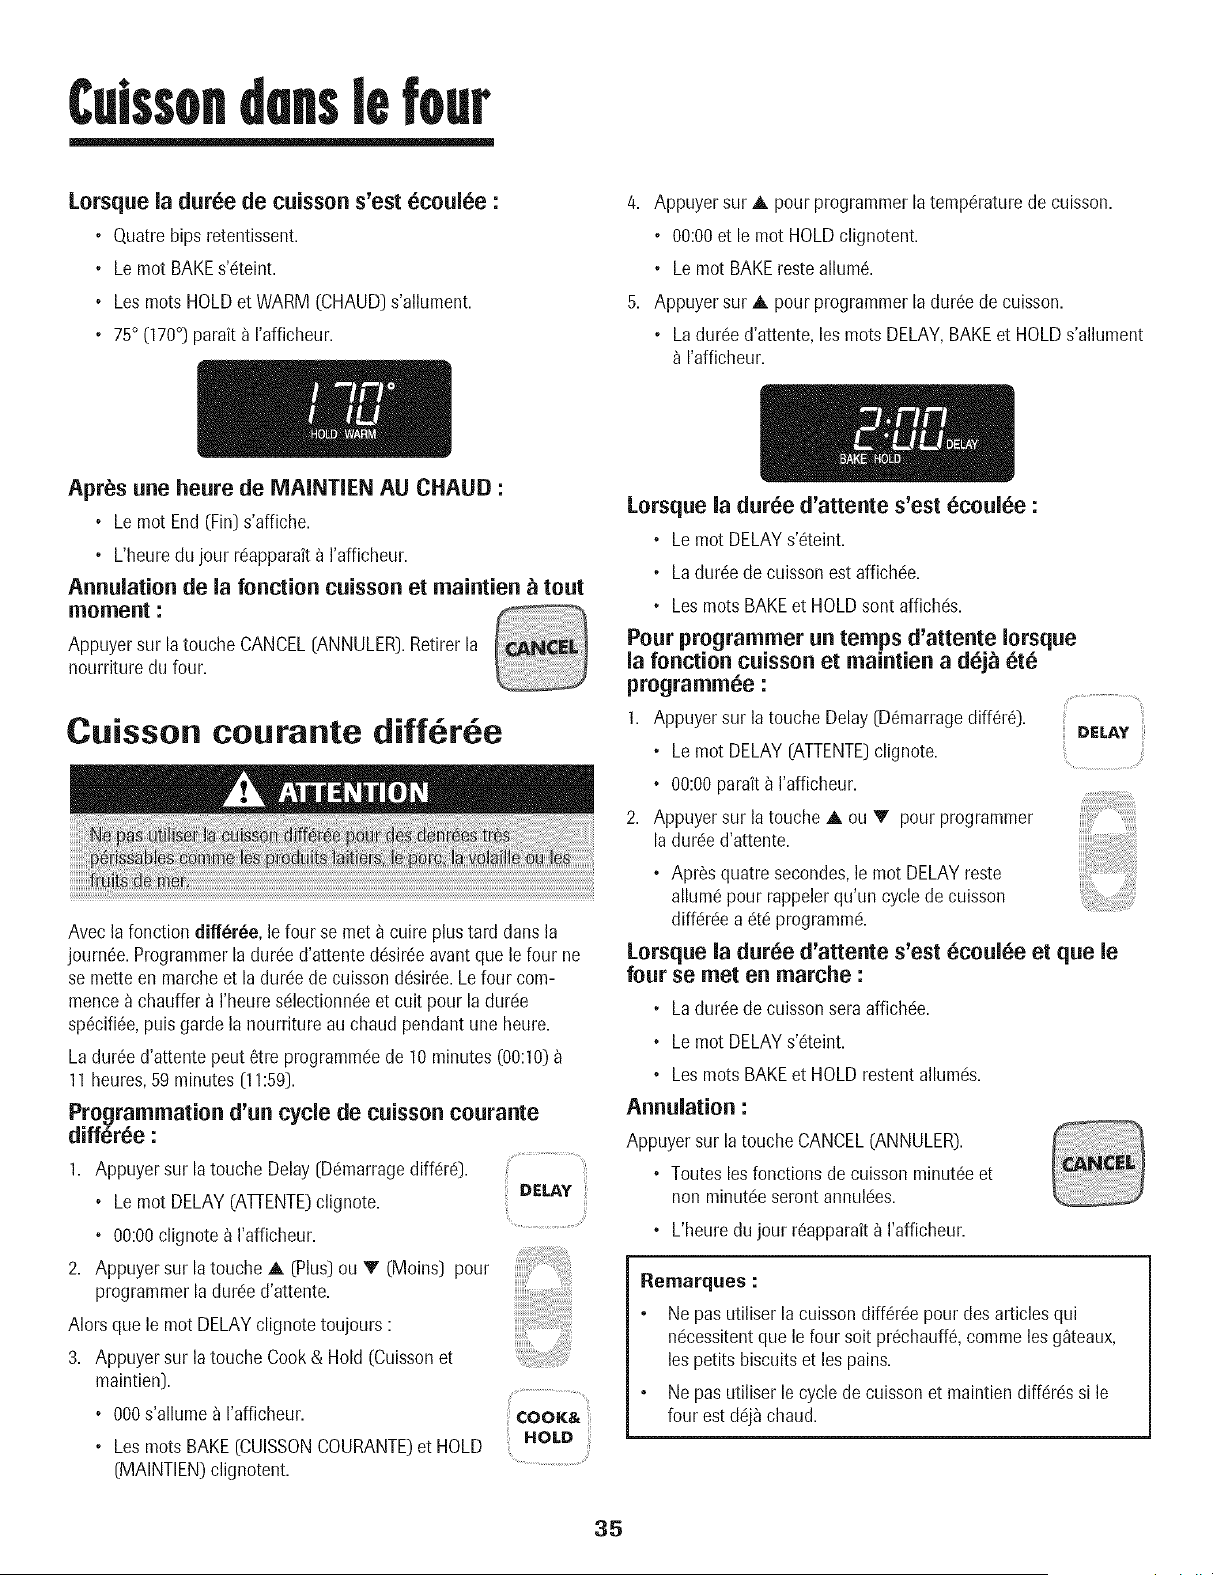
Culssondenslefour
Lorsque la clarke de caisson s'est _coal_e :
• Quatrebips retentissent.
= Lemot BAKEs'6teint.
• Losmots HOLDet WARM (CHAUD)s'allument.
• 75° (170°) parait a rafficheur.
Apr_s ane heure de MAINTIEN AU CHAUD :
• Lemot End (Fin)s'affiche.
• L'heuredu jour rc!apparaita I'afficheur.
Annulation de la fonction caisson et [naintien _ tout
[no[nent :
Appuyer sur la touche CANCEL(ANNULER).Retirerla
nourriture du four.
Caisson courante diff6r6e
Avec la fonction differ_e, le four se met _ cuire plustard dartsla
journ6e. Programmerla durc!ed'attented(!sir_eavantque le four ne
se mette en marcheet la durc!ede cuissond6sir_e.Lefour com-
mencea chauffera I'heuresc!lectionnc!eet cuit pour la durc!e
sp6cifi6e,puis garde la nourriture au chaud pendantune heure.
La dur6ed'attentepeut 6tre programmc!ede 10minutes(00:10)
11heures,59 minutes (11:59).
Program[nation d'an cycle de caisson coarante
diff_r_e :
1. Appuyer sur la touche Delay (Dc!marragediffc!rc!).
• Lemot DELAY(ATfENTE)clignote.
• 00:00clignote_ I'afficheur.
2. Appuyer sur la touche,_ (Plus)ou V (Moins) pour
programmerladurc!ed'attente.
Alors que le mot DELAYclignote toujours :
3. Appuyer sur la toucheCook & Hold (Cuissonet
maintien).
• 000s'allume a I'afficheur.
• Lesmots BAKE(CUISSONCOURANTE)et HOLD
(MAINTIEN)clignotent.
DELAY
COOK&
HOLD
4. Appuyer sur A pour programmerla temp6raturede cuisson.
• 00:00et le mot HOLDclignotent.
• Le mot BAKEreste allure&
5. Appuyer sur ,_ pour programmerla dur6e de cuisson.
• Ladur6e d'attente,les mots DELAY,BAKEet HOLDs'allument
rafficheur.
Lorsque la dur6e d'attente s'est 6coulee :
• Lemot DELAYs'_teint.
, Ladur6ede cuissonest affichc!e.
, Lesmots BAKEet HOLDsont affich(!s.
Pour progra[n[ner an te[nps d'attente Iorsque
la fonction caisson et [naintien a d_j_ 6t_
progra[n[nee :
1. Appuyersur la touche Delay(D6marragediff6r_).
DELAY
, Lemot DELAY(ATTENTE)clignote.
• 00:00parait _ I'afficheur.
2. Appuyersur la touche ,_ ou V pour programmer
ladurc!ed'attente.
• Apr_s quatre secondes,le mot DELAYreste
allum6 pour rappeler qu'un cycle de cuisson
diffc!r_!ea _!t_programm_!.
Lorsqae la dar_e d'attente s'est _coul_e et qua le
four se [net en [narche :
° Ladur_ede cuissonseraaffich_!e.
° Lemot DELAYs'_teint.
° Lesmots BAKEet HOLD restentallum_!s.
Annulation :
Appuyersur la touche CANCEL(ANNULER).
,Toutes les fonctions de cuissonminut_eet
non minut_!eserontannuk!es.
, L'heuredu jour r_apparait_ I'afficheur.
Remarques :
Ne pas utiliser la cuissondiff_r_epour des articlesqui
n_!cessitentquele four soit pr_chauff& commeles g_teaux,
les petits biscuitset les pains.
Ne pas utiliser le cycle de cuissonet maintiendiff_!r_!ssi le
four estd_!j_chaud.
35
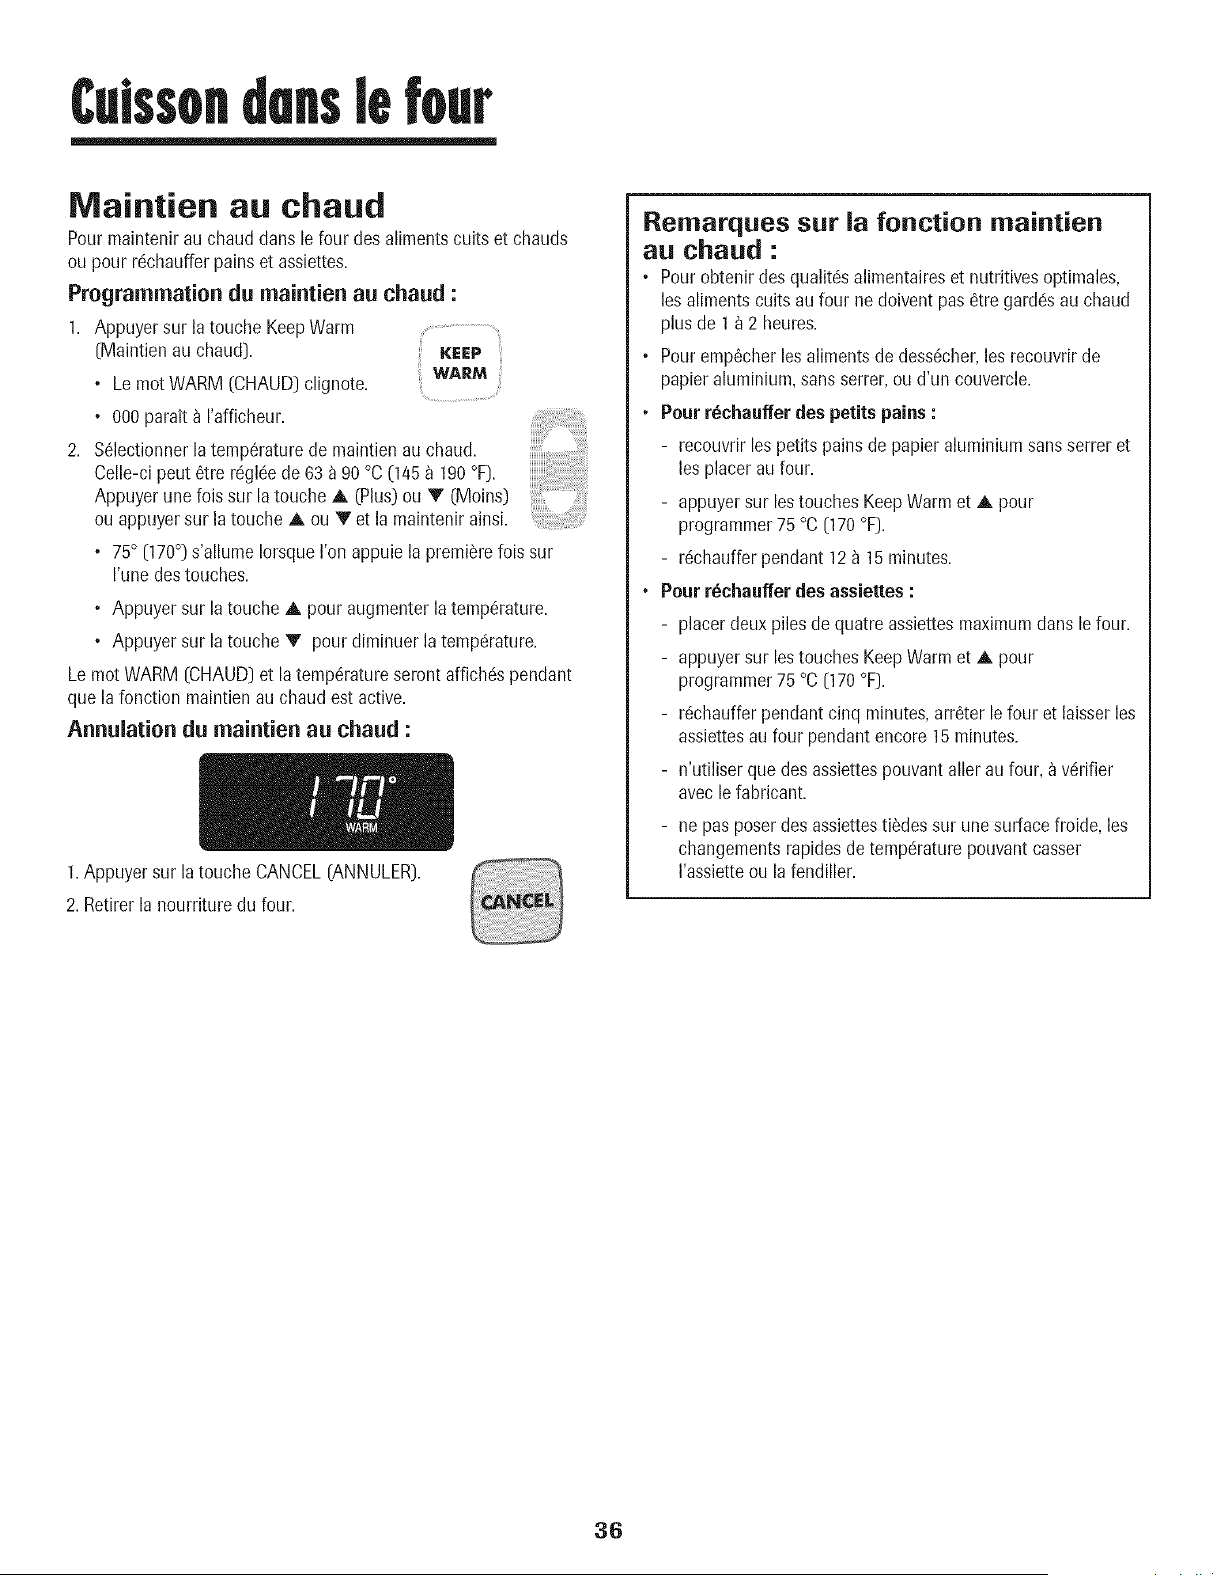
Culssondenslefour
Nlaintien au chaud
Pourmaintenirau chaud duns le four des alimentscuits et chauds
ou pour rc!chaufferpainset assiettes.
Program[nation du maintien au chaud :
1. Appuyersur la touche KeepWarm
(Maintienau chaud). KeEP
• Le motWARM (CHAUD]clignote. WARM
• 000parait a rafficheur.
2. S61ectionnerla temp6raturede maintienau chaud.
Celle-cipout 6tre r(!gl6ede 63 a 90 °C (145a 190°F].
Appuyerune fois sur la toucheA (Plus)ou V (Moins)
ou appuyersur la touche A ou Vet la maintenirainsi.
• 75° (170°) s'allume Iorsque I'onappuie la premierelois sur
I'une destouches.
° Appuyersur latouche A pour augmenterla temp6rature.
• Appuyersur latouche V pour diminuer la tempc!rature.
Lemot WARM [CHAUD]et la temp6ratureseront affichc!spendant
que la function maintienau chaud est active.
Annulation du maintien au chaud :
1.Appuyer sur la touche CANCEL(ANNULER).
2. Retirerla nourriture du four.
Remarques sur la function maintien
au chaud :
• Pourobtenir des qualit6salimentaireset nutritives optimales,
los alimentscuits au four nedoivent pus6tre gardc!sau chaud
plus de I _ 2 heures.
• Pouremp6cherlos alimentsde dess6cher,learecouvrirde
papieraluminium,sans serrer,ou d'un couvercle.
, Pour r_chauffer des petits pains :
- recouvrirles petits pains de papier aluminiumsans serrer et
los placer au four.
- appuyersur lestouchesKeepWarmet A pour
programmer75 °C(170°F].
- r6chaufferpendant 12a 15minutes.
• Pour r_chauffer des assiettes :
- placer deuxpiles de quatre assiettesmaximumdans le four.
- appuyersur lestouchesKeepWarmet A pour
programmer75 °C(170°F).
- r_chaufferpendant cinq minutes,arr6ter lefour et laisserlos
assiettesau four pendantencore 15minutes.
- n'utiliser que des assiettespouvantallerau four,_ v6rifier
aveclelubricant.
- ne pus poserdes assiettestildes sur une surface froide, les
changementsrapidesde tempc!raturepouvantcusser
I'assietteou la fendiller.
36
Culssondenslefour
Arr t automatique/Mode
sabbat
Lefour s'arr6teautomatiquementapr_s 12 heuress'il a 6t6
accidentellementlaissc!en marche.Cettecaract6ristiquede s6curit6
pout 6tre arr6t6e.
Pour annuler I'arr_t 12 heures et faire fonetionner le
four en continu pendant 72 heures :
1. Programmerlefour pour une cuissoncourante (voir page34).
2. Appuyer sur la toucheClock (Horloge)et la
maintenirainsipendant cinq secondes. {;LOCK
• SAbsera affich6 et clignoterapendant ..............
cinq secondes.
• SAbsera ensuiteaffichc!en continujusqu'_ ce qu'on I'arr6te
oujusqu'_ ce que la dur6e limite de 72 heuressoit atteinte.
• Lemot BAKE(CUISSONCOURANTE)sera aussiaffich6si un
cyclede cuissoncouranteesten coursalors que lefour est en
modesabbat.
Toutesles autres fonctions (Minuterie, Maintienau chaud,
Nettoyage,etc.) sont verrouill6es,SAUFBAKE,pendant le
modesabbat.
Annulation de la euisson courante alors que le four
est en mode sabbat :
Appuyer sur CANCEL(ANNULER).
• Lemot BAKEs'c!teint_ I'afficheur.
• Aucun bip sonorene retentit.
Annulation du mode sabbat :
1. Appuyer sur la touche Clock pendantcinc secondes.
OU
2. Apres 72 heures,le modesabbatsetermine.
• SAbclignote pendantcinq secondes.
• L'heuredu jour revienta I'afficheur.
Remarques sur le mode sabbat :
• Le modesabbatpeut 6tre mis en marchea tout moment,que
lefour soit en marcheou non.
, Le modesabbatne peut pas 6tre mis en marche siles
commandossontverrouillc!esou laporte verrouill6e.
, Sile four esten mode cuissonIorsquele modesabbatest
programm&le mot BAKE(CUISSONCOURANTE)s'_teint a la
fin du cycle de cuisson. IIn'y aura aucun signal sonoreaudible.
, Lorsquele modesabbata dc!marr&aucun bip de prc!chauffage
ne retentit.
° Tous los messageset los bipssont dc!sactivc!sIorsquele mode
sabbatest actif.
• SiI'on appuiesur latouche CANCEL,un cycle decuisson
couranteaufour seraannul& Cependant,le programmateur
resteraen modesabbat.
, Apr_s unepannede courant,le four revienten modesabbat
avec72 heuresrestanteset aucuncycle actif.
37
Cuissondenslefour
Ajustement de la temperature
du four
La pr6cisiondes temperaturesdu four a 6t6 soigneusernentverifi_e
I'usine.II est normalde remarquerquelquesdifferencesdans la
cuissonentre un four neuf et un four ancien.Au fur et a mesureque
les cuisinieressont moinsneuves,la temp6raturedu four peut varier.
II estpossibled'ajuster la temp6raturedu four si I'on penseque le
four necuit pasou ne rissolepas correctement.Pourdeciderde
I'ajustementa apporter,r6gler le four _ une temp6raturede 15°C
(25°F)plus elev_eou plus basseque la temp6ratureindiquee darts
la recette,puis faire cuire la preparation.Lesr6sultatsdu {{test >>de
cuissondoivent donner une idee du hombrede degr6sduquel la
temp6raturedoit 6tre ajust6e.
Ajustement de la temperature du four :
1. Appuyer sur la touche Bake(Cuissoncourante].
2. Entrer285°C [550 °F] en appuyantsur la touche
A (Plus).
3. Appuyer sur la touche Bakeet lamaintenirainsi
pendantplusieurssecondesoujusqu'a ce que 0°
paraissea I'afficheur.
Si latemp6raturedu four a ete pr6cedemment
ajust6e,le changementsera affich6.Parexemple,si la
temp6raturedu four a _te r6duite de 8°C 05 °F),I'afficheur
indiquera-8 (-15).
4. Appuyersur la touche A ou V pour ajuster la temperature.
A chaque lois que I'onappuiesur unetouche, la temperature
change de 3 °C(5 °F).La temperaturedu four peut etre
augment6eou diminu6e de 3 a 20 °C [5 _ 35°F).
5. L'heuredu jour reapparaitautomatiquementa I'afficheur.
IIn'est pas necessairede reajusterla temp6raturedu four en cas
de panneou d'interruption de courant. Lestemp6raturesde
cuissonau gril et de nettoyagene peuvent6tre ajust6es.
38
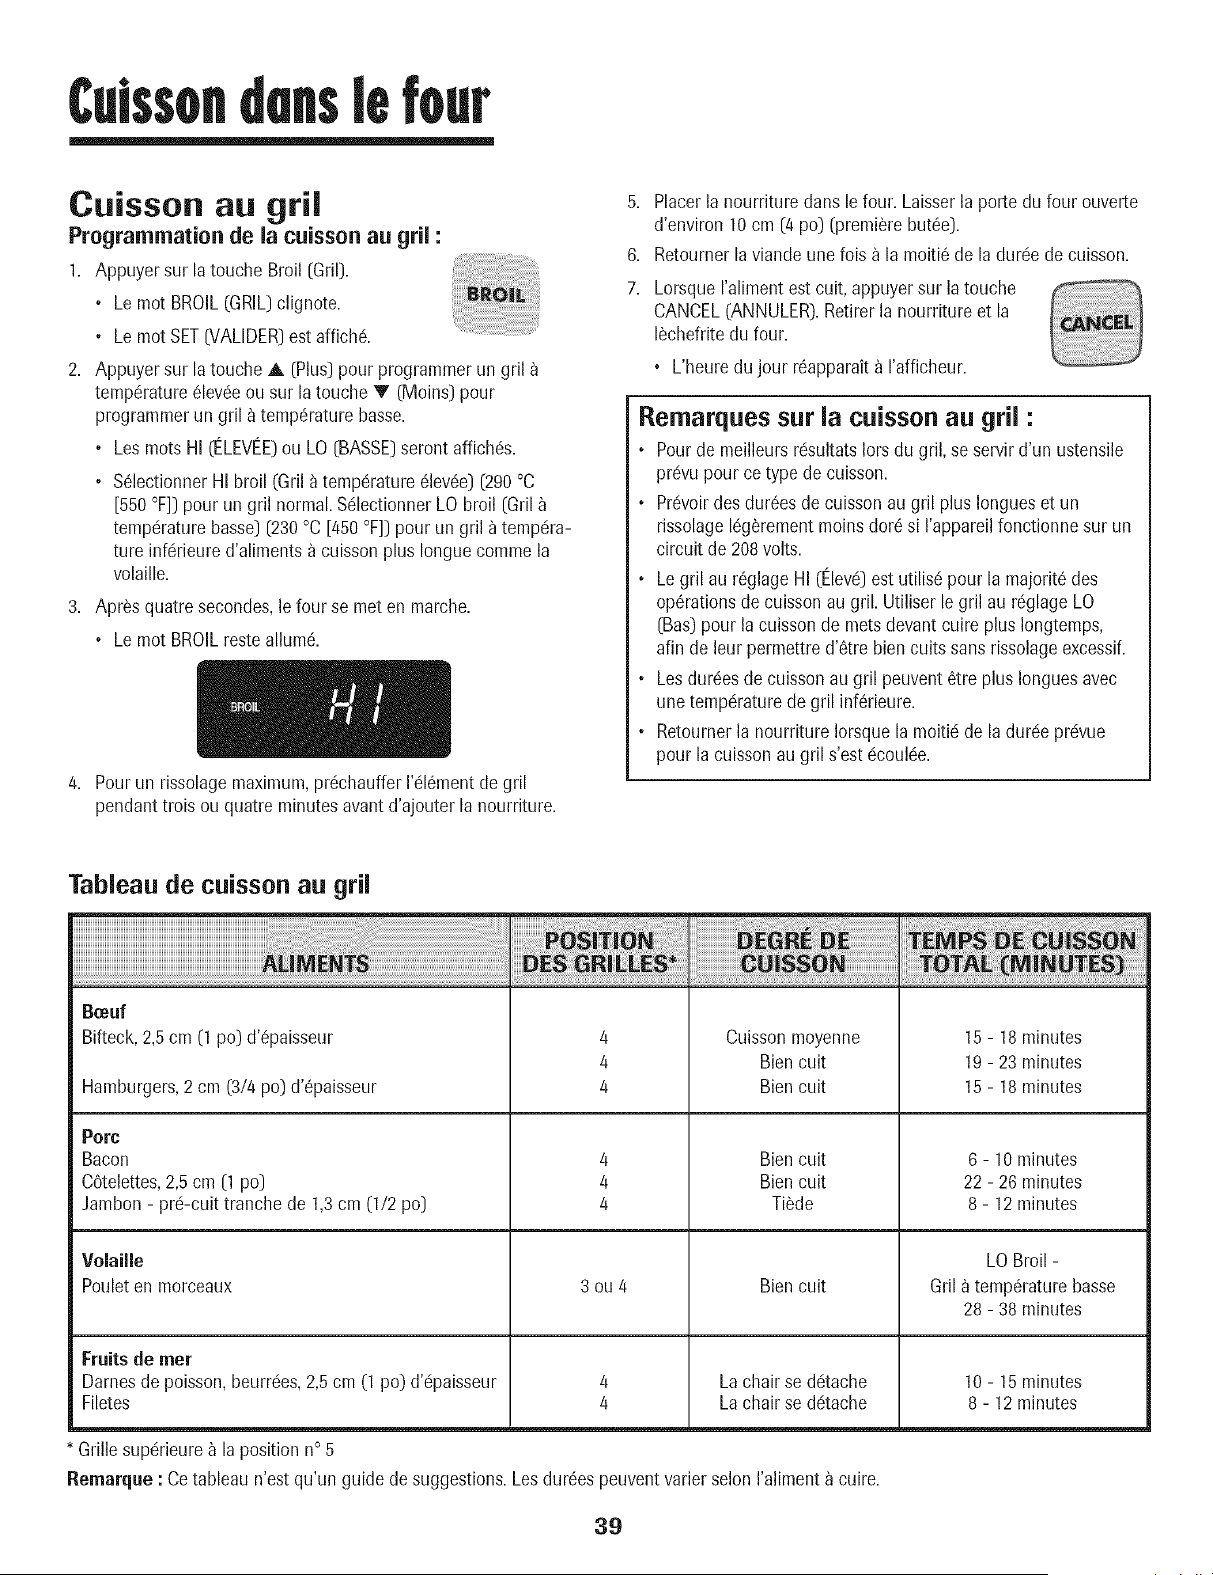
Culssondenslefour
Cuisson au gril
Programmation de la cuisson au gril :
1. Appuyer sur la touche Broil (Gril).
• Lemot BROIL(GRIL)clignote.
• Lemot SET{VALIDER)est affich&
2. Appuyer sur la toucheA (Plus)pour programmerun gril
temperatureelevc!eou sur la touche V (Moins) pour
programmerun gril _ temperaturebasse.
• LesrootsHI (ELEVEE)ou LO (BASSE)serontaffiches.
• SelectionnerHI broil (Grila temperatureelevee)(290°C
[550 °F])pour un gril normal.Sc!lectionnerLObroil (Gril
temperaturebasse) [230°C [450°F]) pour un gril atempera-
ture inferieured'alimentsa cuissonplus Ionguecommela
volaille.
3. Apres quatre secondes,le four se meten marche.
• Lemot BROILresteallure&
4. Pourun rissolagemaximum,prechaufferI'elementde gril
pendanttrois ou quatre minutesavantd'ajouter la nourriture.
5,
6.
7.
Placerla nourrituredans le four. Laisserla porte du four ouverte
d'environ10 cm (4 pc) (premierebutee).
Retournerlaviande une fois a la moitie de la duree decuisson.
LorsqueI'alimentestcult, appuyersur latouche
CANCEL(ANNULER).Retirerla nourriture et la
I_chefritedu four.
L'heuredu jour reapparaita I'afficheur.
Rernarques sur la cuisson au gril :
• Pourde meilleursrc!sultatsIorsdu gril, se servird'un ustensile
prevupour ce type de cuisson.
• Prdvoirdes dureesde cuissonau gril plus Iongueset un
rissolageleg_rementmoinsdoresi I'appareilfonctionne sur un
circuit de 208 volts.
• Legril au reglageHI (Elevc!)eat utilisepour la majoritedes
operationsde cuissonau gril. Utiliser le gril au rdglageLO
(Bas)pour la cuissonde metsdevantcuire plus Iongtemps,
afin de leur permettred'etre bien cults sansrissolageexcessif.
• Lesdureesde cuissonau gril peuventetre plus Ionguesavec
unetempdraturede gril inferieure.
• Retournerla nourriture Iorsquela moitid de ladurde prdvue
pour la cuissonau gril s'estdcoulde.
Tableau de cuisson au gril
B_u|
Bifteck, 2,5 cm (1 pc) d'@aisseur
Hamburgers, 2 cm (3/4 po) d'@aisseur
Porc
Bacon
COtelettes,2,5 cm (1 pc)
Jambon- prc!-cuittranchede 1,3cm (1/2 pc)
4
4
4
4
4
4
Cuisson moyenne
Bien cult
Bien cult
Bien cult
Bien cult
Tiede
Volailie
Poulet en morceaux
3OU/4
Bien cult
Fruitsde mer
Darnesde poisson,beurrc!es,2,5cm (1 pc) d'c!paisseur 4 Lachair se dc!tache
Filetes 4 Lachair se detache
Grillesuperieure_ la position n° 5
Remarque : Cetableau n'est qu'un guidede suggestions.Lesdureespeuvent varierselon I'alimenta cuire.
15 - 18 minutes
19 - 23 minutes
15 - 18 minutes
6 - 10 minutes
22 - 26 minutes
8 - 12 minutes
LOBroil -
Gril _ temperature basse
28 - 38 minutes
10- 15minutes
8 - 12minutes
39

Culssondenslefour
f
Event du four
Lorsquele four fonctionne,lossurfacesvoisinesde l'6vent peuvent
devenir assezchaudespour entrainerdes br01ures.Nejamais
bloquerI'_vent.
L'_ventest situ_ sous le protecteur d'_ventdu dosseret,sur la
cuisini_re. EVENT
DUFOUR Ne pas mettre de
plastiquesprosde
I'@ent,la chaleur
pouvantlos ddormer
ou los faire fondre.
Eclairage du four
Appuyer sur le commutateurd'6clairagedu four situ6 sur
letableau de commandopour allumer ou c!teindrela lampe.
oven light
Sole du four
Prot_gerla sole des produitsrenvers_s,en particulier acidesou
sucrc!s,ceux-ci pouvantd6colorer 1'6mailvitrifi& Utiliserdes
ustensilesde la bonnedimensionpour _viterque los produits nese
renversentou passentpar-dessusI'ustensileen bouillant. Ne pas
placer d'ustensilesou de feuille d'aluminium directement sur
la sole du four.
Grilles du four
Le four comportedeux grilles avec,pourchacune,un dispositifde
calage.
Extraction :
1. Tirer la grille en lignedroite
jusqu'_ ce qu'elle s'arr6te _ la
positiondecalage.
2. Souleverla grille a I'avantpour
pouvoirI'extraire.
Reinstallation :
1. Placerla grille sur los supportsdartsle four.
2. Soulever16g_rementI'avant.Faireglisserlagrille vers I'arri_re
au-del_de la positionde calage.
3. Abaisserlagrille et la faire glisser darts lefour.
Ne pas recouvrir [a totaJit_ d'une grille avec de [a feuiiie
d'aluminium,nigarnirJefonddufouravecde lafeuilled'aluminium.
Cecimodifieraitlosr_sultatsde cuissonau four, et lefond dufour
pourraitsubir des dommages.
Positions des grilles
Grille 5 (positionlaplus
haute) : Pourcuisson
br_veau gril - pain grill6
ou alimentsminces
contenantpeu de graisse.
Grille4 : Pourla plupart
des cuissonsau gril.
Grille 3 : Pourla plupart
des cuissonsde
p_tisseries sur une tOle _ biscuits - g_teaux _ c!tages, tartes aux
fruits, mets surgel6s.
__5
__4
--3
=2
--1
Grille2 : PourrOtissagede pi_cesdeviande,metsen sauce,cuisson
de pain,g_teau 16geren couronne (baba)ou entremets.
Grille 1 : Pourle rOtissagede grossespi_cesde viandeou volatile,
tartessurgel6es,souffl6sou g_teauxdes anges.
CUiSSON SUR PLUSIEURSGRILLES:
Deux grilles: Placerlos grilles aux positions2 et 4 ou 1et 4.
Dotal-grille
Une demi-grille est disponible en
accessoire.Elle augmentela capacit6du
four et s'accrochea gauche,a la partie
sup6rieure.Elleest utile pour la cuisson
d'un plat de IdgumesIorsqu'ungros r6ti
se trouve sur la grille infdrieure. Prendre
contactavecle revendeurpour de-
mander I'accessoireHALFRACK(dotal-
grille) ou pour commander,composerle
1-800-688-8408.
4O
Four autonettoyant
6. Essuyerlesr6sidussucreset acides,commeles patatesdouces,
la tomate ou lessaucesa basede lait. La porcelainevitrifi6e
poss_deunecertaine r6sistanceaux compos6sacides,maisqui
n'est paslimit6e.Elle peut se d6colorersi les r_sidusacides ou
sucr6sne sont pasenlev6savantde commencerI'autonettoyage.
Programmation de I'autenettoyage :
i ernarque : Latemp@aturedu four dolt 6tre situ6een dessous j
de 205°C [400 °F)pour programmerun cycle d'autonettoyage.
1
1. Fermerla porte du four.
2. Placerla manettede verrouillage_ la position de verrouillage.
L'autonettoyageutilisedes temp@aturessup6rieures_ cellesde la
cuissonnormalepour nettoyerautomatiquementI'int6rieurdu four.
Ne forcez pas la portedu four nile levierde verrouillagepour les
ouvrir.Cecipeut provoquerune exposition_ des temp@atures
c!levc!es,et donc pr6senter un risquede brQlure.
Lefour dolt 6tre nettoy6 rc!guli_rement.Les 6claboussuresdoivent
6tre essuyc!espour @iter uneproduction excessivede fum_e ou
I'apparition deflammes.Ne laissezpas de rc!siduss'accumulerdans
le four.
Durant le processusd'autonettoyage,il convient de biena@erla
cuisinepour c!liminerles odeursnormalement6misesdurant le
nettoyage.
Avant I'autonettoyage
1. Eteindrela lampedu four avant le nettoyage.Elle risqueraitsinon,
de griller.
2. Enleverla I_chefrite,tousles plats et lesgrilles du four. Leagrilles
risquentdese dc!coloreret de ne plus glisseraussi bien apr_s un
cycle d'autonettoyagesi on ne les
enl_ve pas.
3. Nettoyer le cadre du four, le cadre de
la porte,lazone _ I'extc!rieurdu joint et
autour de I'ouverturedans lejoint de la
porte,_ I'aided'un produit de
nettoyagenon abrasif commeBon
Ami* ou d'eau additionn6ede d6tergent.Leprocessus
d'autonettoyagene nettoie pasces zones.Ellesdoivent 6tre
nettoy6espour emp6cherlasalet_des'incruster pendant le cycle
de nettoyage.(Lejoint assure1'6tanchc!it6autour de la porte et du
hublot du four.)
4. Pouremp6chertout dommage,ne pas nettoyerni frotter lejoint
qui setrouve autour de la porte du four.Cejoint eatcongu pour
@iter les pertesde chaleur pendant le cycle d'autonettoyage.
5. Eliminerles r_sidusde graisseou de produitsrenvers6ssur la
sole avant le nettoyage.Ceci emp6chelaformation de fiammes
ou defum6edurant le nettoyage.
\
3. Appuyersur latouche Clean(Nettoyage). €LEA. '
• Le mot CLEAN(NETfOYAGE)clignote_ I'afficheur. ............
Si la porte n'est pasfermc!e,des bips retentissentet le mot DOOR
[PORTE)parait a I'afficheur.Sila porte n'est pasferm(_edarts les
45secondes,I'op@ationd'autonettoyageest annul6eet
I'afficheur revienta I'heuredu jour.
4. Appuyersur la touche A [Plus) ou V (Moins).
, CL-M [Nettoyage- salet6moyenne)estaffich&
5. Appuyersur la touche A ou 'V pour voir driller les
diffc!rentsrc!glagesde I'autonettoyage.
CL-H [Nettoyage- salet6 @aisse,4 heures)
CL-M (Nettoyage- salet6moyenne,3 heures)
CL-L (Nettoyage- salet8I%_re,2 heures)
Le choixdu niveaude salet6 du four programme
automatiquementla durc!edu cycle d'autonettoyage.
6. Apr_s quatresecondes,lefour commencele nettoyage.
, La dur6e de nettoyagecommencele dc!compte_ I'afficheur.
. Le mot LOCK07ERROUILLAGE)parait a I'afficheur.
• Le mot CLEANparait _ I'afficheur.
Demarrage differe d'u. cycle d'auteaetteyage :
1. Appuyersur la touche Delay (D6marragediff@_).
• Le mot DELAY[ATTENTE)clignote. DELAY
, 00:00parait _ I'afficheur. ............
suite...
*Lesnomsde marquedes produits de nettoyagesontdes marquesd@os_!esdes diff,!rentsfabricants.
41
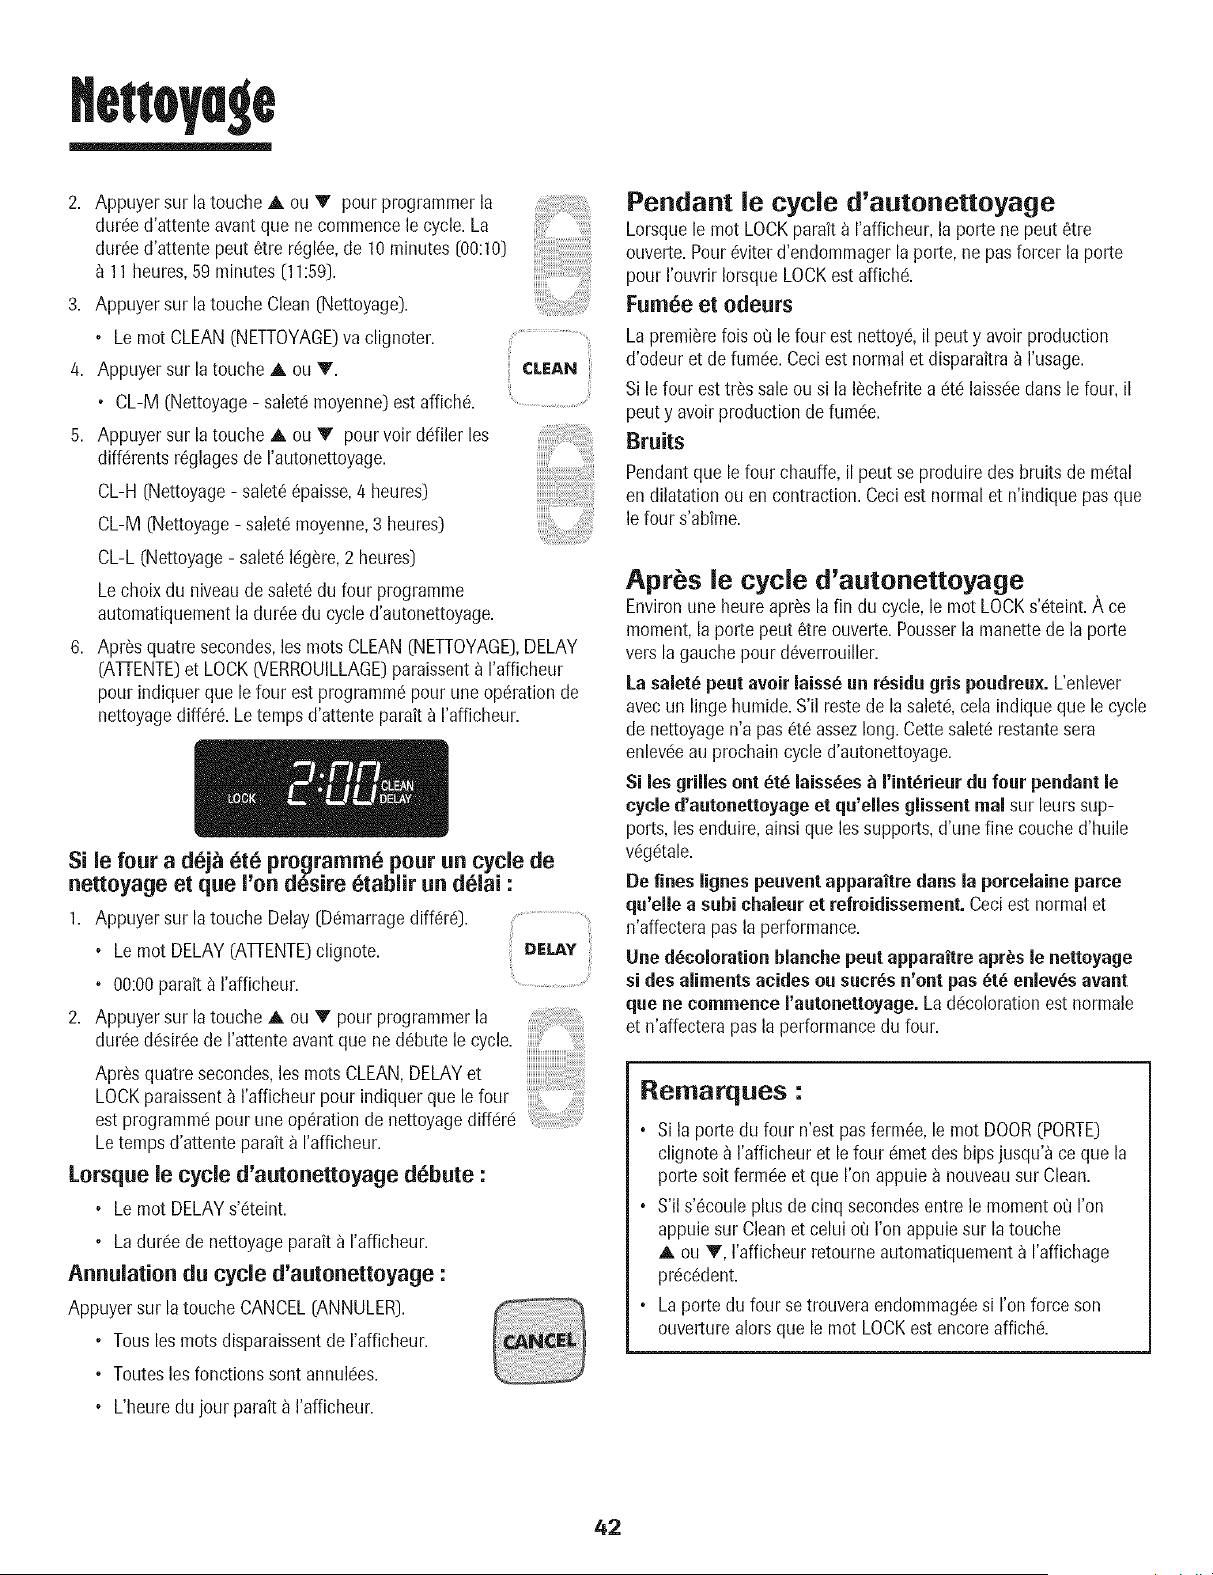
2. Appuyer sur la toucheA ou T pour programmer la
dur6e d'attenteavant que ne commence le cycle. La
dur6e d'attentepout 6tre rc!gl6e,de 10minutes [00:10]
11heures,59minutes (11:59).
3. Appuyer sur la toucheClean (Nettoyage).
• Lemot CLEAN(NETTOYAGE)va clignoter. .................................
4. Appuyer sur la touche A ou V. CLEAN
• CL-M (Nettoyage- salet6moyenne)est affich& ....................................
5. Appuyer sur la touche A ou V pourvoir driller los
diffdrents r6glagesde I'autonettoyage.
CL-H (Nettoyage- salet6@aisse,4 heures)
CL-M (Nettoyage- saletd moyenne,3 heures)
CL-L (Nettoyage- salet6 Ic!gere,2 heures)
Lechoixdu niveaude salet_ du four programme
automatiquementla dur6e du cycled'autonettoyage.
6. Apres quatre secondes,los rootsCLEAN(NETTOYAGE],DELAY
(ATfENTE)et LOCK(VERROUILLAGE]paraissenta I'afficheur
pour indiquerque lefour est programmdpour uneoperation de
nettoyagediff@& Letemps d'attenteparait a I'afficheur.
Si le four a d6j_ ere programme pour un cycle de
nettoyage et que I'on desire etablir un delai :
1. Appuyer sur la touche Delay (Dc!marragediff6rc!]. .........................................
• Lemot DELAY(ATfENTE)clignote. DELAY
• 00:00parait _ I'afficheur. ..........................
2. Appuyer sur la toucheA ou V pour programmerla
dur6e d6sirc!ede I'attenteavant que ne d_bute le cycle.
Apres quatre secondes,los mots CLEAN,DELAYet
LOCKparaissent_ I'afficheur pour indiquerque le four
est programmc!pour une op6rationde nettoyagediff@c!
Letempsd'attente parait a I'afficheur.
Lorsque le cycle d'autonettoyage debate :
• Lemot DELAYs'c!teint.
• Ladur6e de nettoyageparait a I'afficheur.
Annulation du cycle d'autonettoyage :
Appuyer sur la touche CANCEL[ANNULER].
• Tousles mots disparaissentde I'afficheur.
• Toutesles fonctionssont annulc!es.
• L'heuredu jour parait _ I'afficheur.
Pendant le cycle d'autonettoyage
Lorsquele mot LOCKparait a I'afficheur,la porte ne pout 6tre
ouverte.Pour@iter d'endommagerla porte, ne pus forcer la porte
pour I'ouvrir IorsqueLOCKest affichc!.
Fumee et odeurs
Lapremierelois o0 le four est nettoyc!,il peut y avoirproduction
d'odeur et de fumde.Ceciest normalet disparaitra_ I'usage.
Sile four esttr_s saleou si la I_chefritea dtc!laissdeduns le four,il
pout y avoir productionde fumde.
Bruits
Pendantque le four chauffe, il peut se produiredes bruits de m6tal
endilatation ou en contraction.Ceciest normal et n'indique pusque
lefour s'abime.
Apres le cycle d'autonettoyage
Environune heure apr_s la fin du cycle, le mot LOCKs'_teint.Ace
moment,la porte peut 6tre ouverte.Pousserla manettede la porte
vers lagauche pour d@errouiller.
La salet6 peat avoir laiss6 un r6sJdugris poudreux. L'enlever
avecun linge humide.S'il restede la salet6,cela indiqueque le cycle
de nettoyagen'a pus6t6 assezlong.Cette salet6 restantesera
enlev(!eau prochaincycle d'autonettoyage.
Si les grilles ont 6t_ laiss6es _ I'int_rieur dufour pendant le
cycle d'autonettoyage et qu'elles glissentmal sur leurs sup-
ports,los enduire,ainsi que lossupports, d'une fine couche d'huile
v6g(_tale.
De fines lignes peuventapparaitre dunsla porcelaine parce
qu'elle a subi chaleur et refroidissement.Ceciest normal et
n'affecterapas la performance.
Line d6coloration blanche pout apparaitre apr_s le nettoyage
si des aliments acmes ou sucr6s n'ont pus6t6 enlev6s avant
que ne commence I'autonettoyage. La dc!colorationest normale
et n'affectera pus la performancedu four.
Remarques :
• Si la porte du four n'est pus ferm_e,le mot DOOR(PORTE)
clignote_ I'afficheur et lefour _metdes bipsjusqu'a ceque la
porte soit ferm_!eet que I'onappuiea nouveausur Clean.
• S'il s'_couleplus de cinq secondesentre le momentcOI'on
appuiesur Cleanet celui cOI'on appuie sur la touche
A ou V, I'afficheurretourne automatiquementa I'affichage
precedent.
• Laporte du four se trouveraendommag_esi I'on forceson
ouverturealors que le mot LOCKestencoreaffich_!.
42
M thodes de nettoyage
Los noms de marquesont des marques
d@oseesdes differentsfabricants.
_*Pour commanderdirectement,
composerle 1-877-232-6771E.-U.ou
1-800-688-8408Canada.
Bosseretet table L'emailvitrifieest du verrelie au metalpar fusion.IIpout sefissurerous'ecaillerencasde mauvaiseutilisation.IIest resistant
de cuisson= auxacides,maispastotalementinattaquablepar lesacides.Touslesproduitsrenverses,en particulieracidesou sucres,doivent
_rnaiJvitrifi_ etreessuyesimmediatementavecun lingo sec.
• Unefois refroidi,laveravecde I'eausavonneuse,rinceret secher.
• Nejamaisessuyerune surfacetie@ ou chaudeavecun lingo humide.Cecipourraitlafissurerou I'ecailler.
• Nejamaisutiliserdenettoyantspourfour,d'agentsde nettoyagecaustiquesou abrasifssur lefini exterieurde lacuisini_re.
Lbchefriteet
sagrille
Zone de la
consolede
commando/
horloge
Nejamais couvfirlagrille de papier d'aluminium; cola emp_chela graissede coulerdans la I_chefrite.
• Recouvrirla lectlefriteet sa grilled'un lingosavonneux;laisseragir pourdetacherlesresidus.
• LaveravecdeI'eausavonneusetilde. Utiliseruntampon_ recurerpour eliminerlossouillurestenaces.
• Onpeut placerles deuxcomposantsde la lechefritedansun lave-vaisselle.
• PourutiliserlafonctionVerrouillagedescommandospourle nettoyage,voirpage 33.
•Essuyeravecun lingohumide,puisfaire secher.Ne pasutiliserun agentdenettoyageabrasifsusceptiblede rayerlafinition.
• Onpeututiliserun produitdenettoyagedu verre,pulverised'abordsurun chiffon.NEPASprojeter le produit directement
sur lostouchesde commandoou sur I'afficheur.
Boutons de • Placerchaquebouton_ la positiond'ARRET,et retirerchaqueboutonen letirant.
commando • Laver,rinceret faire secher.Ne pasutiliserunagentde nettoyageabrasifsusceptiblede rayerlafinition.
• Fairefonctionnerbri_vementchaqueelementpourverifierque leboutonaete correctementreinstalle.
Table de
cuissonen
vitroc_ramique
Nejamais utiliser de produits de nettoyaqe dufour,javellisant, ammoniaqueell produits de nettoyaqe du verre
contenant de I'ammoniaque.REMARQUE:Prendrecontactavecun r_parateuragr_ si la surface en vitroc_ramique
se fendille, se casseeL!si de I'aluminiumou du m_tal fend surla surface.
• Laisserla tablede cuissonrefroidiravantde la nettoyer.
• G_n_ralit_s- Nettoyerlatable decuissonapr_schaqueemploiou au besoin,avecdu papieressuie-touthumidifieet la
cremedenettoyagepourtable de cuisson(pieceno20000001)**. Puis,essuyeravecun lingosec et propre.
REMARQUE:Desmarquespermanentesvontseproduired lasaleterestesurlasurfacede cuissonetest cuitede faconr4p4t4e.
• Salet_ _paisse ou marques m_talliques - Humidifierune@onge_ recurer<<nerayantpas>>.Appliquerdelacremede
nettoyagepourtable de cuisson(piecen° 20000001}*_et frotterpourretirerautantdesaletequepossible.Appliquerune
mincecouchedecremesur la salete,recouvriravecdu papier essuie-touthumidifieet laisserpendant30_ 45minutes[2 ou
3 heurespour la saletetres importante}.Garderhumideen recouvrantI'essuie-toutd'unepelliculeplastique.Rotter
nouveau,puisessuyeravecunlingepropreet sec.
REMARQUE:N'utiliserqu'untampon_recurer_ nerayantpas_,PROPREETHUMIDE,sansdangerpour lasustensilesde cuisine
rev4tementantiadh4si_Leverreet le motifserontendommag4ssila tamponn'estpashumide,s'il estsouill4ousi unautretype
de tamponest utilis4.
• Saiet_scuites ou dess_cb_es=Frotteravecuntampon _ recurer<{ne rayantpas>_et une cr_mede nettoyage
pourtable de cuisson.
REMARQUE:Tenirunelamederasoir_ un anglede30°et gratterpourenlevertoutesalat4restante.Puis,nettoyercomme
il estd4critci-dessus.Nepasseselvirdelalamede rasoirtouslesjours,colapourraituserlemotif duverre. _
• Plastiqueou sucre fondu - ReglerimmediatementI'elementsurLOWet gratterle sucreet le plastiquede la _ __
surfacechaudepourlespousservers unezonemoinschaude.PuisETEINDREI'elementet le hisserrefroidir.
Nettoyerle residuavecun grattoir9 lamede rasoiret de la cremede nettoyagepourtable decuisson.
43

Huhlotet porte
dufouren verre
• Eviterd'utilisertrop d'eau,quirisqueraitdes'infiltrersousou derrierele verreet detacher.
• Laver9 reauet au savon.Rinceravecde I'eaupropreet s@her.Un pro@itde nettoyagedu verrepeut6tre utilis6en le
vaporisantd'abordsur un linge.
• Nepasutiliserde produitsabrasifscommetampons_ r@urer,lained'acierouproduitdenettoyageen poudrequi
risqueraientde rayerleverre.
Int_rieurdufour • Ex@uterlesinstructionspr6sent@sauxpages41-42pourI'autonettoyagedufour.
Grillesdu four • Nettoyeravecde I'eausavonneuse.
• Eliminerlossouillurestenacesavecunepoudredenettoyageouuntampon_ r@urersavonneux.Rinceret faire s@her.
• Silos grillessentlaiss@sdanslefour pendantle cycled'autonettoyage,ellessed@olorentet peuventneplustres bien
glisser.Si colaseproduit,enduireleborddesgrilleset le supportdes grillesd'une finecouched'huilev6getale,pub essuyer
I'exc6dent.
Acier inoxydable
(certainsmod_les)
Chromehross_
(certainsme@los)
Tiroirde
remisage,
poign_ede
porte,panneaux
Jat_rau×=
_rnail peinte
• NEPAS UTILISERDEPRODUITSDE NETTOYAGECONTENANTDU JAVELLISANT.
• NEPAS UTILISERDENETTOYANT$_ ORANGE_ OUABRA$1FS.
• TOUJOUR$E$SUYERDAN$ LESEN$DELA TEXTUREDE L'AClERLOR$DU NETTOYAGE.
• Nettoyagejournalier/salet_i_g_re=EssuyeravecI'undes produitssuivants: eau savonneuse,vinaigreblanc/eau,produit
denettoyagepourverreet surfaceFormula409*ou unproduitsemblablepourverre- avecun lingosoupleet une@onge.
Rinceret s6cher.Pourpoliret enleverlos marquesde doigts,faire suivrepar unevaporisationde MagicSpraypour acier
inoxydable(piecen° 20000008)**.
• Salet_ mod_r_e/_paisse =EssuyeravecI'undesproduitssuivants: BenAmi*,SmartCleansePouSoftScrub*- _ raided'un
lingosoupleou d'une @ongehumide.Rinceret s@her.Lostachesrebellespeuvent6treenlev@savecuntamponmulti-
usagesScotch-Bdte*humidi% Rotter uniform_mentdartslesonsdu m6tal.Rinceret s@her.Pourredonnerdu lustreet
retirerlosrayures,fairesuivre parunevaporisationde Magic Spraypouracierinoxydable*.
• D_coloration=A raided'une@ongehumidifi@ou d'un lingosouple,essuyer_ I'aidedu nettoyantCameopouracier
inoxydable*.Rincerimm_diatementet s@her.Pourenleverlesmarqueset redonnerdu lustre,faire suivrepar unevaporisation
deMagicSpraypouracierinoxydable*.
• Unefois lacuisini6rerefroidie,nettoyeravecde I'eausavonneuse,rinceret fairebriller.
•Si la surfaceest relativementsale,utiliserun produitnettoyantI_gerementabrasifet frotter dartsle sensdugrainpour@iter
defairedesrayures.Rinceret s@her.
• Pour6viterles6raflures,ne pasutiliserd'articlesou produitsabrasifsou caustiques.
• Pourredonner_ la surfacesonbrillantet 61iminerlestrain@s,fairesuivredeproduit_ vaporiserStainlessSteelMagic
Spray*(rd_renceno 20000008)_*.Le chrome sera d#colordde faconpermanentesi la salet_ cuit dessus.
• Unefois lespi@esrefroidies,laver_ I'eausavonneusetilde, rinceret s@her.Nejamaisessuyerunesurfacetilde ouchaude
avecunlingehumide,cecipouvantendommagerlasurfaceet entrafnerune brt_lurepar lavapeur.
• Pourlestachesrebelles,utiliserdesagentsdenettoyageI_g6rementabrasifscommelap_te aubicarbonatede soudeou Ben
Ami*. Nepasutiliserd'agentsde nettoyageabrasifs,caustiquesou @ergiquescommelesnettoyantspourfour ou les
tamponsen lained'acier.Cesproduitsraieraientouendommageraientde fagonpermanentelasurface.
REMARQUE: Utiliserun lingoou un torchonsecpouressuyer lospreduits renvers_s,surtout s'ils sentacides eu
sucres.La surface pourraitse d#colererou se temir si la salet# n'#tait pasimmddiatementenlev_e. Ceciest
particuli#rement important danslecas de surfaces blanches.
* Loshemsde marquesent des marquesd@os6esdes diffc!rentsfabricants.
** Pourcommanderdirectement,composerle 1-877-232-6771E.-U.ou 1-800-688-8408Canada.
44
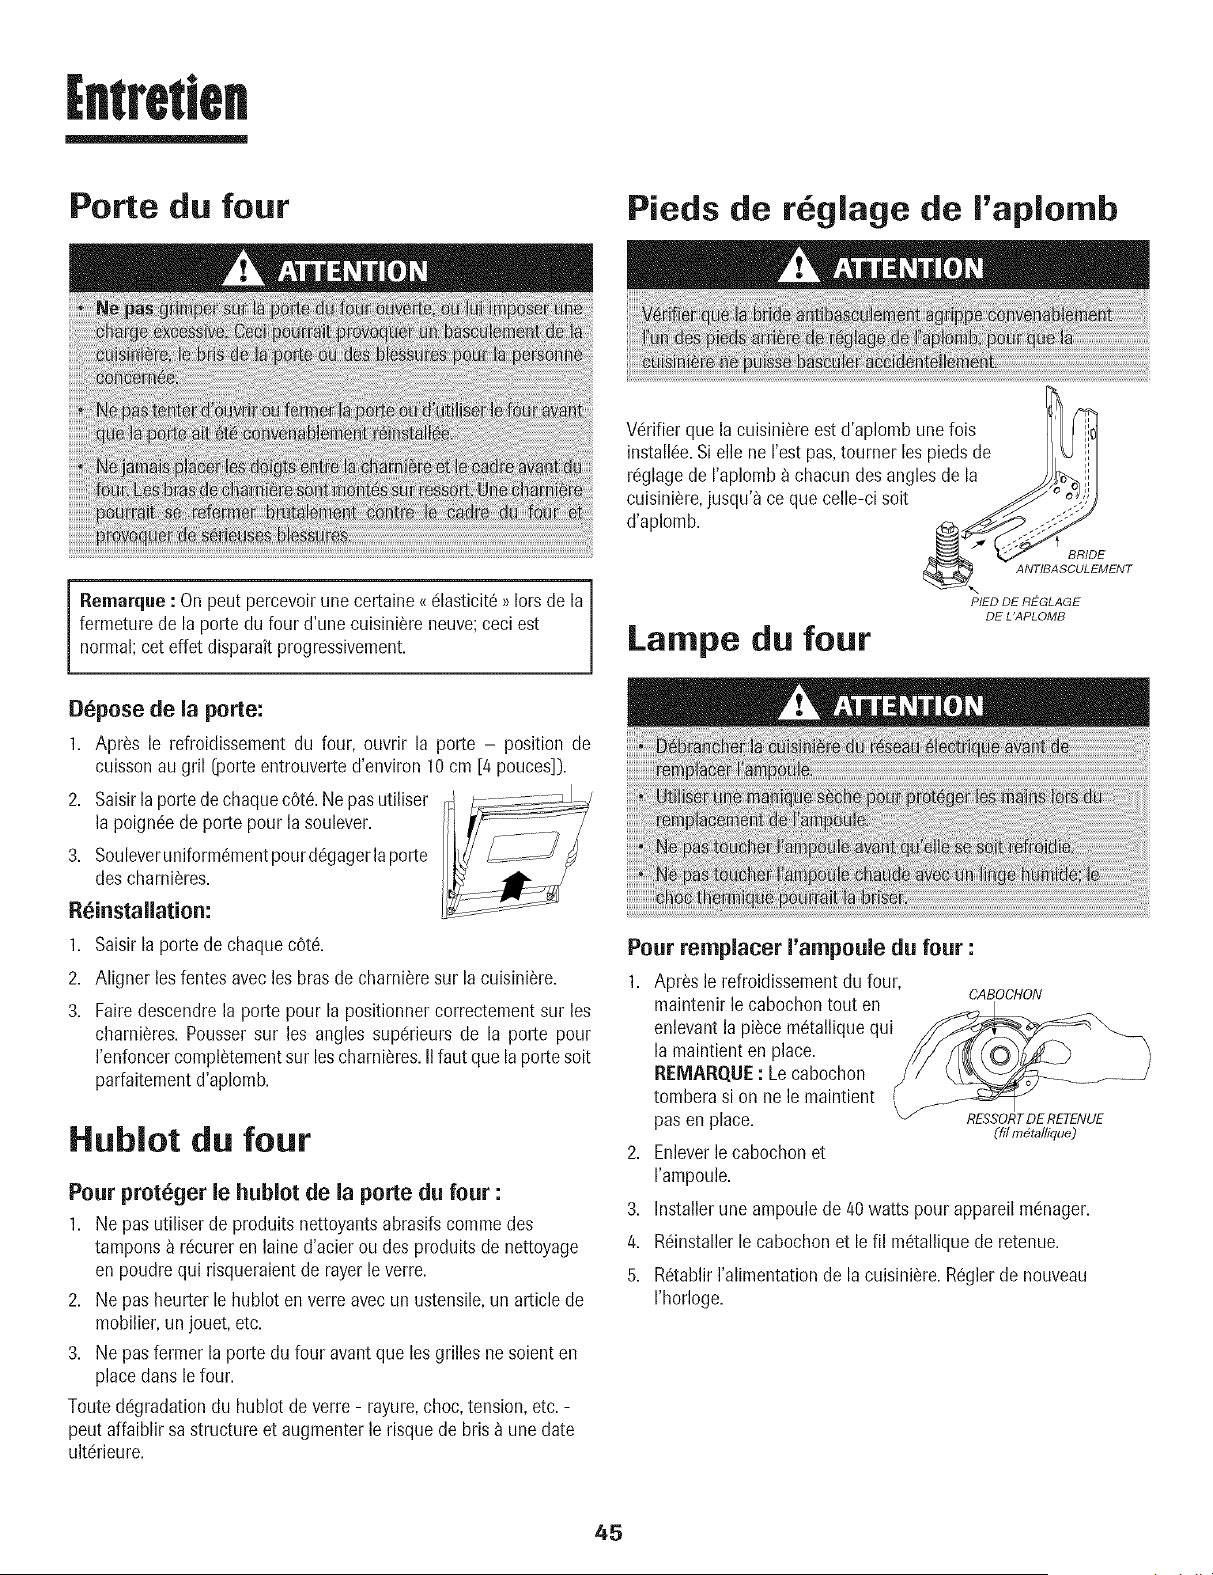
Porte du four
Pieds de r glage de I'aplomb
i emarque : On peut percevoirune certaine_c!lasticit6_lots de la
fermeture de la porte du four d'une cuisini_re neuve;ceci est
normal;cet effet disparait progressivement.
D_pose de la porte:
1. Apr_s le refroidissement du four, ouvrir In porte - position de
cuissonau gril [porte entrouverted'environ 10 cm [4 pouces]).
2. Saisirla porte dechaquecOt&Nepus utiliser
la poign6ede porte pour la soulever.
3. Souleveruniform6mentpour d6gagerla porte
des charni_res.
R_installation:
1. Saisir la portede chaque cOt&
2. Aligner les fentes avecles bras de charni_resur la cuisini_re.
3. Fairedescendrela porte pour la positionnercorrectementsur les
charni_res. Pousser sur les angles sup6rieurs de la porte pour
I'enfoncercomplStementsur lescharni_res.IIfaut que la portesoit
parfaitementd'aplomb.
Hublot du four
Pour proteger le hublot de la porte du four :
1. Ne pas utiliser de produits nettoyantsabrasifscorr_medes
tampons_ r6cureren lained'acier ou des produitsde nettoyage
en poudrequi risqueraientde rayer le verre.
2. Ne pus heurter le hublot en verre avec un ustensile,un article de
mobilier,un jouet,etc.
3. Ne pusfermer la porte du four avant que lesgrilles nesoient en
placeduns le four.
Toutede!gradationdu hublot de verre- rayure,choc,tension, etc.-
peut affaiblir sa structure et augmenterle risque de bris _ unedate
ultc!rieure.
V6rifierque la cuisini_re est d'aplomb unelois I[ I _1
install6e.Si elle ne I'est pas,tourner lespieds de
rc!glagede I'aplomba chacundes anglesde la _.,__
cuisini_re,jusqu'a ce que celle-ci soit /_ _,;,_
d'aplomb. __
V BRIDE
_\ ANTIBASCULEMENT
PIED DE RL:GLAGE
DE L'APLOMB
Lampe du four
Pour rempiacer I'ampoule du four :
1. Apr_s le refroidissementdu four,
maintenirle cabochontout en
enlevantla piece m_talliquequi
la maintienten place.
REMARQUE: Lecabochon
tomberasi on ne le maintient l"
\
pas en place.
2. Enleverle cabochonet
I'ampoule.
CABOCHON
RESSORTDE RETENUE
ffil m6tallique)
3. Installerune ampoulede 40 watts pourappareilmc!nager.
4. R6installerle cabochonet le fil m6talliquede retenue.
5. R_tablirI'alimentationde la cuisini_re.R_glerde nouveau
I'horloge.
45
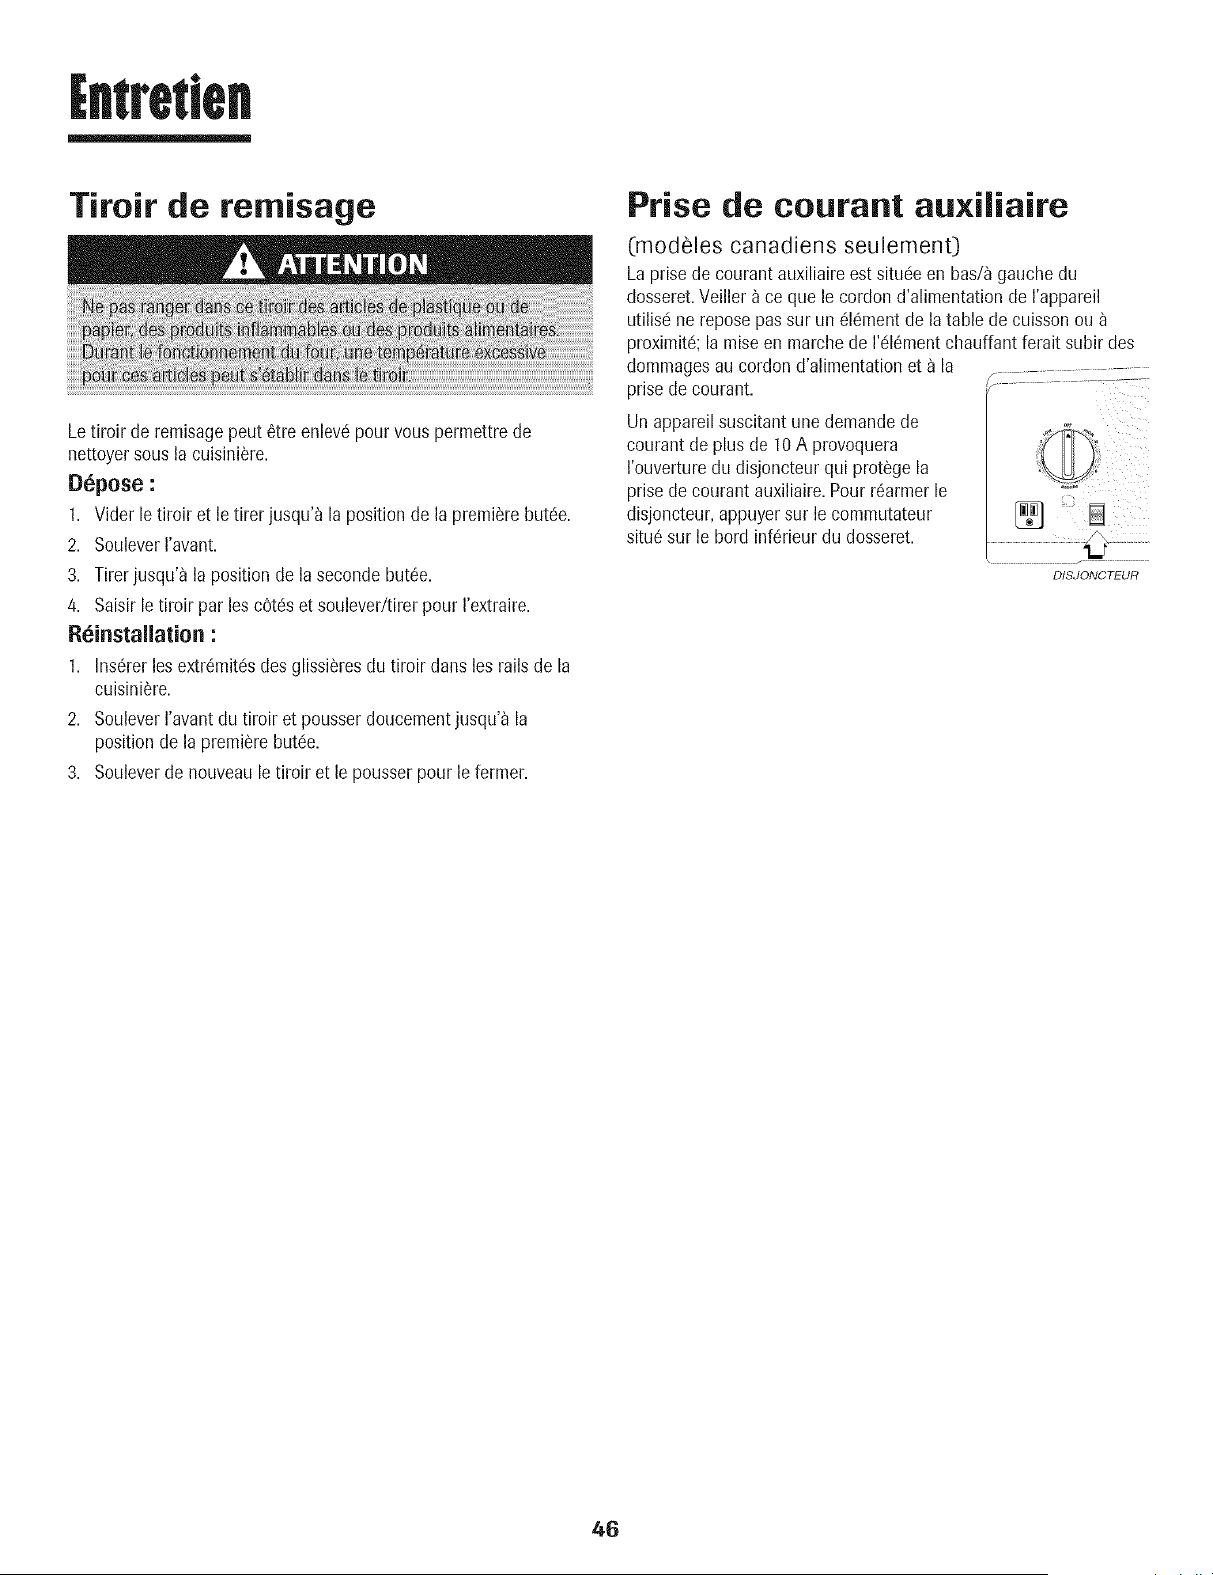
Tiroir de remisage
Letiroir de remisagepeut 6tre enlevc!pourvous permettrede
nettoyersous la cuisini6re.
D_pose :
1. Viderle tiroir et letirer jusqu'a la position de la premierebut6e.
2. SouleverI'avant.
3. Tirerjusqu'a la positionde la secondebut6e.
4. Saisirle tiroir par les cOtc!set soulever/tirer pour I'extraire.
R_installation :
1. Ins6rerlesextr6mit6sdes glissi_resdu tiroir darts les railsde la
cuisini_re.
2. SouleverI'avantdu tiroir et pousserdoucementjusqu'_ la
positionde la premierebutc!e.
3. Souleverde nouveaule tiroir et le pousserpour le fermer.
Prise de courant au×iliaire
(modeles canadiens seulement)
La prisede courant auxiliaireest situc!een bas/_gauche du
dosseret.Veiller_ ce que le cordon d'alimentationde I'appareil
utilisc!nereposepas sur un 616mentde latable de cuissonou
proximit6;la raiseen marche de I'c!l_mentchauffant ferait subir des
dommagesau cordon d'alimentationeta la
prise de courant.
Un appareil suscitantune demandede
courantde plus de 10A provoquera
I'ouverturedu disjoncteur qui protege la
prise de courant auxiliaire.Pourr6armerle
disjoncteur,appuyersur le commutateur
situ_sur le bord inf6rieurdu dosseret.
E
DISJONCTEUR
46
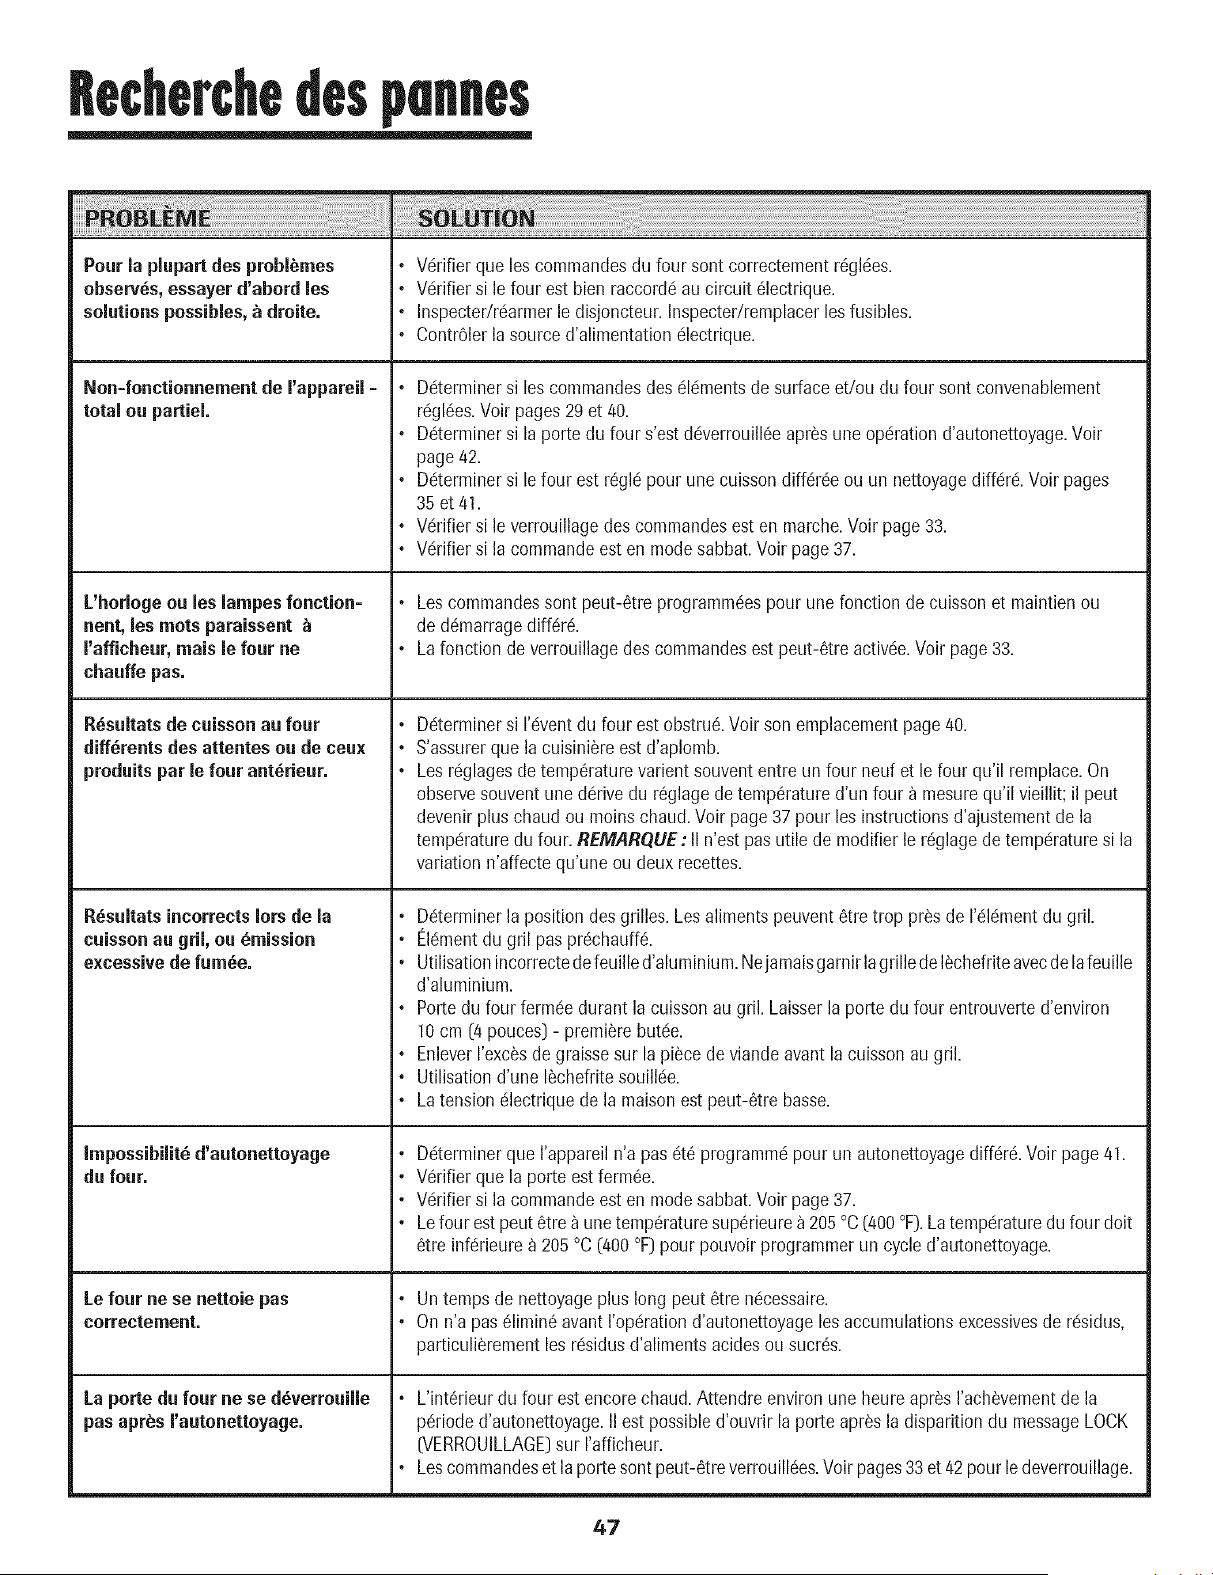
Becherchedes
Pour la plupartdes problbmes
observ6s, essayerd'abord les
solutionspossibles,_ droite.
Non-fonctionnementde rappareil -
total ou partiel.
L'horlogeou les lampes fonction-
nent, les rnotsparaissent
I'afficheur,mais le four ne
chauffepas.
R6suitatsde cuisson au four
diff6rentsdes attentes ou de ceux
produitspar ie four ant6rieur.
R6suitatsincorrectsiors de ia
cuissonau grii, ou 6mission
excessivede furn6e.
Impossibiiit6d'autonettoyage
dufour.
Le four ne se nettoie pas
correctement.
La porte du four ne se d6verrouille
pas apr_s rautonettoyage.
• V6rifierque les commandesdu four sont correctementr6gldes.
• Vdrifiersi le four estbien raccordc!au circuit 61ectrique.
• Inspectedrdarmerle disjoncteur.Inspecter/remplacerlesfusibles.
• ContrOlerlasourced'alimentationdlectrique.
D6terminersi lescommandesdesdldmentsde surfaceet/ou du four sont convenablement
rdgl6es.Voir pages29 et 40.
D_terminersi la porte du four s'estd6verrouill6eapr_suneopdration d'autonettoyage.Voir
page42.
Ddterminersi le four est r%ld pour une cuissondiff6r6eou un nettoyagediffc!rd.Voirpages
35 et 41.
V6rifiersi le verrouillagedes commandesesten marche.Voir page 33.
Vdrifiersi la commandeest en modesabbat.Voir page 37.
• Les commandessont peut-6treprogramm6espour unefonction de cuissonet maintienou
de d6marragediff6r6.
• La fonction deverrouillagedes commandesest peut-6tre activde.Voir page33.
Ddterminersi 1'6ventdu four estobstru6.Voir son emplacementpage 40.
S'assurerque la cuisini_reest d'aplomb.
Les rdglagesde temp6raturevarient souvententreun four neuf et le four qu'il remplace.On
observesouventune d6rive du r%lage detemp6ratured'un four _ mesurequ'il vieillit; il peut
devenirplus chaud ou moinschaud.Voir page37pour les instructionsd'ajustementde la
tempc!raturedu four. REMARQUE: II n'est pasutile de modifierle r6glagede tempc!raturesi la
variationn'affectequ'une ou deux recettes.
Dc!terminerla position des grilles. Lesalimentspeuvent6tre trop prosde I'c!lc!mentdu gril.
EIc!mentdu gril paspr6chauff&
Utilisationincorrectedefeuille d'aluminium.Nejamaisgarnirla grille de I_chefriteavecdela feuille
d'aluminium.
Portedu four fermc!edurant la cuissonau gril. Laisserla porte du four entrouverted'environ
10cm (4pouces)- premierebutc!e.
EnleverI'excSsde graisse sur la piece de viandeavant lacuisson augril.
Utilisationd'une I_chefritesouillc!e.
Latensionc!lectriquede la maisonestpeut-Strebasse.
D_terminerque I'appareiln'a pas _!t6programm_!pour un autonettoyagediff_!r_!.Voir page41.
V_rifierque la porte est fermSe.
V_!rifiersi la commandeest en modesabbat.Voirpage37.
Lefour est peut 6tre a unetemperaturesup_rieurea 205 °C(400°F).La temperaturedu four doit
6tre inf_!rieurea 205°C (400 °F)pourpouvoir programmerun cycle d'autonettoyage.
. Un temps de nettoyageplus long peut _tre ndcessaire.
. On n'a pas dlimin_ avantI'opdrationd'autonettoyagelesaccumulationsexcessivesde rdsidus,
particuli_rementles rdsidus d'alimentsacidesou sucrds.
L'intSrieurdu four est encorechaud. Attendre environ uneheure apr_s I'ach_vementde la
p6rioded'autonettoyage.II est possibled'ouvrir laporte apr_s la disparitiondu messageLOCK
(VERROUILLAGE)sur I'afficheur.
Lescommandeset la portesont peut-_treverrouill_!es.Voirpages33et 42 pour le deverrouillage.
47
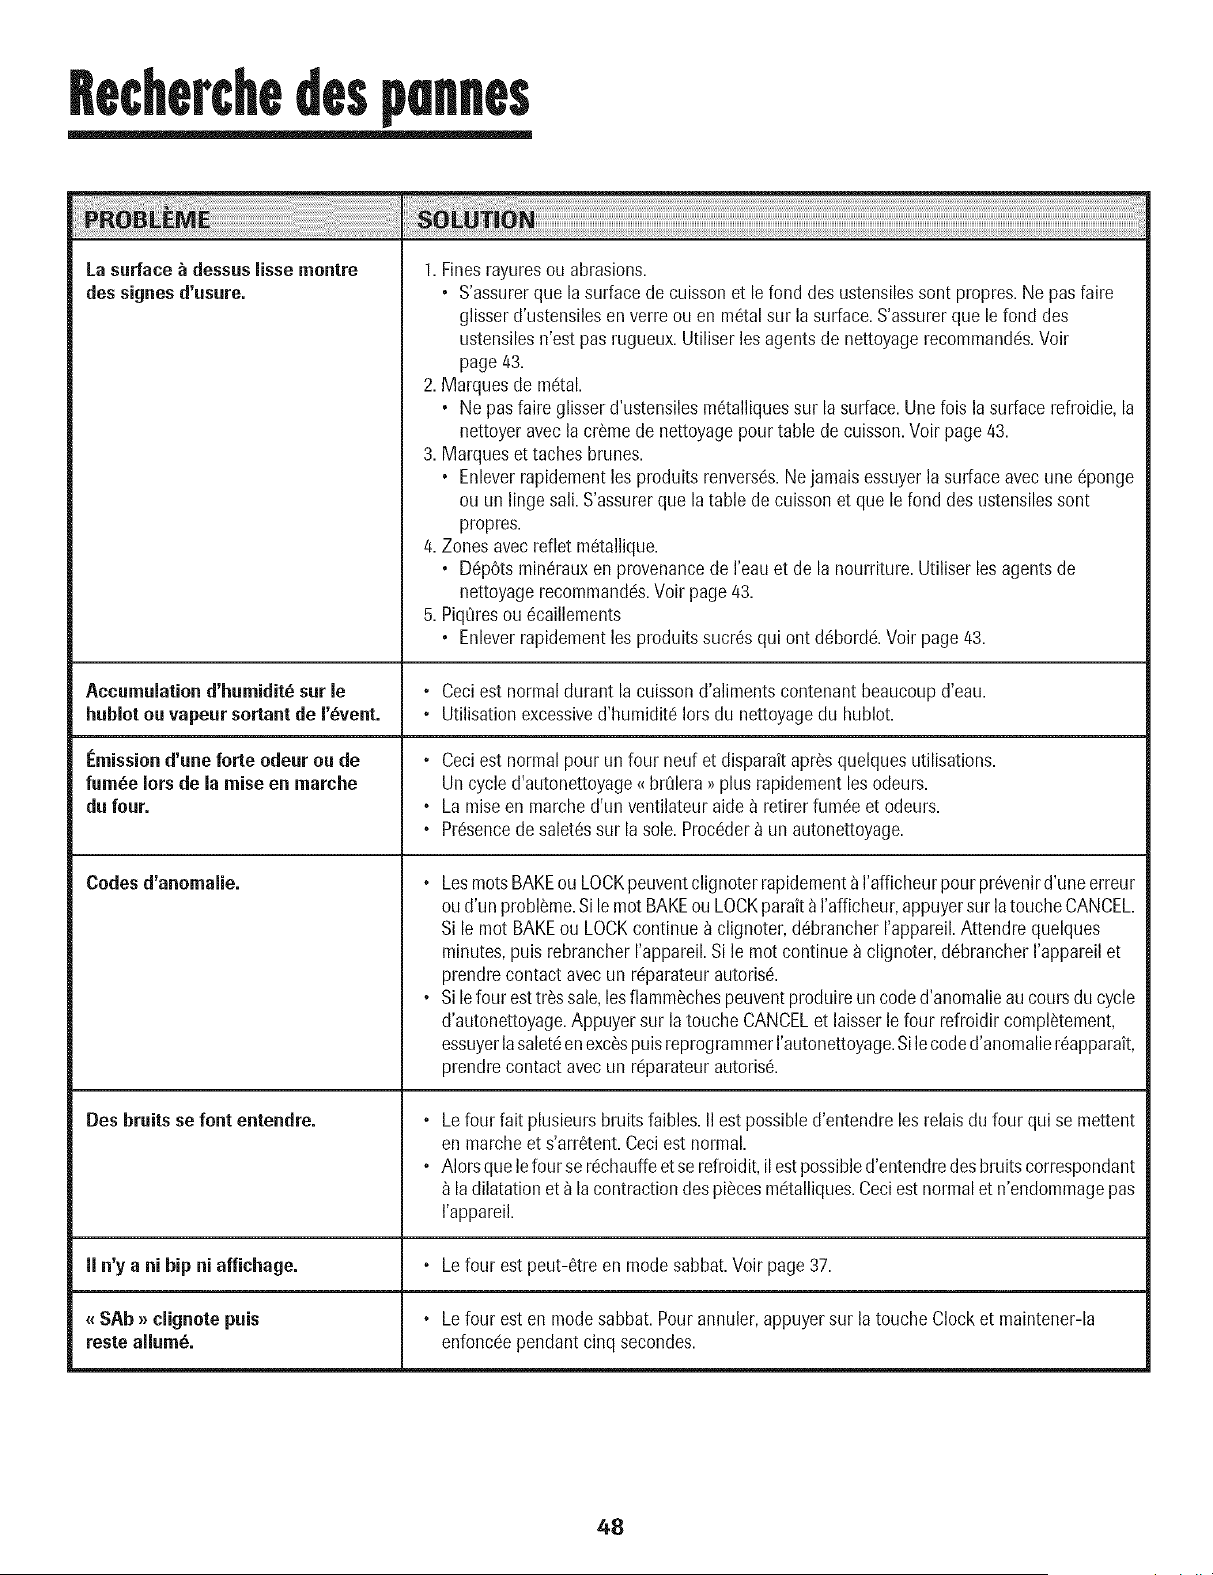
Becherchedes
La surface _ dessuslisse montre
des signes d'usure.
Accumulation d'humidit_ sur le
hubJotouvapeur sortant de J'_vent.
Emission d'une forte odeur ou de
fum_e Iors de la mJse en marche
du four.
Codesd'anomalie.
Des bruits se font entendre.
II n'y a ni hip ni affichage.
_ SAb_ clignote puis
reste ailurn&
1. Finesrayuresou abrasions.
• S'assurerque la surfacede cuissonet le fond des ustensilessont propres.Ne pas faire
glisserd'ustensilesenverre ou en m6tal sur lasurface.S'assurerque le fond des
ustensilesn'est pasrugueux.Utiliserles agents de nettoyagerecommand6s.Voir
page43.
2. Marques de m6tal.
• Ne pasfaire glisserd'ustensilesm6talliquessur la surface.Une fois lasurface refroidie,la
nettoyeravec la cr_me de nettoyagepour table de cuisson.Voir page 43.
3. Marqueset taches brunes.
• Enleverrapidementles produitsrenvers6s.Nejamais essuyerla surfaceavecune@onge
ou un lingesail.S'assurerque la table de cuissonet que le fond des ustensilessont
propres.
4. Zones avec reflet m6tallique.
• D@Otsmin6rauxen provenancede I'eauet de la nourriture.Utiliser lesagents de
nettoyagerecommand6s.Voir page 43.
5. Piqt3resou 6caillements
• Enleverrapidementles produitssucr6squi ont d6bord& Voir page 43.
. Ceciest normaldurant la cuissond'alimentscontenantbeaucoupd'eau.
. Utilisationexcessived'humidit6 Iorsdu nettoyagedu hublot.
. Ceciest normal pour un four neuf et disparaitapr_squelquesutilisations.
Un cycled'autonettoyage_{brQlera>_plus rapidementles odeurs.
• Lamiseen marche d'un ventilateur aide_ retirer fum6eet odeurs.
• Pr6sencede salet6ssur la sole. Procc!der_ un autonettoyage.
LearootsBAKEou LOCKpeuventclignoterrapidementaI'afficheurpourpr6venird'une erreur
ou d'un probl_me.Silemot BAKEou LOCKparait a I'afficheur,appuyersur latoucheCANCEL.
Si le mot BAKEou LOCKcontinue _ clignoter,d6brancher I'appareil.Attendrequelques
minutes,puis rebrancherI'appareil.Si le mot continuea clignoter,d6brancherI'appareilet
prendrecontact avecun rdparateurautoris6.
Si lefour esttr_ssale,lesflamm_chespeuventproduireuncoded'anomalieau coursdu cycle
d'autonettoyage.Appuyersur la toucheCANCELet laisser lefour refroidircompl_tement,
essuyerlasalet6enexc_spuisreprogrammerI'autonettoyage.Si le coded'anomalier_apparait,
prendrecontact avecun r@arateur autoris6.
°
°
Lefour fait plusieursbruits faibles.IIestpossibled'entendrelesrelais dufour qui se mettent
en marcheet s'arr6tent.Ceciest normal.
Alorsque lefour se rc!chauffeetse refroidit,ilestpossibled'entendredesbruitscorrespondant
ladilatationet _ lacontractiondespi_ces mdtailiques.Ceci est normalet n'endommagepas
I'appareil.
° Le four est peut-6tre en mode sabbat. Voir page 37.
• Lefour eaten modesabbat. Pourannuler,appuyersur latouche Clocket maintener-la
enfoncc!ependantcinq secondes.
48
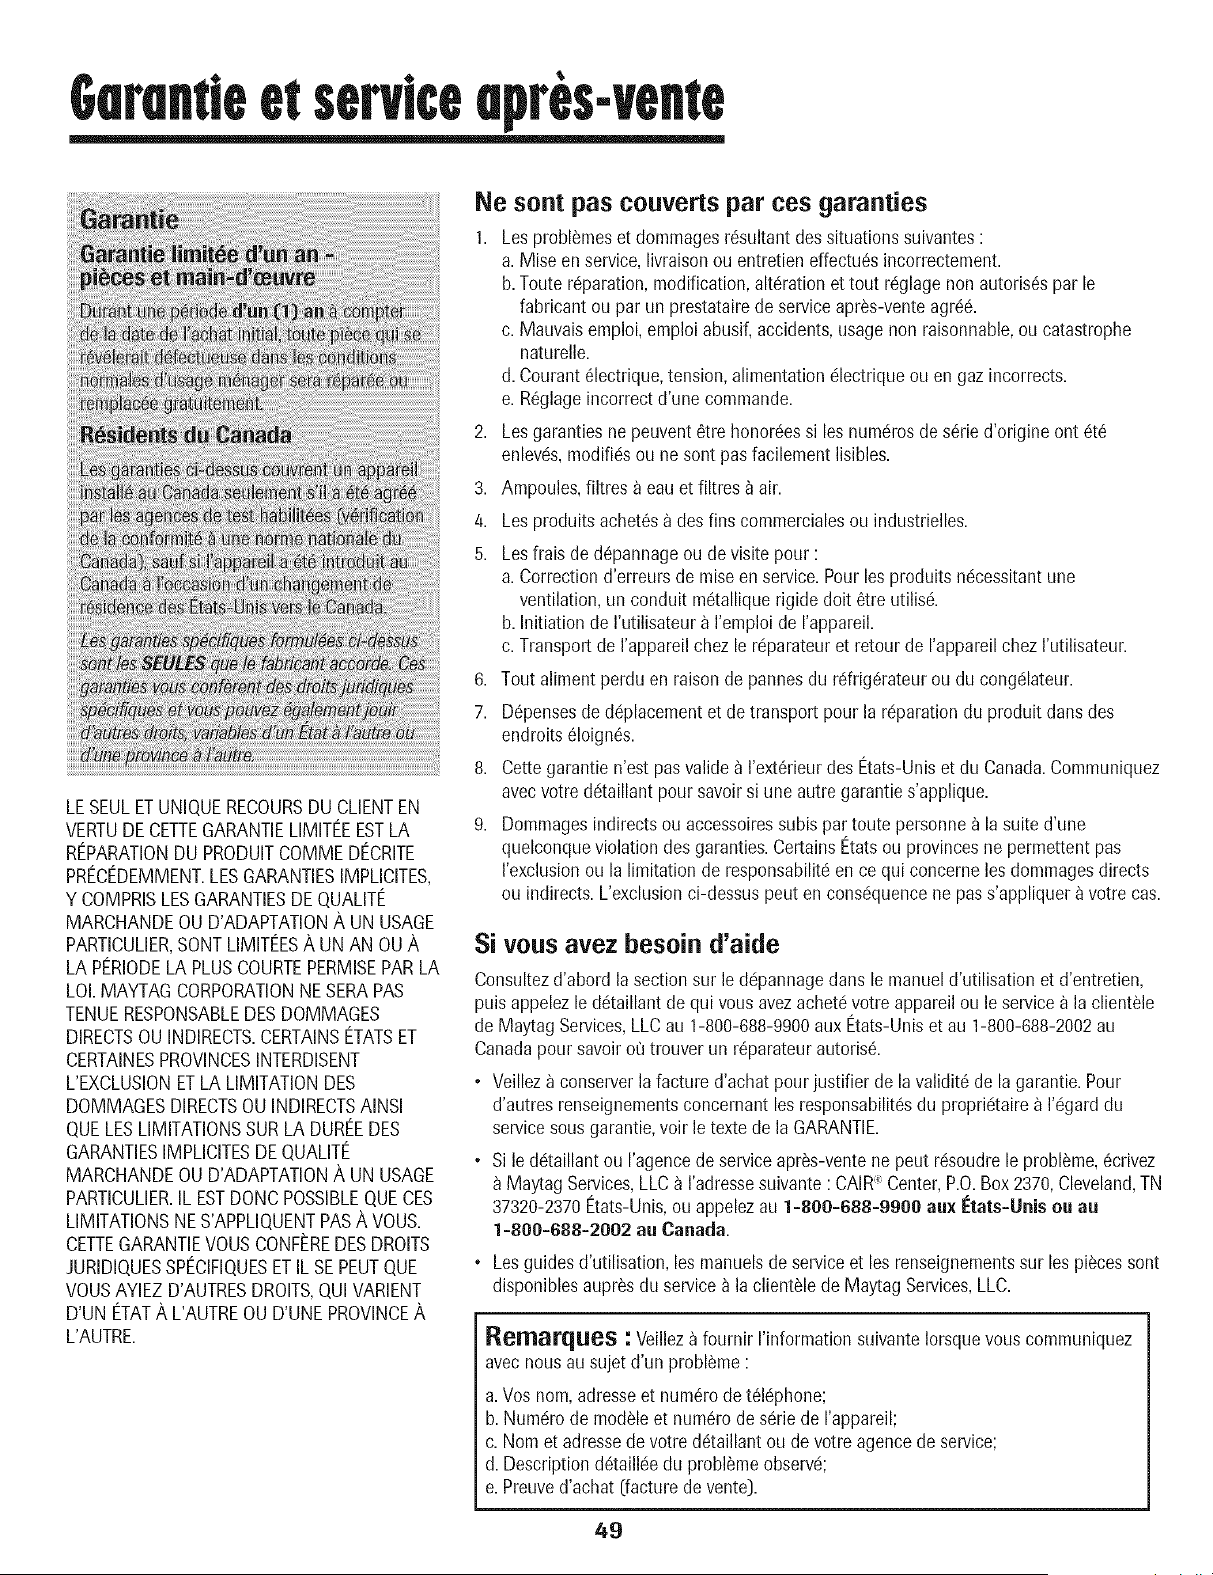
epres-vente
LESEULETUNIQUERECOURSDU CLIENTEN
VERTUDECETTEGARANTIELIMITEEESTLA
REPARATIONDU PRODUITCOMMEDECRITE
PRECEDEMMENT.LESGARANTIESIMPLICITES,
Y COMPRISLESGARANTIESDEQUALITE
MARCHANDEOU D'ADAPTATIONA UN USAGE
PARTICULIER,SONTLIMITEESA UN AN OUA
LA PERIODELA PLUSCOURTEPERMISEPARLA
LOI.MAYTAGCORPORATIONNESERAPAS
TENUERESPONSABLEDESDOMMAGES
DIRECTSOU INDIRECTS.CERTAINSETATSET
CERTAINESPROVINCESINTERDISENT
L'EXCLUSIONETLA LIMITATIONDES
DOMMAGESDIRECTSOUINDIRECTSAINSI
QUELESLIMITATIONSSUR LA DUREEDES
GARANTIESIMPLICITESDE QUALITE
MARCHANDEOU D'ADAPTATIONA UN USAGE
PARTICULIER.IL ESTDONCPOSSIBLEQUECES
LIMITATIONSNES'APPLIQUENTPASA VOUS.
CETTEGARANTIEVOUSCONFEREDESDROITS
JURIDIQUESSPECIFIQUESETIL SEPEUTQUE
VOUSAYIEZ D'AUTRESDROITS,QUIVARIENT
D'UN ETATA L'AUTREOU D'UNEPROVINCEA
L'AUTRE.
Ne sent pas couverts par ces garanties
1. Lesprobl_meset dommagesr6sultantdes situationssuivantes:
a. Miseen service,livraisonou entretieneffectu6sincorrectement.
b.Toute r@aration,modification,alt(!rationet tout r6glagenonautoris6spar le
fabricant ou par un prestatairede serviceapr_s-venteagr66.
c. Mauvaisemploi,emploi abusif,accidents,usagenon raisonnable,ou catastrophe
naturelle.
d. Courant_lectrique,tension, alimentationc!lectriqueou en gaz incorrects.
e. R_glageincorrectd'une commande.
2. Lesgarantiesnepeuvent6tre honor6essi les num@osde s@ied'origine ont €!t6
enlevc!s,modifi6sou ne sont pasfacilementlisibles.
3. Ampoules,filtres a eau et filtres _ air.
4. Lesproduitsachet6s_ des fins commercialesou industrielles.
5. Lesfrais ded@annageou de visite pour :
a. Correctiond'erreursde raiseen service.Pour lesproduits nc!cessitantune
ventilation,un conduit m_talliquerigide dolt 6tre utilisc!.
b. Initiationde I'utilisateur_ I'emploi de I'appareil.
c. Transportde I'appareilchezle r@arateuret retour de I'appareilchezI'utilisateur.
6. Tout alimentperduen raison de pannesdu rc!frig6rateurou du congc!lateur.
7. D@ensesde d@lacementet de transport pour la r@aration du produit dartsdes
endroits61oign6s.
8. Cettegarantie n'est pasvalide_ I'ext6rieurdes Etats-Uniset du Canada.Communiquez
avecvotred_!taillantpour savoirsi une autre garanties'applique.
9. Dommagesindirectsou accessoiressubis par toute personnea la suite d'une
quelconqueviolation des garanties.CertainsEtatsou provincesne permettentpas
I'exclusionou la limitation de responsabilit6en ce qui concerneles dommagesdirects
ou indirects.L'exclusionci-dessuspeut en consc!quencene pass'appliquer_ votrecas.
Si vous avez besoin d'aide
Consultezd'abord lasection sur le d@annagedans le manueld'utilisation et d'entretien,
puis appelezle d_taillantde qui vousavezachetc!votre appareilou leservice_ la clientele
de MaytagServices,LLCau 1-800-688-9900aux Etats-Uniset au 1-800-688-2002au
Canadapour savoir ot'Jtrouver un r@arateur autoris&
• Veillezaconserverla facture d'achat pour justifier de la validit6 de la garantie. Pour
d'autres renseignementsconcemant lesresponsabilit6sdu propric!taire_ I'c!garddu
servicesousgarantie,voir le textede la GARANTIE.
• Si ledc!taillantou I'agencede serviceapr_s-ventene peut rc!soudrele probl_me,6crivez
MaytagServices,LLCa I'adressesuivante: CAIR:_Center,P.O.Box2370,Cleveland,TN
37320-2370Etats-Unis,ouappelezau 1=800=688=9900 aux Etats=Llnisou au
1=800=688=2002au Canada.
Les guidesd'utilisation, les manuelsdeserviceet les renseignementssur les piscessont
disponiblesaupr_sdu service_ la clientelede Maytag Services,LLC.
Re_arques : Veilleza fournir I'informationsuivanteIorsquevouscommuniquez
avecnous au sujet d'un problSme:
a. Vos nora,adresseet num_rode t_l@hone;
b.Num_!rode moduleet num_ro de s_rie de I'appareil;
c. Nomet adressedevotre d_taillantou devotre agencede service;
d. Description d_tailk!edu probl_meobserv_!;
e. Preuved'achat [facturede vente).
49
Es_ufa Ei_c_rica con
Cubier_a Lisa
Estufa ............ 55-57
Homo ............ 58-66
Cuidado y Limpieza .................. 67=70
Horno Autolimpiante
Procedimientos de Limpieza
Nlantenimiento .......................... 71 =72
Ventana del Horno
Luz del Homo
Localizaci6n y Soluci6n
de Averias ...................................73=74
Garantia y Servicio .......................... 75
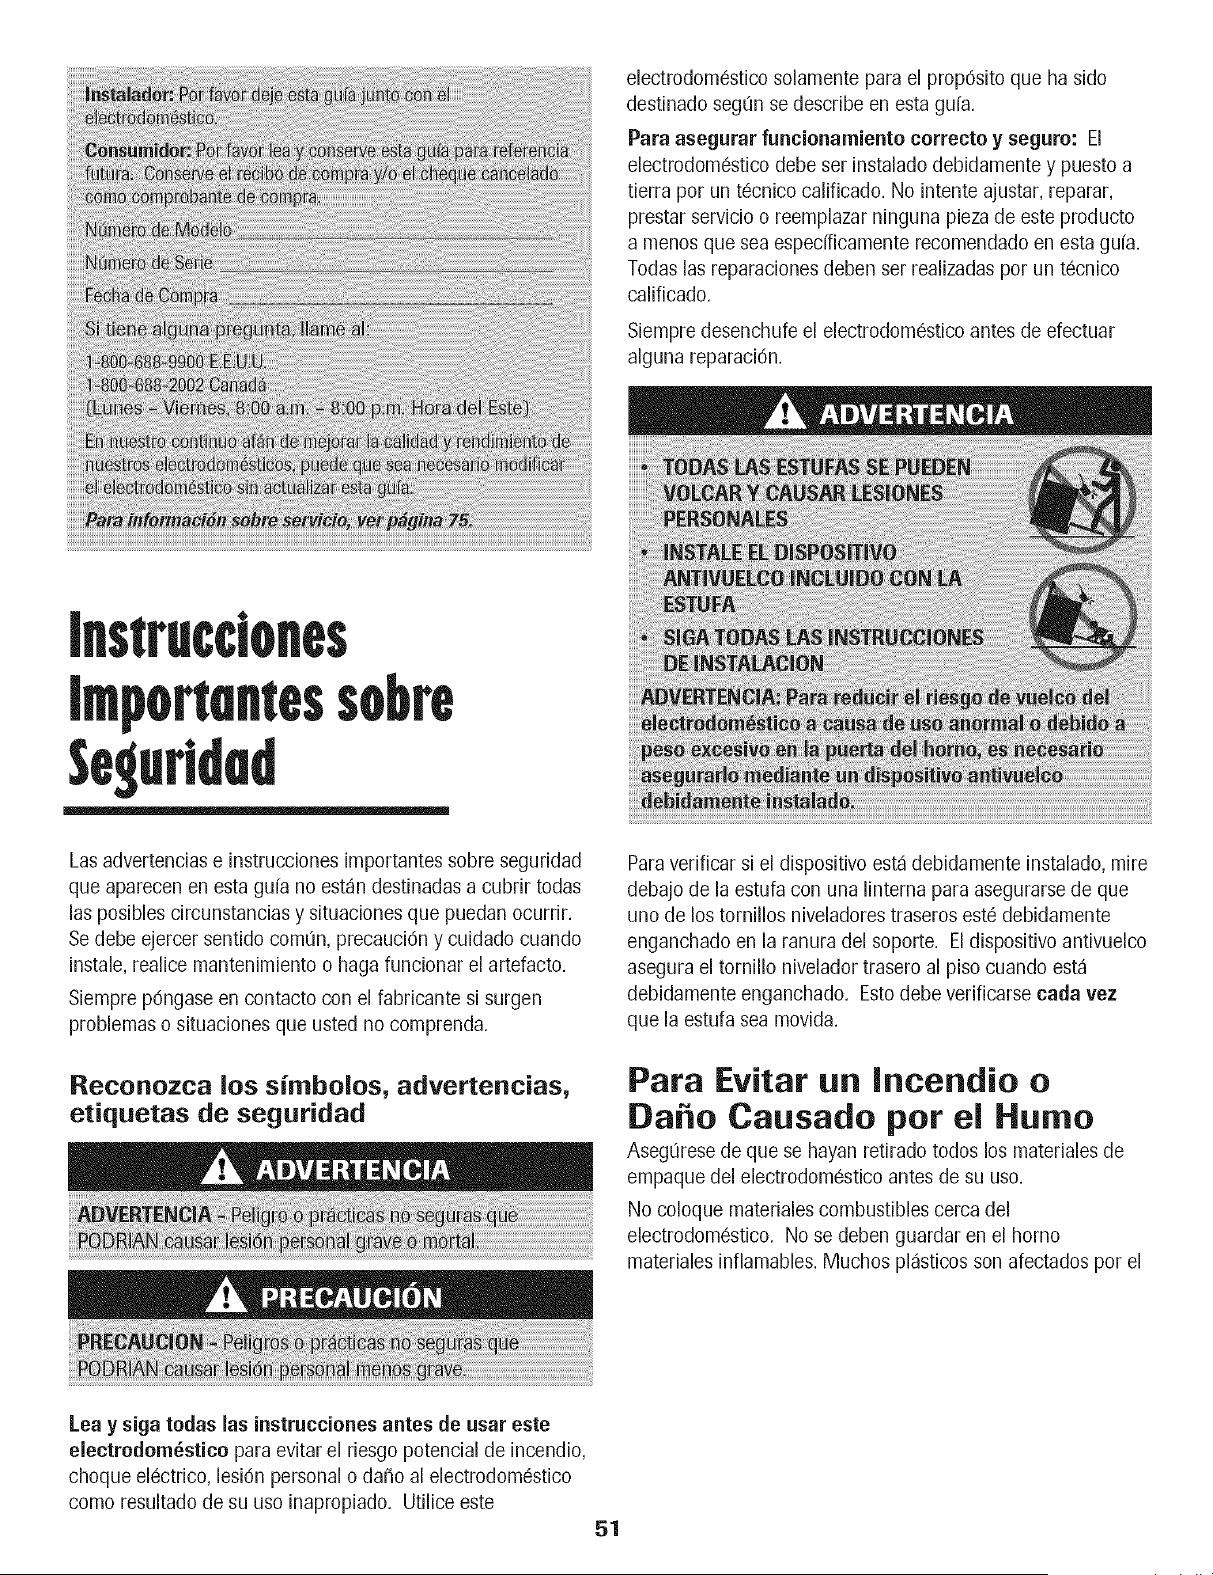
electrodomestico solamente para el prop6sito que ha sido
destinado segt_n se describe en esta gu{a.
Para asegurar funeionarniento eorreeto y seguro: El
electrodom_stico debe set instalado debidamente y puesto a
tierra por un t8cnico calificado. No intente ajustar, reparar,
prestar servicio o reemplazar ninguna pieza de este producto
a menos que sea espedficamente recomendado en esta gu{a.
Todas las reparaciones deben set realizadas por un t6cnico
calificado.
Siempre desenchufe el electrodomestico antes de efectuar
alguna reparaci6n.
Las advertencias e instrucciones importantes sobre segufidad
que aparecen en esta gu{a no est_n destinadas a cubrir todas
las posibles circunstancias y situaciones que puedan ocurrir.
Se debe ejercer sentido comt_n,precauci6n y cuidado cuando
instale, realice mantenimiento o haga funcionar el artefacto.
Siempre p6ngase en contacto con el fabricante si surgen
problemas o situaciones que usted no comprenda.
Reconozca los simbolos, advertencias,
etiquetas de seguridad
_i
Paraverificar si el dispositivo est_ debidamente instalado,mire
debajo de la estufa con una linterna para asegurarse de que
uno de los tornillos niveladores traseros est8 debidamente
enganchado en la ranura del soporte. El dispositivo antivuelco
asegura el tornillo nivelador trasero al piso cuando est_
debidamente enganchado. Esto debe vefificarse carla vez
que la estufa sea movida.
Para Evitar un Incendio o
Da o Causado per el Humo
AsegL_resede que se hayan retirado todos losmateriales de
empaque del electrodomestico antes de su uso.
No coloque matefiales combustibles cerca del
electrodomestico. No se deben guardar en el homo
materiales inflamables.Muchos pl_sticos son afectados por el
Lea y siga todas las instrucciones antes de usar este
eleetrodorn_stico para evitar el riesgo potencial de incendio,
choque electrico, lesi6n personal o da_o al electrodomestico
como resultado de su uso inapropiado. Utilice este
51
Imponentes Segurlded
calor. Mantenga los pl_sticos alejados de las piezas del
electrodomestico que se pueden entibiar o calentar.
Para evitar incendios de grasa, no permita acumulaci6n de
grasa de cocinar o de otros materiales inflamables en el homo
o en su cercanfa.
En Case de Incendio
Use un extinguidor con producto quimico seco odel tipo
espuma o bicarbonato para apagar el incendio o las llamas.
Nunca use agua en un incendio de grasa.
1. Apague el homo para evitar que la llama se disperse.
2. NUNCA levante o mueva una sart6n en Ihmas.
3. Apague el fuego o la llama del homo cerrando la puerta
del homo.
Seguridad para los Ni os
NUNCA deje a los ni_os solos o sin supervisi6n cuando el
homo est6 en uso o cuando est6 caliente. No se debe nunca
permitir que los ni_os se sienten o se paren en ninguna pieza
del electrodomestico pues se pueden lesionar o quemar.
Se les debe ense_ar a los ni_os que el electrodomestico y los
utensilios que est_n en el pueden estar calientes. Deje enffiar
los utensilios calientes en un lugar seguro, fuera del alcance
de los ni_os. Se les debe ense_ar a los ni_os que un
electrodomestico no es un juguete y que no deben jugar con
los controles u otras piezas del artefacto.
Instrucciones Generales
Para evitar posibles riesgos para el usuario y da_o al
electrodomestico, no use este producto como una estufa para
calentar o entibiar una habitacidn. Adem_s no use el homo
como un lugar para guardar alimentos o utensilios de cocina.
No obstruya la circulacidn del aire bloqueando el respiradero
del homo.
NO TOQUE LOS ELEMENTOSCALEFACTORESNI LAS
SUPERFICIESINTERIORESDEL HORNO. Los elementos
calefactores pueden estar calientes aQncuando su color sea
obscuro. Las superficies interiores de cualquier homo se
calientan Io suficiente como para causar quemaduras.
Durante y despues del uso, no toque ni permita que las ropas
u otros matefiales inflamables entren en contacto con los
elementos calefactores o las superficies interiores del homo
hasta que no se hayan enfriado. Otras superficies del
electrodomestico pueden estar Io suficientemente calientes
para causar quemaduras - entre estas superficies est_n la
abertura del respiradero del homo, la superficie cerca de esta
abertura, la puerta del homo y la ventana de la puerta del
homo.
No toque un foco caliente del homo con un paso h_medo
pues se puede quebrar. Si el foco se quiebra, desenchufe el
electrodomestico antes de sacar el foco para evitar suffir un
choque electrico.
NUNCA use papel de aluminio para cubrir las parrilhs del
homo ni el panel inferior del homo. El uso incorrecto puede
resultar en un riesgo de choque electrico, incendio o da_o al
electrodomestico. Use papel de aluminio solamente como se
indica en esta guia.
Seguridad al Cocinar
Nunca caliente un contenedor de alimento cerrado en el
horno. La acumulaci6n de presi6n puede reventar el
contenedor causando una lesi6n personal grave o da_o al
electrodomestico.
52
Imponenles legurlded
Use tomaoNas secos y gruesos. Los tomaoNas hQmedos
pueden causar quemaduras por vapor. No se deben usar
toaNasde secar los platos ni otros sustitutos en vez de los
tomaoNas porque enos pueden pasar sobre los elementos
calientes y prenderse fuego o pueden quedar atrapados en las
piezas del electrodom6stico.
Use vestimentas apropiadas. Las ropas sueltas o ropas con
mangas largas sueltas no se deben usar cuando se est_
cocinando. La ropa se puede prender fuego y causar
quemaduras si entra en contacto con los elementos
calefactores.
Siempre coloque las parrillas del homo en las posiciones
deseadas cuando el homo est6 frfo. Deslice la parrilla del
horno hacia afuera para agregar o retirar alimento usando
tomaoNassecos y gruesos. Siempre evite colocar o retirar
alimento del homo sin sacar la parrilla hacia afuera. Si una
parfilla debe ser movida cuando est6 caliente, use un
tomaoNasseco. No deje que el tomaoNa entre en contacto
con el elemento caliente del horno.
Use las parrillas solamente en el homo en que fueron
enviadas/compradas.
Tenga cuidado cuando abra la puerta del homo. Pfimero deje
que salga el aire o vapor caNente antes de sacar o volver a
colocar el alimento en el homo.
ADVERTENCIA SOBR[ ALIMENTOS PREPARADOS: Siga
las instruccionesdel fabricante del aNmento. Si un contenedor
de aNmento congelado de pl_stico y/o su tapa se deform&
comba o de otra manera se da_a durante la cocci6n,
inmediatamentedescarte el aNmento y su contenedor. El
alimento puede estar contaminado.
No permita que el papel de aluminio o la sonda de la came
toque el elemento calefactor.
Siempre @ague todos los controles cuando haya terminado
de cocinar.
Seguridad sobre el Uso
de Utensilios
Siga las instrucciones del fabricante cuando use bolsas para
cocinar en el horno.
Se ha comprobado el rendimiento y funcionamiento seguro de
este electrodom6stico usando baterfas de cocina
convencionales. No use ningQn dispositivo o accesorio que no
haya sido especfficamente recomendado en esta gufa. No use
rejillas superiores de la estufa o sistemas de convecci6n para
hornos. El uso de dispositivos o accesorios que no sean
expresamente recomendados en esta gufa pueden crear
peligros graves de seguridad, afectar el rendimiento y reducir la
vida Qtil de los componentes de este electrodom6stico.
Asegt_rese de que el utensilio sea Io suficientemente grande
como para contener en forma debida los alimentos y evitar
derrames. El tama_o es particularmente importante cuando se
utilizan freidoras. AsegQrese de que el utensilio tiene
capacidad para el volumen de alimentos que se va a agregar al
igual que para la formaci6n de burbujas de la grasa.
Nunca deje que un utensilio hierva hasta quedar seco pues
esto puede da_ar el utensiNo y la estufa.
Si el utensilio es m_s peque_o que el elemento, una porci6n
del elemento quedar_ expuesta y puede encender la ropa o un
tomaollas.
Solamente ciertos tipos de utensiNos de vidrio, vidrio cer_mico,
cer_mica, gres u otros utensiNos vidriados son convenientes
para cocinar en la superficie o en el homo sin quebrarse
debido al repentino cambio de temperatura. Siga las
instrucciones del fabricante del utensilio cuando use vidrio.
Gire los mangos de los utensilios hacia el centro de la cubierta,
no hacia la habitaci6n ni sobre otro elemento superior. Esto
reduce el riesgo de quemaduras, encendido de materiales
inflamables o derrames si el utensilio es tocado
accidentalmente o alcanzado por ni_os peque_os.
Cubierta
NUNCA deje los elementos superiores sin supervisi6n,
especialmente cuando est_ usando los ajustes de calor altos.
Un derrame sin recibir la debida atenci6n puede causar humo y
un derrame de grasa puede causar un incendio.
Este electrodom6stico tiene diferentes tama_os de elementos
superiores. Seleccione utensilios que tengan bases planas Io
suficientemente grandes para cubrir el elemento. La relaci6n
adecuada entre el utensilio y el elemento mejorar_ la eficiencia
al cocinar.
CUBIERTA DE VIDRIO CERAMICO: NUNCA cocine sobre
una cubierta quebrada. Si la cubierta de la estufa se quiebra,
los agentes de limpieza y los derrames pueden penetrar y crear
un riesgo de choque el6ctrico. P6ngase en contacto con un
t6cnico caNficado inmediatamente.
53
Impomntes Segurlded
Ollas Freidoras
Use extremo cuidado cuando mueva la olla con aceite o
descarte la grasa caliente. Deje que la grasa se enfrfe antes
de intentar mover la olh.
Campanas de Ventilaci6n
Limpie con frecuencia la campana y los filtros a fin de evitar
que se acumule en ellos grasa u otros materiales infhmables y
para evitar incendios de grasa.
Cuando prepare alimentos fhmeados debajo de la campana,
encienda el ventihdor.
Seguridad en la Limpieza
Limpie con cuidado la cubierta. Apague todos loscontroles y
espere que se enfrfen las piezas del electrodomestico antes de
tocarlas o limpiarlas. Limpie con cuidado. Tenga cuidado
para evitar quemaduras de vapor si usa una esponja o un
paso mojado para limpiar los derrames en una superficie
caliente. Algunos limpiadores pueden producir vapores
nocivos cuando se aplican en una superficie caliente.
Limpie sohmente las piezas indicadas en esta guia.
Homo Autolimpiante
No limpie la junta de la puerta. La junta de la puerta es
esencial para obtener un buen seilo. Se debe tener cuidado
de no frotar, daffar ni mover la junta.
No use limpiadores de homo ni forros de homo de ningQn tipo
alrededor ni en ninguna parte del homo autolimpiante.
Es normal que la cubierta de la estufa se caliente durante el
ciclo de autolimpieza. Por Io tanto, se debe evitar tocar la
cubierta durante un ciclo de autolimpieza.
Aviso y Advertencia
Importante Sobre Seguridad
La Propuesta 65 de la Ley de 1986 del Estado de California
Sobre Seguridad y Contaminaci6n del Agua Potable (California
Safe Drinking Water and Toxic Enforcement Act of 1986] exige
que el Gobernador de California publique una lista de las
sustancias que segQn el estado de California causan c_ncer o
da_o al sistema reproductivo y exige que las empresas
adviertan a sus clientes sobre la exposici6n potential a tales
sustancias.
Se advierte a los usuarios de este electrodomestico que
cuando el homo est_ funcionando en el ciclo de autolimpieza,
puede haber exposici6n de bajo nivel a algunas de las
sustancias indicadas en la lista, incluyendo mon6xido de
carbono. La exposid6n a estas sustandas puede ser reducida
a un mfnimo ventilando el homo al exterior en forma
adecuada, abriendo las ventanas y/o la puerta en la habitaci6n
en donde est_ ubicado el electrodomestico durante el ciclo de
autolimpieza.
AVISO IMPORTANTE RESPECTO A LOS PAJAROS
DOIVlESTICO$: Nunca mantenga los p_jaros en la cocina o
en las habitaciones donde puedan Ilegar los humos de la
cocina. Los p_jaros tienen un sistema respiratorio muy
sensitivo. Los humos producidos durante el ciclo de
autolimpieza del homo pueden ser perjudiciales o mortales
para los p_jaros. Los humos que despide el aceite de cocina
recalentado, la grasa, margarina y los utensilios
antiadherentes recalentados pueden tambien set perjudiciales.
Conserve estas Instrucciones para Referencia Futura
54
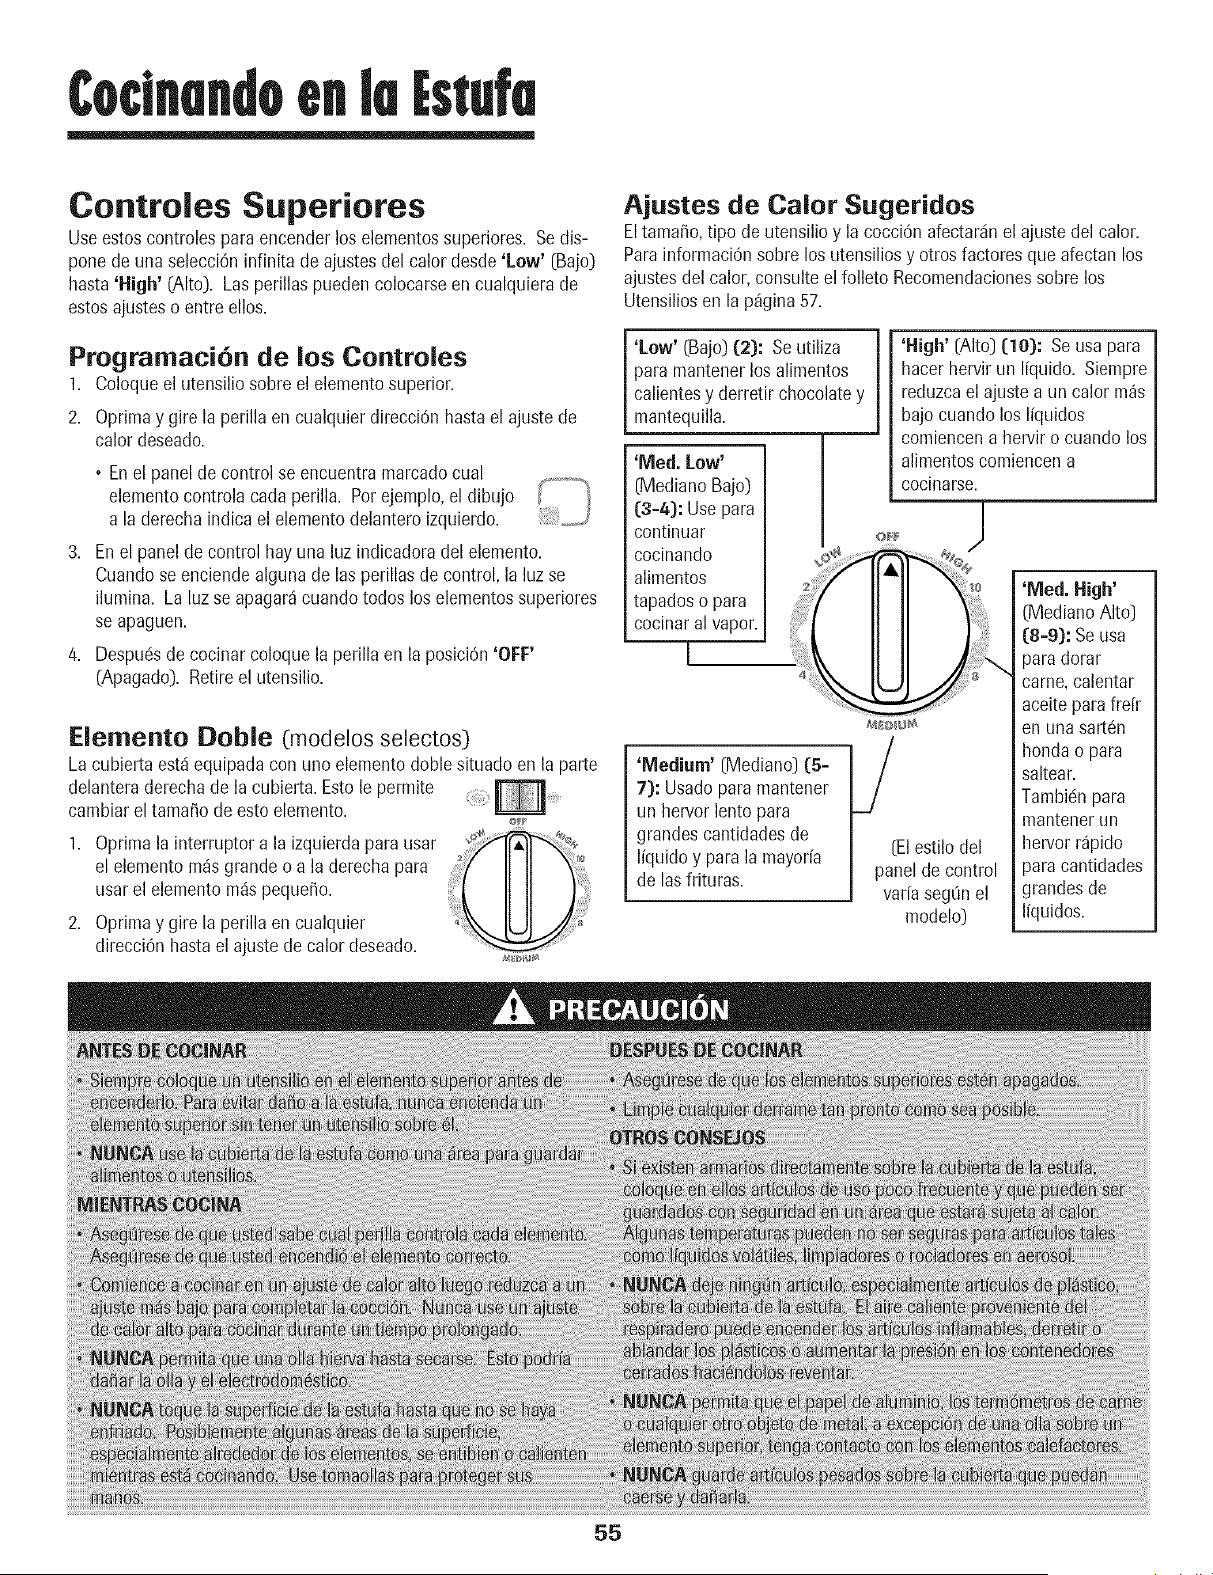
¢oclnaMoenlu Estafa
Controles Superiores
Useestoscontrolesparaencenderlos elementossuperiores. Sedis-
ponede una selecci6ninfinita de ajustesdel calor desde'Low' (Bajo)
hasta'High' (Alto). Las perillaspueden colocarseen cualquierade
estosajusteso entre ellos.
Programaci6n de los Controles
1. Coloqueel utensilio sobre el elementosuperior.
2. Oprimay gire la perillaen cualquier direcci6nhastael ajustede
calor deseado.
• Enel panelde control se encuentramar[ado cual
elementocontrola cada perilla. Por ejemplo,el dibujo
a la derechaindica el elemento delanteroizquierdo.
3. Enel panelde control hayuna luz indicadoradel elemento.
Cuandose enciendealgunade las perillasde control, la luz se
ilumina. La luzse apagar4cuando todos los elementossuperiores
se apaguen.
4. Despu@de cocinarcoloquela perilla en la posiciOn'OFF'
[Apagado}. Retireel utensilio.
Elemento i)oble (modelos selectos}
La cubiertaest,1equipadacon uno elemento done situado en la parte
delanteraderechade la cubierta.Estole permite
cambiareltama_ode estoelement&
1. Oprimala interruptor a la izquierdaparausar
el elementom_sgrandeo a la derechapara
usarel elemento m4s pequeffo.
2. Oprimay gire la perillaen cualquier
direcci6n hastael ajustede calor deseado.
55
Ajustes de Calor Sugeridos
Eltama_o,tipo de utensilio y la cocci6n afectar_inel ajustedel calor.
Parainformaci6nsobre los utensiliosy otros factores que afectan los
ajustesdel calor, consulteel folleto Recomendacionessobre los
Utensiliosen la p_gina57.
'Low' (Bajo}(2): Seutiliza
paramantenerlos alimentos
calientesy derretir chocolatey
mantequilla.
'Med. Low'
[MedianoBajo}
(3=4): Use para
continuar
cocinando
alimentos
tapadoso para
cocinaralvapor.
[
4
'Medium' [Mediano} (5=
7): Usadoparamantener
un hervor lento para
grandescantidadesde
I[quidoy parala mayoria
de las frituras.
'High' [Alto) (10): Seusa para
hacerhervir un I[quido. Siempre
reduzcael ajustea un calor m_s
bajocuandolos Ifquidos
comiencena hervir o cuando los
alirnentoscomiencena
cocinarse.
[El estilo del
panelde control
var[asegOnel
model@
'Meal. High'
(MedianoAlto)
(8-9): Seusa
dorar
calentar
aceiteparafrdr
i en unasart6n
hondao para
saltear.
Tambi_npara
mantenerun
hervorr@ido
paracantidades
grandes de
I[quidos.
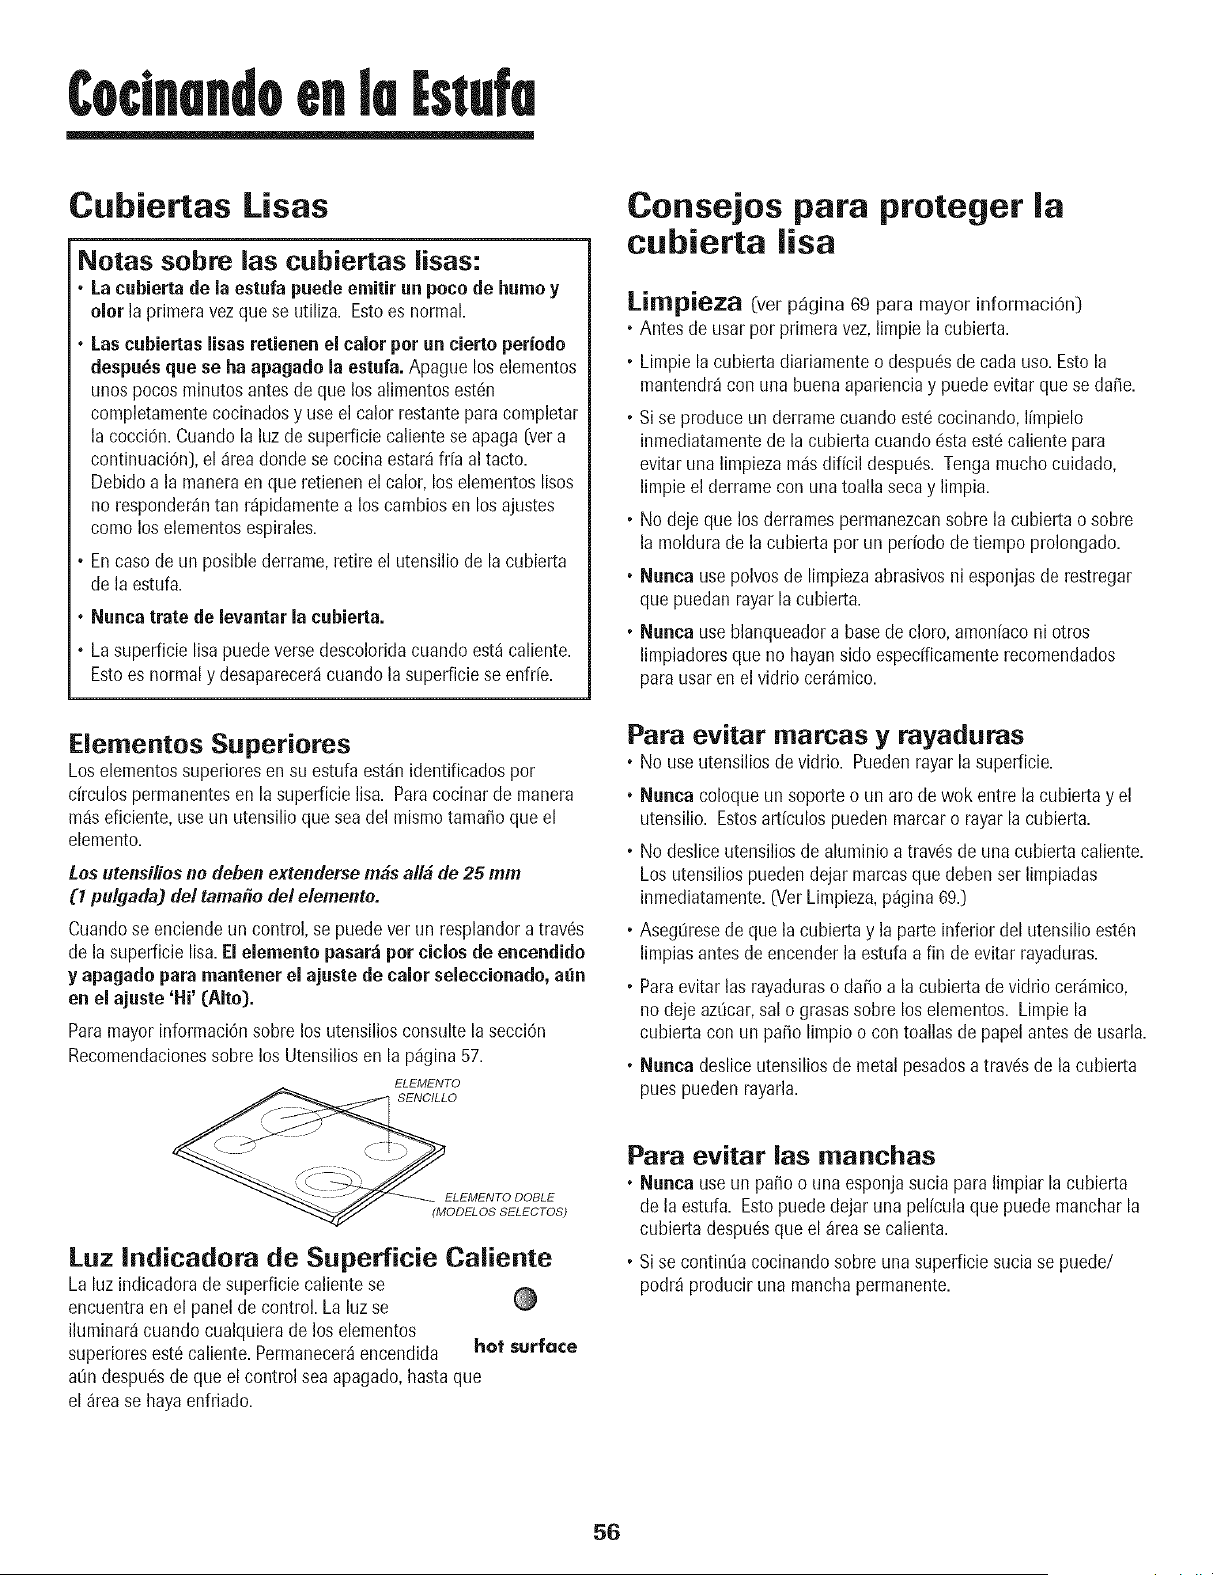
Coclnandoenlu Estafa
Cubiertas Lisas
Notas sobre las cubiertas lisas:
=La cubierta de la estafa puede emitir un poco de hamo y
olor la primeravez que se utiliza. Esto es normal.
• Las cubiertaslisas retienen el calor per an cierto periodo
despu_sqae se ha apagado la estafa. Apaguelos elernentos
unos pocos minutos antesde que los alimentosest_n
completamentecocinadosy use el calor restanteparacompletar
la cocci6n.Cuandola luz de superficie calientese apaga [vera
continuaci6n],el _rea donde se cocina estar_ fr[a al tacto.
Debido a la maneraenque retienen elcalor, loselementoslisos
no responder_ntan r_pidamentea los cambiosen losajustes
como los elementosespirales.
• En caso de un posible derrame,retireel utensiliode lacubierta
de la estufa.
• Nanca trate de levantar la cubierta.
• La superficielisa puede versedescoloridacuando est_ caliente.
Estoes normaly desaparecer_cuando lasuperficiese enfr[e.
Elementos Superiores
Loselementossuperioresen su estufaest_inidentificadospor
drculos permanentesen la superficielisa. Paracocinarde manera
m_iseficiente,use un utensilio que seadel mismotama_oque el
elemento.
Losutendlios nodeben extendemerobsallb de 25 mm
(1 pulgada) de/tamale de/e/emento.
Cuandose enciendeun control,se puede vet un resplandora trav6s
de la superficielisa. [I elemento pasarztpor ciclos de eneendido
y apagado para mantener el ajuste de ealor seleecionado,a_n
en el ajuste 'Hi' (Alto).
Paramayorinformaci0nsobre los utensiliosconsultela secci6n
Recomendacionessobre los Utensiliosen la p_igina57.
ELEMENTO
SENCILLO
Consoles para proteger la
cubierta lisa
Limpieza Cverp_gina 69 para mayor informaciOn_]
• Antes de usarpor primera vez,limpie la cubierta.
• Limpie lacubiertadiariamenteo despu6sdecada uso.Estola
mantendr_con una buena aparienciay puedeevitarque se da_e.
• Si se produce un derramecuando eat6cocinando,limpielo
inmediatamentede la cubiertacuando6sta est6 caliente para
evitar una limpiezamdsdificil despu6s. Tongamuchocuidado,
limpie el derramecon unatoalla secay limpia.
• No dejeque los derramespermanezcansobre la cubierta o sobre
la moldurade la cubierta por un periodode tiempo prolongado.
• Nanca use polvosde limpiezaabrasivosni esponjasde restregar
que puedan rayarla cubierta.
• Nanca use blanqueadora basede cloro, amoniaconi otros
limpiadoresque no hayansido especfficamenterecomendados
parausar en el vidrio cer_mico.
Para evitar marcas y rayaduras
• No use utensiliosde vidrio. Puedenrayar la superficie.
• Nanca coloque unsoporteo un arode wok entre la cubierta y el
utensilio. Estosarticulos pueden marcar o rayarla cubierta.
• No desliceutensiliosde aluminioa travc!sde una cubiertacaliente.
Los utensiliospuedendejar mamasque debenser limpiadas
inmediatamente.(Ver Limpieza,p_gina69.)
• AsegLiresede que la cubiertay la parte inferior del utensilioestc!n
limpiasantesdeencenderla estufa a fin de evitar rayaduras.
• Paraevitarlas rayadurasoda_o a la cubiertadevidrio cer_imico,
no dejeazOcar,sal o grasassobre los elementos. Limpie la
cubierta con un paso limpio o con toallasde papelantesde usarla.
• Nanca desliceutensiliosde metalpesadosa travc!sde la cubierta
puespueden rayarla.
ELEMENTO DOBLE
(MODEL OS SELECTOS)
Luz |ndicadora de Superficie Caliente
La luz indicadoradesuperficie calientese
encuentraen el panelde control. La luz se
iluminar_cuando cualquierade los elementos
superioresest6caliente.Permanecer_encendida hot surface
a_ndespuc!sde que el controlsea apagado,hastaque
el _rease hayaenfriado.
Para evitar las manchas
• Nunca use un paso o una esponjasuciapara limpiar la cubierta
de laestufa. Estopuededejaruna pel[culaque puedemancharla
cubierta despu6squeel _rease calienta.
• Si se continOacocinandosobreuna superficiesucia se puede/
podr_producir una manchapermanente.
56
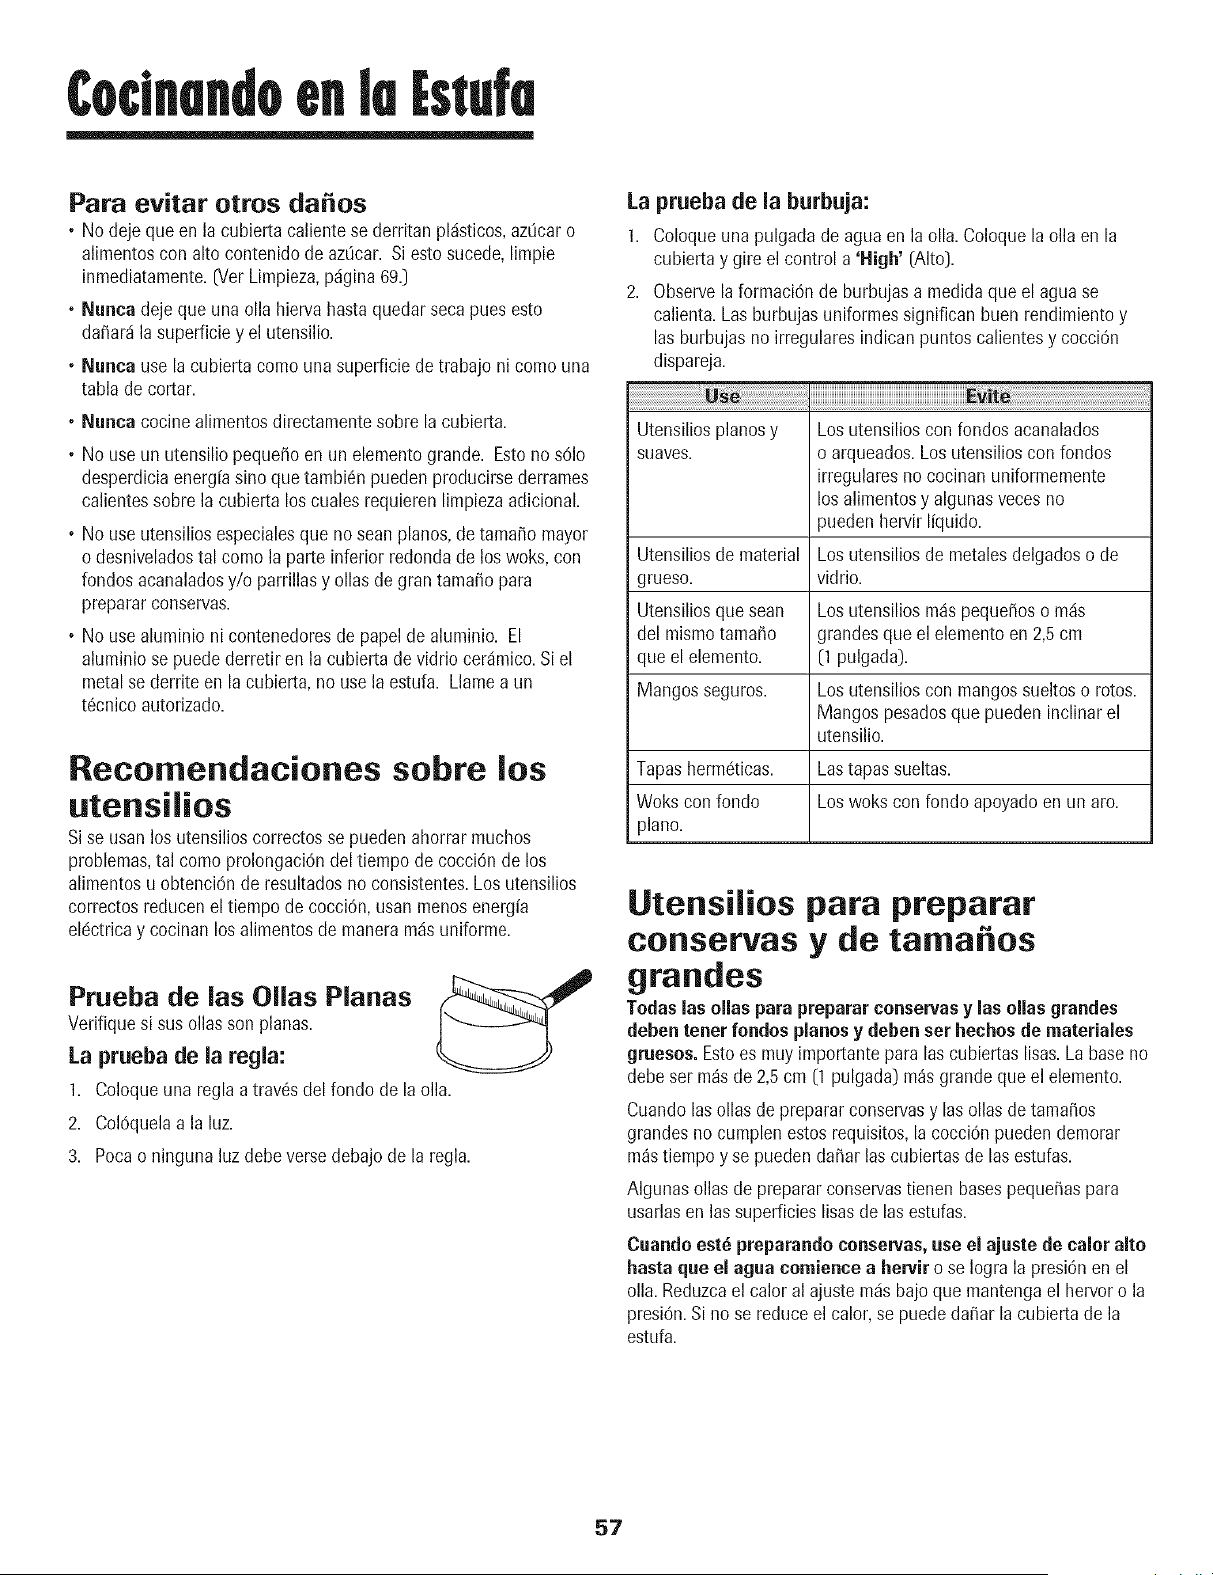
¢oclnandoenluEstafa
Para evitar otros da os
• No dejequeen la cubiertacalientese derritan pl_isticos,az_caro
alimentoscon alto contenido de azOcar.Si estosucede,limpie
inmediatamente.[Ver Limpieza,p_igina69.)
• Nanca dejeque una ella hiervahasta quedarsecapuesesto
da_ar_ila superficiey el utensilio.
• Nanca use la cubiertacomeuna superficiede trabajo ni come una
tabla de cortar.
• Nanca cocinealimentosdirectamentesobre la cubierta.
• No use un utensiliopeque_oen un elementogrande. Estono s01o
desperdiciaenerg[asine que tambi6npueden producirsederrames
calientessobre la cubierta los cualesrequierenlimpiezaadicional.
• No use utensiliosespecialesque nosean planes,detamale mayor
o desniveladostal come la parte inferior redondade loswoks, con
rondos acanaladosy/o parrillasy elias de grantamale para
prepararconservas.
• No use aluminio ni contenedoresde papelde aluminio. El
aluminiose puede derretir en la cubiertade vidrio cer_imico.Siel
metalse derrite en la cubierta, no use laestufa. Llamea un
t6cnico autorizado.
Recomendaciones sobre los
utensilios
Sise usan los utensilioscorrectosse pueden ahorrar muchos
problemas,tal come prolongaci0ndeltiempo de cocci0nde los
alimentosu obtenci0n de resultadosno consistentes.Losutensilios
correctosreducenel tiempo de cocciOn,usanmenosenergfa
elc!ctricay cocinan los alimentosde maneram_isuniforme.
Prueba de las Ollas Planas
Verifique si sus eliasson planas.
La prueba de la regla:
1. Coloqueuna regla a trav_sdel rondode la ella.
2. Col0quelaa la luz.
3. Pocao ningunaluz debe versedebajo de la regla.
La prueba de la burbuja:
1. Coloqueuna pulgada de agua en la ella. Coloquela ella en la
cubiertay gire el control a'High' [Alto).
2. ObservelaformaciOnde burbujasa medidaque el agua se
calienta.Las burbujasuniformessignifican buen rendimientoy
las burbujasno irregularesindicanpuntos calientesy cocciOn
dispareja.
Utensiliosplanesy Los utensilioscon fondosacanalados
suaves, o arqueados.Losutensilioscon rondos
irregularesno cocinan uniformemente
los alimentosy algunasveces no
puedenhervir liquido.
Utensiliosde material Los utensiliosde metalesdelgadoso de
grueso, vidrio.
Utensiliosque sean Los utensiliosm_s peque_oso m_is
del mismotamale grandesque el elementoen 2,5cm
que el elemento. [1 pulgada).
Mangosseguros. Los utensilioscon mangos sueltoso rotes.
Mangos pesadosque puedeninclinar el
utensilio.
Tapashermc!ticas. Lastapas sueltas.
Wokscon rondo Los woks con fondo apoyadoen un are.
plane.
Utensilios para preparar
conservas y de tamales
grandes
Tedaslas elias para preparar censervas y las alias grandes
deben toner rondos pianos y debenser heches de materiales
grueses. Estoes muyimportantepara las cubiertas lisas.La baseno
debeser rodsde 2,5cm [1 pulgada)m_sgrandeque el elemento.
Cuandolas elias deprepararconservasy las eliasde tamales
grandesno cumplen estos requisites,la cocciOnpuedendemorar
m_stiempoy se puedenda_arlas cubiertasde las estufas.
Algunas eliasde prepararconservastienen basespeque_aspara
usarlasen las superficieslisas de las estufas.
Cuande est_ preparande censervas,use el ajuste de taler alto
hasta que el agua cemience a hervir o se Iogra la presi0nen el
ella. Reduzcael calor al ajustem_isbajoque mantengael hervoro la
presi0n.Si no se reduceel calor,se puededaSarla cubiertade la
estufa.
57
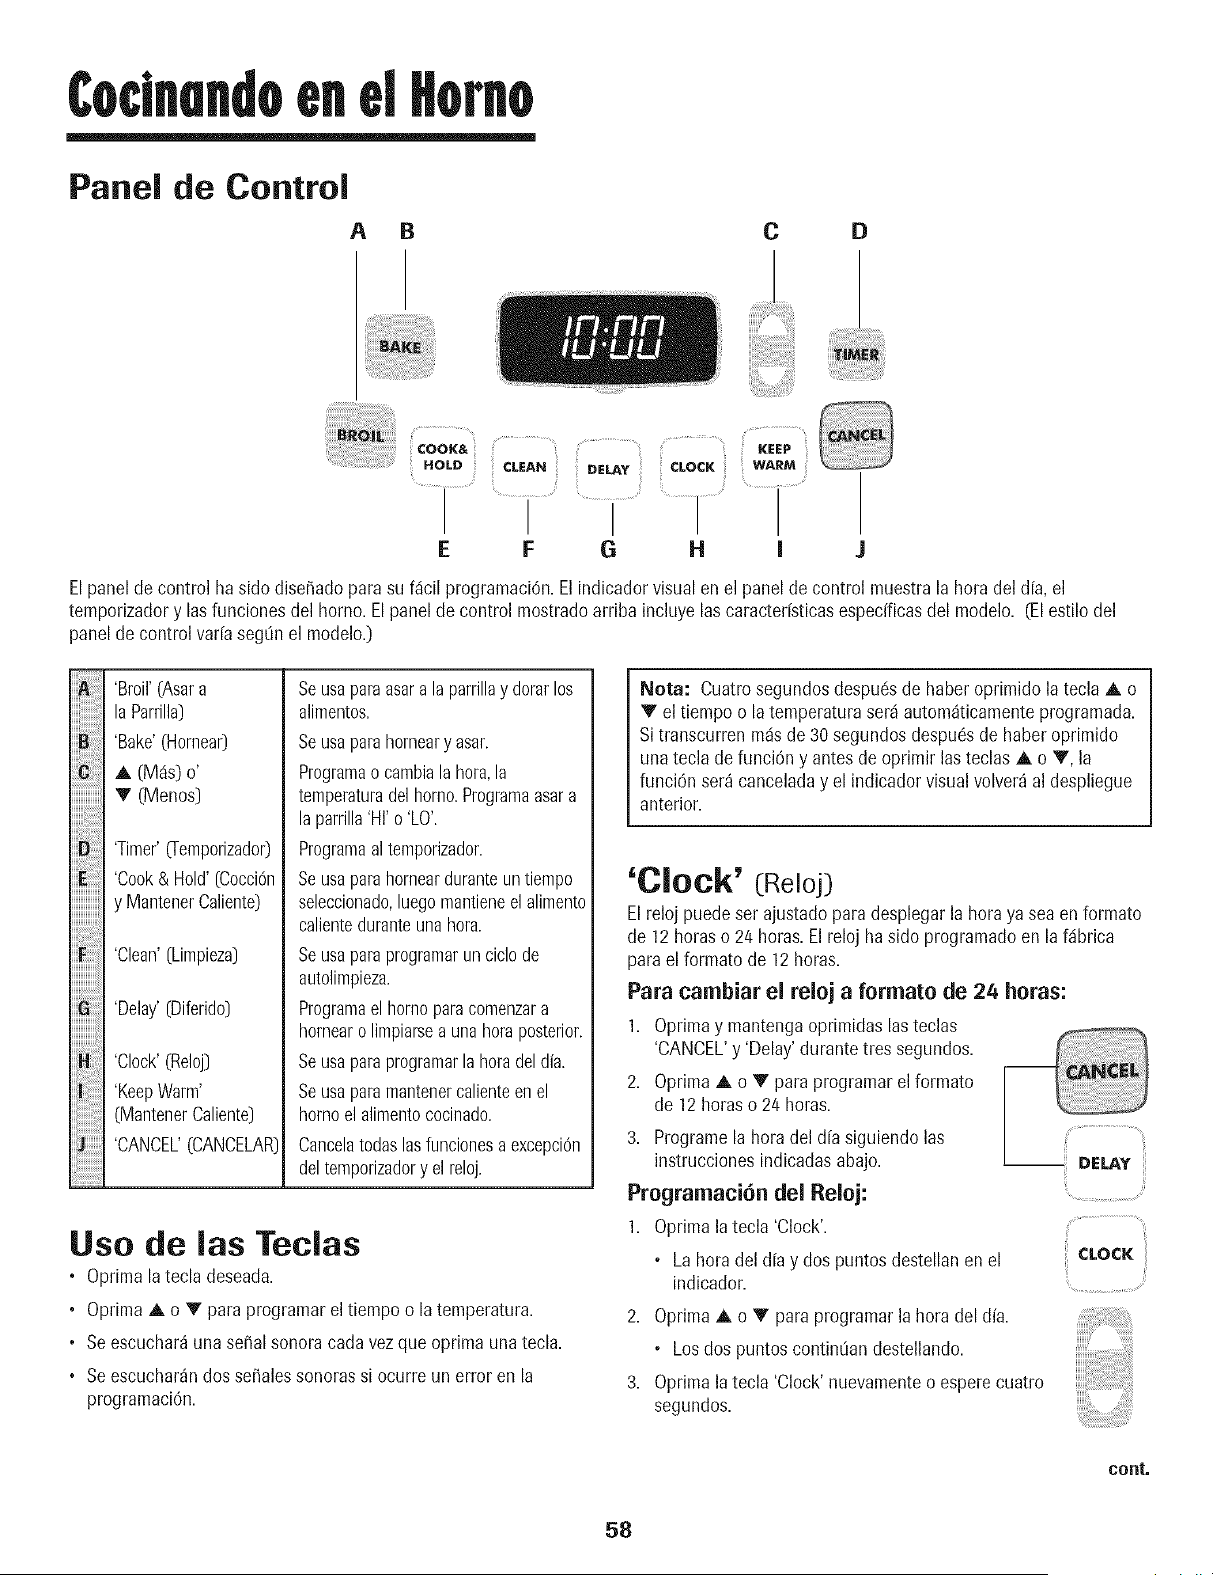
CoclnendoenelHomo
Panel de Control
A B
C
D
/ _i _: :i. /!: i_. i ¸ -
E F G H I
Elpaneldecontrol ha sido disehadopara su f_cil programaciOn.El indicadorvisualen el panelde control muestrala hora del d[a, el
temporizadory lasfunciones del homo. Elpanel decontrol mostradoarriba incluye lascaracter[sticasespedficasdel model& (El estilo del
panelde control var[aseg0n el modelo.)
Ciiii!iiiii
iiiiiiiiiiiii
HHHHHHi
B!i!i!i!i!i!i!
j}}}}}}}}}i_
'Broil'(Asara
laParrilla)
'Bake'(Hornea0
A (M_is)o'
V (Menos)
'Timer'O-emporizado0
'Cook& Hold'[Cocci6n
y MantenerCaliente)
'Clean'(Limpieza)
'Delay'(Diferido)
'Clock'(Reloj)
'KeepWarm'
(MantenerCaliente)
'CANCEL'(CANCELAR)
Seusaparaasara laparrillay dorarlos
alimentos.
Seusaparahorneary asar.
Programao cambiala hora,la
temperaturadelhorno.Programaasara
la parrilla'HI'o'LO'.
Programaaltemporizador.
Seusaparahornearduranteuntiempo
seleccionado,luegomantieneelalimento
calienteduranteunahora.
Seusaparaprogramarun ciclo de
autolimpieza.
Programaelhomoparacomenzara
hornearolimpiarseaunahoraposterior.
Seusaparaprogramarla horadel dia.
Seusaparamantenercalienteen el
homoel alimentococinado.
Cancelatodaslasfuncionesaexcepci6n
deltemporizadory elreloj.
Use de las Teclas
• Oprima latecla deseada.
• Oprima A o V para programareltiempo o la temperatura.
. Se escuchar_una sepalsonoracada vezqueoptima unatecla.
• Seescuchar_ndos sehalessonorassi ocurre un error en la
programaciOn.
Nora: Cuatrosegundos despudsde haberoprimido latecla A o
V el tiempoo latemperaturaserdautomdticamenteprogramada.
Si transcurrenrodsde30 segundosdespu_sde haberoprimido
unatecla defunciOny antesdeoprimir lasteclas _, o V, la
funci6n ser_ canceladay el indicadorvisualvolver_al despliegue
anterior.
'Clock' (Reloj)
El relojpuedeser ajustadoparadesplegarla hora ya seaen formato
de 12horaso 24 horas.El reloj ha sido programadoen la f_ibrica
parael formato de 12 horas.
Para cambiar el reloj a formato de 24 horas:
1. Oprimay mantengaoprimidas lasteclas
'CANCEL'y 'Delay' durantetres segundos.
2. Optima A o V paraprogramarel formato
de 12horaso 24 horas.
3. Programela horadel d[a siguiendolas
instruccionesindicadasabajo.
Programaci6n del Reloj:
1. Oprimala tecla 'Clock'.
• La horadel d[ay dos puntosdestellanenel
indicador.
2. OprimaA o V para programarlahora del dfa.
• Losdos puntoscontinOandestellando.
3. Optima la tecla 'Clock' nuevamenteo esperecuatro
segundos.
CLOCK
coat,
58
CodnendoenelHomo
Cuandose conectaenergfaek!ctricaal homo o despu6sdeuna
interrupci6nde la energfael6ctrica,la 01timahora del reloj previaa
la interrupci6ndestellar_ien el indicador.
Paradesplegarla hora del d[a cuando el indicadorest6 mostrando
otra funci6n de tiempo, optima la tecla 'Clock'.
La horadel reloj no puedeser cambiadacuandoel homo hasido
programadopara 'DelayCook','Delay Clean'o 'Cook & Hold'.
Para cancelar el despliegue del reloj:
Si nodeseaque el indicadorvisualmuestre lahora del d[a:
Optimay mantengaoprimida lasteclas 'CAN-
CEL'y 'Clock'durantetres segundos.La hora
del dfa desaparecer4del indicador.
Cuandose cancelael desplieguedel reloj,
oprima la tecla 'Clock' paradesplegar ...............
brevementela hora del dfa.
CLOCK
Para restaurar el despliegue del
reloj: ....................................
Oprimay mantengaoprimida lasteclas 'CANCEL'y 'Clock'durante
tres segundos.La hora del d[a reaparecer4enel indicador.
'Timer' (Temporizador)
Eltemporizadorpuede ser programadode un minuto (00:01]hasta
99 horasy 59 minutos (99:59),
Eltemporizadorpuede ser usado independientementedecualquier
otra actividaddel homo.Adem4spuedeser programadocuando otra
funci6n del homo est6 en funcionamiento.
Eltemporizadorno controla el homo. Solamentecontrola una sepal
sonora.
Para programar el temporizador:
1. Oprimala tecla 'Timer' Cremporizador].
• '0:00'se ilumina en el indicadorvisual.
• Losdos puntosdestellar_in.
2. Optima la tecla A (M_s) o V (Menos]hastaque el
tiempo correctoaparezcaen el indicadorvisual.
• Losdos puntoscontin0andestellando.
iiiiiii
3. Optima nuevamentelatecla 'Timer'o esperecuatro
segundos.
• Losdos puntoscontinOandestellandoy comienzala cuenta
regresivadel tiempo.
• ElLiltimominutode la cuentaregresivadel temporizadorse
desplegar_en segundos.
4. AI final del tiempo programado,se escuchar_iuna se_alsonora
larga.
Para cancelar el temporizador:
1. Oprimay mantengaoprimida la tecla 'Timer' durantetres
segundos.
U
2. Optima latecla 'Timer'y coloque la hora a 00:00.
Bloqueo de los Controles
Eltecladopuedenser bloqueadospara seguridad, Iimpiezao evitar
el uso no autorizado.No funcionar_ncuandoest6n bloqueados.
Siel homo est_ en uso, los controlespuedenbloquearse.
La horaactualdel aliapermanecer_ien el indicador cuando los
controlesestc!nbloqueados.
Para bloquear:
Oprimay mantengaoprimidaslas teclas
'CANCEL'y 'Cook & Hold'durante tres
segundos.
'LOCK'destellaenel indicadorvisual.
Para desbloquear: cooK&
Oprimay mantengaoprimidaslas teclas -- HOLD
'CANCEL'y 'Cook & Hold'durante tres ...............................
segundos.
'LOCK'desaparecedel indicadorvisual.
C6digos de Errores
'BAKE'o 'LOCK'puedendestellarr_pidamenteparaadvertirleque
hay un error oun problem& Si 'BAKE'o 'LOCK'destellanen el
indicadorvisual,oprima le tecla'CANCEL'. Si'BAKE'o 'LOCK'
continOandestellando,desconectela corriente el6ctrica haciael
artefacto.Espereunos pocosminutosy vuelvaa conectar la
corrienteel6ctrica.Si las palabrasaOncontint3andestellando,
desconectelacorrienteek!ctrica haciael artefactoy Ilamea un
t(!cnicodeservicioautorizado.
59
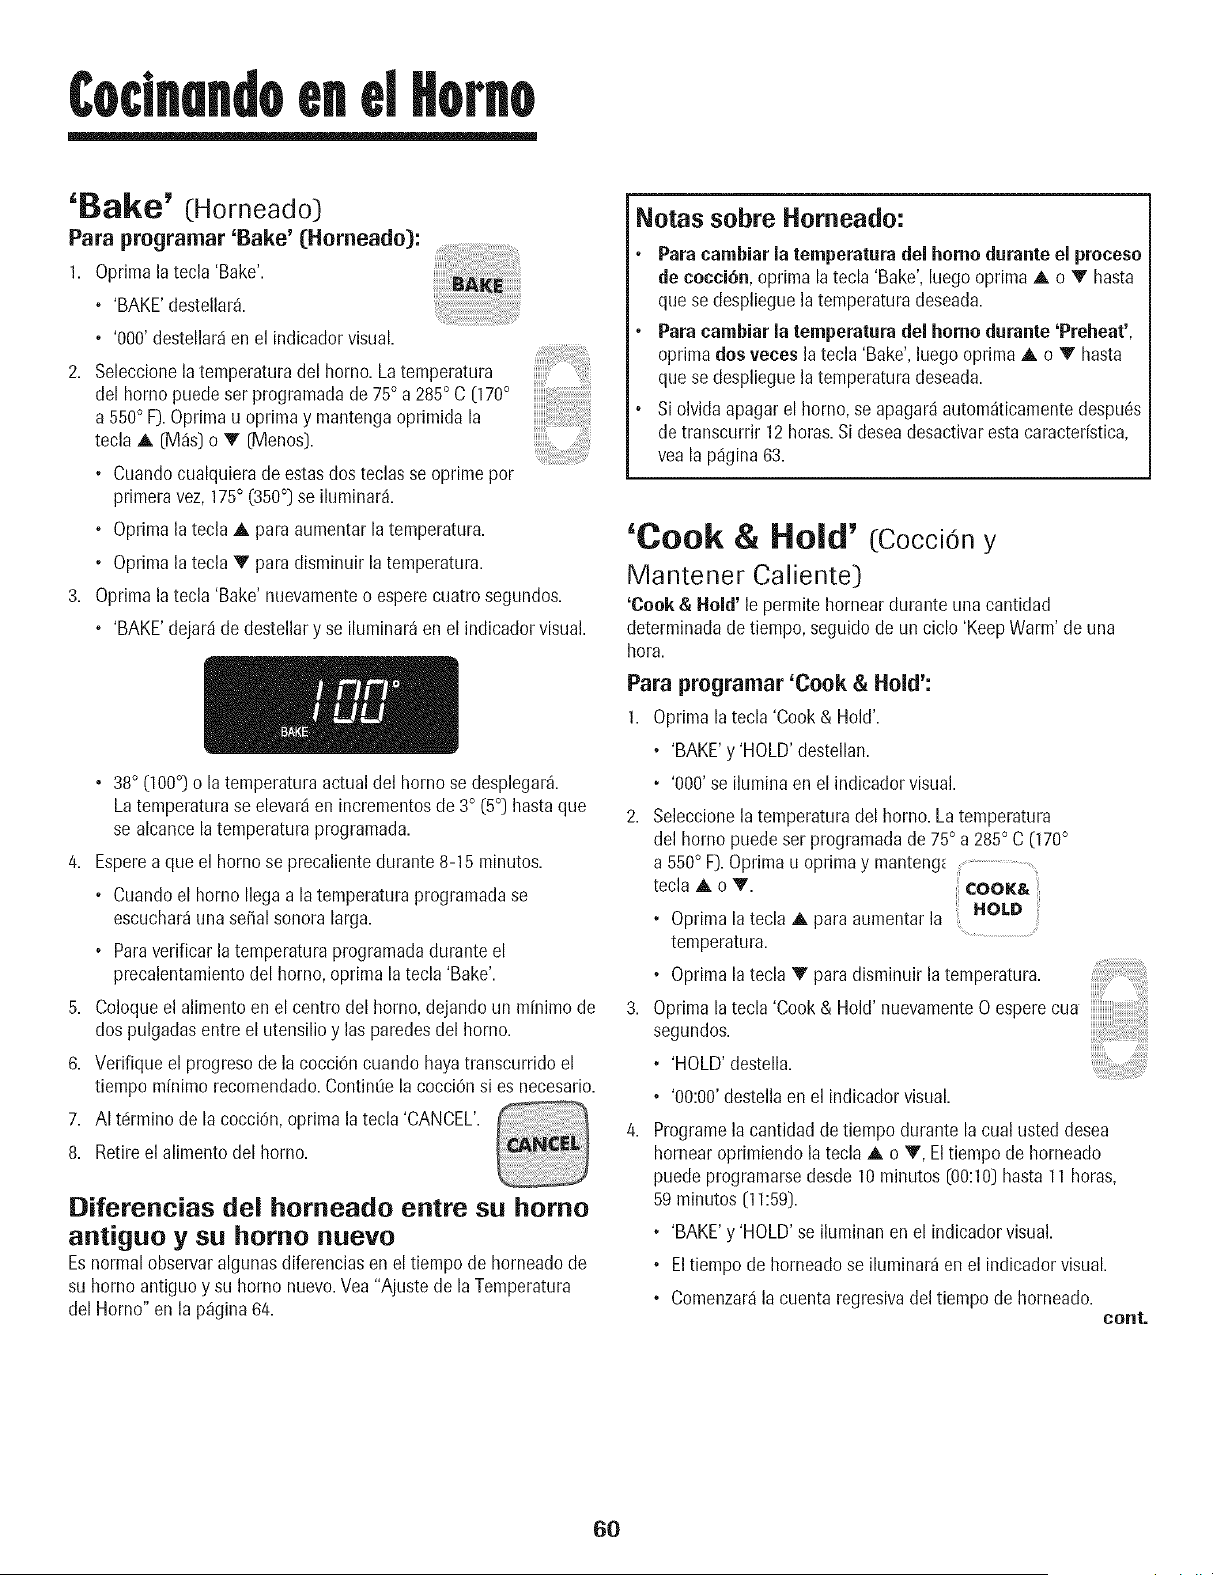
CoclnandoenelHomo
'Bake' (Horneado)
Para programar 'Bake' (Homeado):
1. Oprimala tecla 'Bake'.
• 'BAKE'destellar&
• 'OOO'destellar_ien el indicadorvisual.
2. Seleccionelatemperaturadel homo. La temperatura
del homo puede ser programadade 75° a285° C (170°
a 550° F).Oprimau optima y mantengaoprimida la
tecla A (M_s] o V (Menos].
• Cuandocualquierade estasdos teclasse oprime por
primeravez,175° (350°] se iluminar&
• Oprimalatecla A para aumentarlatemperatura.
• Oprimalatecla V para disminuir la temperatura.
3. Oprimalatecla 'Bake' nuevamenteo esperecuatro segundos.
• 'BAKE'dejar_ide destellary se iluminar_en el indieadorvisual.
• 38° (100°) o la temperaturaactualdel homo se desplegar&
Latemperaturase elevar4en inerementosde 3° (5°] hastaque
se alcancelatemperaturaprogramada.
4. Esperea que el homo se precalientedurante8-15 minutos.
• Cuandoel homo Ilegaa latemperaturaprogramadase
escuehar_unasepal sonoralarga.
• Paraverificarla temperaturaprogramadadurante el
precalentamientodel homo, optima la tecla 'Bake'.
5. Coloqueel alimentoen el centrodel homo, dejandoun m[nimode
dos pulgadasentre el utensilioy las paredesdel homo.
6. Verifique el progresode lacocci6n cuando hayatranscurridoel
tiempo minimorecomendado.ContinOela cocci6nsi es necesario.
7. AI t6rmino de la cocci6n, oprimala tecla'CANCEL'.
8. Retireel alimento del homo.
Diferencias del horneado entre st= homo
antiguo y st= homo nuevo
Esnormal observaralgunas diferenciasen el tiempode horneadode
su homo antiguoy su homo nuevo.Vea"Ajustede la Temperatura
del Homo" en la p_gina 64.
Notas sobre Horneado:
Para carnbiar la temperatura del homo durante el proceso
de cocci6n, oprima la tecla 'Bake',luegooptima A o V hasta
quese desplieguela temperaturadeseada.
Para cambiar la temperatura del homo durante 'Preheat',
oprimados veces la tecla 'Bake',luego oprima A o V hasta
quese desplieguela temperaturadeseada.
Si olvidaapagar el homo, se apagar4autom_ticamentedespu6s
detranscurrir 12horas.Sideseadesactivaresta caracter[stica,
vea la pdgina 63.
'Cook & Hold' (Cocci6ny
Mantener Caliente)
'Cook & Hold' le permite hornear durante una cantidad
determinadadetiempo, seguidode un ciclo 'KeepWarm' de una
hera.
Para programar 'Cook & Hold':
1. Optima latecla 'Cook & Hold'.
• 'BAKE'y'HOLD' destellan.
, 'OO0'se ilumina en el indicadorvisual.
Seleccionelatemperaturadel homo. La temperatura
del homo puedeser programadade 75° a 285o C (170°
a 550° F).Oprimau oprimay manteng_ ...............................
tecla A o Y. COOK&
, Oprima la tecla A para aumentarla HOLD
temperatura.
• Oprima latecla V para disminuir la temperatura.
Oprima la tecla 'Cook & Hold' nuevamente0 espereeua
segundos.
° 'HOLD' destella.
• 'OO:OO'destellaen el indicadorvisual.
Programela cantidad de tiempo durante la cual usted desea
hornearoprimiendo la tecla A o V, Eltiempode horneado
puede programarsedesde 10 minutos (00:10)hasta11horas,
59 minutos (11:59).
° 'BAKE'y 'HOLD'se iluminanen el indicadorvisual.
• Eltiempo de horneadose iluminar_ en el indicadorvisual.
• Comenzar4lacuenta regresivadel tiempode horneado.
cent.
6O
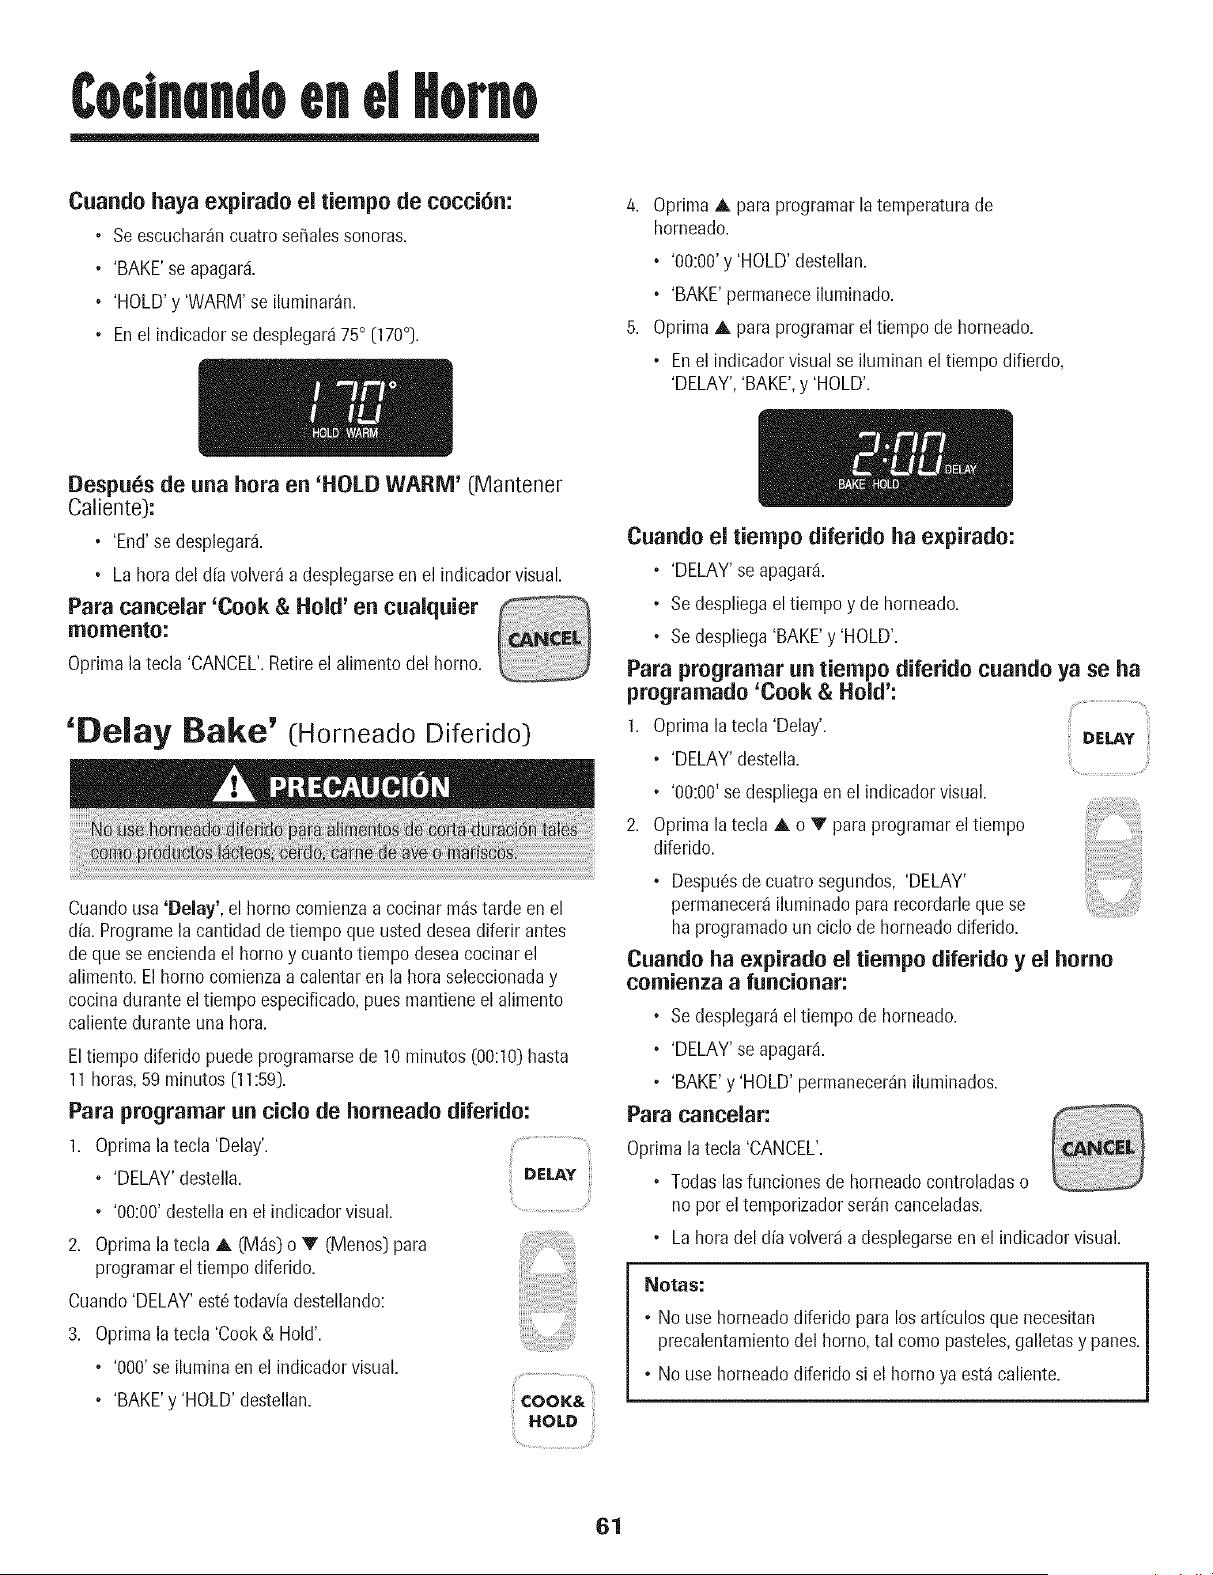
CodnaMoen d Horno
Cuando haya expirado el tiempo de cocci6n:
• Seescuchar_ncuatro se_alessonoras.
• 'BAKE'se apagard.
• 'HOLD'y 'WARM' se iluminar_n.
• Enel indicadorse desplegard75° 070°).
Despu6s de una hora en 'HOLD WARM' (Mantener
Caliente):
• 'End'se desplegar&
• La horadel d[a volver_a desplegarseen el indicadorvisual.
Para cancelar 'Cook & Hold' en cualquier
momento:
Oprimala tecla 'CANCEL'.Retire el alimento del horno.
'Belay Bake' (HorneadoDiferido)
Cuandousa 'Delay', el homo comienzaa cocinarmdstarde en el
dfa.Programela cantidad de tiempo que usted deseadiferir antes
de quese enciendael homo y cuanto tiempo deseacocinarel
alimento.El homo comienzaa calentaren la horaseleccionaday
cocinadurante el tiempo especificado,pues mantieneel alimento
calientedurante una hora.
Eltiempo diferido puede programarsede 10minutos(00:10)hasta
11horas,59minutos [11:59).
Para programar un ciclo de homeado diferido:
1. Oprimala tecla 'Delay'.
° 'BELAY'destella. DELAY
° '00:00'destellaen el indicadorvisual.
2. Oprimalatecla A (M_s}o V (Menos}para
programarel tiempo diferido.
Cuando'DELAY'est6todav[adestellando:
3. Oprimalatecla 'Cook & Hold'.
° '000'se ilumina en el indicadorvisual.
• 'BAKE'y 'HOLD'destellan.
cooK&
HOLD
4. Oprima A para programarla temperaturade
horneado.
° '00:00'y 'HOLD'destellan.
° 'BAKE'permaneceiluminado.
5. Optima A paraprogramarel tiernpode horneado.
° Enel indicadorvisual se iluminanel tiempo difierdo,
'DELAY','BAKE',y 'HOLD'.
Cuando el tiempo diferido ha expirado:
° 'DELAY'se apagar&
, Se despliegaeltiempo y de horneado.
° Se despliega'BAKE'y 'HOLD'.
Para programar un tiempo diferido cuando ya se ha
programatic 'Cook & Hold':
1. Oprima latecla 'Delay'.
DELAY
• 'DELAY'destella.
. '00:00' sedespliegaen el indicadorvisual.
2. Oprima la tecla A o V paraprogramarel tiempo
diferido.
° Despu_sde cuatro segundos, 'DELAY'
permanecer_iluminadopara recordarleque se
haprogramadoun ciclo de horneadodiferido.
Cuando ha expirado el tiempo diferido y el homo
comienza a funcionar:
° Se desplegar_el tiempo de horneado.
° 'DELAY'se apagard.
, 'BAKE'y 'HOLD' permanecerdniluminados.
Para cancelar:
Oprimala tecla 'CANCEL'.
° Todas lasfuncionesde horneadocontroladaso
nopor el temporizadorser_n canceladas.
° Lahoradel dia volverda desplegarseen el indicadorvisual.
Notas:
° No use horneadodiferido para los articulosque necesitan
precalentamientodel homo,tal como pasteles,galletasy panes.
° No use horneadodiferido si el homo ya est_ caliente.
61
Codnandoend Homo
'Keel::} Wa[ ' (Mantener Caliente)
Paramantenercalientesen forma segura alimentoscalienteso para
calentarpanesy platos.
Para programar 'Keep Warm':
1. Oprimala tecla 'KeepWarm'. KEIEP
• 'WARM'destella.
• '000'se despliegaenel indicadorvisual.
2. Seleccionelatemperaturade 'KeepWarm'.Latempera-
tura para'KeepWarm' puedeser programadade 63° a
90° C [145° a 190° F). Oprimau oprima y mantenga
oprimida la tecla A [M_s) o V [Menos).
• Cuandocualquierade estasdos teclasse oprime
por primeravez,75° [170°) se iluminar_.
• Optimala tecla A para aumentarlatemperatura.
• Oprimalatecla V paradisminuir la temperatura.
'WARM'y latemperaturase desplegar_nen el indicador cuando
el ciclo'Keep Warm' est6activo.
Para ¢ancelar 'Keep Warm':
1. Oprimala tecla 'CANCEL'.
2. Retireel alimento del homo.
Notas sobre 'Keep Warm':
• Paracalidad Optimade losalimentos,losalimentoscocinados
en el homo debenser mantenidoscalientespor no mdsde I a
2 horas.
• Paraevitar que losalimentosse sequen,cObraloslevemente
con papelde ahJminioo una tapa.
• Para calentar panecillos:
- cubra levementelos panecilloscon papelde aluminio y
col0quelosen el homo.
- oprima las teclas'Keep Warm'y A para programar
75° C [170° F].
- calientedurante 12a 15minutos.
• Para calentar platos:
- coloque 2 pilasde cuatro platoscada unaen el horno.
- oprima las teclas'Keep Warm'y A para programar
75° C [170° F].
- calientelos platosdurante cinco minutos,apague el homo y
deje los platos en el homo durante 15 minutosm_s.
- use solamenteplatos resistentesal homo,verifique con el
fabricante.
- no coloque los platos calientessobreuna superficiefria
pues el cambio r_pido de temperaturapuede causarfisuras
superficialeso rotura.
62
Coclnandoen d Horno
Cierre Autom tico/Nlodo
Sab tico
Elhomo se apagar_iautom_ticamentedespu6sde 12herossi usted
Io deja accidentalmenteencendido. Estacaracterfsticade seguridad
puedeset desactivada.
Para canceiar el cierre autom_tieo de 12 heros y
dejar que el homo funcione continuamente durante
72 heros:
1. Programeel bornepara hornear (verp_gina60).
CLOCK2. Oprimay mantengaoprimida la tecla 'Clock'
durante cinco segundos.
• 'SAb'se desplegar_y destellar_durante cinco segundos.
• 'SAb'se desplegar_continuamentehastaquese desactiveo
hastaque transcurrael I[mite de 72 heros.
• 'BAKE'tambi6n se desplegar_si se est,1usandoun ciclo de
horneadocuandoel homo est_en Mode Sab_itico.
Todaslosotras funciones EXCEPTO'BAKE'['Timer','KeepWarm',
'Clean',etc.) est_n bloqueadasduranteel Mode Sab_itico.
Para canceiar 'Bake' cuando el Mode Sab_tico est_
active:
Oprima'CANCEL'.
• 'BAKE'se apagar_en el indicadorvisual.
• No se oir_ ningunasepalsonora.
Para cancelar el Mode Sab_tico:
1. Oprimala tecla 'Clock' durante cinco segundos.
O
2. Despu_sde 72heros,el Mode Sab_ticoterminar&
• 'SAb'destellar_durante cincosegundos.
• Lahera del d[a reaparecer_ien el indicadorvisual.
Notas Sol}re el lVlodo Sab&tico:
• ElMode Sab_ticopuedeser activadoen cualquier memento,
estc!o no el homo encendido.
• ElMode Sab_iticonose puedeactivar si los teclasest_in
bloqueadaso cuando la puertoest_ bloqueada.
• Siel homo est_ horneandocuando el Mode Sab_iticoes
programatic,'BAKE'se apagar_al final del ciclo de horneado.
No se emitir_n seSalessonoras.
, Cuandocomienzael Mode Sab_itico,no se emitir_ilasepal
sonorade precalentamiento.
, Cuandoel Mode Sab_ticoest_active,todos los avisos,
mensajesy seSalessonorasest_n desactivados.
, Si oprime la tecla 'CANCEL'se cancelar_un ciclo 'Bake',sin
embargoel control permanecer_en Mode Sab_itico.
• Sifolio la corrienteel6ctrica,cuando vuelvalaenergfael homo
se activar_ien Mode Sab_iticocon 72 herosrestantesy ningt_n
ciclo active.
63
CoclnandoenelHomo
Ajuste de la temperatura del
homo
La exactitudde las temperaturasdel horno es cuidadosamente
probadaen laf_brica. Esnormal notar algunadiferenciaentre la
temperaturade horneado,entre un homo nuevoy un homo antiguo.
Conel correrdel tiempo, latemperaturadel homo puedecambiar.
Ustedpuede ajustar la temperaturadel homo,si consideraquesu
homo noest_ horneandoo dorandoenforma correcta. Paradecidir
cuantodebecambiarla temperatura,programela temperaturadel
homo a 15° C (25° F) m_isalta o m_s bajaque latemperatura
indicadaen sus recetas,luego hornee. Los resultadosde la
"prueba" puedendarleuna ideade cuantoajustarla temperatura.
Ajuste de la temperatura del homo:
1. 0prima 'Bake'.
2. Programe285° (550°) oprimiendolatecla A (M_s).
3. 0prima y mantengaoprimida la tecla 'Bake' durantevarios
segundoso hastaque 0° aparezcaenel indicadorvisual.
Si latemperaturadel homo ha sido previamenteajustada,el
cambioaparecerden el indicador visual. Pot ejemplo,si la
temperaturadel homo rue reducidaen 8° C (15° F)el indicador
mostrar_- 8° (-15°).
4. 0prima latecla A (M_s)o V (Menos)paraajustar la
temperatura.
Cadavez que se oprime una tecla,la temperaturacambia en 3° C
(5° F). La temperaturadel homo puedeser aumentadao
disminuidaen 3° a 20° C (5° a 35° F).
5. La hora del d[a reaparecer_autom_iticamenteenel indicador
visual.
No necesitareajustarla temperaturadel homo si hayuna falla o
interrupci0nde energ[ael6ctrica. Lastemperaturasdeasar a la
parrilla y limpiezano puedenset ajustadas.
64
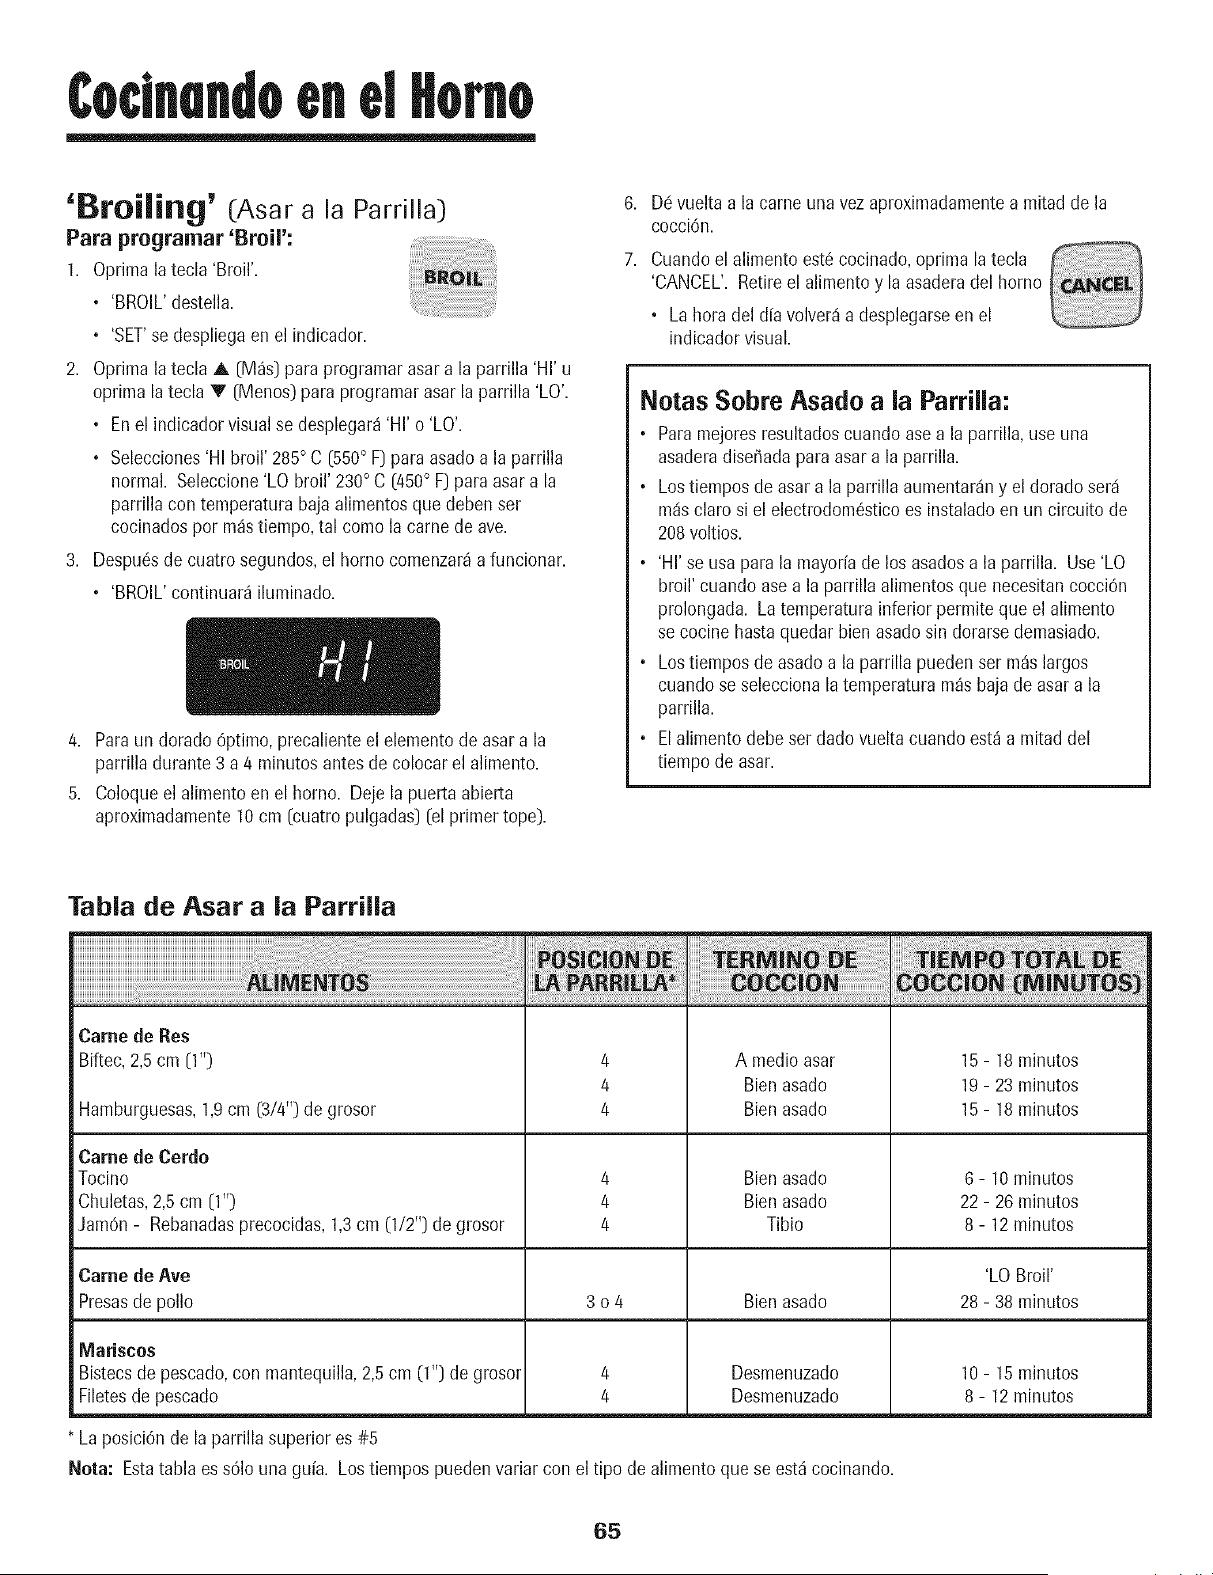
CoclnaMoenelnorno
'Broiling' (Asar a la Parrilla)
Para programar 'Broil':
1. Oprima la tecla 'Broil'.
• 'BROIL'destella.
• 'SET'se despliegaen el indicador.
2. Oprima la tecla A (M_s) para programarasar a la parrilla'HI' u
optima la tecla V (Menos)para programarasar la parrilla 'LO'.
• Enel indicador visualse desplegar_'HI' o 'LO'.
• Selecciones'HI broil' 285° C (550° F)paraasadoa la parrilla
normal. Seleccione'LO broil' 230° C (450° F] paraasara la
parrilla con temperaturabajaalimentosquedebenser
cocinadospor m_s tiempo,tal comola came de ave.
3. DespuOsde cuatro segundos,el homo comenzar_a funcionar.
• 'BROIL'continuar_ iluminado.
4. Paraun dorado 8ptimo,precalienteel elementode asara la
parrilladurante3 a 4 minutosantesde colocarel alimento.
5. Coloqueel alimentoen el homo. Deje la puertaabierta
aproximadamente10cm (cuatropulgadas_(el primer tope).
6,
7.
D6vuelta a la came una vez aproximadamentea mitad de la
cocciOn.
Cuandoel alimento est6 cocinado,oprima latecla
'CANCEL'. Retireel alimentoy laasaderadel homo
, La hora del d[a volver_a desplegarseen el
indicador visual.
Notas Sobre Asado a la Parrilla:
• Paramejoresresultadoscuando asea la parrilla,use una
asaderadise_adaparaasara la parrilla.
• Lostiemposde asar a la parrilla aumentar_ny el dorado ser_i
m_isclaro si el electrodomOsticoes instaladoen un circuito de
208voltios.
• 'HI' se usa parala mayorfade los asadosa la parrilla. Use 'LO
broil' cuando asea la parrillaalimentosque necesitancocciOn
prolongada. Latemperaturainferior permite que el alimento
se cocine hastaquedar bien asadosin dorarsedemasiado.
• Lostiemposde asadoa laparrilla puedenser m_slargos
cuandose seleccionala temperaturam_s baja de asara la
parrilla.
• Elalimentodebeser dado vuelta cuandoest_ a mitaddel
tiempo de asar.
Tabla de Asar a la Parrilla
Came de Res
Biftec, 2,5 cm (1")
Hamburguesas,1,9cm (3/4") degrosor
Came de Cerdo
Tocino
Chuletas,2,5 cm (1")
JamOn- Rebanadasprecocidas,1,3cm (1/2"_de grosor
4
4
4
4
4
4
A medicasar
Bienasado
Bienasado
Bienasado
Bienasado
Tibio
15 - 18 minutos
19 - 23 minutos
15 - 18 minutos
6 - 10 minutos
22 - 26 minutos
8 - 12 minutos
Came de Ave 'LO Broil'
Presasde polio 3 o 4 Bienasado 28- 38 minutos
IVlariscos
Bistecsde pescado,con mantequilla,2,5cm (1"_de grosor 4 Desmenuzado
Filetesde pescado 4 Desmenuzado
La posiciOnde laparrilla superiores #5
Nora: Estatabla es sOlouna guia. Lostiempos puedenvariar con eltipo de alimentoquese estdcocinando.
10- 15minutos
8 - 12minutos
65

Cocinandoen el Homo
Respiradero del Homo
Cuandoel horno est,1en uso,el areacerca del respiraderopuede
calentarseIosuficientecomo paracausarquemaduras.Nunca
bloqueela aberturadel respiradero.
El respiraderodel homo se encuentra debajo del respaldo
protector de su estufa.
RESPIRADERO
HORNO NO coloquepl_sticos
cercade la abertura
del respiraderopues
el calor que sale
puededeformaro
derretir el pl_istico.
'Oven Light' (Luz del Homo)
Oprimael interruptor de la hz del homo en el panel de
control paraencendery apagar la luz del homo.
oven light
Panel inferior del Homo
Protejael panel inferior del horno contra derrames,especiahnente
azucaradoso addicos, puespuedendescolorarla porcelana
esmaltada.Useel utensiliodetama_ocorrecto a fin de evitar
derrames.No coloque utensilios ni papel de aluminio
directamente en la parte inferior del homo.
Parrillas del Homo
Elhomo tiene dos parrillas. TodasIns parrillastienen un hordecon
tope de enganche.
Para retirar la parrilla:
1. Tire de la parrilla derecho hacia
afuera hastaque se detengaen
la posici6ndel tope de
enganche.
2. Levanteel frente de la parrillay
tire de la parrillahacia afuera.
Para reinstalar la parrilla:
1. Coloquela parrilla en el soportede la parrillaen el horno.
2. Incline levementehaciaarriba el extremodelantero;deslicela
parrilla haciaatr_s hastaque pasosobre los topes de enganche.
3. Bajeel frente de la parrilla y desl[celahaciaadentro del homo.
Nocubra unaparrillacompletacon papel de aluminio ni coloque
papel de aluminio en la parte inferior del homo. Se afectar_n los
resultados del homeado y se puede dafiar la parte inferiordel
homo.
Posiciones de la Parrilla
PARRILLA5 (In posici6n
m_salta):Seusa para
tostar pan o asar a la
parrillaalimentos --_
delgadosno grasosos. __4
--3
PARRILLA4: Se usa para __2
la mayor[ade los asadosa
la parrilla. --'
PARRILLA 3: Se usa para
hornearalimentosen una
bandejade horneargalletaso un molde para rollo de mermelada,
parapasteles,paysde frutas o alimentoscongelados.
PARRILLA 2: Se usa para asarcortes de camepequeSos,cacerolas,
hornearbaguetasde pan,pastelesen moldesde tubo o flanes.
PARRI[LA 1: Seusa para asar pedazosgrandesde camey came
de ave,payscongelados,sufl_s de postre o pastelesesponjosos.
HORNEADOCON VARIAS PARRILLAS:
Dos parrillas:Uselasposiciones2y 4, o 1y 4.
Media Parrilla
Sedispone,comoaccesorio,de una media
parrillapara aumentarla capacidaddel
homo. Se instalaen lasecci6nsuperior
del lado izquierdodel homo y ofrece
espaciopara unaplato de verduras
cuandose ha colocado una asadera
grandeen la parrillainferior. P6ngaseen
contactocon su distribuidor para obtener
el accesorio"HALFRACK"o parasolicitar,
Ilameal 1-877-232-6771.
66
Culdudo[Implem
Homo Autolimpiante
esmaltadaes resistenteal _cido pero no a pruebade _cidos. El
acabadode porcelanapuededescolorarsesi los derrames
_cidoso azucaradosno son limpiadosantes de un ciclo de
autolimpieza.
Para programar 'Self=Clean' (Autolimpieza):
i ora: La temperaturadel homo debeser inferiora 205° C[400° F) paraprogramarun ciclo de limpieza.
1. Cierrela puerta del homo.
Elciclo deautolimpiezausatemperaturassuperioresa Ins
temperaturasnormalesde cocciOnpara limpiar autom_iticamenteel
interior del homo. No fuerce la puerta del homo ni lapalancade
bloqueoparaabrirla.Esto puedecausar exposici0na Ins
temperaturasaltasy constituir un riesgo de quemadura.
Limpieel homo con frecuenciaremoviendolos derramespara evitar
humoexcesivoy Ilamaradas.No permita que se acumuledemasiado
sucio enel homo.
Duranteel procesode limpieza,la cocina debe estar bien ventilada
paraeliminar los oloresnormalesasociadoscon lalimpieza.
Antes de la Autolimpieza
1. Apague la luz del hornoantesde la limpieza.La luz del horno
puedefundirsedurante el ciclo de limpieza.
2. Retirelaasadera,todos los utensiliosy Insparrillas del homo.Las
parrillasdel homo se descolorardny no se deslizar_nf_cilmente
despu6sde un ciclo de autolimpiezasi no son retiradasdel homo.
Limpieel marcodel homo,el marcode
la puerta,el areafuera de la junta de la
puertay alrededorde la aberturaen la
junta de la puerta,con un agente de
limpiezano abrasivotal como'Bon
Ami'* o con detergentey agua. El
procesode autolimpiezano limpia
estas_ireas.Eliasdebenset limpiadasparaevitar que lasuciedad
se horneedurante el ciclo de autolimpieza. (Lajunta es el sello
alrededorde la puerta y ventanadel homo.]
4. Paraevitarda_o no limpie ni frote la junta situadaalrededorde la
puerta del homo. La junta est,1dise_adaparasellar
herm6ticamenteel calor durante el ciclo de limpieza.
5. Limpie el excesode grasao derramesde la parte inferior del
homo. Estoevita humo excesivoo Ilamaradasdurante el ciclo de
limpieza.
6. Limpie los derramesazucaradoso 4cidostalescomopapadulce
(camote),tomateso salsasa basede leche.La porcelana
2. Mueva la palancade bloqueode la puerta a laderechaa la
posiciOnbloqueada.
• 'CLEAN'destella en el indicadorvisual. ...................................
Sila puerta no se cierra,se oir_n so,ales sonoresy lapalabra
'DOOR'se desplegar_en el indicadorvisual. Si la puerta no es
cerradadentro de 45 segundos,la operaci0nde autolimpieza
ser_icanceladay el indicadorvolver_a desplegarla horn del d[a.
4. Oprimala tecla A (M_s) o V (Menos).
• Sedespliega'CL-M (SuciedadMedian&
3 horas).
5. Oprimala tecla ,_,o V paradesplazarlos ajustes
deautolimpieza.
'CL-H' (SuciedadIntensa,4 horas)
'CL-M' (SuciedadMedian&,3 horas)
'CL- L' (SuciedadLeve,2 horas)
AI seleccionarel nivel de sueiedaddel homo se programa
autom_iticamenteeltiempo de limpieza.
6. Despuc!sde cuatro segundos,el homo comenzar_a limpiar.
• Eltiempode limpiezacomenzar_ila cuentaregresivaen el
indicador.
• 'LOCK'se desplegar_en el indicadorvisual.
• 'CLEAN'se desplegar_en el indicadorvisual.
Para diferir un ciclo de autolimpieza:
1. Oprimala tecla 'Delay'.
• 'DELAY'destella.
'00:00'se desplegar_ien el indicadorvisual.
DELAY
Oprimala tecla A o V paraprogramarla cantidad de
tiempo que usteddeseadiferir el ciclo. Eltiempo
diferido puede set programadode 10minutos
(00:10}a 11 horns,59 minutos (11:59).
*Loshombresde los productosson marcasregistradasde sus respectivosfabricantes.
67
cont.
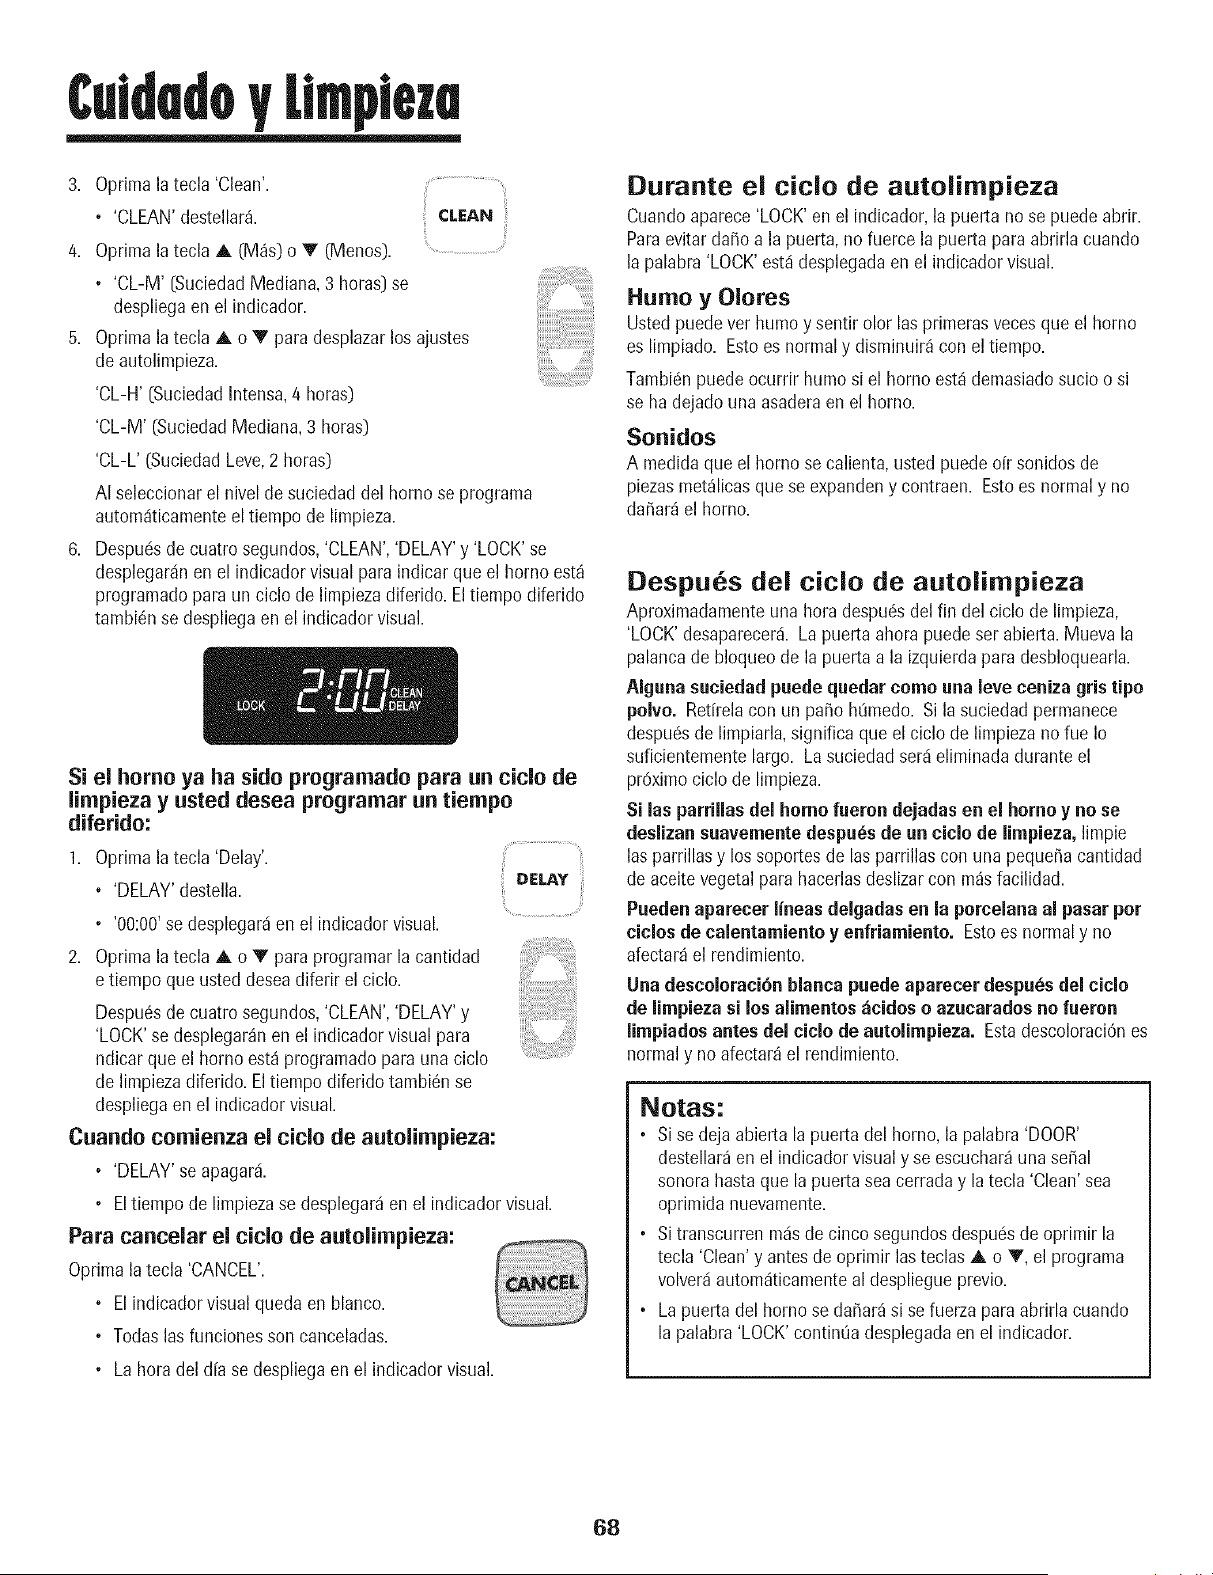
CuldadoUm)lem
3. Oprimalatecla 'Clean'.
• 'CLEAN'destellar&
4. Oprimalatecla A (M_s)o V (Menos).
• 'CL-M' [SuciedadMedian& 3 horas)se
despliegaen el indicador.
CLEAN
5. Oprimalatecla A o V para desplazarlos ajustes
de autolimpieza.
'CL-H' [SuciedadIntensa,4 horas)
'CL-M' (SuciedadMediana,3 horas)
'CL-L' (SuciedadLove,2 horas)
AI seleccionarel nivel de suciedaddel homo se programa
automdticamenteel tiempo de limpieza.
6. Despudsde cuatrosegundos,'CLEAN','DELAY'y 'LOCK'se
desplegardnen el indicadorvisual paraindicar que el homo est_
programaticpara un ciclo de limpiezadiferido. El tiempo diferido
tambi6nse despliegaen el indicadorvisual.
Si el home ya ha side programatic para un title de
limpieza y usted desea programar un tiempo
diferido:
1. Oprimala tecla 'Delay'.
• 'DELAY'destella. DELAY
• '00:00'se desplegarden el indicadorvisual.
2. Oprimalatecla A o V para programar lacantidad
e tiempo queusteddeseadiferir el ciclo.
Despu_sde cuatro segundos,'CLEAN','DELAY'y
'LOCK'se desplegar_nen el indicador visual para
ndicar que el homo est_ programadopara unaciclo
de limpiezadiferido.Eltiempodiferido tambi6nse
despliegaen el indicadorvisual.
Cuande cemienza el title de autolimpieza:
• 'DELAY'se apagard.
• Eltiempo de limpiezase desplegar_en el indicadorvisual.
Para cancelar el tide de aatolimpieza:
Oprimala tecla 'CANCEL'.
• Elindicadorvisual quedaen blanco.
• Todaslasfuncionesson canceladas.
• Lahera del d[a se despliegaen el indicadorvisual.
Durante el title de autolimpieza
Cuandoaparece'LOCK'en el indicador,la puerta no se puede abrir.
Paraevitarda_oa la puerta,no fuerce la puertapara abrirla cuando
la palabra'LOCK'estddesplegadaen el indicadorvisual.
Humo y Olores
Ustedpuede vet humo y sentir olor las primerasvecesque el homo
es limpiado. Estoes normaly disminuir_con el tiempo.
Tambic!npuedeocurrir humosi el homo est_ demasiadosucio o si
se ha dejado una asaderaen el homo.
Sonidos
A medidaque el horno secalienta,usted puedeoir sonidosde
piezasmet_licasquese expandeny contraen. Estoes normaly no
da_ar_el homo.
Despues del ciolo de autolimpieza
Aproximadamenteunahora despu6sdelfin del ciclo de limpieza,
'LOCK'desaparecerd.La puerta ahora puede ser abierta. Mueva la
palancade bloqueo de la puertaa la izquierdapara desbloquearla.
Alguna suciedad puede quedar come una love ceniza gris ripe
polvo. Ret[relacon un paso hOmedo.Si la suciedadpermanece
despudsde limpiarla,significa que el ciclo de limpiezano fue Io
suficientementelargo. Lasuciedadserdeliminada duranteel
proximociclo de limpieza.
Si las parrillasdel homo fueron dejadasen el homo y no se
deslizansuavemente despu_sde an ciclo de limpieza,limpie
las parrillasy los soportesde lasparrillas con una peque_acantidad
de aceitevegetalpara hacerlasdeslizarcon m_sfacilidad.
Pueden aparecer iineas delgadas en la porcelanaal pasarper
ciclos de calentamiento y enfriamiento. Estoes normaly no
afectar_el rendimiento.
Una descoloraci6nblanca puede aparecer despubsdel ciclo
de limpieza si los alimentos _cidos o azucarados no fueron
limpiados antes del ciclo de autolimpieza. Estadescoloraci6nes
normaly no afectar_el rendimiento.
Notas:
• Si se deja abierta la puerta del horno, la palabra 'DOOR'
destellar_ en el indicador visual y se escuchar_ una sepal
sonora hasta que la puerta sea cerrada y la tecla 'Clean' sea
oprimida nuevamente.
• Si transcurren rods de cinco segundos despuds de oprimir la
tecla 'Clean' y antes de oprimir las teclas A o T, el programa
volverd automdticamente al despliegue previo.
• La puerta del homo se da_ar_ si se fuerza para abrirla cuando
la palabra 'LOCK' continQa desplegada en el indicador.
68
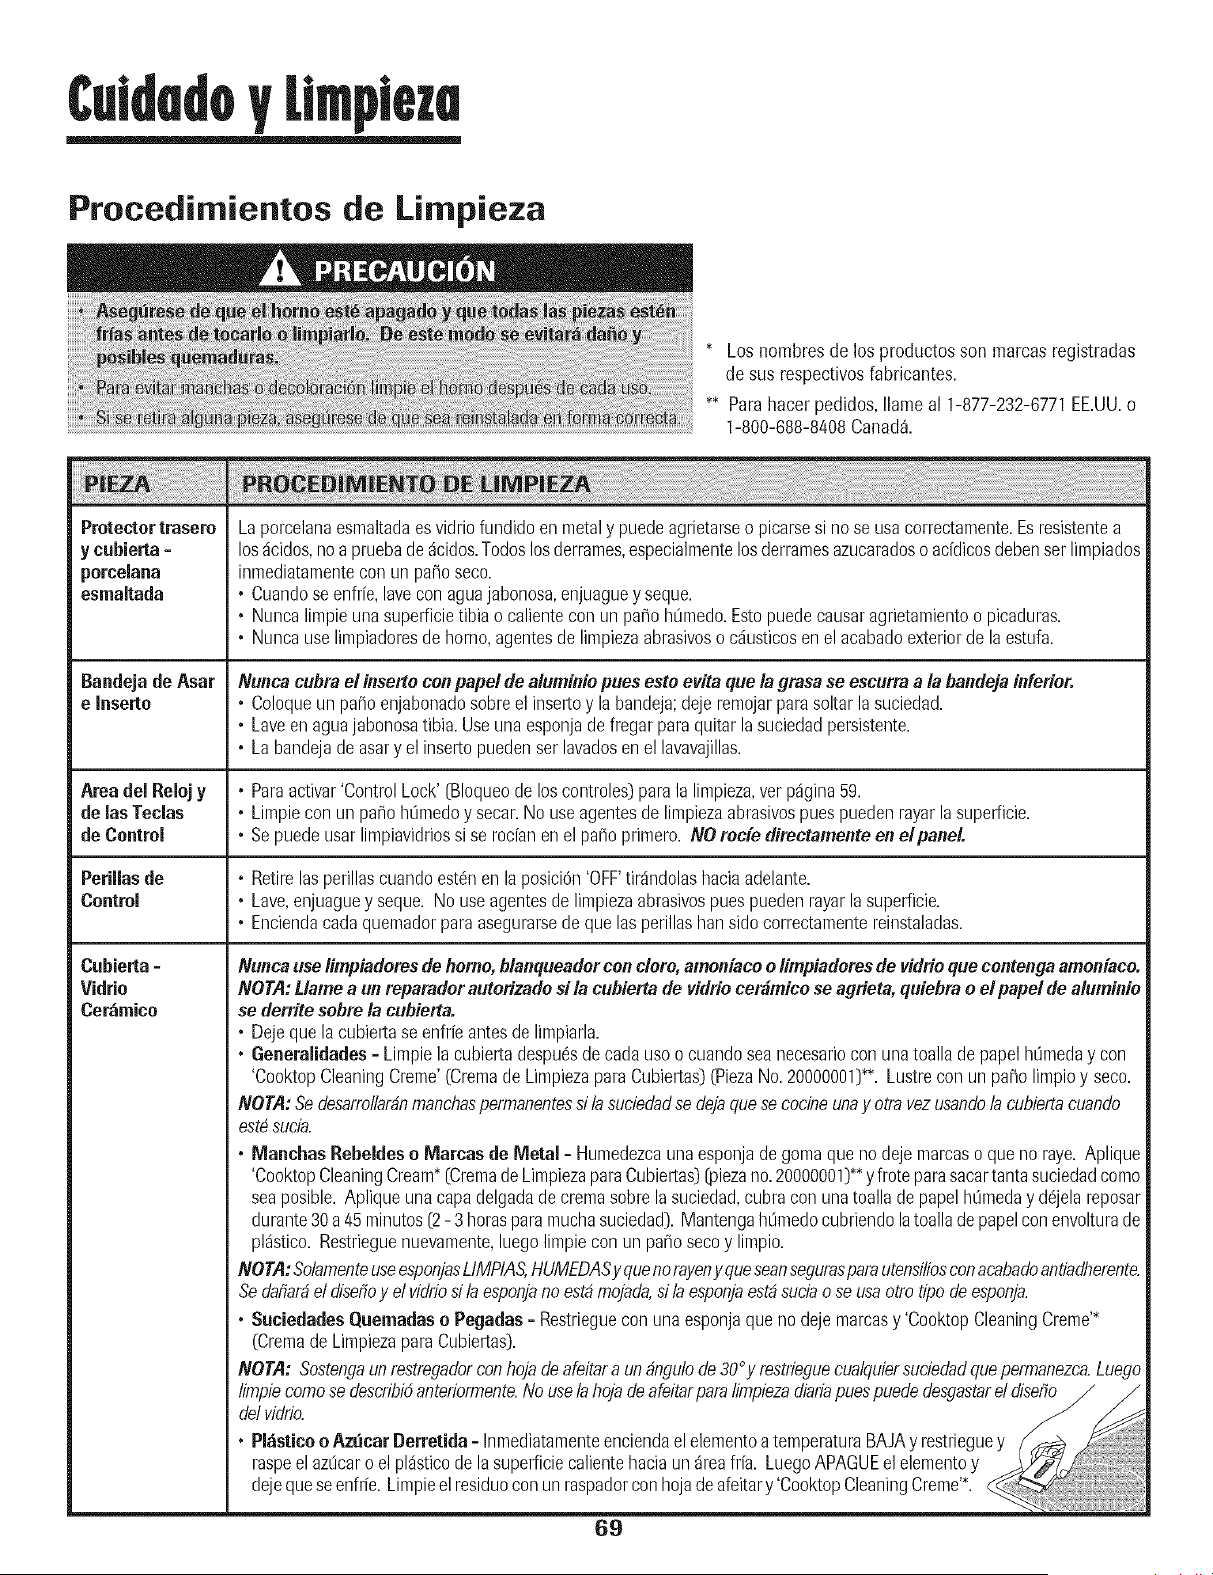
Culdado Lira)ira
Procedimientos de Limpieza
* Loshombresde los productosson marcasregistradas
de sus respectivosfabricantes.
** Parahacer pedidos,Ilameal 1-877-232-6771EE.UU.o
1-800-688-8408Canada.
Protector trasero
y cubierta -
porcelana
esmaltada
Bandejade Asar
e Inserte
Areadel Relojy
de lasTeclas
de Control
Cubierta-
Vidrio
Cer_rnico
Laporcelanaesmaltadaesvidriofundidoen metaly puedeagrietarseo picarsesi no se usacorrectamente.Esresistentea
losacidos,noa pruebade dcidos.Todoslos derrames,especialmentelosderramesazucaradoso acfdicosdebenset limpiados
inmediatamentecon un pasoseco.
• Cuandoseenfr[e,laveconaguajabonosa,enjuaguey seque.
• Nuncalimpieunasuperficietibia o calientecon unpa_ohL_medo.Estopuedecausaragrietamientoo picaduras.
• Nuncauselimpiadoresde homo,agentesde limpiezaabrasivoso causticosenel acabadoexteriorde laestufa.
Nunca cubrael insertoconpapalde aluminio puesesto evita que /a grasa se escurra a/a bandejainferior.
• Coloqueun pasoenjabonadosobreel insertoy labandeja;dejeremojarparasoltarla suciedad.
• Laveenaguajabonosatibia. Useuna esponjadefregarparaquitarla suciedadpersistente.
• Labandejade asary elinsertopuedenserlavadosen el lavavajillas.
• Paraactivar'ControlLock'(Bloqueode los controles}parala limpieza,ver pdgina59.
• Limpiecon un pasoh[3medoy secar.No useagentesde limpiezaabrasivospuespuedenrayarla superficie.
• Se puedeusarlimpiavidriossi se rocfanenel paso primero. NO roc[edirectamenteen elpaneL
• Retirelasperillascuandoest6nen laposiciOn'OFF'tirandolashaciaadelante.
• Lave,enjuaguey seque. No useagentesde limpiezaabrasivospuespuedenrayarlasuperficie.
• Enciendacadaquemadorpara asegurarsede que lasperillasbansidocorrectamentereinstaladas.
Nuncause limpiadoresde homo,blanqueadorconclero,amoniacoo limpiadoresde vidrio quecontenga amoniaco.
NOTA: Llamea un reparadorautorizado si la cubierta de vidrio cerdmico se agrieta, quiebra o el papel de aluminio
se derritesobre la cubierta.
• Dejequela cubiertase enfrfeantesde limpiarla.
• Generalidades= Limpiela cubiertadespuesdecadausoo cuandoseanecesarioconunatoalladepapelhOmeday con
'CooktopCleaningCreme'(CremadeLimpiezaparaCubiertas)(PiezaNo.20000001)**.Lustrecon un paso limpioy seco.
NOTA:Sedesarrollarbnmanchaspermanentesd la suciedadsedejaquesecocineunay otravezusandob cubiertacuando
est#sucia.
• Manchas Rebeldeso Marcas de Metal - Humedezcauna esponjade gomaquenodejemarcasoqueno raye.Aplique
'CooktopCleaningCream*(Cremade LimpiezaparaCubiertas)[piezano.20000001)**y froteparasacartantasuciedadcomo
seaposible. Apliqueuna capadelgadadecremasobrelasuciedad,cubraconunatoallade papelh0meday d6jelareposar
durante30 a 45 minutos(2 - 3 horasparamuchasuciedad).Mantengah0medocubriendolatoallade papelconenvolturade
pldstico.Restrieguenuevamente,luegolimpiecon un pasosecoy limpio.
NOTA:SolamenteuseesponjasLIMPIAS,HUMEDASy quenorayony queseansegurasparautensiliosconacabadoantiadherente.
Sedafial#el disefioy el vidriod la esponjanoestbmojada,si laesponjaest#suciao seusaotto ripede esponja.
• Suciedades Quemadaso Pegadas- Restrieguecon una esponjaqueno dejemarcasy 'CooktopCleaningCreme'*
(Cremade LimpiezaparaCubiertas).
NOTA: Sostendaunrestregadorconhojade afeitara unbndulode 30°y restrieguecualquiersuciedadquepermanezca.Luego
limpiecomosedescribi5anteriormente.Nousela hojadeafeitarparalimpiezadiariapuespuededesdastareldisefio _
1vidrio.
Pl_stice o Az_carDerretida =Inmediatamenteenciendael elementoa temperaturaBAJAy restrieguey
raspeel azdcaro el plasticode la superficiecalientehaciaunareafria. LuegoAPAGUEelelementoy
dejequeseenfrie. Limpieel residuoconunraspadorconhojade afeitary 'CooktopCleaningCreme'*.
69
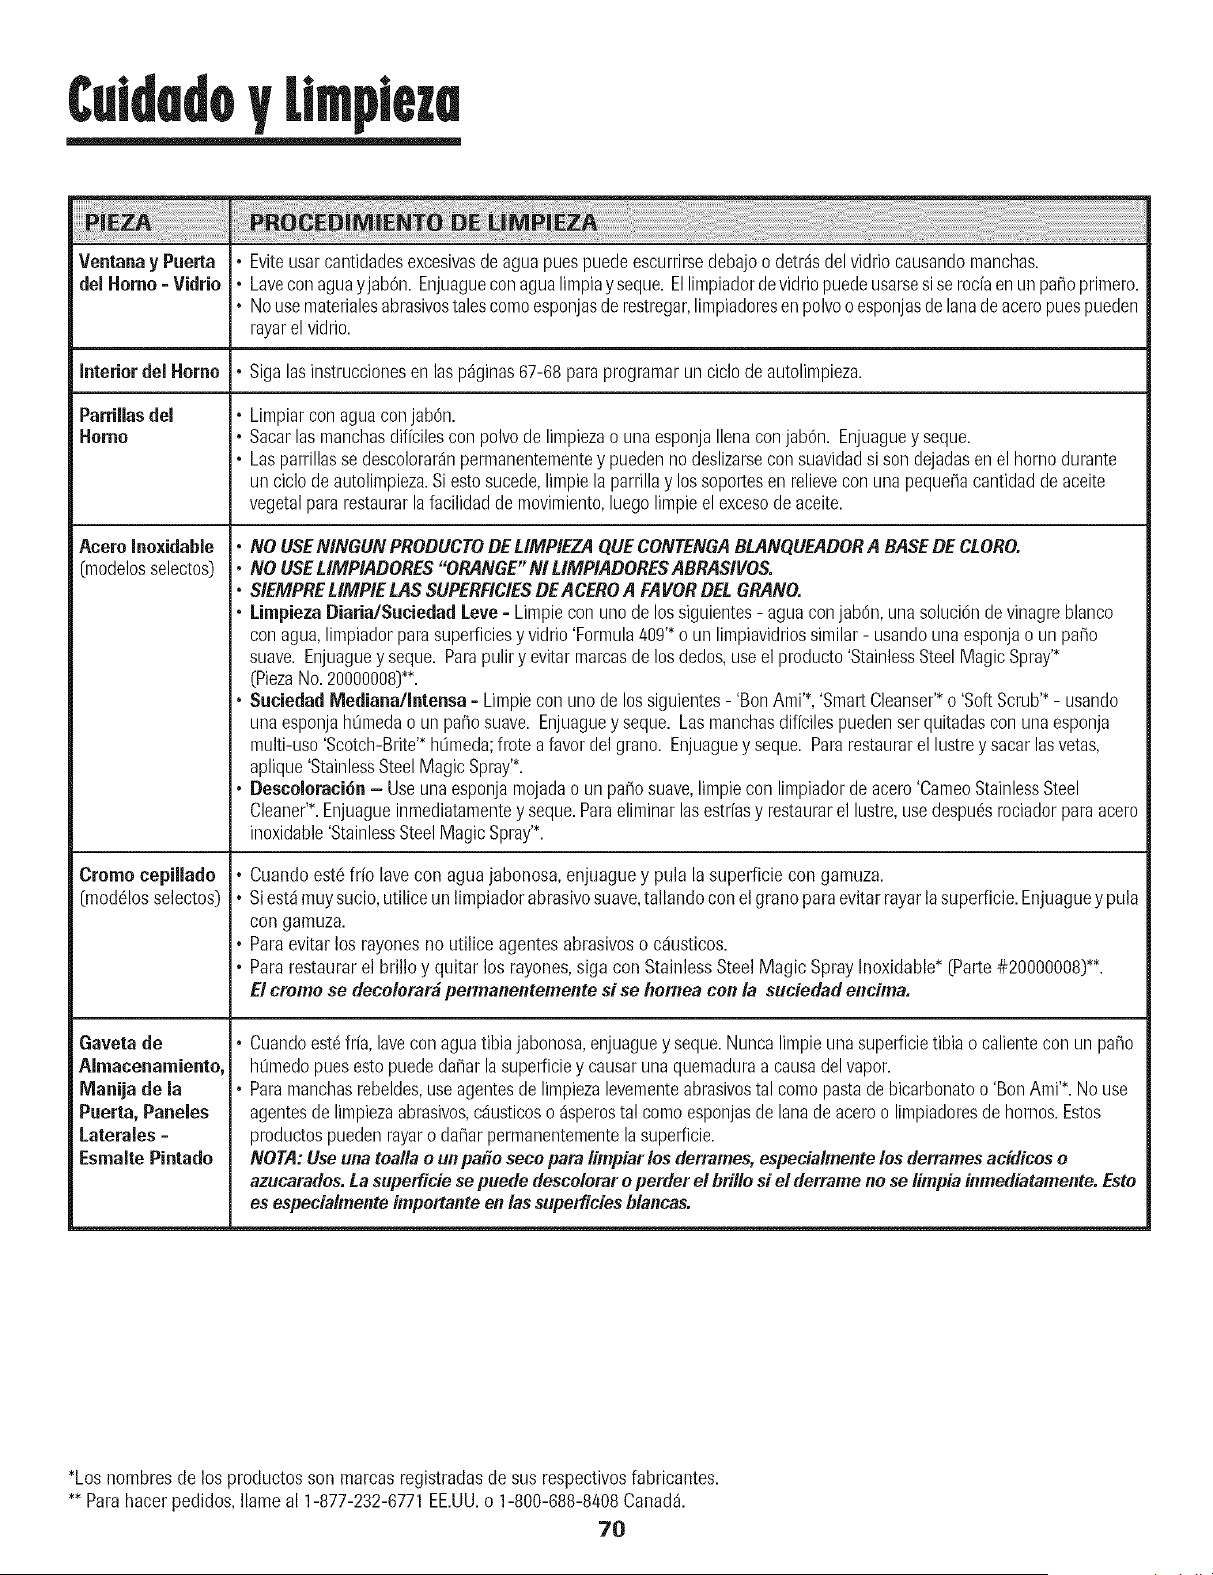
CuldadoUm)lem
Ventanay Puerta • Eviteusarcantidadesexcesivasdeaguapuespuedeescurrirsedebajoo detr4sdel vidriocausandomanchas.
del Homo- Vidrio • Laveconaguayjab6n. Enjuagueconagualimpiay seque.El limpiadordevidriopuedeusarsesiserociaenunpa_oprimero.
• Nousematerialesabrasivestalescomeesponjasde restregar,limpiadoresen polvooesponjasdelanadeaceropuespueden
rayarel vidrio.
InteriordelHome • SignInsinstruccionesenInsp4ginas67-68 paraprogramarunciclodeautolimpieza.
Parriliasdel
Homo
Acere Inoxidabie
(modelosselectos)
Creme cepillado
[me@losselectos)
Gaveta de
Almacenamiento,
Manija de la
Puerta, Paneles
Laterales =
Esmalte Pintado
• Limpiarcon aguaconjab@.
• Sacarlasmanchasdificilescon polvode limpiezao unaesponjaIlenaconjab@. Enjuaguey seque.
• Lasparrillasse descolorar4npermanentementey puedennodeslizarsecon suavidadsi son dejadasen el homodurante
unciclode autolimpieza.Siestosucede,limpiela parrillay lossoportesen relieveconunapeque_acantidaddeaceite
vegetalpararestaurarlafacilidaddemovimiento,luegolimpieel excesode aceite.
* NO USENINGUNPRODUCTODEL/MPIEZAQUECONTENGABLANQUEADORA BASEDE CLORO.
, NO USELIMPIADORES"ORANGE"NI LIMPIADORESABRASIVOS.
* SIEMPRELIMPIE LASSUPERFICIESDEACEROA FAVORDELGRANO.
. LimpiezaDiaria/SuciedadLeve=Limpiecon unode lossiguientes- agua conjab6n,unasoluci6ndevinagreblanco
conagua,limpiadorparasuperficiesy vidrio'Formula409'*o un limpiavidriossimilar- usandounaesponjao unpatio
suave. Enjuaguey seque. Parapuliry evitarmarcasde los@dos,useel producto'StainlessSteelMagicSpray'*
(PiezaNo.20000008}**.
. Suciedad Nlediana/Intensa=Limpieconuno delossiguientes- 'BenAmi'*,'SmartCleanser'*o 'SoftScrub'*- usando
unaesponjahOmedao un pa_osuave.Enjuaguey seque.Lasman@asdif[cilespuedenserquitadasconuna esponja
multi-use'Scotch-Brite'*h0meda;frote a favordel grano. Enjuaguey seque. Pararestaurarel lustrey sacarInsvetas,
aplique'StainlessSteelMagicSpray'*.
. Descoloraci6n- Useunaesponjamojadao unpa_osuave,limpiecon limpiadorde acero'CameoStainlessSteel
Cleaner'*.Enjuagueinmediatamentey seque.Paraeliminarlasestr[asy restaurarel lustre,usedespu6srociadorpara acero
inoxidable'StainlessSteelMagicSpray'*.
, Cuandoestc!fifo lavecon aguajabonosa,enjuaguey pula lasuperficiecon gamuza.
, Siest,1muysucio,utilice un limpiadorabrasivosuave,tallandocon el grano paraevitar rayarlasuperficie.Enjuagueypula
con gamuza.
, Paraevitarlos rayonesno utilice agentesabrasiveso c_iusticos.
, Pararestaurarel brilloy quitar los rayones,sign con StainlessSteelMagic SprayInoxidable*[Parte#20000008)**.
El crome se decolorar#permanentementesi se homea con la suciedad encima.
• Cuandoest6fr[a,laveconaguatibia jabonosa,enjuaguey seque.Nuncalimpieunasuperficietibia o calientecon unpa_o
h0medopuesestopuededa_arlasuperficiey causarunaquemaduraa causadel vapor.
• Paramanchasrebeldes,useagentesde limpiezalevementeabrasivestal comepastade bicarbonateo 'BenAmi'*.No use
agentesdelimpiezaabrasives,@usticoso4sporestal comeesponjasde lanade aceroo limpiadoresdehornos.Estos
productospuedenrayaro daflarpermanentementela superficie.
NOTA: Useuna toa//a o un parle sece para I#npiarlos derrames,especialmente los derramesacidicos o
azucarados.La soperficie se puede descolorar o perder el brillo si el derrame nose limpia inmediatamente. Esto
es especialmente importante en /assuperficies blancas.
*Loshombresde los productosson marcasregistradasde sus respectivosfabricantes.
** Parahacer pedidos,Ilameal 1-877-232-6771EE.UU.o 1-800-688-8/408Canad&
70
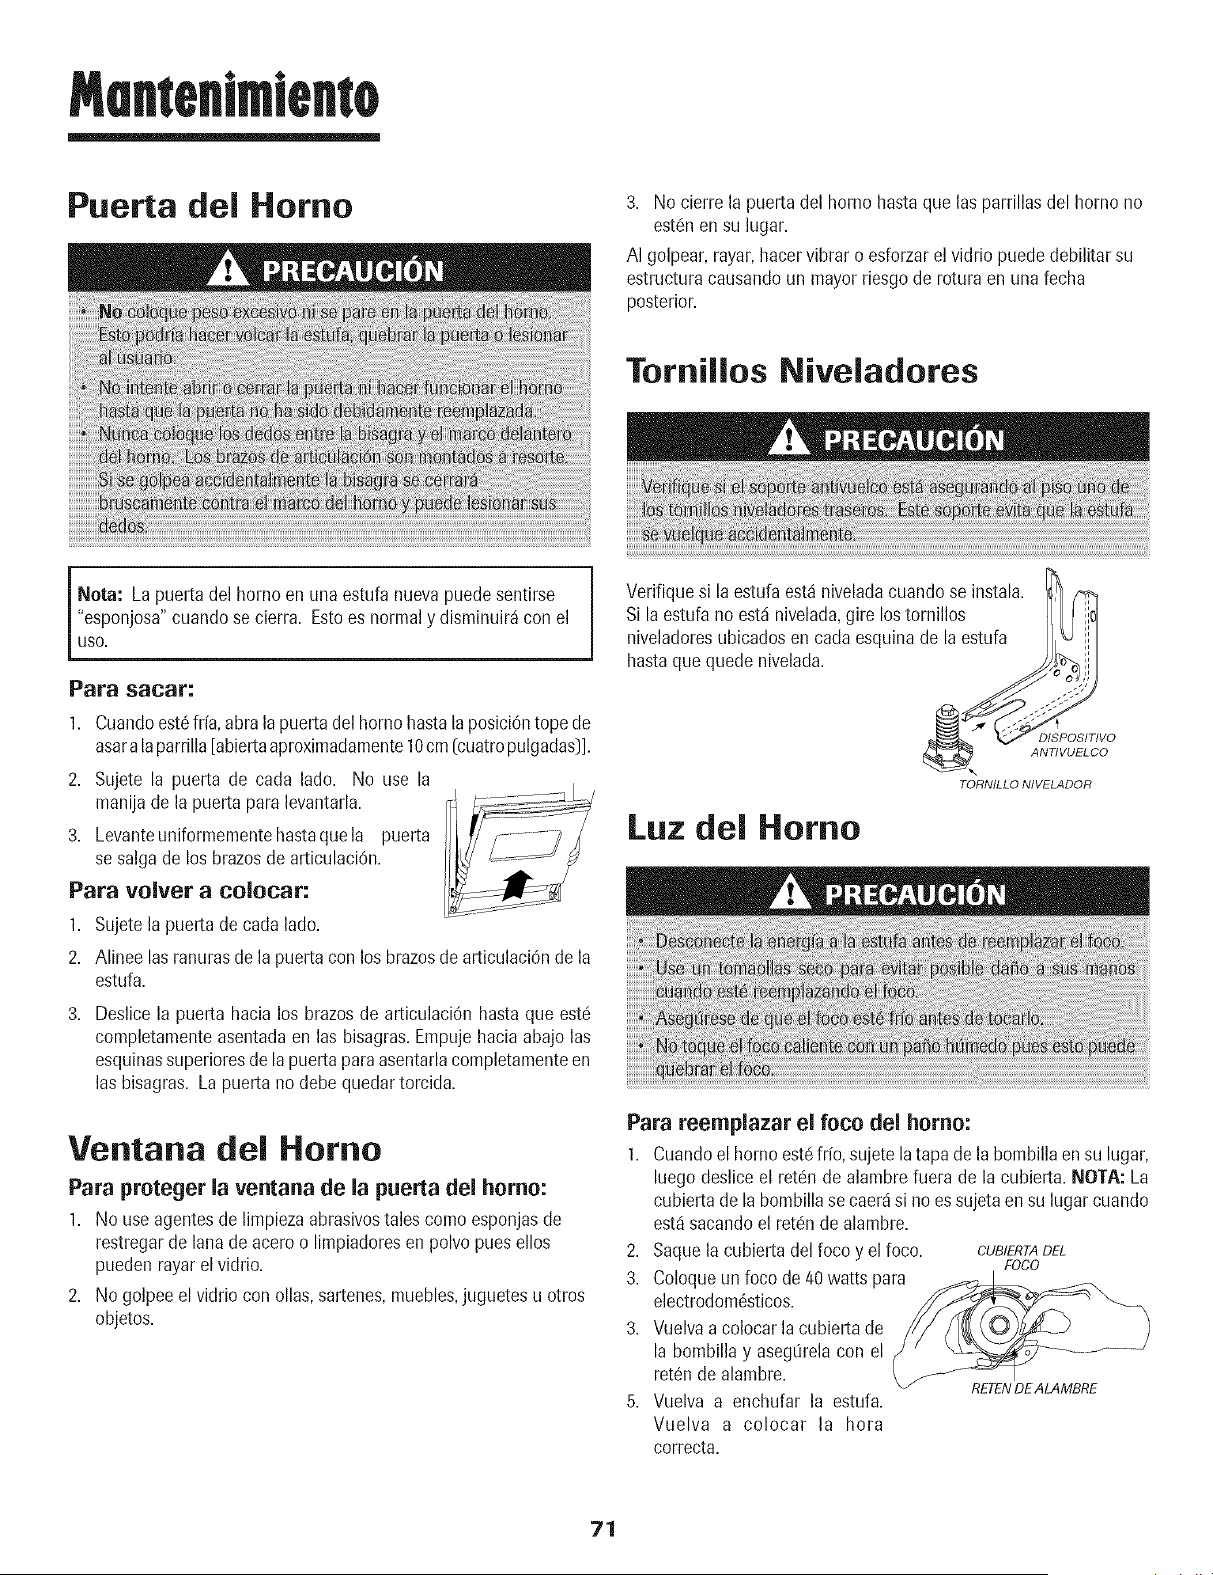
Mententmlento
Puerta del Homo
3. No cierre la puerta del homo hasta que las parrillasdel homo no
est6nen su lugar.
AI golpear,rayar,hacervibrar o esforzarel vidrio puede debilitar su
estructuracausandoun mayorriesgode rotura en una fecha
posterior.
Tornillos Niveladores
Nota: Lapuerta del homo en una estufa nuevapuedesentirse
"esponjosa"cuandose cierra. Estoes normaly disminuir_icon el
USO.
Para sacar:
1. Cuandoest6frfa,abralapuerta delhomo hastalaposiciOntopede
asara la parrilla[abiertaaproximadamente10cm[cuatropulgadas]].
2. Sujete la puerta de cada lado. No use la
manijade la puerta para levantarla.
3. Levanteuniformementehastaquela puerta
se salga de los brazosde articulaciOn.
Para velvet a colocar:
1. Sujete lapuerta de carla lado.
2. Alinee lasranurasde lapuerta con los brazosde articulaci6nde la
estufa.
3. Deslicela puerta hacia los brazos de articulaci6n hastaque est6
completamenteasentada en las bisagras.Empujehacia abajo las
esquinassuperioresde lapuertapara asentarlacompletamenteen
las bisagras. La puertano debe quedartorcida.
Ventana del Homo
Para proteger la ventana de la puerta del homo:
1. No use agentesde limpiezaabrasivostalescomoesponjasde
restregarde lanade aceroo limpiadoresen polvo pues ellos
puedenrayarel vidrio.
2. No golpeeel vidrio con ollas,sartenes,muebles,juguetes u otros
objetos.
Verifiquesi la estufa est4 niveladacuandose instala. I_//('_
Si laestufa no est,1nivelada,gire lostornillos IIll _]
niveladoresubicadosen cadaesquinade laestufa
_. ANTIVUELCO
TORNILLO NIVELADOR
Luz del Homo
Para reemplazar el fete del homo:
1. Cuandoel horno est6frio,sujetelatapa de la bombillaen su lugar,
luegodesliceel ret6n de alambrefuera de la cubierta.NOTA: La
cubiertade la bombillase caer4si no essujeta en su lugar cuando
est,1sacando el ret6nde alambre.
2. Saquela cubiertadelfoco y elfoco. CUBIERTADEL
FOCO
3. Coloqueun foco de/40watts para
electrodom_sticos.
3. Vuelvaa colocar la cubierta de
la bombilla y asegOrelacon el
ret6nde alambre.
RETENDE ALAMBRE
5. Vuelva a enehufar la estufa.
Vuelva a colocar la hora
correcta.
71
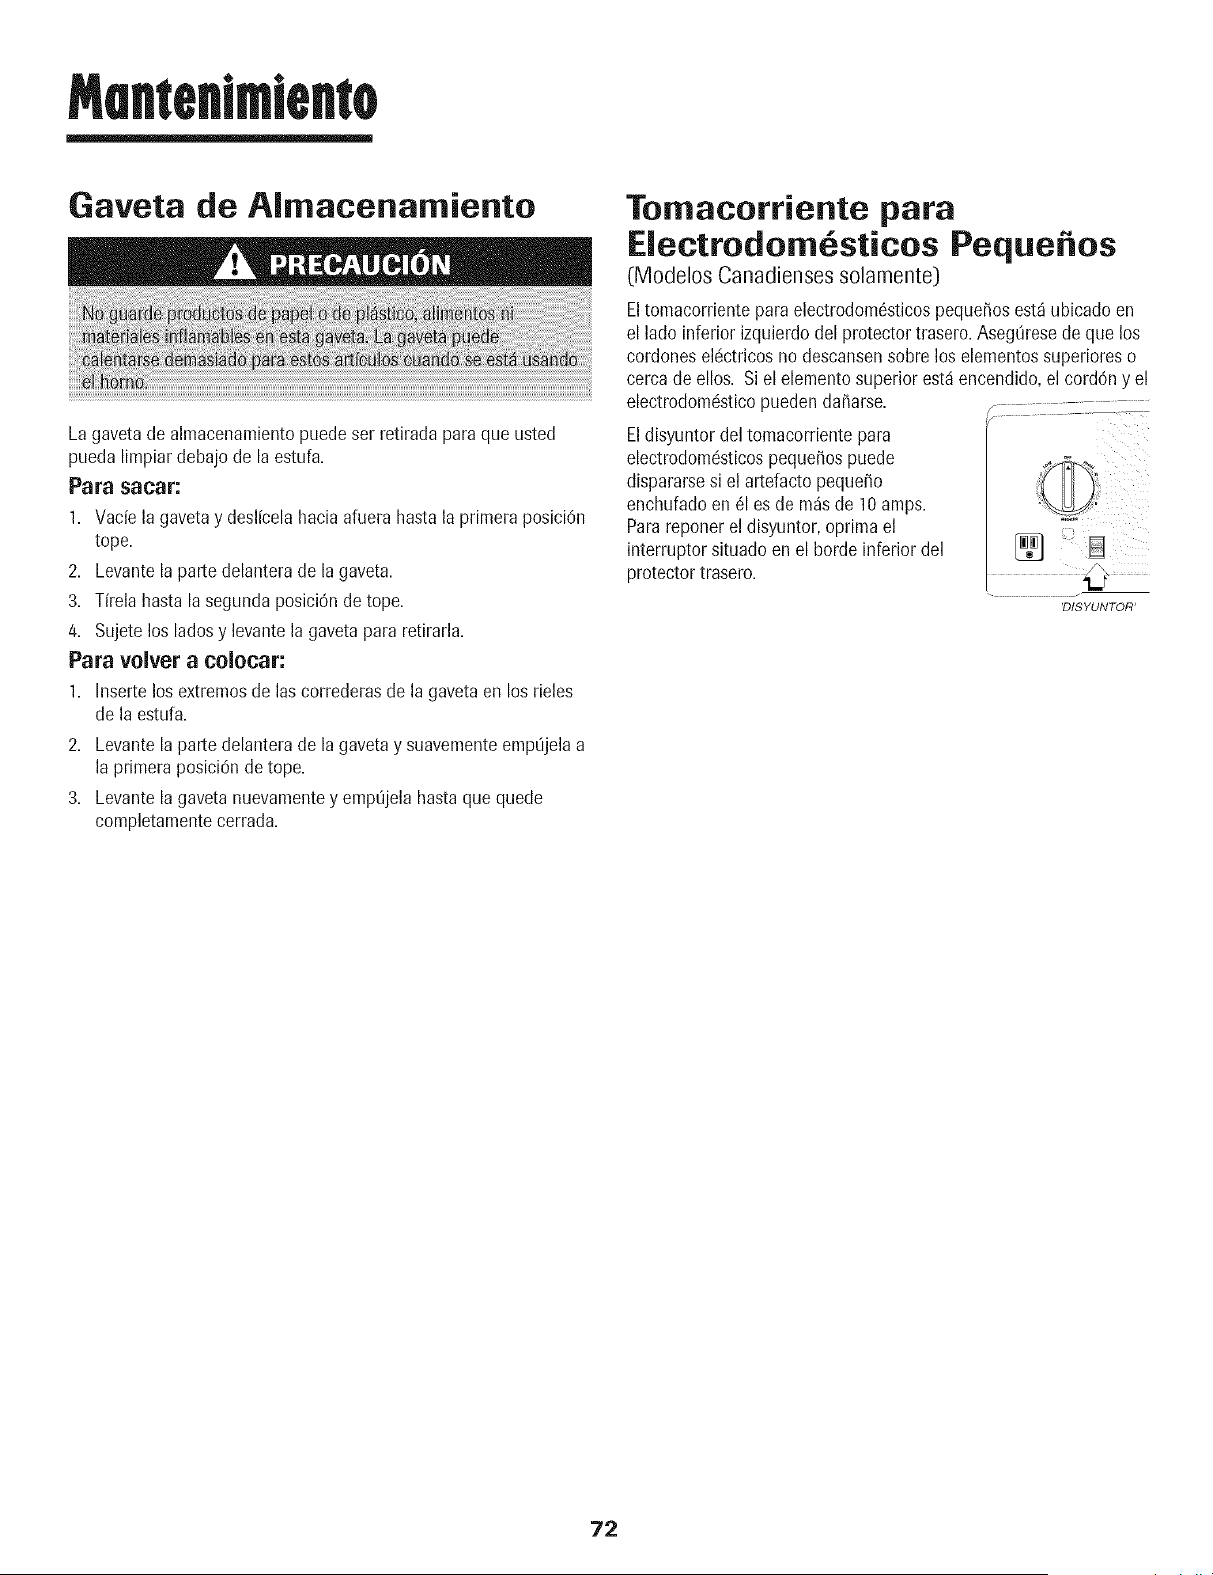
Gaveta de AImacenamiento
La gavetade almacenamientopuedeser retiradaparaque usted
puedalimpiar debajo de la estufa.
Para sacar:
1. Vade la gavetay deslfcelahaciaafuera hasta la primeraposiciOn
tope.
2. Levantela parte delanterade la gaveta.
3. TfrelahastalasegundaposiciOnde tope.
4. Sujete los ladosy levantela gavetapara retirarla.
Para velvet a colocar:
1. Insertelos extremosde las correderasde la gavetaen los rieles
de la estufa.
2. Levantela parte delanterade la gavetay suavementeemp0jelaa
la primeraposiciOnde tope.
3. Levantela gaveta nuevamentey empt_jelahastaquequede
completamentecerrada.
Tomacorriente para
Electrodom sticos Peque os
(Modelos Canadienses solamente)
Eltomacorrienteparaelectrodom6sticospeque_osest_ubicadoen
el lado inferior izquierdodel protectortrasero.Aseg0resede que los
cordonesel6ctricosno descansensobre los elementossuperioreso
cercade ellos. Siel elementosuperior est_ encendido,el cordony el
electrodom6sticopuedenda_arse.
Eldisyuntor del tomacorrientepara
electrodom6sticospeque_ospuede
dispararsesi el artefactopeque_o
enchufadoen 61es de m_s de 10 amps.
Parareporterel disyuntor,optima el
interruptorsituadoen el borde inferior del
protectortrasero.
i©¸¸¸¸¸¸¸¸¸¸¸
'DISYUNTOR'
72
[ocailmd6n $olucJbnde
Para Is mayoda de los preblemas,
verifiqueprimeroIo siguiente.
TodaIs estufs o psr_ede ella no
funeions.
Eireloj, las palabrasen el indicador
visualy/o las lacesfuncionanpero
el homo no se cslients.
Losresultadosdel horneadono
soneomose esperabano son
diferentesa losdel homo anterior.
. Revisesi los controlesdel homoest_ndebidamenteajustados.
. Verifiquesi el enchufeest_firmementeinsertadoenel tomacorriente.
. Verifiqueo vuelvaa reponerel disyuntor.Verifiqueo reemplaceel fusible.
° Verifiqueel suministrode energ[aelc!ctrica.
o
°
o
o
o
o
o
o
o
Losslimentosno se sssns Is
psrrillsen forma debids o sslen
demssisdohumo.
o
o
=
=
=
Elhomo no se sutolimpis. •
=
=
=
Elhomo no se limpi6 en forms •
debids.
Ls puerts deJhomo nose
desbloqsesdesps_sdel cicio
de sutolimpiezs.
Revisesi la superficiey/o loscontrolesdel homoest_indebidamenteajustados. Ver p_ginas
55y 66.
Verifiquesi la puertadel homo seha desbloqueadodespuc!sdel ciclo de autolimpieza.Vet
p_igina68.
Revisesi el homo est,1ajustadoparahorneadodiferidoo programade limpieza.Vet p_ginas61
y 67.
Verifiquesi 'ControlLock' [BloqueodeControl) est,1activado. Ver p_ig.59.
Verifiquesi el control est,1en Modo Sab_itico.Vet p_g.63.
Elhomo puedeestarprogramadopara una funci6n de 'Cook& Hold'o unafunciOndiferida.
Puedeestaractivadala caracterfsticade bloqueode los controlesdel homo.(Vetp_ig.59.)
AsegOresede queel respiraderodel homo no estc!bloqueado.Verp_gina66parala ubicaciOn.
Verifiquepara asegurarsede que la estufaest,1nivelada.
Lastemperaturasa menudovar[anentreun homo nuevoy unoantiguo. A medidaque pasa
eltiempo,la temperaturadel homo cambiay puedehacersem_scalienteo m_sfr[a. Ver
p_gina63 paralas instruccionescomoajustarla temperaturadelhomo. NOTA:No se
recomiendaajustarlatemperaturasi ha tenido problemascon solo unao dos recetas.
Verifiquelas posicionesde lasparrillasdel homo. El alimentopuedeestar muy cercadel
elemento.
Elelementode asar no rue precalentado.
Elpapelde aluminiose us6de maneraincorrecta. Nuncaforre el insertodel asadorcon papel
dealuminio.
Lapuerta del homo estabacerrada mientrasse asabaa la parrilla. Deje la puertaabierta en la
primeraposiciOn[alrededorde 10cm [4 pulgadas]).
Recorteel excesodegrasade lacame antesde ponerlaaasara la parrilla.
Seus6 una asaderasucia.
Elvoltajedel hogarpuedeser bajo.
Verifiquepara asegurarsede que el ciclo no est6ajustadoparaun comienzodiferido.Ver
p_gina67.
Verifiquesi la puertaest_cerrada.
Verifiquesi el control est,1en Modo Sab_itico.Vet p_ig.63.
Elhomo puedeestara m_sde 205° C [400° F). Latemperaturadel homo debeser inferior a
205° C [400° F}paraprogramarun ciclo delimpieza.
Puedeque seanecesarioun tiempo de limpiezam_slargo.
Losderramesexcesivos,especialmentede alimentosazucaradosy/o _cidosnofueron limpiados
antesdelciclo deautolimpieza.
Elinteriordel homotodav[aest_caliente. Dejeque pasoaproximadamenteunahoraparaque
el homose enfrieantesdequese completeun ciclo de autolimpieza. Lapuertapuedeser
abiertacuandodesaparezcala palabra'LOCK'del indicadorvisual.
° El controly la puertapuedeestarbloqueada.Ver p_gs.59et 68 parades bloquear.
73
[ocallmci6n Solutionde
La superficiesuave muestra
desgaste.
Sejunta humedaden la ventana
del home o sale vapor per
el respiraderodel homo.
Hay un oior fuerte o humo leve
cuandose enciende el homo.
C6digosde Errores
Se escuchan ruidos.
_O Se escuchan Senates sonoras
y el indicadorvisual no se activa.
'SAb' destella y luego se
despliega continuamente.
1. Abrasioneso rayaduraspeque_as.
• AsegLiresedeque lacubiertay la parte inferiordelutensilioest6limpia.No desliceutensilios
devidrioo de metala trav6sde la cubierta.Aseg0resedequela parteinferiordel utensiliono
sea_spera.Use losagentesdelimpiezarecomendados.Ver p%. 69.
2. Marcasde metal.
• No desliceutensiliosde metalatrav6sde la cubierta.Cuandoest6frfa,limpiela cubiertacon
CremaparaLimpiezadeCubiertas.Verp_ig.69.
3. Manchasy estr[asmarrones.
• Retirelosderramesr_pidamente.Nuncalimpieconun pasooesponjasucia.Aseg0resedeque
la cubiertay laparte inferiordel utensilioest6 limpia.
4. Areascon un brillo met_lico.
• Dep6sitosmineralesdel aguay de losalimentos.Uselosagentesde limpiezarecomendados.
Ver p_g.69.
5. Picaduraso descascarillado
• Limpielos derramesazucaradosinmediatamente.Ver p%. 69.
• Estoes normal cuandose cocinanalimentoscon alto contenidode humedad.
• Seus6 humedadexcesivacuando limpi6 la ventana.
• Estoes normal en una estufa nuevay desaparecer_despu6sde unospocosusos.
AI iniciar un ciclo de autolimpiezase "quemar_n" los oloresm_s r_pidamente.
• Sise enciendeel ventilador ayudar_a eliminar el humo y/o el clot.
• Suciedadexcesivade alimentosen el panelinferior del homo. Useunciclo de autolimpieza.
• 'BAKE'o 'LOCK'puedendestellarr_pidamenteenel indicador para avisarleque hayun error
o un problema.Si'BAKE'o 'LOCK'aparecenen el indicadorvisual,optimala tecla'CANCEL'.
Si'BAKE'o 'LOCK'continOandestellando,desconectelaenergiael6ctricaalelectrodom6stico.
Espereunospocosminutosyvuelvaa reconectarlaenergiael6ctrica.SicontinOandestellando,
desconectelaenerg[ael6ctricadelelectrodom6sticoy Ilameal t6cnicode servicioautorizado.
• Siel homo est_demasiadosucio,pueden ocurrir demasiadasIlamaradasIo cual resultarden
unc6digo de errordurante la limpieza.Oprimalatecla'CANCEL'y dejequeel homose enfrie
completamente,limpie el excesode suciedady luegovuelvaa programarel ciclo de limpieza.
Siel c6digo de error reaparece,Ilamea un t6cnico autorizado.
• Elhomo emitevariossonidosbajos. Ustedpuedeo[r los rel6sdel homo cuandose encienden
y se apagan.Estoes normal.
• A medidaque el homosecalientayse enfria,ustedpuede oir sonidosde piezasmet_licasque
se expandeny contraen. Estoes normaly no daffar_su electrodom6stico.
• Elhomo puedeestaren Modo Sab_tico. (Verpdg.63).
• Elhomoest_ en modosab_tico.Paraanular el modosab_tico,oprimay mantengaoprimidala
tecla 'Clock'(Reloj)durante cinco segundos.
74
Gamntia¥Se tci
LA UNICAY EXCLUSIVASOLUCIONPARAEL
CLIENTEBMO ESTAGARANTfALIMITADAES
LA REPARACIONDELPRODUCTOSEGONSE
INDICAAQU[.LASGARANTiASIMPLiCITAS,
INCLUYENDOLASGARANTiASDE
COMERCIALIZACIONO DEAPTITUDPARAUN
PROPOSITOENPARTICULARESTA,N
LIMITADASA UN ANO O AL PER[ODODE
TIEMPOMiNIMO PERMITIDOPORLA LEY.
MAYTAGCORPORATIONNO SERA,
RESPONSABLEDEDANOSINCIDENTALESO
CONSECUENTES.ALGUNOSESTADOSY
PROVlNCIASNO PERMITENLAEXCLUSIONO
LIMITACIONDEDANOSINCIDENTALESO
CONSECUENTESO LALIMITACIONDELA
DURACIONDE LASGARANTfASIMPLfCITASDE
COMERCIALIZACIONO APTITUD,PORLO QUE
ESTASEXCLUSIONESO LIMITACIONES
PUEDENNO APLICARSEENSUCASO.ESTA
GARANTiALE OTORGADERECHOSLEGALES
ESPECiFICOS.USTEDTAMBIENPUEDETENER
OTROSDERECHOSQUEVARfANDE UN
ESTADOA OTROO DE UNA PROVlNCIAA
OTRA.
Lo que no cubren estas garantias
1. Situacionesy dafios resultantesdecualquierade lassiguientessituaciones:
a. InstalaciOn,entrega o mantenimientoinapropiados.
b.CualquierreparaciOn,modificaciOn,alteraciOno ajusteno autorizadospor el
fabricante o taller de servicioautorizado.
c. Mal uso,abuso,accidentes,uso no razonableo hechosfortuitos.
d. Corriente,voltaje,suministroelOctricoo suministro de gas incorrectos.
e. Ajuste inadecuadode cualquiercontrol.
2. Lasgarantfasquedanhulas si los n0merosdeserie originalesban sido retirados,
alteradoso nose pueden determinar f_icilmente.
3. Bombillas,filtros deaguay filtros de aire.
4. Losproductoscompradospara uso comercialo industrial.
5. Elcosto del servicioo Ilamadade serviciopara:
a. Corregirerroresde instalaci0n.Paralos productosque requieranventilaciOn,se
debenusar conductos de metal rigido.
b. Instruiral usuario enel usoadecuadodel producto.
c. Transportedel electrodomc!sticoal establecimientodeservicioy de regreso.
6. Cualquierpc!rdidade alimentosdebidoa fallasdel refrigeradoro congelador.
7. Costosde viajey transporte deservicio en_reas remotas.
8. Estagarantfa no se aplicafuera de los EstadosUnidosy Canada.POngaseen contacto
con su distribuidor para determinarsi se aplica cualquierotra garant[a.
9. Losdafiosconsecuenteso incidentalessufridos por cualquierpersonacomo resultado
del incumplimientodeesta garantfa.En algunosestadosnose permitela exclusiono
limitaciOnde dafios consecuenteso incidentales,por Iotanto la limitaciOno exclusion
anterior puede no aplicarseen su caso.
Si necesita servicio
Primerorevise la secciOnde Iocalizaci0ny soluci0nde averiasen su guia de usoy cuidado
o Ilameal distribuidor dondeadquiri0 elelectrodom_stico.Tambic!npuede Ilamara Maytag
Services,LLC,AtenciOnalcliente, al 1-800-688-9900en EE.UU.y al 1-800-688-2002en
Canada1para ubicara un agente deservicio calificado.
• Aseg0resede conservarel comprobantede compraparaverificar el estadode la
garantia.Consultela secci0nsobrela GARANTfAparamayorinformaciOnsobre las
responsabilidadesdel propietario para obtenerserviciobajo la garantia.
• Si el distribuidoro la compafi[ade servicio no pueden resolverel problema,escribaa
MaytagServices,LLC, Attn: CAIR:"Center,P.O.Box2370,Cleveland,TN 37320-2370o
Ilameal 1-800-688-9900 en EE.UU.y al 1-800-688-2002 en Canada.
Lasgu[as del propietario,manualesde servicio e informaciOnsobre las piezaspueden
solicitarsea MaytagServices,LLC,AtenciOnal cliente.
_OIEIS= =CuandoIlame o escriba acercade un problemade servicio,porfavor
incluyala siguienteinformaciOn:
a.Su hombre,direcci0n y nOmerode telc!fono;
b. NOmerode modeloy nOmerodeserie;
c.Nombrey direcci0ndesu distribuidoro tc!cnicode servicio;
d. Una descripciOnclaradel problemaque est,1experimentando;
e.Comprobantede compra (recibode compra).
Form No. A/01/06 Part No 8113P557-60 ':_2006 Maytag Appliances Sales Co Litho USA