
Loading ...
Loading ...
Loading ...
13Cyclone Insert Installation - English
1. Place range hood on its side where the control panel and light
bulbs are on the bottom, closest to the table.
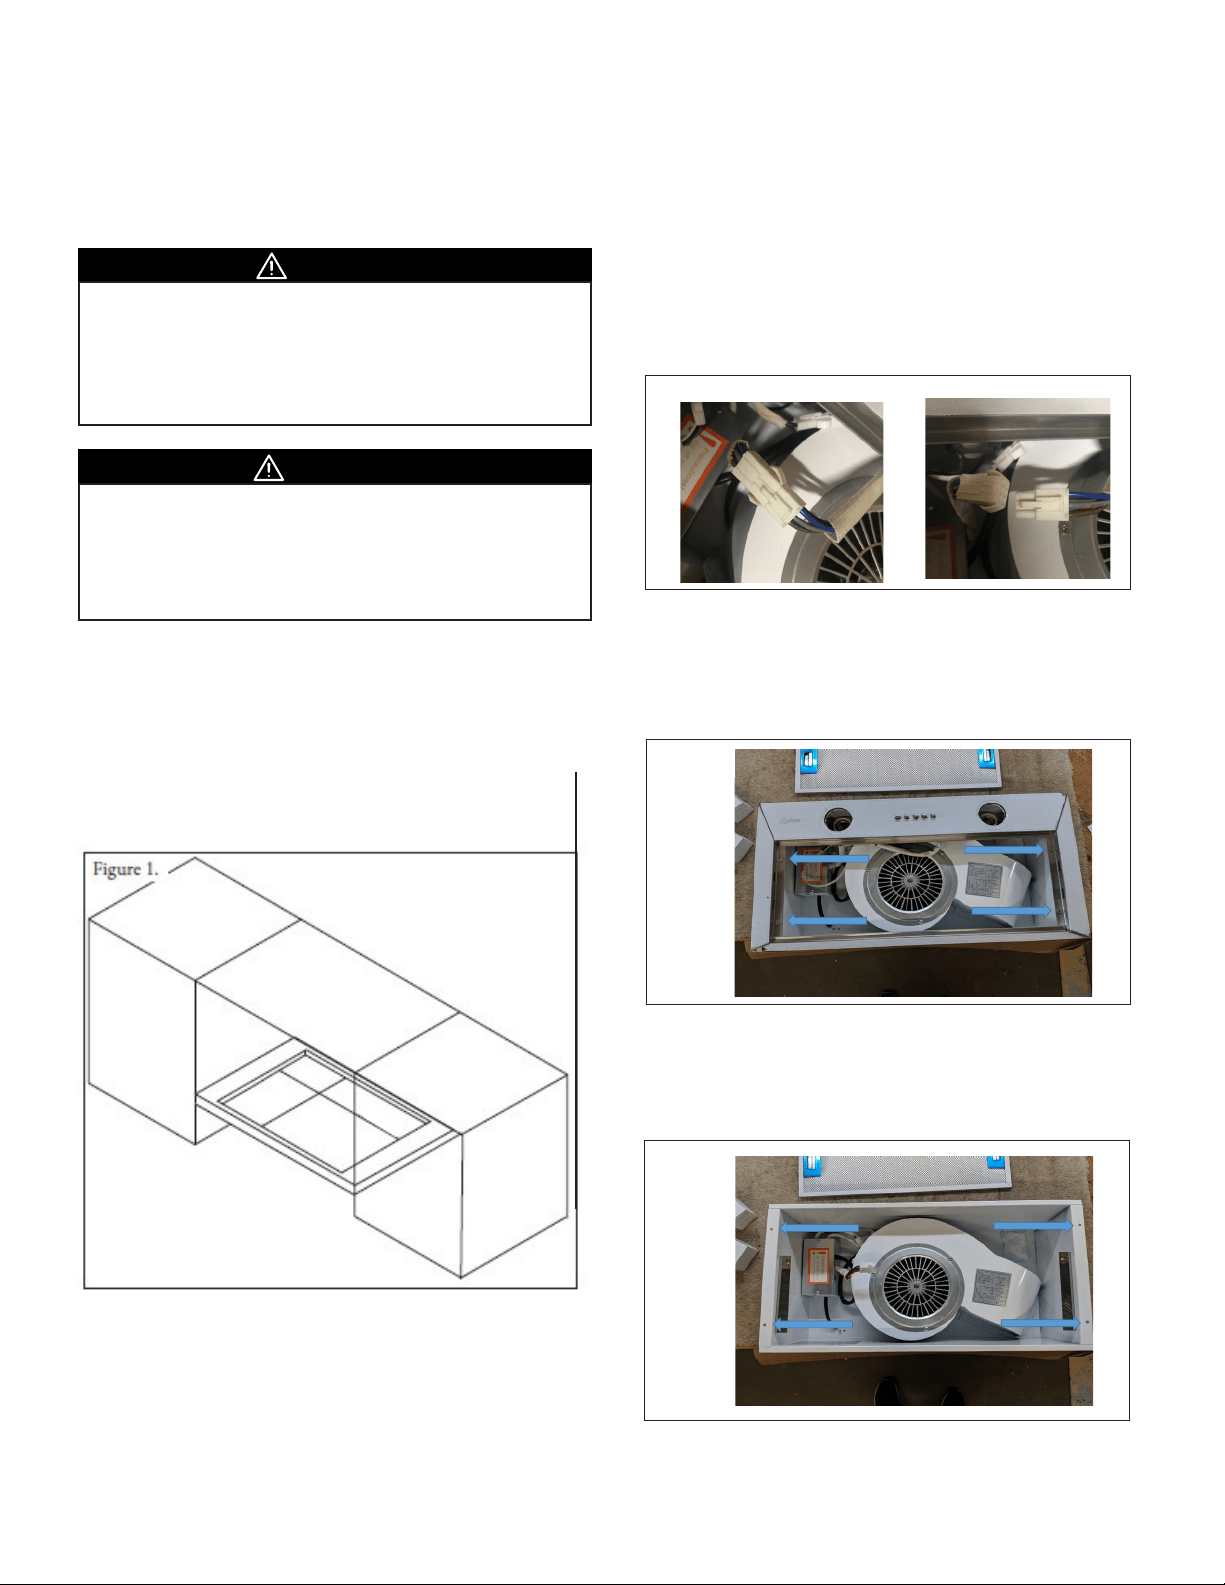
2. Remove the lter and locate the 3 quick release wire connectors
inside the cavity of the hood. ere are 2 for the lights and 1
for the switch/controls. Gently squeeze the plastic tabs and
pull apart the connectors (Figure2).
3. Once all 3 wires have been disconnected, locate the four
Phillips screws. ere are 2 on the right side and 2 on the le
side. Remove the 4 screws using your screwdriver or power
drill and place them aside as you will need them later on to
reattach the face. Remove the face and set it aside (Figure3).
4. With the face removed, you will expose 4 holes in the body of
the hood. 2 on the right side and 2 on the le side. Insert the
hood into the cavity of the cabinet and secure it by driving the
screws through the pilot holes and directly into the bottom of
the cabinet. (Figure 4)
5. With the hood secured to the cabinet, you can now reinstall
the face and reconnect all the wires.
BX155 INSERT HOOD INSTALLATION
is appliance requires 120V 60Hz electrical supply and
connection to an individual properly grounded branch circuit
protected by a circuit breaker or time delay fuse.
• Turn o power circuit at the service panel before wiring
this unit.
• All electrical work must be done by a qualied electrician
in accordance with all applicable codes and standards.
is range hood must be properly grounded.
WARNING
• At least two installers are required due to the weight and
size of the hood.
• Prior to installing the product, Cyclone recommends
inspecting the hood for damage and testing the hood to
ensure proper function.
CAUTION
Prepare for Installation
1. Unpack range hood and check contents. Note: Be cautious of
sharp edges within the unit.
2. Cut the insert cutout at the bottom of the cabinet using the
given cutout measurements on page 15 (Figure 1).
3. Locate the cutout at the center of the bottom of the cabinet.
Installing the BX155 Range Hood
Figure 3.
Figure 4.
Once the cutout has been made to the insert:
Figure 2.
Loading ...
Loading ...
Loading ...