Loading ...
Loading ...
Loading ...
9
44-lb. Clear Ice Maker
www.insigniaproducts.com
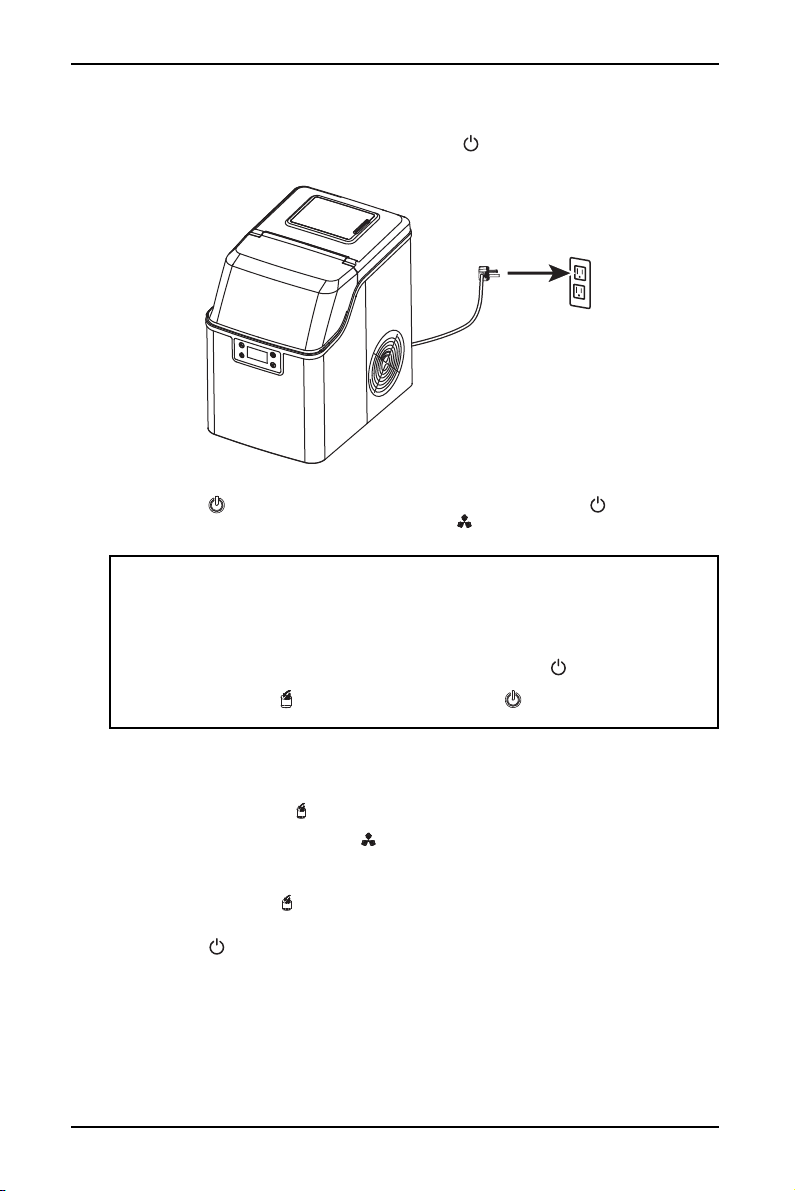
2 Close the water reservoir lid.
3 Plug in your ice maker. The power indicator on the display begins to blink
and the ambient temperature (in degrees Fahrenheit) is shown.
4 Press the (ON/OFF) button to turn on your ice maker. The symbol stops
blinking (stays on), the ice making symbol begins rotating, and the
ambient temperature turns off.
• After several minutes, the countdown is shown on the display, indicating the
time (in minutes) until the ice making process is complete.
• Water flows from the top water reservoir to the bottom water tank and the
water tank symbol turns on.
5 When the ice making symbol blinks, the cycle is over.
6 To make additional ice cubes, leave your ice maker on and refill the top water
reservoir. When the water float in the bottom tank detects a full tank, the
water tank symbol turns off and the next ice making cycle begins.
OR
Press the (ON/OFF) button to turn your ice maker off.
Changing the thickness of the ice cubes
• Press the + or - buttons prior to the ice making cycle to increase or decrease
the ice making time in one minute increments. More time for thicker ice cubes,
and less time for thinner.
Notes:
• The ice making cycle lasts between 13 and 25 minutes, depending on the ambient
temperature.
• The first time you make ice, depending on the initial water temperature, ice-making
time will be a little longer. In a very hot room, ice-making time may vary, but will not
exceed 35 minutes.
• To stop the ice making process at any time, press and hold the (ON/OFF) button for
more than five seconds to cause the ice tray to eject the ice cubes.
• If the low water icon is on, add water then press the (ON/OFF) button to restart
the ice maker.
Loading ...
Loading ...
Loading ...