Loading ...
Loading ...
Loading ...
11
1) The BLUE WIRE
must be connected
to the terminal
marked ‘N’
(Neutral), or
coloured Black.
2) The BROWN
WIRE must be
connected to the
terminal marked
‘L’ (‘Live’), or
coloured RED
(Fig. 7 – at left)
The cooker hood must not
be fitted above stoves with a
radiant top plate.
We recommend that at least
two people install this hood.
Do not tile, grout or silicone
this hood to the wall.
NOTE – YOUR COOKER HOOD COMES WITH THE FOLLOWING FIXING
ACCESSORIES:
- 1 SPACER - 4 SCREWS -RAWLPLUGS
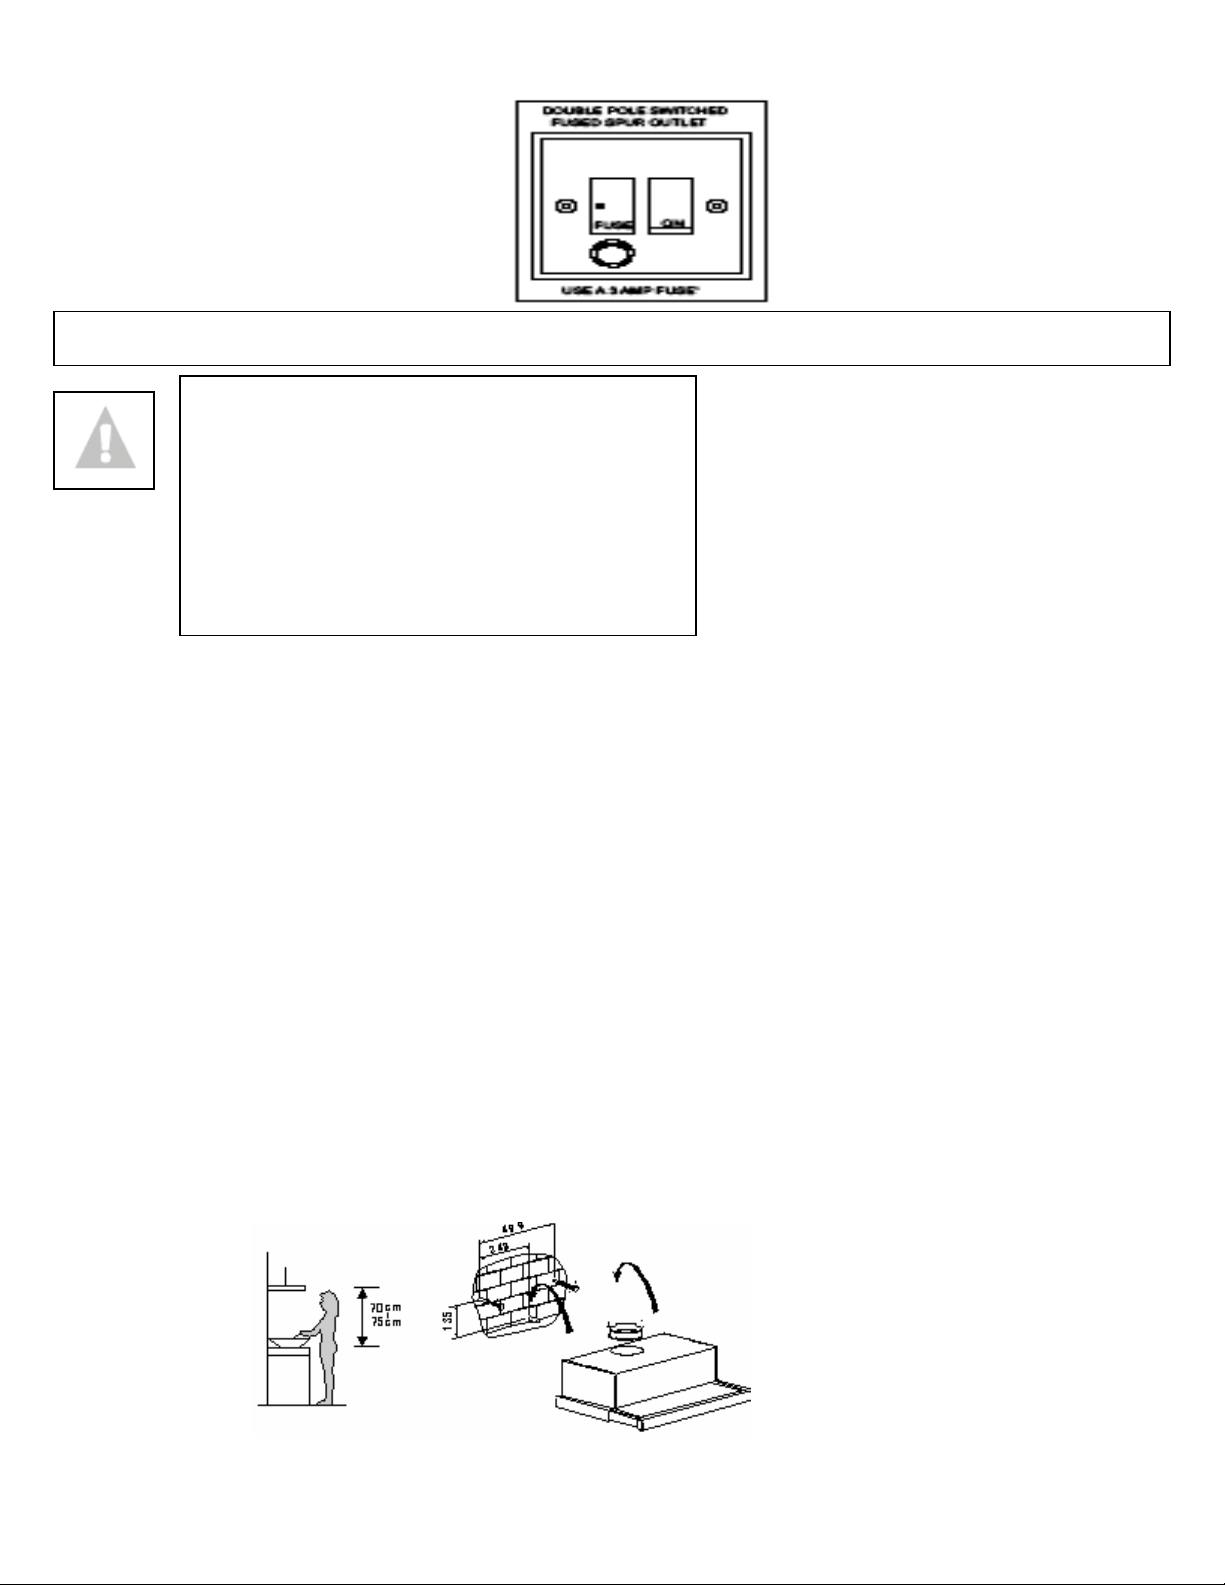
1) Your Cooker Hood should only be fitted into the underside of a dedicated
cabinet / kitchen unit. DO NOT position it any less than 700 mm (70 cm)
above the hob or let other cabinets overhang the hob.
2) Remove the metal anti-grease grille.
3) Drill where indicated. SEE DIAGRAMS BELOW. Using a drill with a
diameter of 6mm, make holes to line up with the screw holes on the
cooker hood’s fixing surfaces (see Fig. below).
4) Insert raw plugs into the holes and work screws in partway. Adjust your
cooker hood so that it is straight using the spacer (‘F’ in figure below).
5) Once you have ensured the unit will be able to sit properly (& is connected
to the ducting, if using as an extraction fan), tighten the screws to secure.
A).
INSTALLATION INSTRUCTIONS – installing your Cooker Hood
PLEASE NOTE THAT YOU WILL HAVE
TO DECIDE BEFORE INSTALLING YOUR
COOKER HOOD THAT YOU CAN ADAPT
IT AS AN EXTRACTION FAN. IF THIS
IS THE CASE, YOU’LL NEED TO ATTACH
A SPIGOT (‘A’ in figure at bottom of
page) AND DUCTING. YOU’LL ALSO
NEED TO HAVE PREPARED YOUR WALL
EXHAUST SYSTEM PROPERLY
Loading ...
Loading ...
Loading ...