
IT
Tosaerba con conducente a bordo seduto
- MANUALE DI ISTRUZIONI
ATTENZIONE: prima di usare la macchina, leggere attentamente il presente libretto.
DE
Aufsitzmäher (Rasenmäher mit Fahrersitz mit sitzendem Benutzer)
GEBRAUCHSANWEISUNG
ACHTUNG: vor inbetriebnahme des Geräts die Gebrauchsanleitung aufmerksam lesen.
EN
Ride-on lawnmower with seated operator
- OPERATOR’S MANUAL
WARNING: read thoroughly the instruction booklet before using the machine.
FR
Tondeuse à gazon à conducteur assis
-
MANUEL D’UTILISATION
ATTENTION: lire attentivement le manuel avant d’utiliser cette machine.
NL
Grasmaaier met zittende bediener
- GEBRUIKERSHANDLEIDING
LET OP: vooraleer de machine te gebruiken, dient men deze handleiding aandachtig te lezen.
171506107/6A 10/2019
T* - TC* - TH* 102 Series
108 Series
118 Series
122 Series


ITALIANO -
Istruzioni Originali ...................................................................................................
IT
БЪЛГАРСКИ - Инструкция за експлоатация
...........................................................................
BG
BOSANSKI - Prijevod originalnih uputa
........................................................................................
BS
ČESKY - Překlad původního návodu k používání
..........................................................................
CS
DANSK - Oversættelse af den originale brugsanvisning
...............................................................
DA
DEUTSCH - Übersetzung der Originalbetriebsanleitung
...............................................................
DE
ΕΛΛΗΝΙΚΑ - Μεταφραση των πρωτοτυπων οδηγιων
.....................................................................
EL
ENGLISH - Translation of the original instruction
..........................................................................
EN
ESPAÑOL - Traducción del Manual Original
................................................................................
ES
EESTI - Algupärase kasutusjuhendi tõlge
.....................................................................................
ET
SUOMI - Alkuperäisten ohjeiden käännös
....................................................................................
FI
FRANÇAIS - Traduction de la notice originale
..............................................................................
FR
HRVATSKI - Prijevod originalnih uputa
.........................................................................................
HR
MAGYAR - Eredeti használati utasítás fordítása
...........................................................................
HU
LIETUVIŠKAI - Originalių instrukcijų vertimas
...............................................................................
LT
LATVIEŠU - Instrukciju tulkojums no oriģināl valodas
...................................................................
LV
МАКЕДОНСКИ - Превод на оригиналните упатства
...............................................................
MK
NEDERLANDS - Vertaling van de oorspronkelijke gebruiksaanwijzing
....................................................
NL
NORSK - Oversettelse av den originale bruksanvisningen
...........................................................
NO
POLSKI - Tłumaczenie instrukcji oryginalnej
.................................................................................
PL
PORTUGUÊS - Tradução do manual original
...............................................................................
PT
ROMÂN - Traducerea manualului fabricantului
.............................................................................
RO
РУССКИЙ - Перевод оригинальных инструкций
......................................................................
RU
SLOVENSKY - Preklad pôvodného návodu na použitie
...............................................................
SK
SLOVENŠČINA - Prevod izvirnih navodil
......................................................................................
SL
SRPSKI - Prevod originalnih uputstva
...........................................................................................
SR
SVENSKA - Översättning av bruksanvisning i original
..................................................................
SV
TÜRKÇE - Orijinal Talimatların Tercümesi ....................................................................................
TR
H AK
GD
F
B
C E
J
I
kW /min
- s/n
9
5
8 1
kg
2
3
6 4
7
Type:
Art.N.
Transmission
10
1
2
max xxx N (xx kg)
max xxx N (xxx kg)
4
3
B
A
B
A
C
D
E
G
F
5
A
B
C
D
A B
C
D
E
6
7
A
B
B
F
F
G
H
I
E
E
C
D
A
B
8
I
A
B
C
A
B
C
C
II
9
T
U
S
S
A
F
M
M
O
P
N
T - U
E
2
1
1
3
4
5
5
A
B
B
C
C Q
R
F
K
B
R Q
F
D - E
L
C (x 2) F (x 4)
I (x 4)
J (x 4) O (x 2) P (x 4) R (x 4) T - U
G
J
JH
I
10
C A
A B H
H
H (x 2)
F
G E
D D C DD
11
A
B
B
C
A
B
B
C
C
C
Mod. 102
Mod. 118 - 122
Mod. 108
A
B
B
C
C
B.2
A
C
B.2
A
D
C
B
A
B
B.1
B
B
D.1
E
D
E.1
12
B
C
A
D
D
D
A
B
C
D
13
14
15
A
L
K
B
G
C
D
M
F.2
O
N
F.1
E
H
I
J
16
A B C FED G H
P
Q
R
I
E
A
H
B
C
D
G
F
J
I
A
O
B
E DJ
K
C
M
G
N
H
L
F
D
III
II
I
21
A
22
B
B
A
C
23
A
H
A
B
B
C
D
17
18
A
19
20
A
C
B
A
B
24
25
A
26
27
1/3
A
B
28
A
C
D
29
30
A
B
E
A
A
A
A
II
I
34
31
B C A
A
B
C
D
E
F
G
II
I
33
32
A
B
C
III
35
36
A
37
39
38
40
180 mm
110 mm
A A
B
C
A
41
42
110 mm
A
45
A
B
TH* TH4*
46
A
B
47
48
A
D
B
C
A
B
49
A
A
43
44
A A
B
C
B
A
T*, TC*
50
52
51
53
B
A
A
B B
AA C
B
A
54
55
A
B
C
D
D
56
57
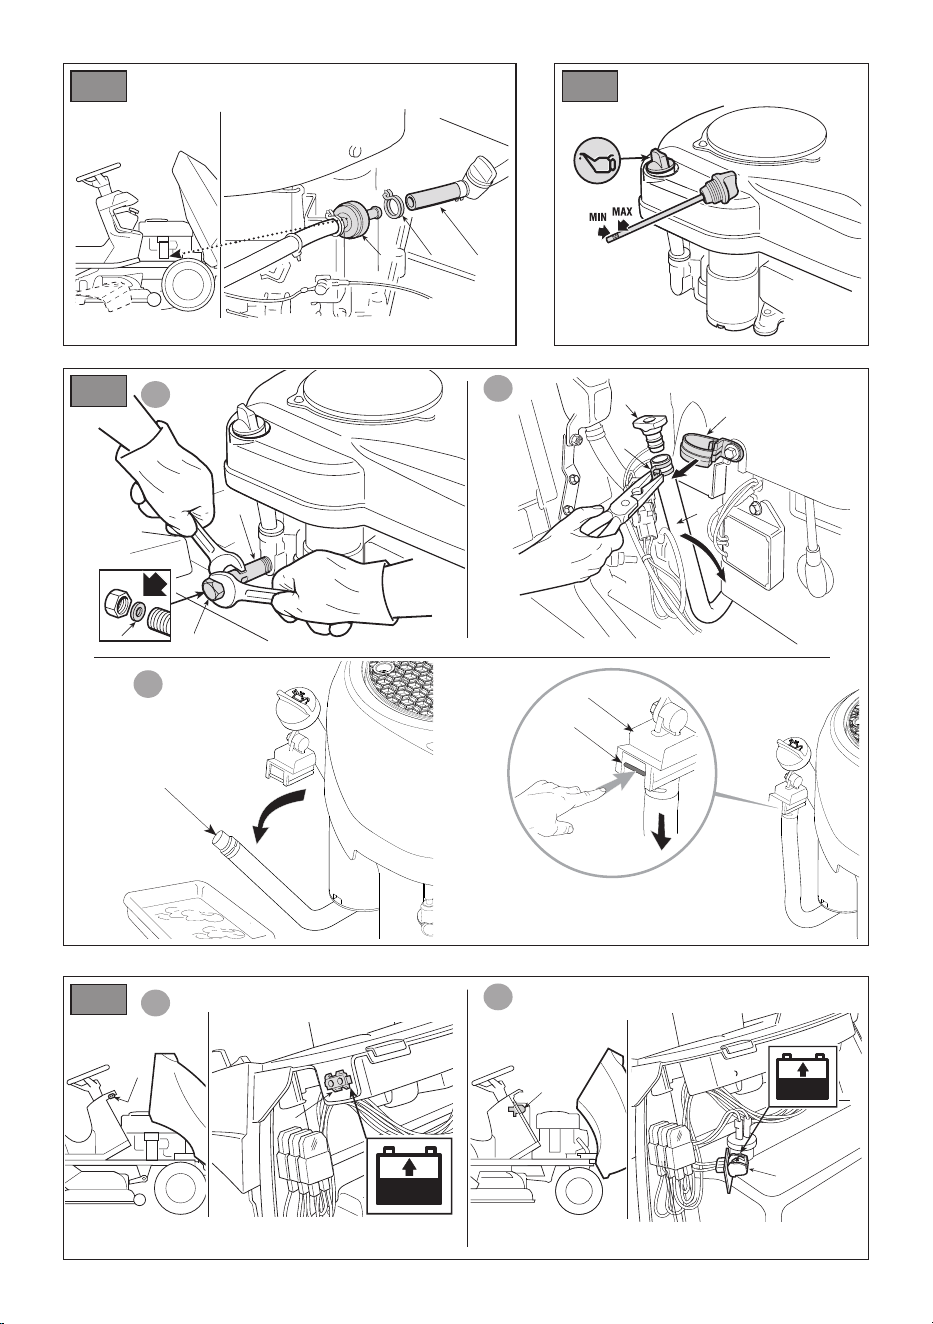
MIN
MAX
A
B
C
A
B
58
A1
A2
B
C
C
C
D
F
G
E
H
58
I
J
K
M
N
O
R 2
R 1
P
R 3
Q
L

�1� DATI TECNICI
T* - TC*
102 Series
T*
108 Series
�2� Potenza nominale * kW 6,0 ÷ 12,4 8,2 ÷ 13,59
�3� Giri al minuto * min
-1
2300 ÷ 2500 ± 100 2600 ÷ 2700 ± 100
�4� Impianto elettrico V 12 12
�5� Capacità del serbatoio carburante l 7,0 8,0
�6� Pneumatici anteriori 15 x 6,00-6 15 x 6,00-6
�7� Pneumatici posteriori 18 x 8,50-8
18 x 8,50-8
20 x 10,00-10
�8� Pressione gonaggio anteriore bar 1,0 1,0
�9� Pressione gonaggio posteriore bar 1,2 1,4
�10� Altezza di taglio cm 3 ÷ 9 3 ÷ 9
�11� Larghezza di taglio cm 101 105
�12� Raggio minimo di erba non tagliata cm 96 120
�13� Codice dispositivo di taglio
82004341/1-82004340/1
(standard)
82004348/0-82004347/0
(mulching)
182004370/0 (standard)
182004357/0 (mulching)
�14�
Velocità di avanzamento (indicativa)
a 3000 min
-1
km/h 0 ÷ 8,8 0 ÷ 9,2
�15�
Limite di velocità con catene da neve
(se accessorio previsto)
km/h 8,8 9,2
�16�
Limite di carico per dispostivo di traino
(Forza verticale massima)
N (kg)
245
(25)
294
(30)
�17�
Limite di carico per dispostivo di traino
(Peso massimo rimorchiabile)
N (kg)
980
(100)
490
(50)
�18� Inclinazione massima consentita 10° (17%) 10° (17%)
�19� Dimensioni
�20� Lunghezza mm 1860
�21�
Lunghezza con sacco
(Lunghezza senza sacco)
mm
2300 ÷ 2418
1780
-
-
�22� Larghezza mm 1050 -
�23�
Larghezza con deettore di scarico laterale
(Larghezza senza deettore di scarico laterale)
1330
(1118)
�24� Altezza mm 1070 1095
�25� Massa * kg 216 ÷ 240 200 ÷ 240
�26�
�27�
Livello di pressione acustica (max.)
Incertezza di misura
dB(A)
dB(A)
84
1,7
83
1,2
�28�
�27�
Livello di potenza acustica misurato (max.)
Incertezza di misura
dB(A)
dB(A)
100
0,8
100
0,63
�29� Livello di potenza acustica garantito dB(A) 100 100
�30�
�27�
Livello di vibrazioni al posto di guida (max.)
Incertezza di misura
m/s
2
m/s
2
1
0,23
0,7
0,25
�31�
�27�
Livello di vibrazioni al volante (max.)
Incertezza di misura
m/s
2
m/s
2
4
2,31
2,3
0,92
* Per il dato specico, fare riferimento a quanto indicato nell’etichetta di identicazione della macchina.

�1� DATI TECNICI
T*
118 Series
T* - TC*
122 Series
�2� Potenza nominale * kW 11,2 ÷ 13,59 11,2 ÷ 13,9
�3� Giri al minuto * min
-1
2700 ± 100 2600 ÷ 2900 ± 100
�4� Impianto elettrico V 12 12
�5� Capacità del serbatoio carburante l 14,0 7,0
�6� Pneumatici anteriori
15 x 6,00-6
16 x 6,00-8
15 x 6,00-6
�7� Pneumatici posteriori 20 x 10,0-10 18 x 8,50-8
�8� Pressione gonaggio anteriore bar 1,0 1,0
�9� Pressione gonaggio posteriore bar 1,4 1,2
�10� Altezza di taglio cm 3 ÷ 9 3 ÷ 9
�11� Larghezza di taglio cm 121 121
�12� Raggio minimo di erba non tagliata cm 111 90
�13� Codice dispositivo di taglio
182004359/0 (standard)
182004361/0 (mulching)
82004343/0-82004342/0
(standard)
82004350/0-82004349/0
(mulching)
�14�
Velocità di avanzamento (indicativa)
a 3000 min
-1
km/h 0 ÷ 9,2 0 ÷ 8,8
�15�
Limite di velocità con catene da neve
(se accessorio previsto)
km/h 9,2 8,8
�16�
Limite di carico per dispostivo di traino
(Forza verticale massima)
N (kg)
294
(30)
245
(25)
�17�
Limite di carico per dispostivo di traino
(Peso massimo rimorchiabile)
N (kg)
490
(50)
980
(100)
�18� Inclinazione massima consentita 10° (17%) 10° (17%)
�19� Dimensioni
�20� Lunghezza mm 1860
�21�
Lunghezza con sacco
(Lunghezza senza sacco)
mm
-
-
2300 ÷ 2418
1780
�22� Larghezza mm - 1260
�23�
Larghezza con deettore di scarico laterale
(Larghezza senza deettore di scarico laterale)
1520
(1300)
�24� Altezza mm 1095 1070
�25� Massa * kg 230 ÷ 270 216 ÷ 240
�26�
�27�
Livello di pressione acustica (max.)
Incertezza di misura
dB(A)
dB(A)
88
0,5
89,2
0,2
�28�
�27�
Livello di potenza acustica misurato (max.)
Incertezza di misura
dB(A)
dB(A)
105
0,78
104
0,81
�29� Livello di potenza acustica garantito dB(A) 105 105
�30�
�27�
Livello di vibrazioni al posto di guida (max.)
Incertezza di misura
m/s
2
m/s
2
0,7
0,16
0,8
0,19
�31�
�27�
Livello di vibrazioni al volante (max.)
Incertezza di misura
m/s
2
m/s
2
2,3
0,92
2,3
0,87
* Per il dato specico, fare riferimento a quanto indicato nell’etichetta di identicazione della macchina.

�1� DATI TECNICI
TH*
102 Series
TH*
118 Series
�2� Potenza nominale * kW 6,0 ÷ 12,4 13,79 ÷ 14,4
�3� Giri al minuto * min
-1
2400 ÷ 2500 ± 100 2700 ± 100
�4� Impianto elettrico V 12 12
�5� Capacità del serbatoio carburante l 10 10
�6� Pneumatici anteriori 16 x 6,00-8 16 x 6,00-8
�7� Pneumatici posteriori 20 x 10,0-10 20 x 10,0-10
�8� Pressione gonaggio anteriore bar 1,0 1,0
�9� Pressione gonaggio posteriore bar 1,4 1,4
�10� Altezza di taglio cm 2 ÷ 10 2 ÷ 10
�11� Larghezza di taglio cm 101 121
�12� Raggio minimo di erba non tagliata cm 101 84
�13� Codice dispositivo di taglio
82004341/1-82004340/1
(standard)
82004348/0-82004347/0
(mulching)
182004359/0 (standard)
182004361/0 (mulching)
�14�
Velocità di avanzamento (indicativa)
a 3000 min
-1
km/h 0 ÷ 9,8 0 ÷ 9,8
�15�
Limite di velocità con catene da neve
(se accessorio previsto)
km/h 9,8 9,8
�16�
Limite di carico per dispostivo di traino
(Forza verticale massima)
N (kg)
245
(25)
294
(30)
�17�
Limite di carico per dispostivo di traino
(Peso massimo rimorchiabile)
N (kg)
980
(100)
490
(50)
�18� Inclinazione massima consentita 10° (17%) 10° (17%)
�19� Dimensioni
�20� Lunghezza mm 1950
�21�
Lunghezza con sacco
(Lunghezza senza sacco)
mm
2620
2000
-
�22� Larghezza mm 1055 -
�23�
Larghezza con deettore di scarico laterale
(Larghezza senza deettore di scarico laterale)
1520
(1300)
�24� Altezza mm 1200 1200
�25� Massa * kg 270 ÷ 310 270 ÷ 310
�26�
�27�
Livello di pressione acustica (max.)
Incertezza di misura
dB(A)
dB(A)
84,7
0,3
89
0,79
�28�
�27�
Livello di potenza acustica misurato (max.)
Incertezza di misura
dB(A)
dB(A)
100
0,2
105
0,77
�29� Livello di potenza acustica garantito dB(A) 100 105
�30�
�27�
Livello di vibrazioni al posto di guida (max.)
Incertezza di misura
m/s
2
m/s
2
0,81
1,06
0,8
0,21
�31�
�27�
Livello di vibrazioni al volante (max.)
Incertezza di misura
m/s
2
m/s
2
2,31
0,98
2,9
1,04
* Per il dato specico, fare riferimento a quanto indicato nell’etichetta di identicazione della macchina.

�1� DATI TECNICI
TH*
122 Series
�2� Potenza nominale * kW 11,3 ÷ 13,9
�3� Giri al minuto * min
-1
2600 ÷ 2800 ± 100
�4� Impianto elettrico V 12
�5� Capacità del serbatoio carburante l 10
�6� Pneumatici anteriori 16 x 6,00-8
�7� Pneumatici posteriori 20 x 10,00-10
�8� Pressione gonaggio anteriore bar 1,0
�9� Pressione gonaggio posteriore bar 1,4
�10� Altezza di taglio cm 2 ÷ 10
�11� Larghezza di taglio cm 121
�12� Raggio minimo di erba non tagliata cm 90
�13� Codice dispositivo di taglio
82004343/0-82004342/0
(standard)
82004350/0-82004349/0
(mulching)
�14�
Velocità di avanzamento (indicativa)
a 3000 min
-1
km/h 0 ÷ 9,8
�15�
Limite di velocità con catene da neve
(se accessorio previsto)
km/h 9,8
�16�
Limite di carico per dispostivo di traino
(Forza verticale massima)
N (kg)
245
(25)
�17�
Limite di carico per dispostivo di traino
(Peso massimo rimorchiabile)
N (kg)
980
(100)
�18� Inclinazione massima consentita 10° (17%)
�19� Dimensioni
�20� Lunghezza mm
�21�
Lunghezza con sacco
(Lunghezza senza sacco)
mm
2620
2000
�22� Larghezza mm 1266
�23�
Larghezza con deettore di scarico laterale
(Larghezza senza deettore di scarico laterale)
�24� Altezza mm 1200
�25� Massa * kg 270 ÷ 310
�26�
�27�
Livello di pressione acustica (max.)
Incertezza di misura
dB(A)
dB(A)
88,5
0,8
�28�
�27�
Livello di potenza acustica misurato (max.)
Incertezza di misura
dB(A)
dB(A)
104
0,6
�29� Livello di potenza acustica garantito dB(A) 105
�30�
�27�
Livello di vibrazioni al posto di guida (max.)
Incertezza di misura
m/s
2
m/s
2
0,70
1,02
�31�
�27�
Livello di vibrazioni al volante (max.)
Incertezza di misura
m/s
2
m/s
2
3,95
1,11
* Per il dato specico, fare riferimento a quanto indicato nell’etichetta di identicazione della macchina.

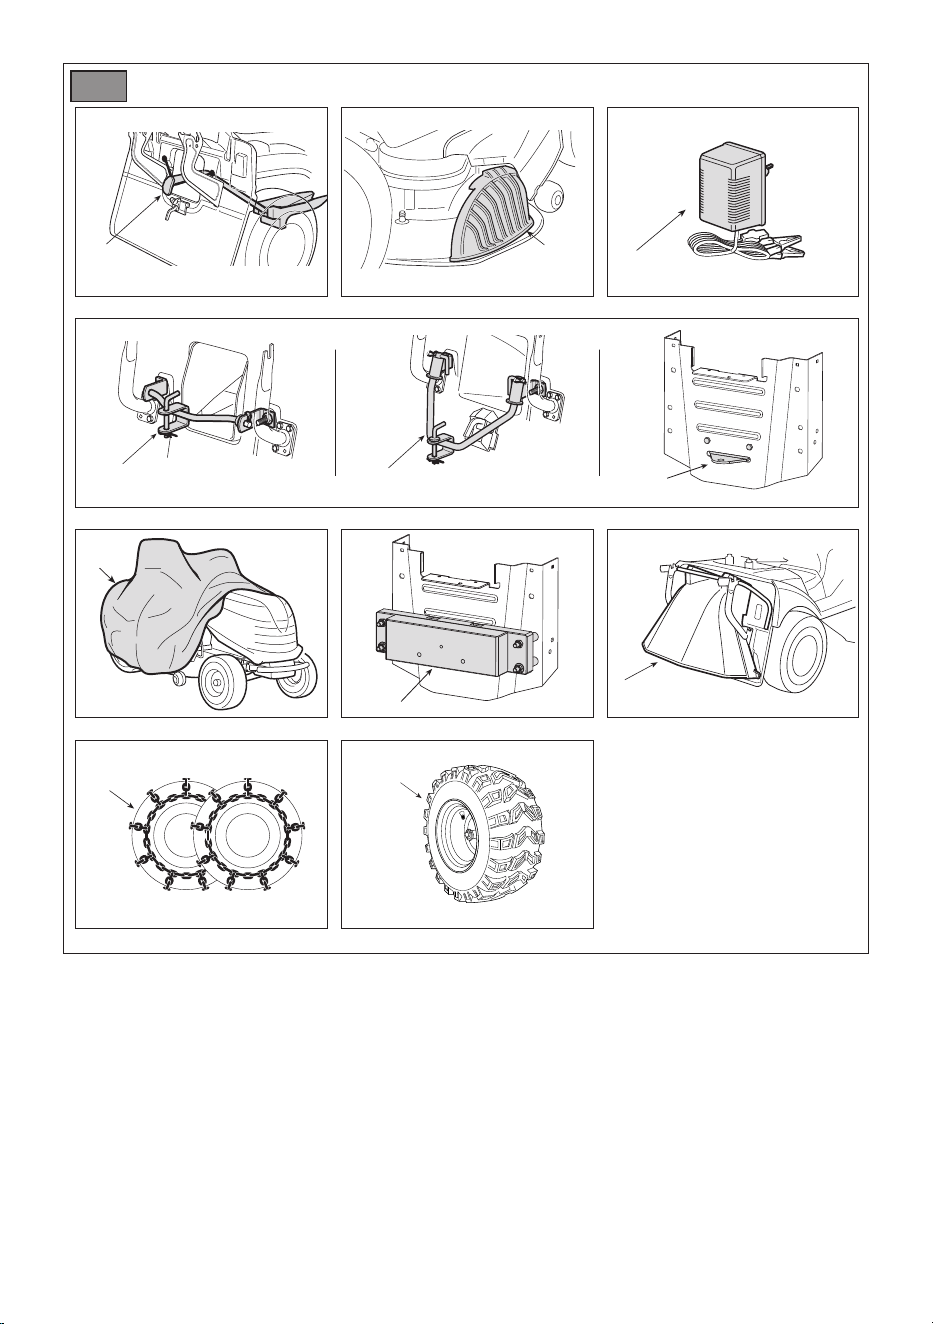
�58� ACCESSORI A RICHIESTA
�58.A1�
�58.A2�
Kit “mulching”
�58.B� Carica batteria di mantenimento
�58.C� Kit traino
�58.D� Telo di copertura
�58.E� Kit pesi posteriori
�58.F�
Kit di protezione scarico posteriore (solo per
modelli con raccolta posteriore)
�58.G� Catene da neve (18”, 20”)
�58.H� Ruote da fango/neve (18”, 20”)
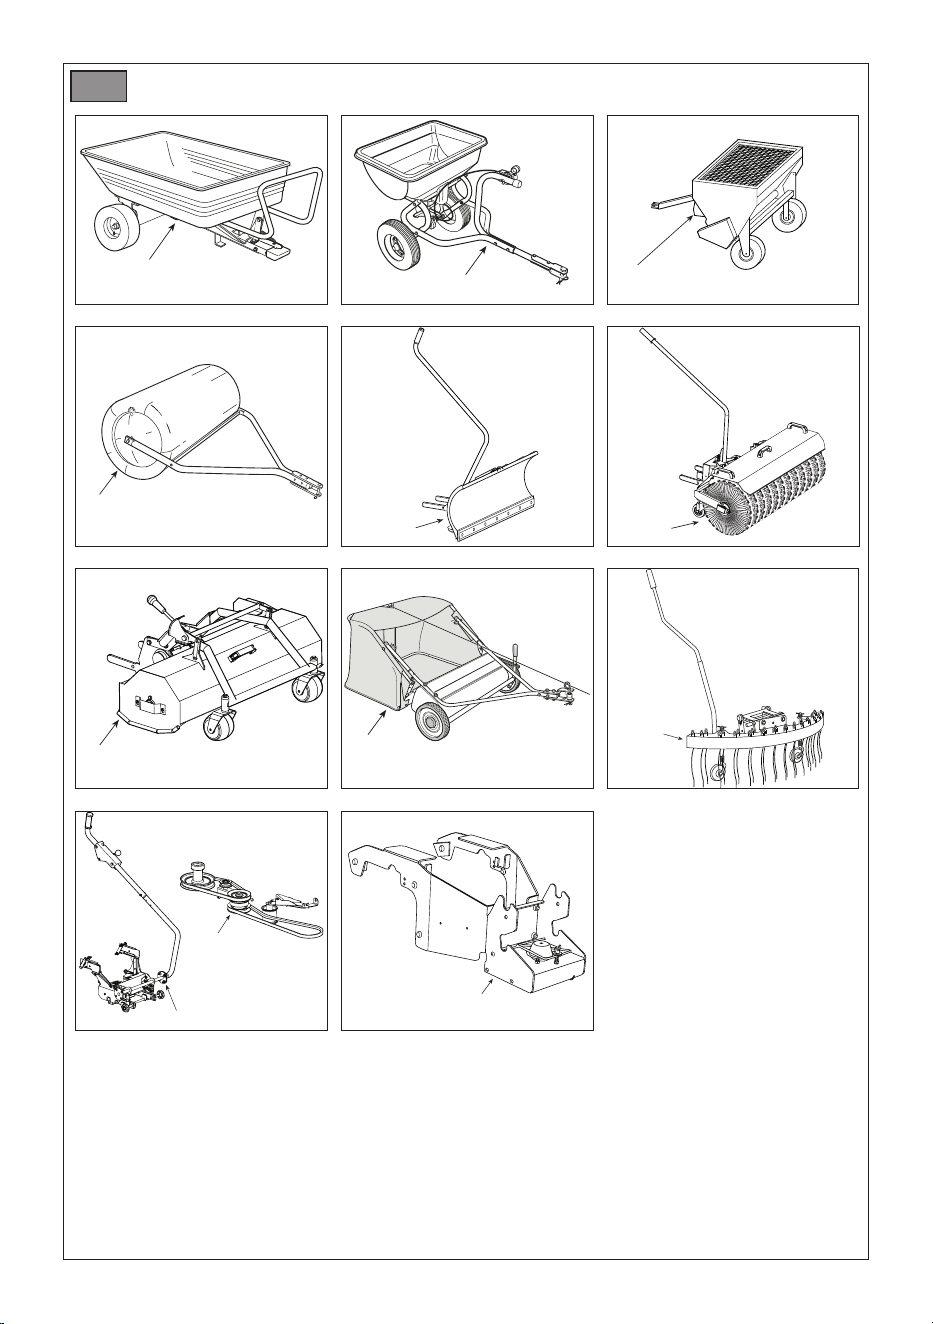
�58.I� Rimorchio 45-03453-997
�58.J�
�58.K�
Spargitore
45-03153-997
PA402 (TH* Series)
�58.L� Rullo per erba
45-0267
45-02681
�58.M� Spalaneve a lama
ST-1401 (+ KIT 1503) (T* - TC* Series)
SNB 1501 (T* - TC* Series)
AE-015-001GI (+ AN-156-001GI) (TH* Series)
�58.N� Spazzatrice frontale
SWR-1401 (+ KIT 1503) (T* - TC* Series)
AD-200-001GI (+ AN-156-001GI) (TH* Series)
�58.O� Trinciatrice FLM-1406 (+ KIT 1503) (T* - TC* Series)
�58.P�
(Solo per modelli SD series)
Raccoglitore foglie ed erba 38” 45-03313-997
Raccoglitore foglie ed erba 42”
45-02616-997
45-03201-997
�58.Q� Rastrello frontale AI-200-001GI (+ AN-156-001GI) (TH* Series)
�58.R1�
�58.R2�
Interfaccia di sollevamento
+
Presa di potenza (PTO)
KIT 1503 (T* - TC* Series)
�58.R3� Presa di potenza (PTO) AN-156-001GI (TH* Series)
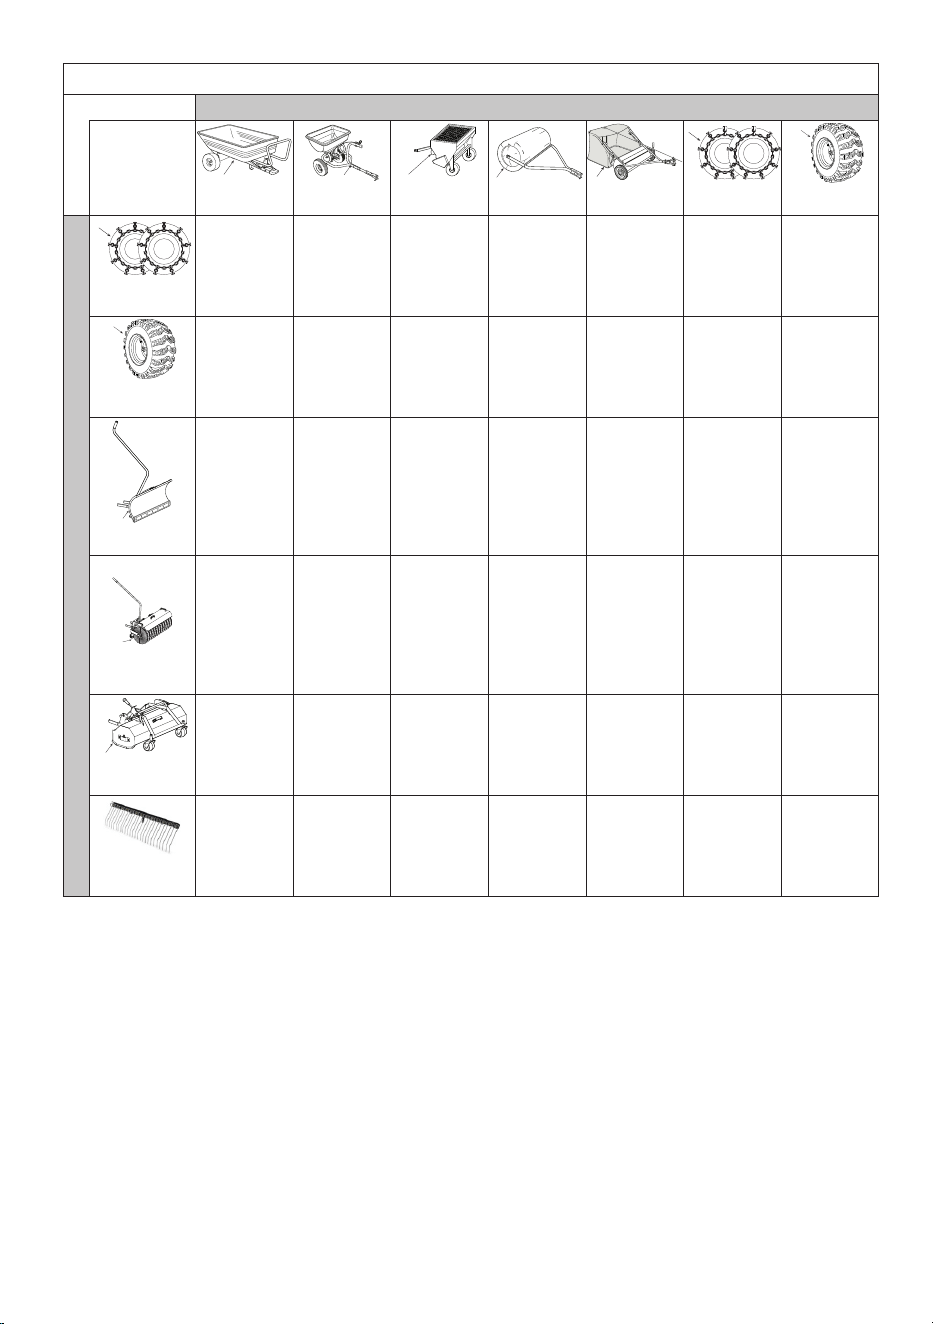
�32� TABELLA PER LA CORRETTA COMBINAZIONE DEGLI ACCESSORI
�32.A� ACCESSORI POSTERIORI
H
�58.I�
I
�58.J�
L
�58.K�
J
�58.L�
L
�58.P�
F
�58.G�
G
�58.H�
�32.B� ACCESSORI FRONTALI
F
�58.G�
- - - -
G
�58.H�
- - - -
K
�58.M�
-
- -
O
�58.N�
-
- -
P
�58.O�
-
- - -
-
�58.Q�
-
-
- - -

[1] BG-ТЕХНИЧЕСКИДАННИ
[2] Номинална мощност *
[3] Обороти в минута *
[4] Електрическа инсталация
[5] Вместимост на резервоара за гориво
[6] Предни гуми
[7] Задни гуми
[8] Налягане на предно напомпване
[9] Налягане на задно напомпване
[10] Височина на косене
[11] Ширина на косене
[12] Минимален радиус на неподрязана
трева
[13] Код на инструмента за рязане
[14] Указателна скорост на придвижва-
не) на 3000 min-1
[15] Ограничение на скоростта с вериги
за сняг (ако тази принадлежност е
предвидена)
[16] Ограничение на тежестта за
тегличното устройство (Максимална
вертикална сила)
[17] Ограничение на тежестта за теглич-
ното устройство (Максимално тегло
за теглене)
[18] Разрешен максимален наклон
[19] Размери
[20] Дължина
[21] Дължина с чувал (Дължина без
чувал)
[22] Ширина
[23] Ширина с дефлектор за странично
разтоварване (Ширина без дефлек-
тор за странично разтоварване)
[24] Височина
[25] Маса *
[26] Ниво на звуково налягане (макс.)
[27] Несигурност на измерване
[28] Измерено ниво на звукова мощност
(макс.)
[29] Гарантирано ниво на звукова
мощност
[30] Ниво на вибрации на мястото на
водача (макс.)
[31] Ниво на вибрации на волана (макс.)
[32] Таблица за правилното комбиниране
на принадлежностите
[32.A] Задни принадлежности
[32.B] Челни принадлежности
[58] Принадлежности по заявка
[58.A1, 58.A2] Комплект “мулчиране”
[58.B] Зарядно устройство за поддър-
жане
[58.C] Комплект теглич
[58.D] Платно за покриване
[58.E] Комплект задни тежести
[58.F] Комплект за защита за задно
разтоварване(само за модели със
задно събиране)
[58.G] Вериги за сняг (18”, 20”)
[58.H] Колела за кал/сняг (18”, 20”)
[58.I] Ремарке
[58.J, 58.K] Приспособление за раз-
сейване
[58.L] Ролка за трева
[58.M] Снегорин с острие
[58.N] Челна метачка
[58.O] Резачка
[58.P] (Само за модели SD series)
Събирач на листа и трева 38”
Събирач на листа и трева 42”
[58.Q] Предно гребло
[58.R1, 58.R2] Интерфейс за повдигане +
Силоотводен вал (PTO)
[58.R3] Силоотводен вал (PTO)
* За конкретни данни, вижте посоченото
на идентификационния етикет на
машината.
[1] BS-TEHNIČKIPODACI
[2] Nazivna snaga *
[3] Okretaji u minuti *
[4] Električni sistem
[5] Zapremina spremnika goriva
[6] Prednje gume
[7] Stražnje gume
[8] Pritisak u prednjim gumama
[9] Pritisak u stražnjim gumama
[10] Visina košenja
[11] Širina košenja
[12] Minimalan radijus nepokošene trave
[13] Br. dijela uređaja za košenje
[14] Brzina vožnje prema naprijed
(indikativno) pri 3000 min-1
[15] Ograničenje brzine s lancima za
snijeg (ako postoji)
[16] Ograničenje opterećenja za vučni
uređaj (maksimalna okomita sila)
[17] Ograničenje opterećenja za vučni
uređaj (dozvoljena visina vuče)
[18] Maksimalni dozvoljeni nagib
[19] Dimenzije
[20] Dužina
[21] Dužina s vrećom za sakupljanje trave
(dužina bez vreće za sakupljanje
trave)
[22] Širina
[23] Širina s bočnim deektorom za
izbacivanje (širina bez bočnog
deektora za izbacivanje)
[24] Visina
[25] Masa *
[26] Nivo zvučnog pritiska (maks.)
[27] Mjerna nesigurnost
[28] Izmjereni nivo zvučne snage (maks.)
[29] Garantirani nivo zvučne snage
[30] Nivo vibracija u položaju vozača
(maks.)
[31] Nivo vibracija na volanu (maks.)
[32] Tabela kompatibilnosti dodatne
opreme
[32.A] Stražnja dodatna oprema
[32.B] Prednja dodatna oprema
[58] Opcionalna dodatna oprema
[58.A1, 58.A2] Komplet za malčiranje
[58.B] Float punjač akumulatora
[58.C] Komplet za vuču
[58.D] Zaštitna pokrovna cerada
[58.E] Komplet stražnjih utega
[58.F] Sigurnosni komplet za stražnje
izbacivanje (samo modeli sa
stražnjom vrećom za sakupljanje
trave)
[58.G] Lanci za snijeg (18”, 20”)
[58.H] Točkovi za snijeg/blato (18”, 20”)
[58.I] Prikolica
[58.J, 58.K] Posipač
[58.L] Valjak za travu
[58.M] Plug za snijeg s nožem
[58.N] Prednja četka
[58.O] Sjeckalica
[58.P] (Samo za modele SD serije)
Skupljač lišća i trave 38”
Skupljač lišća i trave 42”
[58.Q] Prednje grablje
[58.R1, 58.R2] Sučelje za podizanje +
kardansko vratilo (PTO)
[58.R3] kardansko vratilo (PTO)
* Dodatne informacije potražite na
identikacijskoj naljepnici uređaja.
[1] CS - TECHNICKÉ PARAMETRY
[2] Jmenovitý výkon *
[3] Otáčky za minutu *
[4] Elektroinstalace
[5] Kapacita palivové nádrže
[6] Přední pneumatiky
[7] Zadní pneumatiky
[8] Tlak huštění předních pneumatik
[9] Tlak huštění zadních pneumatik
[10] Výška sečení
[11] Šířka záběru
[12] Minimální poloměr neposečené trávy
[13] Kód žacího ústrojí
[14] Rychlost pojezdu (orientační) při
3 000 min-1
[15] Rychlostní limit se sněhovými řetězy
(je-li toto příslušenství ve výbavě)
[16] Mezní zatížení tažného zařízení
(maximální svislá síla)
[17] Mezní zatížení tažného zařízení
(maximální přípojná hmotnost)
[18] Maximální přípustný náklon
[19] Rozměry
[20] Délka
[21] Délka s košem (délka bez koše)
[22] Šířka
[23] Šířka s vychylovačem bočního výho-
zu (šířka bez vychylovače bočního
výhozu)
[24] Výška
[25] Hmotnost *
[26] Hladina akustického tlaku (max.)
[27] Nepřesnost měření
[28] Měřená hladina akustického výkonu
(max.)
[29] Garantovaná hladina akustického
výkonu
[30] Hladina vibrací na místě řidiče (max.)
[31] Hladina vibrací na volantu (max.)
[32] Tabulka správné kombinace příslu-
šenství
[32.A] Zadní příslušenství
[32.B] Přední příslušenství
[58] Příslušenství na vyžádání
[58.A1, 58.A2] Mulčovací sada
[58.B] Udržovací nabíječka akumulátoru
[58.C] Sada tažného zařízení
[58.D] Krycí plachta
[58.E] Sada zadních závaží
[58.F] Sada ochranného krytu zadního
výhozu (pouze u modelů se zadním
sběrem)
[58.G] Sněhové řetězy (18”, 20”)
[58.H] Kola do bláta/sněhu (18”, 20”)
[58.I] Přívěs
[58.J, 58.K] Sypač
[58.L] Travní válec
[58.M] Sněhová radlice
[58.N] Přední zametač
[58.O] Drtička
[58.P] (Pouze u modelů SD series)
Sběrač listí a trávy 38"
Sběrač listí a trávy 42"
[58.Q] Přední pohrabovač
[58.R1, 58.R2] Zdvihací rozhraní + po-
mocný pohon (PTO)
[58.R3] pomocný pohon (PTO)
* Konkrétní údaj naleznete na identikač-
ním štítku stroje.

[1] DA - TEKNISKE DATA
[2] Nominel eekt
[3] Omdrejninger i minuttet
[4] Elektrisk anlæg
[5] Brændstofstankens kapacitet
[6] Forhjulenes dæk
[7] Baghjulenes dæk
[8] Forhulenes tryk
[9] Baghulenes tryk
[10] Klippehøjde
[11] Klippebredde
[12] Minimumsradius af ikke klippet græs
[13] Skæreanordningens kode
[14] Fremføringshastighed (vejledende)
ved 3000 min-1
[15] Fartgrænse med snekæder (hvis
tilbehøret er forudset)
[16] Belastningsgrænse for trækanordning
(Maksimal lodret kraft)
[17] Belastningsgrænse for trækanordning
(Maksimalt tilladt trukket vægt)
[18] Maksimal tilladt terrænstigning
[19] Mål
[20] Længde
[21] Længde med pose (Længde uden
pose)
[22] Bredde
[23] Bredde med sideudkastskærm (Bred-
de uden sideudkastskærm)
[24] Højde
[25] Vægt
[26] Lydtryksniveau (max.)
[27] Måleusikkerhed
[28] Målt lydeektniveau (max.)
[29] Garanteret lydeektniveau
[30] Vibrationsniveau ved førerpladsen
(max.)
[31] Vibrationsniveau ved rattet (max.)
[32] Tabel over den korrekte kombination
af tilbehør
[32.A] Bagmonterede tilbehør
[32.B] Frontale tilbehør
[58] Tilbehør på forespørgsel
[58.A1, 58.A2] Kit “multiclip”
[58.B] Udligningsbatterilader
[58.C] Kit anhænger
[58.D] Dækken
[58.E] Kit med bagmonteret balast
[58.F] Kit til beskyttelse af bagudkast (an-
går kun modeller med opsamling
bagpå)
[58.G] Snekæder (18”, 20”)
[58.H] Mudder- og vinterhjul (18”, 20”)
[58.I] Anhænger
[58.J, 58.K] Spreder
[58.L] Græsrulle
[58.M] Sneplov
[58.N] Frontal fejemaskine
[58.O] Skæremaskine
[58.P] (Angår kun modellerne SD series)
Opsamlingsmaskine til blade og
græs 38”
Opsamlingsmaskine til blade og
græs 42”
[58.Q] Frontal rive
[58.R1, 58.R2] Løftegrænseade + Kraft-
udtag (PTO)
[58.R3] Kraftudtag (PTO)
* Indhent oplysninger om det specikke
data i maskinens identikationsetiket.
[1] DE - TECHNISCHE DATEN
[2] Nennleistung*
[3] Drehungen pro Minute *
[4] Elektrische Anlage
[5] Inhalt des Kraftstotanks
[6] Vorderreifen
[7] Hinterreifen
[8] Reifendruck vorne
[9] Reifendruck hinten
[10] Schnitthöhe
[11] Schnittbreite
[12] Mindestradius nicht geschnittenes
Gras
[13] Code Schneidvorrichtung
[14] Fahrgeschwindigkeit (indikativ) bei
3000 min-1
[15] Geschwindigkeitsbegrenzung
mit Schneekette (wenn Zubehör
vorgesehen)
[16] Tragfähigkeit für Zugvorrichtung
(maximale vertikale Kraft)
[17] Tragfähigkeit für Zugvorrichtung
(maximales Anhängegewicht)
[18] Maximal zulässige Neigung
[19] Abmessungen
[20] Länge
[21] Länge mit Grasfangeinrichtung (Län-
ge ohne Grasfangeinrichtung)
[22] Breite
[23] Breite mit Deektor des seitlichen
Auswurfs (Breite ohne Deektor des
seitlichen Auswurfs)
[24] Höhe
[25] Gewicht *
[26] Schallpegel (max.)
[27] Messungenauigkeit
[28] Gemessener Schalleistungspegel
(max.)
[29] Sichergestellter Schalleistungspegel
[30] Schwingungen am Fahrersitz (max.)
[31] Schwingungen am Lenkrad (max.)
[32] Tabelle für die richtige Kombination
der Anbaugeräte
[32.A] Hintere Anbaugeräte
[32.B] Vordere Anbaugeräte
[58] Anbaugeräte auf Anfrage
[58.A1, 58.A2] Mulching-Kit
[58.B] Batterieladegerät
[58.C] Zugvorrichtung
[58.D] Abdeckung
[58.E] Kit hintere Gewichte
[58.F] Kit der Schutzvorrichtungen
Auswurf hinten (nur für Modelle mit
Sammelvorrichtung hinten)
[58.G] Schneeketten (18”, 20”)
[58.H] Matsch- und Schneeräder (18”, 20”)
[58.I] Anhänger
[58.J, 58.K] Streuer
[58.L] Rasenwalze
[58.M] Schneepug
[58.N] Kehrmaschine vorne
[58.O] Häckselmaschine
[58.P] (Nur für Modelle der SD Reihe)
Sammler für Laub und Gras 38”
Sammler für Laub und Gras 42”
[58.Q] Harke vorne
[58.R1, 58.R2] Nebenabtriebeinheit +
Steckdose (PTO)
[58.R3] Steckdose (PTO)
* Für spezielle Daten beziehen Sie sich
auf die Angaben auf dem Typenschild
der Maschine.
[1] EL-ΤΕΧΝΙΚΑΣΤΟΙΧΕΙΑ
[2] Ονομαστική ισχύς *
[3] Στροφές ανά λεπτό *
[4] Ηλεκτρική εγκατάσταση
[5] Χωρητικότητα ρεζερβουάρ καυσίμου
[6] Εμπρόσθια ελαστικά
[7] Πίσω ελαστικά
[8] Πίεση φουσκώματος εμπρός
[9] Πίεση φουσκώματος πίσω
[10] Ύψος κοπής
[11] Πλάτος κοπής
[12] Ελάχιστη ακτίνα μη κομμένου
χόρτου
[13] Κωδικός συστήματος κοπής
[14] Ταχύτητα προώθησης (ενδεικτική)
σε 3000 min-1
[15] Όριο ταχύτητας με χιοναλυσίδες
(εάν προβλέπεται αυτό το αξεσουάρ)
[16] Όριο φορτίου για της διάταξη ρυ-
μούλκησης (Μέγιστη κάθετη ισχύς)
[17] Όριο φορτίου για της διάταξη
ρυμούλκησης (Μέγιστο ρυμουλκού-
μενο βάρος)
[18] Μέγιστη επιτρεπόμενη κλίση
[19] Διαστάσεις
[20] Μήκος
[21] Μήκος με κάδο (Μήκος χωρίς κάδο)
[22] Πλάτος
[23] Πλάτος με πλευρικό εκτροπέα
αποβολής (Πλάτος χωρίς πλευρικό
εκτροπέα αποβολής)
[24] Ύψος
[25] Γείωση *
[26] Στάθμη ηχητικής πίεσης (μέγ.)
[27] Αβεβαιότητα μέτρησης
[28] Μετρημένη στάθμη ηχητικής πίεσης
(μέγ.)
[29] Εγγυημένη στάθμη ηχητικής πίεσης
[30] Επίπεδο κραδασμών στη θέση
οδήγησης (μέγ.)
[31] Επίπεδο κραδασμών στο τιμόνι
(μέγ.)
[32] Πίνακας για το σωστό συνδυασμό
των παρελκόμενων
[32.A] Πίσω παρελκόμενα
[32.B] Εμπρόσθια παρελκόμενα
[58] Παρελκόμενα κατόπιν παραγγελίας
[58.A1, 58.A2] Κιτ “mulching”
[58.B] Φορτιστής συντήρησης μπαταρίας
[58.C] Κιτ ρυμούλκησης
[58.D] Κάλυμμα προστασίας
[58.E] Κιτ πίσω βαρών
[58.F] Κιτ προστατευτικού πίσω αποβο-
λής (μόνο για μοντέλα με πίσω
περισυλλογή)
[58.G] Χιοναλυσίδες (18”, 20”)
[58.H] Τροχοί για λάσπη / χιόνι (18”, 20”)
[58.I] Ρυμουλκό
[58.J, 58.K] Διανομέας
[58.L] Κύλινδρος χλόης
[58.M] Εκχιονιστικό με λάμα
[58.N] Εμπρόσθιο σάρωθρο
[58.O] Τεμαχιστής
[58.P]
(Μόνο για τα μοντέλα της σειράς SD)
Συλλέκτης φύλλων και χόρτων 38”
Συλλέκτης φύλλων και χόρτων 42”
[58.Q] Εμπρόσθιο δίκρανο
[58.R1, 58.R2] Διασύνδεση ανύψωσης +
Δυναμοδότης (PTO)
[58.R3] Δυναμοδότης (PTO)
* Για το συγκεκριμένο στοιχείο, ανατρέξ-
τε σε όσα αναγράφονται στην ετικέτα
αναγνώρισης του μηχανήματος.

[1] EN - TECHNICAL DATA
[2] Nominal power *
[3] Revolutions per minute *
[4] Electrical system
[5] Fuel tank capacity
[6] Front tyres
[7] Rear tyres
[8] Front tyre pressure
[9] Rear tyre pressure
[10] Cutting height
[11] Cutting width
[12] Minimum radius of uncut grass
[13] Cutting means part n.
[14] Forward speed (indicative) at 3000
min-1
[15] Speed limit with snow chains (if tted)
[16] Loading limit for towing device (Maxi-
mum vertical force)
[17] Loading limit for towing device (Per-
missible towing weight)
[18] Maximum permissible gradient
[19] Dimensions
[20] Length
[21] Length with catcher bag (Length
without catcher bag)
[22] Width
[23] Width with side discharge chute
(Width without side discharge chute)
[24] Height
[25] Mass *
[26] Sound pressure level (max.)
[27] Measurement uncertainty
[28] Measured acoustic power level
(max.)
[29] Guaranteed acoustic power level
[30] Vibration level at driver's position
(max.)
[31] Vibration level at steering wheel
(max.)
[32] Attachment compatibility table
[32.A] Rear attachments
[32.B] Front attachments
[58] Optional attachments
[58.A1, 58.A2] "Mulching" kit
[58.B] Battery oat charger
[58.C] Towing kit
[58.D] Protective canvas cover
[58.E] Rear weights kit
[58.F] Rear discharge safety kit (models
with rear grass catcher only)
[58.G] Snow chains (18”, 20”)
[58.H] Snow/mud wheels (18”, 20”)
[58.I] Trailer
[58.J, 58.K] Sprinkler
[58.L] Grass roller
[58.M] Snow blade
[58.N] Front sweeper
[58.O] Shredder
[58.P] (For SD series models only)
Leaf and collector 38”
Leaf and collector 42”
[58.Q] Front rake
[58.R1, 58.R2] Lifting interface + Power
Take-O (PTO)
[58.R3] Power Take-O (PTO)
* For specic information, refer to the
information on the machine identication
label.
[1] ES - DATOS TÉCNICOS
[2] Potencia nominal *
[3] Revoluciones por minuto *
[4] Instalación eléctrica
[5] Capacidad del depósito carburante
[6] Neumáticos anteriores
[7] Neumáticos posteriores
[8] Presión de inado anterior
[9] Presión de inado posterior
[10] Altura de corte
[11] Anchura de corte
[12] Radio mínimo de hierba no cortada
[13] Código del dispositivo de corte
[14] Velocidad de avance (indicativa) a
3000 min-1
[15] Límite de velocidad con cadenas
para nieve (si está previsto el
accesorio)
[16] Límite de carga para el dispositivo de
arrastre (Fuerza vertical máxima)
[17] Límite de carga para el dispositivo de
arrastre (Peso máximo a remolcar)
[18] Inclinación máxima permitida
[19] Dimensiones
[20] Longitud
[21] Longitud con la bolsa (Longitud sin
la bolsa)
[22] Anchura
[23] Anchura con el deector de descarga
lateral (Anchura sin el deector de
descarga lateral)
[24] Altura
[25] Masa *
[26] Nivel de presión acústica (máx.)
[27] Incertidumbre de medida
[28]
Nivel de potencia acústica medido
(máx.)
[29] Nivel de potencia acústica
garantizado
[30] Nivel de vibración en el puesto del
conductor (máx.)
[31] Nivel de vibración en el volante
(máx.)
[32] Tabla para combinar correctamente
los accesorios
[32.A] Accesorios posteriores
[32.B] Accesorios frontales
[58] Accesorios bajo pedido
[58.A1, 58.A2] Kit “mulching”
[58.B] Cargador de batería de
mantenimiento
[58.C] Kit de arrastre
[58.D] Lona de cobertura
[58.E] Kit de pesos posteriores
[58.F] Kit de protección de descarga
posterior (solo para los modelos
con recolección posterior)
[58.G] Cadenas para nieve (18”, 20”)
[58.H] Ruedas para fango/nieve (18”, 20”)
[58.I] Remolque
[58.J, 58.K] Esparcidor
[58.L] Rodillo para hierba
[58.M] Quitanieves de cuchilla
[58.N] Barredora frontal
[58.O] Trituradora
[58.P] (Solo para modelos de SD series)
Recogedor de hojas y hierba 38”
Recogedor de hojas y hierba 42”
[58.Q] Rastrillo frontal
[58.R1, 58.R2] Conexión para elevación +
Toma de potencia (TDP)
[58.R3] Toma de potencia (TDP)
* Para conocer el dato especíco, con-
sultar todo lo indicado en la etiqueta de
identicación de la máquina.
[1] ET - TEHNILISED ANDMED
[2] Nimivõimsus *
[3] Pööret minutis *
[4] Elektrisüsteme
[5] Kütusepaagi maht
[6] Esirehvid
[7] Tagarehvid
[8] Esirehvide rõhk
[9] Tagarehvide rõhk
[10] Niidukõrgus
[11] Niidulaius
[12] Lõikamata rohu minimaalne raadius
[13] Lõikeseadme osa nr
[14] Edasiliikumise kiirus (soovituslik)
3000 min-1
[15] Kiirusepiirang lumekettidega (kui
need on paigaldatud)
[16] Laadimispiirang vedamisseadmega
(maksimaalne vertikaaljõud)
[17] Laadimispiirang vedamisseadmega
(lubatud haakemass)
[18] Maksimaalne lubatud kalle
[19] Mõõtmed
[20] Pikkus
[21] Pikkus kogumiskorviga (Pikkus ilma
kogumiskorvita)
[22] Laius
[23] Laius koos külgmise väljalaske
suunajaga (Laius ilma külgmise
väljalaske suunajata)
[24] Kõrgus
[25] Mass *
[26] Helitase (max)
[27] Mõõtmisebatäpsus
[28] Mõõdetud akustilise võimsuse tase
(max)
[29] Garanteeritud akustilise võimsuse
tase (max)
[30] Vibratsioonitase juhikohal (max)
[31] Vibratsioon rooliratta juures (max)
[32] Tarvikute ühilduvuse tabel
[32.A] Tagumised tarvikud
[32.B] Eesmised tarvikud
[58] Valikulised tarvikud
[58.A1, 58.A2] Multšimiskomplekt
[58.B] Float režiimiga akulaadija
[58.C] Vedamiskomplekt
[58.D] Kaitsev katteriie
[58.E] Tagaraskuste komplekt
[58.F] Tagumise väljalaske ohutuskomp-
lekt (ainult mudelid tagumise
kogumiskorviga)
[58.G] Lumeketid (18”, 20”)
[58.H] Lume-/mudarehvid (18”, 20”)
[58.I] Järelhaagis
[58.J, 58.K] Puistur
[58.L] Mururull
[58.M] Teraga lumesahk
[58.N] Esipühkija
[58.O] Purustaja
[58.P] (Üksnes SD seeria mudelitele)
Lehtede kollektor 38”
Lehtede kollektor 42”
[58.Q] Eesmine kaaruti
[58.R1, 58.R2] Tõsteliides + jõuvõtuvõll
(PTO)
[58.R3] jõuvõtuvõll (PTO)
* Lisateabe saamiseks vaadake infot
masina tähistussildilt.

[1] FI - TEKNISET TIEDOT
[2] Nimellisteho *
[3] Kierroksia minuutissa *
[4] Sähkölaitteisto
[5] Polttoainesäiliön tilavuus
[6] Eturenkaat
[7] Takarenkaat
[8] Täyttöpaine edessä
[9] Täyttöpaine takana
[10] Leikkuukorkeus
[11] Leikkuuleveys
[12] Leikkaamattoman ruohon minimisäde
[13] Leikkuulaitteen koodi
[14] Ajonopeus (suuntaa antava) kun
3000 min-1
[15] Nopeusrajoitus lumiketjuilla (jos
lisälaite voidaan asentaa)
[16] Kuormitusrajoitus vetolaitteelle
(maksimi pystyvoima)
[17] Kuormitusrajoitus vetolaitteelle
(hinattava maksimipaino)
[18] Suurin sallittu kaltevuus
[19] Koko
[20] Pituus
[21] Pituus säkin kanssa (Pituus ilman
säkkiä)
[22] Leveys
[23] Leveys sivutyhjennyksen
läppäkorkin kanssa (Leveys ilman
sivutyhjennyksen läppäkorkkia)
[24] Korkeus
[25] Massa *
[26] Äänenpainetaso (maks.)
[27] Epätarkka mittaus
[28] Mitattu äänitehotaso (maks.)
[29] Taattu äänitehotaso
[30] Tärinätaso ohjauspaikalla (maks.)
[31] Tärinätaso ohjauspyörällä (maks.)
[32] Lisävarusteiden yhdistämistaulukko
[32.A] Taakse asennettavat lisävarusteet
[32.B] Eteen asennettavat lisävarusteet
[58] Tilattavat lisävarusteet
[58.A1, 58.A2] Silppuamissarja
[58.B] Ylläpitoakkulaturi
[58.C] Hinaussarja
[58.D] Suojakangas
[58.E] Takapainojen sarja
[58.F] Takatyhjennyksen suojasarja
(vain malleissa joissa keruu
tapahtuu takaa)
[58.G] Lumiketjut (18”, 20”)
[58.H] Muta-/talvipyörät (18”, 20”)
[58.I] Perävaunu
[58.J, 58.K] Levitin
[58.L] Nurmikkojyrä
[58.M] Lumiaura
[58.N] Etulakaisulaite
[58.O] Silppuri
[58.P] (Vain malleille SD series)
Lehtien ja ruohon kerääjä 38”
Lehtien ja ruohon kerääjä 42”
[58.Q] Etuharavalaite
[58.R1, 58.R2] Nostolaite + Voimanotto
(PTO)
[58.R3] Voimanotto (PTO)
* Kyseinen tieto on katsottava koneen
tunnistustarrasta.
[1] FR - CARACTÉRISTIQUES TECHNI-
QUES
[2] Puissance nominale *
[3] Tours par minute *
[4] Circuit électrique
[5] Capacité du réservoir de carburant
[6] Pneus avant
[7] Pneus arrière
[8] Pression de gonage avant
[9] Pression de gonage arrière
[10] Hauteur de tonte
[11] Largeur de tonte
[12] Rayon minimal de l'herbe non taillée
[13] Code organe de coupe
[14] Vitesse d'avancement (indicative) à 3 000
min-1
[15] Limite de vitesse avec chaînes à neige (si
cet accessoire est prévu)
[16] Limite de charge pour dispositif de remor-
quage (Force verticale maximum)
[17] Limite de charge pour dispositif de remor-
quage (Poids maximum remorquable)
[18] Inclinaison maximum autorisée
[19] Dimensions
[20] Longueur
[21] Longueur avec sac (Longueur sans sac)
[22] Largeur
[23] Largeur avec déecteur d'éjection latérale
(Largeur sans déecteur d'éjection
latérale)
[24] Hauteur
[25] Masse *
[26] Niveau de pression sonore (max.)
[27] Incertitude de la mesure
[28] Niveau de puissance sonore mesuré
(max.)
[29] Niveau de puissance sonore garanti
[30] Niveau de vibration au poste de conduite
(max.)
[31] Niveau de vibration au volant (max.)
[32] Tableau pour la combinaison correcte des
accessoires
[32.A] Accessoires arrière
[32.B] Accessoire frontaux
[58] Accessoires sur demande
[58.A1, 58.A2] Kit « mulching »
[58.B] Chargeur de maintien batterie
[58.C] Kit remorquage
[58.D] Housse de protection
[58.E] Kit poids arrière
[58.F] Kit de protection d'éjection arrière
(seulement pour les modèles avec
ramassage arrière)
[58.G] Chaînes à neige (18”, 20”)
[58.H] Roues boue / neige (18”, 20”)
[58.I] Remorque
[58.J, 58.K] Épandeur
[58.L] Rouleau pour herbe
[58.M] Chasse-neige à lame
[58.N] Balayeuse frontale
[58.O] Broyeur
[58.P] (Seulement pour les modèles SD series)
Balai de ramassage feuilles et herbe 38”
Balai de ramassage feuilles et herbe 42”
[58.Q] Râteau frontal
[58.R1, 58.R2] Interface de levage + Prise de
puissance (PTO)
[
58.R3
] Prise de puissance (PTO)
* Pour les données spéciques, se référer aux
indications reportées sur l'étiquette d’identi-
cation de la machine.
[1] HR-TEHNIČKIPODACI
[2] Nominalna snaga *
[3] Okretaji u minuti *
[4] Električni sustav
[5] Kapacitet spremnika goriva
[6] Prednje gume
[7] Stražnje gume
[8] Tlak u prednjim gumama
[9] Tlak u stražnjim gumama
[10] Visina košnje
[11] Širina košnje
[12] Minimalni promjer nepokošene trave
[13] Šifra noževa
[14] Brzina kretanja (približna) na
3000 min-1
[15] Ograničenje brzine s lancima za
snijeg (ako ta oprema postoji)
[16] Granično opterećenje uređaja za
vuču (maksimalna vertikalna snaga)
[17] Granično opterećenje uređaja za
vuču (maksimalna težina vuče)
[18] Najveći dozvoljeni nagib
[19] Dimenzije
[20] Duljina
[21] Duljina s košarom (Duljina bez
košare)
[22] Širina
[23] Širina s usmjerivačem bočnog izbaci-
vanja (Širina bez usmjerivača bočnog
izbacivanja)
[24] Visina
[25] Masa *
[26] Razina zvučnog tlaka (max.)
[27] Kolebanje mjerenja
[28] Izmjerena razina zvučnog tlaka (max.)
[29] Zajamčena razina zvučnog tlaka
[30] Razina vibracija na mjestu vozača
(max.)
[31] Razina vibracija na upravljaču (max.)
[32] Tablica za pravilnu kombinaciju
dodatne opreme
[32.A] Stražnja dodatna oprema
[32.B] Prednja dodatna oprema
[58] Dodatna oprema na zahtjev
[58.A1, 58.A2] Komplet za “malčiranje”
[58.B] Punjač baterija za održavanje
[58.C] Komplet za vuču
[58.D] Zaštitna cerada
[58.E] Komplet stražnjih utega
[58.F] Komplet zaštite stražnjeg izbaciva-
nja (samo za modele sa stražnjim
sakupljanjem)
[58.G] Lanci za snijeg (18”, 20”)
[58.H] Kotači za blato/snijeg (18”, 20”)
[58.I] Prikolica
[58.J, 58.K] Rasipač
[58.L] Valjak za travu
[58.M] Nož za čišćenje snijega
[58.N] Prednja četka
[58.O] Priključak za košnju nekultivirane
trave
[58.P] (Samo za modele serije SD)
Sakupljač lišća i trave 38”
Sakupljač lišća i trave 42”
[58.Q] Prednje grablje
[58.R1, 58.R2] Sučelje za podizanje +
Priključno vratilo (PTO)
[58.R3] Priključno vratilo (PTO)
* Za točan podatak pogledajte što je nave-
deno na identikacijskoj etiketi stroja.

[1] HU-MŰSZAKIADATOK
[2] Névleges teljesítmény *
[3] Percenkénti fordulatszám *
[4] Elektromos rendszer
[5] Üzemanyagtartály kapacitása
[6] Első gumiabroncsok
[7] Hátsó gumiabroncsok
[8] Első guminyomás
[9] Hátsó guminyomás
[10] Vágási magasság
[11] Vágási szélesség
[12] Nem levágott fű minimális sugara
[13] Vágószerkezet kódja
[14] Haladási sebesség (hozzávetőleges)
3000 min-1-en
[15] Sebességkorlátozás hólánccal (ha
van ilyen tartozék)
[16] Vontatószerkezet terhelési korlátozás
(Maximális függőleges erő)
[17] Vontatószerkezet terhelési korlátozás
(Maximális vontatható súly)
[18] Megengedett maximális dőlés
[19] Méretek
[20] Hossz
[21] Hossz zsákkal (Hossz zsák nélkül)
[22] Szélesség
[23] Szélesség oldalsó kihordó terelőle-
mezzel (Szélesség oldalsó kihordó
terelőlemez nélkül)
[24] Magasság
[25] Tömeg *
[26] Hangnyomásszint (max.)
[27] Mérési bizonytalanság
[28] Mért hangerőszint (max.)
[29] Garantált hangerőszint
[30] Rezgésszint a vezetőülésnél (max.)
[31] Rezgésszint a kormánynál (max.)
[32] Táblázat a tartozékok helyes össze-
rakásához
[32.A] Hátsó tartozékok
[32.B] Oldalsó tartozékok
[58] Igényelt tartozékok
[58.A1, 58.A2] Mulcsozó készlet
[58.B] Fenntartó akkumulátortöltő
[58.C] Vontatókészlet
[58.D] Takaróvászon
[58.E] Hátsó súlykészlet
[58.F] Hátsó kihordás védőelem készlet
(csak hátsó kihordású modelleknél)
[58.G] Hólánc (18”, 20”)
[58.H] Sár-/hókerekek (18”, 20”)
[58.I] Utánfutó
[58.J, 58.K] Szóró
[58.L] Fűhenger
[58.M] Hótolólap
[58.N] Frontoldali kefe
[58.O] Aprító
[58.P] (Csak az SD sorozat modelljeihez)
Fű- és avargyűjtő 38”
Fű- és avargyűjtő 42”
[58.Q] Frontoldali gereblye
[58.R1, 58.R2] Emelő interfész + erőleadó
(TLT)
[58.R3] Erőleadó (TLT)
* A specikus adatokat a gép azonosító
címkéjén találja.
[1] LT – TECHNINIAI DUOMENYS
[2] Vardinė galia *
[3] Apsisukimai per minutę *
[4] Elektros sistema
[5] Degalų bako talpa
[6] Priekinės padangos
[7] Galinės padangos
[8] Priekinių padangų slėgis
[9] Galinių padangų slėgis
[10] Pjovimo aukštis
[11] Pjovimo plotis
[12] Mažiausias nenupjautos žolės
spindulys
[13] Pjovimo įrenginio kodas
[14] Padavimo greitis (apytikslis) 3 000
min-1
[15] Greičio apribojimas su sniego grandi-
nėmis (jeigu numatytas priedas)
[16] Vilkimo įtaiso apkrovos riba (didžiau-
sia vertikali jėga)
[17] Vilkimo įtaiso apkrovos riba (didžiau-
sias vilkimo svoris)
[18] Didžiausias leistinas nuolydis
[19] Matmenys
[20] Ilgis
[21] Ilgis su maišu (ilgis be maišo)
[22] Plotis
[23] Plotis su šoniniu išmetimo deek-
toriumi (plotis be šoninio išmetimo
deektoriaus)
[24] Aukštis
[25] Masė *
[26] Garso slėgio lygis (didž.)
[27] Matavimo netikslumas
[28] Išmatuotas garso galios lygis (didž.)
[29] Garantuotas garso galios lygis
[30] Vairuotojo sėdynės vibracijos lygis
(didž.)
[31] Vibracijos lygis prie vairo (didž.)
[32] Teisingos priedų kombinacijos lentelė
[32.A] Galiniai priedai
[32.B] Priekiniai priedai
[58] Papildomi priedai
[58.A1, 58.A2] Mulčiavimo komplektas
[58.B] Akumuliatoriaus palaikymo
įkroviklis
[58.C] Vilkimo komplektas
[58.D] Brezentas
[58.E] Galinių svarsčių komplektas
[58.F] Galinio išmetimo apsaugos kom-
plektas (tik modeliams su galiniu
surinkimu)
[58.G] Sniego grandinės (18”, 20”)
[58.H] Ratai purvui / sniegui (18”, 20”)
[58.I] Priekaba
[58.J, 58.K] Barstytuvas
[58.L] Volas žolei
[58.M] Peilinis sniego valytuvas
[58.N] Šlavimo mašina su priekine šluota
[58.O] Smulkintuvas
[58.P] (Tik SD serijos modeliams)
Lapų ir žolės surinkėjas 38”
Lapų ir žolės surinkėjas 42”
[58.Q] Priekinis grėblys
[58.R1, 58.R2] Kėlimo sistema + Galios
teikimo velenas (GTV)
[58.R3] Galios teikimo velenas (GTV)
* Dėl konkrečių duomenų žiūrėti, kas nuro-
dyta įrenginio identikavimo etiketėje.
[1] LV - TEHNISKIE DATI
[2] Nominālā jauda *
[3] Apgriezieni minūtē *
[4] Elektriskā iekārta
[5] Degvielas tvertnes tilpums
[6] Priekšējās riepas
[7] Aizmugurējās riepas
[8] Priekšējais gaisa spiediens
[9] Aizmugurējais gaisa spiediens
[10] Griešanas augstuma regulēšana
[11] Griešanas platuma regulēšana
[12] Minimālais nenopļautās zāles rādiuss
[13] Griešanas mehānisma kods
[14] Pārvietošanās ātrums (aptuvens)
3000 min.-1
[15] Ātruma ierobežojums ar sniega ķēdēm
(ja piederums ir paredzēts)
[16] Griešanas mehānisma maksimālā
nestspēja (maksimālais vertikālais
spēks)
[17] Griešanas mehānisma maksimālā
nestspēja (maksimālais buksēšanas
svars)
[18] Maksimālais pieļaujamais slīpums
[19] Izmēri
[20] Garums
[21] Garums ar maisu (garums bez maisa)
[22] Platums
[23] Platums ar sāniskās izmešanas
deektoru (platums bez sāniskās
izmešanas deektora)
[24] Augstums
[25] Svars *
[26] Maksimālais spiediena līmenis (maks.)
[27] Mērījuma kļūda
[28] Maksimālais izmērītais skaņas spie-
diena līmenis (maks.)
[29] Garantētais skaņas spiediena līmenis
[30] Vibrāciju līmenis vadītāja vietā (maks.)
[31] Vibrāciju līmenis pie stūres (maks.)
[32] Tabula pareizai piederumu savieno-
šanai
[32.A] Aizmugurējie piederumi
[32.B] Priekšējie piederumi
[58] Piederumi pēc pieprasījuma
[58.A1, 58.A2] “Mulčēšanas” komplekts
[58.B] Akumulatora uzturēšanas lādēšana
[58.C] Vilkšanas komplekts
[58.D] Pārvalks
[58.E] Aizmugurējo svaru komplekts
[58.F] Aizmugurējās izmešanas aizsar-
gkomplekts (tikai modeļiem ar
aizmugurējo savākšanu)
[58.G] Sniega ķēdes (18”, 20”)
[58.H] Dubļu/sniega riteņi (18”, 20”)
[58.I] Piekabe
[58.J, 58.K] Izkliedētājs
[58.L] Zāles rullis
[58.M] Sniega tīrītājs ar vērstuvi
[58.N] Priekšpusē novietots slaucītājs
[58.O] Smalcināšanas iekārta
[58.P] (Tikai SD sērijas modeļiem)
Lapu un zāles savācējs 38”
Lapu un zāles savācējs 42”
[58.Q] Priekšējais grābeklis
[58.R1, 58.R2] Pacelšanas kontaktvirsma +
Jaudas noņemšana (PTO)
[58.R3] Jaudas noņemšana (PTO)
* Attiecībā uz šo konkrēto informāciju,
atsaukties uz to, kas norādīta uz ierīces
identikācijas marķējuma.

[1] MK-ТЕХНИЧКИПОДАТОЦИ
[2] Номинална моќност *
[3] Вртежи во минута *
[4] Електричен систем
[5] Капацитет на резервоарот за гориво
[6] Предни гуми
[7] Задни гуми
[8] Притисок во предните гуми
[9] Притисок во задните гуми
[10] Висина на косење
[11] Ширина на косење
[12] Минимален радиус на некосена трева
[13] Сечило дел бр.
[14] Предна брзина (индикативна) на 3000 мин-1
[15] Ограничување на брзината со ланци за
снег (доколку има)
[16] Ограничување на оптоварувањето
за уредот за влечење (Максимална
вертикална сила)
[17] Ограничување на оптоварувањето за
уредот за влечење (Дозволена тежина на
влечење)
[18] Максимална дозволена косина
[19] Димензии
[20] Должина
[21] Должина со корпа за трева (Должина без
корпа за трева)
[22] Ширина
[23] Ширина со дефлектор за странично
исфрлање (Ширина без дефлектор за
странично исфрлање)
[24] Тежина
[25] Маса *
[26] Ниво на звучен притисок (макс.)
[27] Мерна несигурност
[28] Ниво на измерена звучна моќност (макс.)
[29] Ниво на загарантирана звучна моќност
[30] Ниво на вибрација на местото на возачот
(макс.)
[31] Ниво на вибрација на управувачот (макс.)
[32] Табела за компатибилност на дополнителна
опрема
[32.A] Задна дополнителна опрема
[32.B] Предна дополнителна опрема
[58] Опционална дополнителна опрема
[58.A1, 58.A2] Сет за „мулчирање“
[58.B] Полнач за одржување на наполнетоста на
акумулаторот
[58.C] Сет за влечење
[58.D] Заштитно платно
[58.E] Сет за задна корпа за товар
[58.F] Сет за безбедност за задно исфрлање
(само за модели со задна корпа за трева)
[58.G] Ланци за снег (18”, 20”)
[58.H] Гуми за снег/кал (18”, 20”)
[58.I] Приколка
[58.J, 58.K] Прскалка
[58.L] Валјак за трева
[58.M] Сечиво за снег
[58.N] Преден чистач
[58.O] Шредер
[58.P] (Само за модели со SD серија)
Собирач на лисја 38”
Собирач на лисја 42”
[58.Q] Предно гребло
[58.R1, 58.R2] Подигнувачка платформа +
Капацитет на подигање (PTO)
[58.R3] Капацитет на подигање (PTO)
* За повеќе информации погледнете ја ознаката
за идентификација на машината.
[1] NL - TECHNISCHE GEGEVENS
[2] Nominaal vermogen *
[3] Toeren per minuut *
[4] Elektrische installatie
[5] Vermogen brandstofreservoir
[6] Voorbanden
[7] Achterbanden
[8] Bandenspanning vooraan
[9] Bandenspanning achteraan
[10] Maaihoogte
[11] Maaibreedte
[12] Minimum straal ongemaaid gras
[13] Code snijgroep
[14] Voortbewegingssnelheid (indicatief) bij
3000 min-1
[15] Snelheidslimiet met sneeuwkettingen
(indien voorzien accessoire)
[16] Laadlimiet voor aandrijnrichting
(Maximale verticale kracht)
[17] Laadlimiet voor aandrijnrichting
(Trekbaar maximaal gewicht)
[18] Toegestane maximum inclinatie
[19] Afmetingen
[20] Lengte
[21] Lengte met zak (Lengte zonder zak)
[22] Breedte
[23] Breedte met zijdelingse aaatde-
ector (Breedte zonder zijdelingse
aaatdeector)
[24] Hoogte
[25] Gewicht *
[26] Geluidsdrukniveau (max.)
[27] Meetonzekerheid
[28] Gemeten geluidsdrukniveau (max.)
[29] Gegarandeerd geluidsvermogen-
niveau
[30] Trillingsniveau op de bestuurders-
plaats (max.)
[31] Trillingsniveau op het stuur (max.)
[32] Tabel voor de correcte combinatie van
de accessoires
[32.A] Accessoires achteraan
[32.B] Frontale accessoires
[58] Accessoires op verzoek
[58.A1, 58.A2] Kit “Melching”
[58.B] Batterijlader voor behoud
[58.C] Trekset
[58.Do] Afdekzeil
[58.E] Set gewichten achteraan
[58.F] Beschermingskit aaat achteraan
(enkel voor modellen met opvang
achteraan)
[58.G] Sneeuwkettingen (18”, 20”)
[58.H] Modderwielen/sneeuwwielen (18”,
20”)
[58.I] Aanhanger
[58.J, 58.K] Verspreider
[58.L] Rol voor gras
[58.M] Sneeuwruimer met sneeuwschuif
[58.N] Frontale veger
[58.O] Hakselaar
[58.P] (Enkel voor modellen SD series)
Opvanger voor bladeren en gras 38”
Opvanger voor bladeren en gras 42”
[58.Q] Frontale hark
[58.R1, 58.R2] Lift-interface + Aftakas
(PTO)
[58.R3] Aftakas (PTO)
* Voor het specieke gegeven wordt
verwezen naar wat is aangeduid op het
identicerende etiket van de machine.
[1] NO - TEKNISKE DATA
[2] Nominell eekt *
[3] Omdreininger per minutt *
[4] Elektrisk anlegg
[5] Drivstotankens kapasitet
[6] Dekk framme
[7] Dekk bak
[8] Trykk ved oppblåsing framme
[9] Trykk ved oppblåsing bak
[10] Klippehøyde
[11] Klippebredde
[12] Minste radius til ikke klippet gress
[13] Kode til klippeenheten
[14] Hastighet ved framdrift (veiledende)
ved 3000 min-1
[15] Hastighetsbegrensning med
snøkjetting (dersom dette tilbehøret
forutsettes)
[16] Lastbegrensning for trekkanordnin-
gen (Maksimal vertikal eekt)
[17] Lastbegrensning for trekkanordnin-
gen (Maksimal vekt som kan taues)
[18] Maksimal tillatt helning
[19] Dimensjoner
[20] Lengde
[21] Lengde med sekk (Lengde uten sekk)
[22] Bredde
[23] Bredde med deektor for tømming
på siden (Bredde uten deektor for
tømming på siden )
[24] Høyde
[25] Vekt *
[26] Lydtrykknivå (maks.)
[27] Måleusikkerhet
[28] Målt lydeektnivå (maks.)
[29] Garantert lydeektnivå
[30] Nivå for vibrasjoner ved sjåførens
sete (maks.)
[31] Nivå for vibrasjoner ved rattet (maks.)
[32] Tabell for riktig kombinasjon av
tilbehør
[32.A] Tilbehør bak
[32.B] Tilbehør framme
[58] Ekstrautstyr etter forespørsel
[58.A1, 58.A2] Sett for “mulching”
[58.B] Batterilader for opprettholdelse
[58.C] Sett for trekking
[58.D] Presenning for tildekking
[58.E] Sett for vekter framme
[58.F] Sett for beskyttelse av utslipp bak
(kun for modellene med oppsam-
ling bak)
[58.G] Snøkjetting (18”, 20”)
[58.H] Dekk for gjørme/snø (18”, 20”)
[58.I] Tilhenger
[58.J, 58.K] Spreder
[58.L] Plenrull
[58.M] Snøplog med skjær
[58.N] Feiemaskin med koster framme
[58.O] Kutter
[58.P] (Kun for modellene i SD seriene)
Oppsamler av blader og gress 38”
Oppsamler av blader og gress 42”
[58.Q] Rake framme
[58.R1, 58.R2] Grensesnitt for løfting +
Kraftuttak (PTO)
[58.R3] Kraftuttak (PTO)
* For den spesikke dataen, se hva som
er angitt på etiketten for identikasjon av
maskinen.

[1] PL - DANE TECHNICZNE
[2] Moc znamionowa *
[3] Obroty na minutę *
[4] Instalacja elektryczna
[5] Pojemność zbiornika paliwa
[6] Opony przednie
[7] Opony tylne
[8] Ciśnienie przednich opon
[9] Ciśnienie tylnych opon
[10] Wysokość koszenia
[11] Szerokość koszenia
[12] Minimalny promień nieskoszonej trawy
[13] Kod urządzenia tnącego
[14] Prędkość jazdy (orientacyjna) przy 3000
min-1
[15] Limit prędkości z łańcuchami śniegowymi
(jeśli przewidziano)
[16] Limit obciążenia dla urządzenia holowni-
czego (maksymalna siła pionowa)
[17] Limit obciążenia dla urządzenia holowni-
czego (maksymalna masa przyczepy)
[18] Maksymalne dozwolone nachylenie
[19] Wymiary
[20] Długość
[21] Długość z pojemnikiem (długość bez
pojemnika)
[22] Szerokość
[23] Szerokość z deektorem bocznego wy-
rzutu (szerokość bez deektora bocznego
wyrzutu )
[24] Wysokość
[25] Masa *
[26] Poziom ciśnienia akustycznego (maks.)
[27] Błąd pomiaru
[28] Zmierzony poziom mocy akustycznej
(maks.)
[29] Gwarantowany poziom mocy akustycznej
[30] Poziom drgań na miejscu kierowcy (maks.)
[31] Poziom drgań na kierownicy (maks.)
[32] Tabela prawidłowego połączenia
akcesoriów
[32.A] Akcesoria tylne
[32.B] Akcesoria przednie
[58] Akcesoria na zamówienie
[58.A1, 58.A2] Zestaw „mulching”
[58.B] Ładowarka akumulatora
[58.C] Zestaw do holowania
[58.D] Pokrowiec
[58.E] Zestaw tylnych obciążników
[58.F] Zestaw osłony tylnego wyrzutu trawy
(tylko do modeli z tylnym pojemnikiem
na trawę)
[58.G] Łańcuchy śniegowe (18”, 20”)
[58.H] Koła błotne/śnieżne (18”, 20”)
[58.I] Przyczepa
[58.J, 58.K] Rozrzutnik
[58.L] Walec do trawy
[58.M] Pług śnieżny
[58.N] Przednia zamiatarka
[58.O] Rozdrabniacz
[58.P] (Tylko do modeli SD series)
Zbieracz do liści i trawy 38”
Zbieracz do liści i trawy 42”
[58.Q] Przednia zgrabiarka
[58.R1, 58.R2] Interfejs podnoszenia + Przy-
stawka odbioru mocy (PTO)
[58.R3] Przystawka odbioru mocy (PTO)
* Aby uzyskać szczegółowe dane, odnieść się
do informacji wskazanych na etykiecie identy-
kacyjnej maszyny.
[1] PT - DADOS TÉCNICOS
[2] Potência nominal *
[3] Rotações por minuto *
[4] Sistema elétrico
[5] Capacidade do tanque de combustível
[6] Pneus dianteiros
[7] Pneus traseiros
[8] Pressão de enchimento dianteiro
[9] Pressão de enchimento traseiro
[10] Altura de corte
[11] Largura de corte
[12] Raio mínimo da relva não cortada
[13] Código do dispositivo de corte
[14] Velocidade de avanço (indicativa) a
3000 min-1
[15] Limite de velocidade com correntes de
neve (se o acessório estiver incluído)
[16] Limite de carga para dispositivo de
tração (Força vertical máxima)
[17] Limite de carga para dispositivo de
tração (Peso máximo rebocável)
[18] Inclinação máxima permitida
[19] Dimensões
[20] Comprimento
[21] Comprimento com saco (Comprimento
sem saco)
[22] Largura
[23] Largura com deetor de descarga
lateral (Largura sem deetor de
descarga lateral)
[24] Altura
[25] Massa *
[26] Nível de pressão acústica (máx.)
[27] Incerteza de medição
[28] Nível de potência acústica medido
(máx.)
[29] Nível de potência acústica garantido
[30] Nível de vibrações no posto de condu-
ção (máx.)
[31] Nível de vibrações no volante (máx.)
[32] Tabela para a combinação correta dos
acessórios
[32.A] Acessórios traseiros
[32.B] Acessórios dianteiros
[58] Acessórios a pedido
[58.A1, 58.A2] Kit “mulching”
[58.B] Carregador de bateria de manu-
tenção
[58.C] Kit de tração
[58.D] Lona de cobertura
[58.E] Kit de pesos traseiros
[58.F] Kit de proteção de descarga traseira
(apenas para os modelos com
recolha traseira)
[58.G] Correntes de neve (18”, 20”)
[58.H] Rodas para lama/neve (18”, 20”)
[58.I] Reboque
[58.J, 58.K] Distribuidor
[58.L] Rolo para relva
[58.M] Limpa-neves com lâmina
[58.N] Pá frontal
[58.O] Retalhadora
[58.P] (apenas para os modelos SD series)
Recolhedor de folhas e relva 38”
Recolhedor de folhas e relva 42”
[58.Q] Grade frontal
[58.R1, 58.R2] Interface de elevação +
Tomada de força (TDF)
[58.R3] Tomada de força (TDF)
* Para este dado, consulte a indicação na
etiqueta de identicação da máquina.
[1] RO - DATE TEHNICE
[2] Putere nominală *
[3] Rotaţii pe minut *
[4] Instalaţie electrică
[5] Capacitatea rezervorului de carburant
[6] Anvelope faţă
[7] Anvelope spate
[8] Presiunea de umare faţă
[9] Presiunea de umare spate
[10] Înălţimea de tăiere
[11] Lăţimea de tăiere
[12] Raza minimă de iarbă netăiată
[13] Codul dispozitivului de tăiere
[14] Viteza de înaintare (orientativă) la
3000 min-1
[15] Limita de viteză cu lanţuri de zăpadă
(dacă acest accesoriu există în dotare)
[16] Limita de sarcină pentru dispozitivul
de tractare (Forţa verticală maximă)
[17] Limita de sarcină pentru dispoziti-
vul de tractare (Masă remorcabilă
maximă)
[18] Înclinarea maximă admisă
[19] Dimensiuni
[20] Lungime
[21] Lungime cu sac (Lungime fără sac)
[22] Lăţime
[23] Lăţime cu deector de evacuare lateral
(Lăţime fără deector de evacuare
lateral)
[24] Înălţime
[25] Masă *
[22] Nivelul de presiune sonoră (max.)
[27] Nesiguranţă în măsurare
[28] Nivelul de putere acustică măsurat
(max.)
[29] Nivelul de putere acustică garantat
[30] Nivelul de vibraţii pe locul şoferului
(max.)
[31] Nivelul de vibraţii pe volan (max.)
[32] Tabel pentru combinarea corectă a
accesoriilor
[32.A] Accesorii posterioare
[32.B] Accesorii frontale
[58] Accesorii la cerere
[58.A1, 58.A2] Kit pentru mulci
[58.B] Încărcător baterii pentru întreţinere
[58.C] Kit tractare
[58.D] Prelată de acoperire
[58.E] Kit greutăţi posterioare
[58.F] Kit de protecţie pentru evacuare
posterioară (doar pentru modelele
cu sistem de colectare în spate)
[58.G] Lanţuri de zăpadă (18”, 20”)
[58.H] Roţi de noroi / iarnă (18”, 20”)
[58.I] Remorcă
[58.J, 58.K] Dispozitiv de împrăştiere
[58.L] Cilindru pentru iarbă
[58.M] Utilaj de deszăpezire cu lamă
[58.N] Măturător frontal
[58.O] Tocător
[58.P] (Numai pentru modelele din seria
SD)
Colector de frunze şi iarbă 38”
Colector de frunze şi iarbă 42”
[58.Q] Greblă frontală
[58.R1, 58.R2] Interfaţă de ridicare+ Priză
de putere (PTO)
[58.R3] Priză de putere (PTO)
* Pentru date specice, consultaţi infor-
maţiile de pe eticheta de identicare a
maşinii.

[1] RU-ТЕХНИЧЕСКИЕХАРАКТЕРИСТИКИ
[2] Номинальная мощность *
[3] Частота вращения *
[4] Электрическая система
[5] Объем топливного бака
[6] Передние шины
[7] Задние шины
[8] Давление в передних шинах
[9] Давление в задних шинах
[10] Высота скашивания
[11] Ширина скашивания
[12] Минимальный радиус нескошенной травы
[13] Артикул режущего приспособления
[14] Скорость движения (примерная) на 3000
об/мин
[15] Предельная скорость с цепями проти-
воскольжения (если предусмотрены)
[16] Предельная нагрузка на буксировочное
устройство (Максимальная вертикальная
сила)
[17] Предельная нагрузка на буксировочное
устройство (Максимальный буксируемый
вес)
[18] Максимально допустимый наклон
[19] Габариты
[20] Длина
[21] Длина с травосборником (Длина без
травосборника)
[22] Ширина
[23] Ширина с дефлектором бокового выброса
(Ширина без дефлектора бокового выброса)
[24] Высота
[25] Масса *
[26] Уровень звукового давления (макс.)
[27] Неточность размеров
[28] Измеренный уровень звуковой мощности
(макс.)
[29] Гарантированный уровень звуковой
мощности
[30] Уровень вибраций на месте оператора
(макс.)
[31] Уровень вибраций на руле (макс.)
[32] Таблица совместимости дополнительных
принадлежностей
[32.A] Задние принадлежности
[32.B] Передние принадлежности
[58] Опциональные принадлежности
[58.A1, 58.A2] Комплект для мульчирования
[58.B] Поддерживающее зарядное устройство
[58.C] Комплект для буксировки
[58.D] Укрывной брезент
[58.E] Комплект заднего балласта
[58.F] Комплект ограждения заднего выброса
(только для моделей с задним сбором)
[58.G] Цепи противоскольжения (18”, 20”)
[58.H] Грязевые / снеговые колеса (18”, 20”)
[58.I] Прицеп
[58.J, 58.K] Разбрасыватель
[58.L] Садовый каток
[58.M] Шнекороторный снегоочиститель
[58.N] Фронтальная щетка
[58.O] Измельчитель
[58.P] (только для моделей серии SD)
Сборщик травы и листьев 38”
Сборщик травы и листьев 42”
[58.Q] Фронтальные грабли
[58.R1, 58.R2] Подъемный адаптер + отбор
мощности (МОМ)
[58.R3] отбор мощности (МОМ)
* Для получения конкретных значений обращай-
тесь к идентификационной табличке машины.
[1] SK – TECHNICKÉ PARAMETRE
[2] Nominálny výkon
[3] Otáčky za minútu
[4] Elektroinštalácia
[5] Kapacita palivovej nádrže
[6] Predné pneumatiky
[7] Zadné pneumatiky
[8] Tlak nahustenia predných pneumatík
[9] Tlak nahustenia zadných pneumatík
[10] Výška kosenia
[11] Šírka kosenia
[12] Minimálny akčný rádius otáčania
[13] Kód kosiaceho zariadenia
[14] Rýchlosť jazdy (indikatívna) pri ot.
3 000 min-1
[15] Rýchlostný limit so snehovými reťaza-
mi (ak sú súčasťou príslušenstva
[16] Limit nákladu pre ťažné zariadenie
(maximálne vertikálne zaťaženie
[17] Limit nákladu pre ťažné zariadenie
(maximálna hmotnosť pre ťahanie
[18] Maximálny povolený náklon
[19] Rozmery
[20] Dĺžka
[21] Dĺžka s košom (dĺžka bez koša)
[22] Šírka
[23] Šírka s vychyľovačom bočného
vyhadzovania (šírka bez vychyľovača
bočného vyhadzovania
[24] Výška
[25] Hmotnosť
[26] Úroveň akustického tlaku
[27] Nepresnosť merania
[28] Meraná úroveň akustického výkonu
[29] Garantovaná úroveň akustického
výkonu
[30] Úroveň vibrácií na mieste vodiča
[31] Úroveň vibrácií pri volante
[32] Tabuľka pre správne kombinácie
príslušenstva
[32.A] Zadné príslušenstvo
[32.B] Čelné príslušenstvo
[58] Príslušenstvo na požiadanie
[58.A1, 58.A2] Súprava „mulčovanie“
[58.B] Udržiavacia nabíjačka akumulátora
[58.C] Súprava ťažného zariadenia
[58.D] Krycia plachta
[58.E] Súprava zadných závaží
[58.F] Ochranná súprava zadného
vyhadzovania (len pri modeloch so
zadným zberom)
[58.G] Snehové reťaze (18”, 20”)
[58.H] Kolesá do blata / snehu (18”, 20”)
[58.I] Prívesný vozík
[58.J, 58.K] Posypávač
[58.L] Valec na valcovanie trávy
[58.M] Snehová radlica
[58.N] Čelný zametač
[58.O] Drvička
[58.P] (Iba pri modeloch SD series)
Zberač lístia a trávy 38”
Zberač lístia a trávy 42”
[58.Q] Čelný hrabač
[58.R1, 58.R2] Prepojenie na zdvih + po-
hon prídavného zariadenia
(PTO)
[58.R3] Pohon prídavného zariadenia
(PTO)
* Pri špecických údajoch sa riaďte
údajmi uvedenými na identikačných
štítkoch stroja.
[1] SL-TEHNIČNIPODATKI
[2] Nazivna moč*
[3] Vrtljaji na minuto*
[4] Električna napeljava
[5] Prostornina rezervoarja za gorivo
[6] Sprednje pnevmatike
[7] Zadnje pnevmatike
[8] Polnilni tlak sprednjih pnevmatik
[9] Polnilni tlak zadnjih pnevmatik
[10] Višina košnje
[11] Širina košnje
[12] Najmanjše področje nepokošene
trave
[13] Šifra rezalne naprave
[14] Hitrost vožnje (nazivna) pri 3000
min-1
[15] Omejitev hitrosti pri uporabi snežnih
verig (če je oprema predvidena)
[16] Omejitev obremenitve za vlečno
napravo (največja navpična sila)
[17] Omejitev obremenitve za vlečno
napravo (največja dovoljena vlečena
masa)
[18] Največji dovoljeni naklon
[19] Dimenzije
[20] Dolžina
[21] Dolžina s košaro (dolžina brez
košare)
[22] Širina
[23] Širina z odbijačem bočnega izmeta
(širina brez odbijača bočnega izmeta)
[24] Višina
[25] Masa*
[26] Raven zvočnega tlaka (najv.)
[27] Nezanesljivost meritve
[28] Raven izmerjene jakosti zvoka (najv.)
[29] Raven zajamčene jakosti zvoka
[30] Raven vibracij na voznikovem sedežu
(najv.)
[31] Raven vibracij na volanu (najv.)
[32] Preglednica za pravilno kombiniranje
dodatne opreme
[32.A] Zadnja dodatna oprema
[32.B] Sprednja dodatna oprema
[58] Dodatna oprema po naročilu
[58.A1, 58.A2] Komplet za „mulčenje“
[58.B] Polnilnik akumulatorja za vzdrže-
vanje
[58.C] Komplet za vleko
[58.D] Prekrivno platno
[58.E] Komplet zadnjih uteži
[58.F] Komplet za zaščito zadnjega izmeta
(samo za modele z zbiralnikom na
zadnjem delu)
[58.G] Snežne verige (18”, 20”)
[58.H] Kolesa za blato / sneg (18”, 20”)
[58.I] Prikolica
[58.J, 58.K] Trosilec
[58.L] Valj za travo
[58.M] Snežni plug z nožem
[58.N] Sprednja naprava za pometanje
[58.O] Mulčer
[58.P] (Samo za modele serije SD)
Pobiralnik listja in trave 38”
Pobiralnik listja in trave 42”
[58.Q] Sprednje grablje
[58.R1, 58.R2] Vmesnik za dviganje +
odjem moči (PTO)
[58.R3] Odjem moči (PTO)
* Za specične podatke si oglejte navedbe
na Identikacijski etiketi stroja.

[1] SR–TEHNIČKIPODACI
[2] Nominalna snaga *
[3] Obrtaja u minutu *
[4] Električni uređaj
[5] Kapacitet rezervoara za gorivo
[6] Prednji pneumatici
[7] Zadnji pneumatici
[8] Pritisak naduvanosti za prednje
[9] Pritisak naduvanosti za zadnje
[10] Visina otkosa
[11] Širina otkosa
[12] Minimalni poluprečnik nepokošene
trave
[13] Kôd rezne glave
[14] Brzina napredovanja (indikativna) pri
3000 min-1
[15] Ograničenje brzine sa lancima za
sneg (ako je dodatak predviđen)
[16] Ograničenje opterećenja prema
sistemu za vuču (maksimalna
vertikalna sila)
[17] Ograničenje opterećenja prema
sistemu za vuču (maksimalna težina
prikolice)
[18] Maksimalni dozvoljeni nagib
[19] Dimenzije
[20] Dužina
[21] Dužina sa vrećom (dužina bez vreće)
[22] Širina
[23] Širina sa usmerivačem bočnog
izbacivanja (širina bez usmerivača
bočnog izbacivanja)
[24] Visina
[25] Masa *
[26] Nivo akustičnog pritiska (maks.)
[27] Nepouzdanost merenja
[28] Izmereni nivo akustične snage
(maks.)
[29] Garantovani nivo akustične snage
[30] Nivo vibracija na mestu vozača
(maks.)
[31] Nivo vibracija na volanu (maks.)
[32] Tabela za ispravnu kombinaciju
dodataka
[32.A] Dodaci za zadnji deo
[32.B] Dodaci za prednji deo
[58] Dodaci na zahtev
[58.A1, 58.A2] Oprema za malč
[58.B] Punjač akumulatora za održavanje
[58.C] Oprema za vuču
[58.D] Pokrovna cerada
[58.E] Oprema za teret na zadnjoj strani
[58.F] Oprema za zaštitu istovara
otpozadi(samo za modele sa
skupljanjem otpozadi)
[58.G] Lanci za sneg (18”, 20”)
[58.H] Točkovi za blato/sneg (18”, 20”)
[58.I] Prikolica
[58.J, 58.K] Posipač
[58.L] Valjak za travu
[58.M] Plug za sneg s nožem
[58.N] Deo za čišćenje sa prednje strane
[58.O] Kosačica
[58.P] (Samo za modele iz serije SD)
Skupljač lišća i trave 38”
Skupljač lišća i trave 42”
[58.Q] Prednje grabulje
[58.R1, 58.R2] Priključak za podizanje +
Priključno vratilo (PTO)
[58.R3] Priključno vratilo (PTO)
* Za navedene podatke, pogledati
identikacionu etiketu mašine.
[1] SV - TEKNISKA SPECIFIKATIONER
[2] Nominell eekt *
[3] Varv per minut *
[4] Elsystem
[5] Bränsletankens kapacitet
[6] Främre däck
[7] Bakre däck
[8] Främre däcktryck
[9] Bakre däcktryck
[10] Klipphöjd
[11] Klippbredd
[12] Minimiradie på oklippt gräs
[13] Klippredskapets kod
[14] Körhastighet (ungefärlig) vid 3000
min-1
[15] Hastighetsgräns med snökedjor (om
tillbehöret förutses)
[16] Belastningsgräns för bogseranord-
ning (maximal vertikal kraft)
[17] Belastningsgräns för bogseranord-
ning (maximal bogserbar vikt)
[18] Maximal tillåten lutning
[19] Dimensioner
[22] Längd
[21] Längd med påse (Längd utan påse)
[22] Bredd
[23] Bredd med sidotömningens rikt-
platta (Bredd utan sidotömningens
riktplatta)
[24] Höjd
[25] Vikt *
[26] Ljudtrycksnivå (max)
[27] Tvivel med mått
[28] Ljudeektsnivå (max)
[29] Garanterad ljudeektsnivå
[30] Vibrationsnivå på förarplatsen (max)
[31] Vibrationsnivå vid ratten (max)
[32] Tabell för korrekt kombination av
tillbehören
[32.A] Bakre tillbehör
[32.B] Främre tillbehör
[58] Tillbehör på begäran
[58.A1, 58.A2] Sats för "mulching"
[58.B] Underhållsladdning av batteriet
[58.C] Bogsersats
[58.D] Presenning
[58.E] Bakre viktsats
[58.F] Sats för bakre tömningsskydd
(bara för modeller med bakre
uppsamling)
[58.G] Snökedjor (18”, 20”)
[58.H] Hjul för lera/snö (18”, 20”)
[58.I] Släp
[58.J, 58.K] Spridare
[58.L] Gräsrulle
[58.M] Snöröjare med blad
[58.N] Främre sopmaskin
[58.O] Slaghack
[58.P] (Bara för modeller i SD-serien)
Blad- och grässamlare 38”
Blad- och grässamlare 42”
[58.Q] Främre kratta
[58.R1, 58.R2] Lyftkoppling + Kraftuttag
(PTO)
[58.R3] Kraftuttag (PTO)
* För specik uppgift, se anvisningar på
maskinens märkskylt.
[1] TR-TEKNİKVERİLER
[2] Nominal güç *
[3] Dakikada devir *
[4] Elektrik sistemi
[5] Yakıt deposunun kapasitesi
[6] Ön lastikler
[7] Arka lastikler
[8] Ön lastik basıncı
[9] Arka lastik basıncı
[10] Kesim yüksekliği
[11] Kesim genişliği
[12] Minimum kesilmemiş çim yarıçapı
[13] Kesim cihazı parça n.
[14] 3000 dak-1'deki ileri hız (gösterge
niteliğinde)
[15] Kar zincirleriyle birlikte hız sınırı
(varsa)
[16] Yedekte çekme cihazı için yükleme
sınırı (Maksimum dikey kuvvet)
[17] Yedekte çekme cihazı için yükleme
sınırı (İzin verilebilir yedekte çekme
ağırlığı)
[18] İzin verilebilir maksimum eğim
[19] Ebatlar
[20] Uzunluk
[21] Toplama haznesi torbasıyla birlikte
uzunluk (Toplama haznesi torbası
olmaksızın uzunluk)
[22] Genişlik
[23] Yanal döküm deektörüyle birlikte
genişlik (Yanal döküm deektörü
olmaksızın genişlik )
[24] Yükseklik
[25] Kütle *
[26] Ses basıncı seviyesi (maks.)
[27] Ölçü belirsizliği
[28] Ölçülen ses gücü seviyesi (maks.)
[29] Garanti edilen ses gücü seviyesi
[30] Sürüş mahallindeki titreşim seviyesi
(maks.)
[31] Direksiyon simidindeki titreşim
seviyesi (maks.)
[32] Aksesuar uyumluluk tablosu
[32.A] Arka aksesuarlar
[32.B] Ön aksesuarlar
[58] İsteğe bağlı aksesuarlar
[58.A1, 58.A2] "Malçlama" kiti
[58.B] Akü tampon şarj cihazı
[58.C] Yedekte çekme kiti
[58.D] Branda bezinden koruyucu örtü
[58.E] Arka ağırlıklar kiti
[58.F] Arka döküm güvenlik kiti (yalnızca
arka çim toplama haznesine sahip
modeller)
[58.G] Kar zincirleri (18”, 20”)
[58.H] Kar/çamur tekerlekleri (18”, 20”)
[58.I] Römork
[58.J, 58.K] Serpici
[58.L] Çim silindiri
[58.M] Bıçaklı kar küreme makinesi
[58.N] Ön süpürücü
[58.O] Kıyıcı
[58.P] (Yalnızca SD serisi modeller için)
Yaprak ve toplayıcı 38”
Yaprak ve toplayıcı 42”
[58.Q] Ön tırmık
[58.R1, 58.R2] Kaldırma arayüzü + Ara
Şanzıman (PTO)
[58.R3] Ara Şanzıman (PTO)
* Özel bilgiler için, makine kimlik etiketin-
deki bilgilere başvurun.

EN - 1
WARNING!: READ THE INSTRUCTION BOOKLET THOROUGHLY
BEFORE USING THE MACHINE. Keep for future reference.
EN
INDEX
1. GENERAL INFORMATION ........................... 2
2. SAFETY REGULATIONS .............................. 2
3. GETTING TO KNOW THE MACHINE ........... 5
3.1 Description of the machine and planned
use ........................................................ 5
3.2 Safety signs .......................................... 5
3.3 Identication label ................................ 6
3.4 Main components ................................. 6
4. ASSEMBLY ................................................... 7
4.1 Assembly components .......................... 7
4.2 Steering wheel assembly ...................... 7
4.3 Seat assembly ...................................... 8
4.4 Mounting and connecting the battery .... 8
4.5 Mounting the grass catcher supports .... 8
4.6 Removing the grass catcher retaining
pawl ...................................................... 8
4.7 Mounting the rear bumper ..................... 8
4.8 Mounting the grass catcher bag ............ 8
4.9 Mounting the grass catcher tipping levers
.............................................................. 9
4.10 Mounting the side guards of the cutting
device assembly (if any) ........................ 9
4.11 Side discharge chute assembly (for
models with side discharge only) .......... 9
5. CONTROLS.................................................. 9
5.1 Brake pedal ........................................... 9
5.2 Forward gear pedal ............................... 9
5.3 Reverse gear pedal ........................... 10
5.4 Hydrostatic drive release command .... 10
5.5 Key ignition switch ............................... 10
5.6 Throttle command ............................... 10
5.7 Parking brake lever .............................. 11
5.8 Headlights switch .............................. 11
5.9 Cutting device engage and disengage
functions ............................................. 11
5.10 Enable reverse gear cutting button ...... 12
5.11 Controls for adjusting the cutting unit
assembly height .................................. 12
5.12 Speed cruise control ......................... 12
5.13 Counter (if tted) ................................. 12
5.14 Auxiliary socket for accessories .......... 13
5.15 Grass catcher tipping command ......... 13
5.16 Type "I" display and buzzers ................ 13
5.17 Type "II" display and buzzers ............... 13
6. USING THE MACHINE ............................... 16
6.1 Preparation ......................................... 16
6.2 Safety checks ...................................... 17
6.3 Using on slopes .................................. 17
6.4 Start-up ............................................... 18
6.5 Operation ............................................ 18
6.6 Stop .................................................... 20
6.7 After operation .................................... 20
7. ROUTINE MAINTENANCE ........................ 20
7.1 General information ............................. 20
7.2 Refuelling / emptying the fuel tank....... 21
7.3 Check, top up, draining of engine oil ... 21
7.4 Anti-scalping wheels ........................... 22
7.5 Battery ................................................ 22
7.6 Cleaning .............................................. 22
7.7 Nuts and bolts ..................................... 23
8. EXTRAORDINARY MAINTENANCE .......... 23
8.1 Safety recommendations .................... 23
8.2 Cutting device assembly ..................... 23
8.3 Replacing front / rear wheels ............... 24
8.4 Electronic circuit board ........................ 25
8.5 Replacing a fuse ................................. 25
8.6 Replacing bulbs .................................. 25
8.7 Rear drive unit ..................................... 25
8.8 Front drive unit (4WD model) .............. 26
8.9 Regulating the grass catcher retaining
pawl spring .......................................... 26
9. STORAGE .................................................. 26
10. HANDLING AND TRANSPORTATION ....... 26
11. ASSISTANCE AND REPAIRS ..................... 26
12. WARRANTY COVERAGE .......................... 27
13. MAINTENANCE TABLE .............................. 28
14. PROBLEM IDENTIFICATION ..................... 29
15. ATTACHMENTS ......................................... 31

EN - 2
1. GENERAL INFORMATION
1.1 HOW TO READ THE MANUAL
Some paragraphs in the manual contain
important information regarding safety and
operation and are emphasized in this manner:
NOTE or IMPORTANT these give details
or further information on what has already been
said, and aim to prevent damage to the machine.
The symbol highlights danger. Non-
compliance with the warning could lead to
personal and/or third party injury and or damage.
The paragraphs highlighted in a square with
grey spots indicate the optional characteristics
not on all models documented in this manual.
Check if the characteristic is on this model.
Whenever reference is made to a position on the
machine "front", "back", "left" or "right" hand side,
this refers to the operator's working position.
1.2 REFERENCES
1.2.1 Figures
The gures in these instructions for
use are numbered 1, 2, 3, etc.
Components shown in the gures
are marked A, B, C, etc.
A reference to component C in gure 2 is
written: “See g. 2.C” or simply “(Fig. 2.C)”.
The gures are given as a guide only. The
actual parts may vary from those shown.
1.2.2 Titles
The manual is divided into chapters and
paragraphs. The title of paragraph “2.1 Training” is
a sub-title of “2. Safety regulations". References
to titles or paragraphs are marked with the
abbreviation chap. or par. and the relevant
number. Example: “chap. 2” or “par. 2.1"
2. SAFETY REGULATIONS
2.1 TRAINING
Become acquainted with the controls
and the proper use of the machine. Learn
how to stop the engine quickly. Failure
to follow the warnings and instructions
may result in re and/or serious injury.
• Never allow children or persons
unfamiliar with these instructions to
use the machine. Local regulations
may restrict the age of the operator.
• Never use the machine if the user is tired
or unwell, or has taken medicine, drugs,
alcohol or any substances which may slow
his reexes and compromise his judgement.
• Do not allow children or other
passengers to ride on the machine.
• Bear in mind that the operator or user is
responsible for accidents or unexpected
events occurring to other people or their
property. It is the user’s responsibility
to assess the potential risk of the area
where work is to be carried out, and
to take all the necessary precautions
to ensure his own safety and that of
others, particularly on slopes or rough,
slippery and unstable ground.
• If the machine is sold or lent to others, make
sure that the operator looks over the user
instructions contained in this manual.
2.2 PREPARATION
Personal Protective Equipment (PPE)
• Always wear suitable work attire, hard-
wearing safety footwear with non-slip soles
and long trousers. Do not operate the
machine when barefoot or wearing open
sandals. Wear hearing protection devices.
• The use of hearing protection devices may
reduce the operator's capacity to hear
warnings (cries or alarms). Monitor the area
in and around the working zone at all times.
• Never wear scarves, shirts, necklaces,
bracelets, clothing with owing parts, laces or
ties or any hanging or apping attachments
that could catch in the machine or in any
objects or materials in the work area.
• Tie your hair back if it is long.

EN - 3
Work area/Machine
• Thoroughly inspect the entire work
area and remove anything that could be
thrown by the machine or damage the
cutting device/rotating units (stones,
branches, iron wire, bones, etc.).
Internal combustion engines: fuel
DANGER! The fuel is highly ammable.
• Keep the fuel in approved
containers, in a safe place, away from
any naked lights or heat sources.
• Keep the containers and storage area free of
grass cuttings, leaves, or excessive grease.
• Keep the containers out of
the reach of children.
• Do not smoke when lling up with
fuel or when handling the fuel.
• Use a funnel to top up with
fuel only in the open air.
• Do not inhale fuel fumes.
• Never remove the tank cap or add
fuel while the engine is running
or when the engine is hot.
• Open the fuel tank slowly to allow the
pressure inside to decrease gradually.
• Do not approach the tank opening with
a naked ame to check its contents.
• If you have spilt some fuel, do not attempt to
start the engine but move the machine away
from the area of spillage and avoid creating
any source of ignition until the fuel has
evaporated and fuel vapours have dissipated.
• Immediately clean up all traces of fuel
spilt on the machine or on the ground.
• Replace caps of all fuel tanks
and containers securely.
• Never start the machine in the same
place in which you relled it with fuel; the
engine must be started in an area at least
3 metres from where you refuelled.
• If fuel is spilt on clothing, change
clothing before starting the engine.
2.3 DURING OPERATION
Work Area
• Do not operate the engine in a conned
space where dangerous carbon
monoxide fumes can develop. All starting
operations have to be carried out in an
open or well ventilated area. Always
remember that exhaust gases are toxic!
• When starting up the machine, do not direct
the silencer and therefore the exhaust
fumes towards ammable materials.
• Do not use the machine in environments at
risk of explosion, in the presence of ammable
liquids, gas or powder. Electrical contacts
and mechanical friction can generate sparks
that can ignite the powder or vapours.
• Work only in daylight or with good articial
light in good visibility conditions.
• Keep persons, children and animals away
from the working area. Instruct another adult
to supervise any children in the vicinity.
• Avoid working with wet grass, in the
rain and when there is a risk of a
thunderstorm, especially lightening.
• Pay careful attention to uneven ground
(hills, dips), slopes, hidden hazards and
obstacles that could limit visibility.
• Be very careful near ravines, ditches
or embankments. The machine could
overturn if a wheel slides over the
edge or if the earth gives way.
• Pay attention on sloping ground which
requires particular care to prevent overturning
or loss of control of the machine. The
main reasons for loss of control are:
– Insucient wheel grip
– Excessive speed
– Inadequate braking
– Type of machine unsuitable for its task
– Lack of awareness of the eect of
ground conditions, especially slopes
– Incorrect use as a towing machine.
• Be careful of trac when operating
the machine close to public roads.
• To avoid the risk of re, do not
leave the machine standing in high
grass with the engine running.
Behaviour
• When working behind the wheel, do
not become distracted and maintain
the required level of concentration.
• Exercise caution when reversing or
moving backwards. Look behind you to
make sure there are no obstacles before
and during operations in reverse gear.
• Use care when pulling loads or
using heavy equipment:
– Use approved draw-bar hitch
points only when towing;
– Limit loads to those that can
be handled safely;
– Do not turn sharply. Take
care when reversing;
– Use counterweight(s) or wheel weights
whenever advised in the owner's manual.
• Pay attention when using the grass catcher
and attachments that can alter the stability
of the machine, especially on slopes.
• Always keep hands and feet away
from the cutting device, when starting
and when using the machine.

EN - 4
• Attention: the cutting device will continue to
rotate for a few seconds after disengagement
or after you have switched o the engine.
• Pay attention to cutting device
assembly with more than one cutting
mean, as rotating cutting device can
trigger the rotation of the others.
• Keep away from the discharge opening.
• Do not touch the engine parts which
heat up during use. Burns hazard.
• To avoid the risk of re, do not
leave the machine standing in high
grass with the engine running.
If something breaks or an accident occurs
during work, turn o the engine immediately
and move the machine away to prevent further
damage; if an accident occurs with injuries
or third parties are injured, carry out the rst
aid measures most suitable for the situation
immediately and contact the medical authorities
for any necessary health care. Carefully
remove any debris which could cause damage
or injury to persons or animals if ignored.
Use limitations
• Never operate the machine with guards
damaged, missing or incorrectly
assembled (grass catcher, side discharge
guards rear discharge guards)
• Don’t use the machine if the attachments/
tools are not installed in their seats.
• Never disengage, deactivate, remove
or tamper with the safety systems/
micro-switches installed.
• Do not alter the engine regulator settings,
or run it at overspeed. Excessive engine
speeds increase the risk of injury to
operators and other persons.
• Do not strain the machine too much and
do not use a small machine for heavy-
duty work. If you use the right machine,
you will reduce the risk of hazards and
improve the quality of your work.
• The machine has not been approved
for use on public roads. It must be used
(as indicated by the highway code)
in private areas closed to trac.
2.4 MAINTENANCE, STORAGE
Ensure regular maintenance and correct
storage to maintain machine safety
and high performance levels.
Maintenance
• Never use the machine with worn or
damaged parts. Faulty or worn-out parts must
always be replaced and never repaired.
• To reduce the risk of re, regularly check
the machine for oil and/or fuel leaks.
• Be careful during adjustment of the
machine to prevent entrapment of the
ngers between moving parts of the cutting
device and xed parts of the machine.
The noise and vibration levels shown in these
instructions are the maximum levels for use of
the machine. The use of an unbalanced cutting
device, the excessive speed of movement, or
the absence of maintenance have a signicant
inuence on noise emissions and vibrations.
Consequently, it is necessary to take preventive
steps to eliminate possible damage due to
high levels of noise and stress from vibration.
Maintain the machine well, wear ear protection
devices, and take breaks while working.
Storage
• Do not store the machine with fuel in the tank
in an area where fuel vapours could reach a
naked light, a spark or a strong heat source.
• To reduce re risks, do not leave
containers with debris inside a room.
2.5 ENVIRONMENTAL PROTECTION
Safeguarding the environment must
be a relevant and priority aspect of
machine use, of benet to the community
and the environment we live in.
• Avoid being a disturbance to the
neighbourhood. Use this machine at
reasonable times of the day only (not
early morning or late evening when the
noise could cause disturbance).
• Adhere strictly to the local regulations
governing the disposal of packaging, oil,
fuel, lters, damaged parts or any other
element which may have an impact on
the environment; this waste should not be
disposed of along with standard household
waste, but must be disposed of separately
and sent to special waste disposal
facilities for handling and recycling.
• Comply with local regulations for
the disposal of waste materials
• When the machine is withdrawn from service,
do not dispose of it in the environment,
but take it to a waste disposal facility in
accordance with the local regulations in force.

EN - 5
3. GETTING TO KNOW THE MACHINE
3.1 DESCRIPTION OF THE MACHINE
AND PLANNED USE
This machine is a ride-on lawn
mower with seated operator.
The machine is equipped with an engine
which drives cutting device protected
by a casing, as well as a transmission
unit that moves the machine.
The machine is equipped with:
– a two wheel (2WD) or four wheel (4WD)
hydrostatic drive system, with innitely
variable forward and reverse gear ratios.
The operator is able to operate the
machine and use the main controls, always
seated in the operator's position.
The safety devices installed on the machine
will disengage the engine and cutting device
in a couple of seconds (par. 6.2.2).
3.1.1 Intended use
This machine was designed
and built to cut grass.
Generally speaking this machine can:
1. mow grass and collect it in
the grass catcher bag.
2. mow grass and deposit it on
the ground via the rear.
3. mow, chop and deposit the grass
on the ground (mulching eect).
4. mow the grass and deposit it
on the ground laterally.
The use of special attachments provided for
by the Manufacturer as original equipment or
which may be purchased separately, allows this
work to be done in various operating modes,
illustrated in this manual or the instructions
that accompany the single attachments.
Likewise, the intended use can be extended
to include other functions by applying
supplementary attachments (if provided
for by the Manufacturer), abiding by the
restrictions and conditions indicated in the
instructions accompanying the attachment.
3.1.2 Improper use
Any other usage not in keeping with the afore-
mentioned ones may be hazardous and harm
persons and/or damage things. Examples of
improper use may include, but are not limited to:
– allowing children, animals or other
passengers to ride on the machine as
they could fall o and injure themselves or
compromise safe driving by the operator;
– towing or pushing loads without the use
of the specied attachment for towing;
– using the machine for riding over unstable,
slippery, icy, stony, rough, marshy
ground or puddles that do not allow the
consistency of the ground to be assessed;
– using the cutting device on
surfaces other than grass;
– using of the machine for leaf
or debris collection.
IMPORTANT Improper use of the
machine will invalidate the warranty, relieve
the Manufacturer from all liabilities, and the
user will consequently be liable for all and
any damage or injury to himself or others.
3.1.3 User types
This machine is intended for use by
consumers, i.e. non-professional operators.
The machine is intended for "DIY" use only.
IMPORTANT The machine must
be used by one operator.
3.2 SAFETY SIGNS
Various symbols appear on the machine
(g. 2). They are used to remind the operator
of the behaviour to follow to use it with
the necessary attention and caution.
EN - 6
Meaning of symbols:
Warning! Read the
instructions before use.
Warning! Remove the key
and read the instructions
before carrying out any
maintenance or repair work.
Danger! Ejected objects:
Do not operate without either
the rear discharge guard or
the grass catcher being in
place. (for models with rear
collection system only).
Danger! Ejected objects:
Ensure persons remain
at a safe distance.
Danger! Machine rollover:
Do not use the machine on
gradients in excess of 10°.
Danger! Dismemberment:
Make sure that children
remain at a safe distance
from the machine when
the engine is running .
Cutting risk. Cutting
device in operation. Do not
insert hands or feet into the
cutting device housing.
Warning! Keep away
from hot surfaces.
Do not climb on the
machine by treading on the
cutting device assembly
protection panels.
max xxx N (xx kg)
max xxx N (xxx kg)
When using the towing
kit, do not exceed the load
limits indicated on the label,
and respect the applicable
safety regulations.
IMPORTANT Any damaged or illegible
decals must be replaced. Order replacement
decals from an Authorised Service Centre.
3.3 IDENTIFICATION LABEL
The identication label includes
the following data (g. 1):
1. Sound power level
2. CE Conformity marking
3. Year of manufacture
4. Type of machine
5. Serial number
6. Name and address of Manufacturer
7. Article code
8. Nominal power and maximum
operating engine speed
9. Weight in kg
10. Type of transmission
Write the identication data of the
machine in the specic space on the
label on the back of the cover page.
IMPORTANT Quote the information on
the product identication label whenever you
contact an Authorised Service Centre.
IMPORTANT The example of the
Declaration of Conformity is provided
on the last page of the manual.
3.4 MAIN COMPONENTS
The machine consists of a series of
main components, which perform
the following functions (g. 1):
A. Engine: this moves the cutting
device and drives the wheels. Its
specications and regulations for use
are described in a specic manual.
B. Cutting device assembly: this is
the assembly comprising the casing
that houses the rotating cutting
device, and the cutting device.
C. Cutting device: these are what cut the
grass; the ns at the ends help convey the
cut grass towards the discharge chute.
D. Rear discharge guard (available upon
request): this can be tted in place of
the grass catcher and prevents objects
from being drawn up by the cutting device
and hurled away from the machine.
(for rear collection models only).
E. Side discharge chute: in addition to
depositing the grass on the ground
laterally, the side chute also constitutes
a safety element, since it prevents
any objects picked up by the cutting
device from being projected long
EN - 7
distance from the machine (for models
with side discharge function only).
F. Grass catcher: in addition to collecting
the mown grass, the grass catcher also
constitutes a safety element, since it
prevents any objects picked up by the
cutting device from being projected
long distance from the machine (for
models with rear collector only).
G. Discharge chute: this is the part
connecting the cutting device
assembly to the grass catcher (for
models with rear collector only).
H. Driving seat: this is where the
machine operator sits. It has a sensor
connected to safety devices for detecting
the presence of the operator.
I. Steering wheel: turns the front wheels.
J. Front bumper: this protects the
front section of the machine.
K. Battery: provides the energy for starting the
engine. Its specications and regulations
for use are described in a specic manual.
4. ASSEMBLY
The safety regulations to follow
are described in chap. 2. Strictly
comply with these instructions to
avoid serious risks or hazards.
For storage and transport purposes, some
components of the machine are not installed
in the factory and have to be assembled after
unpacking. Follow the instructions below.
Unpacking and completing the assembly
should be done on a flat and stable surface,
with enough space for machine handling
and its packaging, always making use of
suitable equipment. Do not use the machine
until all the indications provided in the
“ASSEMBLY” section have been carried out.
4.1 ASSEMBLY COMPONENTS
The packaging holds the components needed
for assembly as listed in the table below:
Description
1 Steering wheel
2 Dashboard cover and steering
wheel assembly parts
3 Driving seat
4 Front bumper (if tted)
5 Bag with mounting screws etc. and in-
structions TS-TX-TH models only) (mod-
els with rear collector only)
6 Grass catcher bag supports and asso-
ciated attachments (models with rear
collector only)
7 Side discharge chute (for models with
side discharge only)
8 Cutting device assembly side strength-
eners (if tted).
9 Envelope containing:
- the instruction manuals and documents
- driving seat assembly screws
- side discharge chute assembly ttings
(for models with side discharge only)
- the connection screws for the battery
cables
- 2 starter keys
- 1 spare 10 A fuse
10 Mulching kit (models with side discharge
function only) (if tted).
4.1.1 Unpacking
1. Carefully open the packaging, paying
attention not to lose components.
2. Consult the documentation in the
box, including these instructions.
3. Remove all the unassembled
parts from the box.
4. Remove the machine from the packaging
taking the following precautions:
– move the cutting device assembly
to its maximum height (par. 5.11) to
protect it against damage when the
machine is lifted o the base pallet;
– Lift the machine o the base pallet.
5. Move the front drive release lever to
the released position (par. 5.4).
4.2 STEERING WHEEL ASSEMBLY
1. Put the machine on a at surface
and straighten the front wheels.
2. Using a screwdriver, remove the central cap
(g. 3.B) from the steering wheel (g. 3.A).
3. Fit the steering wheel (g. 3.A) onto the
protruding shaft (g. 3.C), rotate it so that the
spokes are facing the seat and then push
it so that the steering wheel hub couples
with the protruding end of the pin (g. 3.D).
4. Secure the steering wheel using the screw
(g. 3.E) and the washers (g. 3.F) e (g.
3.G) supplied, in the indicated sequence.
5. Tighten the screw (g. 3.E) fully
using a socket wrench.

EN - 8
6. Replace the cap on the steering wheel (g.
3.B) inserting it so that it clicks into place.
4.3 SEAT ASSEMBLY
Pull the regulator lever up (g. 4.C) and
slide the seat (g. 4.A) into the guide (g.
4.B) from the steering wheel side, until
it clicks into one of the six positions.
At this point, the seat has been mounted
securely, so that it cannot be removed again
without pressing the release lever (g. 4.D).
4.4 MOUNTING AND CONNECTING
THE BATTERY
The battery (g. 5.A) is housed under the
seat and secured by a spring (g. 5.B).
1. First connect the red wire (g. 5.C) to
the positive pole (+) and then the black
wire (g. 5.D) to the negative pole (–),
using the screws supplied as shown.
2. Mount the battery retaining spring (g. 5.B),
making sure that the cables are routed
correctly in front of the battery, so that they
are not pinched by the spring (g. 5.B).
IMPORTANT Always fully charge the
battery according to the instructions
in the battery booklet.
IMPORTANT To avoid tripping the electronic
board protection device, never attempt to start
the engine if the battery is not fully charged
!
4.5 MOUNTING THE GRASS
CATCHER SUPPORTS
Mount the two supports (g. 6.A) on
the rear plate (g. 6.B), using the three
screws (g. 6.C) supplied for each
support, as indicated, without locking
the corresponding nuts (g. 6.D).
Fasten the upper part of the grass catcher
frame (g. 6.E) to the supports and centre it
with respect to the rear plate (g. 6.B).
Adjust the position of the two supports (g.
6.F) with respect to the stop (g. 6.G) so that,
by rotating the grass catcher frame, the stud
(g. 6.H) ts into the housing correctly (g.
6.I).
Check again that the frame (g. 6.E) is
centred correctly with respect to the rear
plate (g. 6.B) and that it rotates correctly, as
described above, then tighten the fastening
screws (g. 6.C) and nuts (g. 6.D).
4.6 REMOVING THE GRASS
CATCHER RETAINING PAWL
When the machine is shipped the grass
catcher retaining catch (g. 7.A) is secured to
the rear plate by device of the hook (g. 7.B).
This must be removed before mounting
the grass catcher bag supports
and may no longer be used
4.7 MOUNTING THE REAR BUMPER
• Type “I” bumper
• Type “II” bumper
1. Mount the front bumper (g. 8.A) on
the lower part of the frame (g. 8.B)
using the four screws (g. 8.C).
4.8 MOUNTING THE GRASS
CATCHER BAG
• For TC model
1. First assemble the frame, uniting the
upper part (g. 9.A) with the lower
part (g. 9.B), using the nuts and bolts
supplied (g. 9.C) as indicated.
Position the angular plates (g.
9.D) and (g. 9.E), respecting the
right (R⇑) left (L⇑) alignment, and
securing them to the frame using
four self-tapping screws (g. 9.F).
2. Models with electrical tipping
function only: Mount the two rollers
(g. 9.G) on the support pins (g.
9.H), making sure that the catcher is
facing the support, and secure it using
elastic rings (g. 9.I). Next, secure the
supports to the front frame (g. 9.B)
using the nuts and bolts (g. 9.J).
3. Insert the frame into the canvas cover
(g. 9.K), making sure that it is positioned
correctly around the base. Attach the
various plastic proles to the frame
tubes using a screwdriver (g. 9.L).
4. Insert the handle (g. 9.M) via the holes
on the cover (g. 9.N), and secure the
resulting sub-assembly to the frame
using the screws (g. 9.O) as indicated,
and the rear self-tapping screws (g. 9.P).
5. Mount the strengthening cross bar
(g. 9.Q) under the frame using the
nuts and bolts (g. 9.R), so that the
at part is facing the canvas. Insert
the emptying lever (g. 9.S) into its
housing and t the retaining screw (g.
9.T) and associated nut (g. 9.U).
EN - 9
• TS-TX-TH models
Complete the grass catcher mounting
sequence as described in the instruction
sheets supplied with the components.
4.9 MOUNTING THE GRASS
CATCHER TIPPING LEVERS
Position the lever shaft (g. 10.A) so
that it lies in the groove in the two plates
(g. 10.B) and secure it to the inner
part of the grass catcher bag supports
(g. 10.C), using the nuts and bolts (g.
10.D) supplied in accordance with the
sequence indicated in the gure.
Connect the end of the lifting piston
shaft (g. 10.E) to the lever (g. 10.F)
by using the pin (g. 10.G) and mount
the two elastic rings (g. 10.H).
Before mounting the grass catcher
bag on its support, make sure that
tipping levers move correctly.
4.10 MOUNTING THE SIDE GUARDS
OF THE CUTTING DEVICE
ASSEMBLY(IFANY)
Mount the safety panels (g. 11.A) using
the screws (g. 11.B) and nuts (g. 11.C)
supplied, in accordance with the instructions
provided for each machine type.
4.11 SIDE DISCHARGE CHUTE
ASSEMBLY(FORMODELSWITH
SIDEDISCHARGEONLY)
1. From the inside of the side discharge
chute (g. 12.A), t the spring (g.
12.B) by inserting the terminal (g.
12.B.1) into the hole and turning it so
that both the spring (g. 12.B) and
the terminal (g. 12.B.2) are securely
positioned in their housings.
2. Position the side discharge chute (g.
12.A) in line with the cutting device
assembly brackets (g. 12.C). Using a
screwdriver, turn the second terminal (g.
12.B.2) of the spring (g. 12.B) to bring
it outside the side discharge chute.
3. Fit the pin (g. 12.D) in the holes
on the brackets (g. 12.C) and on
the side discharge chute, so that it
passes through the coils of the spring
(g. 12.B) and the drilled end comes
out of the inner most bracket.
4. Insert the cotter pin (g. 12.E) into
the hole (g. D.1) on the pin (g. 12.D)
and rotate the pin in order to bend
the two ends (g. 12.E.1) of the cotter
pin, (with the aid of a pair of pliers),
so that it cannot slide out, causing
the pin (g. 12.D) to disengage.
Check that the spring works
correctly and keep the side discharge
chute securely lowered. Make sure
that the pin is fitted properly to prevent
it from falling out accidentally.
IMPORTANT For models with optional
side unloading: make sure that the side
unloading guard (Fig. 21.A) is lowered and
locked by the safety lever (Fig. 21.B).
IMPORTANT Before disassembling or
servicing the deector, always push the safety
lever (Fig. 21.B) and lift the side unloading
guard (Fig. 21.A) to allow disassembly.
NOTE To remove the deector, perform
assembly steps in reverse order.
5. CONTROLS
5.1 BRAKE PEDAL
This pedal operates the brakes on
the rear wheels (g. 13.A, 14.A)
5.2 FORWARD GEAR PEDAL
This pedal is used to apply traction to the
wheels and regulate the speed of the machine
when it is moving forward (g. 13.B, 14.B):
1. Forward drive gear. Increasing
the pressure on the pedal
progressively increases the
speed of the machine.
EN - 10
2. Neutral position. The pedal
automatically goes into neutral
position when released.
NOTE The “Neutral” condition is
indicated by the lamp (g. 16.F).
NOTE If the operator presses the
pedal while the parking brake (g.
13.D) is on, the engine stops.
5.3 REVERSE GEAR PEDAL
This pedal is used to apply traction to
the wheels in reverse and regulate the
speed of the machine (g. 13.C, 14.C):
1. Reverse gear. Increasing
the pressure on the pedal
progressively increases the
speed of the machine.
Reverse must only
be engaged when the
machine has stopped.
2. Neutral position. The pedal
automatically goes into neutral
position when released.
NOTE The “Neutral” condition is
indicated by the lamp (g. 16.F).
NOTE If the operator presses the
pedal while the parking brake (g.
15.D) is on, the engine stops.
5.4 HYDROSTATIC DRIVE
RELEASE COMMAND
This command has two positions, as
indicated on the label (g. 13.D, 14.D):
1. Drive engaged : for all uses,
when moving and during cutting.
2. Drive disengaged : this
makes it much easier to move
the machine by hand, with
the engineturnedo.
IMPORTANT To avoid damaging the drive
unit, perform this operation only when the
engine is stopped and the pedals (g. 13.B,
13.C, 14.B, 14.C) are in the neutral position.
• 4WD model only
The machine may only be moved easily
backwards, even if the rear drive is released.
5.5 KEY IGNITION SWITCH
The key enables/disables the machine ignition
It has three positions (g. 15.A):
1. Stop position. The machine
turns o immediately.
2. On position. All functions are active.
3. Start position. Switch on the
starter motor to start the machine.
If you release the key on start it
will automatically return to On.
5.6 THROTTLE COMMAND
Regulates the engine's r.p.m.
Depending on the type of motor, there
are two types of throttle control:
A. Type “I” with separate Choke
command (Fig. 15.B + Fig. 15.C)
B. Type “II” (Fig. 15.B)
The positions shown correspond to:
1. Choke Command - Cold start.
(if tted) This command is used to
start the engine when it is cold. The
«CHOKE» position enriches the
mixture so it must only be used for
the time necessary for cold starts.
2. Maximum engine speed. To
be used always when starting
the machine, while it is On and
during grass cutting operations.
3. Minimum engine speed. Used
when the engine is suciently warm
during stationary periods of operation.
NOTE When moving from one area
to another, place the lever in a position
between "tortoise" and "hare".
NOTE Some models are equipped
with a system that automatically controls
EN - 11
the choke position in the carburettor
during engine ignition and heating.
5.7 PARKING BRAKE LEVER
This lever stops the machine from
moving when it has been parked.
This lever has two positions (g.
15.D), corresponding to:
1. Brake not engaged. To release
the parking brake, press the pedal
(g. 13.A, 14.A). The lever returns
to the brake disengaged position.
2. Brake engaged. To engage the
parking brake, press the pedal
down as far as it will go (g. 13.A,
14.A) and move the lever to the
brake engaged position. When you
take your foot o the pedal it will be
blocked in the lowered position.
5.8 HEADLIGHTS SWITCH
This button (g. 15.E) is used to
control the headlights when the key
(g. 15.A) is in the «ON» position.
5.9 CUTTING DEVICE ENGAGE AND
DISENGAGE FUNCTIONS
This control is used to engage and
disengage the cutting device by using
of an electro-magnetic clutch:
1. Cutting device engaged.
Mushroom type button pulled
out
(g. 15.F.1)
or button
pressed
(g. 15.F.2)
.
2. Cutting device disengaged.
Mushroom type button
pressed
(g. 15.F.1)
or button
released
(g. 15.F.2)
.
When the cutting device are
disengaged, a brake is applied
simultaneously in order to stop them
rotating within a few seconds.
NOTE The “Cutting device disengaged”
condition is indicated by the lamp (g. 16.A).
NOTE If you engage the cutting device
without taking the necessary safety
precautions, the engine shuts down and
cannot be restarted (see par. 6.2.2)
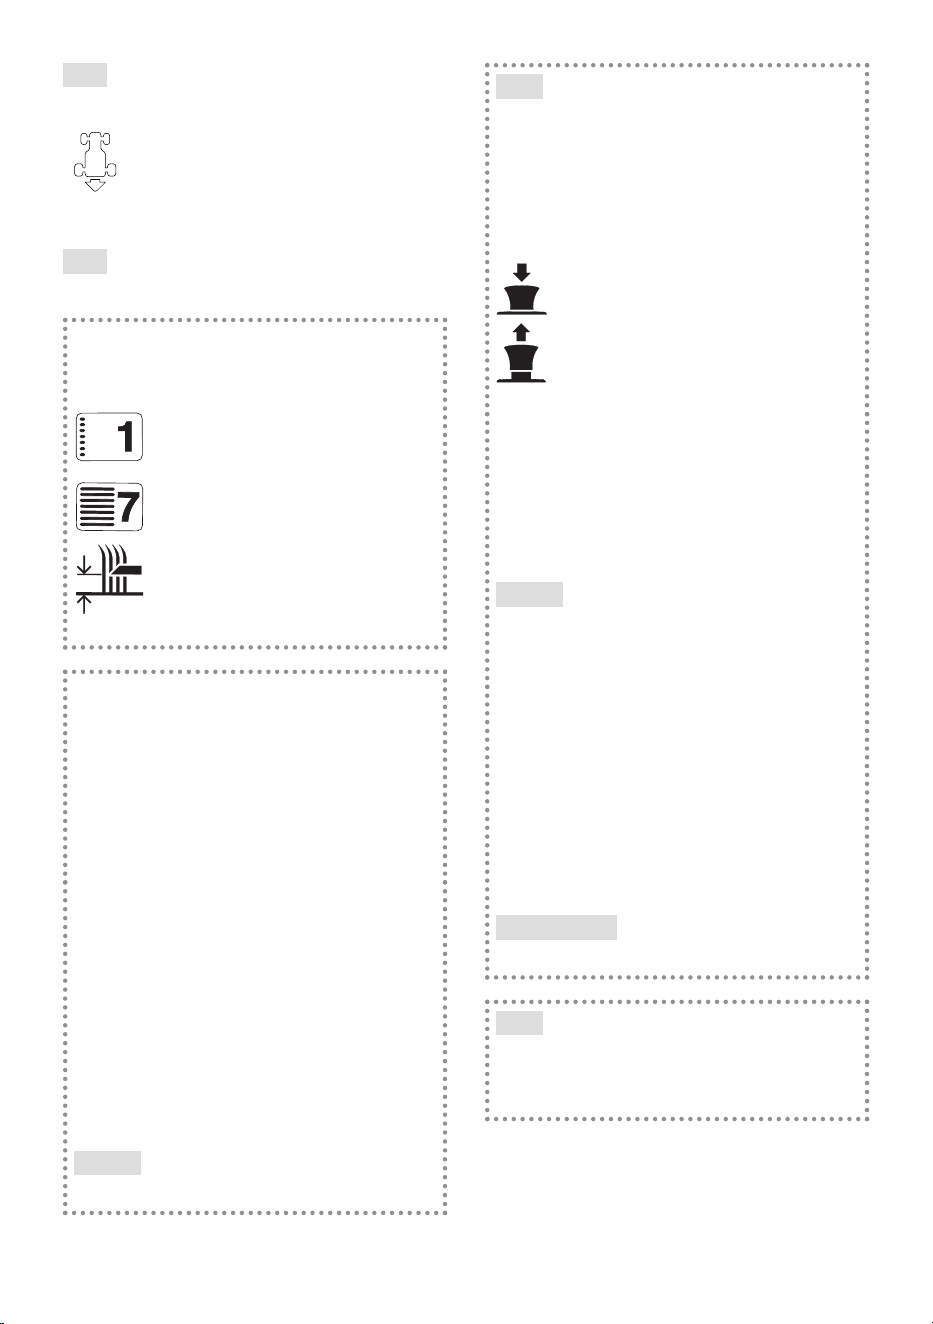
EN - 12
5.10 ENABLE REVERSE GEAR
CUTTING BUTTON
Press and hold the button (g.
15.G) to reverse while the cutting
device are engaged, without
causing the engine to stop.
5.11 CONTROLS FOR ADJUSTING THE
CUTTING UNIT ASSEMBLY HEIGHT
• Control with lever
This lever is used to raise and lower the cutting
device assembly, which may be positioned
at 7 dierent cutting heights (g. 15.H).
The seven positions for this lever,
shown as «1» to «7» on the label,
correspond to various cutting
heights between 3 and 9 cm.
To change positions,
press the release button
on the end of the lever.
• Control with lever and knob
This lever (g. 15.H) is used to raise and
lower the cutting device assembly.
• Position «A»
Cutting device assembly raised.
• Position «B»
Cutting device assembly lowered.
The knob (g. 15.I) is used to set the
cutting device assembly to one of 9
dierent positions, corresponding to nine
cutting heights between 2 and 10 cm.
1. Set the lever (g. 15.H) to position «A» .
2. Adjust the cutting height using
the knob (g. 15.I).
3. Set the lever (g. 15.H) to position
«B» to move the cutting device
assembly automatically to a
pre-dened cutting height.
NOTE Set the lever (g. 15.H) to position
«A» during transport and shipping.
5.12 SPEED CRUISE CONTROL
This device is used to maintain the
forward speed at the desired value,
without having to maintain pressure
on the pedal (g. 13.B, 14.B).
The mushroom type control
button has two positions:
1. Pressed. Device disabled
(deactivated)
2. Pulled out. Device
enabled (active)
• When the device is activated, the machine
maintains the same forward speed, without
having to operate the pedal (g. 13.B, 14.B).
• The device cannot be used
in reverse mode.
• The reverse pedal is disabled when this
device is enabled (g. 13.C, 14.C).
NOTE Speeds may vary with respect
to the selected value when the machine
is moving up or down slopes.
To deactivate the device and restore pedal
speed control (g. 13.B, 14.B) simply:
• press the pedal (g. 13.B, 14.B);
or
• press the brake pedal (g. 13.A, 14.A).
In both cases, the mushroom button will return
automatically to the «Pressed» position.
IMPORTANT Never use the mushroom
button to deactivate the device.
5.13 COUNTER(IFFITTED)
The counter (g. 15.K) is activated whenever
the key (g. 15.A) is set to the «ON» position,
and indicates the engine operating hours.
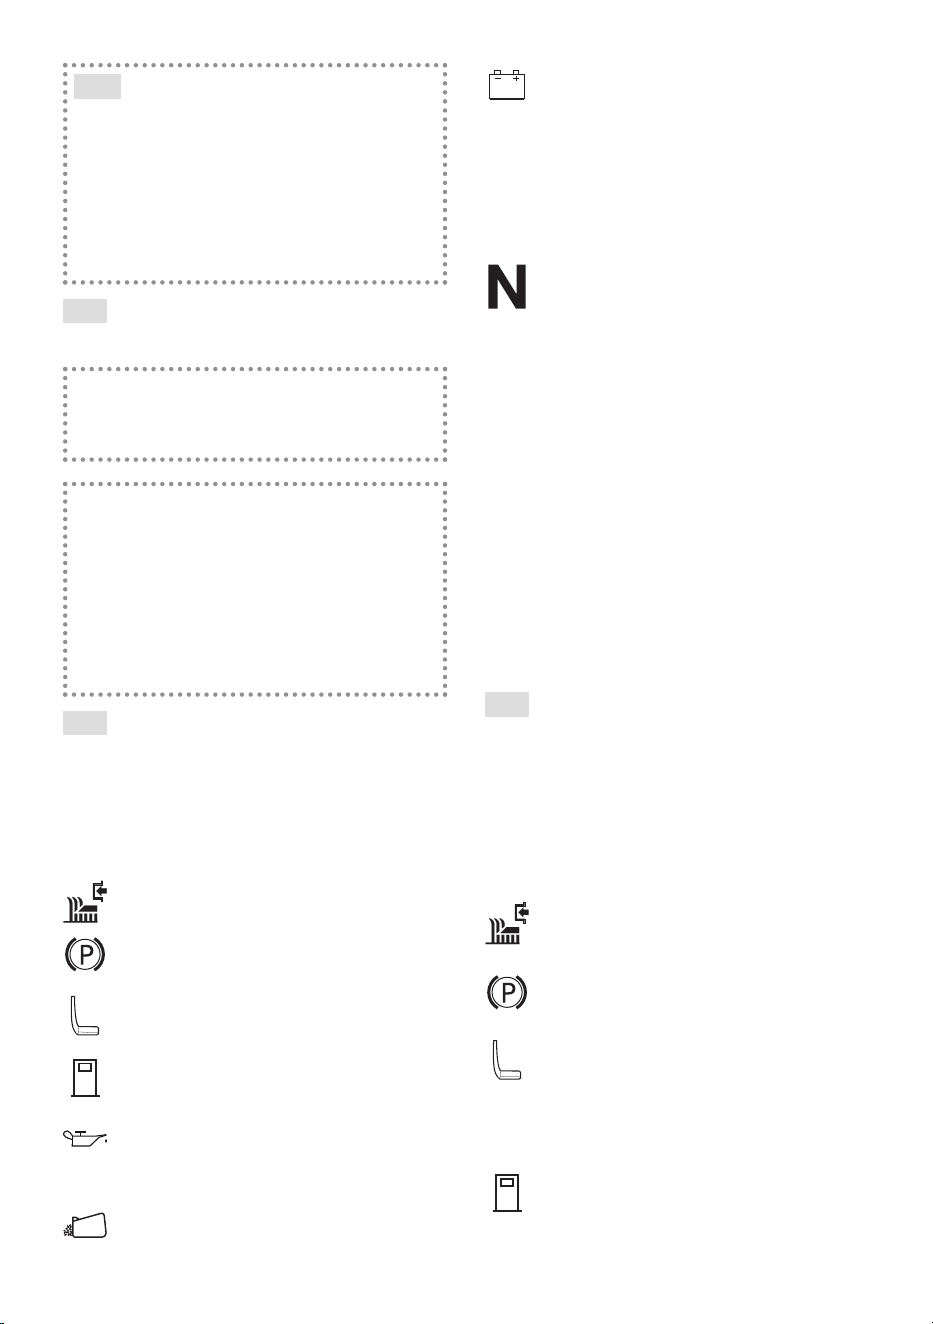
EN - 13
5.14 AUXILIARY SOCKET
FOR ACCESSORIES
This socket can be used to connect
electrical devices that run o a 12 Volt dc
power supply, with a maximum power rating
of 50 Watt, and tted with a compatible
plug (motoring type plug) (g. 15.M).
– The socket is live only when the key
(g. 15.A) is in the «ON» position.
5.15 GRASS CATCHER
TIPPING COMMAND
• Manual command
To tip the grass catcher bag in order to
empty it, the operator must extract the
lever (g. 15.L) from its housing .
• Electrical command
To tip the grass catcher bag in order
to empty it, the operator must press
and hold the button (g. 15.N) until the
command motor stops running.
The grass catcher is returned to the working
position by pressing and holding the button
(g. 15.O) until the retaining catch locks into
place and the command motor stops running.
5.16 TYPE "I" DISPLAY AND BUZZERS
When the key is turned to the «ON» position,
all the indicator lights switch on for about half
a second (accompanied by a short acoustic
signal) to indicate that they function correctly.
Thereafter, these lights indicate:
Indicator light ON: cutting
devices engaged (Fig. 16.A).
Indicator light ON: parking
brake engaged (Fig. 16.B).
Indicator light ON: operator
not present (Fig. 16.C).
Flashing indicator light: fuel
is in reserve (Fig. 16.D).
Flashing indicator light: engine
lubrication faults (Fig. 16.E). Stop
engine immediately, check oil level and
contact an Authorized Service Centre.
Indicator light ON: grass catcher or rear
discharge guard missing (Fig. 16F);
Indicator light ON: when the engine
is running there are battery re-
charging faults (Fig. 16.G).
Flashing indicator light before start-
up: the battery is unable to start
the engine. Contact an Authorized
Service Centre (Fig. 16.G).
Indicator light ON: transmission
in "neutral" (Fig. 16.H).
• Acoustic signals - Buzzer
There are two types of acoustic signal:
1. Continuous
acoustic signal:
• Electronic card protection
system has intervened.
• The engine has been
switched o for more than
30 seconds with the key
in the "DRIVE" position.
2. Intermittent
acoustic signal:
• The grass catcher is full.
5.17 TYPE "II" DISPLAY AND BUZZERS
When the key is turned to the «ON» position,
all the icons switch on for about half a second
(accompanied by a short acoustic signal)
to indicate that they function correctly, then
the display goes into "Timer" mode.
Thereafter, these lights indicate:
Indicator light ON: cutting
devices engaged (Fig. 16.A).
Indicator light ON: parking
brake engaged (Fig. 16.B).
Indicator light ON: operator
not present (Fig. 16.C).
Simple fuel indicator light (Fig. 16.D).
Flashing indicator light: fuel is in reserve.
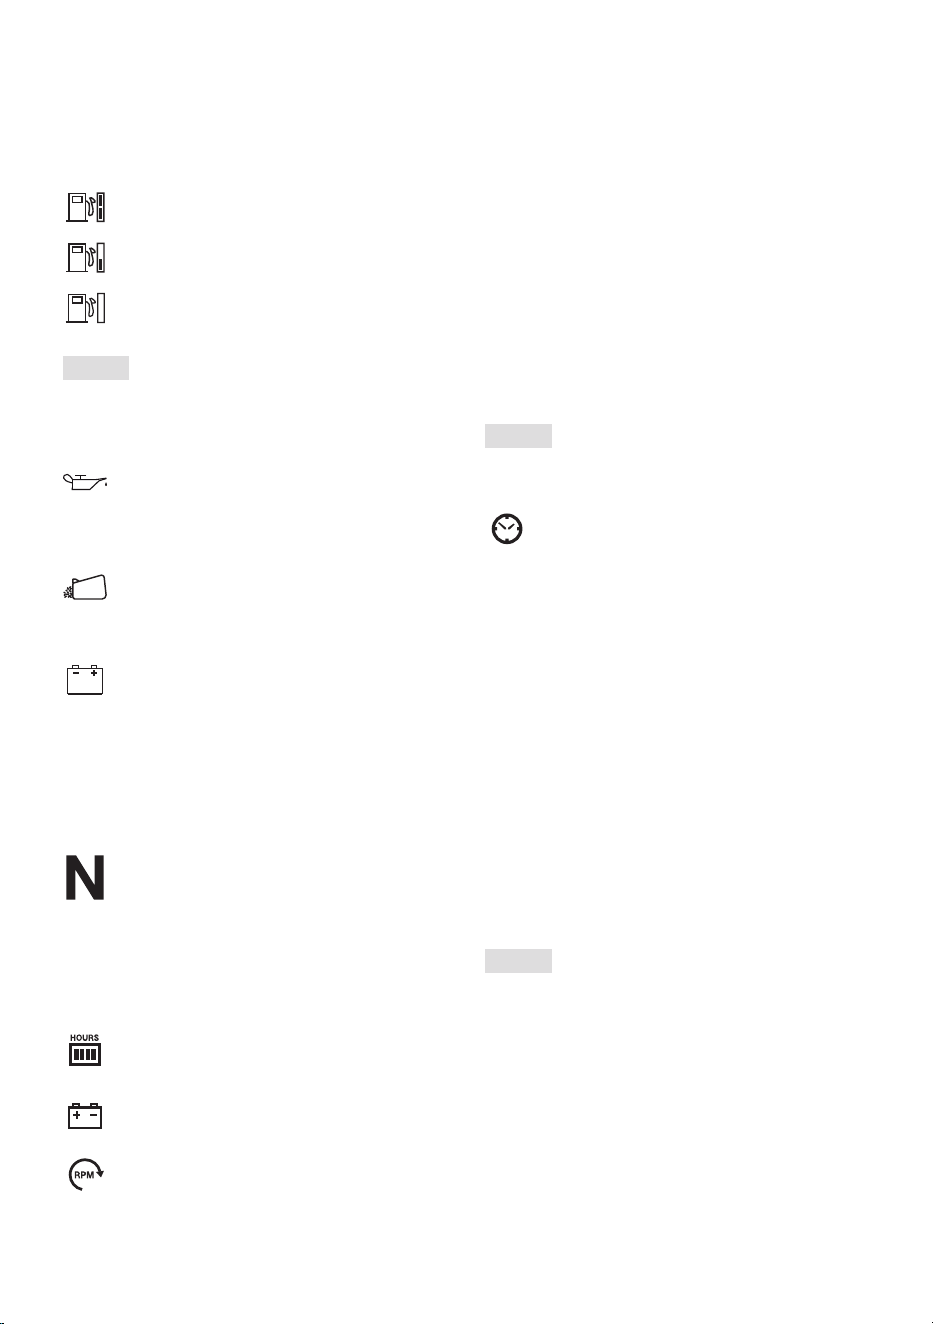
EN - 14
Fuel indicator light with level
indicator (Fig. 16.D).
The indicator light shows the fuel level in the
tank in accordance with the following criteria:
Fuel level is between full
and about half full.
Fuel level is between half full and reserve.
Fuel level is in reserve.
NOTE The reserve tank holds
approximately 2 litres of fuel, which is
sucient for operating the machine for 30-
40 minutes at nominal engine speed.
Flashing indicator light: engine
lubrication faults (Fig. 16.E). Stop
engine immediately, check oil level and
contact an Authorized Service Centre.
Indicator light ON: Grass catcher or rear
discharge guard missing (Fig. 16F) (only
for models with rear grass catcher);
Indicator light ON: when the engine
is running there are battery re-
charging faults (Fig. 16.G).
Flashing indicator light before start-
up: the battery is unable to start
the engine. Contact an Authorized
Service Centre (Fig. 16.G).
Indicator light ON: transmission
in "neutral" (Fig. 16.H).
• Operating functions
Press the "MODE" button to access
operating functions in sequence.
Hour meter (Fig. 16.I). Indicates the total
number of engine operating hours.
Voltmeter (Fig. 16.O). Indicates
the battery charge state.
Tachometer (Fig. 16.K) Indicates the
engine speed as numerical values or a
series of asterisks, corresponding to:
Displayed values:
< 1600 engine idling speed
< 2500 transfer speed
> 2500 cutting speed
*
(**)
engine idling speed
**
***
****
transfer speed
*****
******
cutting speed
NOTE When the engine speed display is
ashing, it indicates that the current engine
speed is unsuitable for mowing grass.
Clock (if present) (Fig. 16.L) Indicates
the time in 24 hour/day mode.
To set-up the clock, turn the ignition key
to the «ON» position and, without starting
the engine, proceed as follows:
• Press the "MODE" key repeatedly
until the clock icon appears.
• Hold the "MODE" button pressed until
the rst two digits (hour) ash.
• Press one of the two side buttons
(Fig. 16.K, L) to increase or decrease
the setting by one unit.
• Press the "MODE" button until the
other two digits (minutes) ash.
• Press one of the two side buttons to increase
or decrease the setting by one unit.
• Press the "MODE" button to
complete the setting.
NOTE The clock is powered by a back-
up battery; when this battery goes at,
contact an Authorised Service Centre.
• Acoustic signals - Buzzer
There are two types of acoustic signal:
1. Continuous
acoustic signal:
• Electronic card protection
system has intervened.
• The engine has been
switched o for more than
30 seconds with the key
in the "DRIVE" position.
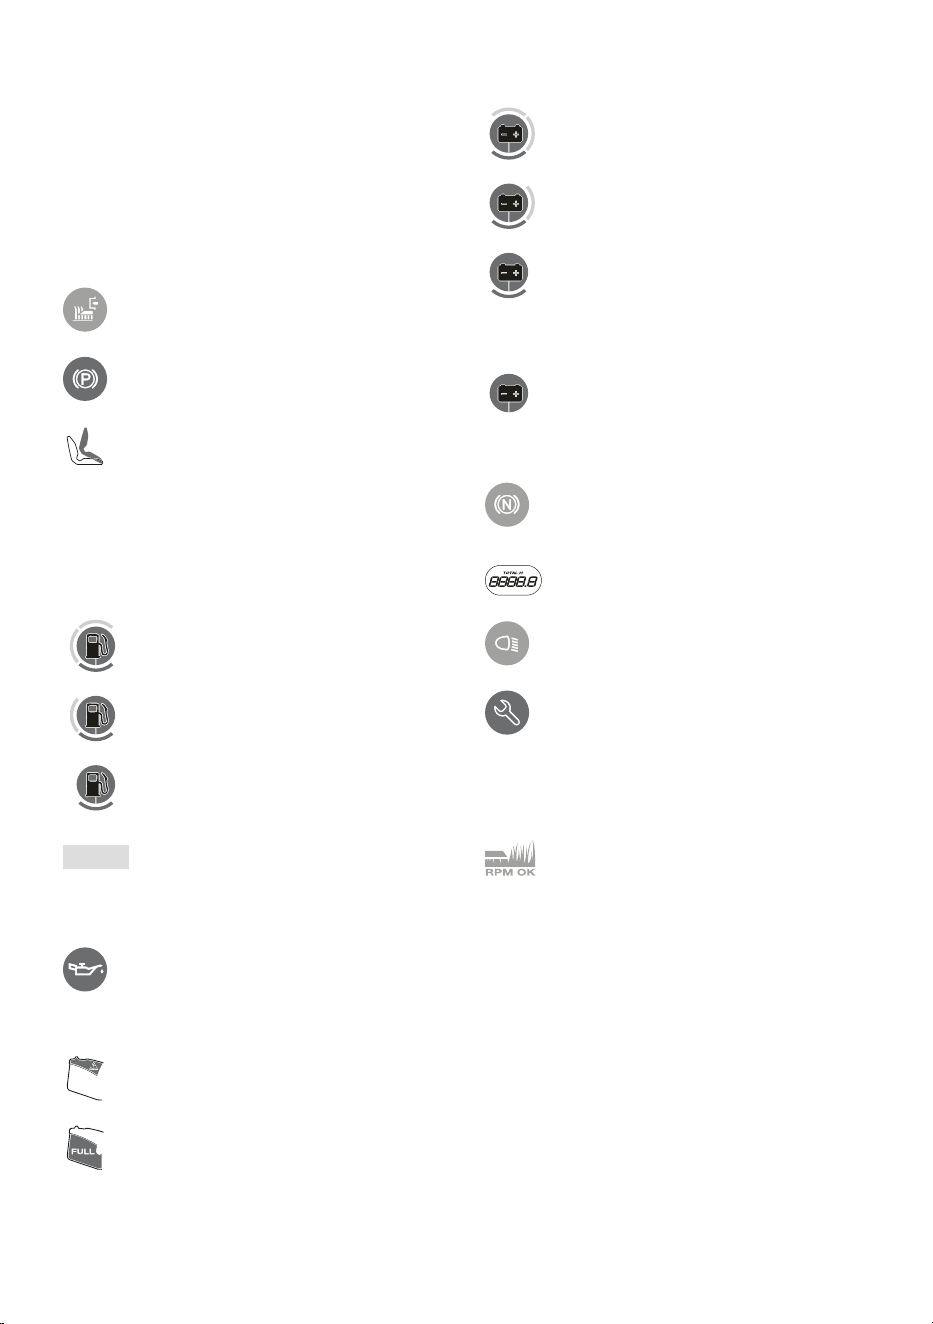
EN - 15
2. Intermittent
acoustic signal:
• The grass catcher is full.
TYPE "III" DISPLAY AND BUZZERS
When the key is turned to the "DRIVE" position,
all the icons switch on for about half a second
(accompanied by a short acoustic signal)
to indicate that they function correctly.
Thereafter, these icons indicate:
Icon ON: cutting devices
engaged (Fig. 16.A).
Icon ON: parking brake
engaged (Fig. 16.B).
Indicator light ON: operator
not present (Fig. 16.C).
Fuel icon with level indicator (Fig. 16.D).
The icon indicates the fuel level in the tank
in accordance with the following criteria:
Fuel level is between full
and about half full.
Fuel level is between half full and reserve.
Fuel level is in reserve.
NOTE The reserve tank holds
approximately 2 litres of fuel, which is
sucient to operate the machine for 30-
40 minutes at nominal engine speed.
Icon ON: engine lubrication faults
(Fig. 16.E). Stop engine immediately,
check oil level and contact an
Authorized Service Centre.
Icon ON: Grass catcher or rear discharge
guard missing (Fig. 16F) (only for
models with rear grass catcher);
Icon ON: The grass catcher is full and
must be emptied (Fig. 16.F) (only for
models with rear grass catcher).
Battery icon with level indicator (Fig. 16.G).
Icon ON: Battery is charging.
Icon ON: Battery voltage level is optimal.
Icon on with engine o: Indicates
that the battery needs re-charging
Icon on with engine on: Indicates
battery charging problems.
Flashing icon: The battery is unable
to start the engine. You must contact
an Authorized Service Centre.
Icon ON: transmission in
"neutral" (Fig. 16.H).
Hour meter (Fig. 16.I). Indicates the total
number of engine operating hours.
Headlights (Fig. 16.P). Icon ON:
Indicates that the headlights are on.
Maintenance required (Fig. 16.Q).
Icon ON: Routine maintenance
indicator. The maintenance schedule
to follow is described in section
13. The icon comes ON every 50
hours and remains ON for 1 hour.
Green Area (Fig. 16.R). The
engine rotation speed is suitable
for optimal grass cutting.
• Acoustic signals - Buzzer
There are two types of acoustic signal:
1. Continuous
acoustic signal:
• Electronic card protection
system has intervened.
• The engine has been
switched o for more than
30 seconds with the key
in the "DRIVE" position.
2. Intermittent
acoustic signal:
• The grass catcher is full.
EN - 16
6. USING THE MACHINE
The safety regulations to follow
are described in chap. 2. Strictly
comply with these instructions to
avoid serious risks or hazards.
6.1 PREPARATION
Before starting to mow, it is necessary to carry
out several checks and operations to ensure you
can work eciently and in maximum safety.
1. ensure the machine is level and
resting safely on the ground:
2. select the appropriate operating
mode (par. 6.1.4);
6.1.1 Filling with oil and fuel
IMPORTANT The machine is
supplied without engine oil or fuel.
Before using the machine check for fuel and
the oil level (par. 7.2, par. 7.3). For refuelling
and oil top-up methods and precautions
follow the instructions given in (par. 7.2,
par. 7.3) and in the engine handbook.
6.1.2 Seat adjustment
The sliding seat may be set to one
of six dierent positions.
To adjust it, lift the handle (g. 17.A), slide
the seat and lock it in the desired position.
6.1.3 Tyre pressure
Having the right tyre pressure is the main
condition for ensuring that the cutting device
assembly is horizontal and mows evenly.
1. Unscrew the valve caps
2. Connect a compressed air line with
a gauge to the valves (g. 18)
3. Adjust the pressure according to the values
indicated in the "Technical Data" chart.
6.1.4 Preparing the machine
before starting work
NOTE This machine can be used to
mow lawns in a number of dierent ways;
before starting work, prepare the machine
based on how the lawn is to be mowed.
a. Preparation for grass cutting and
collection in the grass catcher (for
rear collection models only)
– Couple the grass catcher (g. 19.A) to
its supports (g. 19.B) and centre it with
respect to the plate, making sure that the
two reference marks are aligned (g. 19.B).
– Make sure that the lower pipe
of the grass catcher opening is
attached to the pawl (g. 19.C).
– If the coupling is dicult or too loose,
regulate the retaining spring (see 8.9).
b. Preparation for mowing and rear
grass discharge (models with rear
grasscatcheronly)(iftted)
– If you decide to work without the grass
catcher, a rear discharge guard kit
is available upon request (Fig. 20,
section 15.7) which must be securely
mounted on the rear plate as indicated
in the instructions provided.
c. Preparation for mowing and
mulching of grass
– If you decide to mow the grass, mulching
it and leaving it on the grass, a "mulching"
kit is available upon request (chap.
15.1). This has to be attached to the rear
plate as indicated in the instructions.
In the case of models with
side discharge, make sure that the
lateral discharge support has been
mounted (fig. 22.A) (if fitted).
d. Prepare the machine for cutting
and lateral grass discharge (for
models with side discharge only):
– Always make sure that the spring inside
the deector (Fig. 21.A) and the safety
lever (Fig. 21.B) operate correctly,
holding it rmly in the lowered position.
– When cutting tall or wet grass,
we recommend removing the
lateral discharge strengthener
(g. 22.A) (if tted).
– To remove the strengthener,
undo the screws (g. 22.B) while
maintaining the side discharge chute
in the raised position (g. 22.C).
In the event of collisions without
the side discharge strengthener
fitted (fig. 22.A), the cutting device
assembly may be deformed.
Always remember to replace the
side discharge strengthener after use.

EN - 17
6.1.5 Positioning the anti-scalping wheels
The anti-scalping wheels are used to reduce
the risk of tearing up sections of lawn, which
can occur when the edge of the cutting device
assembly drags over irregular ground.
Position the wheels as indicated (par. 7.4).
6.2 SAFETY CHECKS
Run the following safety checks and
check that the results correspond to
those outlined on the tables.
Always carry out the safety
checks before use.
6.2.1 General safety check
Object Result
Battery No damage to the casing,
cover or terminals
Rear discharge guard,
grass catcher
Good condition. No
damage. Properly
installed.
Side discharge
guard, suction grid
Good condition. No
damage. Properly
installed
Fuel lines and
connections.
No leaks.
Electrical cables. All insulation intact.
No mechanical damage.
Oil lines No leaks.
No damage.
Safety devices Proceed as indicated
in par. 6.2.2
6.2.2 Control of safety devices
The safety devices work in two ways:
A. they prevent the engine from starting if all
the safety requirements have not been met;
B. by stopping the engine if even just one
of the safety requirements is lacking.
Action Result
1. gear in “neutral”;
2. cutting device
disengaged;
3. operator seated.
The engine starts
the operator leaves his seat The engine stops
Action Result
the grass catcher is lifted
or the rear discharge
guard removed without
disengaging the cutting
device (for rear collection
models only)
The engine stops
the parking brake is engaged
without disengaging
the cutting device
The engine stops
the speed change is
activated or the drive
pedal with the parking
brake engaged
The engine stops
the reverse gear is
engaged with the cutting
device engaged, without
pressing the consent
button (par. 5.10)
The engine stops
Drive the machine forwards
and backwards, shift to
neutral /release the drive
pedal (par. 5.2; par. 5.3)
The machine slows
down and stops
Press the brake
pedal (par. 5.1)
The machine stops
Test driving No abnormal
vibrations.
No abnormal sound
If any of the results fail to match the
indications provided in the tables, do not
use the machine! Contact a service centre to
have it checked and repaired if necessary.
IMPORTANT Always bear in mind that
the safety devices prevent the engine from
starting if safety requirements have not
been met. In these cases, once the start
consent has been reinstated, the ignition
key (g. 15.A) must rst be turned back to
O before the engine can be restarted.
6.3 USING ON SLOPES
Comply with the limits indicated in the
"Technical Data" Tables as in "g. 24"
regardless of the mowing direction.
Remember there is no such thing as a "safe”
slope. Driving on grass slopes requires
particular care. To prevent overturning
or loss of control over the machine:
• Never mow across the face of the slope.
Lawns on a slope have to be mowed moving
up and down and never across them. When
changing direction, take great care that
the wheels facing the slope do not hit any
obstacles (such as stones, branches, roots,

EN - 18
etc.) that may cause the machine to slide
sideways, tip over or make you lose control.
• Do not stop or start suddenly
when going up or downhill;
• Shift to drive gear very gently paying
particular attention to prevent the
machine from tipping up.
• Reduce speed:
– before changing direction
and during tight turns
– before facing a slope, particularly downhill
• Never switch to reverse gear to decrease
speed when going downhill: this could
cause loss of control of the machine,
especially on slippery ground.
• Always engage the parking brake
before leaving the machine at a
standstill and unattended.
• In order to exploit the braking eect of the
hydrostatic drive, when the transmission
is not engaged, avoid pressing the
drive pedal when moving down hill
6.4 START-UP
1. Open the fuel tap (g. 25.A) (if provided).
2. Sit in the operator’s position.
3. Put the drive into neutral («N»)
(par. 5.2; par. 5.3).
4. Disengage the cutting device (par. 5.9).
5. Engage the parking brake (par. 5.7).
6. Shift the throttle control to maximum
"hare" speed position (par. 5.6).
7. If cold starting: engage choke
control (para 5.6) (if present).
8. Insert the key switch and turn it to the
running position to engage the electric
circuit. Wait for 2 seconds and turn it to
the start-up position to start the engine.
9. Release the ignition key once
the engine has started.
10. If cold starting: as soon as
the engine ticks over:
10a. Deactivate the choke command
(par. 5.6, type "II"), setting the
accelerator command to the
maximum speed - “hare” (if tted).
10b. Deactivate the choke command
(par. 5.6, type "I") (if tted).
NOTE Using the choke when the engine
is already warm can foul the spark plugs
and cause the engine to run erratically.
11. When the engine has started, shift
the throttle control to the minimum
«tortoise» speed position.
NOTE If there are engine starting problems,
do not persist as you can risk running the
battery at and ooding the engine. Turn
the key to the O position, wait for a few
minutes and then repeat the operation. If
the malfunction persists, refer to the engine
manual and chapter «14» in this manual.
6.5 OPERATION
6.5.1 Forward gear and riding
without mowing
When moving the machine:
• disengage the cutting device (par. 5.9);
• set the cutting device assembly to the
fully raised position (par. 5.11);
• shift the throttle control to a point
midway between the «tortoise»
and «hare» speed positions.
• release the parking brake by releasing
the brake pedal (par. 5.7).
• press the drive pedal (par. 5.2) in the
“forward” direction and accelerate to the
desired speed by applying pressure to
the pedal and operating the throttle.
Drive must be engaged in accordance
with the modes described (paragraph
5.2) to avoid sudden meshing,
jerking start and loss of control of
the vehicle, especially on slopes.
6.5.2 Braking
Reduce machine speed by decreasing the
engine speed, then press the brake pedal
(par. 5.1) to reduce the speed further, until
bringing the machine to a standstill.
The machine can be signicantly slowed down
by releasing the drive pedal (section 5.2).
6.5.3 Reverse gear
IMPORTANT Reverse must be engaged
when the machine has stopped.
1. Press the pedal (par. 5.1) until the
machine comes to a stop;
2. Start reversing by pressing the drive
pedal in the “R” direction (par. 5.3).
6.5.4 Grass cutting
To operate the machine proceed
as described below:

EN - 19
1. shift the throttle to the maximum speed
position ("hare"); this position is always
used when using the machine;
2. bring the cutting device assembly
to the highest position;
3. engage the cutting device (par. 5.9) only on
grass lawns; avoid engaging them on stony
ground or when the grass is very high;
4. When starting to cut grass, start o slowly
and carefully, as described above;
5. Regulate the speed and cutting height
(par. 5.11) according to the lawn conditions
(grass height, density and humidity) and
the quantity of grass to be removed;
6. The appearance of the lawn will be improved
if the grass is always cut at the same height
and in two alternating directions (g. 27).
IMPORTANT To proceed in reverse gear
with the cutting device engaged, it is necessary
to press and hold the consent button (par.
5.10) so as not to cause the engine to stop.
Lower the speed whenever you note a drop
in engine speed, since a forward speed that
is too fast compared to the amount of grass
being cut will never mow the grass well.
Disengage the cutting device and move the
cutting device assembly to the highest position:
– When moving between work areas
– When driving on grass free surfaces
– Every time it is necessary to
overcome an obstacle.
6.5.5 Suggestions for maintaining
a nice lawn
• To keep a lawn green and soft with a good
appearance, it should be cut regularly. A
lawn can be composed of dierent types of
grass. If the lawn is cut frequently, grass and
roots grow more vigorously, forming a solid
grassy bed. If the lawn is cut is less frequently,
higher grass and weeds start growing (clover
and daisies, etc.). The frequency of mowing
should be in relation to the rate of growth of
the grass, which should not be left to grow
too much between one cut and the next.
• The best height of the grass on a well-kept
lawn is approx. 4-5 cm and with one mowing,
you do not need to remove more than a third
of the total height. If the grass is very tall,
it should be cut twice in a twenty-four hour
period. the rst cut should be carried out with
the cutting device at the maximum height, and
the second cut at the desired height (g. 26).
• If the cutting device are positioned too
low, they will tend to rip the grass out by
its roots, resulting in a "patchy" eect.
• During hot and dry periods, the grass
should be cut a little higher to prevent
the ground from drying out.
• It is always better to cut the grass when dry.
Do not cut grass when wet; this may reduce
the eectiveness of the cutting device, due
to the grass getting stuck to it, and result in
the grass being ripped out of the ground.
• The cutting device must be in good
condition and well sharpened so that the
grass is cut straight without a ragged edge
that leads to yellowing at the ends.
• The engine must run at full speed, both
to ensure a sharp cut of the grass and
to get the necessary thrust to push the
cuttings through the discharge chute.
• If the discharge chute tends to get blocked
with grass, you should reduce the forward
speed as it may be too high for the condition
of the grass. If the problem persists, the
probable causes are either badly sharpened
cutting device or deformed ns.
• Be very careful when mowing near bushes
or kerbs as these could distort the horizontal
position of the cutting device assembly and
damage its edge as well as the cutting device.
6.5.6 Emptying the grass catcher (for
rear collection models only)
NOTE The emptying of the grass catcher
can only be done with the cutting device
disengaged, otherwise the engine stops.
• Do not let the grass catcher become too full
as this may block the discharge chute.
• When the grass catcher is full you
will hear a warning sound:
1. disengage the cutting device (par.
5.9) and the audible signal will stop;
2. shift the throttle control to minimum
"tortoise" speed position
3. stop moving forward and switch
to neutral (par. 5.2; par. 5.3);
4. engage the parking brake;
• Manual command
5. extract the lever (g. 28.A)
and tip the grass catcher bag
up in order to empty it;
6. close the grass catcher again so
that it remains coupled to the pawl
(g. 28.B) and replace the lever.

EN - 20
• Electrical command
5. with the operator in the sitting
position, press and hold the button
(g. 28.C) until the grass catcher
bag is in the fully tipped position;
6. once the bag is empty, press and
hold the button (g. 28.D) until
the grass catcher bag is fully
lowered, make sure that it remains
coupled to the pawl (g. 28.B).
NOTE After emptying the grass catcher bag,
the acoustic signal may be reactivated when the
cutting device are engaged, this is caused by
caused by traces of grass remaining attached
to the indicator micro-switch sensor; if this
happens, disengage and re-engage the cutting
device immediately to silence the buzzer.
Ensure the sensor (g. 28.E) is always
kept free from traces of grass.
6.5.7 Cleaning the discharge chute (for
rear collection models only)
• Cutting very tall or wet grass, particularly
at excessively high speed, can clog up
the discharge chute. If it clogs, follow the
instructions provided in chap. 7.6.2.
6.5.8 Mowing completed
When mowing has been completed:
1. disengage the cutting device;
2. decrease the engine's r.p.m.
3. drive back with the cutting device
assembly in its highest position.
6.6 STOP
To stop the machine:
1. shift the throttle lever to minimum
"tortoise" speed position
To avoid backre, leave the throttle in
the minimum "tortoise" speed position for
20 seconds before switching o the engine.
2. switch o the engine by turning
the ignition key to O;
3. with the engine turned o, close the
fuel tap (g. 25.A) (if provided);
4. remove the key from the ignition
IMPORTANT To keep the battery
charged, do not leave the ignition key
in the «on» or «headlights on» position
when the engine is not running.
The engine may be very warm
immediately after it is shut o. Do not
touch the exhaust or adjacent parts.
This can cause burn injuries.
6.7 AFTER OPERATION
1. Allow the engine to cool before
storing in an enclosed space.
2. Clean (par. 7.6).
3. Make sure there are no loose or
damaged components. If necessary,
replace any damaged components
and tighten loose screws or bolts, or
contact an Authorised Service Centre.
IMPORTANT
– Lower the cutting device assembly;
– shift into neutral;
– engage the parking brake;
– stop the engine
– remove the ignition key (making
sure that all moving parts have
come to a complete stop);
• whenever the machine is left unattended,
the operator dismounts from the
driving seat or parks the machine;
7. ROUTINE MAINTENANCE
7.1 GENERAL INFORMATION
The safety regulations to follow
are described in chap. 2. Strictly
comply with these instructions to
avoid serious risks or hazards.
Before conducting any inspections,
cleaning or maintenance/adjustment
interventions on the machine:
• disengage the cutting device;
• shift into neutral;
• engage the parking brake;
• stop the engine;
• remove the key, (never leave the
keys in the ignition or within reach of
children or unauthorised persons);
• make sure that all moving parts
have come to a complete stop;
• read the relevant instructions;
• use suitable clothing, protective
gloves and goggles
• The frequency and types of maintenance are
summarised in the "Maintenance Table". The
table will help you maintain your machine’s

EN - 21
safety and performance. It lists the main
maintenance tasks and how often they need
to be performed. Carry out the relevant task
as soon as it is scheduled to be performed.
7.2 REFUELLING / EMPTYING
THE FUEL TANK
IMPORTANT Observe the precautions
provided in the engine owner's manual.
Consult the engine owner's manual
for the type of fuel to be used.
7.2.1 Refuelling
To refuel:
1. Unscrew the fuel tank ller cap
and remove it (g. 30).
2. Insert the funnel (g. 30).
3. Refuel being careful not to
completely ll the tank.
4. Remove the funnel.
5. Close the fuel cap securely after
refuelling and clean away any spills.
IMPORTANT Do not drip petrol onto the
plastic parts to avoid ruining them. In the
event of accidental leaks, rinse immediately
with water. The warranty does not cover for
damage to plastic parts of the bodywork
or the engine caused by petrol.
7.2.2 Emptying the fuel tank
NOTE Fuel is perishable and should
not remain in the tank for more than 30
days. Empty the fuel tank before storing the
machine for long periods of time (chap. 9).
Allow the engine to cool
before emptying the fuel tank.
1. Place the machine on a at
surface, in the open air.
2. Place a suitable container under
the drain tube (g. 31.A).
3. Disconnect the tube (g. 31.A) installed
on the fuel lter inlet (g. 31.B).
4. Open the fuel tap (if provided)
5. Collect the fuel in a suitable container.
6. Reconnect the tube (g. 31.A) making sure
you position the clamp properly (g. 31.C).
7. Close the fuel tap (if provided).
The next time the machine is used,
check that there are no fuel leaks from
the tubes, fuel stopcock or carburettor.
7.3 CHECK, TOP UP, DRAINING
OF ENGINE OIL
IMPORTANT Observe the precautions
provided in the engine owner's manual.
Consult the engine owner's manual
for the type of oil to be used.
7.3.1 Check/top-up
Always check the oil level before use.
Procedure:
• Make sure that the machine is level
before performing the check.
• Check the oil level: according to the
instructions in the engine manual, this
must be between the MIN and MAX
marks on the dipstick (g. 32).
Do not overfill as this could cause
the engine to overheat. If the oil level
exceeds the “MAX” mark, drain until
the correct level is achieved.
7.3.2 Draining
To ensure that the machine functions
correctly, and to guarantee a long working
life, we recommend changing the engine
oil at regular intervals, as indicated in the
Owner's Manual supplied with the engine.
The oil may be very hot if removed
just after the engine has been switched
off. Consequently allow the engine to
cool down for a few minutes before
proceeding to drain off the oil.
Replace the engine oil according to the frequency
indicated in the engine owner's manual.
Proceed as follows:
• Type “I”
1. Place the machine on a at surface.
2. Place a suitable container under
the extension tube (g. 33.A).
3. Hold the extension tube (g.
33.A) rmly in place and unscrew
the drain plug (g. 33.B).
4. Collect the oil in a suitable vessel.
5. Replace the drain plug (g. 33.B)
making sure that the gasket is in
the right position (g. 33.C).
6. Fully tighten holding the extension
tube rmly in place (g. 33.A).
7. Clean up any spills.

EN - 22
• Type “II”
1. Place the machine on a at surface.
2. Place a suitable container under
the extension tube (g. 33.D).
3. Detach the extension tube (g. 33.D)
from the support (g. 33.E) then,
using a pair of pliers, loosen the
clamp g. 33.F) until it is possible to
extract the drain plug (g. 33.G).
4. Bend the extension tube and
drain the oil into the container.
5. Replace the drain plug (g. 33.G)
and reattach the extension tube
(g. 33.D) to the support (g.
33.E) before relling with oil.
6. Clean up any spills.
• Type “III”
1. Place the machine on a at surface.
2. Place a suitable container under
the extension tube (g. 33.A).
3. Press the cotter (g. 33.B)
4. Release the extension tube from the
support by moving it downwards;
5. Bend the extension tube and drain
the oil into a suitable container.
6. Ret the extension tube (g.
33.A) on the support (g. 33.C)
before topping up the oil.
7. Clean up any spills.
IMPORTANT Hand the spent
oil over to a disposal facility in
accordance with local provisions.
7.4 ANTI-SCALPINGWHEELS
Thanks to the various mounting positions of
the wheels, it is possible to maintain a safety
distance “H” between the edge of the cutting
device assembly and the ground (g. 23.A).
Adjust the position of the anti-scalping wheels
according to how irregular the ground is.
This should always be performed
on both wheels, positioning them at the
same height WITH THE ENGINE OFF
AND CUTTING device DISENGAGED.
To change the position:
1. Release the arrest plate (g. 23.B) using
a screwdriver and extract the pin (g.
23.C) with the spring (g. 23.D).
2. Reposition the wheel (g. 23.A)
in the desired position
3. Replace the pin (g. 23.C), the spring
(g. 23.D) and the arrest plate (g. 23.B)
in the sequence indicated, making
sure that the head of the pin (g. 23.C)
is facing the inside of the machine
7.5 BATTERY
To ensure long life to the battery it is
essential to keep it carefully maintained.
The machine battery must always be charged:
• before using the machine for the
rst time after purchase;
• before leaving the machine disused for
a long period (over 30 days) (par. 9);
• before starting up the machine after
a prolonged period of inactivity.
Carefully read and observe the battery
recharging instructions in the booklet provided
with the battery. Failure in following the procedure
or in charging the battery could permanently
damage the battery elements. A at battery
must be recharged as soon as possible.
IMPORTANT Recharging must be
done using a battery charger at constant
voltage. Other recharging systems can
irreversibly damage the battery.
• The machine comes with a connector (g.
34.A) for recharging; this is connected to
the corresponding connector for the special
maintenance battery charger supplied (if
included) or available on request (par. 15.2).
IMPORTANT This connector must
only be used for connection to the
maintenance battery charger indicated
by the Manufacturer. For its use:
– follow the instructions given in the
relative instruction manual;
– follow the instructions in the battery manual;
7.6 CLEANING
Clean thoroughly following the instructions
below every time it is used.
7.6.1 Cleaning the machine
• Clean the outside of the machine washing
the plastic parts of the bodywork with a
damp sponge using water and detergent,
taking care not to wet the engine, the
electrical parts or the electronic circuit
board located under the dashboard.
• To reduce re hazards, keep the
engine, silencer, battery compartment
and petrol storage area free of grass,
leaves, or excessive grease.

EN - 23
IMPORTANT Never use hose nozzles or harsh
detergents for cleaning the body and engine!
7.6.2 Cleaning the discharge chute (for
rear collection models only)
If the discharge chute is clogged:
1. remove the grass catcher or the
rear discharge guard;
2. remove the grass cuttings; you can reach
them from the chute discharge opening.
7.6.3 Cleaning the grass catcher (for
rear collection models only)
1. Empty the grass catcher
2. Shake it to remove grass
cuttings and soil residue
3. Replace the grass catcher and clean
the interior of the cutting device
assembly (par. 7.6.4-a), now remove
the grass catcher, empty and rinse it,
then place it where it can dry quickly.
7.6.4 Cleaning the cutting
device assembly
Keep people or animals away from
the surrounding area when cleaning
the cutting device assembly.
a. Cleaning the interiors
Remove any traces of grass or dirt that
have accumulated inside the cutting device
assembly, since otherwise these may
dry and harden, making it more dicult
to start the device the next time.
When washing the inside of the cutting
device assembly and the discharge chute,
the machine must be on rm ground with:
– the grass catcher or the rear
discharge guard mounted in place
(for rear collection models only)
– the side discharge chute mounted (for
models with side discharge only);
– the operator seated;
– the cutting device assembly in position «1»;
– the engine running
– the transmission in neutral
– the cutting device engaged
• Alternatively, connect a water tube to the
dedicated coupling (g. 35.A), allowing
water to ow through each cutting device
for a few minutes, while they are in motion.
IMPORTANT In order not to compromise
the eciency of the electromagnetic clutch:
- do not let the clutch come into contact with oil;
- do not spray pressurised water
directly on the clutch unit;
- do not clean the clutch with petrol.
b. Cleaning the exterior
Do not let debris and dried grass
accumulate in the upper part of the
cutting device assembly in order
to maintain maximum machine
efficiency and safety levels.
To clean the upper part of the
cutting device assembly:
• lower the cutting device assembly
completely (position «1»);
• direct an air jet through the apertures in
the left and right safety guards (g. 36).
7.7 NUTS AND BOLTS
• Keep all nuts, bolts and screws tight to be sure
the equipment is in safe working condition.
8. EXTRAORDINARY MAINTENANCE
8.1 SAFETY RECOMMENDATIONS
You must go to a Authorised
Service Centre or contact your Dealer
if the following are malfunctioning:
- the brake
- the cutting device engage
and disengage functions
- switching the drive to forward
or reverse gears.
8.2 CUTTING DEVICE ASSEMBLY
8.2.1 Aligning the cutting device assembly
The cutting device assembly should be properly
adjusted to obtain an evenly mown lawn (g. 37).
If mowing is uneven, check the
tyre pressure (par. 6.1.3).
If this is not sucient to achieve an even
cut, please contact your Dealer to adjust the
alignment of the cutting device assembly.

EN - 24
8.2.2 Cutting device
Badly sharpened cutting device pull at the
grass and cause the lawn to turn yellow.
All work on the cutting device
(disassembly, sharpening, balancing,
repairing, reassembly and/or replacing)
are demanding jobs that require special
skills as well as special tools. For safety
reasons, these jobs are best carried
out at a Authorised Service Centre.
Always replace damaged, bent
or worn cutting device, together
with their nuts and bolts, in order to
ensure they remain balanced.
IMPORTANT We strongly recommend
changing all the cutting device at the same
time, especially in the case of uneven wear.
IMPORTANT Always use original
cutting device bearing the code
indicated in the “Technical Data”.
Given product evolution, the cutting device
listed in the "Technical Data" table may be
replaced in time with others having similar
interchangeable and operating safety features.
8.3 REPLACING FRONT / REAR WHEELS
8.3.1 Preparation
IMPORTANT Use a suitable lifting
device, for example a scissor jack.
Before changing the wheels it is necessary
to complete some preliminary operations:
• Remove all attachments.
• Position the machine on a solid
and even surface that guarantees
stability of the machine.
• Engage the parking brake;
• Stop the engine;
• Remove the key from the ignition;
• Position the jack in the lifting position near the
wheel to be changed (par. 8.3.2; par. 8.3.3).
• Check that the jack is perfectly
perpendicular to the ground.
8.3.2 Choice and positioning of the
jack on the rear wheels
Position some wooden wedges (g. 38.A)
at the base of the wheel (g. 38.B) next to
the wheel to be changed (g. 38.C).
For models with rear collection:
• The maximum possible jack height
when closed is 110 mm. (g. 39).
• Position the jack under the rear plate (g.
40.A) at 180 mm from the side edge.
For side discharge models:
• The maximum possible jack height
when closed is 110 mm. (g. 41).
• Position the jack under the rear axle, in the
point indicated in the diagram (g. 42.A).
NOTE In this position the jack allows you
to only raise the wheel to be changed.
8.3.3 Choice and positioning of the
jack on the front wheels
1. Position some wooden wedges (g. 43.A)
at the base of the wheel (g. 43.B) behind
the wheel to be changed (g. 43.C).
2. The maximum possible jack height
when closed is 110 mm.
NOTE Select the position of the jack
depending on the type of machine.
3. Position the jack under the front
part of the machine (g. 44.A, 45.A,
46.A) as indicated in the gure.
NOTE The jack must be positioned under
the at part of the support (g. 44.B, 45.B).
NOTE The jack must be positioned under
the central rib of the support (g. 46.B).
8.3.4 Changing the wheel
IMPORTANT Make certain the machine
remains still and stable during the lifting process.
If you notice anything out of the ordinary,
lower the jack immediately, check and resolve
any problems and lift the machine again.
1. Slide the cover o (g. 47.A)
before raising the machine.
2. Raise it enough to extract the wheel easily.
3. Using a screwdriver, remove
the snap ring (g. 47.B) and the
shoulder washer (g. 47.C).
4. Remove the wheel to be changed.
5. Coat the axle (g. 47.D) with
lubricating grease.
6. Mount the spare wheel.
7. Carefully replace the shoulder
washer and snap ring.
8. Rest the wheel on the ground
replace the cover (g. 47.A).

EN - 25
IMPORTANT Check that the two rear wheels
are the same height (g. 48.A) and that the
dierence between the external diameters of
the two wheels (g. 48.B) is no greater than
8-10 mm. On the contrary, to avoid uneven
mowing, the cutting device assembly must be
aligned by an Authorised Service Centre.
8.3.5 Repairing or changing tyres
Every replacement or repair of a tyre following
a puncture must be performed at a specialist
tyre repair centre in accordance with the
procedures for the type of tread used.
8.4 ELECTRONIC CIRCUIT BOARD
The electronic circuit board is a component
tted below the dashboard which
manages all machine safety devices.
The electronic board is tted with a self-
rearming protection device that interrupts the
circuit in the event of a fault on the electrical
system; when this device is tripped, it stops the
engine and generates an acoustic signal that
can only be disabled by removing the key.
The circuit is re-armed automatically after
a few seconds; identify and eliminate the
cause or causes of the fault in order to
prevent subsequent interruptions.
IMPORTANT To avoid tripping the
electronic board protection device:
– do not invert the battery terminals;
– do not operate the machine without the
battery, as this would cause the battery
charge regulator to function irregularly;
– take care to avoid short circuits.
8.5 REPLACING A FUSE
The machine is tted with fuses (g. 49.A) with
dierent capacities and functions. Specically:
– 10 A fuse = protects the electronic board
general and power circuits, when it
blows the machine stops running and the
dashboard light is extinguished (par. 5.16)
– 25 A fuse = protects the battery
recharge circuit. When it blows, the
battery gradually runs down and the
machine will have problems starting.
– 5 A fuse = protects the auxiliary 12 V
power supply socket for the attachments.
– 15 A fuse = protects the command motor
circuit, when it blows the electrical grass
catcher bag tipping system is disabled; in
this condition it is still possible to tip the
bag by using the manual lever (if tted).
The fuse capacity is indicated on the fuse.
IMPORTANT A blown fuse must always
be replaced by one of the same type and
amperage and never with one of another rating.
If you are unable to understand why
it has blown contact Your Dealer.
8.6 REPLACING BULBS
8.6.1 Type "l" - Incandescent light bulbs
• The bulbs (18W) have a bayonet tting
and are installed in the bulb holder,
which can be taken out by turning it
anti-clockwise with pliers (g. 50).
8.6.2 Type "ll" - LED light bulbs
• Loosen the lock nut (g. 51.A) and
remove the connector (g. 51.B).
Remove the LED illuminator (g. 51.C),
secured by screws (g. 51.D).
8.6.3 Type “III” - LED light bulbs
(for TNS, THNS models)
1. Raise the bonnet and remove
the connector (g. 52.A).
2. Detach the cotter pin (g. 52.B) and
slide the bonnet o laterally.
3. Detach the LED light bulb cables (g.
53.A), undo the screws (g. 53.B)
and release the tabs (g. 53.C).
4. Raise and release the upper part
of the bonnet (g. 54.A).
5. Undo the screws (g. 55.A) and replace
the LED headlights (g. 55.B).
6. To replace the bonnet, repeat the
above procedure in reverse order.
8.7 REAR DRIVE UNIT
This is a sealed single unit that does not require
maintenance. It is permanently lubricated and its
lubricant does not need changing or topping up.

EN - 26
8.8 FRONTDRIVEUNIT(4WDMODEL)
This is a sealed single unit that does not
require maintenance. It is necessary to check
the oil in the hydraulic coupling circuit, top
it up and change it at regular intervals.
Check that the oil level in the hydraulic
system is between the «MIN» and
«MAX» markers on the tank.
If the level is below the «MIN»
reference marker (Fig. 56):
– remove the guard (g. 56.A), which
is secured by the nut (g. 56.B):
– unscrew the plug (g. 56.C) and top
up using 10W30 oil until the level
reaches the «MAX» marker:
– replace the plug (g. 56.C)
and the guard (g. 56.A).
IMPORTANT If it becomes necessary to
top-up the oil level frequently, check the oil
tubes and tank for leaks and contact your
Dealer for the necessary maintenance.
8.9 REGULATING THE GRASS
CATCHER RETAINING
PAWL SPRING
If the grass catcher bag tends to jolt or
open unexpectedly while driving over
uneven ground, or if it is dicult to
recouple the retaining pawl after emptying
the bag, it may be necessary to adjust
the tension on the spring (g. 57.A).
Adjust the mounting point by selecting the
hole (g. 57.B) that provides the desired result.
9. STORAGE
When you intend to put your machine
away for more than 30 days:
1. Wait for the engine to cool
2. Disconnect the battery cables and
store it in a cool and dry place.
3. Empty the fuel tank (par. 7.2.2) and follow
all the instructions in the engine manual.
4. Clean the machine thoroughly.
5. Check the machine for any
damage. If necessary, contact the
Authorised Service Centre.
6. Store the machine:
– with the cutting device assembly lowered
– in a dry place
– protected from inclement weather
– covered with a sheet where
possible (par. 15.4)
– in a place where children cannot get to it
– making sure that keys or tools used
for maintenance are removed.
Before starting to use the machine again:
• check that there are no fuel leaks from
the tubes, fuel stopcock or carburettor:
• prepare the machine as described in
chapter "6. Using the machine" .
10. HANDLING AND TRANSPORTATION
• When handling the machine, always:
– disengage the cutting device;
– bring the cutting device assembly
to the highest position;
– stop the engine;
• When transporting the machine
on a vehicle or trailer, always:
– use an access ramp of suitable
strength, width and length;
– load the machine with the engine
switched o, with the key removed from
the ignition, without a driver and pushed
by an adequate number of people;
– close the fuel tap (if provided);
– lower the cutting -device assembly;
– engage the parking brake;
– position it so that it does not
cause a hazard to anyone;
– fasten rmly to the device of transport using
ropes or chains to prevent it from tipping
over causing damage and fuel leaks.
11. ASSISTANCE AND REPAIRS
This manual provides all the necessary
information to run the machine and for correct
basic maintenance operations which can
be performed by the user. Any regulations
and maintenance operations not described
herein must be carried out by your Dealer
or Authorised Service Centre, which have
the necessary knowledge and equipment to
ensure that the work is carried out correctly,
maintaining the correct degree of safety and the
original operating conditions of the machine.
Any operations performed in unauthorised
centres or by unqualied persons will totally
invalidate the Warranty and all obligations
and responsibilities of the Manufacturer.
• Only Authorised Service Centres can carry
out guaranteed repairs and maintenance.

EN - 27
• Non-original parts and attachments are
not approved; use of non-original spare
parts and attachments will jeopardise
the safety of the machine and relieve the
Manufacturer from all obligations or liabilities.
• Genuine spare parts are supplied by
Authorised Assistance Centres and Dealers.
• It is advisable to send your machine
once a year to an Authorised Service
Centre for servicing, assistance
and safety device inspection.
12. WARRANTY COVERAGE
The warranty covers all material and
manufacturing defects. The user must
follow all the instructions provided in
the accompanying documentation.
The warranty does not cover
damages caused by:
• Failure to become familiar with the
documentation accompanying the machine.
• Carelessness.
• Incorrect or prohibited use or assembly.
• Use of non-genuine spare parts.
• Use of attachments not supplied or
approved by the manufacturer.
The warranty does not cover:
• Normal wear and tear of consumables,
such as drive belts, headlights, wheels,
blades, safety bolts and wires.
• Normal wear and tear.
• Engines. Engines are covered by
the warranty provided by the relative
manufacturer in compliance with the
specied terms and conditions.
The purchaser is protected by his own national
legislation. The purchaser’s rights envisaged
by the national laws in his own country are
not in any way restricted by this warranty.

EN - 28
13. MAINTENANCE TABLE
Operation Interval (hours) Paragraph
/ Notes
First time Subsequently every
MACHINE
Safety checks/check controls
Before each use par. 6.2
Tyre pressure check
Before each use par. 6.1.3
Check the rear/lateral discharge guards. Check the
grass catcher bag and lateral discharge chute.
Before each use par. 6.1.4
General cleaning and inspection
After each use par. 7.6
Checking for any damage to the machine. If
necessary, contact the Authorised Service Centre.
After each use -
Charging the battery
Before storage
par. 7.5
Complete bolt and screw check
25
Cutting device positioning and sharpening check
25 ***
Transmission belt check
25 ***
Cutting device control belt check
25 ***
Brake regulation and check
25 ***
Drive regulation and check
25 ***
Cutting device gear and brake check
25 ***
General lubrication
25 ****
Replacing cutting device
100 ***
Replacing the transmission belt
- ** / ***
Replacing the cutting device control belt
- ** / ***
ENGINE *
Checking/topping up fuel level
Before each use par 7.2
Check/top-up engine oil
Before each use par 7.3
Replacement of the engine oil
* *
Air lter cleaning and check
* *
Air lter replacement
* *
Fuel lter check
* *
Fuel lter replacement
* *
Spark plug points cleaning and check
* *
Replace the spark plug
* *
* Consult the manual supplied with the engine for a complete list of
maintenance operations and the corresponding intervals
** At the rst signs of any malfunction, contact your Dealer immediately
*** The operation must be carried out by your Dealer or a Authorised Service Centre
*** General lubrication of all joints should also be carried out whenever
the machine is to be left unused for a long period

EN - 29
14. PROBLEM IDENTIFICATION
PROBLEM PROBABLE CAUSE REMEDY
1. When the key is turned
to the «ON» position,
the dashboard fails to
switch on and there
is no acoustic signal
The safety device of the electronic
circuit board has cut in due to:
Turn the ignition key to «STOP» position
and look for the cause of the problem:
badly connected battery check the connections (par. 4.4)
battery terminals inverted check the connections (par. 4.4).
at battery recharge the battery (par. 7.5)
fuse blown replace fuse (10 A) (par. 8.5).
wet circuit board dry using lukewarm air
2. When the key is
turned to the «ON»
position, the dashboard
fails to switch on
but the acoustic
signal is activated
The safety device of the electronic
circuit board has cut in due to:
Turn the ignition key to «STOP» position
and identify the cause of the problem:
wet circuit board dry using lukewarm air
3. With the key on
«START» the
dashboard is
illuminated, but
the starter motor
does not run
insuciently charged battery recharge the battery (par. 7.5)
battery charger fuse blown replace fuse (25 A) (par. 8.5)
4. With the key on
«START» the starter
motor runs but the
engine does not start
insuciently charged battery recharge the battery (par. 7.5)
faulty fuel supply check the level in the tank (par. 7.2.1)
open the fuel stopcock (if foreseen) (par. 6.4)
check the fuel lter
faulty ignition check that the spark plug
cap is securely tted
check that the electrodes are clean
and have the correct gap
5. Starting is dicult or the
engine runs erratically
carburation problems clean or replace the air lter
empty the fuel tank and rell with fresh fuel
check and replace the fuel lter if necessary
6. Weak engine
performance
during cutting
forward speed too high in
relation to cutting height
reduce the forward speed and/or
raise the cutting height (par. 6.5.4)
7. The engine stops
when the cutting
device are engaged
engage not enabled check that all starting conditions
are met (par. 6.2.2)
8. The battery indicator
light remains on even
after the machine
has been running
for a few minutes
insucient battery charge contact your Dealer
9. The oil indicator light
switches on during
operation (if tted)
engine lubrication problems Turn the key to the «STOP»
position immediately:
top-up the oil level (see 7.3.1)
replace the lter (if the problem
persists, contact your Dealer)
If problems persist after having performed the above operations, contact your Dealer.

EN - 30
PROBLEM PROBABLE CAUSE REMEDY
10. The engine stops
running and an acoustic
signal is generated
The safety device of the electronic
circuit board has cut in due to:
Turn the ignition key to «STOP» position
and identify the cause of the problem:
over-voltage caused by
the charger regulator
contact your Dealer
battery not connected
correctly (poor contacts)
check the connections (see 3.4)
11. The engine stops
running, and no
acoustic signal
is generated
battery disconnected check the connections (see 3.4)
engine problems contact your Dealer
12. The cutting device do
not engage or do not
stop promptly when
they are disengaged
loose belt contact your Dealer
problems with the electro-
magnetic clutch
contact your Dealer
13. Uneven mowing and
insucient collection
(for rear collection
models only)
cutting device assembly is
not parallel to the ground
check the tyre pressure (par. 6.1.3)
reinstate the alignment of the cutting device
assembly in relation to the ground (par. 8.2.1)
inecient cutting device contact your Dealer
forward speed too high
compared to height of grass
reduce the forward speed and/or raise
the cutting device assembly (par. 6.5.4)
wait for the grass to dry
collector chute is blocked remove the grass catcher bag and
empty the chute (see 7.6.2)
14. Uneven mowing (side
discharge models only)
cutting device assembly is
not parallel to the ground
check the tyre pressure (par. 6.1.3)
reinstate the alignment of the cutting device
assembly in relation to the ground (par. 8.2.1)
inecient cutting device contact your Dealer
15. Unusual vibrations
while working
cutting device assembly is full of grass clean the cutting device assembly (par. 7.6.4)
the cutting device are
unbalanced or loose
contact your Dealer
loose bolts and screws check and tighten all the
engine and frame bolts
16. Uncertain or
ineective braking
the brake is not adjusted correctly contact your Dealer
17. Erratic forward
movement, poor drive
when going uphill or
if the machine has a
tendency to rear up
problems with the belt or the
engagement device
contact your Dealer
18. When the engine is
running, the machine
remains stationary
when the drive
pedal is pressed
release lever in the gear
disengagement position
return it to the gear engaged
position (par. 5.4)
If problems persist after having performed the above operations, contact your Dealer.

EN - 31
PROBLEM PROBABLE CAUSE REMEDY
19. Unusual machine
vibrations
damaged or loose parts stop the machine and remove
the ignition key
inspect for damage
check for and tighten any loose parts
have all checks, repair work and
replacements carried out by a
Authorised Service Centre only
If problems persist after having performed the above operations, contact your Dealer.
15. ATTACHMENTS
15.1 "MULCHING" KIT
It nely chops the grass cuttings and leaves
them on the lawn (g. 58.A1; g 58.A2).
15.2 MAINTENANCE BATTERY CHARGER
This keeps the battery in good working
order when the machine is in storage,
guaranteeing an optimum level of charge
and longer battery life (g. 58.B).
15.3 TOWING KIT
To tow a small trailer (g. 58.C).
15.4 CANVAS COVER
Protects the machine from dust
when not in use (g. 58.D)
15.5 REAR WEIGHT KIT
They improve the rear stability of the
machine, especially when used mainly
on sloping ground (Figure 58.E).
15.6 REAR DISCHARGE GUARD KIT
To be used in place of the grass catcher
when mown grass is not collected (Fig. 58.F).
(For rear discharge models only).
15.7 SNOW CHAINS 18'', 20''
Improved adherence of the rear wheels on
the snow-covered sections and possibility
of using snow ploughs (Fig. 58.G).
15.8 MUD / SNOW WHEELS 18’’, 20’’
Improve drive performance on
snow and mud (Figure 58.H).
15.9 TRAILER
To transport tools or tall objects within
permitted load limits (Fig. 58.I).
15.10 SPRINKLER
To spread salt or fertilizers (Fig. 58.J).
15.11 SPRINKLER
To spread sand or gravel (Fig. 58.K).
15.12 GRASS ROLLER
To compact the soil after sowing or
to atten grass (Fig. 58.L).
15.13 SNOW BLADE
For ploughing and accumulating
removed snow at sides (Fig. 58.M).
15.14 FRONT SWEEPER
To clean leaves and dirt from paths
and solid surfaces and remove thin
layers of fresh snow (Fig. 58.N).
15.15 SHREDDER
Cutting and shredding rough grass (Fig. 58.O).

EN - 32
15.16 LEAF AND GRASS COLLECTOR
To collect leaves and grass from
grassy areas (Fig. 58.P).
15.17 FRONT RAKE
To collect grass and twigs (Fig. 58.Q).
15.18 LIFTING INTERFACE
Used to mount additional front
accessories that do not require using
the power take-o (Fig. 58.R1).
15.19 POWERTAKE-OFF(PTO)
Used for transferring the engine
power to an attachment. Lifting
interface is required (Fig. 58.R2).
15.20 POWERTAKE-OFF(PTO)
Used for transferring the engine power
to an attachment. Lifting interface
is not required (Fig. 58.R3).

doc_base r.15 – RO-FM-P_0
DICHIARAZIONE CE DI CONFORMITÁ (Istruzioni Originali)
(Direttiva Macchine 2006/42/CE, Allegato II, parte A)
1. La Società: ST. S.p.A. – Via del Lavoro, 6 – 31033 Castelfranco Veneto (TV) – Italy
2. Dichiara sotto la propria responsabilità, che la macchina: Tosaerba con conducente a bordo seduto / taglio erba
a) Tipo / Modello Base
TC, TC HE 102
b) Mese/Anno di costruzione
c) Matricola
d) Motore
a scoppio
3. É conforme alle specifiche delle direttive:
• MD: 2006/42/EC
e) Ente Certificatore: /
f) Esame CE del tipo: /
• OND: 2000/14/EC, ANNEX VI - 2005/88/EC
D. Lgs. 262/2002, ANNEX VI, proc. 1 (Italy)
e) Ente Certificatore: N°0197–TÜV Rheinland LGA Products GmbH
Tillystrasse 2, 90431 Nürnberg – Germany
• EMCD: 2014/30/EU
• RoHS II: 2011/65/EU - 2015/863/EU
4. Riferimento alle Norme armonizzate:
EN ISO 5395-1:2013+A1:2018
EN ISO 5395-3:2013+A1:2017+A2:2018
EN 55012:2007+A1:2009
EN ISO 14982:2009
EN 50581:2012
g) Livello di potenza sonora misurato
100
dB(A)
h) Livello di potenza sonora garantito
100
dB(A)
i) Ampiezza di taglio
101
cm
n) Persona autorizzata a costituire il Fascicolo Tecnico: ST. S.p.A.
Via del Lavoro, 6
31033 Castelfranco Veneto (TV)- Italia
o) Castelfranco V.to, 01.09.2019 CEO Stiga Group
Sean Robinson
171512724_7
FR (
Traduction de la notice originale)
Déclaration CE de Conformité
(Directive Machines 2006/42/CE, Annexe II, partie
A)
1. La Société
2. Déclare sous sa propre responsabilité que la
machine : Tondeuse à gazon à conducteur
assis/ coupe du gazon
a) Type / Modèle de Base
b) Mois / Année de construction
c) Série
d) Moteur: moteur essence
3. Est conforme aux prescriptions des
directives :
e) Organisme de certification
f) Examen CE du Type
4. Renvoi aux Normes harmonisées
g) Niveau de puissance sonore mesuré
h) Niveau de puissance sonore garanti
i) Largeur de coupe
n) Personne habilitée à établir le Dossier
Technique :
o) Lieu et Date
EN (
Translation of the original instruction)
EC Declaration of Conformity
(Machine Directive 2006/42/EC, Annex II, part A)
1. The Company
2. Herby declares under its own responsibility
that the machine: ride-on lawnmower with
seated operator/ Grass cutting
a) Type / Base Model
b) Month / Year of manufacture
c) Serial number
d) Motor: petrol
3. Conforms to directive specifications:
e) Certifying body
f) EC examination of Type
4. Reference to harmonised Standards
g) Sound power level measured
h) Sound power level guaranteed
i) Range of cut
n) Person authorised to create the Technical
Folder:
o) Place and Date
DE (
Übersetzung der Originalbetriebsanleitung
)
EG-Konformitätserklärung
(Maschinenrichtlinie 2006/42/EG, Anhang II, Teil
A)
1. Die Gesellschaft
2. Erklärt auf eigene Verantwortung, dass die
Maschine: Aufsitzmäher / Rasenschnitt
a) Typ / Basismodell
b) Monat / Baujahr
c) Seriennummer
d) Motor: Verbrennungsmotor
3. Den Anforderungen der folgenden Richtlinien
entspricht:
e) Zertifizierungsstelle
f) EG-Baumusterprüfung
4. Bezugnahme auf die harmonisierten Normen
g) Gemessener Schallleistungspegel
h) Garantierter Schallleistungspegel
i) Schnittbreite
n) Zur Verfassung der technischen Unterlagen
befugte Person:
o) Ort und Datum
NL
(
Vertaling van de oorspronkelijke gebruiksaanwijzing)
EG-verklaring van overeenstemming
(Richtlijn Machines 2006/42/CE, Bijlage II, deel A)
1. Het bedrijf
2. Verklaart onder zijn eigen
verantwoordelijkheid dat de machine:
Grasmaaier met zittende bediener / grasmaaier
a) Type / Basismodel
b) Maand / Bouwjaar
c) Serienummer
d) Motor: benzinemotor
3. Voldoet aan de specificaties van de
richtlijnen:
e) Certificatie-instituut
f) EG-onderzoek van het Type
4. Verwijzing naar de Geharmoniseerde normen
g) Gemeten niveau van geluidsvermogen
h) Gegarandeerd niveau van geluidsvermogen
i) Snijbreedte
n) Bevoegd persoon voor het opstellen van het
Technisch Dossier
o) Plaats en Datum
ES
(Traducción del Manual Original)
Declaración de Conformidad CE
(Directiva Máquinas 2006/42/CE, Anexo II, parte
A)
1. La Empresa
2. Declara bajo su propia responsabilidad que la
máquina: Cortadora de pasto con conductor
sentado/ Corte hierba
a) Tipo / Modelo Base
b) Mes / Año de fabricación
c) Matrícula
d) Motor: motor de explosión
3. Cumple con las especificaciones de las
directivas:
e) Ente certificador
f) Examen CE del Tipo
4. Referencia a las Normas armonizadas
g) Nivel de potencia sonora medido
h) Nivel de potencia sonora garantizado
i) Amplitud de corte
n) Persona autorizada a realizar el Manual
Técnico:
o) Lugar y Fecha
PT
(Tradução do manual original)
Declaração CE de Conformidade
(Diretiva de Máquinas 2006/42/CE, Anexo II,
parte A)
1. A Empresa
2. Declara sob a própria responsabilidade que a
máquina: Corta-relvas para operador sentado/
corte da relva
a) Tipo / Modelo Base
b) Mês / Ano de fabrico
c) Matrícula
d) Motor: motor a explosão
3. É conforme às especificações das diretivas:
e) Órgão certificador
f) Exame CE do Tipo
4. Referência às Normas harmonizadas
g) Nível medido de potência sonora
h) Nível garantido de potência sonora
i) Amplitude de corte
n) Pessoa autorizada a elaborar o Caderno
Técnico
o) Local e Data
EL (
Μετάφραση του πρωτοτύπου των οδηγιών
χρήσης)
EK-Δήλωση συμμόρφωσης
(Οδηγία Μηχανών 2006/42/CE, Παράρτημα II,
μέρος A)
1. Η Εταιρία
2. Δηλώνει υπεύθυνα ότι η μηχανή:
Χλοοκοπτικό τρακτέρ με εποχούμενο χειριστή/
κοπή της χλόης
a) Τύπος / Βασικό Μοντέλο
b) Μήνας / Έτος κατασκευής
c) Αριθμός μητρώου
d) Κινητήρας: κινητήρας εσωτερικής ανάφλεξης
3. Συμμορφώνεται με τις προδιαγραφές της
οδηγίας:
e) Οργανισμός πιστοποίησης
f) Εξέταση CE του Τύπου
4. Αναφορά στους Κανονισμούς εναρμόνισης
g) Στάθμη μέτρησης ακουστικής ισχύος
h) Στάθμη εγγυημένης ακουστικής ισχύος
i) Εύρος κοπής
n) Εξουσιοδοτημένο άτομο για την κατάρτιση
του Τεχνικού Φυλλαδίου:
o) Τόπος και Χρόνος
TR (Orijinal Talimatların Tercümesi)
AT Uygunluk Beyanı
(2006/42/CE Makine Direktifi, Ek II, bölüm A)
1. Şirket
2. Şahsi sorumluluğu altında aşağıdaki
makinenin: Oturan sürücülü çim biçme makinesi
/ çim kesimi
a) Tip / Standart model
b) Üretimin Ay / yıl
c) Sicil numarası
d) Motor: patlamalı motor
3. Aşağıdaki direktiflerin özelliklerine uygun
olduğunu beyan etmektedir:
e) Sertifikalandıran kurum
f) ... Tipi CE incelemesi
4. Harmonize standartlara atıf
g) Ölçülen ses güç seviyesi
h) Garanti edilen ses güç seviyesi
i) Kesim genişliği
n) Teknik Dosyayı oluşturmaya yetkili kişi:
o) Yer ve Tarih
MK (Превод на оригиналните упатства)
Декларација за усогласеност со ЕУ
(Директива за машини 2006/42/CE, Анекс II,
дел A)
1. Компанијата
2. изјавува со целосна лична одговорност
дека следната машина: Тревокосачка со
седнат управувач / косење трева
а) Тип / основен модел
б) Месец / Година на производство
в) етикета
г) мотор: мотор со согорување
3. Усогласено со спецификациите според
директивите:
д) тело за сертификација
ѓ) тест СЕ за типот
4. Референци за усогласени нормативи
е) Акустички притисок
ж) измерено ниво на звучна моќност
з) Ниво на гарантирана звучна моќност
н) овластено лице за составување на
Техничката брошура
o) место и датум
EXAMPLE

doc_base r.15 – RO-FM-P_0
DICHIARAZIONE CE DI CONFORMITÁ (Istruzioni Originali)
(Direttiva Macchine 2006/42/CE, Allegato II, parte A)
1. La Società: ST. S.p.A. – Via del Lavoro, 6 – 31033 Castelfranco Veneto (TV) – Italy
2. Dichiara sotto la propria responsabilità, che la macchina: Tosaerba con conducente a bordo seduto / taglio erba
a) Tipo / Modello Base
TC 108
b) Mese/Anno di costruzione
c) Matricola
d) Motore
a scoppio
3. É conforme alle specifiche delle direttive:
• MD: 2006/42/EC
e) Ente Certificatore: /
f) Esame CE del tipo: /
• OND: 2000/14/EC, ANNEX VI - 2005/88/EC
D. Lgs. 262/2002, ANNEX VI, proc. 1 (Italy)
e) Ente Certificatore: N°0197–TÜV Rheinland LGA Products GmbH
Tillystrasse 2, 90431 Nürnberg – Germany
• EMCD: 2014/30/EU
• RoHS II: 2011/65/EU - 2015/863/EU
4. Riferimento alle Norme armonizzate:
EN ISO 5395-1:2013+A1:2018
EN ISO 5395-3:2013+A1:2017+A2:2018
EN 55012:2007+A1:2009
EN ISO 14982:2009
EN 50581:2012
g) Livello di potenza sonora misurato
100
dB(A)
h) Livello di potenza sonora garantito
100
dB(A)
i) Ampiezza di taglio
105
cm
n) Persona autorizzata a costituire il Fascicolo Tecnico: ST. S.p.A.
Via del Lavoro, 6
31033 Castelfranco Veneto (TV)- Italia
o) Castelfranco V.to, 01.09.2019 CEO Stiga Group
Sean Robinson
171512725_6
FR (
Traduction de la notice originale)
Déclaration CE de Conformité
(Directive Machines 2006/42/CE, Annexe II, partie
A)
1. La Société
2. Déclare sous sa propre responsabilité que la
machine : Tondeuse à gazon à conducteur
assis/ coupe du gazon
a) Type / Modèle de Base
b) Mois / Année de construction
c) Série
d) Moteur: moteur essence
3. Est conforme aux prescriptions des
directives :
e) Organisme de certification
f) Examen CE du Type
4. Renvoi aux Normes harmonisées
g) Niveau de puissance sonore mesuré
h) Niveau de puissance sonore garanti
i) Largeur de coupe
n) Personne habilitée à établir le Dossier
Technique :
o) Lieu et Date
EN (
Translation of the original instruction)
EC Declaration of Conformity
(Machine Directive 2006/42/EC, Annex II, part A)
1. The Company
2. Herby declares under its own responsibility
that the machine: ride-on lawnmower with
seated operator/ Grass cutting
a) Type / Base Model
b) Month / Year of manufacture
c) Serial number
d) Motor: petrol
3. Conforms to directive specifications:
e) Certifying body
f) EC examination of Type
4. Reference to harmonised Standards
g) Sound power level measured
h) Sound power level guaranteed
i) Range of cut
n) Person authorised to create the Technical
Folder:
o) Place and Date
DE (
Übersetzung der Originalbetriebsanleitung
)
EG-Konformitätserklärung
(Maschinenrichtlinie 2006/42/EG, Anhang II, Teil
A)
1. Die Gesellschaft
2. Erklärt auf eigene Verantwortung, dass die
Maschine: Aufsitzmäher / Rasenschnitt
a) Typ / Basismodell
b) Monat / Baujahr
c) Seriennummer
d) Motor: Verbrennungsmotor
3. Den Anforderungen der folgenden Richtlinien
entspricht:
e) Zertifizierungsstelle
f) EG-Baumusterprüfung
4. Bezugnahme auf die harmonisierten Normen
g) Gemessener Schallleistungspegel
h) Garantierter Schallleistungspegel
i) Schnittbreite
n) Zur Verfassung der technischen Unterlagen
befugte Person:
o) Ort und Datum
NL
(
Vertaling van de oorspronkelijke gebruiksaanwijzing)
EG-verklaring van overeenstemming
(Richtlijn Machines 2006/42/CE, Bijlage II, deel A)
1. Het bedrijf
2. Verklaart onder zijn eigen
verantwoordelijkheid dat de machine:
Grasmaaier met zittende bediener / grasmaaier
a) Type / Basismodel
b) Maand / Bouwjaar
c) Serienummer
d) Motor: benzinemotor
3. Voldoet aan de specificaties van de
richtlijnen:
e) Certificatie-instituut
f) EG-onderzoek van het Type
4. Verwijzing naar de Geharmoniseerde normen
g) Gemeten niveau van geluidsvermogen
h) Gegarandeerd niveau van geluidsvermogen
i) Snijbreedte
n) Bevoegd persoon voor het opstellen van het
Technisch Dossier
o) Plaats en Datum
ES
(Traducción del Manual Original)
Declaración de Conformidad CE
(Directiva Máquinas 2006/42/CE, Anexo II, parte
A)
1. La Empresa
2. Declara bajo su propia responsabilidad que la
máquina: Cortadora de pasto con conductor
sentado/ Corte hierba
a) Tipo / Modelo Base
b) Mes / Año de fabricación
c) Matrícula
d) Motor: motor de explosión
3. Cumple con las especificaciones de las
directivas:
e) Ente certificador
f) Examen CE del Tipo
4. Referencia a las Normas armonizadas
g) Nivel de potencia sonora medido
h) Nivel de potencia sonora garantizado
i) Amplitud de corte
n) Persona autorizada a realizar el Manual
Técnico:
o) Lugar y Fecha
PT
(Tradução do manual original)
Declaração CE de Conformidade
(Diretiva de Máquinas 2006/42/CE, Anexo II,
parte A)
1. A Empresa
2. Declara sob a própria responsabilidade que a
máquina: Corta-relvas para operador sentado/
corte da relva
a) Tipo / Modelo Base
b) Mês / Ano de fabrico
c) Matrícula
d) Motor: motor a explosão
3. É conforme às especificações das diretivas:
e) Órgão certificador
f) Exame CE do Tipo
4. Referência às Normas harmonizadas
g) Nível medido de potência sonora
h) Nível garantido de potência sonora
i) Amplitude de corte
n) Pessoa autorizada a elaborar o Caderno
Técnico
o) Local e Data
EL (
Μετάφραση του πρωτοτύπου των οδηγιών
χρήσης)
EK-Δήλωση συμμόρφωσης
(Οδηγία Μηχανών 2006/42/CE, Παράρτημα II,
μέρος A)
1. Η Εταιρία
2. Δηλώνει υπεύθυνα ότι η μηχανή:
Χλοοκοπτικό τρακτέρ με εποχούμενο χειριστή/
κοπή της χλόης
a) Τύπος / Βασικό Μοντέλο
b) Μήνας / Έτος κατασκευής
c) Αριθμός μητρώου
d) Κινητήρας: κινητήρας εσωτερικής ανάφλεξης
3. Συμμορφώνεται με τις προδιαγραφές της
οδηγίας:
e) Οργανισμός πιστοποίησης
f) Εξέταση CE του Τύπου
4. Αναφορά στους Κανονισμούς εναρμόνισης
g) Στάθμη μέτρησης ακουστικής ισχύος
h) Στάθμη εγγυημένης ακουστικής ισχύος
i) Εύρος κοπής
n) Εξουσιοδοτημένο άτομο για την κατάρτιση
του Τεχνικού Φυλλαδίου:
o) Τόπος και Χρόνος
TR (Orijinal Talimatların Tercümesi)
AT Uygunluk Beyanı
(2006/42/CE Makine Direktifi, Ek II, bölüm A)
1. Şirket
2. Şahsi sorumluluğu altında aşağıdaki
makinenin: Oturan sürücülü çim biçme makinesi
/ çim kesimi
a) Tip / Standart model
b) Üretimin Ay / yıl
c) Sicil numarası
d) Motor: patlamalı motor
3. Aşağıdaki direktiflerin özelliklerine uygun
olduğunu beyan etmektedir:
e) Sertifikalandıran kurum
f) ... Tipi CE incelemesi
4. Harmonize standartlara atıf
g) Ölçülen ses güç seviyesi
h) Garanti edilen ses güç seviyesi
i) Kesim genişliği
n) Teknik Dosyayı oluşturmaya yetkili kişi:
o) Yer ve Tarih
MK (Превод на оригиналните упатства)
Декларација за усогласеност со ЕУ
(Директива за машини 2006/42/CE, Анекс II,
дел A)
1. Компанијата
2. изјавува со целосна лична одговорност
дека следната машина: Тревокосачка со
седнат управувач / косење трева
а) Тип / основен модел
б) Месец / Година на производство
в) етикета
г) мотор: мотор со согорување
3. Усогласено со спецификациите според
директивите:
д) тело за сертификација
ѓ) тест СЕ за типот
4. Референци за усогласени нормативи
е) Акустички притисок
ж) измерено ниво на звучна моќност
з) Ниво на гарантирана звучна моќност
н) овластено лице за составување на
Техничката брошура
o) место и датум
EXAMPLE

doc_base r.15 – RO-FM-P_0
DICHIARAZIONE CE DI CONFORMITÁ (Istruzioni Originali)
(Direttiva Macchine 2006/42/CE, Allegato II, parte A)
1. La Società: ST. S.p.A. – Via del Lavoro, 6 – 31033 Castelfranco Veneto (TV) – Italy
2. Dichiara sotto la propria responsabilità, che la macchina: Tosaerba con conducente a bordo seduto / taglio erba
a) Tipo / Modello Base
TC, TC HE 118
b) Mese/Anno di costruzione
c) Matricola
d) Motore
a scoppio
3. É conforme alle specifiche delle direttive:
• MD: 2006/42/EC
e) Ente Certificatore: /
f) Esame CE del tipo: /
• OND: 2000/14/EC, ANNEX VI - 2005/88/EC
D. Lgs. 262/2002, ANNEX VI, proc. 1 (Italy)
e) Ente Certificatore: N°0197–TÜV Rheinland LGA Products GmbH
Tillystrasse 2, 90431 Nürnberg – Germany
• EMCD: 2014/30/EU
• RoHS II: 2011/65/EU - 2015/863/EU
4. Riferimento alle Norme armonizzate:
EN ISO 5395-1:2013+A1:2018
EN ISO 5395-3:2013+A1:2017+A2:2018
EN 55012:2007+A1:2009
EN ISO 14982:2009
EN 50581:2012
g) Livello di potenza sonora misurato
105
dB(A)
h) Livello di potenza sonora garantito
105
dB(A)
i) Ampiezza di taglio
121
cm
n) Persona autorizzata a costituire il Fascicolo Tecnico: ST. S.p.A.
Via del Lavoro, 6
31033 Castelfranco Veneto (TV)- Italia
o) Castelfranco V.to, 01.09.2019 CEO Stiga Group
Sean Robinson
171512726_6
FR (
Traduction de la notice originale)
Déclaration CE de Conformité
(Directive Machines 2006/42/CE, Annexe II, partie
A)
1. La Société
2. Déclare sous sa propre responsabilité que la
machine : Tondeuse à gazon à conducteur
assis/ coupe du gazon
a) Type / Modèle de Base
b) Mois / Année de construction
c) Série
d) Moteur: moteur essence
3. Est conforme aux prescriptions des
directives :
e) Organisme de certification
f) Examen CE du Type
4. Renvoi aux Normes harmonisées
g) Niveau de puissance sonore mesuré
h) Niveau de puissance sonore garanti
i) Largeur de coupe
n) Personne habilitée à établir le Dossier
Technique :
o) Lieu et Date
EN (
Translation of the original instruction)
EC Declaration of Conformity
(Machine Directive 2006/42/EC, Annex II, part A)
1. The Company
2. Herby declares under its own responsibility
that the machine: ride-on lawnmower with
seated operator/ Grass cutting
a) Type / Base Model
b) Month / Year of manufacture
c) Serial number
d) Motor: petrol
3. Conforms to directive specifications:
e) Certifying body
f) EC examination of Type
4. Reference to harmonised Standards
g) Sound power level measured
h) Sound power level guaranteed
i) Range of cut
n) Person authorised to create the Technical
Folder:
o) Place and Date
DE (
Übersetzung der Originalbetriebsanleitung
)
EG-Konformitätserklärung
(Maschinenrichtlinie 2006/42/EG, Anhang II, Teil
A)
1. Die Gesellschaft
2. Erklärt auf eigene Verantwortung, dass die
Maschine: Aufsitzmäher / Rasenschnitt
a) Typ / Basismodell
b) Monat / Baujahr
c) Seriennummer
d) Motor: Verbrennungsmotor
3. Den Anforderungen der folgenden Richtlinien
entspricht:
e) Zertifizierungsstelle
f) EG-Baumusterprüfung
4. Bezugnahme auf die harmonisierten Normen
g) Gemessener Schallleistungspegel
h) Garantierter Schallleistungspegel
i) Schnittbreite
n) Zur Verfassung der technischen Unterlagen
befugte Person:
o) Ort und Datum
NL
(
Vertaling van de oorspronkelijke gebruiksaanwijzing)
EG-verklaring van overeenstemming
(Richtlijn Machines 2006/42/CE, Bijlage II, deel A)
1. Het bedrijf
2. Verklaart onder zijn eigen
verantwoordelijkheid dat de machine:
Grasmaaier met zittende bediener / grasmaaier
a) Type / Basismodel
b) Maand / Bouwjaar
c) Serienummer
d) Motor: benzinemotor
3. Voldoet aan de specificaties van de
richtlijnen:
e) Certificatie-instituut
f) EG-onderzoek van het Type
4. Verwijzing naar de Geharmoniseerde normen
g) Gemeten niveau van geluidsvermogen
h) Gegarandeerd niveau van geluidsvermogen
i) Snijbreedte
n) Bevoegd persoon voor het opstellen van het
Technisch Dossier
o) Plaats en Datum
ES
(Traducción del Manual Original)
Declaración de Conformidad CE
(Directiva Máquinas 2006/42/CE, Anexo II, parte
A)
1. La Empresa
2. Declara bajo su propia responsabilidad que la
máquina: Cortadora de pasto con conductor
sentado/ Corte hierba
a) Tipo / Modelo Base
b) Mes / Año de fabricación
c) Matrícula
d) Motor: motor de explosión
3. Cumple con las especificaciones de las
directivas:
e) Ente certificador
f) Examen CE del Tipo
4. Referencia a las Normas armonizadas
g) Nivel de potencia sonora medido
h) Nivel de potencia sonora garantizado
i) Amplitud de corte
n) Persona autorizada a realizar el Manual
Técnico:
o) Lugar y Fecha
PT
(Tradução do manual original)
Declaração CE de Conformidade
(Diretiva de Máquinas 2006/42/CE, Anexo II,
parte A)
1. A Empresa
2. Declara sob a própria responsabilidade que a
máquina: Corta-relvas para operador sentado/
corte da relva
a) Tipo / Modelo Base
b) Mês / Ano de fabrico
c) Matrícula
d) Motor: motor a explosão
3. É conforme às especificações das diretivas:
e) Órgão certificador
f) Exame CE do Tipo
4. Referência às Normas harmonizadas
g) Nível medido de potência sonora
h) Nível garantido de potência sonora
i) Amplitude de corte
n) Pessoa autorizada a elaborar o Caderno
Técnico
o) Local e Data
EL (
Μετάφραση του πρωτοτύπου των οδηγιών
χρήσης)
EK-Δήλωση συμμόρφωσης
(Οδηγία Μηχανών 2006/42/CE, Παράρτημα II,
μέρος A)
1. Η Εταιρία
2. Δηλώνει υπεύθυνα ότι η μηχανή:
Χλοοκοπτικό τρακτέρ με εποχούμενο χειριστή/
κοπή της χλόης
a) Τύπος / Βασικό Μοντέλο
b) Μήνας / Έτος κατασκευής
c) Αριθμός μητρώου
d) Κινητήρας: κινητήρας εσωτερικής ανάφλεξης
3. Συμμορφώνεται με τις προδιαγραφές της
οδηγίας:
e) Οργανισμός πιστοποίησης
f) Εξέταση CE του Τύπου
4. Αναφορά στους Κανονισμούς εναρμόνισης
g) Στάθμη μέτρησης ακουστικής ισχύος
h) Στάθμη εγγυημένης ακουστικής ισχύος
i) Εύρος κοπής
n) Εξουσιοδοτημένο άτομο για την κατάρτιση
του Τεχνικού Φυλλαδίου:
o) Τόπος και Χρόνος
TR (Orijinal Talimatların Tercümesi)
AT Uygunluk Beyanı
(2006/42/CE Makine Direktifi, Ek II, bölüm A)
1. Şirket
2. Şahsi sorumluluğu altında aşağıdaki
makinenin: Oturan sürücülü çim biçme makinesi
/ çim kesimi
a) Tip / Standart model
b) Üretimin Ay / yıl
c) Sicil numarası
d) Motor: patlamalı motor
3. Aşağıdaki direktiflerin özelliklerine uygun
olduğunu beyan etmektedir:
e) Sertifikalandıran kurum
f) ... Tipi CE incelemesi
4. Harmonize standartlara atıf
g) Ölçülen ses güç seviyesi
h) Garanti edilen ses güç seviyesi
i) Kesim genişliği
n) Teknik Dosyayı oluşturmaya yetkili kişi:
o) Yer ve Tarih
MK (Превод на оригиналните упатства)
Декларација за усогласеност со ЕУ
(Директива за машини 2006/42/CE, Анекс II,
дел A)
1. Компанијата
2. изјавува со целосна лична одговорност
дека следната машина: Тревокосачка со
седнат управувач / косење трева
а) Тип / основен модел
б) Месец / Година на производство
в) етикета
г) мотор: мотор со согорување
3. Усогласено со спецификациите според
директивите:
д) тело за сертификација
ѓ) тест СЕ за типот
4. Референци за усогласени нормативи
е) Акустички притисок
ж) измерено ниво на звучна моќност
з) Ниво на гарантирана звучна моќност
н) овластено лице за составување на
Техничката брошура
o) место и датум
EXAMPLE

doc_base r.15 – RO-FM-P_0
DICHIARAZIONE CE DI CONFORMITÁ (Istruzioni Originali)
(Direttiva Macchine 2006/42/CE, Allegato II, parte A)
1. La Società: ST. S.p.A. – Via del Lavoro, 6 – 31033 Castelfranco Veneto (TV) – Italy
2. Dichiara sotto la propria responsabilità, che la macchina: Tosaerba con conducente a bordo seduto / taglio erba
a) Tipo / Modello Base
TC, TC HE 122
b) Mese/Anno di costruzione
c) Matricola
d) Motore
a scoppio
3. É conforme alle specifiche delle direttive:
• MD: 2006/42/EC
e) Ente Certificatore: /
f) Esame CE del tipo: /
• OND: 2000/14/EC, ANNEX VI - 2005/88/EC
D. Lgs. 262/2002, ANNEX VI, proc. 1 (Italy)
e) Ente Certificatore: N°0197–TÜV Rheinland LGA Products GmbH
Tillystrasse 2, 90431 Nürnberg – Germany
• EMCD: 2014/30/EU
• RoHS II: 2011/65/EU - 2015/863/EU
4. Riferimento alle Norme armonizzate:
EN ISO 5395-1:2013+A1:2018
EN ISO 5395-3:2013+A1:2017+A2:2018
EN 55012:2007+A1:2009
EN ISO 14982:2009
EN 50581:2012
g) Livello di potenza sonora misurato
104
dB(A)
h) Livello di potenza sonora garantito
105
dB(A)
i) Ampiezza di taglio
121
cm
n) Persona autorizzata a costituire il Fascicolo Tecnico: ST. S.p.A.
Via del Lavoro, 6
31033 Castelfranco Veneto (TV)- Italia
o) Castelfranco V.to, 01.09.2019 CEO Stiga Group
Sean Robinson
171512696_10
FR (
Traduction de la notice originale)
Déclaration CE de Conformité
(Directive Machines 2006/42/CE, Annexe II, partie
A)
1. La Société
2. Déclare sous sa propre responsabilité que la
machine : Tondeuse à gazon à conducteur
assis/ coupe du gazon
a) Type / Modèle de Base
b) Mois / Année de construction
c) Série
d) Moteur: moteur essence
3. Est conforme aux prescriptions des
directives :
e) Organisme de certification
f) Examen CE du Type
4. Renvoi aux Normes harmonisées
g) Niveau de puissance sonore mesuré
h) Niveau de puissance sonore garanti
i) Largeur de coupe
n) Personne habilitée à établir le Dossier
Technique :
o) Lieu et Date
EN (
Translation of the original instruction)
EC Declaration of Conformity
(Machine Directive 2006/42/EC, Annex II, part A)
1. The Company
2. Herby declares under its own responsibility
that the machine: ride-on lawnmower with
seated operator/ Grass cutting
a) Type / Base Model
b) Month / Year of manufacture
c) Serial number
d) Motor: petrol
3. Conforms to directive specifications:
e) Certifying body
f) EC examination of Type
4. Reference to harmonised Standards
g) Sound power level measured
h) Sound power level guaranteed
i) Range of cut
n) Person authorised to create the Technical
Folder:
o) Place and Date
DE (
Übersetzung der Originalbetriebsanleitung
)
EG-Konformitätserklärung
(Maschinenrichtlinie 2006/42/EG, Anhang II, Teil
A)
1. Die Gesellschaft
2. Erklärt auf eigene Verantwortung, dass die
Maschine: Aufsitzmäher / Rasenschnitt
a) Typ / Basismodell
b) Monat / Baujahr
c) Seriennummer
d) Motor: Verbrennungsmotor
3. Den Anforderungen der folgenden Richtlinien
entspricht:
e) Zertifizierungsstelle
f) EG-Baumusterprüfung
4. Bezugnahme auf die harmonisierten Normen
g) Gemessener Schallleistungspegel
h) Garantierter Schallleistungspegel
i) Schnittbreite
n) Zur Verfassung der technischen Unterlagen
befugte Person:
o) Ort und Datum
NL
(
Vertaling van de oorspronkelijke gebruiksaanwijzing)
EG-verklaring van overeenstemming
(Richtlijn Machines 2006/42/CE, Bijlage II, deel A)
1. Het bedrijf
2. Verklaart onder zijn eigen
verantwoordelijkheid dat de machine:
Grasmaaier met zittende bediener / grasmaaier
a) Type / Basismodel
b) Maand / Bouwjaar
c) Serienummer
d) Motor: benzinemotor
3. Voldoet aan de specificaties van de
richtlijnen:
e) Certificatie-instituut
f) EG-onderzoek van het Type
4. Verwijzing naar de Geharmoniseerde normen
g) Gemeten niveau van geluidsvermogen
h) Gegarandeerd niveau van geluidsvermogen
i) Snijbreedte
n) Bevoegd persoon voor het opstellen van het
Technisch Dossier
o) Plaats en Datum
ES
(Traducción del Manual Original)
Declaración de Conformidad CE
(Directiva Máquinas 2006/42/CE, Anexo II, parte
A)
1. La Empresa
2. Declara bajo su propia responsabilidad que la
máquina: Cortadora de pasto con conductor
sentado/ Corte hierba
a) Tipo / Modelo Base
b) Mes / Año de fabricación
c) Matrícula
d) Motor: motor de explosión
3. Cumple con las especificaciones de las
directivas:
e) Ente certificador
f) Examen CE del Tipo
4. Referencia a las Normas armonizadas
g) Nivel de potencia sonora medido
h) Nivel de potencia sonora garantizado
i) Amplitud de corte
n) Persona autorizada a realizar el Manual
Técnico:
o) Lugar y Fecha
PT
(Tradução do manual original)
Declaração CE de Conformidade
(Diretiva de Máquinas 2006/42/CE, Anexo II,
parte A)
1. A Empresa
2. Declara sob a própria responsabilidade que a
máquina: Corta-relvas para operador sentado/
corte da relva
a) Tipo / Modelo Base
b) Mês / Ano de fabrico
c) Matrícula
d) Motor: motor a explosão
3. É conforme às especificações das diretivas:
e) Órgão certificador
f) Exame CE do Tipo
4. Referência às Normas harmonizadas
g) Nível medido de potência sonora
h) Nível garantido de potência sonora
i) Amplitude de corte
n) Pessoa autorizada a elaborar o Caderno
Técnico
o) Local e Data
EL (
Μετάφραση του πρωτοτύπου των οδηγιών
χρήσης)
EK-Δήλωση συμμόρφωσης
(Οδηγία Μηχανών 2006/42/CE, Παράρτημα II,
μέρος A)
1. Η Εταιρία
2. Δηλώνει υπεύθυνα ότι η μηχανή:
Χλοοκοπτικό τρακτέρ με εποχούμενο χειριστή/
κοπή της χλόης
a) Τύπος / Βασικό Μοντέλο
b) Μήνας / Έτος κατασκευής
c) Αριθμός μητρώου
d) Κινητήρας: κινητήρας εσωτερικής ανάφλεξης
3. Συμμορφώνεται με τις προδιαγραφές της
οδηγίας:
e) Οργανισμός πιστοποίησης
f) Εξέταση CE του Τύπου
4. Αναφορά στους Κανονισμούς εναρμόνισης
g) Στάθμη μέτρησης ακουστικής ισχύος
h) Στάθμη εγγυημένης ακουστικής ισχύος
i) Εύρος κοπής
n) Εξουσιοδοτημένο άτομο για την κατάρτιση
του Τεχνικού Φυλλαδίου:
o) Τόπος και Χρόνος
TR (Orijinal Talimatların Tercümesi)
AT Uygunluk Beyanı
(2006/42/CE Makine Direktifi, Ek II, bölüm A)
1. Şirket
2. Şahsi sorumluluğu altında aşağıdaki
makinenin: Oturan sürücülü çim biçme makinesi
/ çim kesimi
a) Tip / Standart model
b) Üretimin Ay / yıl
c) Sicil numarası
d) Motor: patlamalı motor
3. Aşağıdaki direktiflerin özelliklerine uygun
olduğunu beyan etmektedir:
e) Sertifikalandıran kurum
f) ... Tipi CE incelemesi
4. Harmonize standartlara atıf
g) Ölçülen ses güç seviyesi
h) Garanti edilen ses güç seviyesi
i) Kesim genişliği
n) Teknik Dosyayı oluşturmaya yetkili kişi:
o) Yer ve Tarih
MK (Превод на оригиналните упатства)
Декларација за усогласеност со ЕУ
(Директива за машини 2006/42/CE, Анекс II,
дел A)
1. Компанијата
2. изјавува со целосна лична одговорност
дека следната машина: Тревокосачка со
седнат управувач / косење трева
а) Тип / основен модел
б) Месец / Година на производство
в) етикета
г) мотор: мотор со согорување
3. Усогласено со спецификациите според
директивите:
д) тело за сертификација
ѓ) тест СЕ за типот
4. Референци за усогласени нормативи
е) Акустички притисок
ж) измерено ниво на звучна моќност
з) Ниво на гарантирана звучна моќност
н) овластено лице за составување на
Техничката брошура
o) место и датум
EXAMPLE
doc_base r. 15 – RO-FM-P_0
NO (Oversettelse av orginal bruksanvisning)
EF- Samsvarserklæring
(Maskindirektiv 2006/42/EF, Vedlegg II, del A)
1. Firmaet
2. Erklærer på eget ansvar at maskinen:
Sittegressklipper / gressklipping
a) Type / Modell
b) Måned / Byggeår
c) Serienummer
d) Motor: forbrenningsmotor
3. Oppfyller kravene i direktivene:
e) Sertifiseringsorgan
f) EF-typeprøving
4. Henvisning til harmoniserte standarder
g) Målt lydeffektnivå
h) Garantert lydeffektnivå
i) Klippebredde
n) Person som har fullmakt til å utferdige teknisk
dokumentasjon:
o) Sted og dato
SV (Översättning av bruksanvisning i original)
EG-försäkran om överensstämmelse
(Maskindirektiv 2006/42//EG, bilaga II, de la)
1. Företaget
2. Försäkrar på eget ansvar att maskinen
Åkgräsklippare / gräsklippning
a) Typ / Basmodell
b) Månad / Tillverkningsår
c) Serienummer
d) Motor: förbränningsmotor
3. Överensstämmer med föreskrifterna i
direktivet
e) Intygsorgan_ Anmält organ
f) EG typgodkännande
4. Referens till harmoniserade standarder
g) Uppmätt ljudeffektnivå
h) Garanterad ljudeffektnivå
i) Skärbredd
n) Auktoriserad person för upprättandet av den
tekniska dokumentationen:
o) Ort och datum
DA (Oversættelse af den originale brugsanvisning)
EF-overensstemmelseserklæring
(Maskindirektiv 2006/42/EF, bilag II, del A)
1. Firmaet
2. Erklærer på eget ansvar, at maskinen:
Havetraktor/ klipning af græsset a) Type / Model
b) Måned / Konstruktionsår
c) Serienummer
d) Motor: forbrændingsmotor
3. Er i overensstemmelse med specifikationerne
ifølge direktiverne:
e) Certificeringsorgan
f) EF-typeafprøvning
4. Henvisning til harmoniserede standarder
g) Målt lydeffektniveau
h) Garanteret lydeffektniveau
i) Klippebredde
n) Person, der har bemyndigelse til at udarbejde
det tekniske dossier:
o) Sted og dato
FI (
Alkuperäisten ohjeiden käännös)
EY-VAATIMUSTENMUKAISUUSVAKUUTUS
(Konedirektiivi 2006/42/EY, Liite II, osa A)
1. Yritys
2. Vakuuttaa omalla vastuullaan, että kone:
Päältäajettava ruohonleikkuri / ruohonleikkuu
a) Tyyppi / Perusmalli
b) Kuukausi /Valmistusvuosi
c) Sarjanumero
d) Moottori : räjähdysmoottori
3. On yhdenmukainen seuraavien direktiivien
asettamien vaatimusten kanssa:
e) Sertifiointiyritys
f) EY-tyyppitarkastus
4. Viittaus harmonisoituihin standardeihin
g) Mitattu äänitehotaso
h) Taattu äänitehotaso
i) Leikkuuleveys
n) Teknisten asiakirjojen laatimiseen valtuutettu
henkilö:
o) Paikka ja päivämäärä
CS (
Překlad původního návodu k používání)
ES – Prohlášení o shodě
(Směrnice o Strojních zařízeních 2006/42/ES,
Příloha II, část A)
1. Společnost
2. Prohlašuje na vlastní odpovědnost, že stroj:
Sekačka se sedící obsluhou/ sekačka na trávu
a) Typ / Základní model
b) Měsíc / Rok výroby
c) Výrobní číslo
d) Motor: spalovací motor
3. Je ve shodě s nařízeními směrnic:
e) Certifikační orgán
f) ES zkouška Typu
4. Odkazy na Harmonizované normy
g) Naměřená úroveň akustického výkonu
h) Zaručená úroveň akustického výkonu
i) Šířka řezání
n) Osoba autorizovaná pro vytvoření
Technického spisu:
o) Místo a Datum
PL (
Tłumaczenie instrukcji oryginalnej)
Deklaracja zgodności WE
(Dyrektywa maszynowa 2006/42/WE, Załącznik II,
część A)
1. Spółka
2. Oświadcza na własną odpowiedzialność, że
maszyna: Kosiarka z operatorem jadącym, w
pozycji siedzącej na maszynie/ cięcie trawy
a) Typ / Model podstawowy
b) Miesiąc / Rok produkcji
c) Numer seryjny
d) Silnik: silnik o zapłonie iskrowym
3. Spełnia podstawowe wymogi następujących
Dyrektyw:
e) Jednostka certyfikująca
f) Badanie typu WE
4. Odniesienie do Norm zharmonizowanych
g) Zmierzony poziom mocy akustycznej
h) Gwarantowany poziom mocy akustycznej
i) Szerokość cięcia
n) Osoba upoważniona do zredagowania
Dokumentacji technicznej:
o) Miejscowość i data
HU (
Eredeti használati utasítás fordítása)
EK-megfelelőségi nyilatkozata
(2006/42/EK gépirányelv, II. melléklet "A" rész)
1. Alulírott Vállalat
2. Felelősségének teljes tudatában kijelenti,
hogy az alábbi gép: Vezetőüléses fűnyírógép/
fűnyírás
a) Típus / Alaptípus
b) Hónap / Gyártás éve
c) Gyártási szám
d) Motor: robbanómotor
3. Megfelel az alábbi irányelvek előírásainak:
e) Tanúsító szerv
f) CE vizsgálat típusa
4. Hivatkozás a harmonizált szabványokra
g) Mért zajteljesítmény szint
h) Garantált zajteljesítmény szint
i) Vágási szélesség
n) Műszaki Dosszié szerkesztésére
felhatalmazott személy:
o) Helye és ideje
RU (
Перевод оригинальных инструкций)
Декларация соответствия нормам ЕС
(Директива о машинном оборудовании
2006/42/ЕС, Приложение II, часть A)
1. Предприятие
2. Заявляет под собственную
ответственность, что машина: Ездовая
косилка с водителем / стрижка газона
a) Тип / Базовая модель
b) Месяц /Год изготовления
c) Паспорт
d) Двигатель: двигатель внутреннего
сгорания
3. Соответствует требованиям следующих
директив:
e) Сертифицирующий орган
f) Испытание ЕС типового образца
4. Ссылки на гармонизированные нормы
g) Измеренный уровень звуковой мощности
h) Гарантируемый уровень звуковой
мощности
i) Амплитуда кошения
n) Лицо, уполномоченное на
подготовку
технической документации:
o) Место и дата
HR (
Prijevod originalnih uputa)
EK Izjava o sukladnosti
(Direktiva 2006/42/EZ o strojevima, dodatak II,
dio A)
1. Tvrtka:
2. pod vlastitom odgovornošću izjavljuje da je
stroj: Sjedeća kosilica trave s operaterom/
košenje trave
a) Vrsta / Osnovni model
b) Mjesec / Godina proizvodnje
c) Matični broj
d) Motor: motor s unutarnjim izgaranjem
3. sukladan s temeljnim zahtjevima direktiva:
e) Certifikacijsko tijelo
f) Tipsko ispitivanje EZ
4. Primijenjene su slijedeće harmonizirane
norme:
g) Izmjerena razina zvučne snage
h) Zajamčena razina zvučne snage
i) Širina rezanja
n) Osoba ovlaštena za pravljenje Tehničke
datoteke:
o) Mjesto i datum
SL (Prevod izvirnih navodil)
ES izjava o skladnosti
(Direktiva 2006/42/ES) , priloga II, del A)
1. Družba
2. pod lastno odgovornostjo izjavlja, da je stroj:
Traktorska kosilnica/ košnja trave
a) Tip / osnovni model
b) Mesec /Leto izdelave
c) Serijska številka
d) Motor: motor z notranjim izgorevanjem
3. Skladen je z določili direktiv :
e) Ustanova, ki izda potrdilo
f) ES pregled tipa
4. Sklicevanje na usklajene predpise
g) Izmerjen nivo zvočne moči
h) Zagotovljen nivo zvočne moči
i) Obseg košnje
n) Oseba, pooblaščena za sestavo tehnične
knjižice:
o) Kraj in datum
BS (Prijevod originalnih uputa)
EZ izjava o sukladnosti
(Direktiva o mašinama 2006/42/EZ, Prilog II, deo
A)
1. Firma
2. Daje izjavu pod vlastitom odgovornošću da je
mašina: Traktorska kosilica (traktorčić) /
Košenje trave
a) Tip / Osnovni model
b) Mjesec / Godina proizvodnje
c) Serijski broj
d) Motor: motor s unutrašnjim izgaranjem
3. sukladna s osnovnim zahtjevima direktive:
e) Certifikaciono tijelo
f) EZ ispitivanje tipa
4. Pozivanje na usklađene norme
g) Izmjereni nivo zvučne snage
h) Garantovani nivo zvučne snage
i) Širina košenja
n) Osoba ovlaštena za izradu tehničke brošure:
o) Mjesto i datum
SK (Preklad pôvodného návodu na použitie)
ES vyhlásenie o zhode
(Smernica o Strojných zariadeniach 2006/42/ES,
Príloha II, časť A)
1. Spoločnosť
2. Vyhlasuje na vlastnú zodpovednosť, že stroj:
Kosačka so sediacou obsluhou/ kosačka na
trávu
a) Typ / Základný model
b) Mesiac / Rok výroby
c) Výrobné číslo
d) Motor: spaľovací motor
3. Je v zhode s nariadeniami smerníc:
e) Certifikačný orgán
f) Skúška typu ES
4. Odkaz na Harmonizované normy
g) Nameraná úroveň akustického výkonu
h) Zaručená úroveň akustického výkonu
i) Šírka kosenia
j) Čistý inštalovaný výkon
n) Osoba autorizovaná na vytvorenie
Technického spisu:
o) Miesto a Dátum
RO (
Traducerea manualului fabricantului)
CE -Declaratie de Conformitate
(Directiva Maşini 2006/42/CE, Anexa II, partea A)
1. Societatea
2. Declară pe propria răspundere că maşina:
Mașină de tuns iarba cu șofer la volan/ tăiat
iarba
a) Tip / Model de bază
b) Luna /Anul de fabricație
c) Număr de serie
d) Motor: motor cu combustie
3. Este în conformitate cu specificaţiile
directivelor:
e) Organism de certificare
f) Examinare CE de Tip
4. Referinţă la Standardele armonizate
g) Nivel de putere sonoră măsurat
h) Nivel de putere sonoră garantat
i) Lăţimea de tăiere
n) Persoană autorizată să întocmească Dosarul
Tehnic
o) Locul şi Data
LT (
Originalių instrukcijų vertimas)
EB atitikties deklaracija
(Mašinų direktyva 2006/42/CE, Priedas II, dalis A)
1. Bendrovė
2. Prisiima atsakomybę, kad įrenginys: Balninė
vejapjovė su sėdinčiu operatoriumi / žolės
pjovimas
a) Tipas / Bazinis Modelis
b) Mėnuo / Pagaminimo metai
c) Serijos numeris
d) Variklis: vidaus degimo variklis
3. Atitinka direktyvose pateiktas specifikacijas:
e) Sertifikavimo įstaiga
f) CE tipo tyrimas
4. Nuoroda į suderintas Normas
g) Išmatuotas garso galios lygis
h) Užtikrinamas garso galios lygis
i) Pjovimo plotis
n) Autorizuotas asmuo sudaryti Techninę
Dokumentaciją:
o) Vieta ir Data
LV (
Instrukciju tulkojums no oriģinālvalodas)
EK atbilstības deklarācija
(Direktīva 2006/42/EK par mašīnām, pielikums II,
daļa A)
1. Uzņēmums
2. Uzņemoties par to pilnu atbildību, paziņo, ka
mašīna: Sēžot vadāma zālienu pļaujmašīna/
zāles pļaušana
a) Tips / Bāzes modelis
b) Mēnesis / Ražošanas gads
c) Sērijas numurs
d) Motors: iekšdedzes motors
3. Atbilst šādu direktīvu prasībām:
e) Sertifikācijas iestāde
f) CE tipveida pārbaude
4. Atsauce uz harmonizētiem standartiem
g) Izmērītais skaņas intensitātes līmenis
h) Garantētais skaņas intensitātes līmenis
i) Pļaušanas platums
n) Pilnvarotais darbinieks, kas sagatavoja
tehnisko dokumentāciju:
o) Vieta un datums
SR (
Prevod originalnih uputstvaI)
EC deklaracija o usaglašenosti
(Direktiva o mašinama 2006/42/EC, Prilog II, deo
A)
1. Preduzeće
2. Daje izjavu pod vlastitom odgovornošću da je
mašina: Traktorska kosačica (traktorčić)/
košenje trave
a) Tip / Osnovni model
b) Mesec /Godina proizvodnje
c) Serijski broj
d) Motor: motor s unutrašnjim sagorevanjem
3. u skladu s osnovnim zahtevima direktiva:
e) Sertifikaciono telo
f) EC ispitivanje tipa:
4. Pozivanje na usklađene norme
g) Izmereni nivo zvučne snage
h) Garantovani nivo zvučne snage
i) Širina košenja.....................
n) Osoba ovlašćena za sastavljanje tehničke
brošure
o) Mesto i datum
BG (
Превод на оригиналните инструкции)
ЕО декларация за съответствие
(Директива Машини 2006/42/ЕО, Приложение
II, част А)
1. Дружеството
2. На собствена отговорност декларира, че
машината: Косачка със седнал водач/ рязане
на трева
а) Вид / Базисен модел
б) Месец / година на производство
в) Сериен номер
г) Мотор: мотор с вътрешно горене
3. Е в съответствие със спецификата на
директивите:
д) Сертифициращ орган
е) ЕО изследване на вида
4. Базирано на хармонизираните норми
ж) Ниво на измерена акустична мощност
и) Гарантирано ниво на акустична мощност
й) Широчина на косене
р) Лице, упълномощено да състави
Техническата Документация:
o) Място и дата
ET (
Algupärase kasutusjuhendi tõlge)
EÜ vastavusdeklaratsioon
(Masinadirektiiv 2006/42/EÜ, Lisa II, osa A)
1. Firma
2. Kinnitab omal vastutusel, et masin: Istuva
juhiga muruniitja / muruniitja
a) Tüüp / Põhimudel
b) Kuu aega / Tootmisaasta
c) Matrikkel
d) Mootor: Sisepõlemismootor
3. Vastab direktiivide nõuetele:
e) Kinnitav asutus
f) EÜ tüübihindamine
4. Viide ühtlustatud standarditele
g) Mõõdetud helivõimsuse tase
h) Garanteeritud helivõimsuse tase
i) Lõikelaius
n) Tehnilise Lehe autoriseeritud koostaja:
o) Koht ja Kuupäev
doc_base r. 15 – RO-FM-P_0
DICHIARAZIONE CE DI CONFORMITÁ (Istruzioni Originali)
(Direttiva Macchine 2006/42/CE, Allegato II, parte A)
1. La Società: ST. S.p.A. – Via del Lavoro, 6 – 31033 Castelfranco Veneto (TV) – Italy
2. Dichiara sotto la propria responsabilità, che la macchina: Tosaerba con conducente a bordo seduto / taglio erba
a) Tipo / Modello Base
TC, TC HE 122
b) Mese/Anno di costruzione
c) Matricola
d) Motore
a scoppio
3. É conforme alle specifiche delle direttive:
• MD: 2006/42/EC
e) Ente Certificatore: /
f) Esame CE del tipo: /
• OND: 2000/14/EC, ANNEX VI - 2005/88/EC
D. Lgs. 262/2002, ANNEX VI, proc. 1 (Italy)
e) Ente Certificatore: N°0197–TÜV Rheinland LGA Products GmbH
Tillystrasse 2, 90431 Nürnberg – Germany
• EMCD: 2014/30/EU
• RoHS II: 2011/65/EU - 2015/863/EU
4. Riferimento alle Norme armonizzate:
EN ISO 5395-1:2013+A1:2018
EN ISO 5395-3:2013+A1:2017+A2:2018
EN 55012:2007+A1:2009
EN ISO 14982:2009
EN 50581:2012
g) Livello di potenza sonora misurato
104
dB(A)
h) Livello di potenza sonora garantito
105
dB(A)
i) Ampiezza di taglio
121
cm
n) Persona autorizzata a costituire il Fascicolo Tecnico: ST. S.p.A.
Via del Lavoro, 6
31033 Castelfranco Veneto (TV)- Italia
o) Castelfranco V.to, 01.09.2019 CEO Stiga Group
Sean Robinson
171512696_10
FR (
Traduction de la notice originale)
Déclaration CE de Conformité
(Directive Machines 2006/42/CE, Annexe II, partie
A)
1. La Société
2. Déclare sous sa propre responsabilité que la
machine : Tondeuse à gazon à conducteur
assis/ coupe du gazon
a) Type / Modèle de Base
b) Mois / Année de construction
c) Série
d) Moteur: moteur essence
3. Est conforme aux prescriptions des
directives :
e) Organisme de certification
f) Examen CE du Type
4. Renvoi aux Normes harmonisées
g) Niveau de puissance sonore mesuré
h) Niveau de puissance sonore garanti
i) Largeur de coupe
n) Personne habilitée à établir le Dossier
Technique :
o) Lieu et Date
EN (
Translation of the original instruction)
EC Declaration of Conformity
(Machine Directive 2006/42/EC, Annex II, part A)
1. The Company
2. Herby declares under its own responsibility
that the machine: ride-on lawnmower with
seated operator/ Grass cutting
a) Type / Base Model
b) Month / Year of manufacture
c) Serial number
d) Motor: petrol
3. Conforms to directive specifications:
e) Certifying body
f) EC examination of Type
4. Reference to harmonised Standards
g) Sound power level measured
h) Sound power level guaranteed
i) Range of cut
n) Person authorised to create the Technical
Folder:
o) Place and Date
DE (
Übersetzung der Originalbetriebsanleitung
)
EG-Konformitätserklärung
(Maschinenrichtlinie 2006/42/EG, Anhang II, Teil
A)
1. Die Gesellschaft
2. Erklärt auf eigene Verantwortung, dass die
Maschine: Aufsitzmäher / Rasenschnitt
a) Typ / Basismodell
b) Monat / Baujahr
c) Seriennummer
d) Motor: Verbrennungsmotor
3. Den Anforderungen der folgenden Richtlinien
entspricht:
e) Zertifizierungsstelle
f) EG-Baumusterprüfung
4. Bezugnahme auf die harmonisierten Normen
g) Gemessener Schallleistungspegel
h) Garantierter Schallleistungspegel
i) Schnittbreite
n) Zur Verfassung der technischen Unterlagen
befugte Person:
o) Ort und Datum
NL
(
Vertaling van de oorspronkelijke gebruiksaanwijzing)
EG-verklaring van overeenstemming
(Richtlijn Machines 2006/42/CE, Bijlage II, deel A)
1. Het bedrijf
2. Verklaart onder zijn eigen
verantwoordelijkheid dat de machine:
Grasmaaier met zittende bediener / grasmaaier
a) Type / Basismodel
b) Maand / Bouwjaar
c) Serienummer
d) Motor: benzinemotor
3. Voldoet aan de specificaties van de
richtlijnen:
e) Certificatie-instituut
f) EG-onderzoek van het Type
4. Verwijzing naar de Geharmoniseerde normen
g) Gemeten niveau van geluidsvermogen
h) Gegarandeerd niveau van geluidsvermogen
i) Snijbreedte
n) Bevoegd persoon voor het opstellen van het
Technisch Dossier
o) Plaats en Datum
ES
(Traducción del Manual Original)
Declaración de Conformidad CE
(Directiva Máquinas 2006/42/CE, Anexo II, parte
A)
1. La Empresa
2. Declara bajo su propia responsabilidad que la
máquina: Cortadora de pasto con conductor
sentado/ Corte hierba
a) Tipo / Modelo Base
b) Mes / Año de fabricación
c) Matrícula
d) Motor: motor de explosión
3. Cumple con las especificaciones de las
directivas:
e) Ente certificador
f) Examen CE del Tipo
4. Referencia a las Normas armonizadas
g) Nivel de potencia sonora medido
h) Nivel de potencia sonora garantizado
i) Amplitud de corte
n) Persona autorizada a realizar el Manual
Técnico:
o) Lugar y Fecha
PT
(Tradução do manual original)
Declaração CE de Conformidade
(Diretiva de Máquinas 2006/42/CE, Anexo II,
parte A)
1. A Empresa
2. Declara sob a própria responsabilidade que a
máquina: Corta-relvas para operador sentado/
corte da relva
a) Tipo / Modelo Base
b) Mês / Ano de fabrico
c) Matrícula
d) Motor: motor a explosão
3. É conforme às especificações das diretivas:
e) Órgão certificador
f) Exame CE do Tipo
4. Referência às Normas harmonizadas
g) Nível medido de potência sonora
h) Nível garantido de potência sonora
i) Amplitude de corte
n) Pessoa autorizada a elaborar o Caderno
Técnico
o) Local e Data
EL (
Μετάφραση του πρωτοτύπου των οδηγι ών
χρήσης)
EK-Δήλωση συμμόρφωσης
(Οδηγία Μηχανών 2006/42/CE, Παράρτημα II,
μέρος A)
1. Η Εταιρία
2. Δηλώνει υπεύθυνα ότι η μηχανή:
Χλοοκοπτικό τρακτέρ με εποχούμενο χειριστή/
κοπή της χλόης
a) Τύπος / Βασικό Μοντέλο
b) Μήνας / Έτος κατασκευής
c) Αριθμός μητρώου
d) Κινητήρας: κινητήρας εσωτερικής ανάφλεξης
3. Συμμορφώνεται με τις προδιαγραφές της
οδηγίας:
e) Οργανισμός πιστοποίησης
f) Εξέταση CE του Τύπου
4. Αναφορά στους Κανονισμούς εναρμόνισης
g) Στάθμη μέτρησης ακουστικής ισχύος
h) Στάθμη εγγυημένης ακουστικής ισχύος
i) Εύρος κοπής
n) Εξουσιοδοτημένο άτομο για την κατάρτιση
του Τεχνικού Φυλλαδίου:
o) Τόπος και Χρόνος
TR (Orijinal Talimatların Tercümesi)
AT Uygunluk Beyanı
(2006/42/CE Makine Direktifi, Ek II, bölüm A)
1. Şirket
2. Şahsi sorumluluğu altında aşağıdaki
makinenin: Oturan sürücülü çim biçme makinesi
/ çim kesimi
a) Tip / Standart model
b) Üretimin Ay / yıl
c) Sicil numarası
d) Motor: patlamalı motor
3. Aşağıdaki direktiflerin özelliklerine uygun
olduğunu beyan etmektedir:
e) Sertifikalandıran kurum
f) ... Tipi CE incelemesi
4. Harmonize standartlara atıf
g) Ölçülen ses güç seviyesi
h) Garanti edilen ses güç seviyesi
i) Kesim genişliği
n) Teknik Dosyayı oluşturmaya yetkili kişi:
o) Yer ve Tarih
MK (Превод на оригиналните упатства)
Декларација за усогласеност со ЕУ
(Директива за машини 2006/42/CE, Анекс II,
дел A)
1. Компанијата
2. изјавува со целосна лична одговорност
дека следната машина: Тревокосачка со
седнат управувач / косење трева
а) Тип / основен модел
б) Месец / Година на производство
в) етикета
г) мотор: мотор со согорување
3. Усогласено со спецификациите според
директивите:
д) тело за сертификација
ѓ) тест СЕ за типот
4. Референци за усогласени нормативи
е) Акустички притисок
ж) измерено ниво на звучна моќност
з) Ниво на гарантирана звучна моќност
н) овластено лице за составување на
Техничката брошура
o) место и датум
doc_base r. 15 – RO-FM-P_0
NO (Oversettelse av orginal bruksanvisning)
EF- Samsvarserklæring
(Maskindirektiv 2006/42/EF, Vedlegg II, del A)
1. Firmaet
2. Erklærer på eget ansvar at maskinen:
Sittegressklipper / gressklipping
a) Type / Modell
b) Måned / Byggeår
c) Serienummer
d) Motor: forbrenningsmotor
3. Oppfyller kravene i direktivene:
e) Sertifiseringsorgan
f) EF-typeprøving
4. Henvisning til harmoniserte standarder
g) Målt lydeffektnivå
h) Garantert lydeffektnivå
i) Klippebredde
n) Person som har fullmakt til å utferdige teknisk
dokumentasjon:
o) Sted og dato
SV (Översättning av bruksanvisning i original)
EG-försäkran om överensstämmelse
(Maskindirektiv 2006/42//EG, bilaga II, de la)
1. Företaget
2. Försäkrar på eget ansvar att maskinen
Åkgräsklippare / gräsklippning
a) Typ / Basmodell
b) Månad / Tillverkningsår
c) Serienummer
d) Motor: förbränningsmotor
3. Överensstämmer med föreskrifterna i
direktivet
e) Intygsorgan_ Anmält organ
f) EG typgodkännande
4. Referens till harmoniserade standarder
g) Uppmätt ljudeffektnivå
h) Garanterad ljudeffektnivå
i) Skärbredd
n) Auktoriserad person för upprättandet av den
tekniska dokumentationen:
o) Ort och datum
DA (Oversættelse af den originale brugsanvisning)
EF-overensstemmelseserklæring
(Maskindirektiv 2006/42/EF, bilag II, del A)
1. Firmaet
2. Erklærer på eget ansvar, at maskinen:
Havetraktor/ klipning af græsset a) Type / Model
b) Måned / Konstruktionsår
c) Serienummer
d) Motor: forbrændingsmotor
3. Er i overensstemmelse med specifikationerne
ifølge direktiverne:
e) Certificeringsorgan
f) EF-typeafprøvning
4. Henvisning til harmoniserede standarder
g) Målt lydeffektniveau
h) Garanteret lydeffektniveau
i) Klippebredde
n) Person, der har bemyndigelse til at udarbejde
det tekniske dossier:
o) Sted og dato
FI (
Alkuperäisten ohjeiden käännös)
EY-VAATIMUSTENMUKAISUUSVAKUUTUS
(Konedirektiivi 2006/42/EY, Liite II, osa A)
1. Yritys
2. Vakuuttaa omalla vastuullaan, että kone:
Päältäajettava ruohonleikkuri / ruohonleikkuu
a) Tyyppi / Perusmalli
b) Kuukausi /Valmistusvuosi
c) Sarjanumero
d) Moottori : räjähdysmoottori
3. On yhdenmukainen seuraavien direktiivien
asettamien vaatimusten kanssa:
e) Sertifiointiyritys
f) EY-tyyppitarkastus
4. Viittaus harmonisoituihin standardeihin
g) Mitattu äänitehotaso
h) Taattu äänitehotaso
i) Leikkuuleveys
n) Teknisten asiakirjojen laatimiseen valtuutettu
henkilö:
o) Paikka ja päivämäärä
CS (
Překlad původního návodu k používání)
ES – Prohlášení o shodě
(Směrnice o Strojních zařízeních 2006/42/ES,
Příloha II, část A)
1. Společnost
2. Prohlašuje na vlastní odpovědnost, že stroj:
Sekačka se sedící obsluhou/ sekačka na trávu
a) Typ / Základní model
b) Měsíc / Rok výroby
c) Výrobní číslo
d) Motor: spalovací motor
3. Je ve shodě s nařízeními směrnic:
e) Certifikační orgán
f) ES zkouška Typu
4. Odkazy na Harmonizované normy
g) Naměřená úroveň akustického výkonu
h) Zaručená úroveň akustického výkonu
i) Šířka řezání
n) Osoba autorizovaná pro vytvoření
Technického spisu:
o) Místo a Datum
PL (
Tłumaczenie instrukcji oryginalnej)
Deklaracja zgodności WE
(Dyrektywa maszynowa 2006/42/WE, Załącznik II,
część A)
1. Spółka
2. Oświadcza na własną odpowiedzialność, że
maszyna: Kosiarka z operatorem jadącym, w
pozycji siedzącej na maszynie/ cięcie trawy
a) Typ / Model podstawowy
b) Miesiąc / Rok produkcji
c) Numer seryjny
d) Silnik: silnik o zapłonie iskrowym
3. Spełnia podstawowe wymogi następujących
Dyrektyw:
e) Jednostka certyfikująca
f) Badanie typu WE
4. Odniesienie do Norm zharmonizowanych
g) Zmierzony poziom mocy akustycznej
h) Gwarantowany poziom mocy akustycznej
i) Szerokość cięcia
n) Osoba upoważniona do zredagowania
Dokumentacji technicznej:
o) Miejscowość i data
HU (
Eredeti használati utasítás fordítása)
EK-megfelelőségi nyilatkozata
(2006/42/EK gépirányelv, II. melléklet "A" rész)
1. Alulírott Vállalat
2. Felelősségének teljes tudatában kijelenti,
hogy az alábbi gép: Vezetőüléses fűnyírógép/
fűnyírás
a) Típus / Alaptípus
b) Hónap / Gyártás éve
c) Gyártási szám
d) Motor: robbanómotor
3. Megfelel az alábbi irányelvek előírásainak:
e) Tanúsító szerv
f) CE vizsgálat típusa
4. Hivatkozás a harmonizált szabványokra
g) Mért zajteljesítmény szint
h) Garantált zajteljesítmény szint
i) Vágási szélesség
n) Műszaki Dosszié szerkesztésére
felhatalmazott személy:
o) Helye és ideje
RU (
Перевод оригинальных инструкций)
Декларация соответствия нормам ЕС
(Директива о машинном оборудовании
2006/42/ЕС, Приложение II, часть A)
1. Предприятие
2. Заявляет под собственную
ответственность, что машина: Ездовая
косилка с водителем / стрижка газона
a) Тип / Базовая модель
b) Месяц /Год изготовления
c) Паспорт
d) Двигатель: двигатель внутреннего
сгорания
3. Соответствует требованиям следующих
директив:
e) Сертифицирующий орган
f) Испытание ЕС типового образца
4. Ссылки на гармонизированные нормы
g) Измеренный уровень звуковой мощности
h) Гарантируемый уровень звуковой
мощности
i) Амплитуда кошения
n) Лицо, уполномоченное на
подготовку
технической документации:
o) Место и дата
HR (
Prijevod originalnih uputa)
EK Izjava o sukladnosti
(Direktiva 2006/42/EZ o strojevima, dodatak II,
dio A)
1. Tvrtka:
2. pod vlastitom odgovornošću izjavljuje da je
stroj: Sjedeća kosilica trave s operaterom/
košenje trave
a) Vrsta / Osnovni model
b) Mjesec / Godina proizvodnje
c) Matični broj
d) Motor: motor s unutarnjim izgaranjem
3. sukladan s temeljnim zahtjevima direktiva:
e) Certifikacijsko tijelo
f) Tipsko ispitivanje EZ
4. Primijenjene su slijedeće harmonizirane
norme:
g) Izmjerena razina zvučne snage
h) Zajamčena razina zvučne snage
i) Širina rezanja
n) Osoba ovlaštena za pravljenje Tehničke
datoteke:
o) Mjesto i datum
SL (Prevod izvirnih navodil)
ES izjava o skladnosti
(Direktiva 2006/42/ES) , priloga II, del A)
1. Družba
2. pod lastno odgovornostjo izjavlja, da je stroj:
Traktorska kosilnica/ košnja trave
a) Tip / osnovni model
b) Mesec /Leto izdelave
c) Serijska številka
d) Motor: motor z notranjim izgorevanjem
3. Skladen je z določili direktiv :
e) Ustanova, ki izda potrdilo
f) ES pregled tipa
4. Sklicevanje na usklajene predpise
g) Izmerjen nivo zvočne moči
h) Zagotovljen nivo zvočne moči
i) Obseg košnje
n) Oseba, pooblaščena za sestavo tehnične
knjižice:
o) Kraj in datum
BS (Prijevod originalnih uputa)
EZ izjava o sukladnosti
(Direktiva o mašinama 2006/42/EZ, Prilog II, deo
A)
1. Firma
2. Daje izjavu pod vlastitom odgovornošću da je
mašina: Traktorska kosilica (traktorčić) /
Košenje trave
a) Tip / Osnovni model
b) Mjesec / Godina proizvodnje
c) Serijski broj
d) Motor: motor s unutrašnjim izgaranjem
3. sukladna s osnovnim zahtjevima direktive:
e) Certifikaciono tijelo
f) EZ ispitivanje tipa
4. Pozivanje na usklađene norme
g) Izmjereni nivo zvučne snage
h) Garantovani nivo zvučne snage
i) Širina košenja
n) Osoba ovlaštena za izradu tehničke brošure:
o) Mjesto i datum
SK (Preklad pôvodného návodu na použitie)
ES vyhlásenie o zhode
(Smernica o Strojných zariadeniach 2006/42/ES,
Príloha II, časť A)
1. Spoločnosť
2. Vyhlasuje na vlastnú zodpovednosť, že stroj:
Kosačka so sediacou obsluhou/ kosačka na
trávu
a) Typ / Základný model
b) Mesiac / Rok výroby
c) Výrobné číslo
d) Motor: spaľovací motor
3. Je v zhode s nariadeniami smerníc:
e) Certifikačný orgán
f) Skúška typu ES
4. Odkaz na Harmonizované normy
g) Nameraná úroveň akustického výkonu
h) Zaručená úroveň akustického výkonu
i) Šírka kosenia
j) Čistý inštalovaný výkon
n) Osoba autorizovaná na vytvorenie
Technického spisu:
o) Miesto a Dátum
RO (
Traducerea manualului fabricantului)
CE -Declaratie de Conformitate
(Directiva Maşini 2006/42/CE, Anexa II, partea A)
1. Societatea
2. Declară pe propria răspundere că maşina:
Mașină de tuns iarba cu șofer la volan/ tăiat
iarba
a) Tip / Model de bază
b) Luna /Anul de fabricație
c) Număr de serie
d) Motor: motor cu combustie
3. Este în conformitate cu specificaţiile
directivelor:
e) Organism de certificare
f) Examinare CE de Tip
4. Referinţă la Standardele armonizate
g) Nivel de putere sonoră măsurat
h) Nivel de putere sonoră garantat
i) Lăţimea de tăiere
n) Persoană autorizată să întocmească Dosarul
Tehnic
o) Locul şi Data
LT (
Originalių instrukcijų vertimas)
EB atitikties deklaracija
(Mašinų direktyva 2006/42/CE, Priedas II, dalis A)
1. Bendrovė
2. Prisiima atsakomybę, kad įrenginys: Balninė
vejapjovė su sėdinčiu operatoriumi / žolės
pjovimas
a) Tipas / Bazinis Modelis
b) Mėnuo / Pagaminimo metai
c) Serijos numeris
d) Variklis: vidaus degimo variklis
3. Atitinka direktyvose pateiktas specifikacijas:
e) Sertifikavimo įstaiga
f) CE tipo tyrimas
4. Nuoroda į suderintas Normas
g) Išmatuotas garso galios lygis
h) Užtikrinamas garso galios lygis
i) Pjovimo plotis
n) Autorizuotas asmuo sudaryti Techninę
Dokumentaciją:
o) Vieta ir Data
LV (
Instrukciju tulkojums no oriģinālvalodas)
EK atbilstības deklarācija
(Direktīva 2006/42/EK par mašīnām, pielikums II,
daļa A)
1. Uzņēmums
2. Uzņemoties par to pilnu atbildību, paziņo, ka
mašīna: Sēžot vadāma zālienu pļaujmašīna/
zāles pļaušana
a) Tips / Bāzes modelis
b) Mēnesis / Ražošanas gads
c) Sērijas numurs
d) Motors: iekšdedzes motors
3. Atbilst šādu direktīvu prasībām:
e) Sertifikācijas iestāde
f) CE tipveida pārbaude
4. Atsauce uz harmonizētiem standartiem
g) Izmērītais skaņas intensitātes līmenis
h) Garantētais skaņas intensitātes līmenis
i) Pļaušanas platums
n) Pilnvarotais darbinieks, kas sagatavoja
tehnisko dokumentāciju:
o) Vieta un datums
SR (
Prevod originalnih uputstvaI)
EC deklaracija o usaglašenosti
(Direktiva o mašinama 2006/42/EC, Prilog II, deo
A)
1. Preduzeće
2. Daje izjavu pod vlastitom odgovornošću da je
mašina: Traktorska kosačica (traktorčić)/
košenje trave
a) Tip / Osnovni model
b) Mesec /Godina proizvodnje
c) Serijski broj
d) Motor: motor s unutrašnjim sagorevanjem
3. u skladu s osnovnim zahtevima direktiva:
e) Sertifikaciono telo
f) EC ispitivanje tipa:
4. Pozivanje na usklađene norme
g) Izmereni nivo zvučne snage
h) Garantovani nivo zvučne snage
i) Širina košenja.....................
n) Osoba ovlašćena za sastavljanje tehničke
brošure
o) Mesto i datum
BG (
Превод на оригиналните инструкции)
ЕО декларация за съответствие
(Директива Машини 2006/42/ЕО, Приложение
II, част А)
1. Дружеството
2. На собствена отговорност декларира, че
машината: Косачка със седнал водач/ рязане
на трева
а) Вид / Базисен модел
б) Месец / година на производство
в) Сериен номер
г) Мотор: мотор с вътрешно горене
3. Е в съответствие със спецификата на
директивите:
д) Сертифициращ орган
е) ЕО изследване на вида
4. Базирано на хармонизираните норми
ж) Ниво на измерена акустична мощност
и) Гарантирано ниво на акустична мощност
й) Широчина на косене
р) Лице, упълномощено да състави
Техническата Документация:
o) Място и дата
ET (
Algupärase kasutusjuhendi tõlge)
EÜ vastavusdeklaratsioon
(Masinadirektiiv 2006/42/EÜ, Lisa II, osa A)
1. Firma
2. Kinnitab omal vastutusel, et masin: Istuva
juhiga muruniitja / muruniitja
a) Tüüp / Põhimudel
b) Kuu aega / Tootmisaasta
c) Matrikkel
d) Mootor: Sisepõlemismootor
3. Vastab direktiivide nõuetele:
e) Kinnitav asutus
f) EÜ tüübihindamine
4. Viide ühtlustatud standarditele
g) Mõõdetud helivõimsuse tase
h) Garanteeritud helivõimsuse tase
i) Lõikelaius
n) Tehnilise Lehe autoriseeritud koostaja:
o) Koht ja Kuupäev
EXAMPLE

© by ST. S.p.A.
IT • Il contenuto e le immagini del presente manuale d’uso sono stati realizzati per conto di ST. S.p.A. e sono tutelati da diritto d’autore – E’
vietata ogni riproduzione o alterazione anche parziale non autorizzata del documento.
BG • Съдържанието и изображенията в настоящото ръководство са извършени за ST. S.p.A. и са защитени с авторски права –
Забранява се всяко неоторизирано възпроизвеждане или промяна, дори и отчасти на документа.
BS • Sadržaj i slike iz ovog korisničkog priručnika napravljeni su isključivo za ST. S.p.A. i zaštićeni su autorskim pravima – zabranjena je
svaka neovlaštena reprodukcija ili izmjena dokumenta, djelomično ili u potpunosti.
CS • Obsah a obrázky v tomto návodu k použití byly zpracovány jménem společnosti ST. S.p.A. a jsou chráněny autorským právem –
Reprodukce či nepovolené pozměňování tohoto dokumentu, a to i částečné, je zakázáno.
DA • Indhold og illustrationer i denne vejledning er blevet skabt på vegne af ST. S.p.A. og er beskyttet af ophavsret – Enhver gengivelse
eller ændring, også delvis, af dokumentet uden autorisation hertil er forbudt.
DE • Inhalt und Bilder dieser Bedienungsanleitung wurden im Namen von ST. S.p.A. erstellt und sind urheberrechtlich geschützt – Jede
nicht genehmigte Vervielfältigung oder Veränderung, auch auszugsweise, dieses Dokuments ist verboten.
EL • Το περιεχόμενο και οι εικόνες στο παρόν εγχειρίδιο χρήσης δημιουργήθηκαν για λογαριασμό της εταιρείας ST. S.p.A. και
προστατεύονται από πνευματικά δικαιώματα – Απαγορεύεται οποιαδήποτε αναπαραγωγή ή τροποποίηση, έστω και μερική, του
εγγράφου χωρίς έγκριση.
EN • The content and images in this User Manual were produced expressly for ST. S.p.A. and are protected by copyright – any unauthori-
sed reproduction or modication to the document, either partially or in full, is prohibited.
ES • El contenido y las imágenes del presente manual de uso han sido creados por ST. S.p.A. y están protegidos por los derechos de
autor – Se prohíbe toda reproducción o modicación, incluso parcial, no autorizada del documento.
ET • Käesoleva kasutusjuhendi sisu ja kujutised on toodetud konkreetselt ettevõttele ST. S.p.A. ja neile rakendub autorikaitseseadus –
dokumendi igasugune osaline või täielik ilma loata reprodutseerimine või muutmine on keelatud.
FI • Tämän käyttöoppaan sisältö ja kuvat on valmistettu ST. S.p.A. -yhtiön toimesta ja niitä suojaa tekijänoikeuslaki. – Asiakirjan kaikenlai-
nen kopioiminen tai muuttaminen, osittainkin, on kielletty ilman erityistä lupaa.
FR • Le contenu et les images du présent manuel d'utilisation ont été réalisés pour le compte de ST. S.p.A. et sont protégés par un droit
d'auteur - Toute reproduction ou modication non autorisée, même partielle, du document, est interdite.
HR • Sadržaj i slike u ovom priručniku za uporabu izrađeni su za tvrtku ST. S.p.A. te su obuhvaćeni autorskim pravima – Zabranjuje se
neovlašteno umnožavanje ili prilagodba, djelomična ili u cijelosti, ovog dokumenta.
HU • Ennek a használati útmutatónak a tartalma és a benne szereplő képek kizárólag a ST. S.p.A. számára készültek és szerzői joggal
védettek – tilos a dokumentum bármely részének vagy egészének engedély nélküli sokszorosítása és módosítása.
LT • Šio naudotojo vadovo turinys ir paveikslėliai skirti tik „ST. S.p.A.“ ir yra saugomi autorių teisėmis – dokumentą atgaminti ar modikuoti,
visiškai arba iš dalies, yra draudžiama.
LV • Šīs lietotāja rokasgrāmatas saturs un attēli ir veidoti tikai ST. S.p.A. un ir aizsargāti ar autortiesībām. Jebkāda dokumenta vai tā daļas
prettiesiska kopēšana vai pārveide ir stingri aizliegta.
MK • Содржината и сликите во Упатството за корисникот се подготвени исклучиво за ST. S.p.A. и се заштитени со авторски
права – забрането е секое делумно или целосно неовластено репродуцирање или измена на документот.
NL • De inhoud en de afbeeldingen van deze gebruikshandleiding werden gerealiseerd voor rekening van ST. S.p.A. en zijn beschermd
door het auteursrecht – Elke niet-geautoriseerde reproductie of wijziging, ook gedeeltelijke, van het document is verboden.
NO • Innholdet og bildene i denne brukerveiledningen er utført på oppdrag fra ST. S.p.A. og er beskyttet ved opphavsrett - Enhver gjengi-
velse eller endring, selv kun delvis, er forbudt.
PL • Treść oraz ilustracje zawarte w niniejszej instrukcji obsługi powstały na zlecenie spółki ST. S.p.A. i są chronione prawami autorskimi –
Zabrania się wszelkiego kopiowania bądź modykowania, także częściowego, niniejszego dokumentu bez uzyskania stosownej zgody.
PT • As imagens e os conteúdos contidos no presente Manual do Utilizador foram expressamente criados para uso exclusivo da ST.
S.p.A., encontrando-se protegidos por direitos de autor. Qualquer tipo de reprodução ou alteração, parcial ou integral, não autorizadas
deste Manual estão expressamente proibidas.
RO • Conţinutul şi imaginile din manualul de utilizare de faţă au fost realizate în numele ST. S.p.A. şi sunt protejate de drepturi de autor –
Este interzisă orice reproducere sau modicare chiar şi parţială neautorizată a documentului.
RU • Тесты и изображения, содержащиеся в настоящем руководстве, были созданы в интересах ST. S.p.A. и защищены
авторскими правами – Любое несанкционированное воспроизведение или изменение документа запрещено.
SK • Obsah a obrázky v tomto návode na používanie boli spracované menom spoločnosti ST. S.p.A. a sú chránené autorským právom –
Reprodukcie či nepovolené pozmeňovanie tohto dokumentu, a to aj čiastočné, je zakázané.
SL • Vsebine in slike v tem uporabniškem priročniku so izdelane za podjetje ST. S.p.A. in so zaščitene z avtorskimi pravicami – vsakršno
nepooblaščeno razmnoževanje ali spreminjanje dokumenta, v celoti ali delno, je prepovedano.
SR • Sadržaj i slike ovog priručnika za upotrebu su napravljeni u ime ST. S.p.A. i zaštićeni su autorskim pravima – Zabranjena je svaka
potpuna ili delimična reprodukcija ili izmena dokumenta bez odobrenja.
SV • Innehållet och bilderna i denna användarhandbok har framställts för ST. S.p.A. och skyddas av upphovsrätt – all form av reproduktion
eller ändring, även partiell, som inte auktoriserats är förbjuden.
TR • Bu Kullanıcı Kılavuzundaki içerik ve resimler açıkça ST. S.p.A. için üretilmiştir ve telif hakkı ile korunmaktadır – dokümanın izinsiz
olarak tamamen ya da kısmen herhangi bir şekilde çoğaltılması ya da değiştirilmesi yasaktır.

ST. S.p.A.
Via del Lavoro, 6
31033 Castelfranco Veneto (TV) ITALY
dB
L
WA
Type:
................................
.................. -s/n ........................................
Art.N .......................................................