Use _ Care Guide
IPLEASEREADAND SAVETH SGUDE
[] [] [] [] [] [] [] [] [] [] [] [] [] [] [] [] [] [] [] [] []
Thank you for choosing EJectrolux, the new premium brand in home appliances.
This Use & Care Guide is part of our commitment to customer satisfaction and
product quality throughout the service life of your new cooktop.
We view your purchase as the beginning of a relationship. To ensure our ability to
continue serving you, please use this page to record key product information.
Once you have your unit installed, we suggest you keep this manual in a safe
place for future reference. Should any problems occur, refer to the
Troubleshooting section of this manual. This information will help you quickly
identify a problem and get it remedied. In the event you require assistance, please
contact the dealer where you purchased your unit.
MAKEA RECORDFOR@UCKREFERENCE
[] [] [] [] [] [] [] [] [] [] [] [] [] [] [] [] [] [] [] [] []
Whenever you call to request information or service, you will need to know your
model number and serial number. You can find this information on the serial plate
located on the inside wall of your unit and on the product registration card.
@2005 Eiectrolux Home Products, Inc.
Post Office Box 212378, Augusta, Georgia 30917, USA
All rights reserved. Printed in the USA
IIPBODU BEGII BATION6£
[] [] [] [] [] [] [] [] [] [] [] [] [] [] [] [] [] [] [] [] []
The package containing this manual abo includes your product registration
information. Warranty coverage begins at the time your Ebctrolux cooktop was
purchased.
tf you received a damaged product, immediately contact your deabr or builder. Do
not install or use a damaged appliance.
Phase record the purchase date of your Electrolux unit and your deabr's name,
address and tebphone number.
Purchase Date
Electrolux Model Number
Electrolux Serial Number
Dealer Name
Dealer Address
Dealer Telephone
Keep this manual and the sales receipt together in a safe place for further
refe re nce.
iiiiiiiiiiiiiiiiiiiiiii
[] [] [] [] [] [] [] [] [] [] [] [] [] [] [] [] [] [] [] [] [] []
For toll-free telephone support in the U.S. and Canada:
1-877- 4ELECTROLUX (1-877-435-3287)
For online support and lnternet product information:
www.eleetroluxusa.eorn

TABLE OIF'CONN
[] [] [] [] [] [] [] [] [] [] []
Finding information ...........................................2
PleaseReadAndSaveThis Guide...................2
MakeARecordForQuickReference................2
Questions..........................................................3
TableOfContents..............................................4
Safety ...................................................................5
ImportantSafetyInstructions..............................5
GeneralPrecautions..........................................6
Cooktop Features...............................................9
SealedBurners.................................................9
BrassBurnerRings.........................................10
Burnerigniters................................................10
SeabdBurnerConfigurations.........................10
KnobsandSpillProtectorRings .......................11
SelectingtheProperCookware........................11
Operation ...........................................................12
BeforeCooking...............................................12
OperatingtheControlValves...........................12
SettingtheBurnerFlameHeight......................14
EnergySavingTips ........................................14
[] [] [] [] [] [] [] [] [] [] []
Care and Cleaning ............................................15
CleaningTips..................................................15
CleaningStainbssSteelSurfaces....................18
CleaningPorcelainGrates...............................18
CleaningKnobsand KnobBezels...................19
CleaningBurnerBases...................................19
CleaningBurnerRings....................................20
CleaningBurnerIgniters..................................21
Cleaningthe GasGrill......................................21
Troubleshooting ...............................................22
if ServiceisRequired......................................22
TroubbshootingGuide....................................23
Warranty Information .......................................24
IIM £NT S£F Y IINS U _ONS
[] [] [] [] [] [] [] [] [] [] [] [] [] [] [] [] [] [] [] [] [] []
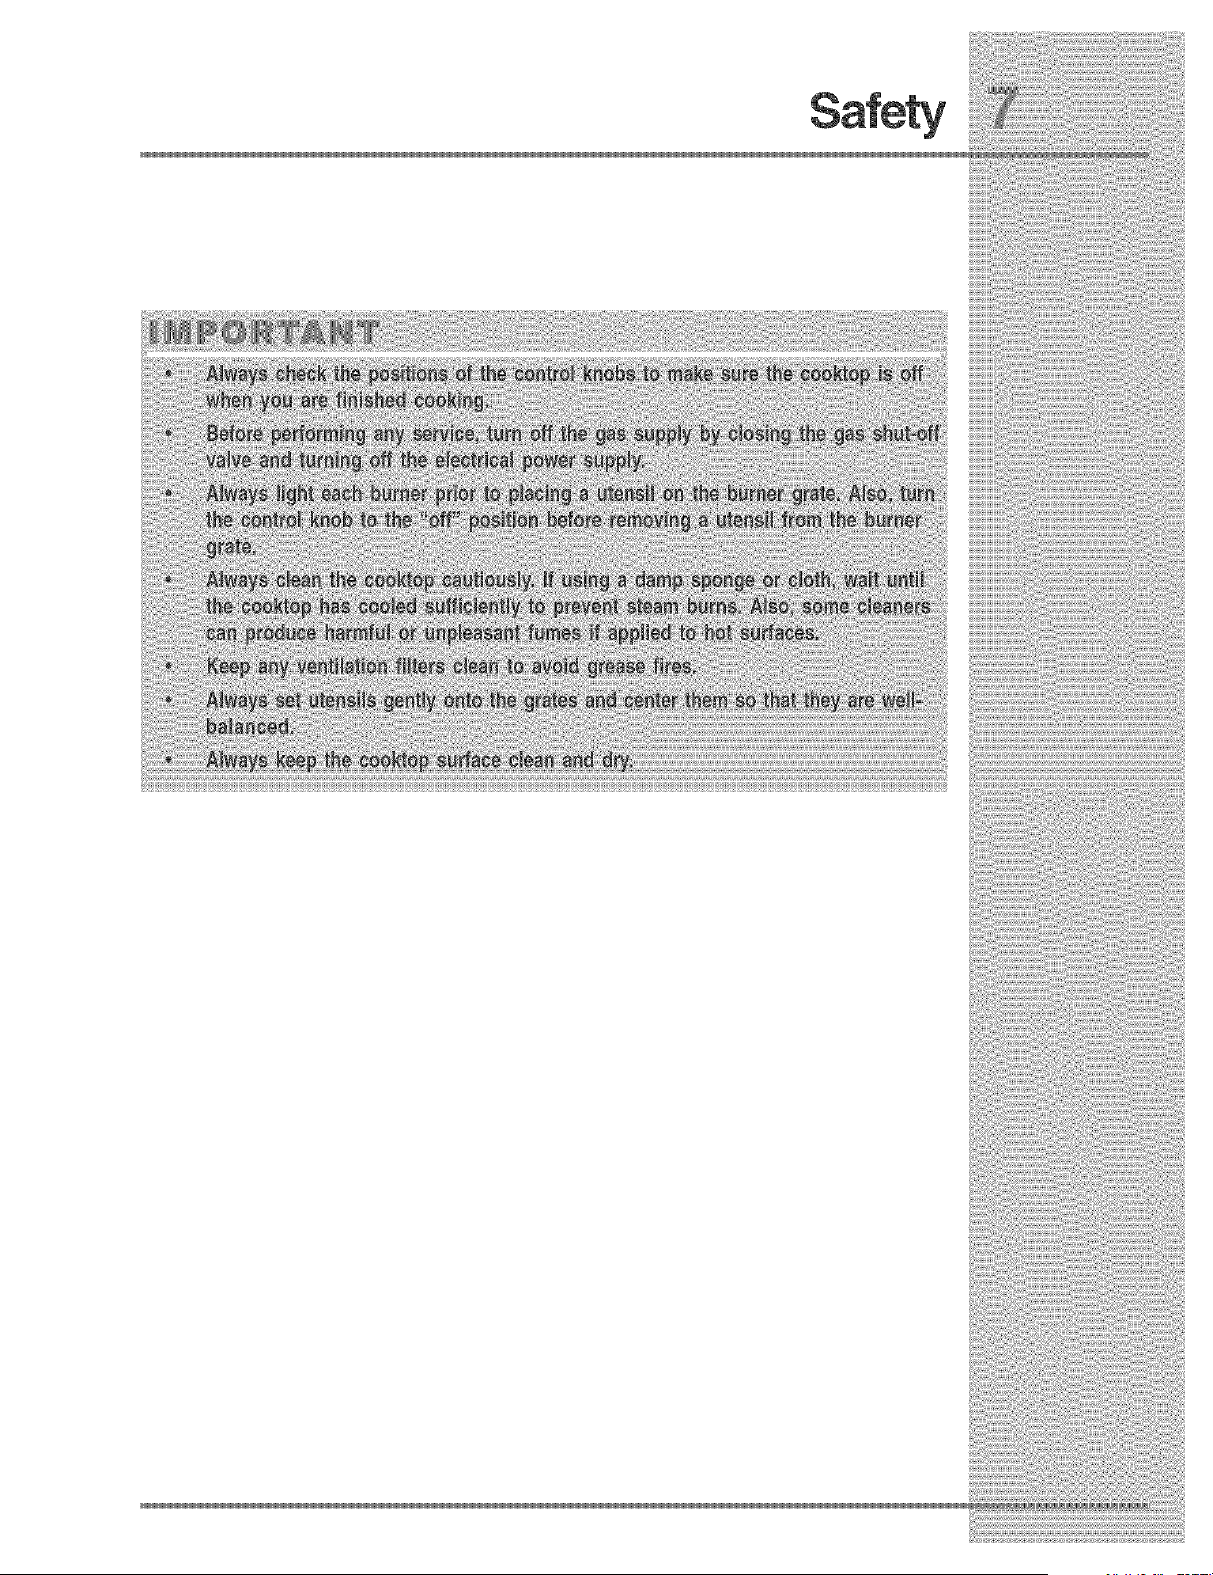
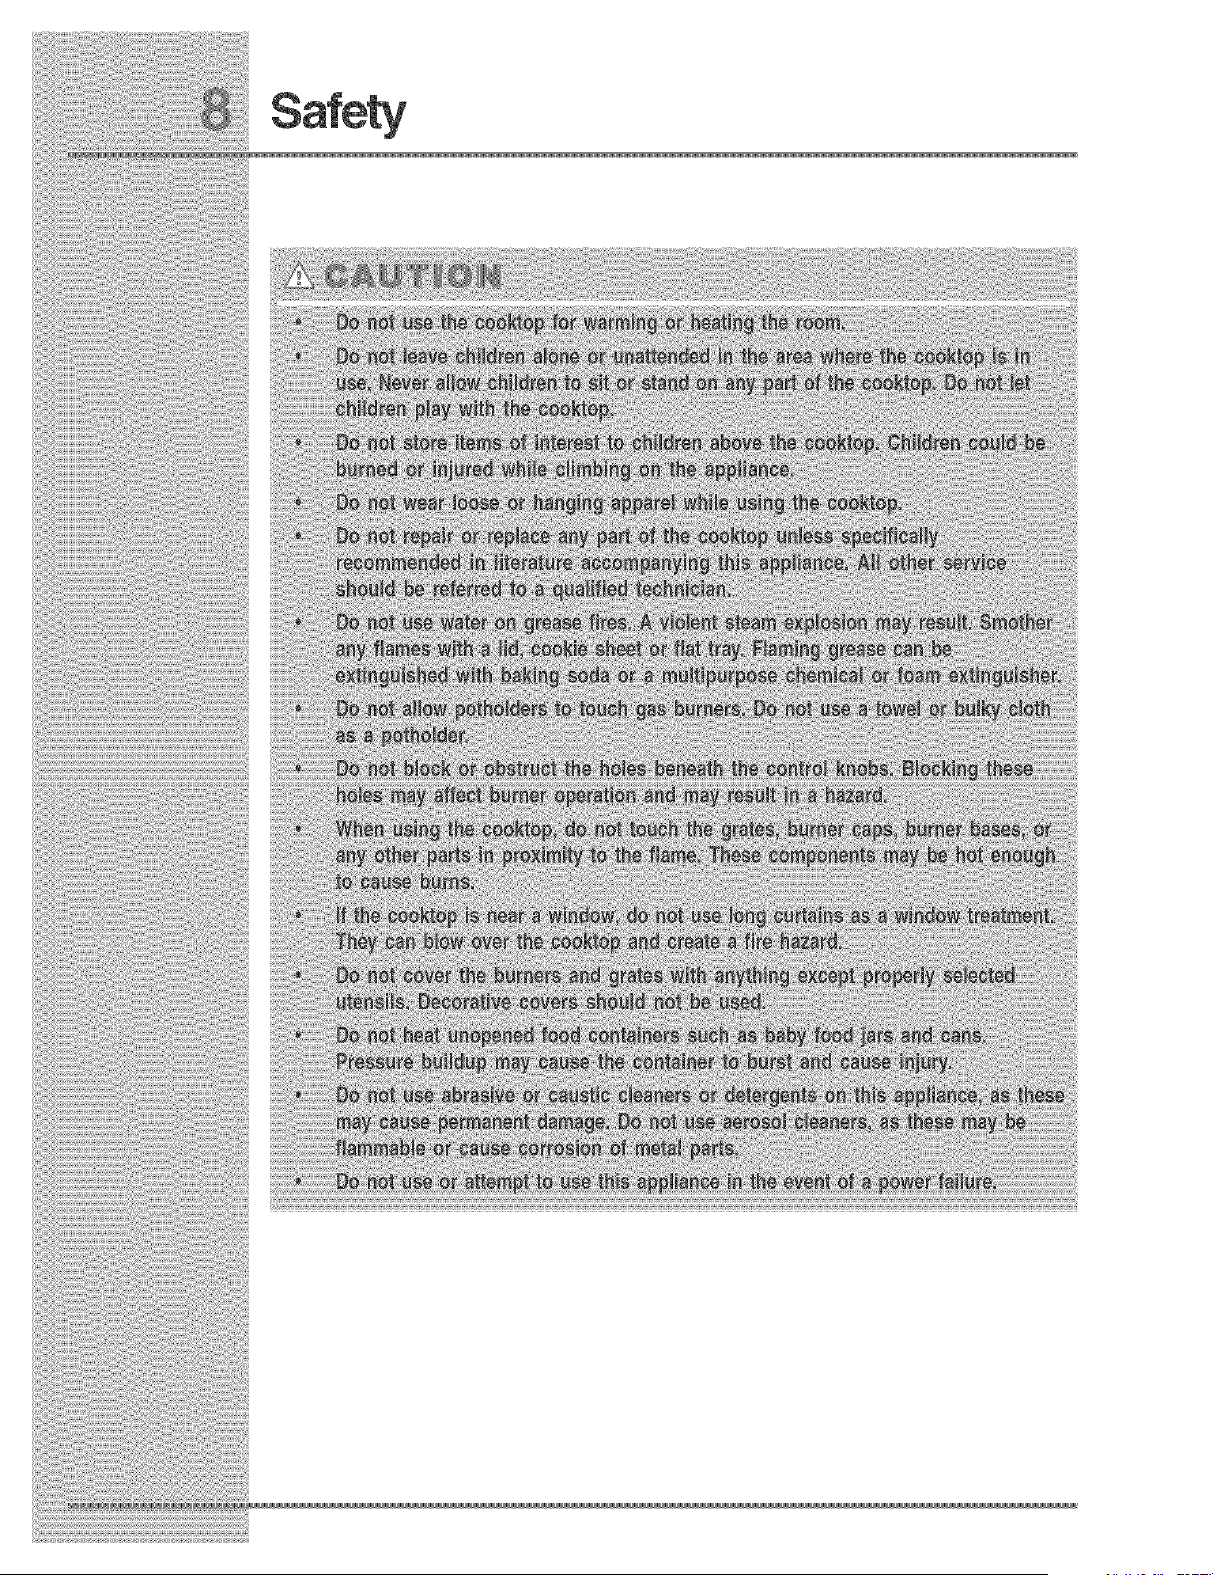
Safety Precautions
Do not attempt to install or operate your unit until you have read the safety
precautions in this manual. Safety items throughout this manual are labeled with a
Warning or Caution based on the risk type.
Definitions
;_'_This is the safety alert symbol. It is used to alert you to potential personal injury
hazards. Obey all safety messages that follow this symbol to avoid possible injury
or death.
GeneramPrecautions
SEALEDBURNERS
[] [] [] [] [] [] [] [] [] [] [] [] [] [] [] [] [] [] [] [] []
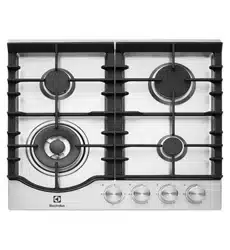
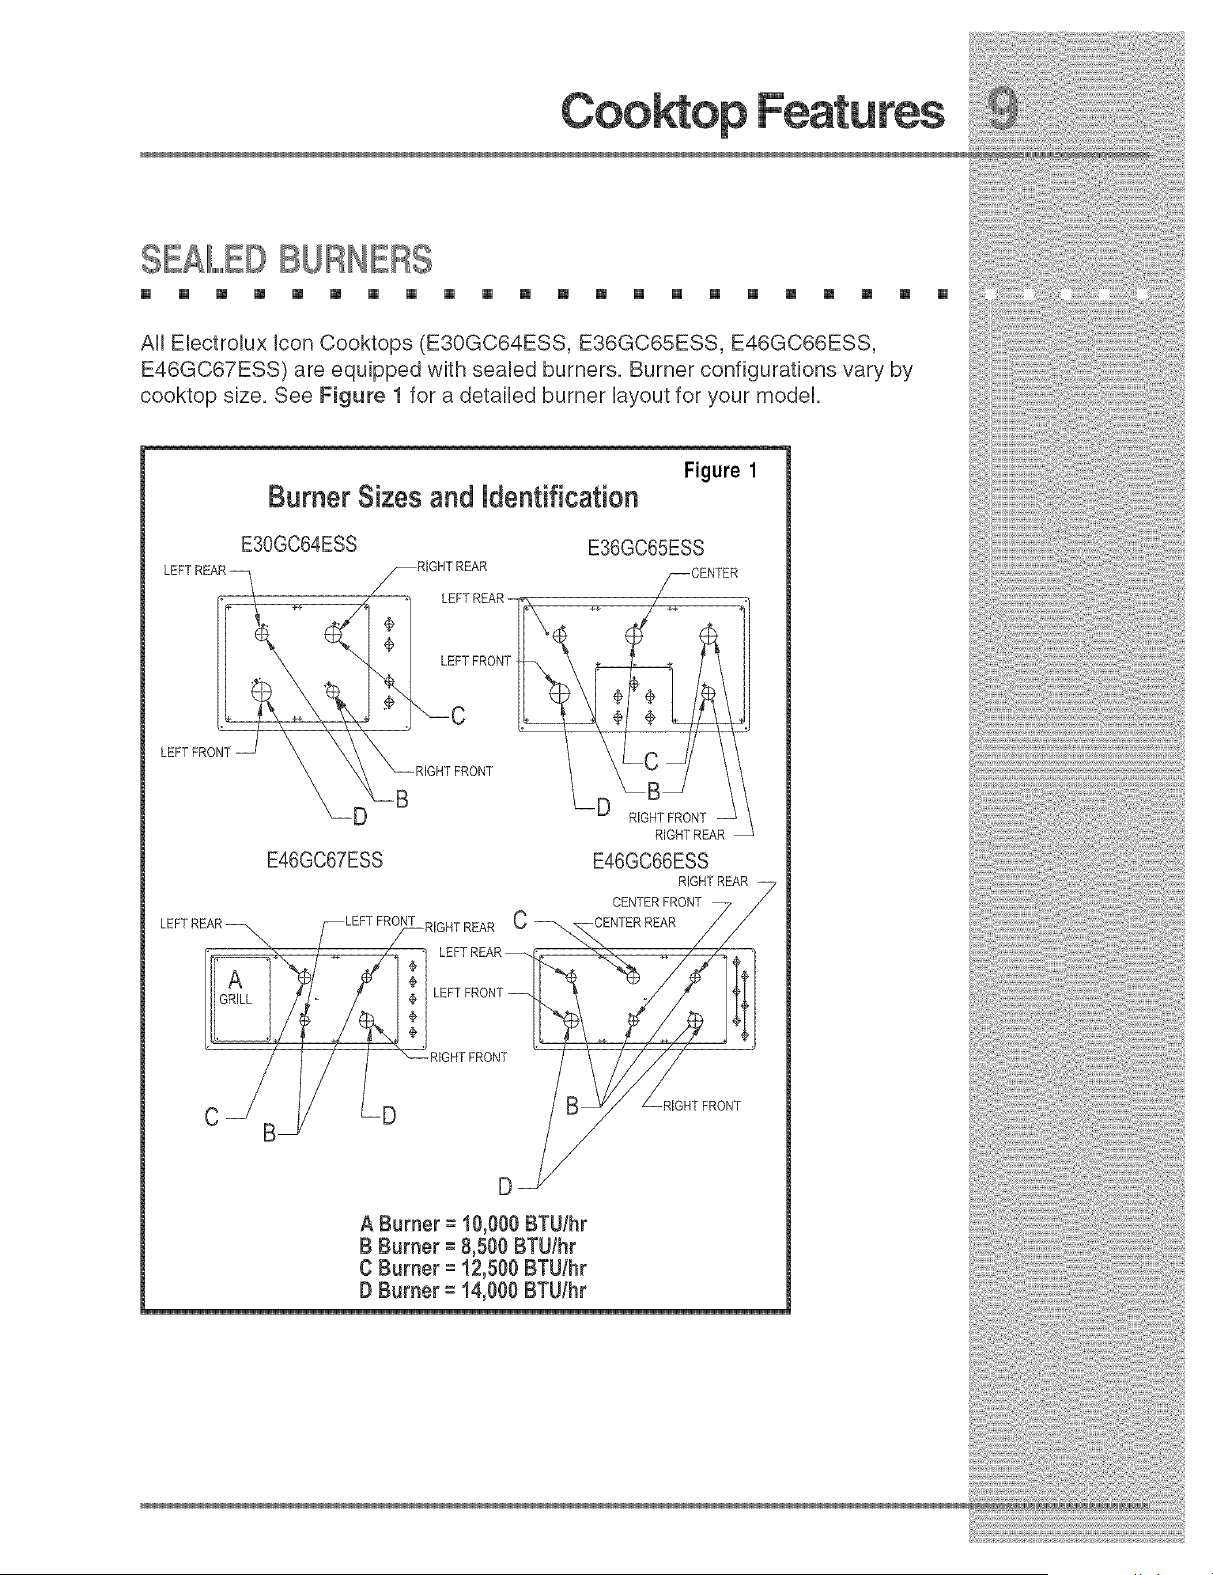
AH EbctroUux Icon Cooktops (E30GC64ESS, E36GC65ESS, E46GC66ESS,
E46GC67ESS) are equipped with seabd burners. Burner configurations vary by
cooktop size. See Figure 1 for a detaibd burner layout for your modek
Figure 1
Burner Sizes and Mdentification
LEFTFRONT
E30GC64ESS
HT REAR
E36GC65ESS
/
RIGHTREAR
E46GC67ESS E46GG66ESS
C D
B
A Burner = 10,000 BTU/hr
B Burner = 8,500 BTU/hr
C Burner = !2,500 BTU/hr
B Burner = 14,000 BTU/hr
BRASS BURNERB NGS
[] [] [] [] [] [] [] [] [] [] [] [] [] [] [] [] [] [] [] [] [] []
All burners are attached to the cooktop by retaining nuts. Gaskets around the
undersides of the burner cross rings and burner bases ensure that the burners are
sealed, thereby preventing any liquid spills from entering the cooktop chassis. All
spills remain on the surface of the cooktop.
The brass burner heads spread the flame evenly around the burner perimeters.
The burner heads must seat properly in the burner cross rings or burner bases to
enable proper cooktop operation. To ensure proper seating, positioning tabs have
been placed on the bottom of each burner cross ring or burner head to slide into
corresponding notches in the fixed burner base.
BURH IIGNITORS
[] [] [] [] [] [] [] [] [] [] [] [] [] [] [] [] [] [] [] [] [] []
Figure 2
Porcelain
Burner Cap
Burner @
Base
j Burner Ring
Burner
Ignitor
Burner Assembly
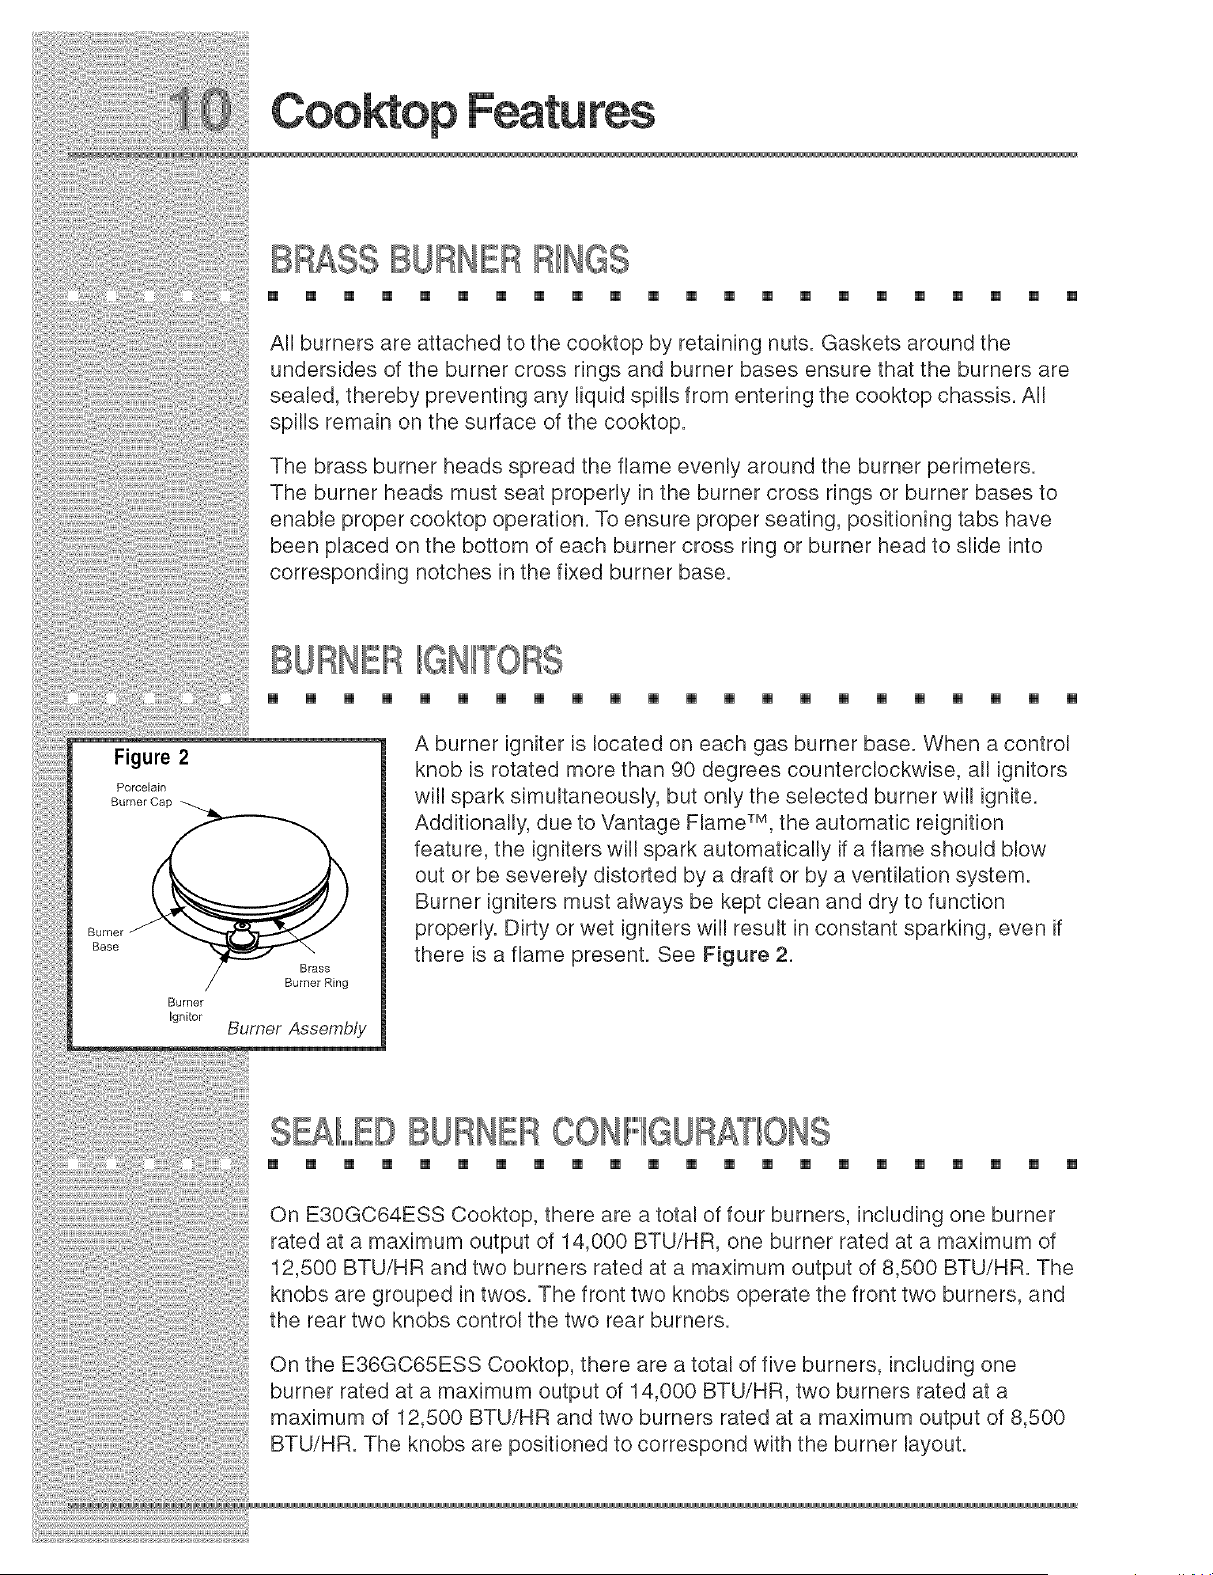
A burner igniter is located on each gas burner base. When a control
knob is rotated more than 90 degrees counterclockwise, all ignitors
will spark simultaneously, but only the selected burner will ignite.
Additionally, due to Vantage Flame TM, the automatic reignition
feature, the igniters will spark automatically if a flame should blow
out or be severely distorted by a draft or by a ventilation system.
Burner igniters must always be kept clean and dry to function
properly. Dirty or wet igniters will result in constant sparking, even if
there is a flame present. See Figure 2.
SEALEDBURNERCONHGUBAT ONS
[] [] [] [] [] [] [] [] [] [] [] [] [] [] [] [] [] [] [] [] [] []
On E30GC64ESS Cooktop, there are a total of four burners, including one burner
rated at a maximum output of 14,000 BTU/HR, one burner rated at a maximum of
12,500 BTU/HR and two burners rated at a maximum output of 8,500 BTU/HR. The
knobs are grouped in twos. The front two knobs operate the front two burners, and
the rear two knobs control the two rear burners.
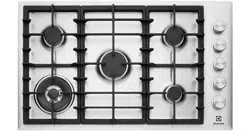
On the E36GC65ESS Cooktop, there are a total of five burners, including one
burner rated at a maximum output of 14,000 BTU/HR, two burners rated at a
maximum of 12,500 BTU/HR and two burners rated at a maximum output of 8,500
BTU/HR. The knobs are positioned to correspond with the burner layout.

Onthe E46GC66ESSCooktop,there area totalof sixburners,includingtwo
burnersratedat a maximumoutputof 14,000BTU/HR,oneburnerratedat a
maximumof 12,500BTU/HRandthreeburnersratedat a maximumoutputof
8,500BTU/HR.Theknobsaregroupedin threes.Thefrontthreeknobsoperatethe
frontthree burners,andthe rearthree knobscontrolthe three rearburners.
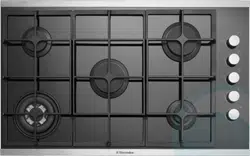
Onthe E46GC67ESSCooktop,thereare atotal of fiveburners,includingone
burnerratedata maximumoutputof 14,000BTU/HR,oneburnerratedat a
maximumof 12,500BTU/HR,two burnersratedat a maximumoutputof 8,500
BTU/HRandoneburnerratedata maximumof 9,300BTU/HR(gasgrillburner).
Thefronttwo knobsoperatethefronttwo burners,andthe centerknobcontrolsthe
gas grilL
KNOBSANBSPB,,LIIPBO C B BINGS
[] [] [] [] [] [] [] [] [] [] [] [] [] [] [] [] [] [] [] [] [] []
The control knobs provided with this cooktop are designed for ease of use and
longevity. The "D" shaped design of the knob shaft ensures proper orientation when
reinstalling the knob. Located beneath each knob is a bezel ring that mounts to the
cooktop. The umbrella shaped spill protector ring sits on the valve spindle
underneath the cooktop. The spill protector is made of a silicone rubber material
that is resistant to staining.
SEI,,,,,,,,,,ECTINGTHEOIPEB COOKWABE
[] [] [] [] [] [] [] [] [] [] [] [] [] [] [] [] [] [] [] [] []
Utensils will affect the overall safety and performance of cooktop cooking, so it is
important to select them carefully. An improperly selected utensil will not cook
efficiently or evenly. For best results, follow these guidelines:
1. Use medium to heavy gauge metal cookware with flat and smooth bottoms
for greatest efficiency.
2. Use utensils with tight fitting lids to retain heat, odors, and steam.
BEFORECOOKING
[] [] [] [] [] [] [] [] [] [] [] [] [] [] [] [] [] [] [] [] [] []
Ensure that the cooktop has been installed by a quaUified individual who has tested
the operation of the cooktop in accordance with the Installation Instructions. The
brass burner rings, burner caps, grates, knobs and spill protectors must be in
place for the cooktop to operate properly. AH cooktop components must be dean.
Be certain that the gas and eUectrbaU power supplies to the cooktop are operationak
Read this Use and Care Manual in its entirety prior to operating the cooktop.
OPERAT HGTHECOH @,,,,,,,,,,
[] [] [] [] [] [] [] [] [] [] [] [] [] [] [] [] [] [] [] [] [] []
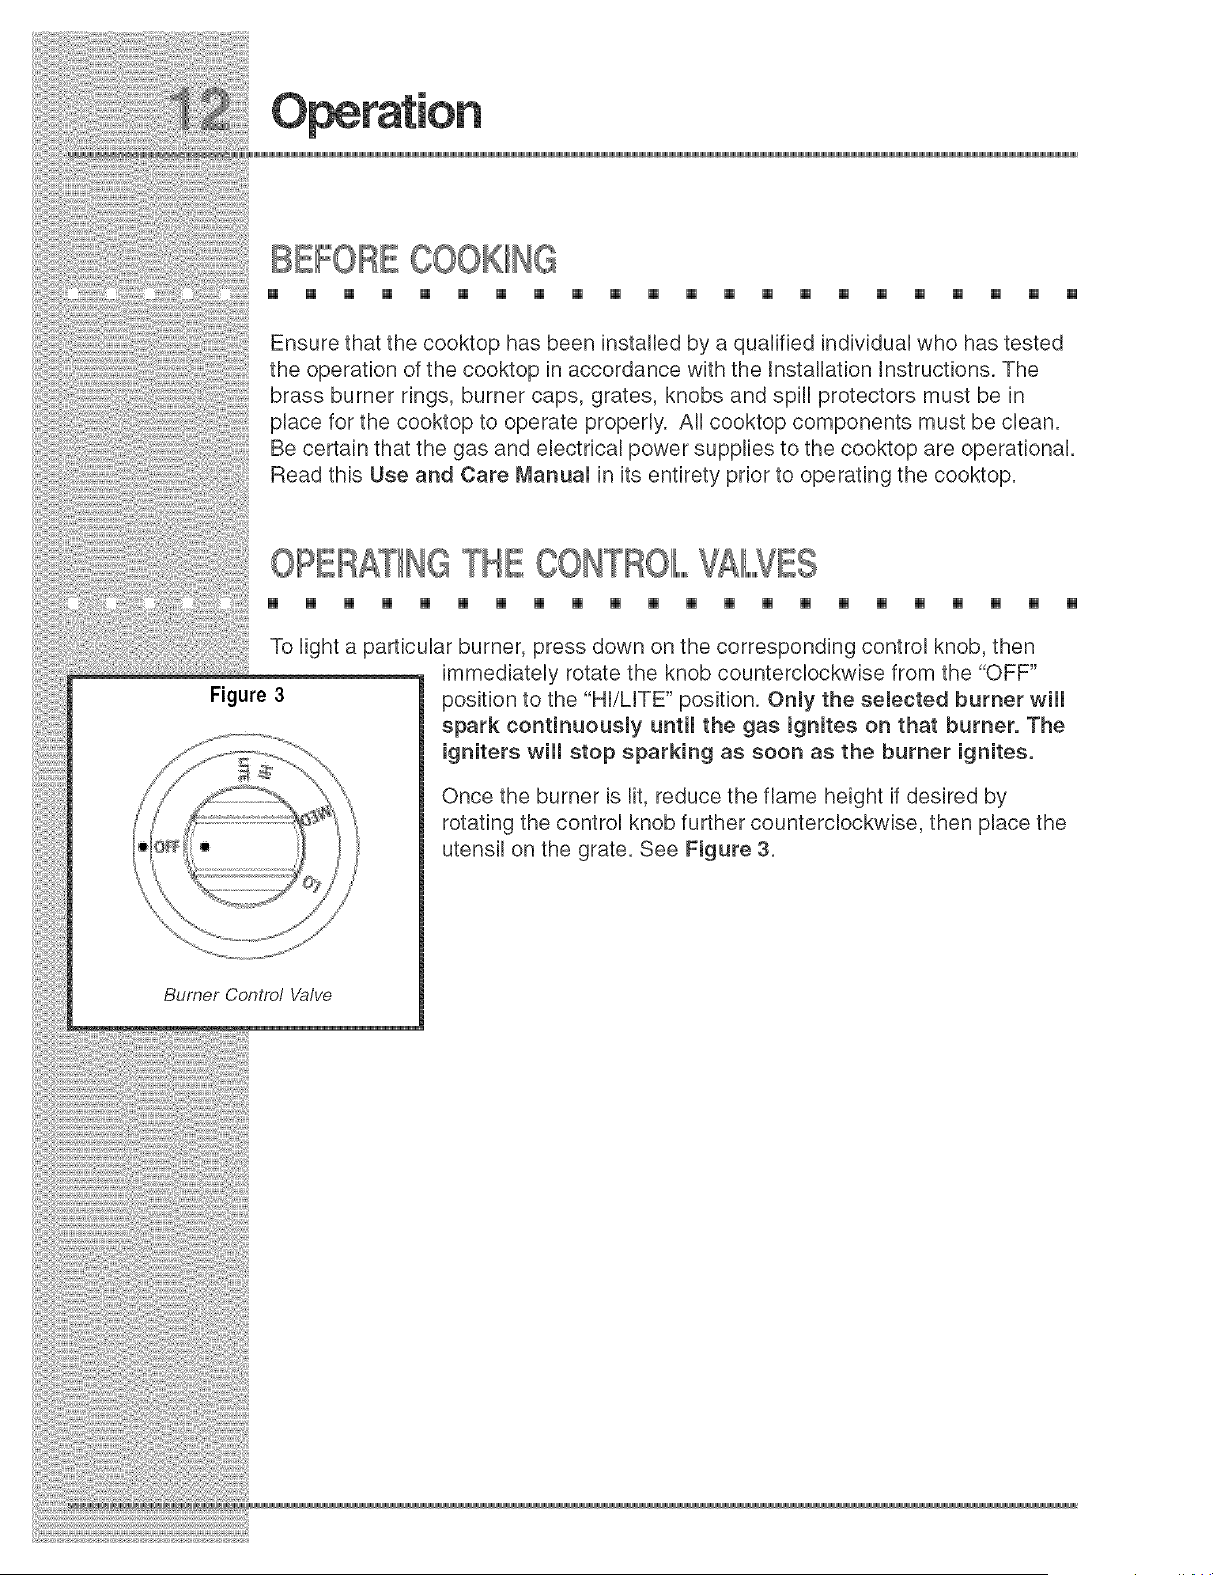
To light a particular burner, press down on the corresponding control knob, then
immediately rotate the knob counterclockwise from the "OFF"
Figure 3 position to the "HI/LFE" position. Only the selected burner will
spark continuously until the gas ignites on that burner. The
...................*°" igniters will stop sparking as soon as the burner ignites.
Once the burner is lit, reduce the flame height if desired by
rotating the control knob further counterclockwise, then place the
utensil on the grate. See Figure 3.
Burner Control Valve
$E NG THE BUBNEB FLAME GHT
[] [] [] [] [] [] [] [] [] [] [] [] [] [] [] [] [] [] [] [] [] []
Setting the proper burner flame height for the desired cooking process and
sebcted utensil will resuR in superior cooking performance, whib abo saving time
and energy. Follow these recommendations for best resuRs:
1. Use low or medium flame heights when cooking in utensils that are poor
conductors of heat, such as glass, ceramic, and cast iron cooking vessels.
Reduce the flame height until it covers approximately 1/3 of the utensil
diameter. This will ensure even heating within the utensil and reduce the
likelihood of burning or scorching of food.
2. Reduce the flame if it is extending beyond the bottom of the utensik Aflame
that licks along the sides of the utensil is potentially dangerous, heats the
utensil handle and kitchen instead of the food, and wastes energy.
3. Reduce the flame height to the minimum level necessary to perform the
desired cooking process. Remember that food cooks just as quickly at a
gentle boil as it does at a vigorous, rolling boik Maintaining a higher boil than is
necessary wastes energy, cooks away moisture, and causes a loss in food
flavor and nutrient bvek
ENERGYSAVINGT PS
[] [] [] [] [] [] [] [] [] [] [] [] [] [] [] [] [] [] [] [] [] []
Always use utensils with flat, smooth bottoms and tight-fitting lids to retain
heat and moisture.
Minimize the amount of liquid or fat to reduce cooking times.
Select cookware of the proper size, material and construction for the cooking
process being performed.
,, Adjust the flame height to fit the utensil size.
,, After liquid reaches a boil, reduce the heat to maintain a simmer rather than a
roJJing boJk
Use a timer rather than repeatedly removing the lid to check food.
Thaw foods prior to cooking to reduce cooking time.
No maintenance,otherthanthe Careand Charting identifiedin this Use & Care
Manuam,shouUdbe attemptedby the owner/operator.AUUothermaintenanceand
servicemustbe performedbya qualifiedappliancetechnician.
Readandfollowthe Careand Charting instructionsto ensurethat propercooktop
operationandappearancewill be maintainedthroughoutthe Hfetimeoftheproduct.
SeveraUmateriabandfinishesare usedinthe cooktop.Eachmaterialandfinish
mustbe properlycleanedaccordingto thefollowingrecommendations.Failureto
followtheserecommendationsmayresultin permanentdamageto the cooktop.
Propercleaningis necessaryto maintaincooktopperformanceandappearance,
whilealsoensuringsafeoperation.Thecleaningeffortnecessaryto maintainthe
cooktopvariesaccordingtothe type andamountofcooking.Forexample,more
frequentcleaningis requiredifthe cooktopis usedoftenforfrying or otherhigh
temperatureoperations.
Cleanthecooktopthoroughlypriorto operatingitthe firsttime. Forinitialand
everydaycleaning,usea soft clothor spongelightlydampenedwith a solutionof
warmwaterandhanddishwashingliquidto cleanall components.

Recommendationsfor cleaningspecificcooktopcomponentsaresummarized
below:
Treatingthe porcelaincomponentswithcarewillslowthe naturaldeteriorationthat
takesplacewithcooktopuse. Pleasefollowthese guidelinesto keeptheporcelain
partslookingtheir best:
1. Do not use utensilshavingroughbottoms,asthis can resultin permanent
damageto the topsurfacesof the porcelainizedgrates.
2. Do notdrop utensilsontothe gratesor drag heavypotsacrossthetops ofthe
grates.
3. Setthe gratesintothe locatingdimplesgently.Do notdropthe gratesinto
place.
4. Usecautionwhencookingto avoidspillsas muchas possible.Porcelainis
acid-resistantbutnot acid-proof,so somefoods can causepermanent
damageif allowedto remainon porcelainsurfaces.
Dailycleaningof the grates,burnerheads,and burnercaps is best accomplished
with asoft clothor spongedampenedin a solutionof warmwaterand hand
dishwashingliquid.Gratesare dishwashersafe.Burnercaps shouldnotbe
cleanedinthe dishwasher.
Stubbornstainsmay be removedby applyingfull-strength,all purposecleaning
sprays.(Ifyouare unableto locatethesecleaningcompounds,pleasephonethe
ElectroluxCustomerServiceDepartmentfor a referral.)
Mildlyabrasivecleanersor applicators,suchas soap-filledsteelwool pads,maybe
usedwith extremecare on occasionto removethe mostseriousstains.Exercise
caution - extensive use of abrasives will eventually damage the porcelain
enamem surface.
AIINLESS STEELSURFACES
[] [] [] [] [] [] [] [] [] [] [] [] [] [] [] [] [] [] [] [] [] []
Clean these surfaces with the provided Stainless Steel Cleaner. Rinse and dry with
a soft Iintofree cloth.
Always wipe stainless steel surfaces with the grain.
IPORGEII,,,,,,,,,,AINGRATES
[] [] [] [] [] [] [] [] [] [] [] [] [] [] [] [] [] [] [] [] []
Clean the porcelain grates with a solution of mild detergent and hot water. Rinse
with a soft cloth. Do not use abrasives or commercial oven cleaners.
Stubborn stains may be removed by washing the grates in a dishwasher, using
normal dishwashing detergent.

CLEANINGKNOBSANB KNOB BEZ S
[] [] [] [] [] [] [] [] [] [] [] [] [] [] [] [] [] [] [] [] []
The control knobs provided with this cooktop are designed for ease of use and
longevity. The "D" shaped design of the knob shaft ensures proper orientation
when reinstalling the knob.
The knobs are made of a composite plastic. These components should be washed
regularly in warm, soapy water. Hand dishwasNng Hquid is excellent for this task.
Knobs should be removed by gently pulling them straight out and off of the valve
shafts. The spill protectors should be cleaned in place. Use caution to avoid
introduction of moisture into the control panel behind the bezels. To replace knobs,
align the "Doshaped" opening at the bottom of the knob with the "Doshaped" valve
shaft, then carefully press the knob onto the valve.
OL,,,,,EAHIIH@BUBNEBBASES
[] [] [] [] [] [] [] [] [] [] [] [] [] [] [] [] [] [] [] [] [] []
The burner base is permanently attached to the cooktop. The base should be
wiped clean using a soft cloth or sponge that has been lightly dampened with warm
water and hand dishwashing liquid. Thoroughly clean and dry the igniters to prevent
constant sparking of the reignition system. Refer to the Cleaning the Burner
Igniters section for cleaning tips.
BoU:" R21Sooooooooooo
The brass burner rings spread the flame evenly around the burner perimeters. The
burner rings must seat properly in the burner bases to enable proper cooktop
operation. To ensure proper seating, positioning tabs have been placed on the
bottom of each burner ring to slide into corresponding notches in the fixed burner
base.
To remove the burner ring, first remove the grate, then lift off the porcelain burner
cap. The burner ring may then be removed from the burner base. Soak the burner
ring in a warm solution of hand dishwashing liquid and water, then rinse well with
clean wateL Dry the burner thoroughly
Stubborn stains may be removed by applying a metal polishing compound. (If you
are unable to locate this type of polishing compound, please phone the Eleetrolux
Customer Service Department for a referral.)
: :: : ::::
CLEANINGT BURNERIIGNBTORS
[] [] [] [] [] [] [] [] [] [] [] [] [] [] [] [] [] [] [] [] [] []
Under certain cooking or cleaning conditions, your cooktop igniters may become
coated with or corroded by food deposits, splattered grease or cleaning agents.
This condition can cause erratic or continuous sparking. Keeping the igniters clean
and dry will help to reduce this problem. To avoid unnecessary and costly service
calls, the homeowner should perform periodic cleaning of the igniters.
To clean the igniters:
,
2.
Be sure burners are cool to the touch. Remove the grate, burner cap and
burner heads.
Brush completely around the igniter, including over and under the edge of the
metal cap and base. Use care while cleaning here. Parts of the igniter are
porcelain and can be fragile.
3. DO NOT USE WATER when cleaning the igniters. If a liquid must be used to
clean the igniter effectively, use only a small amount of rubbing alcohol.
4. After cleaning, reinstall the burner ring, burner cap and grate. Make sure the
brass burner ring is properly seated into the burner base.
5. Test the burners, tf erratic clicking is still present, make sure the igniter is
completely dry.
tf the unit still exhibits problems after drying, please phone the Electrolux Customer
Service Department for further assistance.
Your gas grill will develop greasy areas as a normal result of use. Clean all greasy
surfaces, including the heat control channel, with mild soap and a cloth.
Do not wash the U-shaped burner in a dishwasher. Clean the surface of the
U-shaped burner with soapy water and a soft bristle brush. Do not submerge the
burner in water. Rinse under water and dry thoroughly.
During cleaning, some material may get clogged in the holes of the gas tubing. Use
a paper clip or needle to free all plugged hobs of lose material. Dump out all
cleaning materials from inside the U-shaped burner before reassembling the
appliance.
IIFSERVICEIISBEOUB
[] [] [] [] [] [] [] [] [] [] [] [] [] [] [] [] [] [] [] [] [] []
First, review the recommended checks listed in the TroubJeshoothg Guide.
Then, be certain that the appliance has been installed properly and is being
operated correctly. Familiarize yourself with the warranty terms and conditions
listed in the Warranty section.
If the above checks have been completed and the problem has not yet been
remedied, contact the dealer where you purchased the unit. State the Model and
Serial number and explain the problem. The Model and Serial number plate is
located on the bottom of the chassis box.
If you do not know the name of the selling dealer or local service company, you can
check online at www.eJectroluxusa.corn or call 1-877-4EJectrolux.
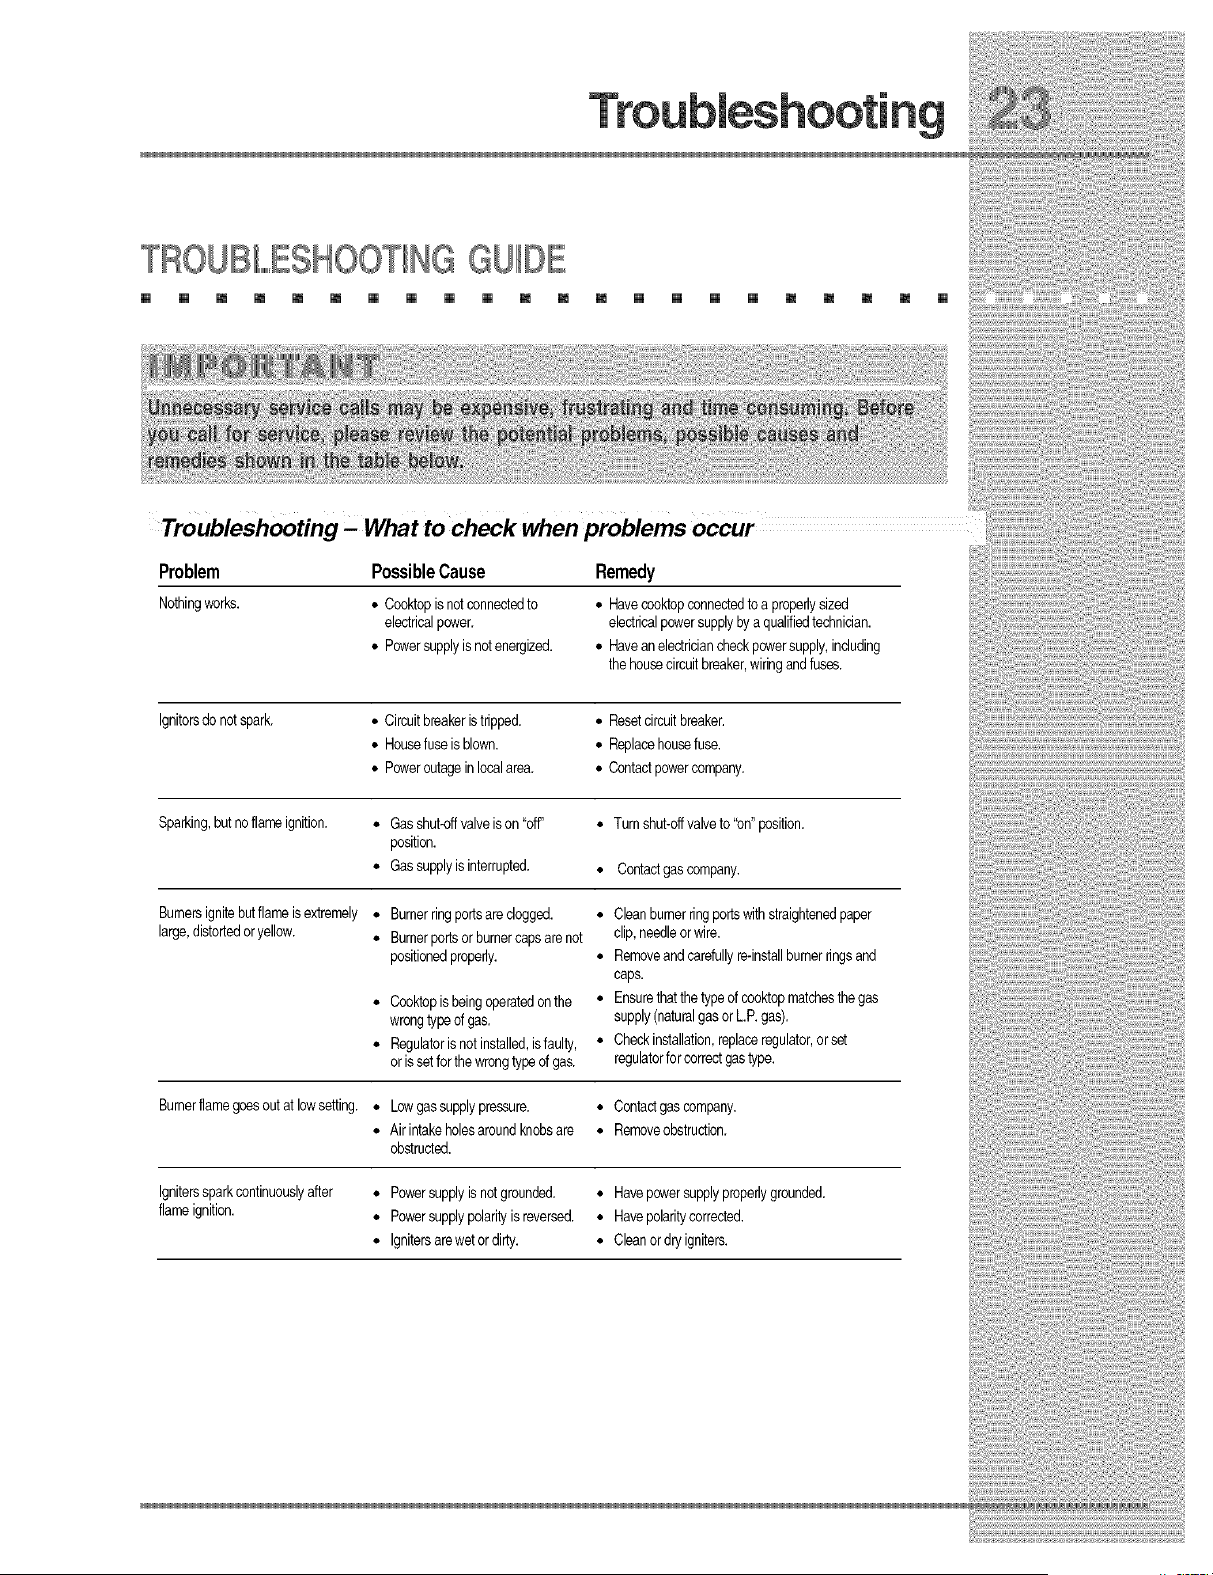
Troubleshooting - What to check when problems occur
Problem PossibleCause Remedy
Nothingworks. • Cooktopis notconnectedto
electricalpower.
• Powersupplyis notenergized.
• Havecooktopconnectedto a properlysized
electricalpowersupplybya qualifiedtechnician.
• Haveanelectriciancheckpowersupply,including
thehousecircuitbreaker,wiringandfuses.
Ignitorsdo notspark.
• Circuitbreakeristripped.
• Housefuseis blown.
• Poweroutageinlocalarea.
• Resetcircuitbreaker.
• Replacehousefuse.
• Contactpowercompany.
Sparking,butnoflameignition.
• Gasshut-offvalveison "off'
position.
• Gassupplyis interrupted.
• Turnshut-offvalveto "on"position.
• Contactgas company.
Bumersignitebutflame is extremely • Burnerringportsare clogged. • Cleanbumerringportswithstraightenedpaper
large,distortedoryellow. • Burnerportsor burnercapsarenot clip,needleor wire.
poeitioeedproperly. • Removeandcarefullyre-installbumerringsand
caps.
• Cooktopis beingoperatedonthe • Ensurethatthe typeof cooktopmatchesthegas
wrongtypeof gas. supply(naturalgasor L.P.gas).
• Regulatoris not installed,isfaulty, • Checkinstallation,replaceregulator,or set
oris setforthe wrongtype of gas. regulatorfor correctgastype.
Bumerflamegoesoutat lowsetting. • Lowgassupplypressure. • Contactgascompany.
• Airintakeholesaroundknobsare • Removeobstructioe.
obstructed.
Igniterssparkcontinuouslyafter
flameignition.
• Powersupplyis notgrounded. • Havepowersupplyproperlygrounded.
• Powersupplypolarityis reversed. • Havepolaritycorrected.
• Ignitersarewetor dirty. • Cleanor dryigniters.
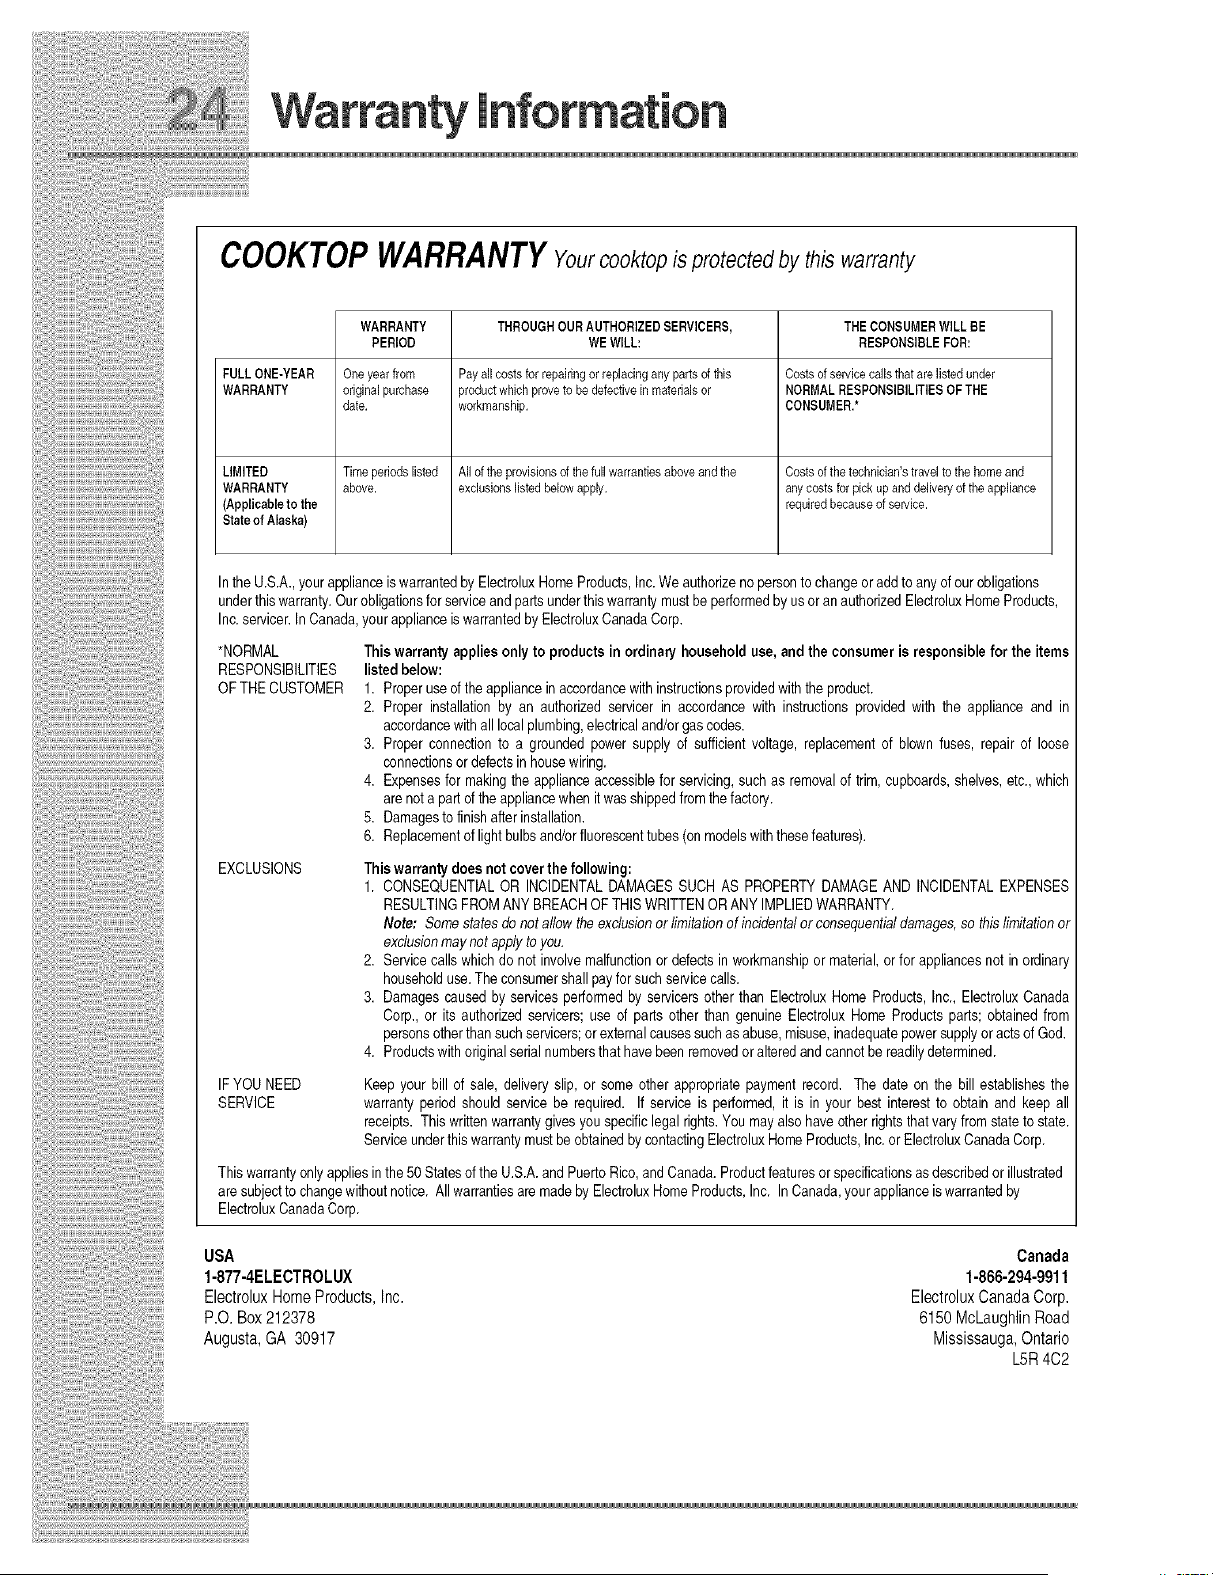
COOKTOPWARRANTYYourcooktop is protected by this warranty
WARRANTY THROUGHOURAUTHORIZEDSERVICERS, THECONSUMERWILLBE
PERIOD WEWILL: RESPONSIBLEFOR:
FULLONE-YEAR Oneyearfrom Payallcostsfor repairingorreplacinganypartsofthis Costsofservicecallsthatarelistedunder
WARRANTY originalpurchase productwhichproveto bedefectivein materialsor NORMALRESPONSIBILITIESOFTHE
date. workmanship. CONSUMER.*
LIMITED Timeperiodslisted Alloftheprovisionsof thefullwarrantiesaboveandthe Costsofthetechnician'stravelto thehomeand
WARRANTY above, exclusionslistedbelowapply, anycostsforpickupanddeliveryof theappliance
(Applicableto the requiredbecauseof selvice.
Stateof Alaska)
In the U.S.A.,yourapplianceis warrantedby ElectroluxHomeProducts,Inc. We authorizeno personto changeor addto any of ourobligations
underthis warranty.Our obligationsfor serviceand partsunderthis warrantymust be performedby usor an authorizedElectroluxHomeProducts,
Inc.servicer.In Canada,your applianceis warrantedby ElectroluxCanadaCorp.
*NORMAL
RESPONSIBILITIES
OFTHECUSTOMER
Thiswarrantyappliesonly to productsin ordinaryhousehold use, andthe consumeris responsiblefor the items
listedbelow:
1. Proper use of the applianceinaccordancewith instructionsprovidedwith the product.
2. Proper installation by an authorized servicer in accordance with instructionsprovided with the appliance and in
accordancewith all localplumbing,electricaland/orgas codes.
3. Proper connectionto a grounded power supply of sufficientvoltage, replacementof blown fuses, repair of loose
connectionsordefectsin housewiring.
4. Expensesfor makingthe appliance accessiblefor servicing,such as removalof trim, cupboards,shelves,etc., which
are nota part of theappliancewhen itwas shippedfrom thefactory.
5. Damagesto finishafter installation.
6. Replacementof lightbulbsand/orfluorescenttubes(onmodelswiththese features).
EXCLUSIONS
Thiswarrantydoes not coverthe following:
1. CONSEQUENTIALOR INCIDENTALDAMAGESSUCH AS PROPERTYDAMAGEAND INCIDENTALEXPENSES
RESULTINGFROMANYBREACHOFTHIS WRITTENOR ANYIMPLIEDWARRANTY.
Note: Somestatesdo not allow theexclusionor limitationof incidentalorconsequentialdamages,so this limitationor
exclusionmaynot applyto you.
2. Servicecalls which do not involvemalfunctionor defects in workmanshipor material,or for appliancesnot in ordinary
householduse.The consumershall payfor suchservicecalls.
3. Damages causedby servicesperformed by servicersother than ElectroluxHome Products,Inc., ElectroluxCanada
Corp., or its authorized servicers;use of parts other than genuine Electrolux Home Products parts; obtained from
personsotherthan suchservicers;or externalcausessuchas abuse,misuse,inadequatepower supplyoracts of God.
4. Productswith originalserial numbersthat havebeen removedor alteredandcannot be readilydetermined.
IFYOU NEED
SERVICE
Keep your bill of sale, delivery slip, or some other appropriatepayment record. The date on the bill establishes the
warrantyperiod should service be required. If service is performed, it is in your best interest to obtain and keep all
receipts. Thiswrittenwarrantygivesyou specificlegal rights.You may also haveother rights thatvary from stateto state.
Serviceunderthis warrantymust be obtainedby contactingElectroluxHomeProducts,Inc.orElectroluxCanadaCorp.
This warrantyonlyapplies inthe 50 Statesof the U.S.A. andPuertoRico, andCanada.Productfeatures orspecificationsasdescribedor illustrated
are subjectto changewithout notice. All warrantiesaremadeby ElectroluxHomeProducts,Inc. InCanada,your applianceis warrantedby
ElectroluxCanadaCorp.
USA
1-877-4ELECTROLUX
ElectroluxHomeProducts,Inc.
P.O.Box 212378
Augusta,GA 30917
Canada
1-866-294-9911
ElectroluxCanadaCorp.
6150 McLaughlinRoad
Mississauga,Ontario
LSR4C2