Use _ Care Guide
Slide In Gas Cooktop
%
!_!_!_!_!_!_!_ii'!_i_i!_i_!_!_!_!_i_i_iiiiiiilli_ii_ii_ii_ii_ii_ii_ii_ii_ii_ii_ii_ii_ii_ii_ii_ii_ii_ii_ii_ii_ii_ii_ii_ii_ii_ii_ii_ii_ii_ii_i!_i!_ii_!_i!!!i_iii__i!_!!i!!_i!__i_ii_ii_ii_ii_ii_ii_ii_ii_ii_ii_ii_ii_ii_ii_ii_ii_ii_ii_ii_ii_ii_ii_ii_ii_ii_ii_ii_ii_ii_ii_ii_ii_ii_ii_ii_ii_ii_ii_ii_ii_ii_ii_ii_ii_ii_ii_ii_ii_ii_ii_ii_ii_ii_ii_ii_ii_ii_ii_ii_ii_ii_ii_ii_ii_ii_ii_ii_ii_ii_ii_ii_ii_ii_ii_ii_ii_ii_ii_ii_ii_ii_ii_ii_ii_ii_ii_ii_ii_ii_ii_ii_ii_ii_ii_ii_ii_ii_ii_ii_ii_ii_ii_ii_ii_ii_ii_ii_ii_ii_ii_ii_ii_ii_ii_ii_ii_ii_ii_ii_ii_ii_ii_ii_ii_ii_ii_ii_ii_ii_ii_ii_ii_ii_ii_ii_ii_ii_ii_ii_ii_ii_ii_ii_ii_ii_ii_ii_ii_ii_ii_ii_ii_ii_ii_ii_ii_ii_ii_ii_ii_ii_ii_ii_ii_ii_ii_ii_ii_ii_ii_ii_ii_ii_ii_ii_ii_ii_ii_ii_ii_ii_ii_ii_ii_ii_ii_ii_ii_ii_ii_ii_ii_ii_ii_ii_ii_ii_ii_ii_ii_ii_ii_ii_ii_ii_ii_ii_ii_ii_ii_ii_ii_ii_ii_ii_ii_ii_ii_ii_ii_ii_ii_ii_ii_ii_ii_ii_ii_ii_ii_ii_ii_ii_ii_ii_ii_ii_ii_ii_ii_ii_ii_ii_ii_ii_ii_ii_ii_ii_ii_ii_ii_ii_ii_ii_ii_ii_ii_ii_ii_ii_ii_ii_ii_ii_ii_ii_ii_ii_ii_ii_ii_ii_ii_ii_ii_ii_ii_ii_ii_ii_ii_ii_ii_ii_ii_ii_ii_ii_ii_ii_ii_ii_ii_ii_ii_ii_ii_ii_ii_ii_ii_ii_ii_ii_ii_ii_ii_ii_ii_ii_ii_ii_ii_ii_ii_ii_ii_ii_ii_ii_ii_ii_ii_ii_ii_ii_ii_ii_ii_ii_ii_ii_ii_ii_ii_ii_ii_ii_ii_ii_ii_ii_ii_ii_ii_ii_ii_ii_ii_ii_ii_ii_ii_ii_ii_ii_ii_ii_ii_ii_ii_ii_ii_ii_ii_ii_ii_ii_ii_ii_ii_ii_ii_ii_ii_ii_ii_ii_ii_ii_ii_i_i!_i!_i!_!!!!!i_i!_!!i_!!!_ii_ii_i_
_____________________________________________________________________________________________________________________________________________________________________________________________________________________________________________________________________________________________________________________________________________________________________________________________________________________________________________________________________________________________________________________________________________________________________________________________________

Finding Information
PLEASEREADANDSAVETHISGUIDE
[] [] [] [] [] [] [] [] [] [] [] [] [] [] [] [] [] [] [] [] []
Thank you for choosing Electrolux, the new premium brand in home appliances.
This Use & Care Guide is part of our commitment to customer satisfaction and
product quality throughout the service life of your new cooktop.
We view your purchase as the beginning of a relationship. To ensure our ability to
continue serving you, please use this page to record key product information.
Once you have your cooktop installed, we suggest you keep this manual in a safe
place for future reference. Should any problems occur, refer to the
Troubleshooting section of this manual. This information will help you quickly
identify a problem and get it remedied. In the event you require assistance, please
contact the dealer where you purchased your cooktop.
MAKEA RECORDFORQUICKREFERENCE
[] [] [] [] [] [] [] [] [] [] [] [] [] [] [] [] [] [] [] [] [] []
Whenever you call to request information or service, you will need to know your
model number and serial number. You can find this information on the appliance's
serial plate and on the product registration card.
@2005 Eiectroiux Home Products, Inc.
Post Office Box 212378, Augusta, Georgia 30917, USA
All rights reserved. Printed in the USA
Finding Information
PRODUCTREGiSTRATiONCARD
[] [] [] [] [] [] [] [] [] [] [] [] [] [] [] [] [] [] [] [] []
The package containing this manual also includes your product registration
information. Warranty coverage begins at the time your Electrolux cooktop was
purchased.
If you received a damaged product, immediately contact your dealer or builder. Do
not install or use a damaged appliance.
HHHHHHHHHHHHHHHHHHHHHHHHHHHHHHHHHHHHHHHHHHHHHHHHHHHHHHHHHHHHH_
name, address and telephone number.
Purchase Date
Electrolux Model Number
Electrolux Serial Number
Dealer Name
Dealer Address
Dealer Telephone
Keep this manual and the sales receipt together in a safe place for further
refe re nce.
QUESTIONS?
[] [] [] [] [] [] [] [] [] [] [] [] [] [] []
For toll-free telephone support in the U.S. and Canada:
1-877- 4ELECTROLUX (1-877-435-3287)
For online support and Internet product information:
www.electroluxusa.com
[] [] [] [] [] []
Finding Information
TABLEOF CONTENTS
m [] [] [] [] [] [] [] [] [] []
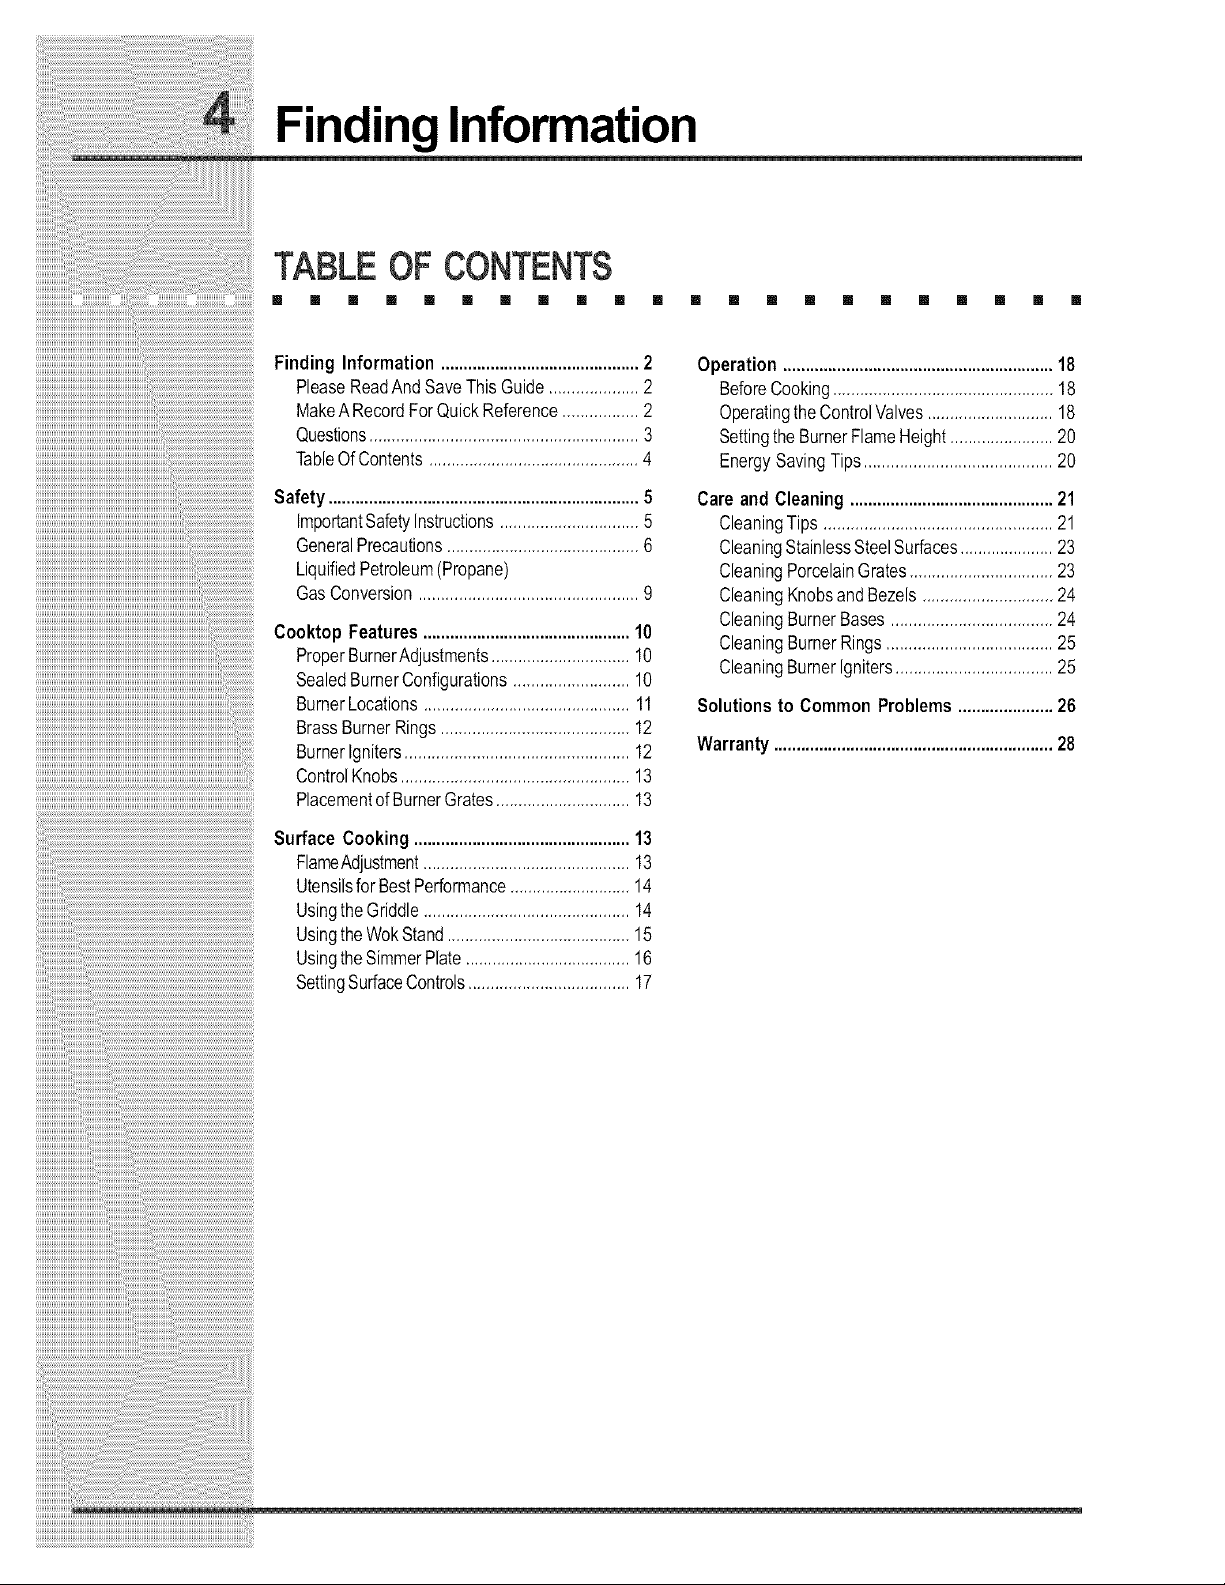
Finding Information............................................2
PleaseReadAndSaveThisGuide....................2
MakeARecordForQuickReference.................2
Questions............................................................3
TableOfContents...............................................4
Safety.....................................................................5
ImportantSafetyInstructions...............................5
GeneralPrecautions...........................................6
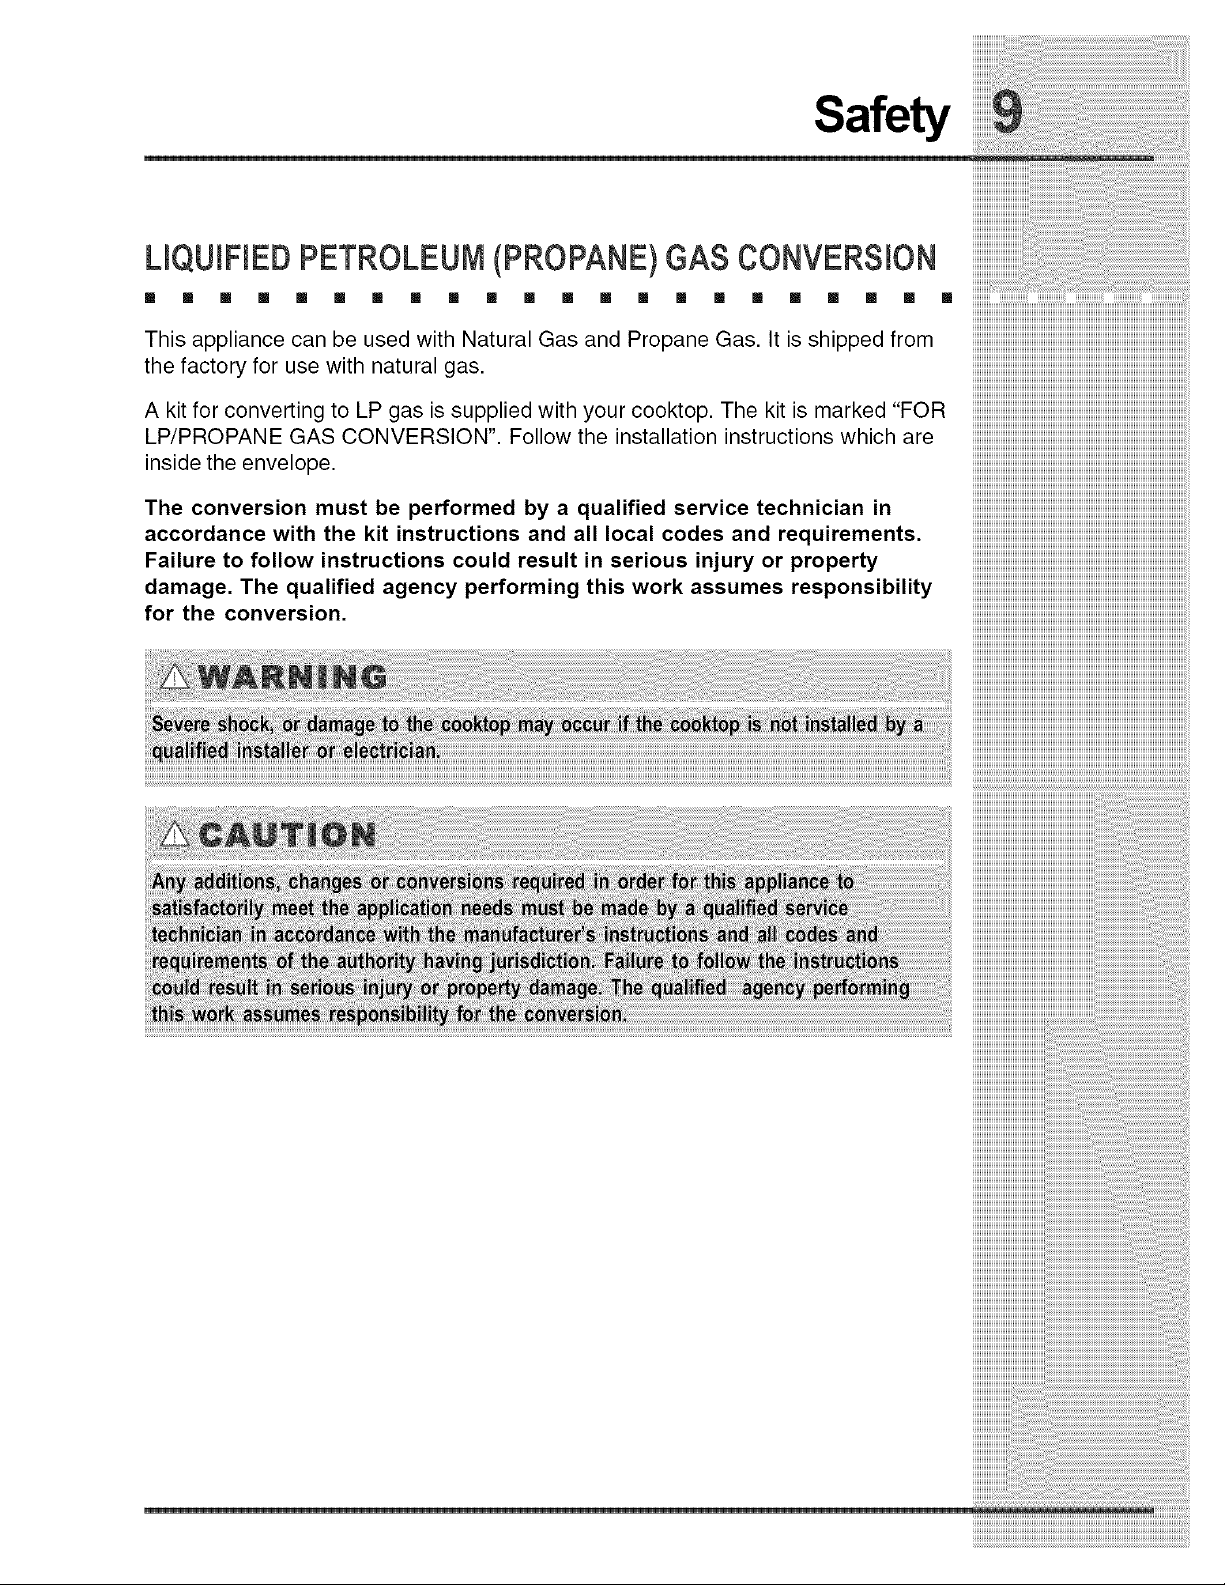
LiquifiedPetroleum(Propane)
GasConversion.................................................9
Cooktop Features..............................................10
ProperBurnerAdjustments...............................10
SealedBurnerConfigurations..........................10
BurnerLocations..............................................11
BrassBurnerRings..........................................12
BurnerIgniters..................................................12
ControlKnobs...................................................13
Placementof BurnerGrates..............................13
SurfaceCooking................................................13
FlameAdjustment..............................................13
Utensilsfor BestPerformance...........................14
UsingtheGriddle..............................................14
UsingtheWokStand.........................................15
UsingtheSimmerPlate.....................................16
SettingSurfaceControls....................................17
[] [] [] [] [] [] [] [] [] [] []
Operation............................................................18
BeforeCooking.................................................18
OperatingtheControlValves............................18
SettingtheBurnerFlameHeight.......................20
EnergySavingTips..........................................20
Careand Cleaning.............................................21
CleaningTips ...................................................21
CleaningStainlessSteelSurfaces.....................23
CleaningPorcelainGrates................................23
CleaningKnobsandBezels.............................24
CleaningBurnerBases....................................24
CleaningBurnerRings.....................................25
CleaningBurnerIgniters...................................25
Solutions to Common Problems.....................26
Warranty ..............................................................28
Safety
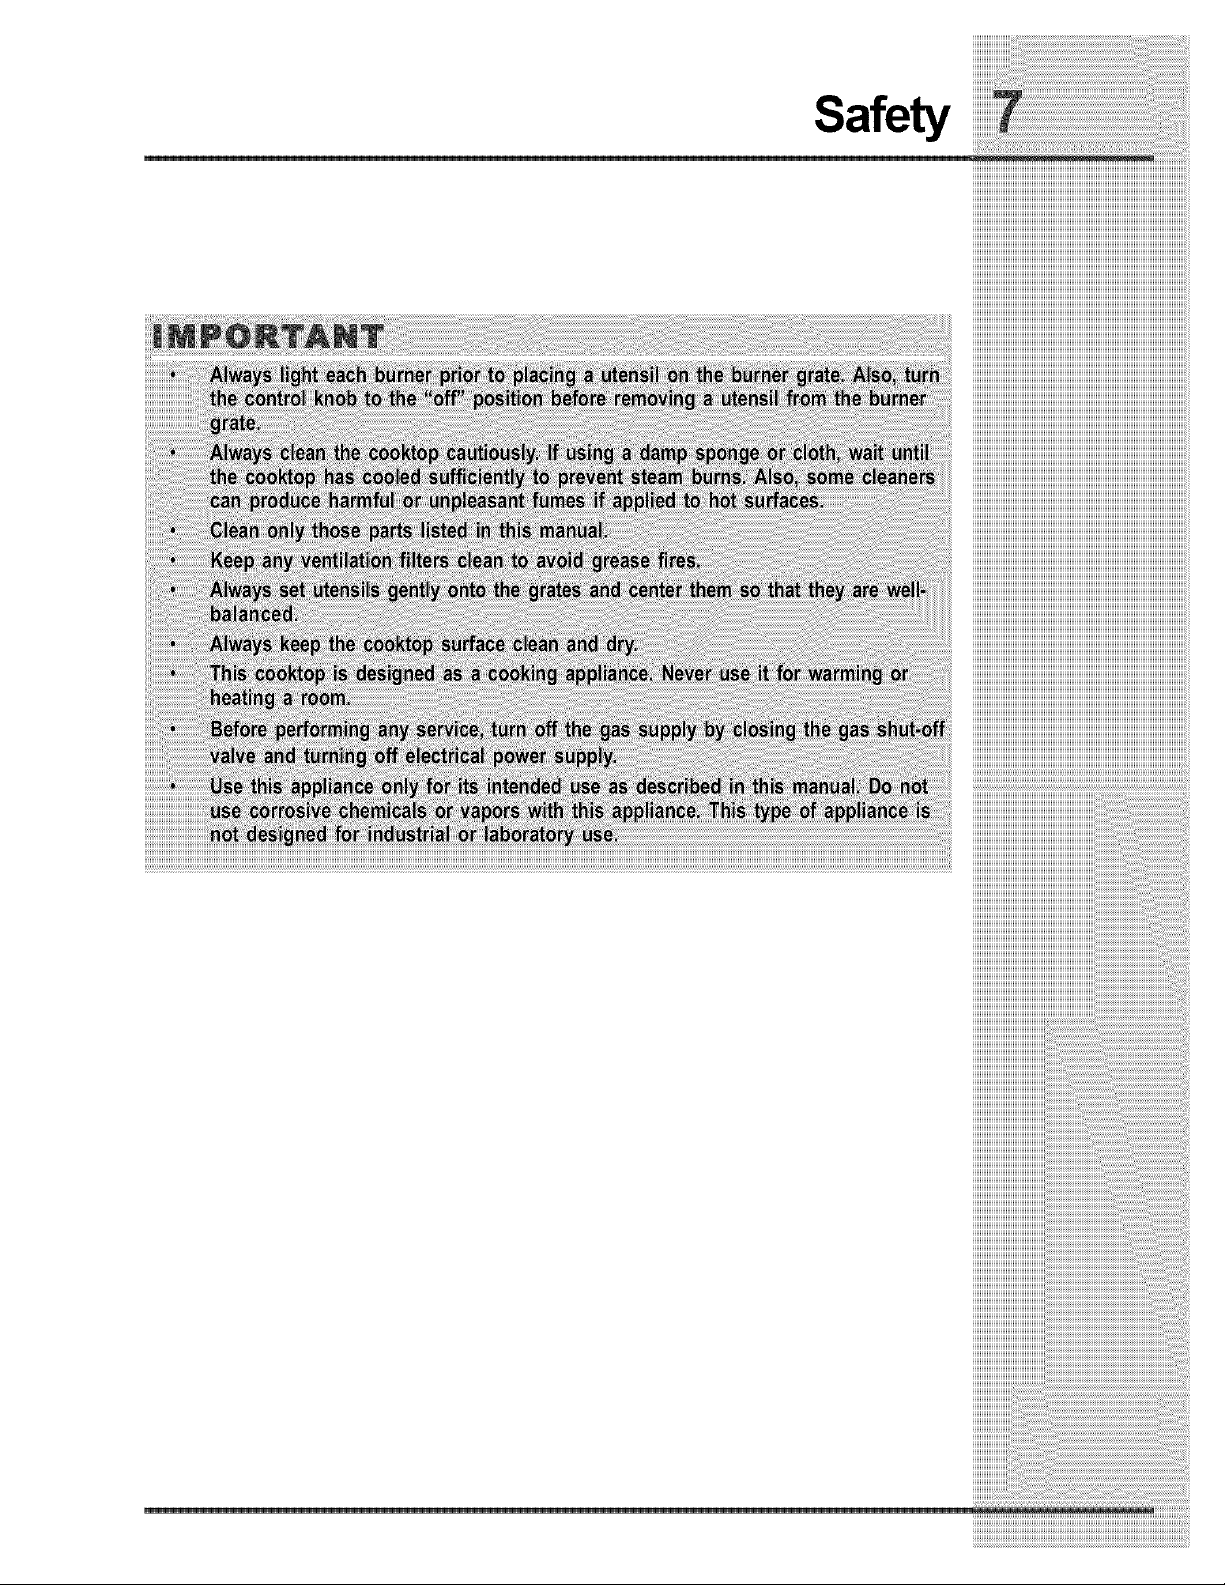
(MPORTANTSAFETY(NSTRUCT(ONS
[] [] [] [] [] [] m [] [] [] [] [] [] [] [] m [] [] [] [] []
Safety Precautions
Do not attempt to install or operate your appliance until you have read the safety
precautions in this manual. Safety items throughout this manual are labeled with a
Warning or Caution based on the risk type.
Definitions
This is the safety alert symbol. It is used to alert you to potential personal
injury hazards. Obey all safety messages that follow this symbol to avoid possible
injury or death.
_JJJJJJJJJJJJJJJJ_JJJJJJJJJJJJJJJ_)JJJJJJJJJJJJJJJ_)JJJJJJJJJJJJJJJ_CJJJJJJJJJJJJJJJJJJ_)
___________________________________________________________________________________________________________________________
)))))))))))))))))))))))))))))))))))))))))))))))))))))))))))))))))))))))))))))))))))))))))))))))))))))))))))))))))))))))))))
CCCCCCCCCCCCCCCCCCCCCCCCIII
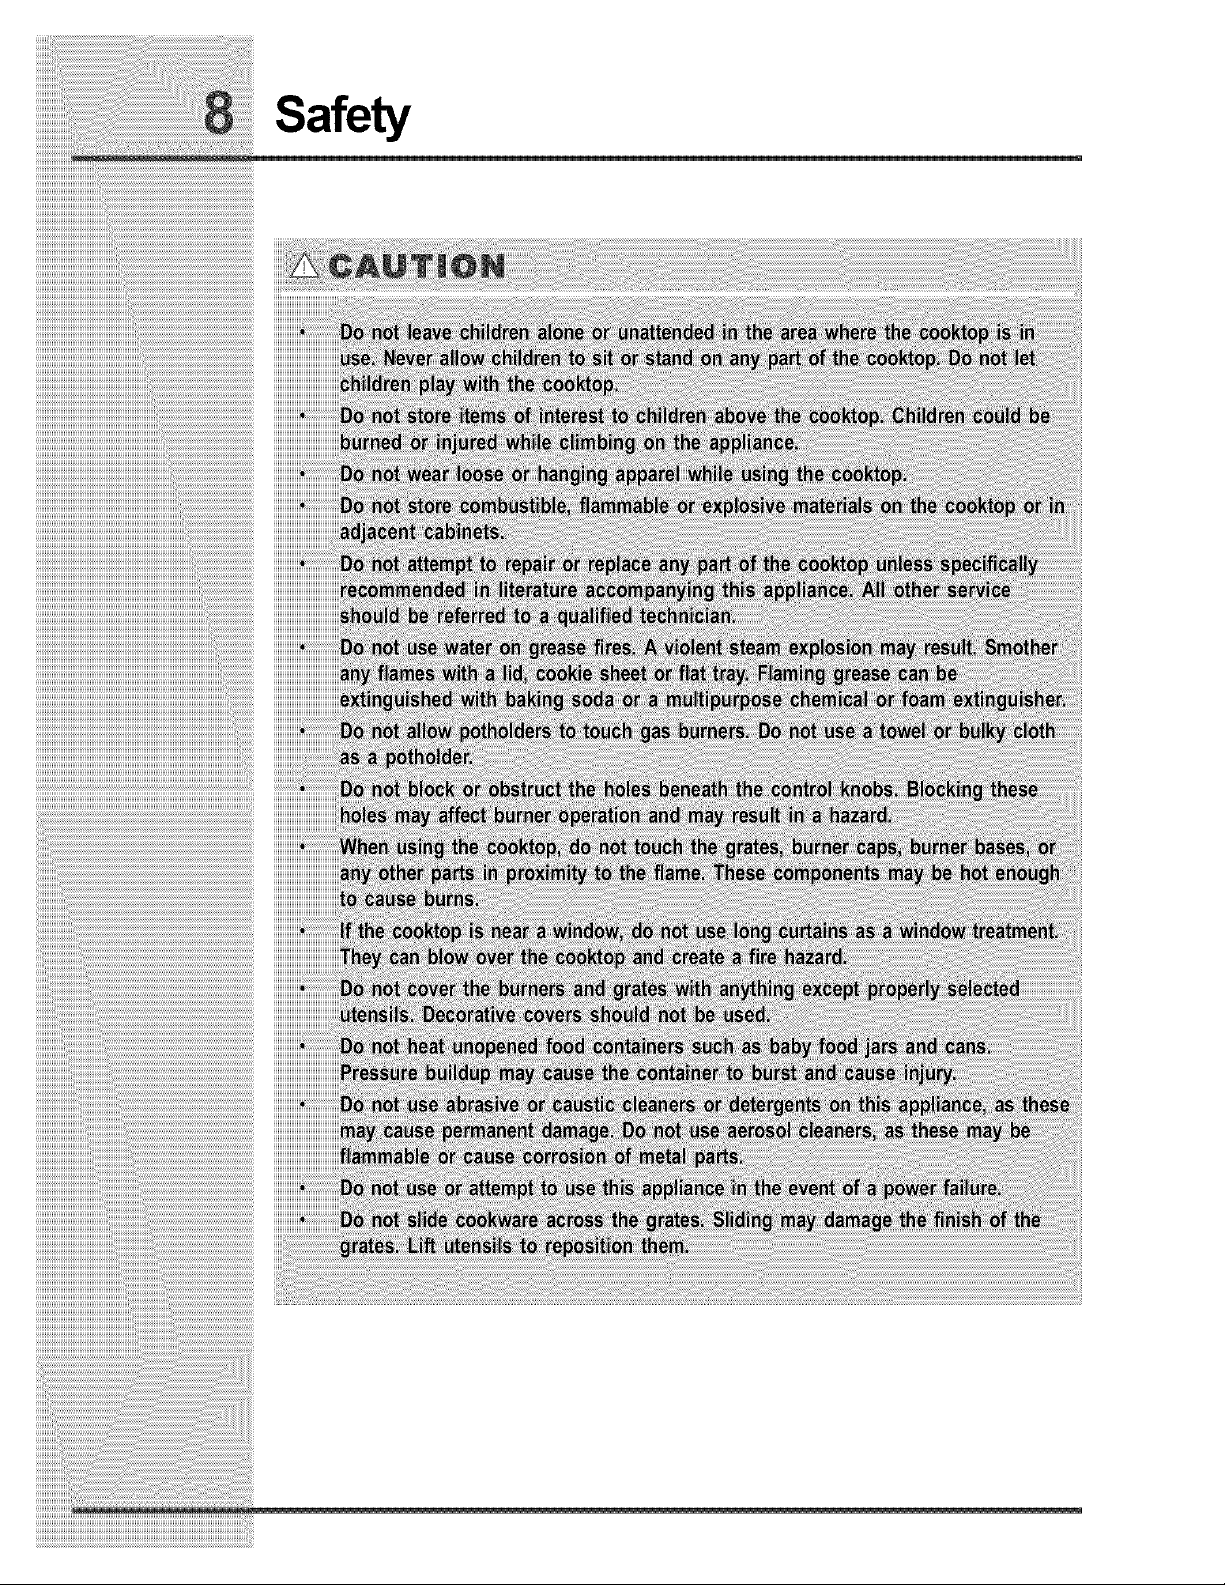
Safety
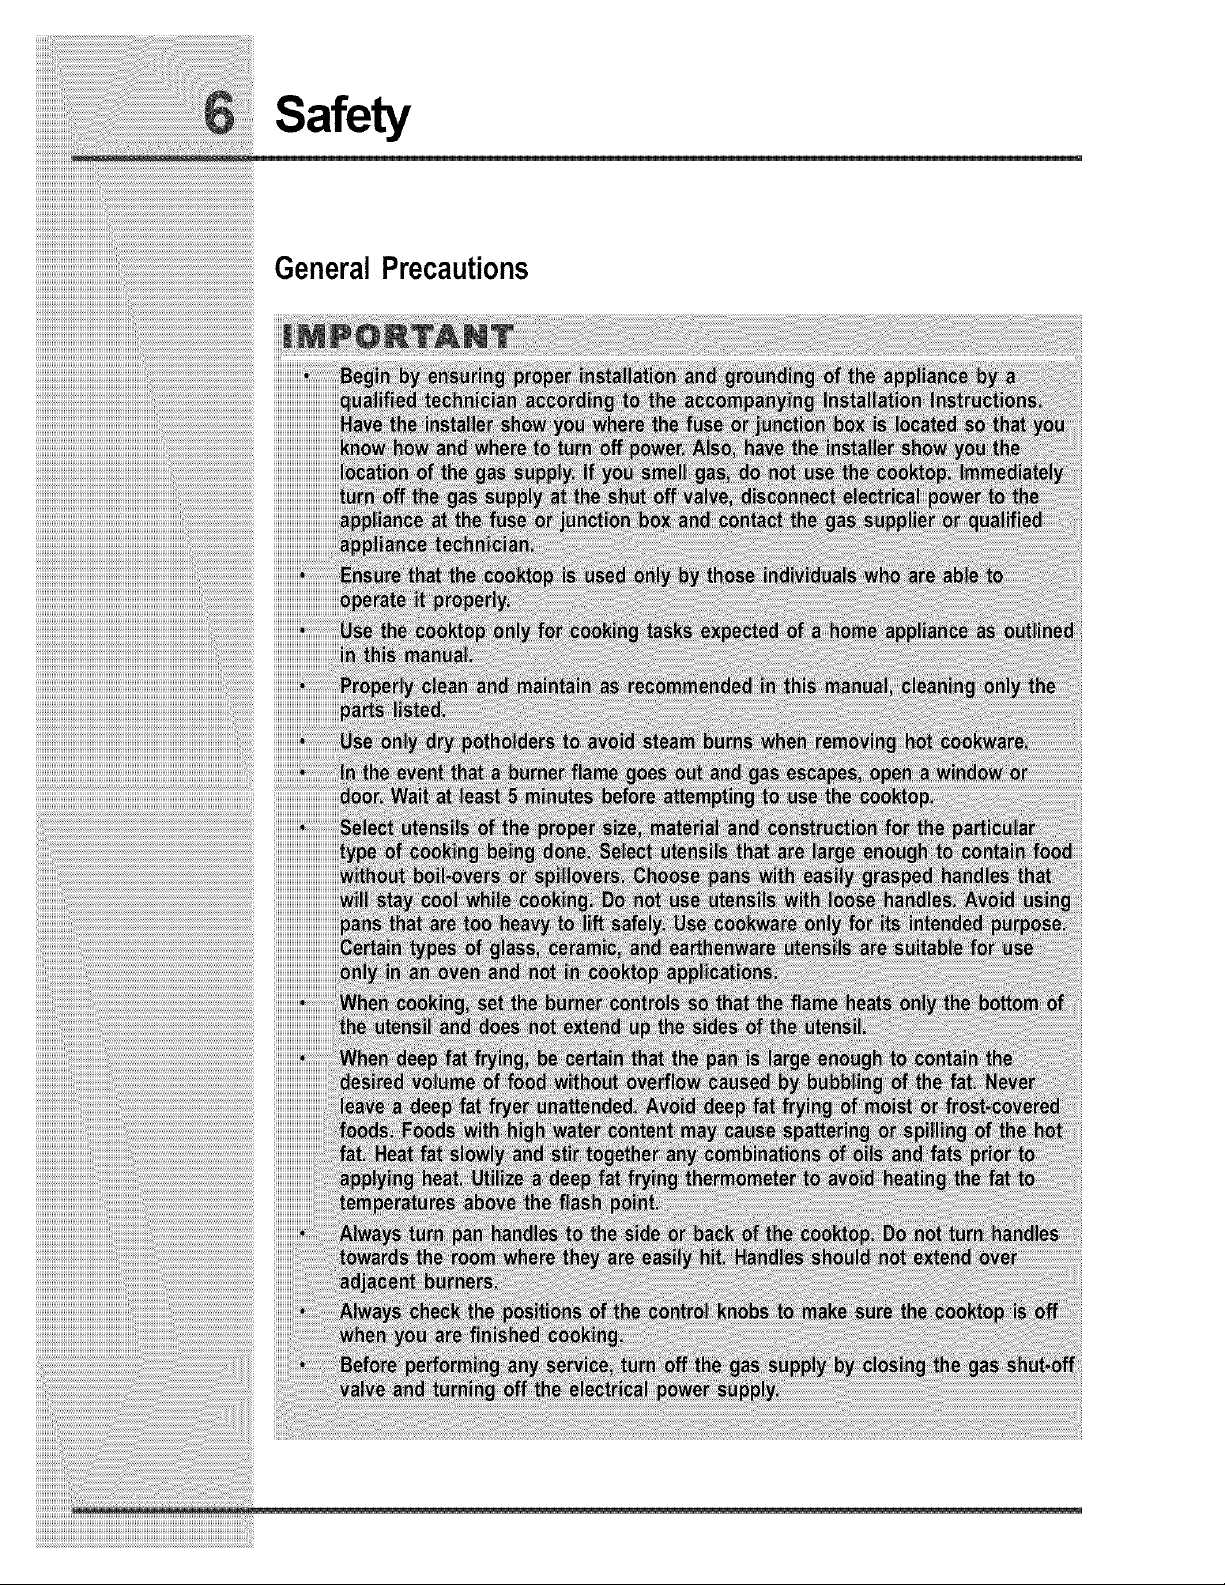
General Precautions
Safety
Safety
Cooktop Features
PROPERBURNERADJUSTMENTS
[] [] [] [] [] [] [] [] [] [] [] [] [] [] [] [] [] [] [] [] [] []
The color of the flame is the key to proper burner adjustment. A good flame is clear, blue
and hardly visible in a well-lighted room. Each cone of flame should be steady and sharply
defined. Adjust or clean burner if flame is yellow-ocooktop. To clean burner, see instructions
under General Care & Cleaning.
SEALEDBURNERCONFIGURATIONS
[] [] [] [] [] [] [] [] [] [] [] [] [] [] [] [] [] [] [] [] []
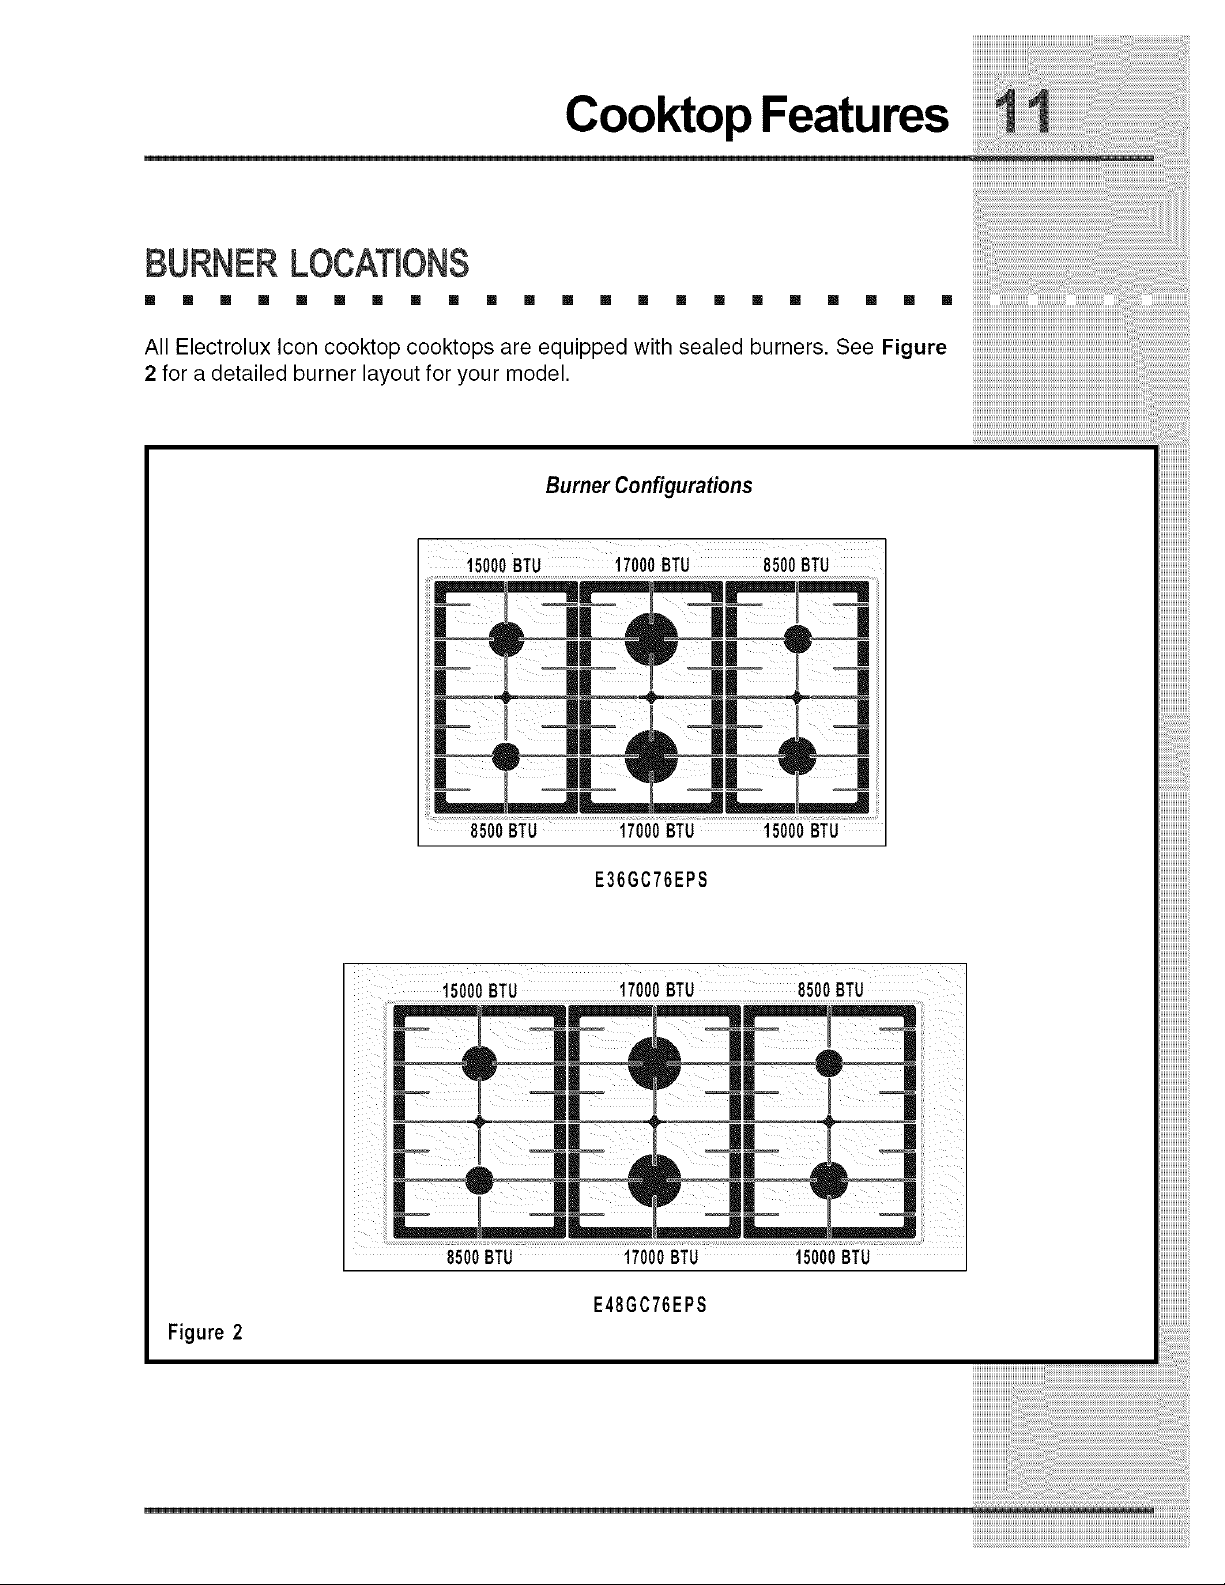
On E36GC76EPS and E48GC76EPS cooktops, there are a total of six burners,
including two burners rated at a maximum output of 17,000 BTU/HR, two burners
rated at a maximum of 15,000 BTU/HR and two burners rated at a maximum
output of 8,500 BTU/HR. The knobs are positioned to correspond with the burner
layout.
Cooktop Features
BURNERLOCAT(ONS
[] [] [] [] [] [] [] [] [] [] [] [] [] [] [] [] [] [] [] [] [] []
All Electrolux Icon cooktop cooktops are equipped with sealed burners. See Figure
2 for a detailed burner layout for your model.
))))))))))))))))))))))))))i(((((((((((((((ii(((((((((((((((ii
Burner Configurations
15000BTU 17000 BTU 8500 BTU
8500 BTU 17000BTU 15000BTU
E36GC76EPS
15000BTU 17000BTU 8500BTU
Figure 2
8500BTU 17000BTU 15000BTU
E48GC76EPS
Cooktop Features
BRASSBURNERRINGS
[] [] [] [] [] [] [] [] [] [] [] [] [] [] [] [] [] [] [] [] [] []
All burners are attached to the cooktop by retaining nuts. Gaskets around the
undersides of the burner bases ensure that the burners are sealed, thereby
preventing any liquid spills from entering the cooktop chassis. All spills remain on
the surface of the cooktop.
The brass burner heads spread the flame evenly around the burner perimeters.
The burner heads must seat properly in the burner bases to enable proper cooktop
operation. To ensure proper seating, positioning tabs have been placed on the
bottom of each burner head to slide into corresponding notches in the fixed burner
base.
BURNERiGNiTERS
[] [] [] [] [] [] [] [] [] [] [] [] [] [] [] [] [] [] [] [] [] []
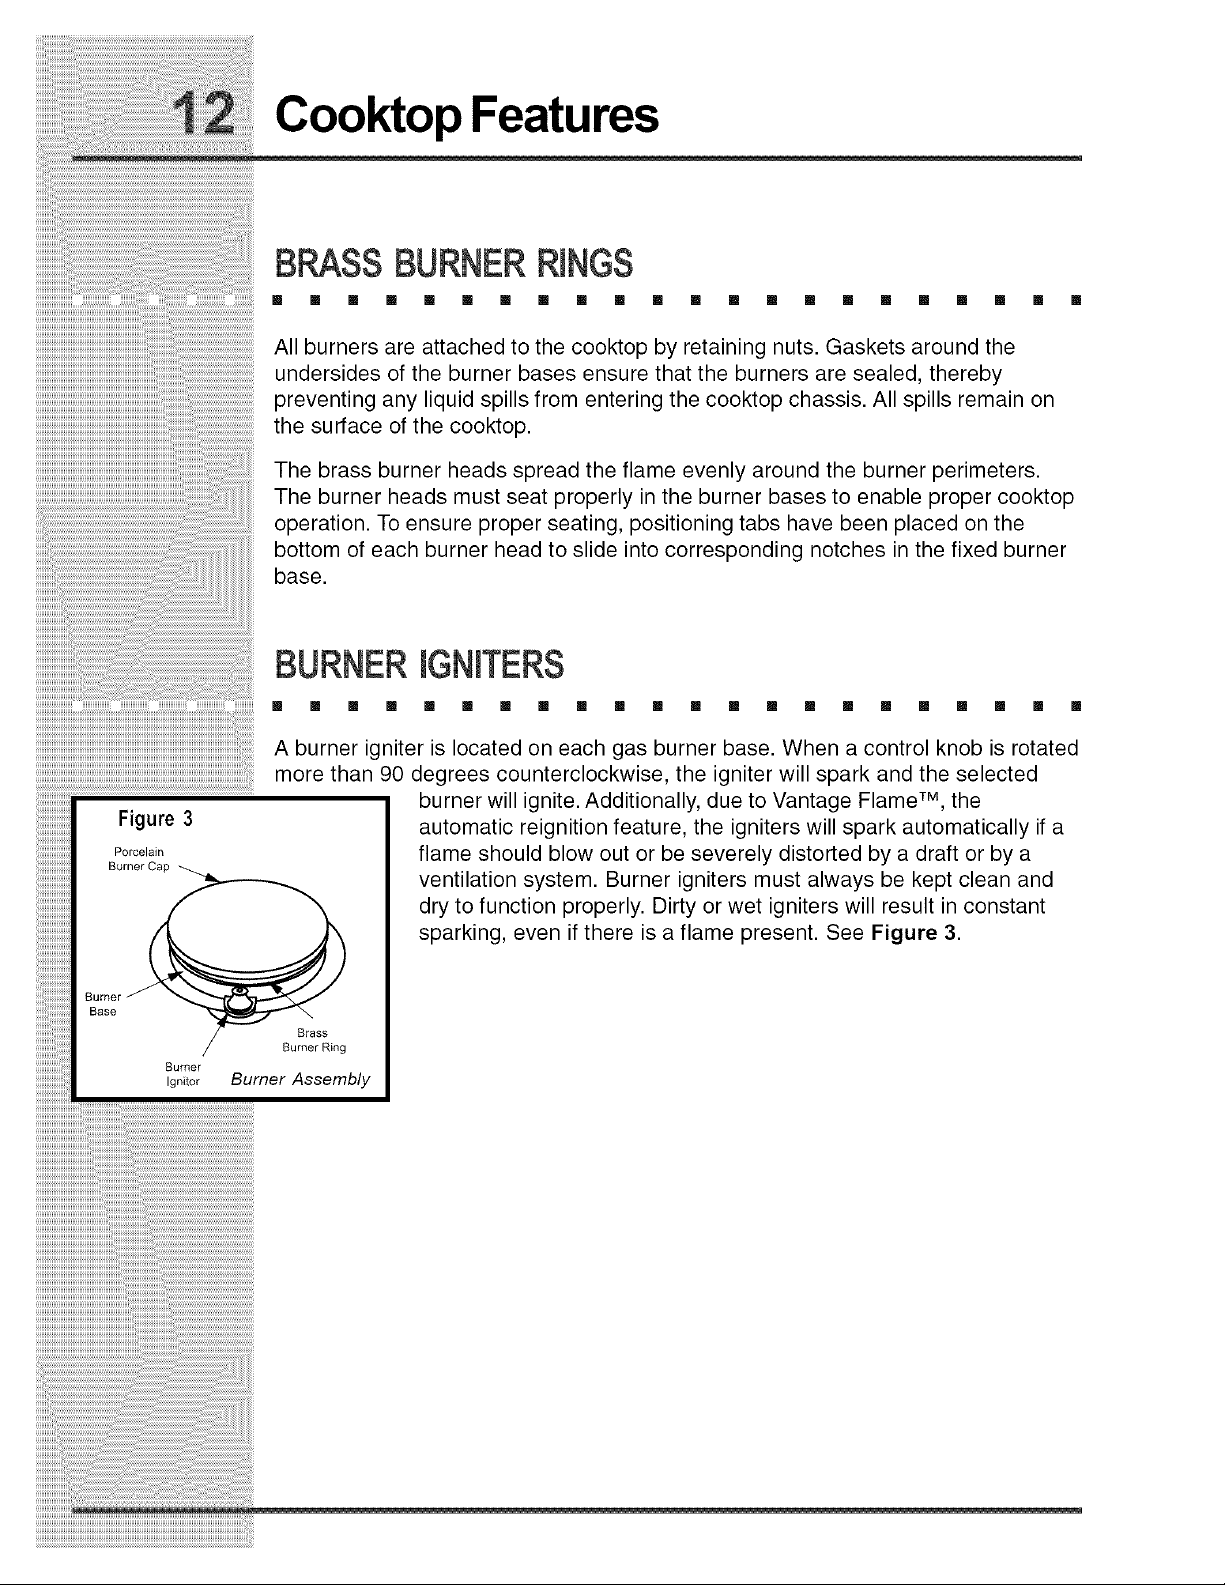
A burner igniter is located on each gas burner base. When a control knob is rotated
more than 90 degrees counterclockwise, the igniter will spark and the selected
burner will ignite. Additionally, due to Vantage Flame TM, the
automatic reignition feature, the igniters will spark automatically if a
flame should blow out or be severely distorted by a draft or by a
ventilation system. Burner igniters must always be kept clean and
dry to function properly. Dirty or wet igniters will result in constant
sparking, even if there is a flame present. See Figure 3.
Cooktop Features/SurfaceCooking
CONTROLKNOBS
[] [] [] [] [] [] [] [] [] [] [] [] [] [] [] [] [] [] [] [] [] [] ..................................
The control knobs provided with this range are designed for ease of use and
longevity. The "D" shaped design of the knob shaft ensures proper orientation when
reinstalling the knob. Located beneath each knob is a bezel ring that mounts to the
range.
PLACEMENTOFBURNERGRATES
[] [] [] [] [] [] [] [] [] [] [] [] [] [] []
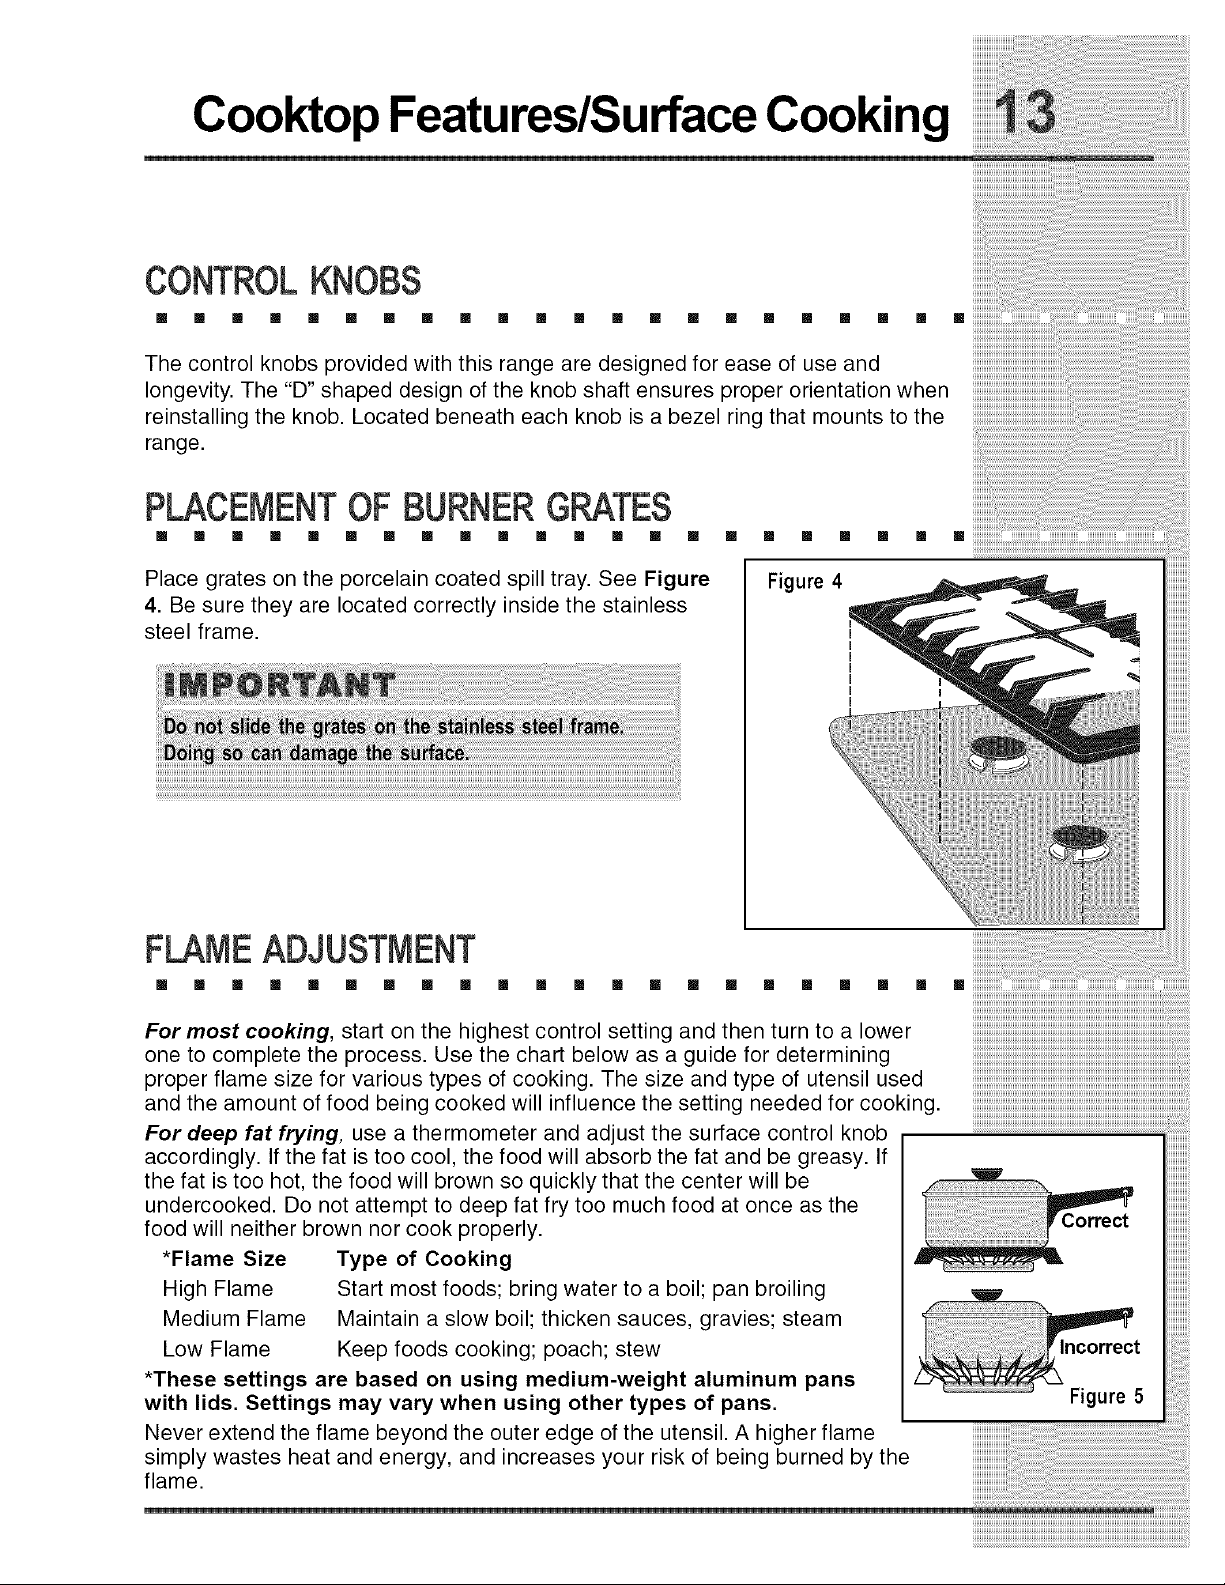
Place grates on the porcelain coated spill tray. See Figure
4. Be sure they are located correctly inside the stainless
steel frame.
[] [] [] [] [] [] []
Figure 4
FLAMEADJUSTMENT
For most cooking, start on the highest control setting and then turn to a lower
one to complete the process. Use the chart below as a guide for determining
proper flame size for various types of cooking. The size and type of utensil used
and the amount of food being cooked will influence the setting needed for cooking.
For deep fat frying, use a thermometer and adjust the surface control knob --
accordingly. If the fat is too cool, the food will absorb the fat and be greasy. If I
the fat is too hot, the food will brown so quickly that the center will be _ I
undercooked. Do not attempt to deep fat fry too much food at once as the
food will neither brown nor cook properly. I
*Flame Size Type of Cooking _ I
High Flame Start most foods; bring water to a boil; pan broiling _,
Medium Flame Maintain a slow boil; thicken sauces, gravies; steam I
Low Flame Keep foods cooking; poach; stew t I
*These settings are based on using medium-weight aluminum pans I
Rgure 5
with lids. Settings may vary when using other types of pans.
Never extend the flame beyond the outer edge of the utensil. A higher flame ..................................
simply wastes heat and energy, and increases your risk of being burned by the
flame.
Surface Cooking
iiiiiiiiiiiii
iiiiiiiiiiiiii
iiiiiiiiiiiii
iiiiiiiiiiiiii
UTENSILSTO USEFOR BESTPERFORMANCE
[] [] [] [] [] [] [] [] [] [] [] [] [] [] [] [] [] [] [] []
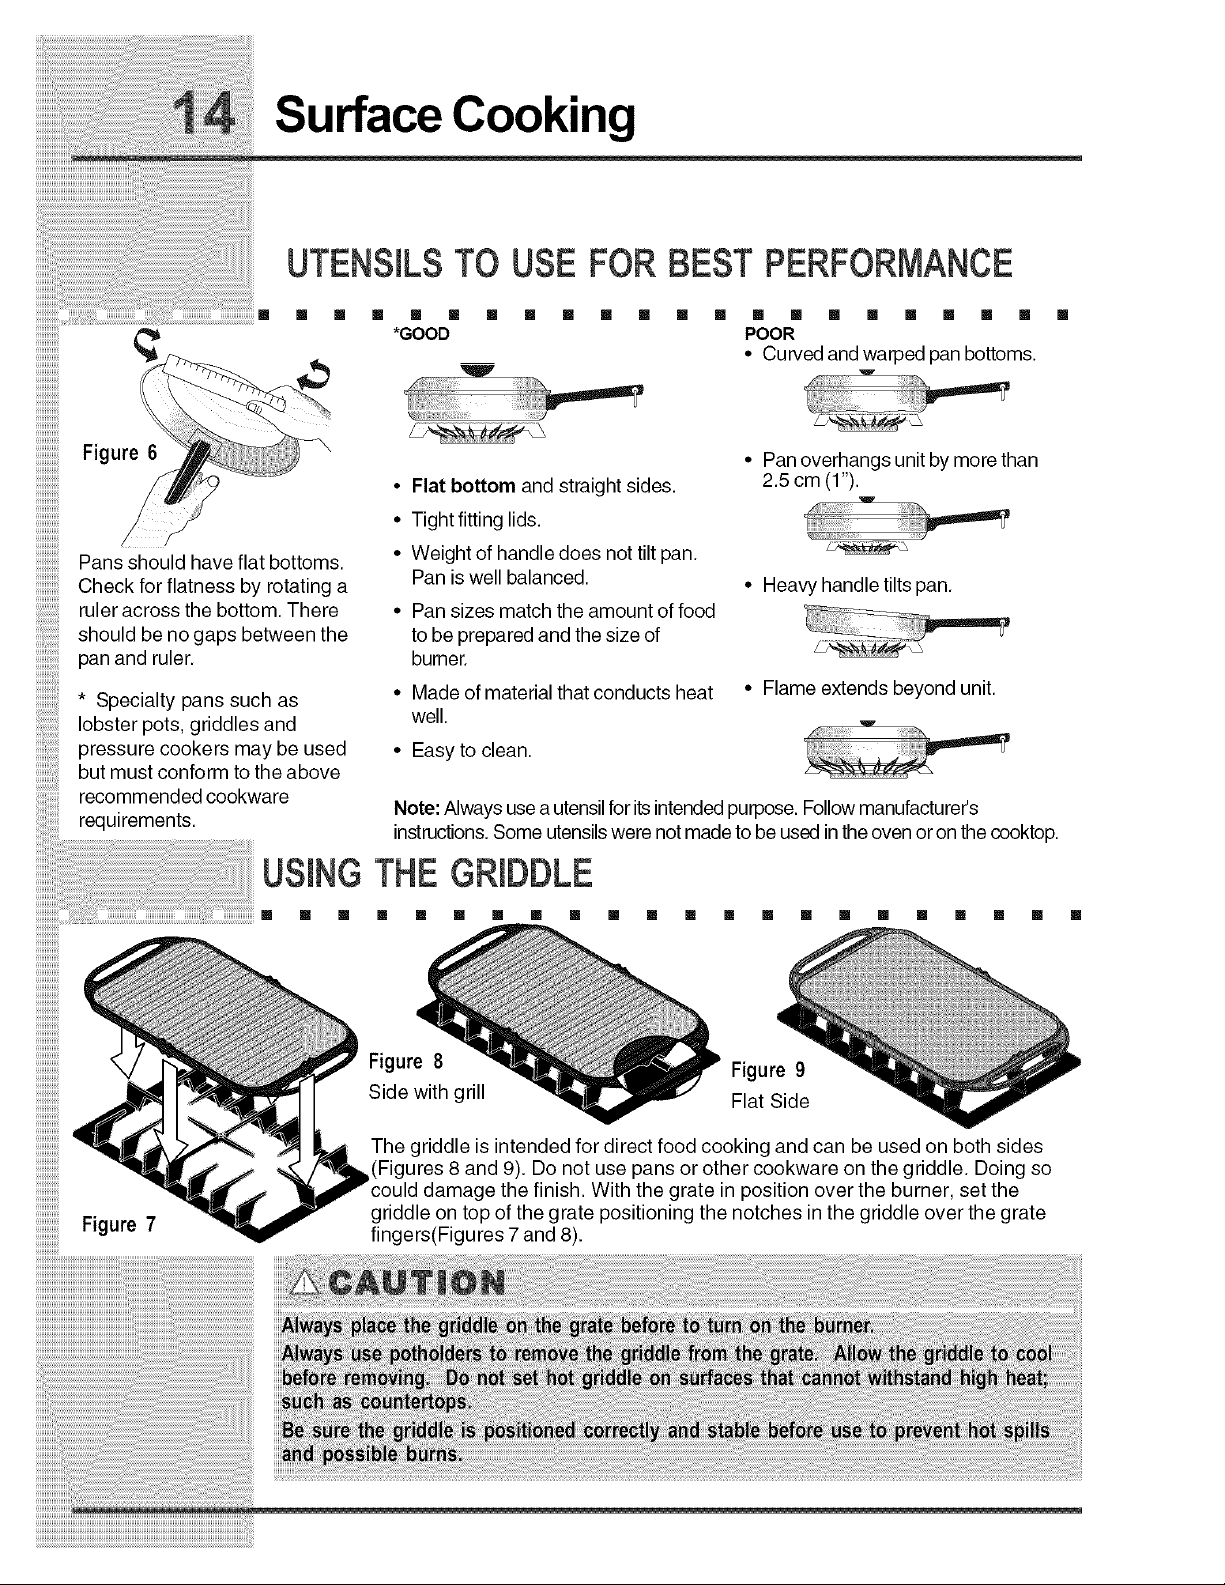
*GOOD POOR
• Curved and warped pan bottoms.
Figure 6
Pans should have flat bottoms.
Check for flatness by rotating a
ruler across the bottom. There
should be no gaps between the
pan and ruler.
* Specialty pans such as
lobster pots, griddles and
pressure cookers may be used
but must conform to the above
recommended cookware
requirements.
• Flat bottom and straight sides.
• Tight fitting lids.
• Weight of handle does not tilt pan.
Pan is well balanced.
• Pan sizes match the amount of food
to be prepared and the size of
burner.
• Made of material that conducts heat
well.
• Easy to clean.
• Pan overhangs unit by more than
2.5 cm (1"1.
i
• Heavy handle tilts pan.
• Flame extends beyond unit.
Note: Always use a utensil for its intended purpose. Follow manufactureCs
instructions. Some utensils were not made to be used in the oven or on the cooktop.
USING THE GRIDDLE
[] [] [] [] [] [] [] [] [] [] [] [] [] [] [] [] [] [] [] [] [] []
Figure 7
Figure 8
Figure 9
Flat Side
The griddle is intended for direct food cooking and can be used on both sides
(Figures 8 and 9). Do not use pans or other cookware on the griddle. Doing so
[ge the finish. With the grate in position over the burner, set the
griddle on top of the grate positioning the notches in the griddle over the grate
fingers(Figures 7 and 8).
Surface Cooking
USINGTHEWOKSTAND
[] [] [] [] [] [] [] [] [] [] [] [] [] [] [] [] [] [] [] [] [] []
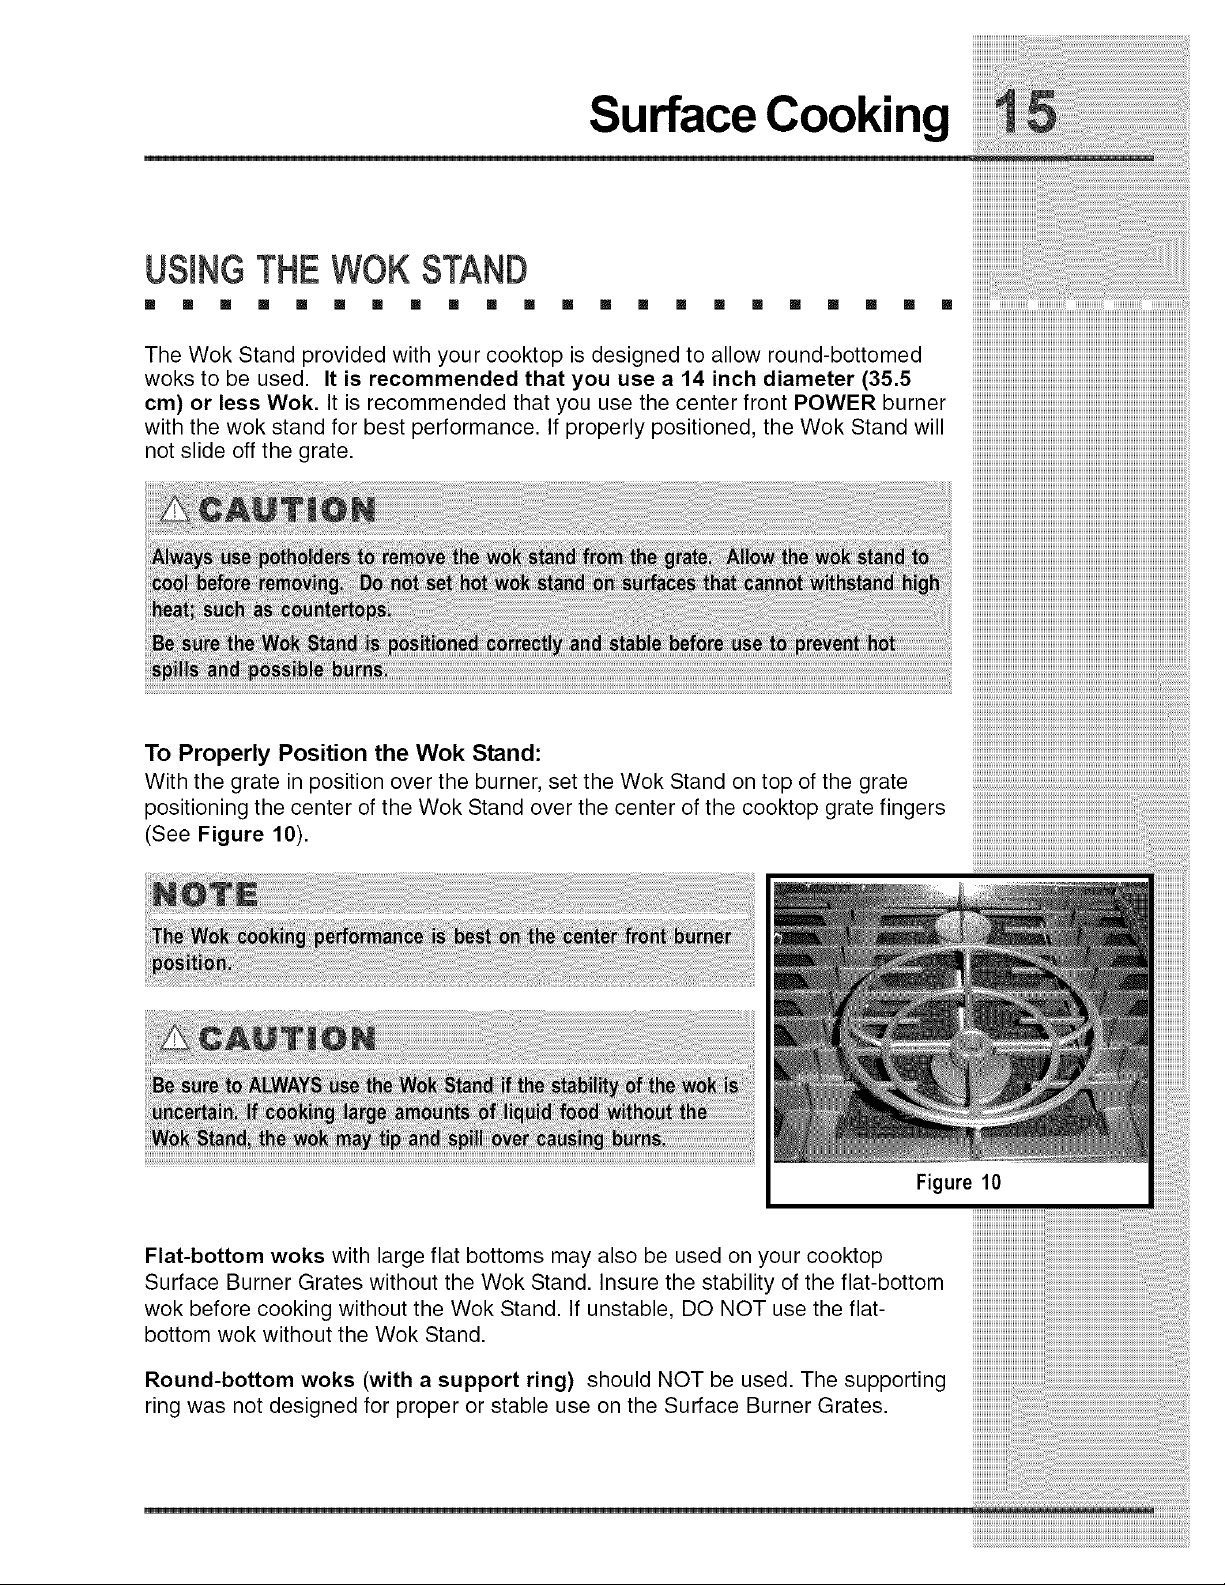
The Wok Stand provided with your cooktop is designed to allow round-bottomed
woks to be used. It is recommended that you use a 14 inch diameter (35.5
cm) or less Wok. It is recommended that you use the center front POWER burner
with the wok stand for best performance. If properly positioned, the Wok Stand will
not slide off the grate.
Flat-bottom woks with large flat bottoms may also be used on your cooktop
Surface Burner Grates without the Wok Stand. Insure the stability of the flat-bottom
wok before cooking without the Wok Stand. If unstable, DO NOT use the flat-
bottom wok without the Wok Stand.
Round-bottom woks (with a support ring) should NOT be used. The supporting
ring was not designed for proper or stable use on the Surface Burner Grates.
Surface Cooking
USINGTHE SIMMERPLATE
[] [] [] [] [] [] [] [] [] [] [] [] [] [] [] [] [] [] [] [] [] []
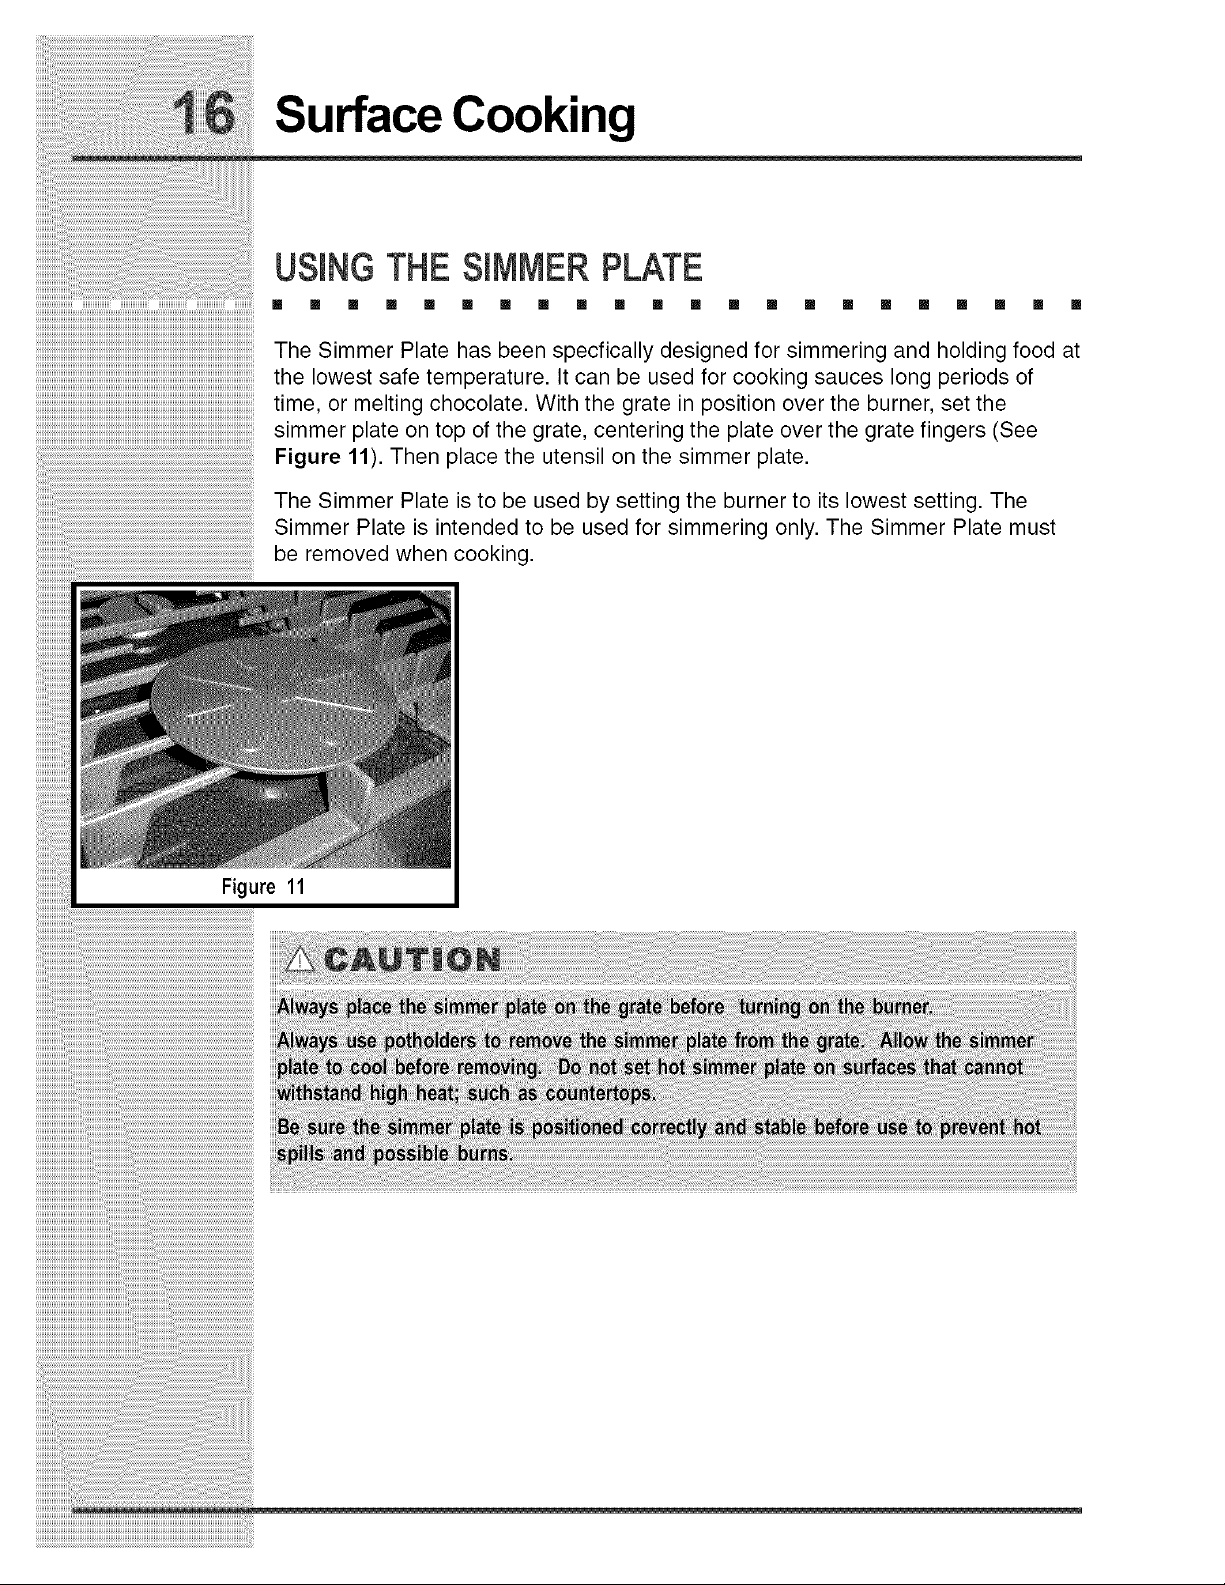
The Simmer Plate has been specfically designed for simmering and holding food at
the lowest safe temperature. It can be used for cooking sauces long periods of
time, or melting chocolate. With the grate in position over the burner, set the
simmer plate on top of the grate, centering the plate over the grate fingers (See
Figure 11). Then place the utensil on the simmer plate.
The Simmer Plate is to be used by setting the burner to its lowest setting. The
Simmer Plate is intended to be used for simmering only. The Simmer Plate must
be removed when cooking.
Figure 11

Surface Cooking
SETTINGSURFACECONTROLS
[] [] [] [] [] [] [] [] [] [] [] [] [] [] [] [] [] [] [] [] [] []
CCCCCCCCCCCCCCCCCCCCCCCCIII
HHHHHHHHHHHHHHHHHHHHHHHHHHHHHHHHHHHHHHHHHHHHHHHHHHHHHHHHHHHHHi
HHHHHHHHHHHHHHHHHHHHHHHHHHHHHHHHHHHHHHHHHHHHHHHHHHHHHHHHHHHHHi
HHHHHHHHHHHHHHHHHHHHHHHHHHHHHHHHHHHHHHHHHHHHHHHHHHHHHHHHHHHHHi
HHHHHHHHHHHHHHHHHHHHHHHHHHHHHHHHHHHHHHHHHHHHHHHHHHHHHHHHHHHHHi
Your cooktop may be equipped with any combination of the following burners: iiiiiiiiiiiiiiiiiiiiiiiiiiiiiiiiiiiiiiiiiiiiiiiiiiiiiiiiiiiiiiiiiiiiiiiiiiiiiiiiiiiiiiiiiiiiiiiiiiiiiiiiiiiiiiiiiiiiiiiiiii
IIIIIIIIIIIIIIIIIIIIIIIIIIIIIIIIIIIIIIIIIIIIIIIIIIIIIIIIIIIIIIIHHHHHHHHHHHHHHHHHHHHHHHHHHHHHH
HHHHHHHHHHHHHHHHHHHHHHHHHHHHHHHHHHHHHHHHHHHHHHHHHHHHHHHHHHHHHi
Simmer Burner: best usedforsimmering delicate sauces, etc. iiiiiiiiiiiiiiiiiiiiiiiiiiiiiiiiiiiiiiiiiiiiiiiiiiiiiiiiiiiiiiiiiiiiiiiiiiiiiiiiiiiiiiiiiiiiiiiiiiiiiiiiiiiiiiiiiiiiiiiiiii
HHHHHHHHHHHHHHHHHHHHHHHHHHHHHHHHHHHHHHHHHHHHHHHHHHHHHHHHHHHHHi
HHHHHHHHHHHHHHHHHHHHHHHHHHHHHHHHHHHHHHHHHHHHHHHHHHHHHHHHHHHHHi
StandardBurner:usedformostallsurfacecookingneeds. iiiiiiiiiiiiiiiiiiiiiiiiiiiiiiiiiiiiiiiiiiiiiiiiiiiiiiiiiiiiiiiiiiiiiiiiiiiiiiiiiiiiiiiiiiiiiiiiiiiiiiiiiiiiiiiiiiiiiiiiiii
HHHHHHHHHHHHHHHHHHHHHHHHHHHHHHHHHHHHHHHHHHHHHHHHHHHHHHHHHHHHHi
HHHHHHHHHHHHHHHHHHHHHHHHHHHHHHHHHHHHHHHHHHHHHHHHHHHHHHHHHHHHHi
Large Burner: best used when bringing large quantities of liquid to temperature and iiiiiiiiiiiiiiiiiiiiiiiiiiiiiiiiiiiiiiiiiiiiiiiiiiiiiiiiiiiiiiiiiiiiiiiiiiiiiiiiiiiiiiiiiiiiiiiiiiiiiiiiiiiiiiiiiiiiiiiiiii
whenpreparinglargerquantitiesoffood, iiiiiiiiiiiiiiiiiiiiiiiiiiiiiiiiiiiiiiiiiiiiiiiiiiiiiiiiiiiiiiiiiiiiiiiiiiiiiiiiiiiiiiiiiiiiiiiiiiiiiiiiiiiiiiiiiiiiiiiiiii
HHHHHHHHHHHHHHHHHHHHHHHHHHHHHHHHHHHHHHHHHHHHHHHHHHHHHHHHHHHHHi
HHHHHHHHHHHHHHHHHHHHHHHHHHHHHHHHHHHHHHHHHHHHHHHHHHHHHHHHHHHHHi
Regardless of size, always select a utensil that is suitable for the amount and type iiiiiiiiiiiiiiiiiiiiiiiiiiiiiiiiiiiiiiiiiiiiiiiiiiiiiiiiiiiiiiiiiiiiiiiiiiiiiiiiiiiiiiiiiiiiiiiiiiiiiiiiiiiiiiiiiiiiiiiiiii
of food being prepared. Select a burner and flame size appropriate to the pan. iiiiiiiiiiiiiiiiiiiiiiiiiiiiiiiiiiiiiiiiiiiiiiiiiiiiiiiiiiiiiiiiiiiiiiiiiiiiiiiiiiiiiiiiiiiiiiiiiiiiiiiiiiiiiiiiiiiiiiiiiii
Neverallowflamestoextendbeyondtheouteredgeofthepan. iiiiiiiiiiiiiiiiiiiiiiiiiiiiiiiiiiiiiiiiiiiiiiiiiiiiiiiiiiiiiiiiiiiiiiiiiiiiiiiiiiiiiiiiiiiiiiiiiiiiiiiiiiiiiiiiiiiiiiiiiii
Your cooktop is also equipped with 300 ° rotation flame control valves. These valves iiiiiiiiiiiiiiiiiiiiiiiiiiiiiiiiiiiiiiiiiiiiiiiiiiiiiiiiiiiiiiiiiiiiiiiiiiiiiiiiiiiiiiiiiiiiiiiiiiiiiiiiiiiiiiiiiiiiiiiiiii
provide enhanced control of the burner flame. Each burner lights automatically iiiiiiiiiiiiiiiiiiiiiiiiiiiiiiiiiiiiiiiiiiiiiiiiiiiiiiiiiiiiiiiiiiiiiiiiiiiiiiiiiiiiiiiiiiiiiiiiiiiiiiiiiiiiiiiiiiiiiiiiiii
fromanelectricigniterwhenitscontrolknobisturnedtotheLITEposition, iiiiiiiiiiiiiiiiiiiiiiiiiiiiiiiiiiiiiiiiiiiiiiiiiiiiiiiiiiiiiiiiiiiiiiiiiiiiiiiiiiiiiiiiiiiiiiiiiiiiiiiiiiiiiiiiiiiiiiiiiii
iiiiiiiiiiiiiiiiiiiiiiiiiiiiiiiiiiiiiiiiiiiiiiiiiiiiiiiiiiiiiiiiiiiiiiiiiiiiiiiiiiiiiiiiiiiiiiiiiiiiiiiiiiiiiiiiiiiiiiiiiii
Operation
BEFORECOOKING
[] [] [] [] [] [] [] [] [] [] [] [] [] [] [] [] [] [] [] [] [] []
Ensure that the cooktop has been installed by a qualified individual who has tested
the operation of the cooktop in accordance with the Installation Instructions. The
brass burner rings, burner caps, grates, knobs and spill protectors must be in
place for the cooktop to operate properly. All cooktop components must be clean.
Be certain that the gas and electrical power supplies to the cooktop are operational.
Read this Use and Care Manual in its entirety prior to operating the cooktop.
OPERATINGTHECONTROLVALVES
[] [] [] [] [] [] [] [] [] [] [] [] [] [] [] [] [] [] [] [] [] []
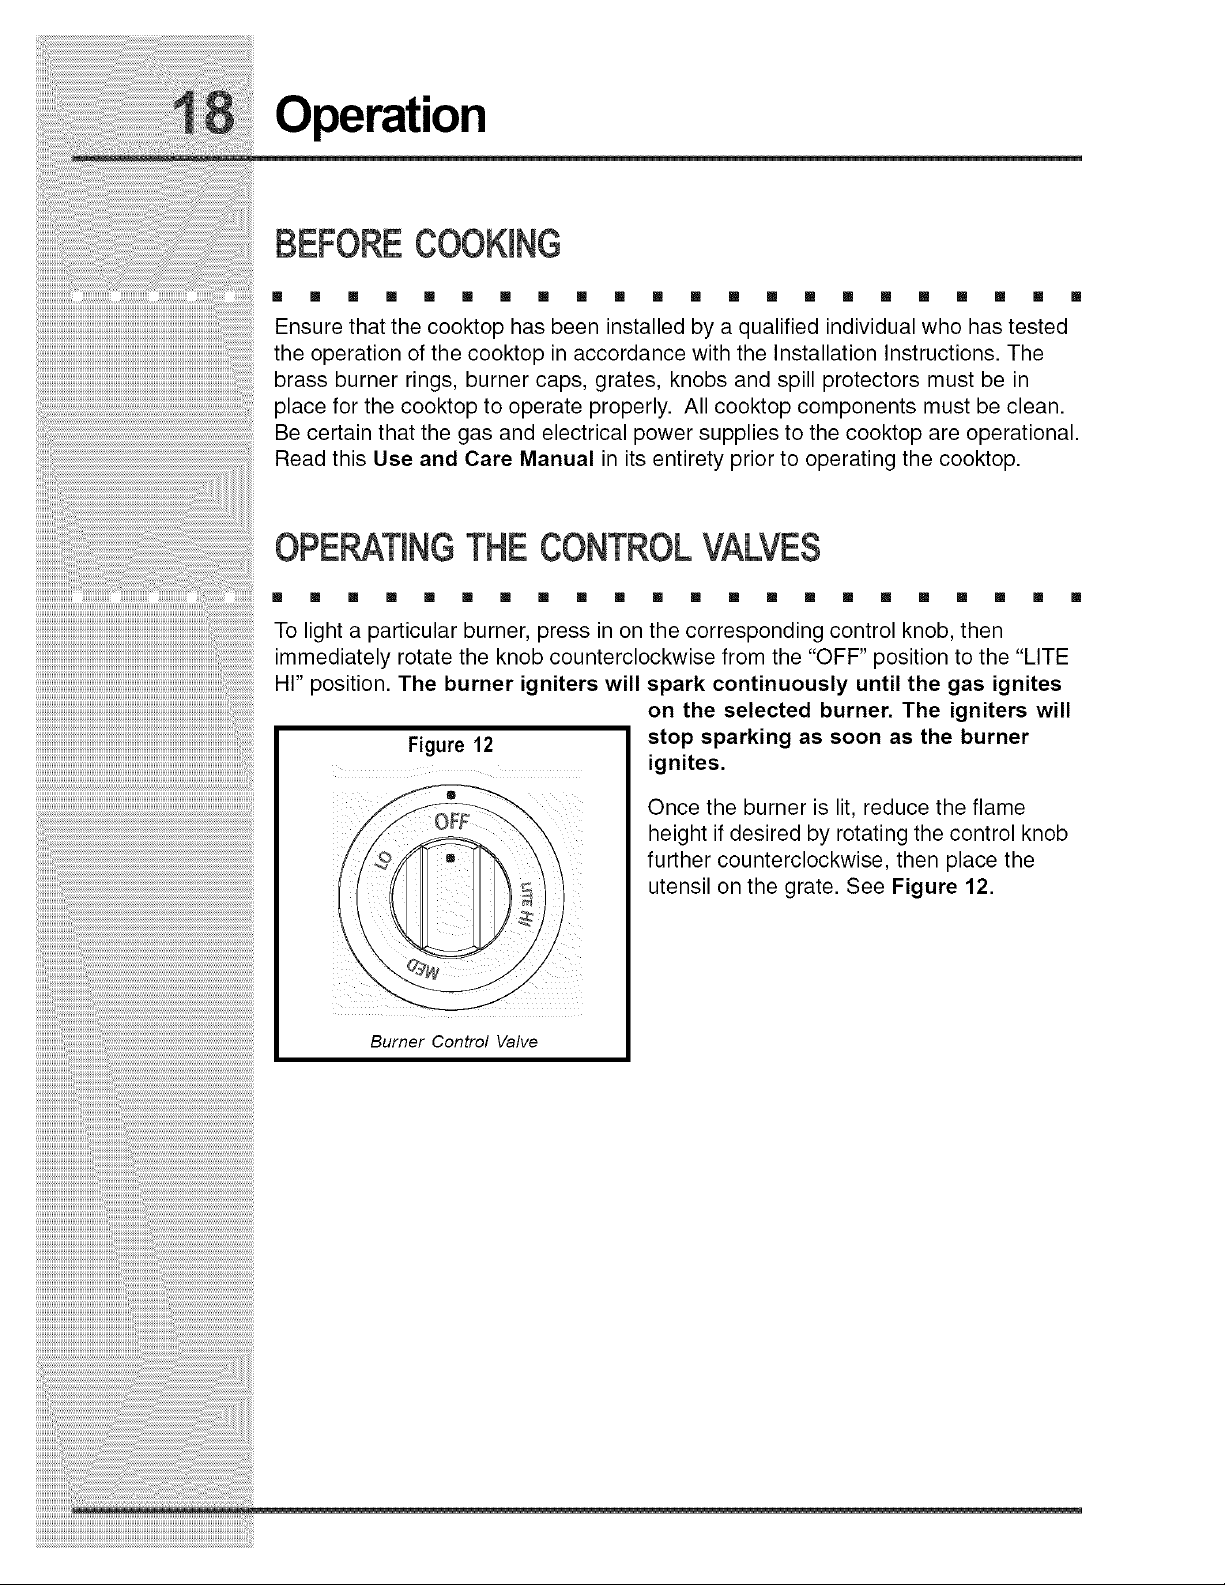
To light a particular burner, press in on the corresponding control knob, then
immediately rotate the knob counterclockwise from the "OFF" position to the "LITE
HI" position. The burner igniters will spark continuously until the gas ignites
Figure 12
Burner Control Valve
on the selected burner. The igniters will
stop sparking as soon as the burner
ignites.
Once the burner is lit, reduce the flame
height if desired by rotating the control knob
further counterclockwise, then place the
utensil on the grate. See Figure 12.
Operation
Operation
SETTINGTHEBURNERFLAMEHEIGHT
[] [] [] [] [] [] [] [] [] [] [] [] [] [] [] [] [] [] [] [] [] []
Setting the proper burner flame height for the desired cooking process and
selected utensil will result in superior cooking performance, while also saving time
and energy. Follow these recommendations for best results:
1. Use low or medium flame heights when cooking in utensils that are poor
conductors of heat, such as glass, ceramic, and cast iron cooking vessels.
Reduce the flame height until it covers approximately 1/3 of the utensil
diameter. This will ensure even heating within the utensil and reduce the
likelihood of burning or scorching of food.
2. Reduce the flame if it is extending beyond the bottom of the utensil. A flame
that extends up the sides of the utensil is potentially dangerous, heats the
utensil handle and kitchen instead of the food, and wastes energy.
3. Reduce the flame height to the minimum level necessary to perform the
desired cooking process. Remember that food cooks just as quickly at a
gentle boil as it does at a vigorous, rolling boil. Maintaining a higher boil than is
necessary wastes energy, cooks away moisture, and causes a loss in food
flavor and nutrient level.
ENERGYSAVINGTIPS
[] [] [] [] [] [] [] [] [] [] [] [] [] [] [] [] [] [] [] [] [] []
• Always use utensils with flat, smooth bottoms and tight-fitting lids to retain
heat and moisture.
• Minimize the amount of liquid or fat to reduce cooking times.
• Select cookware of the proper size, material and construction for the cooking
process being performed.
• Adjust the flame height to fit the utensil size.
• After liquid reaches a boil, reduce the heat to maintain a simmer rather than a
rolling boil.
• Use a timer rather than repeatedly removing the lid to check food.
• Thaw foods prior to cooking to reduce cooking time.
Care and Cleaning
CLEANINGTIPSFORCOOKTOP
[] [] [] [] [] [] [] [] [] [] [] [] [] [] [] [] [] [] [] [] []
No maintenance, other than the Care and Cleaning identified in this Use & Care
Manual, should be attempted by the owner/operator. All other maintenance and
service must be performed by a qualified appliance technician.
Read and follow the Care and Cleaning instructions to ensure that proper cooktop
operation and appearance will be maintained throughout the lifetime of the product.
Several materials and finishes are used in the cooktop. Each material and finish
must be properly cleaned according to the following recommendations. Failure to
follow these recommendations may result in permanent damage to the cooktop.
Proper cleaning is necessary to maintain cooktop performance and appearance,
while also ensuring safe operation. The cleaning effort necessary to maintain the
cooktop varies according to the type and amount of cooking. For example, more
frequent cleaning is required if the cooktop is used often for frying or other high
temperature operations.
Clean the cooktop thoroughly prior to operating it the first time. For initial and
everyday cleaning, use a soft cloth or sponge lightly dampened with a solution of
warm water and hand dishwashing liquid to clean all components.
Care and Cleaning
Recommendations for cleaning and care of specific cooktop components are
summarized below:
Treating the porcelain components with care will slow the natural deterioration that
takes place with cooktop use. Please follow these guidelines to keep the porcelain
parts looking their best:
1 Do not use utensils having rough bottoms, as this can result in permanent
damage to the top surfaces of the porcelainized grates.
2 Do not drop utensils onto the grates or drag heavy pots across the tops of the
grates.
3 Set the grates into the locating dimples gently. Do not drop the grates into
place.
4 Use caution when cooking to avoid spills as much as possible. Porcelain is
acid-resistant but not acid-proof, so some foods can cause permanent
damage if allowed to remain on porcelain surfaces.
Daily cleaning of the grates, burner heads, and burner caps is best accomplished
with a soft cloth or sponge dampened in a solution of warm water and hand
dishwashing liquid. Grates are dishwasher safe. Burner caps should not be
cleaned in the dishwasher.
Stubborn stains may be removed by applying full-strength, all purpose cleaning
sprays. (If you are unable to locate these cleaning compounds, please phone the
Electrolux Customer Service Department for a referral.)
Mildly abrasive cleaners or applicators, such as soap-filled steel wool pads, may be
used with extreme care on occasion to remove the most serious stains. Exercise
caution - extensive use of abrasives will eventually damage the porcelain
enamel surface.
Care and Cleaning
CLEANINGSTAINLESSSTEELSURFACES
[] [] [] [] [] [] [] [] [] [] [] [] [] [] [] [] [] [] [] [] [] []
Clean these surfaces with the provided Stainless Steel Cleaner. Rinse and dry with
a soft lint-free cloth.
Always wipe stainless steel surfaces with the grain.
CLEANINGPORCELAINGRATES
[] [] [] [] [] [] [] [] [] [] [] [] [] [] [] [] [] [] [] [] []
Clean the porcelain grates with a solution of mild detergent and hot water. Rinse
with a soft cloth. Do not use abrasives or commercial oven cleaners.
Stubborn stains may be removed by washing the grates in a dishwasher, using
normal dishwashing detergent.
Care and Cleaning
CLEANINGKNOBSANDKNOBBEZELS
[] [] [] [] [] [] [] [] [] [] [] [] [] [] [] [] [] [] [] [] [] []
The control knobs provided with this cooktop are designed for ease of use and
longevity. The "D" shaped design of the knob shaft ensures proper orientation
when reinstalling the knob.
The knobs and knob bezels are made of a composite plastic. These components
should be washed regularly in warm, soapy water. Hand dishwashing liquid is
excellent for this task. Knobs should be removed by gently pulling them straight out
and off of the valve shafts. Use caution to avoid introduction of moisture into the
control panel behind the bezels. To replace knobs, align the "D-shaped" opening at
the bottom of the knob with the "D-shaped" valve shaft, then carefully press the
knob onto the valve.
CLEANINGBURNERBASES
[] [] [] [] [] [] [] [] [] [] [] [] [] [] [] [] [] [] [] [] [] []
The burner base is permanently attached to the cooktop. The base should be
wiped clean using a soft cloth or sponge that has been lightly dampened with warm
water and hand dishwashing liquid. Thoroughly clean and dry the igniters to prevent
constant sparking of the reignition system. Refer to the Cleaning the Burner
Igniters section for cleaning tips.

Care and Cleaning
CLEAN(NGBURNERR(NGS
[] [] [] [] [] [] [] [] [] [] [] [] [] [] [] [] [] [] [] [] [] []
The brass burner rings spread the flame evenly around the burner perimeters. The
burner rings must seat properly in the burner bases to enable proper cooktop
operation. To ensure proper seating, positioning tabs have been placed on the
bottom of each burner ring to slide into corresponding notches in the fixed burner
base.
To remove the burner ring, first remove the grate, then lift off the porcelain burner
cap. The burner ring may then be removed from the burner base. Soak the burner
ring in a warm solution of hand dishwashing liquid and water, then rinse well with
clean water. Dry the burner thoroughly
Stubborn stains may be removed by applying a metal polishing compound. (If you
are unable to locate this type of polishing compound, please phone the Electrolux
Customer Service Department for a referral.)
CLEAN(NGTHE BURNER(GN(TERS
[] [] [] [] [] [] [] [] [] [] [] [] [] [] [] [] [] [] [] [] []
Under certain cooking or cleaning conditions, your cooktop igniters may become
coated with or corroded by food deposits, splattered grease or cleaning agents.
This condition can cause erratic or continuous sparking. Keeping the igniters
clean and dry will help to reduce this problem. To avoid unnecessary and costly
service calls, the homeowner should perform periodic cleaning of the igniters.
To clean the igniters:
1
2
Be sure the burners are cool to the touch. Remove the grate, burner cap and
burner heads.
Clean completely around the igniter, including over and under the edge of the
metal cap and base. Use care while cleaning here. Parts of the igniter are
porcelain and can be fragile.
3 DO NOT USE WATER when cleaning the igniters. If a liquid must be used to
clean the igniter effectively, use only a small amount of rubbing alcohol.
4 After cleaning, reinstall the burner ring, burner cap and grate. Make sure the
brass burner ring is properly seated into the burner base.
5 Test the burners. If erratic clicking is still present, make sure the igniter is
completely dry.
If the cooktop still exhibits problems after drying, please phone the Electrolux
Customer Service Department for further assistance.

Solutionsto Common Problems
PROBLEM POSSIBLE CAUSE SOLUTION
i
including the house circuit breaker, wiring and
fuses.
House fuse is blown. Replace house fuse.
Power outage in local area. Contact power company.
€ooktop is being operated on the wrong type Ensure tha ! the !ype of cook!o p matches the gas
of gas. supply (natural gas or LP. gas)
................................................................................................................................Regu!a!or is no! ins!ailed !s !au!!y or is se! fo[ .............Check !nsta!la!ion, rePlace [egul!a!or, O[ set
Ignitors are wet or dirty. Dry or clean ignitors.

Notes
Warranty Information
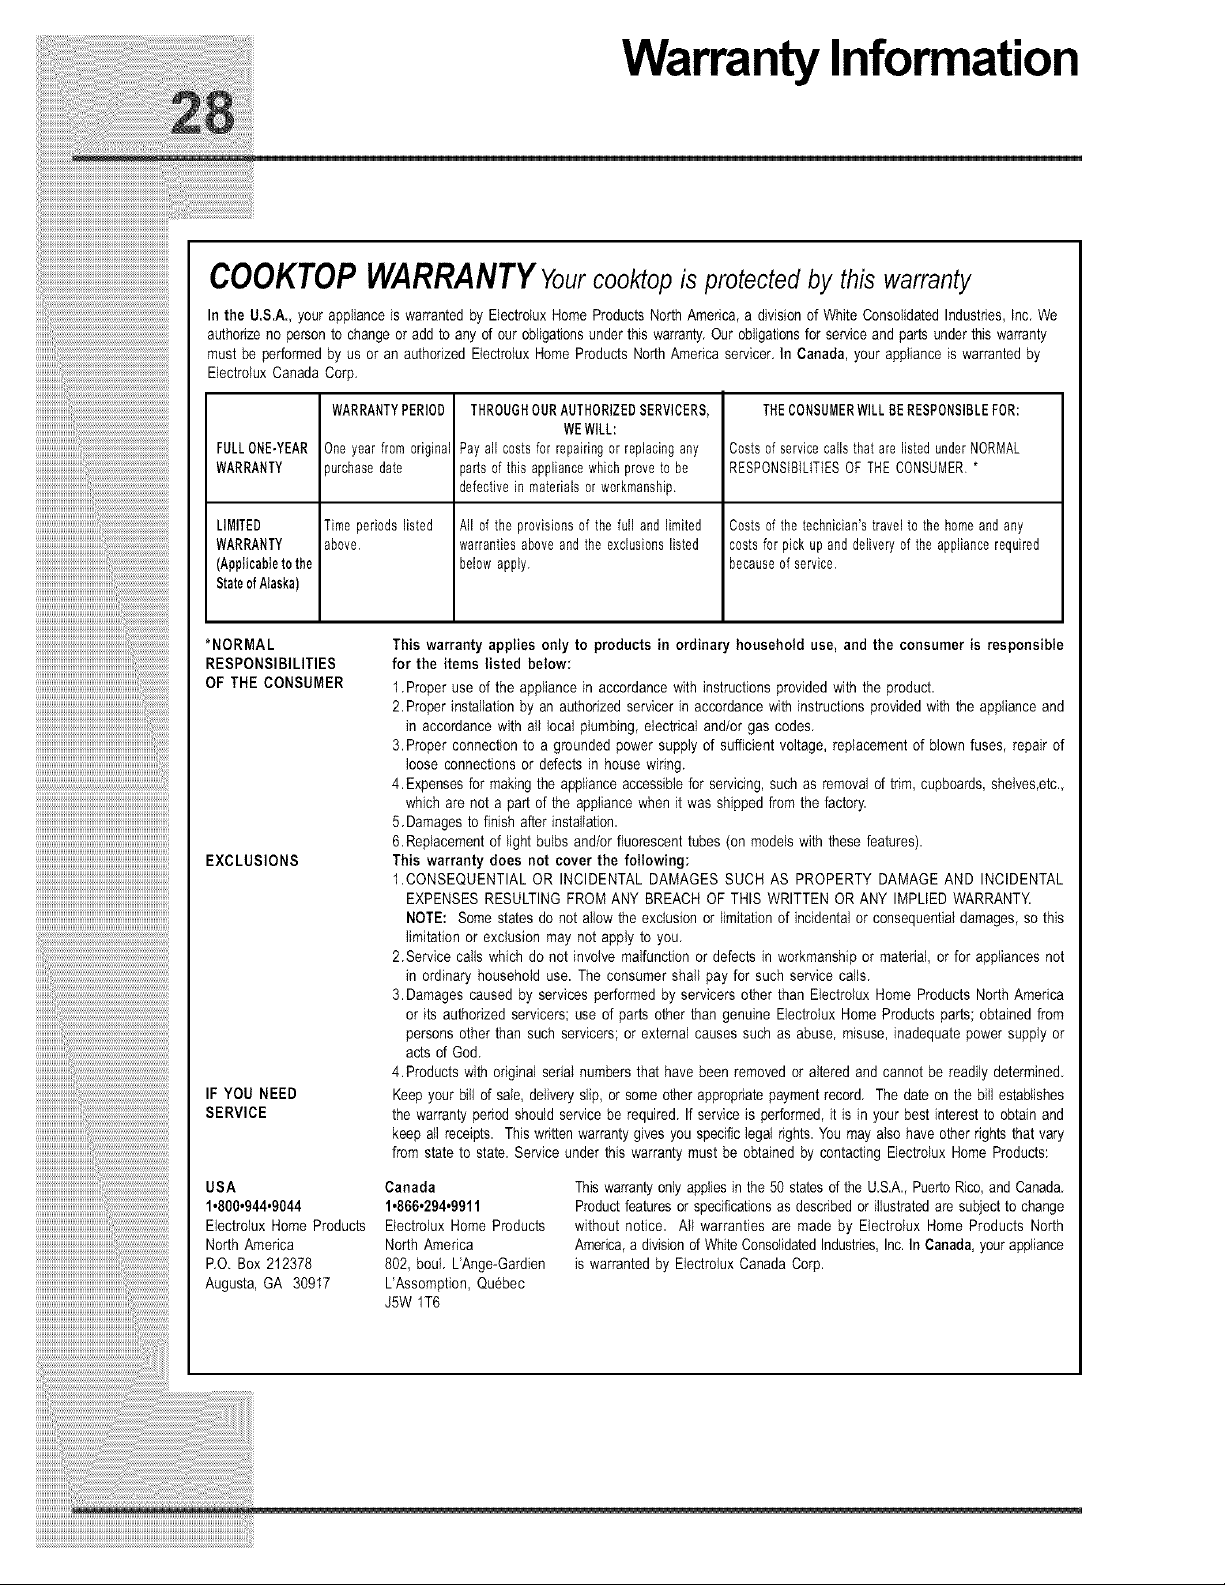
COOKTOPWARRANTYYourcooktopis protected by this warranty
In the U.S.A., your appliance is warranted by ElectroluxHome ProductsNorth America, a division of White ConsolidatedIndustries, Inc. We
authorize no personto change or add to any of our obligationsunder this warranty.Our obligationsfor serviceand parts under this warranty
must be performedby us or an authorized EtectroluxHome Products North America servicer.In Canada, your appliance is warranted by
Electrolux Canada Corp.
FULLONE-YEAR
WARRANTY
LIMITED
WARRANTY
(Applicabletothe
StateofNaska)
WARRANTY PERIOD
Oneyear from original
_urchasedate
Time periodslisted
above.
THROUGHOURAUTHORIZEDSERVICERS,
WEWILL:
Pay all costsfor repairingor replacingany
partsof this appliancewhichproveto be
defectiveinmaterialsor workmanship.
All of the provisionsof the full and limited
warrantiesaboveand the exclusionslisted
belowapply.
THECONSUMERWILLBERESPONSIBLEFOR:
Costsof servicecalls that arelistedunderNORMAL
RESPONSIBILITIESOF THECONSUMER.*
Costsof the technician'stravelto the homeandany
costsfor pickup and deliveryof the appliancerequired
becauseof service.
*NORMAL
RESPONSIBILITIES
OF THE CONSUMER
IF YOU NEED
SERVICE
This warranty applies only to products in ordinary household use, and the consumer is responsible
for the items listed below:
1 Proper use of the appliance in accordance with instructionsprovided with the product
2.Proper instaltationby an authorized servicer in accordancewith instructionsprovided with the appliance and
in accordance with ag local plumbing,electrical and/or gas codes.
3.Proper connection to a grounded power supply of sufficient voltage, replacement of blown fuses, repair of
loose connectionsor defects in house wiring.
4. Expensesfor making the appliance accessiblefor servicing,such as removal of trim, cupboards,shelves,etc.,
which are not a part of the appliancewhen it was shippedfrom the factory.
5. Damagesto finish after installation.
6. Replacementof light bulbs and/or fluorescenttubes (on models with these features).
This warranty does not cover the following:
1.CONSEQUENTIAL OR INCIDENTAL DAMAGES SUCH AS PROPERTY DAMAGE AND INCIDENTAL
EXPENSES RESULTINGFROM ANY BREACH OF THIS WRITTEN OR ANY IMPLIED WARRANTY.
NOTE: Some states do not allow the exclusion or limitationof incidentalor consequentialdamages, so this
limitation or exclusion may not apply to you.
2.Service calls which do not involve malfunction or defects in workmanship or material, or for appliances not
in ordinary household use. The consumer shall pay for such service calls.
3.Damages caused by services performed by servicers other than Electrolux Home Products North America
or its authorized servicers; use of parts other than genuine Electrolux Home Products parts; obtained from
persons other than such servicers; or external causes such as abuse, misuse, inadequate power supply or
acts of God.
4.Products with original serial numbersthat have been removed or altered and cannot be readily determined.
Keepyour bill of sale, delivery slip, or some otherappropriatepaymentrecord. The date on the bill establishes
the warranty period should service be required. If service is performed,it is in your best interest to obtain and
keep all receipts. Thiswritten warranty gives you specificlegal rights. You may also have other rightsthat vary
from state to state. Service under this warranty must be obtained by contacting Electrolux Home Products:
USA Canada
1o800o944o9044 1°866o294,9911
Electrolux Home Products Etectrolux Home Products
North America North America
P.O. Box 212378 802, bouL L'Ange-Gardien
Augusta, GA 30917 L'Assomption, Qu6bec
JSW 1T6
Thiswarrantyonly appliesin the 50 states d the U.S.A., PuertoRico, and Canada.
Product featuresor specificationsas describedor illustrated are subjectto change
without notice. Ag warranties are made by Electrolux Home Products North
America,a divisiond White ConsolidatedIndustries,Inc.In Canada,your appliance
is warranted by Electrolux Canada Corp.