Loading ...
Loading ...
Loading ...
INSPECTING I CLEANING BURNERS AND GAS VALVE ORIFICES
By following these cleaning procedures on a timely basis, your grill will be kept clean and working properly with minimum effort.
BURNER CLEANING
1. Remove burner from the grill bowl. Bend a stiff wire (a light-weight coat hanger works well) into a small hook. Run the hook through
each burner tube and burner several times.
2. Use a narrow bottlebrush with a flexible handle. Run the hook through each burner tube and burner several times.
3. Wire brush entire outside surface of burner to remove loose corrosion.
4. Clean any clogged hole with a stiff wire (such as an open paper clip).
5. Inspect the burner assembly for any opening caused by correction.
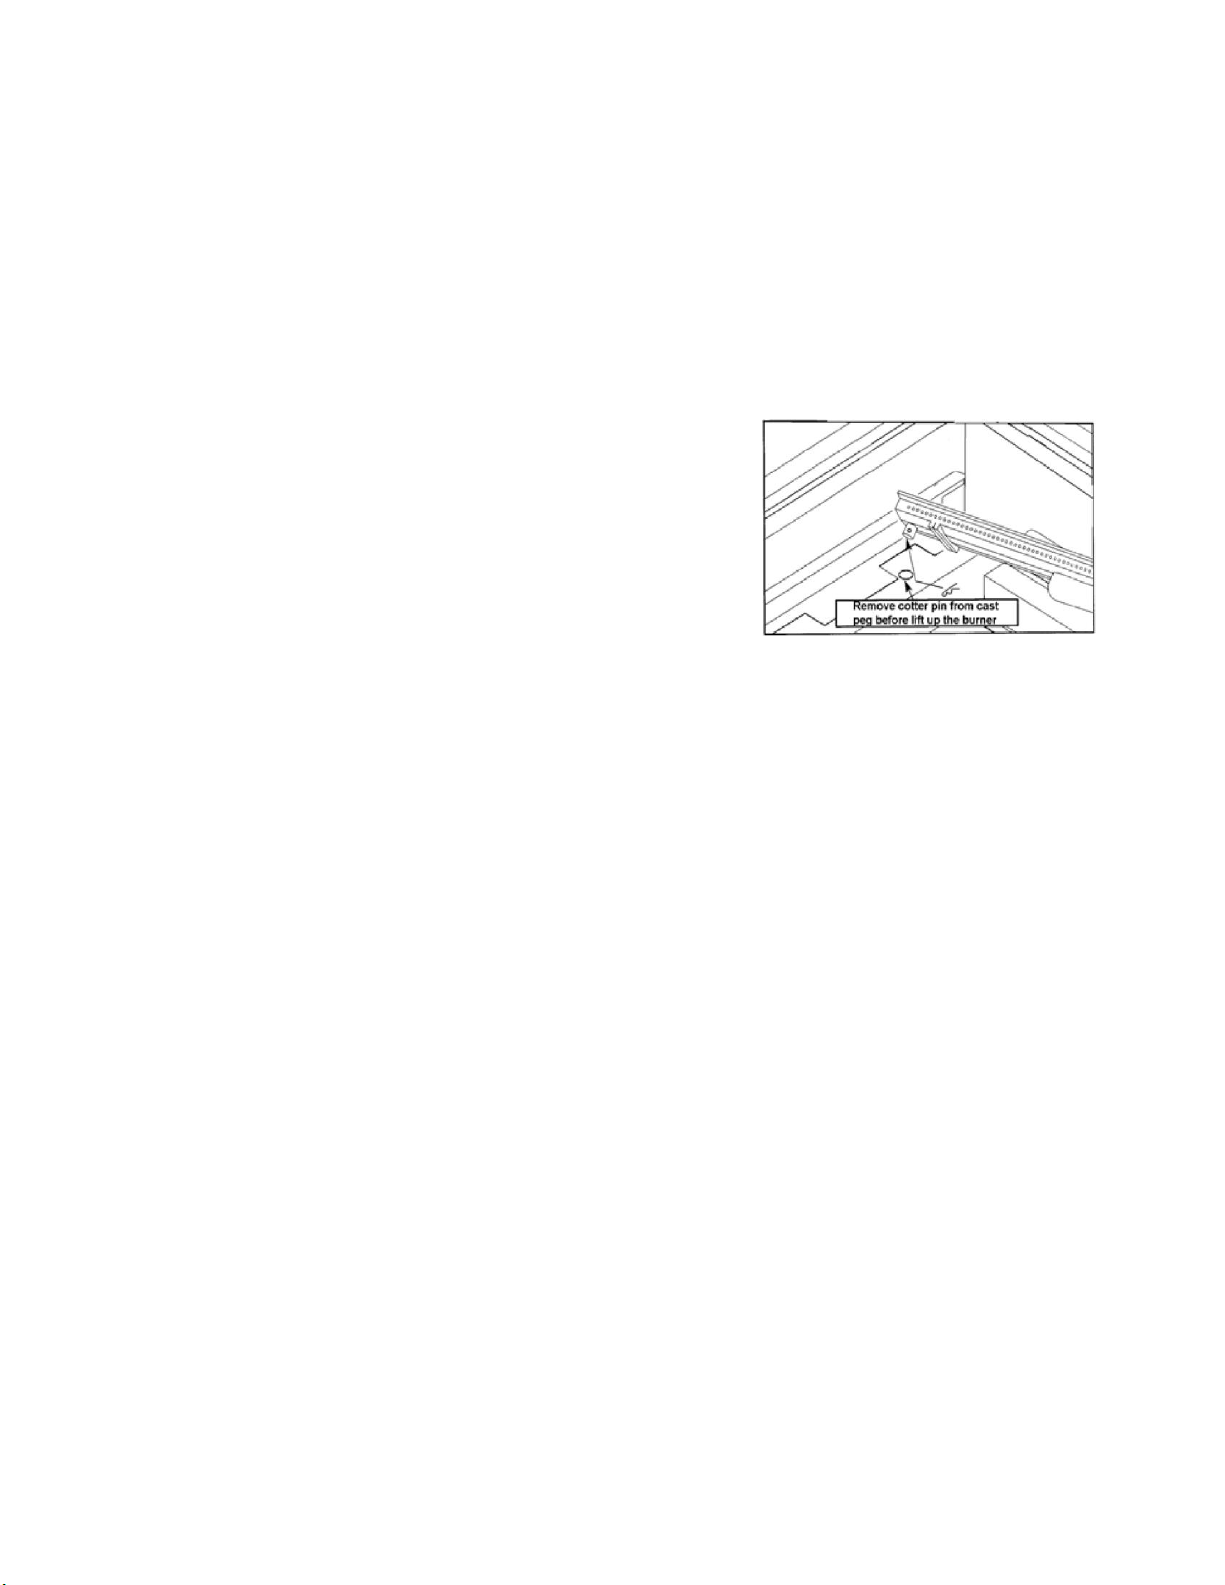
6. Replace burner and put cotter pin back to hole of the cast peg beneath the burner.
7. Check the burner for proper location after replacing. To assure the valve orifices are inside of the burner tubes. See right drawing.
If the valve orifices do not fit inside the burner tubes, lighting the burners may cause explosion and/or fire.
IGNITOR I ELECTRODE CHECK
With all control knobs set to OFF”, check each igniter individually for presence of spark at electrode. In turn, push each control knob in
fully and turn slowly about a 1/4 turn to the left (counter-clockwise) until a click is heard; the trigger hitting the strike block should produce
a blue spark at the electrode tip. Return control knob to “OFF” before checking next igniter.
BURNER OPERATION CHECK
1. With BBQ Grill control knobs in “OFF” position turn on the Gas supply.
2. Light any burner by pushing its control knob in fully and slowly (3 to 4 seconds) turning it about 1/4 turn to the left (counter-clockwise)
until a click is heard. The 3 to 4 second duration should provide enough gas to light the burner. If the burner does not light,
immediately return the control knob to “OFF”, wait several minutes for the gas to disperse, and repeat the process. After burner lights
successfully, turn control knob to “OFF”.
NOTE: Upon first assembly the gas lines and burners will be full of air. In order for the burners to light properly the lines must fill with gas.
It may require several attempts at lighting the burners before you are successful.
3. Repeat process for each control knob/igniter, in turn, ensuring that other knobs are in “OFF” position as you perform each check.
4. If any burners fail to light after several attempts, discontinue gas supply at source and re-inspect for obstructions to gas flow and
orifices.
.
9
Certificate 252521-2405769
Project 2405769
Figure No.(75)
Loading ...
Loading ...
Loading ...