Loading ...
Loading ...
Loading ...
!_i_i_ii_i_Ili%i_ii_iiii!i,]!"!,,,!!!_li_ii_'!ii_!!iD!_IH!fill,,iiii:_ii_,¸i!ii,_ili:iii_,:i_,
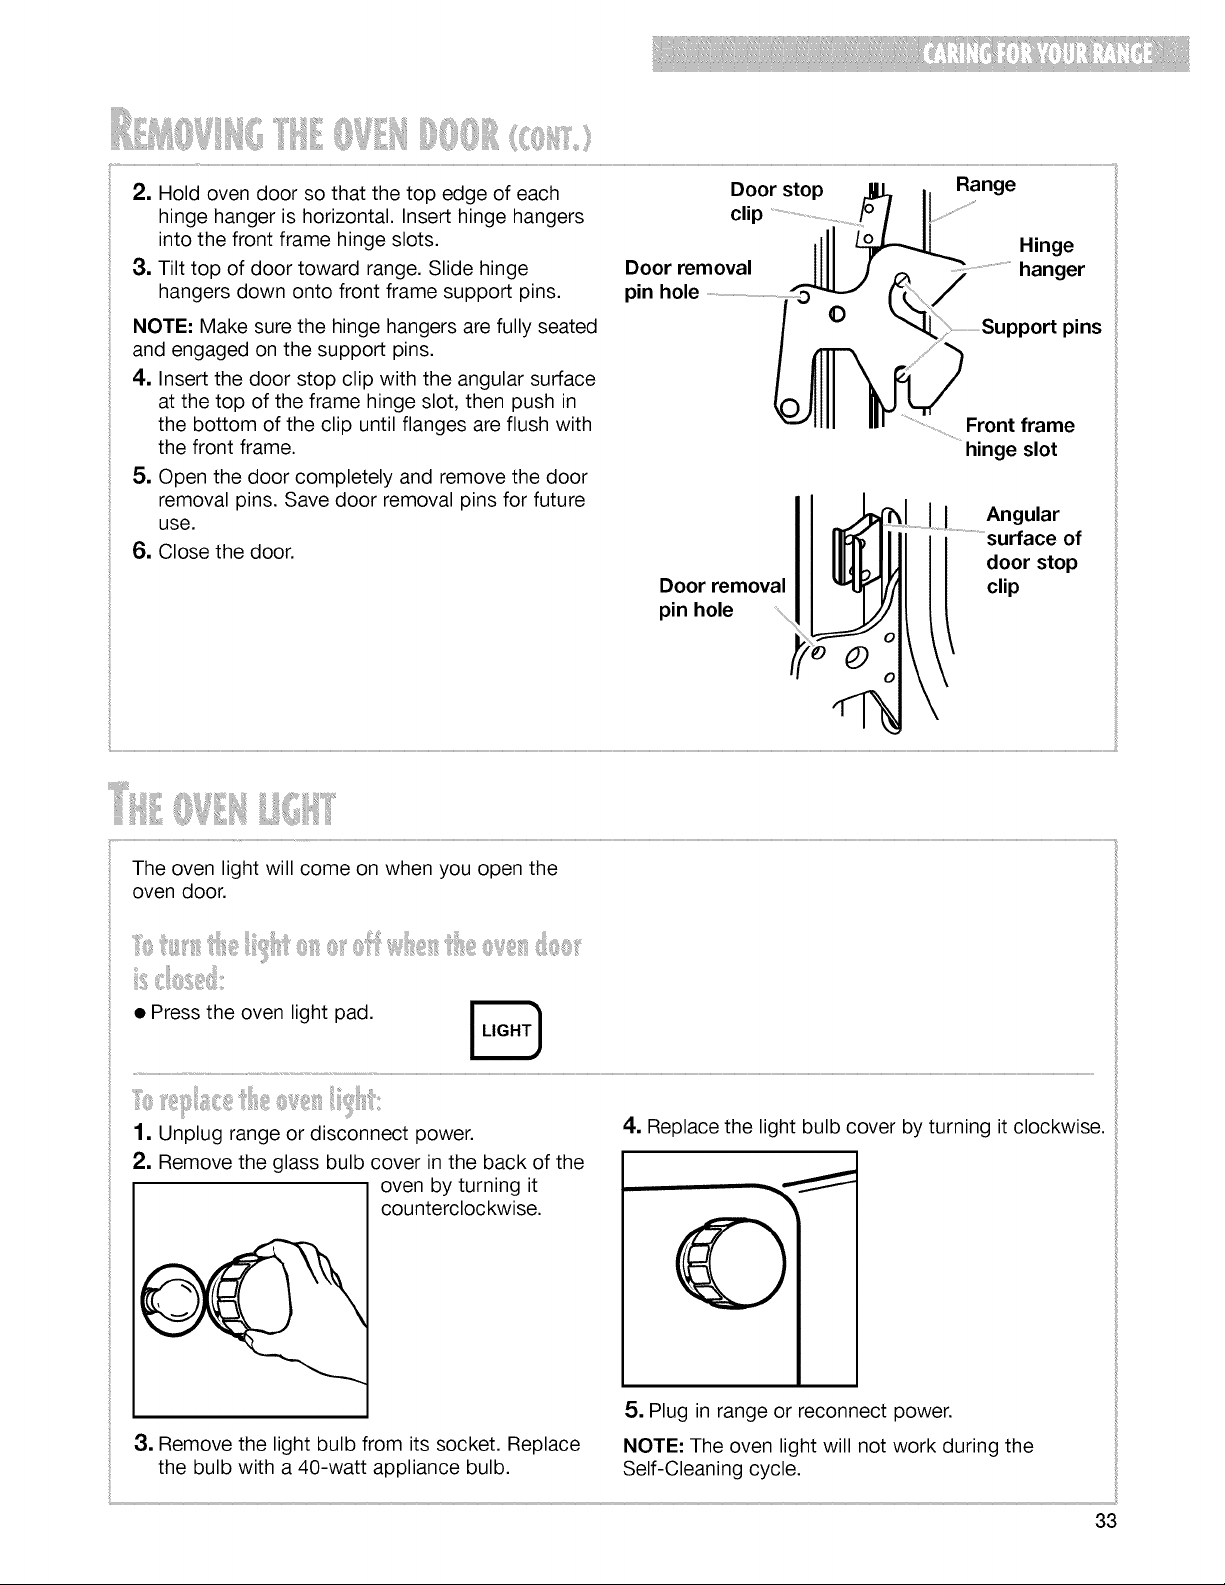
2, Hold oven door so that the top edge of each
hinge hanger is horizontal. Insert hinge hangers
into the front frame hinge slots.
3, Tilt top of door toward range. Slide hinge
hangers down onto front frame support pins.
NOTE: Make sure the hinge hangers are fully seated
and engaged on the support pins.
4, Insert the door stop clip with the angular surface
at the top of the frame hinge slot, then push in
the bottom of the clip until flanges are flush with
the front frame.
5. Open the door completely and remove the door
removal pins. Save door removal pins for future
use.
6. Close the door.
Door stop r_ II Range
clip ................................................................................/v I I!...........................................
lJJJ _ Hinge
Door removal 1111] _".....................................hanger
pin hole
pins
Front frame
hinge slot
Door removal
pin hole ...............
Angular
of
door stop
clip
silililiiiiii_[_i_i_
• Press the oven light pad.
E
1. Unplug range or disconnect power.
2. Remove the glass bulb cover in the back of the
oven by turning it
counterclockwise.
4, Replace the light bulb cover by turning it clockwise.
5. Plug in range or reconnect power.
3. Remove the light bulb from its socket. Replace
the bulb with a 40-watt appliance bulb.
NOTE: The oven light will not work during the
Self-Cleaning cycle.
33
Loading ...
Loading ...
Loading ...