Loading ...
Loading ...
Loading ...
-6-
SPECIAL MOBILE HOME REQUIREMENTS (APPROVED FOR USE IN MOBILE HOMES (USA ONLY)
WARNING - DO NOT INSTALL IN A SLEEPING ROOM.
CAUTION - THE STRUCTURAL INTEGRITY OF THE MOBILE HOME FLOOR, WALL, AND CEILING/ROOF MUST BE MAINTAINED.
In addition to the previously detailed installation requirements, mobile home installations must meet the following
requirements:
• The space heater is to be connected to a factory-built chimney conforming to UL 103, therefore it must be a
Type HT (2100°F).
• The heater must be permanently attached to the oor.
• The heater must be electrically grounded to the steel chassis of the mobile home with 8 ga copper wire using
a serrated or star washer to penetrate paint or protective coating to ensure grounding.
• When moving your mobile home, all exterior venting must be removed while the mobile home is being
relocated. After relocation, all venting must be reinstalled and securely fastened.
• Outside air is mandatory for mobile home installation. See your dealer for purchasing.
• Check with your local building ofcials as other codes may apply.
• Only use the specied components listed in this manual for this unit. The use of components that are not meant
for this unit can cause unsafe conditions.
COMBUSTION AIR ASSEMBLY INSTRUCTIONS (REQUIRED FOR MOBILE HOME INSTALLATIONS)
This appliance requires a source of combustion air when installed in a mobile home.
If the building this unit is being installed in is of tight construction or has negative pressure problems, an outside
source of air is needed. Below is a list of possible indicators that a source of outside combustion air may be
required.
• The stove does not draw steadily, smoke rollout occurs, wood burns poorly, or back-drafts occur whether or
not there is combustion present.
• Existing fuel-red equipment in the house, such as replaces or other heating appliances, smell, do not operate
properly, suffer smoke roll-out when opened, or back-drafts occur whether or not there is combustion present.
• Opening a window slightly on a calm (windless) day alleviates any of the above symptoms.
• The house is equipped with a well-sealed vapor barrier and tight tting windows and/or has any powered
devices that exhaust house air.
• There is excessive condensation on windows in the winter.
• A ventilation system is installed in the house.
If an outside air intake is required, you may purchase a standard 4” dryer vent kit from your local hardware supply
store and install it on the rear of the appliance.
When using a dryer venting kit, the outlet cover must be of a design that DOES NOT close by means of a ap or
trap door. You must purchase a style that allows a continuous in-ow of air and that has a rodent screen. This
adapter can be purchased from your dealer.
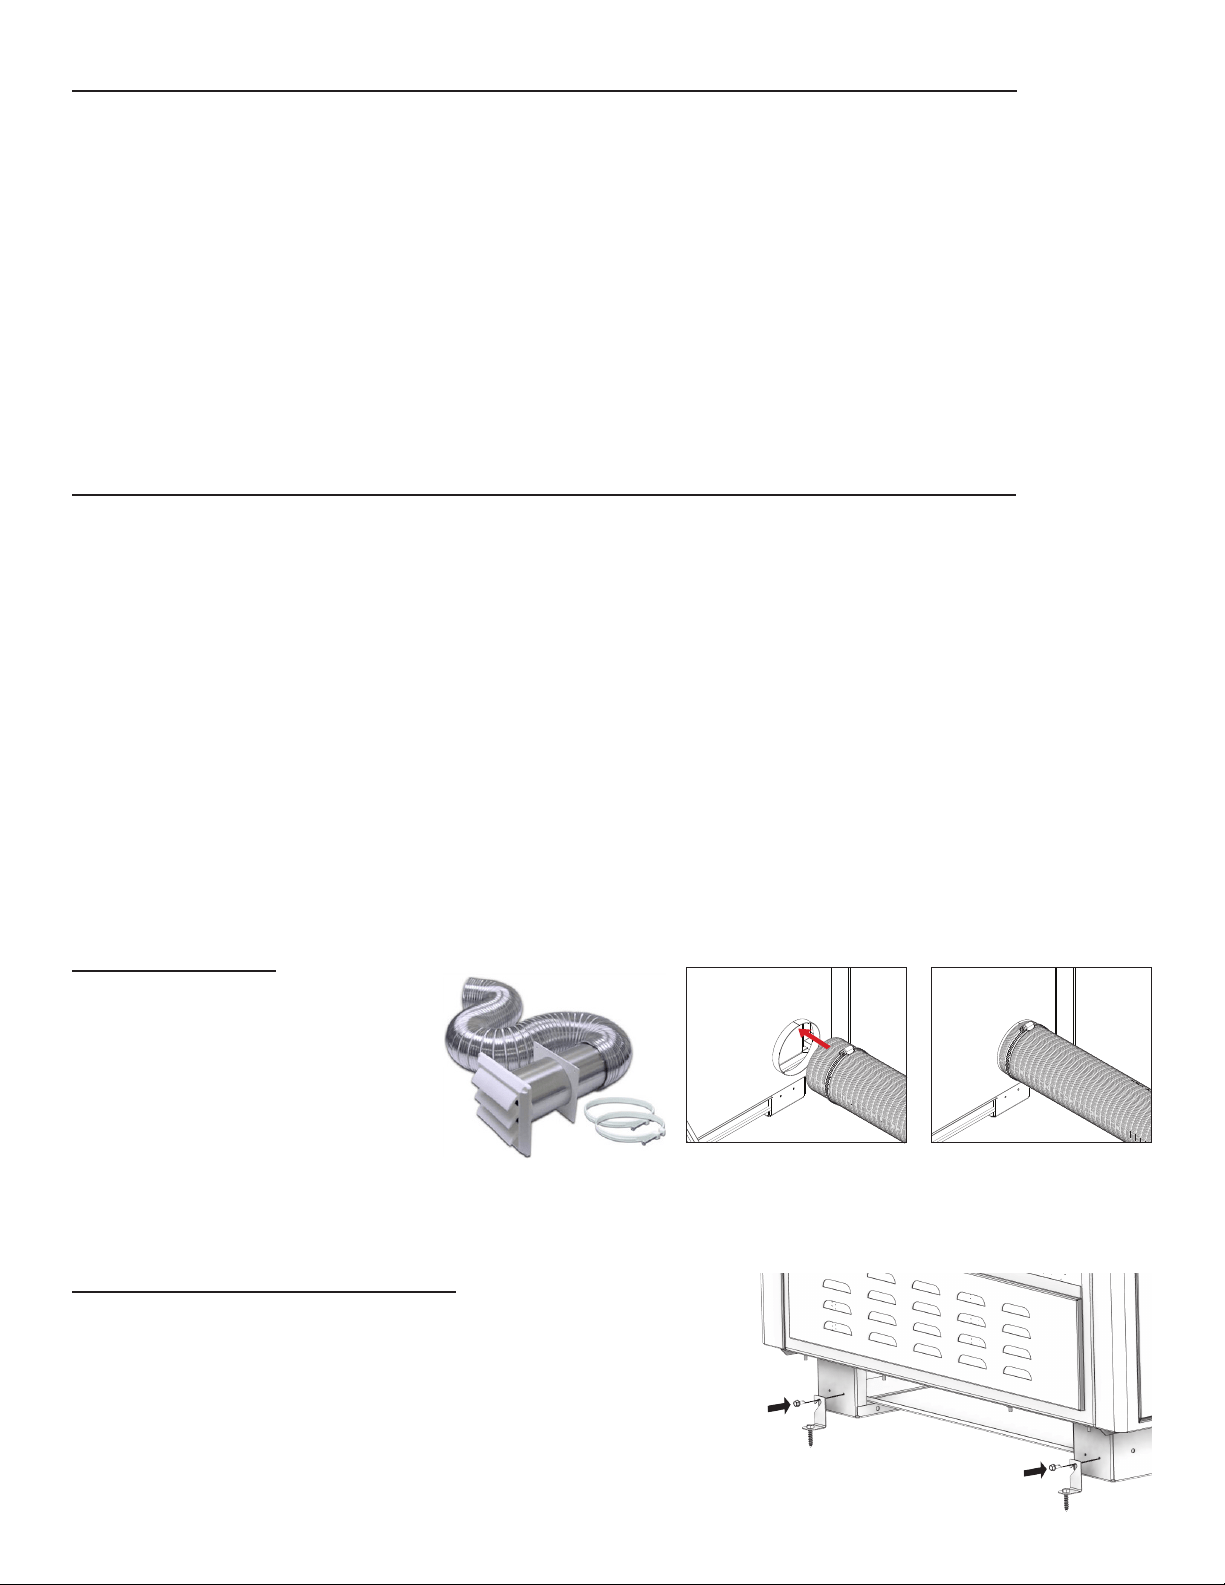
4FAK INSTALLATION
Follow the manufacturer’s installation
instructions for attaching the dryer
vent kit to the home. Then, attach
it to the adapter on the combustion
air inlet on the back of the unit as
shown.
“Dryer Venting Kit”
Installation
Slide the hose clamp over the aluminium ex
pipe. Then slide the ex pipe over the air intake
tube of the stove. Next tighten the hose clamp
over the end of the aluminium ex hose.
SECURING APPLIANCE TO THE FLOOR
Use the designated holes to secure the unit to the oor as shown.
Loading ...
Loading ...
Loading ...