Loading ...
Loading ...
Loading ...

SERVICE AND ADJUSTMENTS
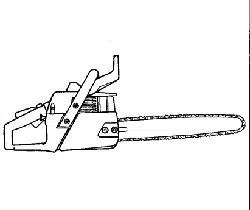
CHAIN REPLACEMENT (Fig. 37, 38, 39 & 40)
CAUTION: Wear protective gloves when J
handling chain. The chain is sharp end
I
can cut you even when it is not moving.
• Move on/stop switchtothe "STOP"position.
• Replace the old chainwhen itbecomes wornor dam-
aged.
• Use onlythe Low-Kickbackreplacement chainspeci-
•fled in the "Product Specifications."
• See yourSears Service Centerto replaceand sharp-
en individualcutters for matchingyourchain.
• Loosen and remove the 2 bar clamp nuts.
• Remove bar clamp.
• Remove the old chain.
• Turn adjusting screw by hand counterclockwiseuntil
adjustingpin just touchesthe stop.
• Carefullyremove newchainfrom package.Holdchain
with the drive linksas shownin Fig 38.
• Place chain over and behindtheclutch.
• Fit bottom of drive links between teeth in sprooket
nose.
• Fit chain drive linksintotop ofguide bar.Fig 39.
Bar C,_ __Y
Figure 37
Cutters Dept_ Gauge
Figure38
• Pullguide bar forwarduntilchainis snug in guide bar
grooves.
• Now,installbar clampmakingsurethe adjusting pinis
positionedin the lowerhole inthe guide bar.
BarClamp
Adjusting
\ Pin 1.1
"--_ _ _" Guide Bar
Figure 39
• Install bar clamp nuts and finger tighten only.Do not
tightenany further at this point,
• Now proceed to the =ChainAdjustment"section.
-20-
Figure40
CHAIN ADJUSTMENT (Fig. 41,42, 43 & 44)
• Roll chain around guide bar to ensure kinks do not
exist (rotatesfreely).
• Loosen barclamp nuts.
• Turn adjustingscrewclockwiseuntil chainjust barely
touchesthebottomof guide bar.
/
Bar ClampNuts GuideBar
Figure 41
• Lift up tipof guide bar to check forsag, releasetip of
guide bar, then turn adjusting screw 1/4 turn clook-
wise.Repeat this stepuntila sag does not exist.
• While littini]tip of guide bar, tighten bar clamp nuts
with the bar tool(provided).Torque 10-15 ft-lbs.
Figure 42
To check chain tension:
• Use the screwdriverend ofthe bar toolto movechain
aroundtheguide bar (Fig 44).
• If chaindoes not rotate,it istoo tight- slightlyloosen
bar clamp nuts and turn adjusting screw 1/4 turn
counterclockwise.Retighten bar clamp nuts•
• If chain is too loose, it will sag below the guide bar
(Fig.43).
//Sag
Figure 43
Loading ...
Loading ...
Loading ...