Loading ...
Loading ...
Loading ...
Q
O
O
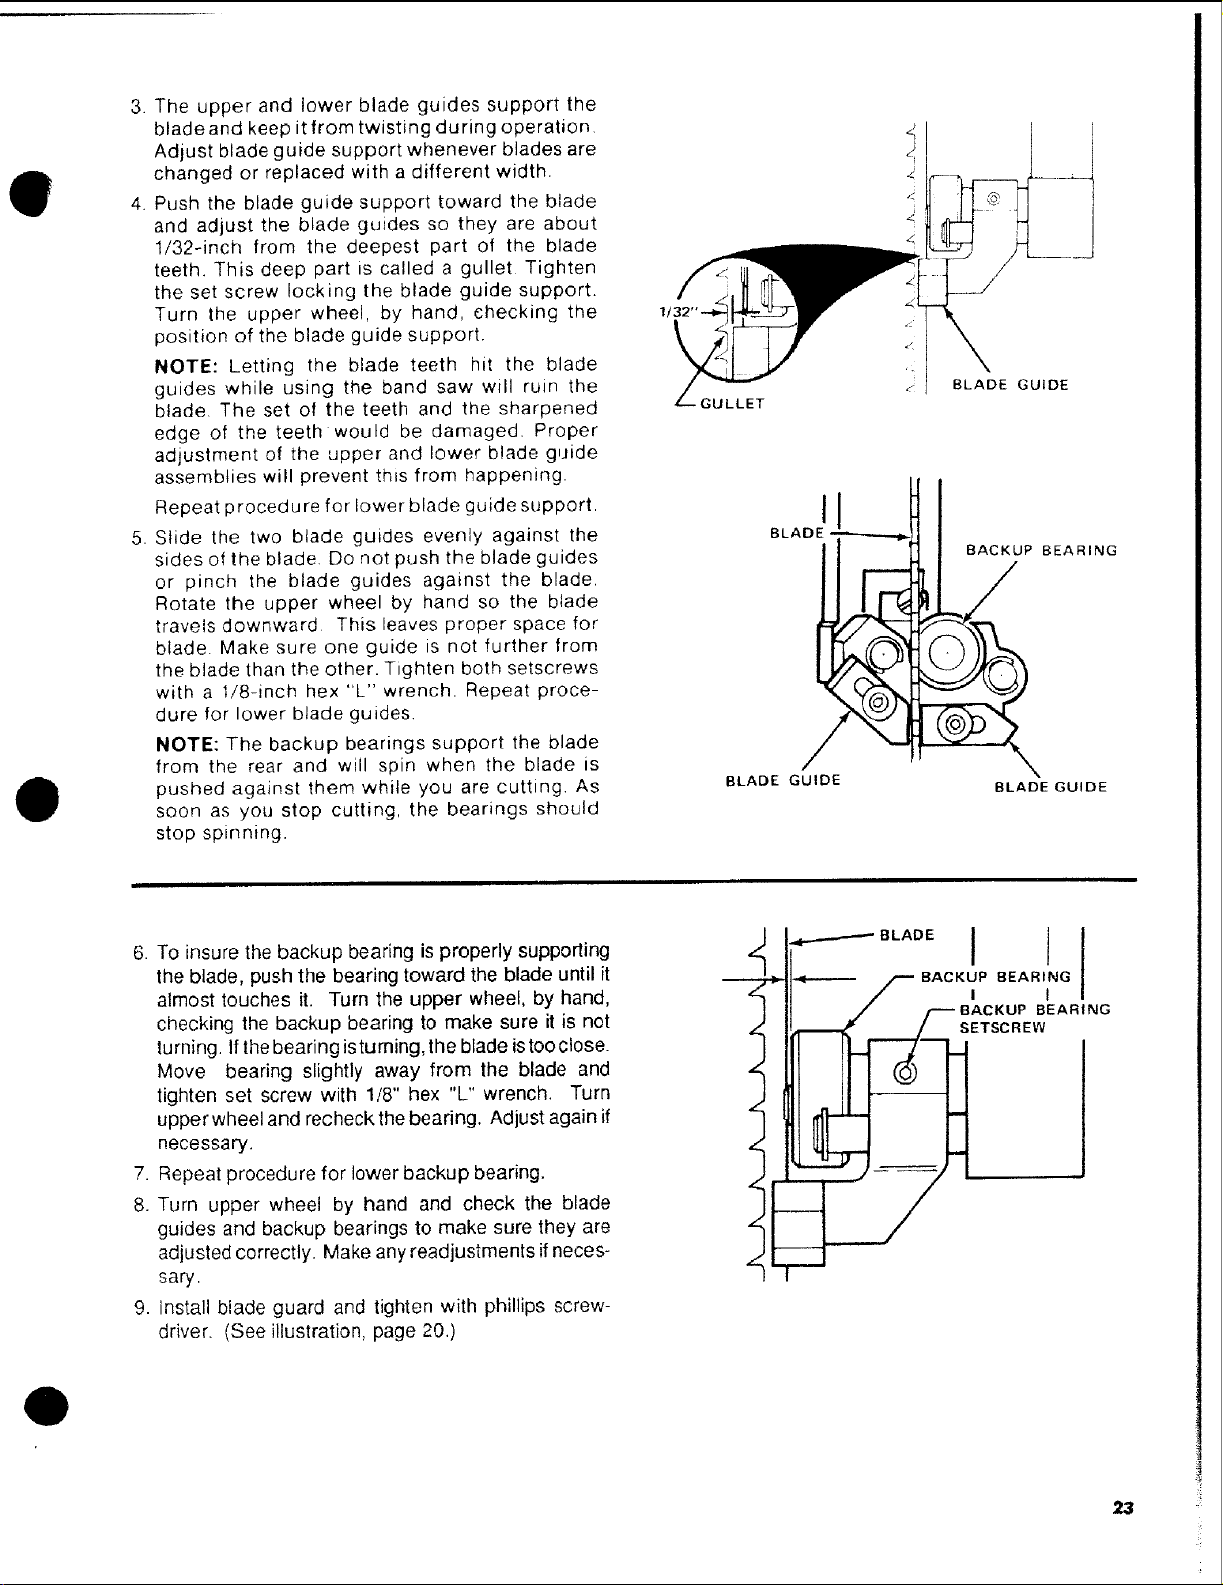
3. The upper and lower blade guides support the
blade and keep it from twisting during operation
Adjust blade guide support whenever blades are
changed or replaced with a different width.
4. Push the blade guide support toward the blade
and adjust the blade guides so they are about
1/32÷inch from the deepest part of the blade
teeth. This deep part is called a gullet Tighten
the set screw locking the blade guide support.
Turn the upper wheel, by hand, checking the
position of the blade guide support.
NOTE: Letting the blade teeth hit the blade
guides while using the band saw will ruin the
blade The set of the teeth and the sharpened
edge of the teeth would be damaged. Proper
adjustment of the upper and lower blade guide
assemblies will prevent this from happening.
Repeat procedure for lower blade guide support.
5. Slide the two blade guides evenly against the
sides of the blade. Do not push the blade guides
or pinch the blade guides against the blade.
Rotate the upper wheel by hand so the blade
travels downward This leaves proper space for
blade. Make sure one guide is not further from
the blade than the other. Tighten both setscrews
with a 1/8-inch hex "L" wrench. Repeat proce
dure for lower blade guides.
NOTE: The backup bearings support the blade
from the rear and will spin when the blade is
pushed against them while you are cutting. As
soon as you stop cutting, the bearings should
stop spinning.
GULLET
BLADEGUIDE
BLA
BEARING
BLADE GUIDE BLADE GUIDE
6. To insure the backup bearing is properly supporting
the blade, push the bearing toward the blade until it
almost touches it. Turn the upper wheel, by hand,
checking the backup bearing to make sure it is not
turning. If the bearing isturning, the blade istoo close.
Move bearing slightly away from the blade and
tighten set screw with 1t8" hex %" wrench. Turn
upperwheel and recheckthe bearing. Adjust again if
necessary.
7. Repeat procedure for lower backup bearing.
8. Turn upper wheel by hand and check the blade
guides and backup bearings to make sure they are
adjusted correctly. Make any readjustments if neces-
sary.
9. install blade guard and tighten with phillips screw-
driver. (See illustration, page 20.)
/
L
i
L
L
L
i
4"--'--"--'_ B LAD E I (
•.<--.----p BACKyP BEARIING I
./ /.--"-- BACKUP BEARING
,---/-,i E'scR w
23
Loading ...
Loading ...
Loading ...