Loading ...
Loading ...
Loading ...
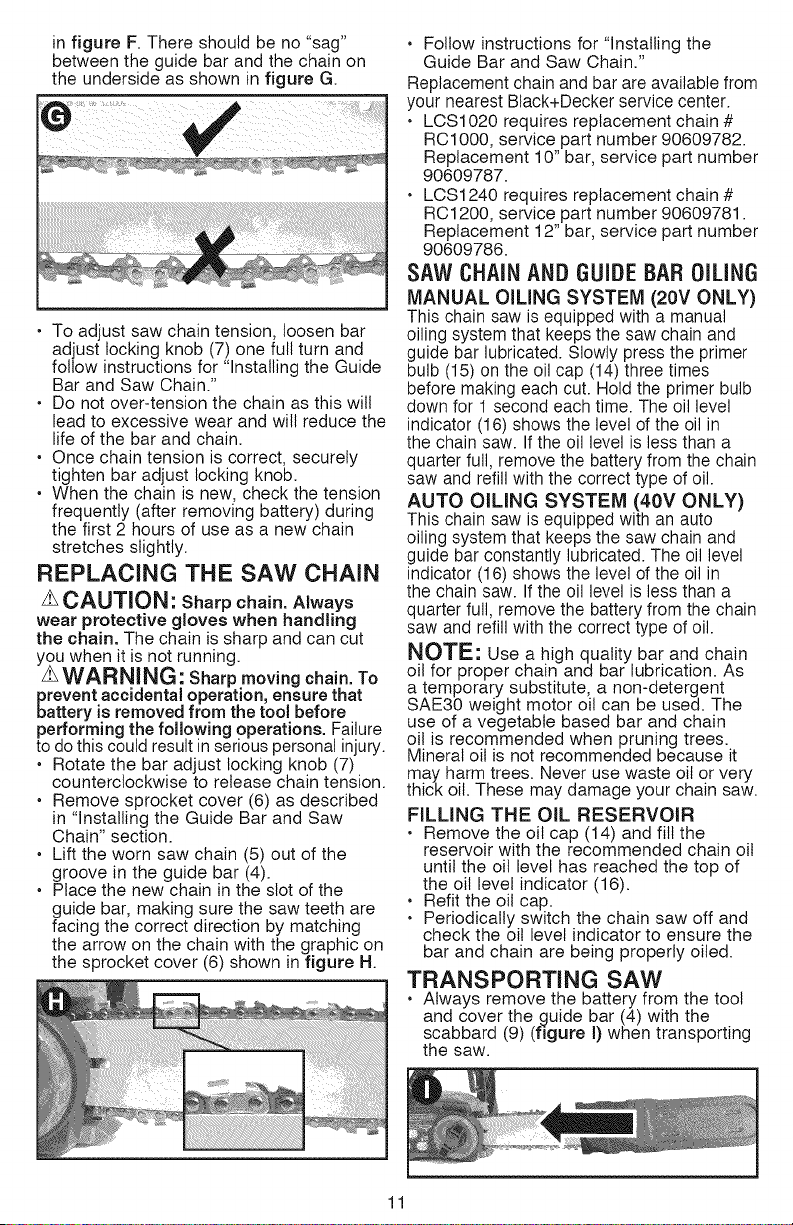
infigureF. There should be no "sag"
between the guide bar and the chain on
the underside as shown in figure G.
• To adjust saw chain tension, loosen bar
adjust locking knob (7) one full turn and
follow instructions for "Installing the Guide
Bar and Saw Chain."
• Do not over-tension the chain as this will
lead to excessive wear and will reduce the
life of the bar and chain.
• Once chain tension is correct, securely
tighten bar adjust locking knob.
• When the chain is new, check the tension
frequently (after removing battery) during
the first 2 hours of use as a new chain
stretches slightly.
REPLACING THE SAW CHAIN
zLCAUTION: Sharp chain. Always
wear protective gloves when handling
the chain. The chain is sharp and can cut
you when it is not running.
z_WARNING: Sharp moving chain. To
prevent accidental operation, ensure that
battery is removed from the tool before
performing the following operations. Failure
to do this could result in serious personal injury.
• Rotate the bar adjust locking knob (7)
counterclockwise to release chain tension.
• Remove sprocket cover (6) as described
in "Installing the Guide Bar and Saw
Chain" section.
• Lift the worn saw chain (5) out of the
groove in the guide bar (4).
• Place the new chain in the slot of the
guide bar, making sure the saw teeth are
facing the correct direction by matching
the arrow on the chain with the graphic on
the sprocket cover (6) shown in figure H.
• Follow instructions for "Installing the
Guide Bar and Saw Chain."
Replacement chain and bar are available from
your nearest Black+Decker service center.
• LCS1020 requires replacement chain #
RC1000, service part number 90609782.
Replacement 10" bar, service part number
90609787.
• LCS1240 requires replacement chain #
RC1200, service part number 90609781.
Replacement 12" bar, service part number
90609786.
SAWCHAINANDGUIDEBAROiLiNG
MANUAL OiLiNG SYSTEM (20V ONLY)
This chain saw is equipped with a manual
oiling system that keeps the saw chain and
guide bar lubricated. Slowly press the primer
bulb (15) on the oil cap (14) three times
before making each cut. Hold the primer bulb
down for 1 second each time. The oil level
indicator (16) shows the level of the oil in
the chain saw. If the oil level is less than a
quarter full, remove the battery from the chain
saw and refill with the correct type of oil.
AUTO OiLiNG SYSTEM (40V ONLY)
This chain saw is equipped with an auto
oiling system that keeps the saw chain and
guide bar constantly lubricated. The oil level
indicator (16) shows the level of the oil in
the chain saw. If the oil level is less than a
quarter full, remove the battery from the chain
saw and refill with the correct type of oil.
NOTE: Use a high quality bar and chain
oil for proper chain and bar lubrication. As
a temporary substitute, a non-detergent
SAE30 weight motor oil can be used. The
use of a vegetable based bar and chain
oil is recommended when pruning trees.
Mineral oil is not recommended because it
may harm trees. Never use waste oil or very
thick oil. These may damage your chain saw.
FILLING THE OIL RESERVOIR
• Remove the oil cap (14) and fill the
reservoir with the recommended chain oil
until the oil level has reached the top of
the oil level indicator (18).
• Refit the oil cap.
• Periodically switch the chain saw off and
check the oil level indicator to ensure the
bar and chain are being properly oiled.
TRANSPORTING SAW
• Always remove the battery from the tool
and cover the guide bar (4) with the
scabbard (9) (figure I) when transporting
the saw.
11
Loading ...
Loading ...
Loading ...