Loading ...
Loading ...
Loading ...
9
6-B WALL MOUNT HIGH BACKGUARD WITH LOW SHELF - ASSEMBLY
5
6
4
8
7
9
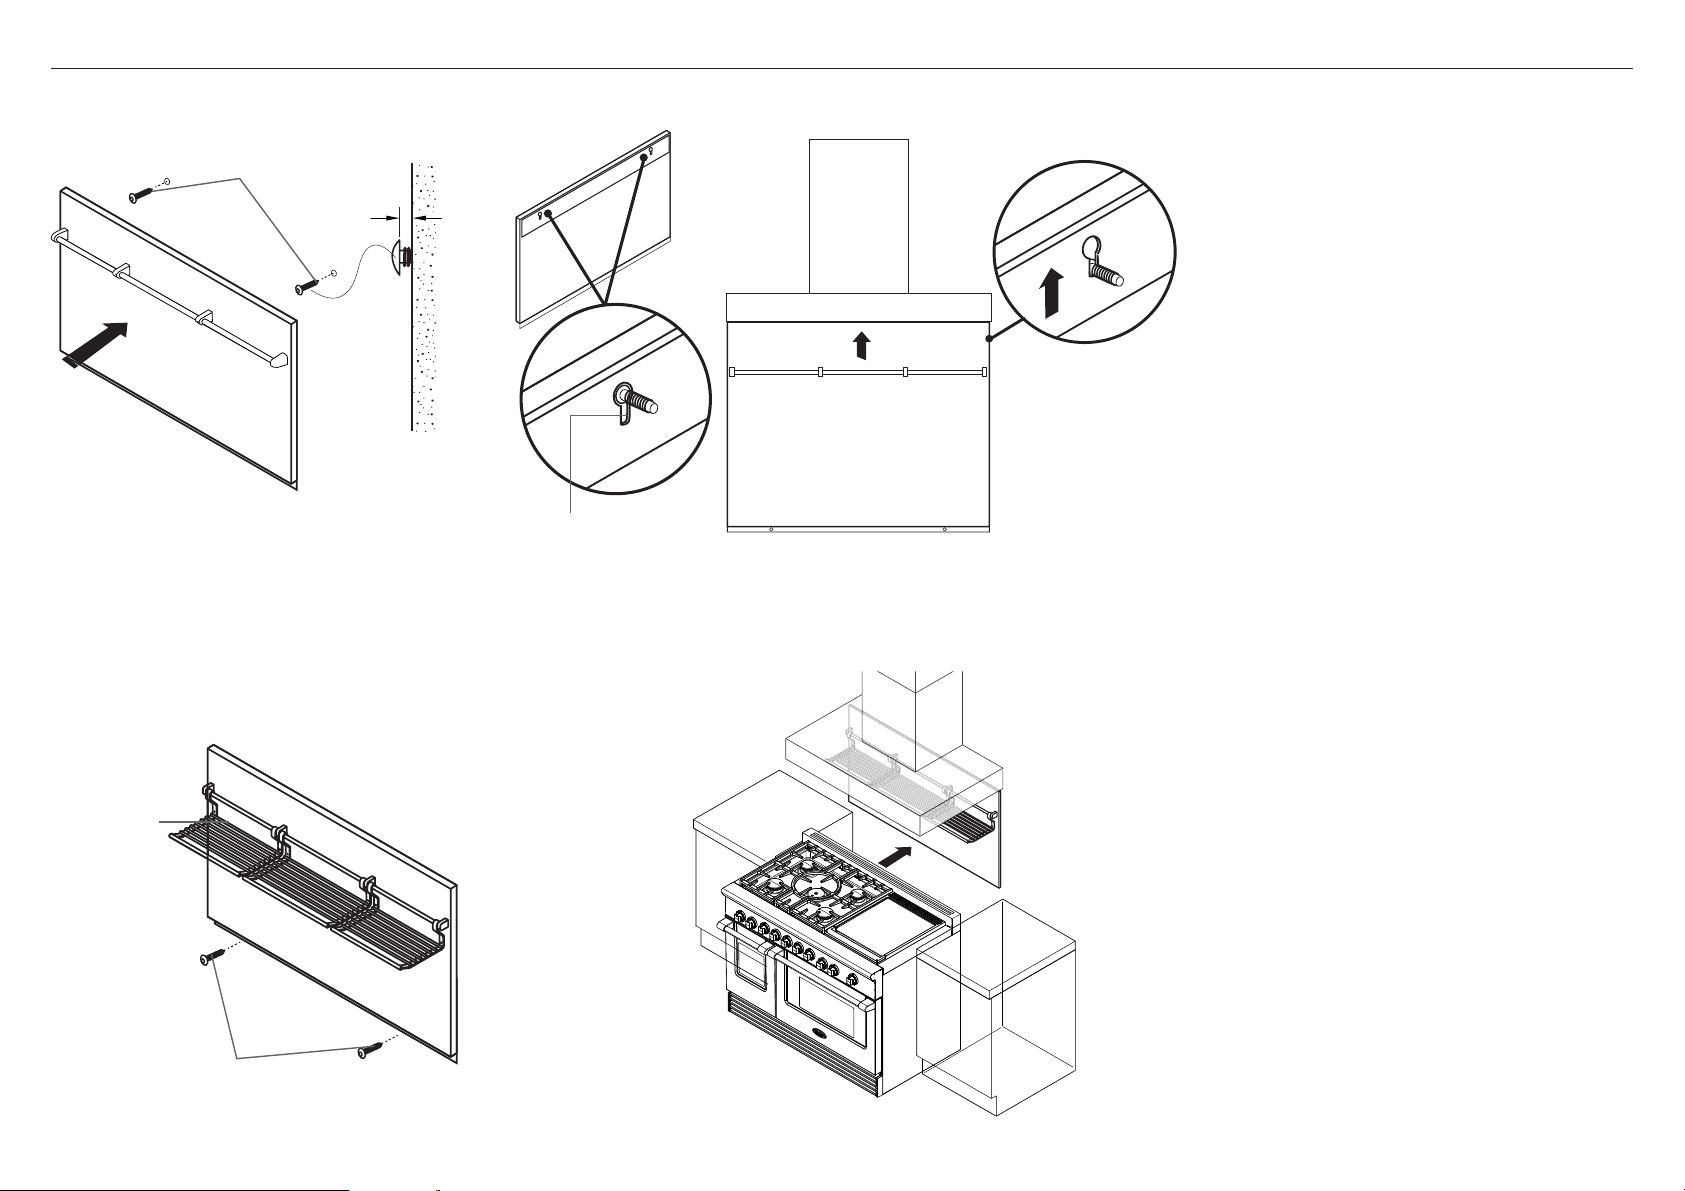
Mount Backguard to wall
4 Use the marked holes to locate the upper
mounting screw locations on the wall.
Pre-drill and install flange head screws (not
supplied), leaving 1/16” (1mm) between the
screw head and wall.
5 Place the backguard onto the screws by lining
up the screw heads with the rear mounting slots.
6 Push backguard up and adjust until it sits flush
with the bottom of the vent hood.
Ensure the backguard is tight on the wall and is
not loose. You may need to adjust the depth of
the mounting screws to achieve this.
7 Once the backguard is in position, mark, drill and
install the lower mounting screws at the bottom
of the backguard.
Attach racks
8 Attach the racks to rod (racks may vary).
Finally position range
9 Push the range into position so that the
backguard sits flush with the top of the range
vent trim.
Follow the rest of the instructions shown in the
range installation instructions.
IMPORTANT!
The back section must be securely fastened to
the wall. Failure to do so could cause damage
or personal injury if the Backguard was to pull
free from wall when racks are loaded. The
maximum weight placed on each rack should
be 10lbs.
Racks
1/16”
(2mm)
Rear mounting slots
Upper
mounting
screws
Lower
mounting
screws
Ensure backguard is
snug tight with the
bottom of the vent
hood and wall
Loading ...
Loading ...
Loading ...