Loading ...
Loading ...
Loading ...
7
6-A WALL MOUNT LOW BACKGUARD - ASSEMBLY
VENT HOOD
1
34
2
30” MODELS = 16” (406mm)
36/48” MODELS = 32” (813mm)
BACKGUARD
1/4”
(6mm)
COOKTOP
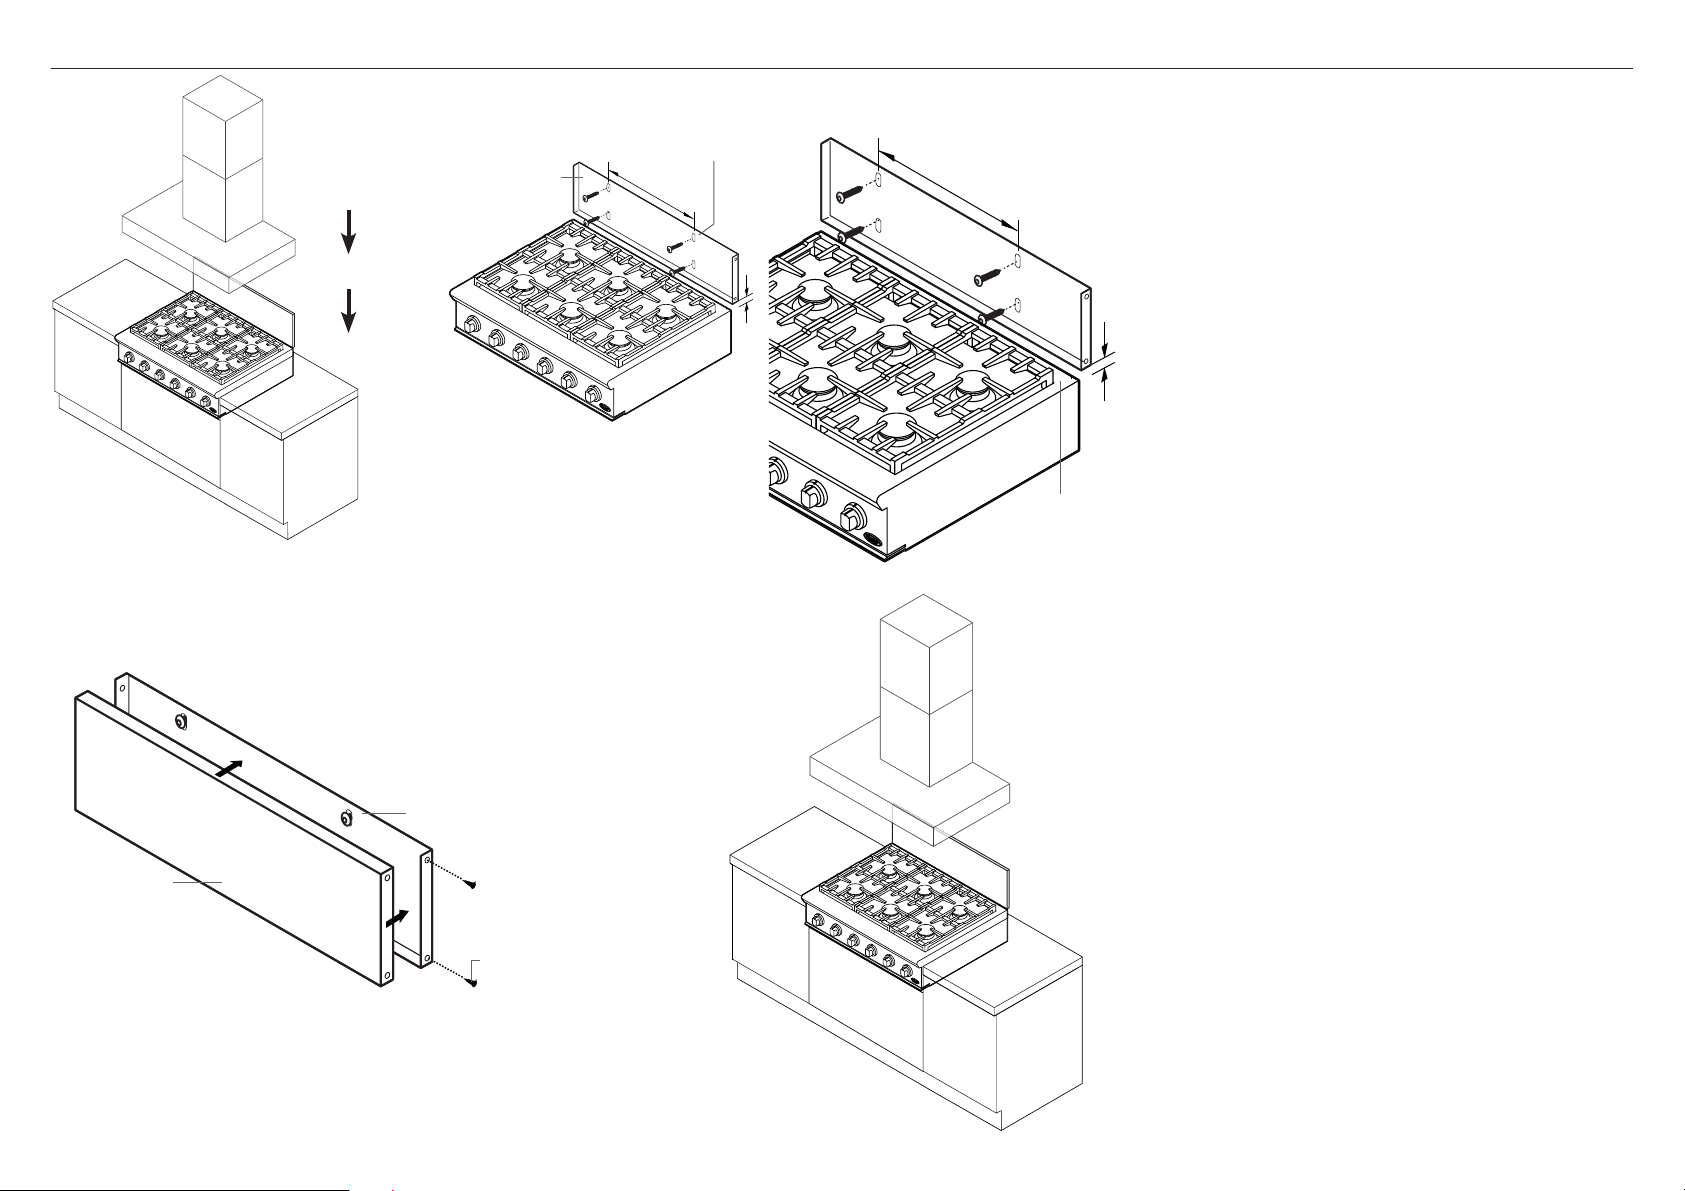
1 Recommended installation order:
1] VENT HOOD
2] BACKGUARD
3] COOKTOP
Locate and Mark the mounting screw locations for
back section
2 After unpacking all backguard parts, position the
back section so that it’s 1/4” (6mm) and centered
above the cooktop trim. Secure back section to wall
with the appropriate fasteners (not supplied) to
anchors or wood stud. The slots in the back section
may be used to adjust spacing between cooktop trim
and backguard for a flush fit.
Secure front section to back section
3 Secure front section of backguard to back section
with #8 self-tapping sheet metal screws supplied.
Finally position cooktop
7 Place the cooktop into position so that the backguard
sits flush with the top of the cooktop trim.
Follow the rest of the instructions shown in the
cooktop installation instructions.
IMPORTANT!
The back section must be securely fastened to
the wall. Failure to do so could cause damage or
personal injury if the Backguard was to pull free
from wall.
Back section
Cooktop
Trim
Back section
Front section
#8
Selftapping
sheet metal
screws
Use slots to
correctly position
Loading ...
Loading ...
Loading ...