Loading ...
Loading ...
Loading ...
• Do not use any blade or other cutting tool marked for oper-
ating speed less than 4000 RPM. Never use a cutting tool
larger in diameter than diameter for which saw was
designed. For greatest safety and efficiency when ripping,
use maximum diameter blade for which saw is designed,
since under these conditions spreader is nearest the
blade.
• Adjust table inserts flush with table top. Never operate saw
unless proper insert is installed.
• Never feed material into the cutting tool from the rear of
the saw. An accident and serious injury could result.
THINK SAFETY
Safety is a combination of operator common sense and alert-
ness at all times when the saw is being used.
Never use another person as a substitute for a table exten-
sion, or as additional support for a workpiece that is longer or
wider than basic saw table, or to assist in feeding, supporting
or pulling the workpiece.
Do not pull the workpiece through the saw blade--position
your body at the infeed side of the guard; start and complete
the cut from that same side. This will require added table sup-
port for long or wide workpieces that extend beyond the
length or width of the saw table.
CAUTION: Follow safety instructions that appear on the front
of your saw.
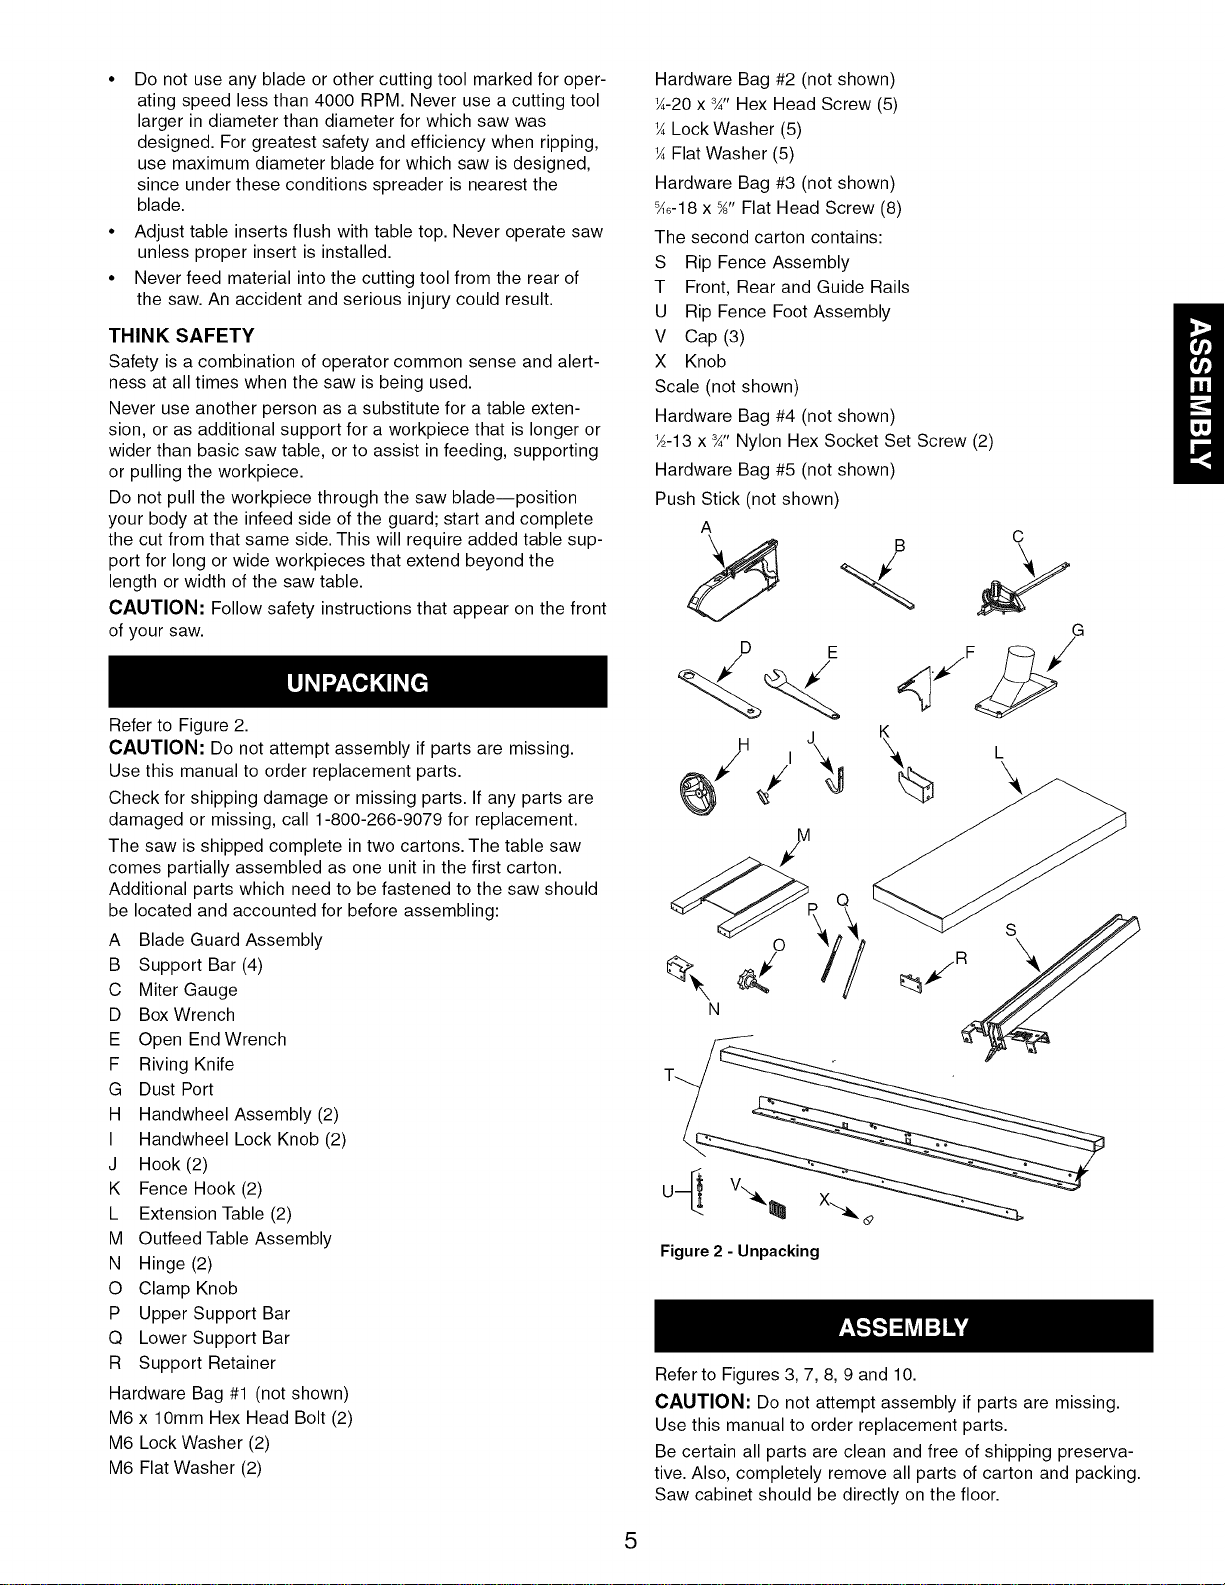
Refer to Figure 2.
CAUTION: Do not attempt assembly if parts are missing.
Use this manual to order replacement parts.
Check for shipping damage or missing parts. If any parts are
damaged or missing, call 1-800-266-9079 for replacement.
The saw is shipped complete in two cartons. The table saw
comes partially assembled as one unit in the first carton.
Additional parts which need to be fastened to the saw should
be located and accounted for before assembling:
A Blade Guard Assembly
B Support Bar (4)
C Miter Gauge
D Box Wrench
E Open End Wrench
F Riving Knife
G Dust Port
H Handwheel Assembly (2)
I Handwheel Lock Knob (2)
J Hook (2)
K Fence Hook (2)
L Extension Table (2)
M OutfeedTable Assembly
N Hinge (2)
O Clamp Knob
P Upper Support Bar
Q Lower Support Bar
R Support Retainer
Hardware Bag #1 (not shown)
M6 x 10mm Hex Head Bolt (2)
M6 Lock Washer (2)
M6 Flat Washer (2)
Hardware Bag #2 (not shown)
¼-20 x 3/_,,Hex Head Screw (5)
¼Lock Washer (5)
¼Flat Washer (5)
Hardware Bag #3 (not shown)
_6-18 x %" Flat Head Screw (8)
The second carton contains:
S Rip Fence Assembly
T Front, Rear and Guide Rails
U Rip Fence Foot Assembly
V Cap (3)
X Knob
Scale (not shown)
Hardware Bag #4 (not shown)
1/_-13x _" Nylon Hex Socket Set Screw (2)
Hardware Bag #5 (not shown)
Push Stick (not shown)
A
D E
J
C
G
F /
o
N
Figure2 - Unpacking
Refer to Figures 3, 7, 8, 9 and 10.
CAUTION: Do not attempt assembly if parts are missing.
Use this manual to order replacement parts.
Be certain all parts are clean and free of shipping preserva-
tive. Also, completely remove all parts of carton and packing.
Saw cabinet should be directly on the floor.
5
Loading ...
Loading ...
Loading ...