Loading ...
Loading ...
Loading ...
This product ca.n accept any of the batteries and
argers lls_ea in the cnar_ [_elow.
LI-ION Battery Packs and Chargers
Description Cat. #
Batteries: LI-ION LBX36
LBXR36
LBXR2036
Chargers: LI-ION LCS36
LCS436
Z_WARNING: Before assembly, make sure that the tool is
switched off and the battery has been removed.
ASSEMBLY TOOLS REQUIRED (NOT SUPPLIED):
- Phillips Screwdriver
z_WARNING: Remove the battery before attempting to attach any
of the following components.
ATTACHING THE GUARD
(FIGURES D AND E)
ZhWARNING: NEVER
OPERATE TOOL WITHOUT
GUARD FIRMLY IN PLACE.
The guard must always be
properly attached on the toot to
protect the user.
• Remove the screw from the
guard.
• Keeping the guard square tc
the trimmer head slide it fully
into place until the retaining
tab clicks into place (Ensure
that the guide rails (D1) on
the guard (D2) are correctly
aligned with the guide rails
(D3) on the trimmer head (D4)
(figure D). The locking tab (D5)
should snapped into the housing
slot (D6).
• Secure the guard with the
screw (El) (figure E).
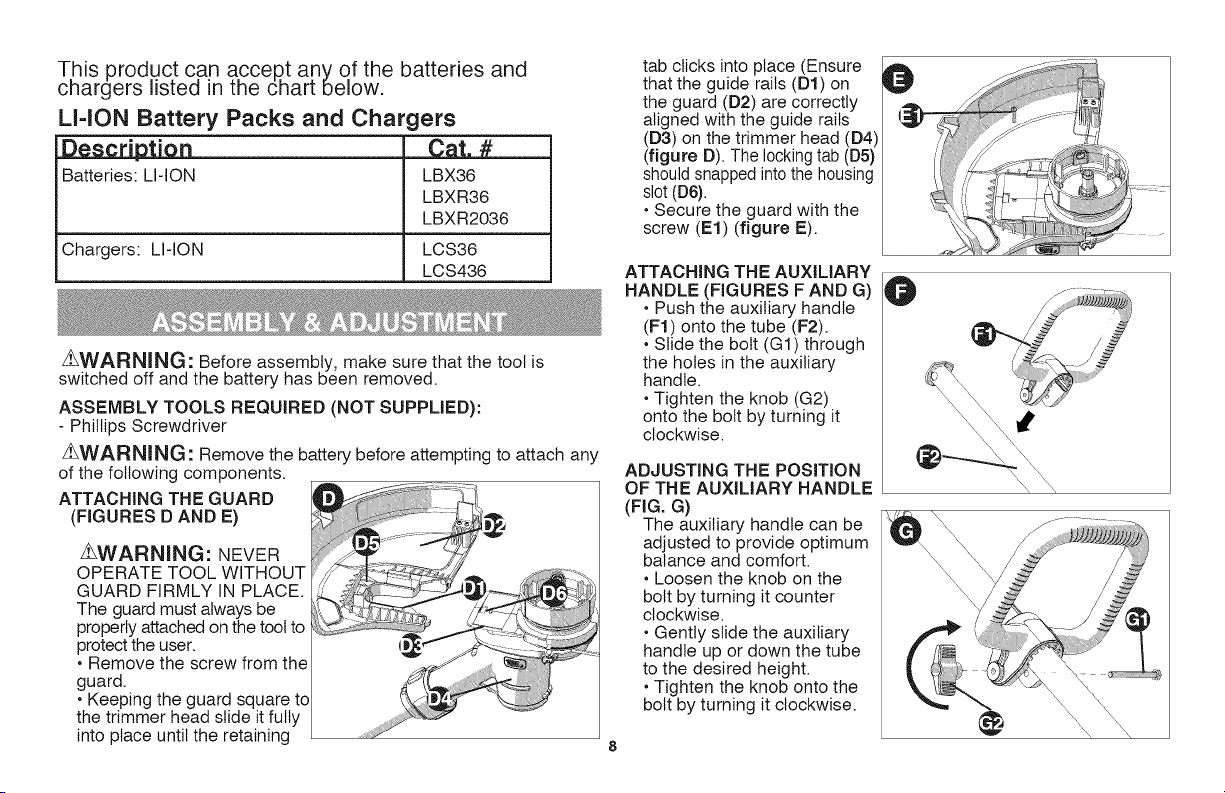
ATTACHING THE AUXILIARY
HANDLE (FIGURES F AND G)
• Push the auxiliary handle
(F1) onto the tube (F2).
• Slide the bolt (G1) through
the holes in the auxiliary
handle.
• Tighten the knob (G2)
onto the bolt by turning it
clockwise.
ADJUSTING THE POSITION
OF THE AUXILIARY HANDLE
(FIG. G)
The auxiliary handle can be
adjusted to provide optimum
balance and comfort.
• Loosen the knob on the
bolt by turning it counter
clockwise.
• Gently slide the auxiliary
handle up or down the tube
to the desired height.
• Tighten the knob onto the
bolt by turning it clockwise.
O
@
Loading ...
Loading ...
Loading ...