Loading ...
Loading ...
Loading ...
•Removethebatteryfromthetool.
•Pressandholdtheheadreleasebutton(K1).
•Whileholdingtheauxiliaryhandle,rotatetheheadcounterclockwise.
•Releasetheheadreleasebutton.
•Droptheedgeguide(K2)intotheopenposition.Ensurethatthe
edgingguideisallthewaydown,anaudibleclickwillbeheard.
Note:Theheadwiltonlyrotateinonedirection.
Note:TheAutoFeedSystemmaynotoperatecorrectlyifedgeguideisnotused.
SWITCHINGONANDOFF
•Toswitchthetoolon,press
inandholdthelockoffbutton_ _'
(L1)thensqueezethetrigger
lever(L2).Oncethetootis
runningyoumayreleasethe
lockoffbutton(L1).
•Toswitchthetooloff,release
thetriggerlever.
ZLWARNING: Never attempt
to lock the trigger lever in the
on position.
POWER COMMAND =
MAX POWER / MAX RUNTIME
The max power / max runtime
feature (M1) is located on the
tool handle. It allows you to
optimize the tools performance
and boost the power as needed.
• To choose max power to
tackle thick weeds, rotate dial
to setting 6.
• To choose max runtime to
increase battery life rotate dial
to setting 1.
• For a combination of both,
rotate dial to setting from 2 to 5.
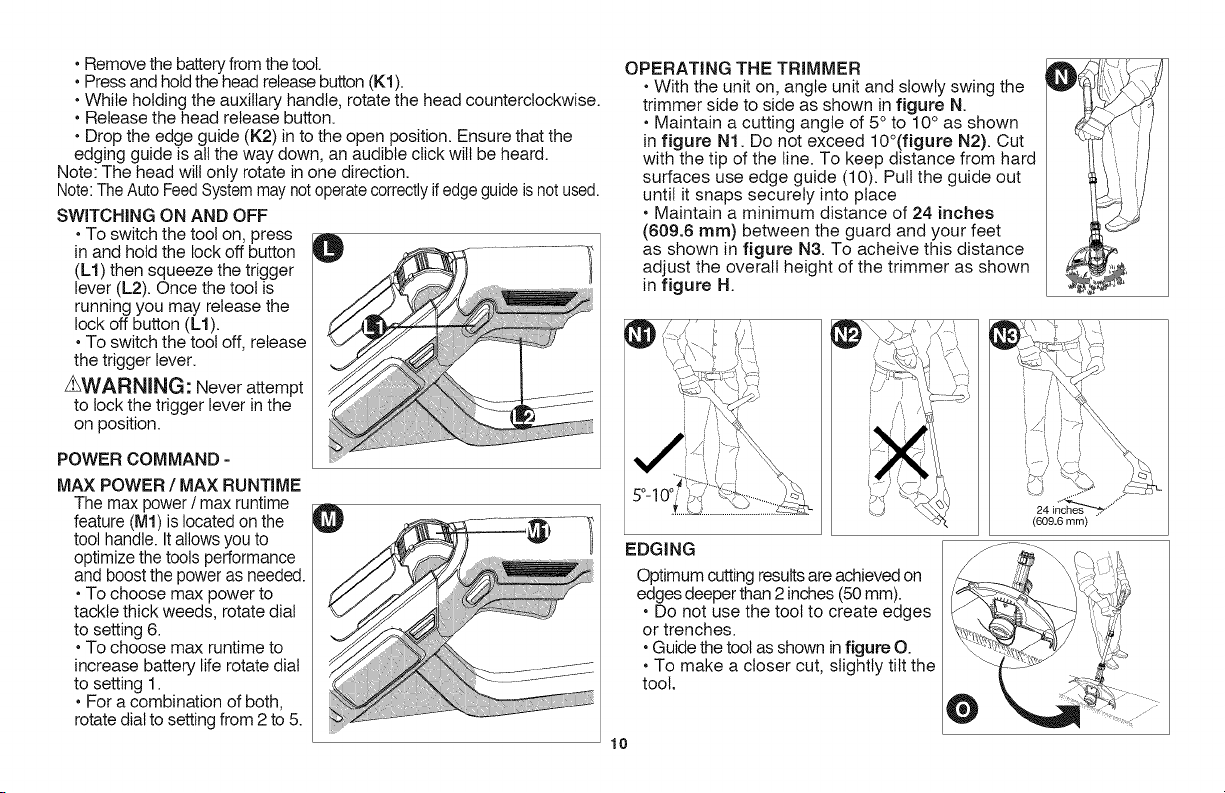
OPERATING THE TRIMMER
• With the unit on, angle unit and slowly swing the
trimmer side to side as shown in figure N.
• Maintain a cutting angle of 5° to 10° as shown
in figure N1. Do not exceed 10°(figure N2). Cut
with the tip of the line. To keep distance from hard
surfaces use edge guide (10). Pull the guide out
until it snaps securely into place
• Maintain a minimum distance of 24 inches
(609.6 ram) between the guard and your feet
as shown in figure N3. To acheive this distance
adjust the overall height of the trimmer as shown
in figure H.
(609.6 mm)
EDGING
Optimum cutting results are achieved on
edges deeper than 2 inches (50 mm).
• Do not use the tool to create edges
or trenches.
• Guide the tool as shown in figure O.
• To make a closer cut, slightly tilt the
tool.
lO
Loading ...
Loading ...
Loading ...