Loading ...
Loading ...
Loading ...
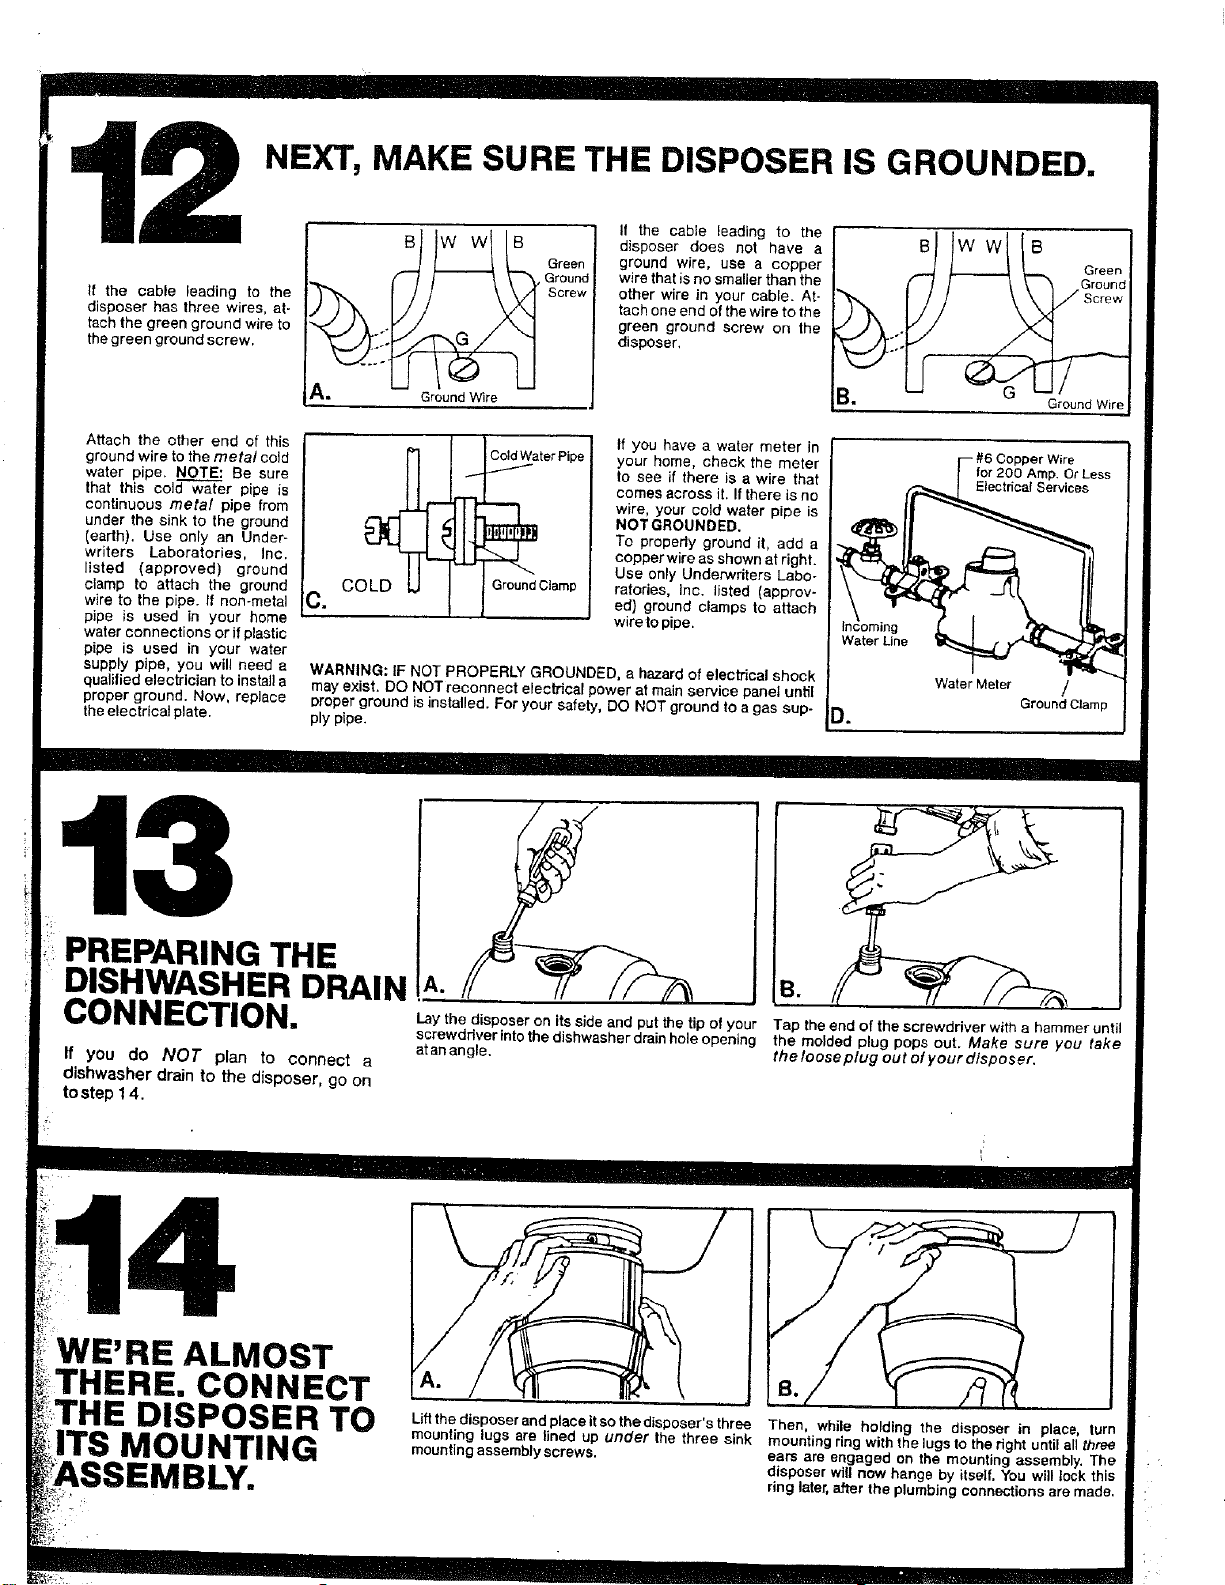
2 NEXT, MAKE SURE THE DISPOSER IS GROUNDED.
tt the cable _eading to the
If the cable leading to the
A, Ground Wire
disposer has three wires, at-
tach the green ground wire to
the green ground screw.
disposer does not have a
Green ground wire, use a copper
Ground wire that is no smaller than the
Screw other wire in your cable. At.
tach one end of the wire to the
green ground screw on the
disposer,
B/lww/I
_ _ Green
f I I / \ _ _round
Ground Wire
Attach the other end of this
ground wire to the metal sold
water pipe. NOTE: Be sure
that this cold water pipe is
continuous metal pipe from
under the sink to the ground
(earth), Use only an Under-
writers Laboratories, Inc.
listed (approved) ground
clamp to attach the ground
wire to the pipe. If non-metal
pipe is used in your home
water connections or if plastic
pipe is used in your water
supply pipe, you will need a
qualified elecb'ician to install a
proper ground. Now, replace
the electrical plate.
C,
COLD
If you have a water meter in
your home, check the meter
Io see if there is a wire that
comes across it. Ifthere is no
wire, your cold water pipe is
NOT GROUNDED.
To properly ground it, add a
copper wire as shown at right.
Use only Underwriters Labo-
ratories, Inc. listed (approv-
ed) ground clamps to attach
wire to pipe.
WARNING: IF NOT PROPERLY GROUNDED, a hazard of electrical shock
may exist. DO NOT reconnect electrical power at tnain service panel until
proper ground is installed. For your safety, DO NOT ground to a gas sup-
ply pipe.
Water Meter /
Ground Clamp
13
PREPARING THE
DISHWASHER DRAIN
CONNECTION.
If you do NOT plan to connect a
dishwasher drain to the disposer, go on
tostep 14.
A. _
Lay the disposer on its side and put the tip of your Tap the end of the screwdriver with a hammer until
screwddverintothedishwasherdrainholeopening the molded plug pops out. Make sure you take
atanangle, the loose plug out ot your disposer.
RE ALMOST
CONNECT
DISPOSER TO
ITS MOUNTING
LY.
Liffthedisposerandplaceitsothedisposer'sthree Then, while holding the disposer in place, turn
mounting lugs are lined up under the three sink mounting ring with the lugs to the right until all three
mountingassembtyscrews, ears are engaged on the mounting assembly. The
disposer will now hangs by itself. You will lock this
ring later, after the plumbing connections are made.
Loading ...
Loading ...
Loading ...