Loading ...
Loading ...
Loading ...
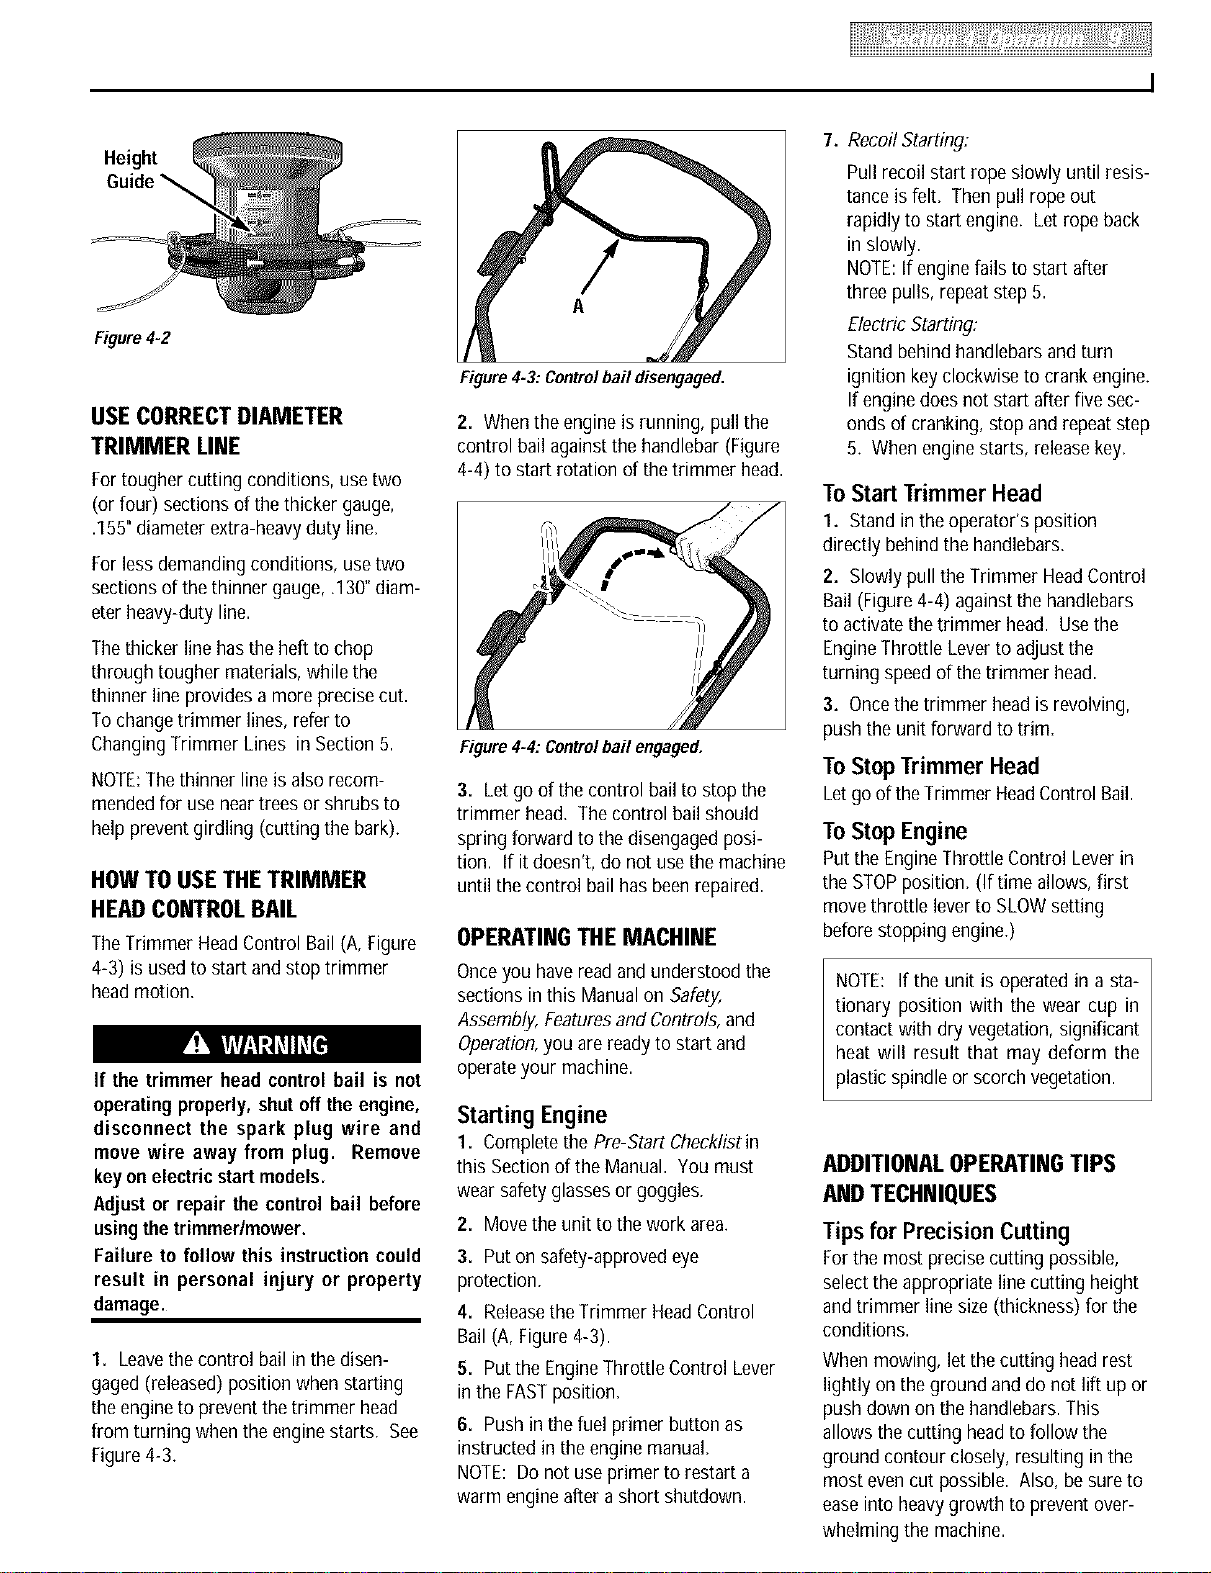
Height
Figure4=2
USE CORRECTDIAMETER
TRIMMER LINE
Fortougher cutting conditions, use two
(or four) sections of thethicker gauge,
.155"diameterextra-heavyduty line.
Forless demandingconditions, usetwo
sections of thethinner gauge,.130"diam-
eter heavy-duty line.
Thethicker line hasthe heft to chop
through tougher materials, while the
thinner line provides a moreprecise cut.
To changetrimmer lines, refer to
ChangingTrimmer Lines in Section5.
NOTE:Thethinner line is also recom-
mendedfor use neartrees or shrubs to
help preventgirdling (cutting the bark).
HOW TOUSE THETRIMMER
HEADCONTROLBAIL
TheTrimmer HeadControl Bail(A,Figure
4-3) is usedto start andstop trimmer
headmotion.
If the trimmer head controlbail is not
operating properly,shut off the engine,
disconnect the spark plug wire and
move wire away from plug. Remove
keyonelectricstartmodels.
Adjust or repair the control bail before
usingthetrimmerlmower.
Failure to follow this instructioncould
result in personal injury or property
damage.
1. Leavethe control bail in the disen-
gaged (released)position when starting
the engineto prevent thetrimmer head
from turning when the enginestarts. See
Figure4-3.
A
Figure4-3: Controlbail disengaged.
2. Whenthe engine is running, pull the
control bail againstthe handlebar (Figure
4-4) to start rotation of thetrimmer head.
Figure4-4: Controlbail engaged.
3. Letgo of the control bailto stop the
trimmer head. The control bail should
spring forward to thedisengagedposi-
tion. If it doesn't, do not usethe machine
until thecontrol bail has beenrepaired.
OPERATINGTHE MACHINE
Onceyou havereadand understood the
sections in this Manualon Safety,
Assembly, Featuresand Controls,and
Operation,you are readyto start and
operateyour machine.
Starting Engine
1. Completethe Pre-Start Checklistin
this Section of the Manual. You must
wear safetyglassesor goggles.
2. Movethe unit to thework area.
3. Puton safety-approvedeye
protection.
4. Releasethe Trimmer HeadControl
Bail (A, Figure4-3).
5. Putthe EngineThrottle Control Lever
in the FASTposition.
6. Pushin the fuel primer button as
instructed in theengine manual.
NOTE: Do not useprimer to restart a
warm engineafter a short shutdown.
7. Recoil Starting:
Pull recoil start rope slowly until resis-
tance isfelt. Thenpull rope out
rapidly to start engine. Let rope back
in slowly.
NOTE:If engine fails to start after
three pulls, repeatstep 5.
Electric Starting:
Standbehind handlebarsand turn
ignition keyclockwise to crank engine.
If enginedoes not start after five sec-
onds of cranking, stop and repeatstep
5. When enginestarts, releasekey.
ToStart Trimmer Head
1. Stand in the operator's position
directly behind the handlebars.
2. Slowly pullthe Trimmer HeadControl
Bail (Figure4-4) againstthe handlebars
to activatethe trimmer head. Usethe
EngineThrottle Leverto adjust the
turning speedof thetrimmer head.
3. Oncethe trimmer headis revolving,
push the unit forward to trim.
To Stop Trimmer Head
Letgo of theTrimmer HeadControl Bail.
ToStopEngine
Putthe EngineThrottle Control Leverin
the STOPposition. (If time allows, first
move throttle leverto SLOWsetting
beforestopping engine.)
NOTE: If the unit is operated in a sta-
tionary position with the wear cup in
contact with dry vegetation, significant
heat will result that may deform the
plastic spindleor scorch vegetation.
ADDITIONALOPERATINGTIPS
ANDTECHNIQUES
Tips for Precision Cutting
Forthe most precisecutting possible,
selectthe appropriateline cutting height
and trimmer line size (thickness) for the
conditions.
Whenmowing, letthe cutting head rest
lightly on theground and do not lift up or
push down on the handlebars.This
allows the cutting headto follow the
ground contour closely, resulting in the
most evencut possible. Also, besure to
easeinto heavygrowth to preventover-
whelming the machine.
Loading ...
Loading ...
Loading ...