Loading ...
Loading ...
Loading ...
6
3.2 Checking Airflow
An inclined tube manometer is attached to the unit to
determine if the filters need replacing. It measures
negative static pressure between the blower inlet and the
HEPA filter outlet.
To check airflow:
• Remove any inlet or outlet ducting, but leave the top
and all filters in place. Make sure the unit is sitting
level.
• Turn the unit on high speed for at least 15 minutes.
Read the number values for the fluid levels in the
upper and lower tubes. The fluid levels are slanted.
Read the level at the center of both tubes.
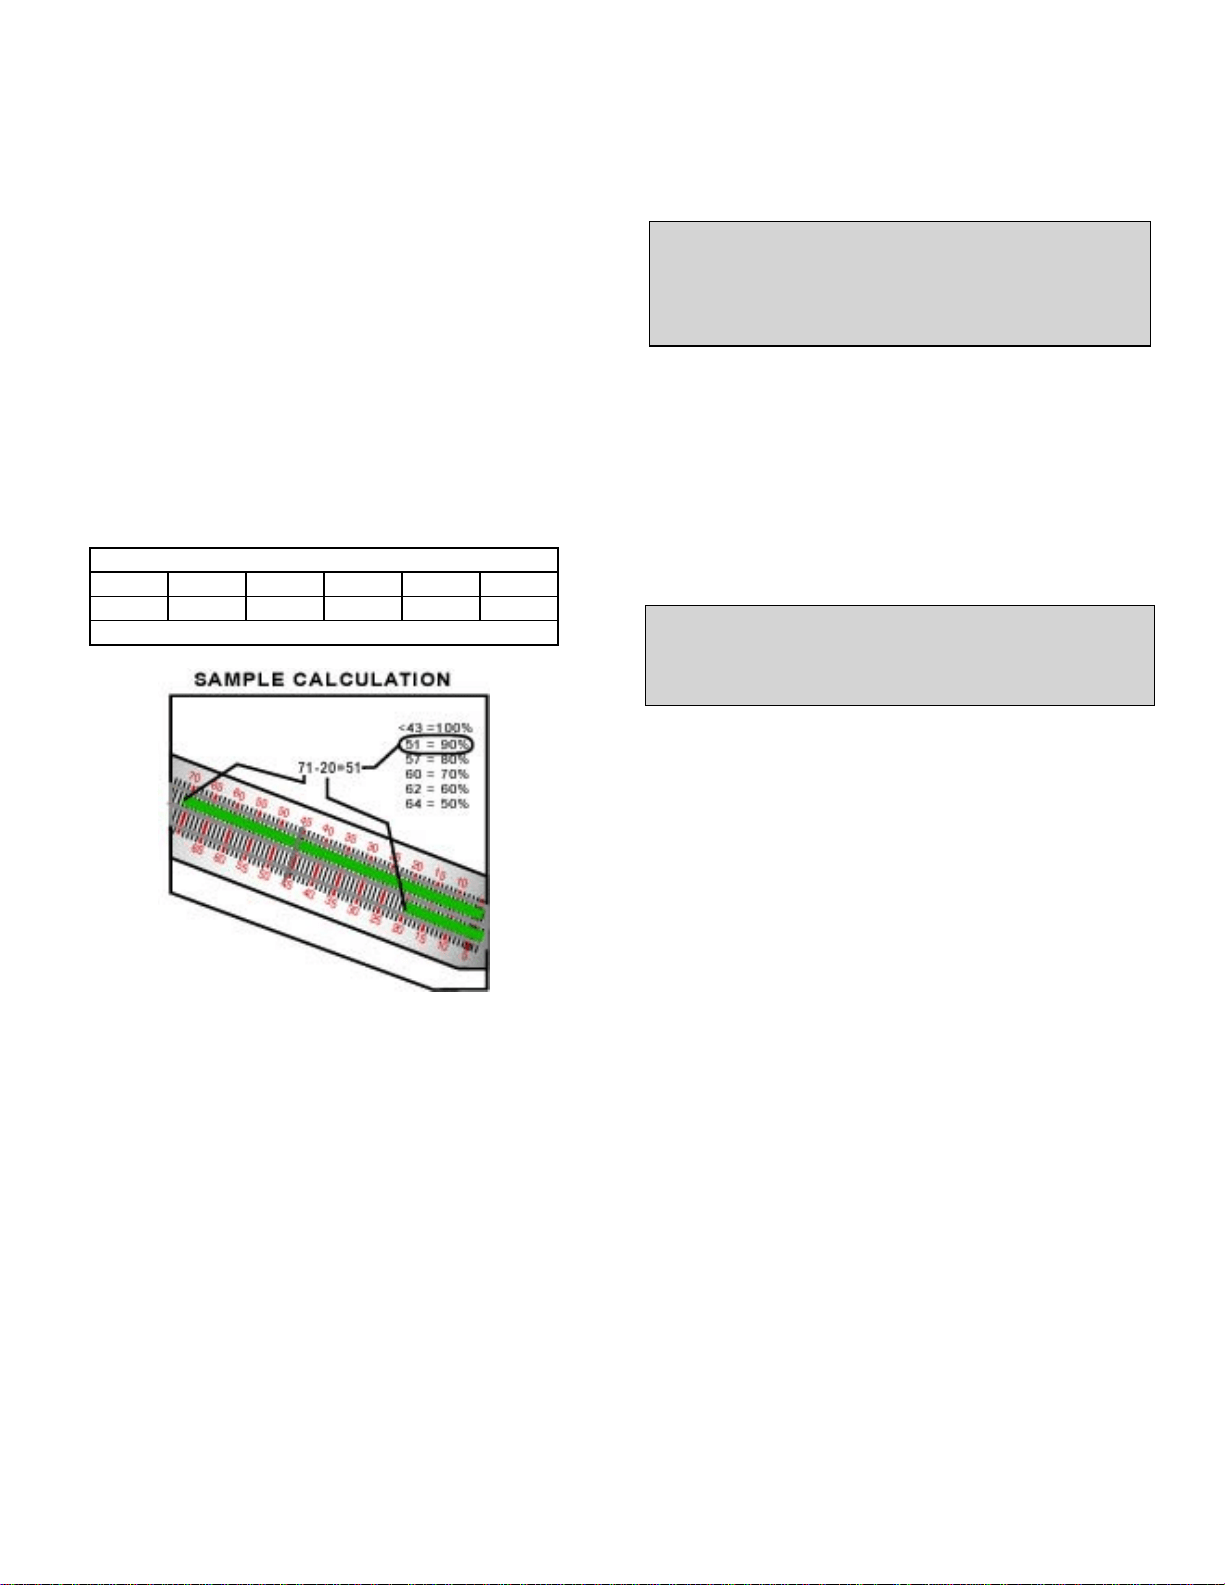
• Subtract the lower tube number from the upper tube
number. Match this difference to the chart on the
manometer label to establish the percentage of clean
air flow.
Calculation
43 51 57 60 62 64
100% 90% 80% 70% 60% 50%
Percentage
Airflow on high speed with all filters clean and no ducting
is about 1400 CFM. The unit can be run with very dirty
filters and virtually no flow without harming the unit. The
operator’s decision to change filters should be based on
filter cost versus the unit’s filtering effectiveness. If
airflow is 700 CFM versus 1400 CFM, the unit will filter
particles from a space at half the rate. The operator must
judge if that is acceptable.
If the operator determines the filters should be changed
due to low airflow, it is most economical to change them
in the following order:
• Change the pad pre-filter (top) first. This is the least
expensive filter. Recheck the airflow. If the airflow is
acceptable, no other filters need to be changed.
• Change the pleated fabric filter (middle) second. It is
the second least expensive filter. Recheck the
airflow. If acceptable, the HEPA filter does not need
changing.
• If the airflow is still too low, the HEPA filter must be
changed.
4 Service
CAUTION: Servicing the Phoenix Guardian with its
high voltage circuitry presents a health hazard that
could result in death, serious bodily injury, and/or
property damage. Only qualified service people should
service this unit.
4.1 Warranty
A warranty certificate has been enclosed with this unit.
Read it before any repair is initiated. If a warranty repair
is required, call the factory first at 1-800-533-7533 for
warranty claim authorization and technical assistance.
4.2 Blower Motor Replacement
OCCASSIONALLY THE BLOWER MAY NOT START
ON LOW SPEED. IF THIS OCCURS, START THE
UNIT ON HIGH SPEED, THEN SWITCH IT TO LOW
SPEED.
The centrifugal blower has a PSC motor and internal
thermal overload protection. Follow the steps below to
change the motor:
1. Unplug the power cord.
2. Remove the top and all air filters.
3. Remove the wire nut that connects the blower’s
white lead to the wire harness. Disconnect the
motor’s green ground wire from the unit. Remove
the black and red wires from the switch.
4. Remove the four nuts that fasten the blower
mounting flanges to the base of the unit.
5. Lift the blower out of the unit.
6. Loosen the set screw that holds the impeller hub to
the motor shaft.
7. Lay the blower on its side, motor up.
8. Remove the 3 screws that fasten the motor support
brackets to the blower housing.
9. Lift out the motor with support brackets.
10. Remove the two screws (one at each motor end)
that hold the support brackets to the motor end
mounting rings.
11. Remove the six screws that hold the support
bracket halves together. Note which holes and slots
they were located in.
12. Reassembling with the new motor is the above
procedure reversed.
www.sylvane.com 1-800-934-9194
Loading ...
Loading ...