Loading ...
Loading ...
Loading ...
-10-
© 2021 United States Stove Company
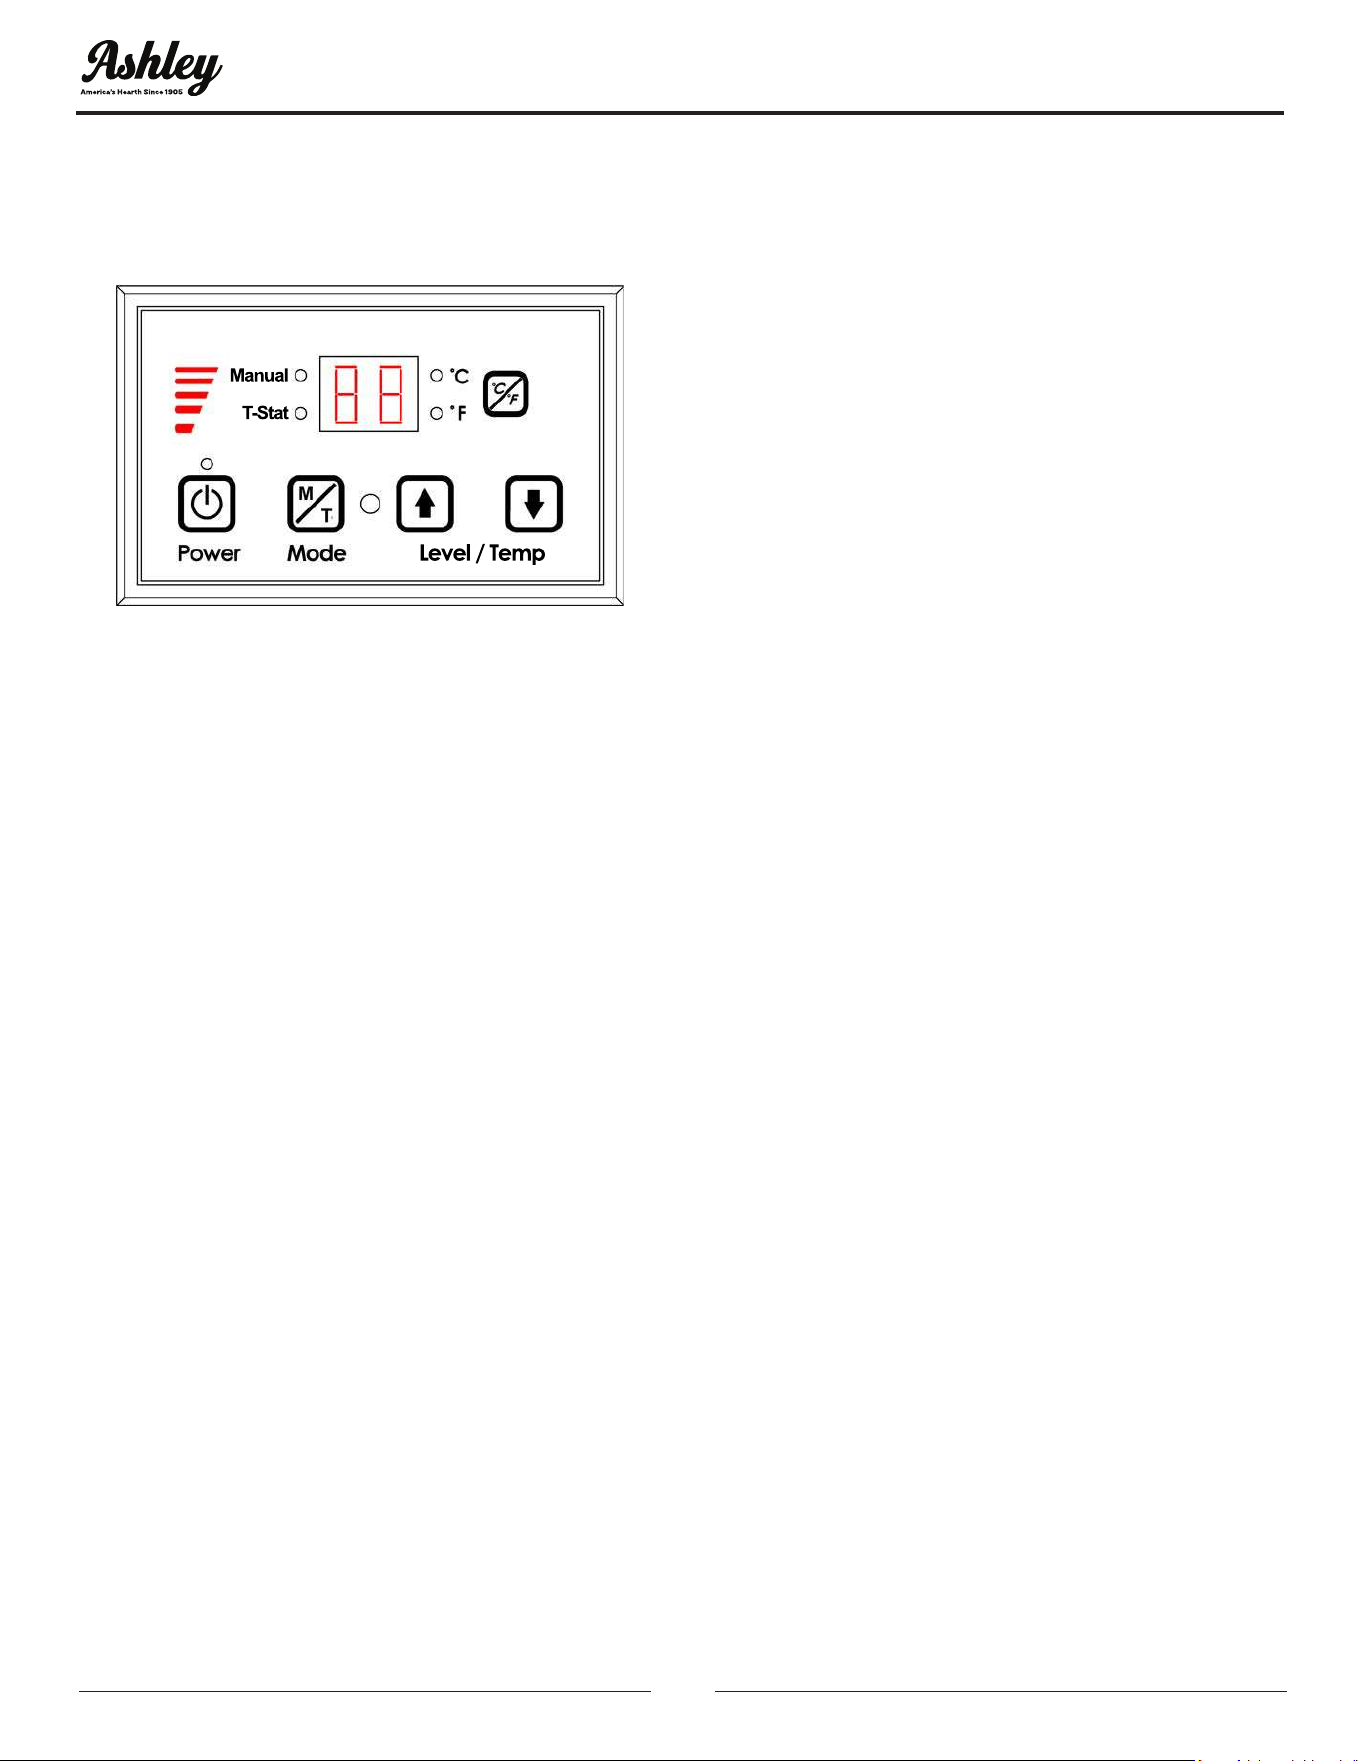
PANEL CONTROLS
The blowers and automatic fuel supply are controlled
from a panel on the top of this unit. The control panel
functions are as follows.
A. ON/OFF SWITCH (“POWER” BUTTON)
• When pushed, the stove will automatically ignite.
No other re starter is necessary. The igniter
will stay on for at least 10 and up to 12 minutes,
depending on when Proof of Fire is reached. The
re should start in approximately 5 minutes.
• The red light located above the “POWER” button
will turn green when pressed and remain green
until the stove is turned off.
• After pushing “POWER”, the auger motor is on for
3.5 minutes, off for 1 minute. During the remainder
of the start-up period, the auger motor operates
on the heat range “1” setting.
• During start up the heat level advance (Up and
Down keys) will change the heat range indicator
level accordingly, but there is no change in the
stoves operating conditions until start-up is
completed.
• During start-up ignition must occur within 12
minutes or the stove will error out and show E4.
• During the start-up phase, the Mode key does not
function.
B. LEVEL / TEMP ARROW BUTTONS
• These buttons when pushed will set the pellet feed
rate, hence the heat output or heat range of your
stove.
• The levels of heat output will incrementally change
on the bar graph starting from heat range “1” to
heat range “5”.
C. °C / °F Button
• The °C / °F button changes the two digit display
from degrees Celsius to degrees Fahrenheit.
D. MODE (M/T) BUTTON
• The Mode of the stove can be switched between
manual and controlled with a Thermostat. Separate
LEDs to the left of the two digit display indicate the
mode of operation – Manual or T-Stat. The stove
has to be in normal operation to be switched from
Manual to T-Stat mode.
• Manual mode operates according to the 5 set
levels of feed on the bar graph from heat range “1”
to heat range “5”.
T-Stat mode works as follows:
• The stove has a built in Thermostat into the controls
of the appliance. The temperature sensor for the
T-Stat is located on the back of the stove behind
the display board.
• Once the stove has gone into run mode the stove
can be switch into T-Stat mode.
• The Up and Down Level / Temp Arrow buttons are
used to change the desired set-point temperature.
Once the desired temperature is reached the two
digit display will ash for four seconds and reset to
the actual room temperature.
• Once the stove reaches within 3°F of the desired
temperature set point, it returns to the heat range
that the stove was set on before it was switched
to T-Stat mode (if the stove was running on heat
range “5” when switched to T-stat mode when it
gets within 3°F of the set point it will return to heat
range “5”).
• Once the stove reaches the desired set-point, the
stove will drop to heat range “1”.
• When room temperature drops below desired set-
point the stove will ramp back up until it reaches
the desired temperature.
HOW TO ADJUST THE FUEL ADJUSTER
It is a common occurrence in the pellet industry for
the average pellet size to vary. Due to the varying
sizes of pellets, this appliance is equipped with a fuel
adjuster to adjust the amount of fuel allowed to pass
into the auger assembly. The fuel adjuster is located
inside the hopper. Note: The factory default setting
for this is full open. To decrease the ow of pellets,
move the fuel adjuster down.
OPERATION INSTRUCTIONS
NEVER OPERATE THIS PRODUCT WHILE UNATTENDED
Loading ...
Loading ...
Loading ...